Mother Daughter Projects

  • Blog
  • About
    • Contact
    • Privacy Policy
  • Tools
    • Tool Tuesday
  • Maintenance
  • Improvement
  • Decor
  • Tech
  • Blog
  • About
    • Contact
    • Privacy Policy
  • Tools
    • Tool Tuesday
  • Maintenance
  • Improvement
  • Decor
  • Tech

DIY for Homeowners

DIY Lamp Christmas Tree

11/16/2016

2 Comments

 
text by Vicki     ​Sign up to get Mother Daughter Projects updates in your email!
DIY Lamp Christmas Tree. MotherDaughterProjects.com
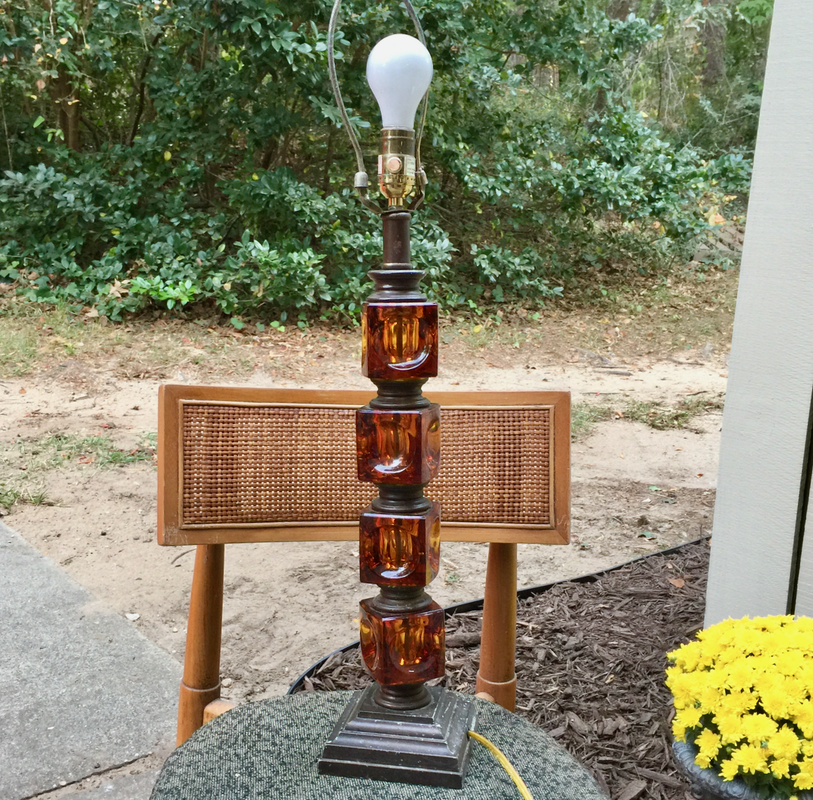
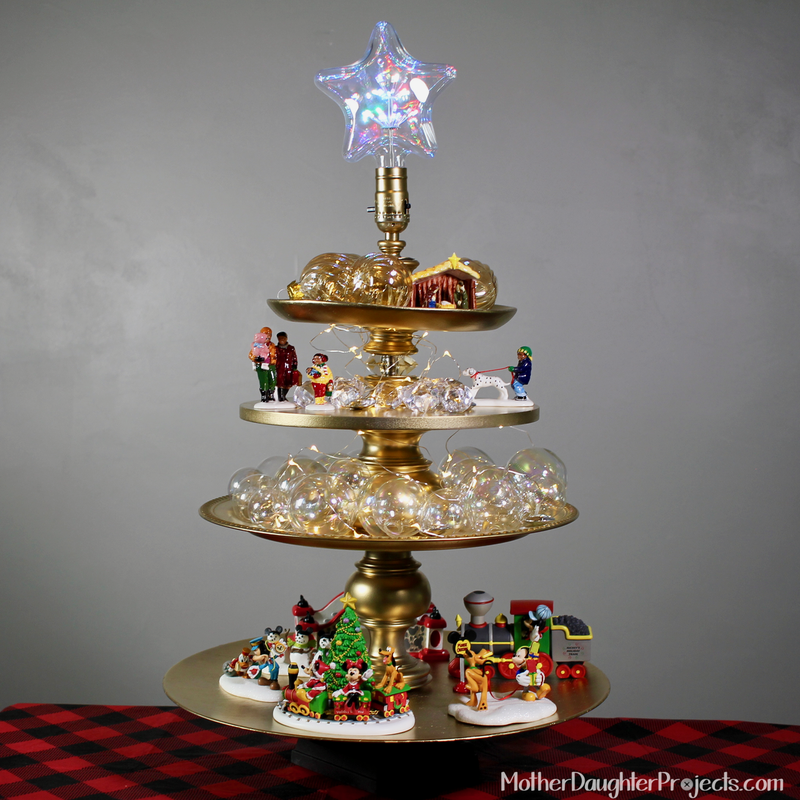
One of my favorite ways to create is by using “what I have” on hand—stuff that is in my stash of raw materials, odds and ends, including lamps in all state of disrepair. When Steph challenged me to create an unconventional Christmas tree, I headed to this stash to see what I could come up with. I was intrigued by the idea of transforming the “bones” of a lamp into a multi-level tree complete with wiring to make it a functional lamp as well. 

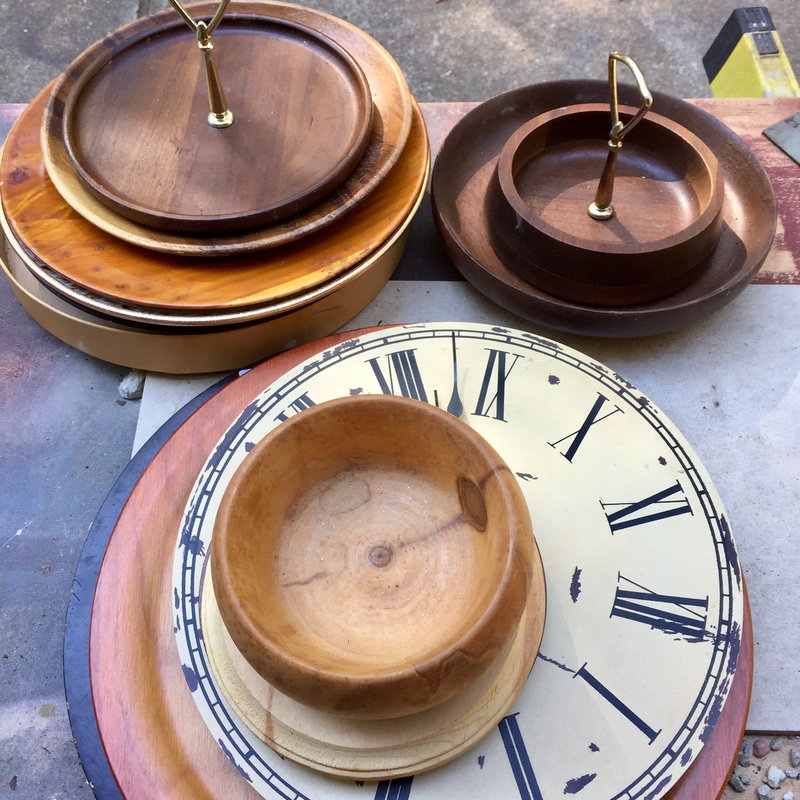
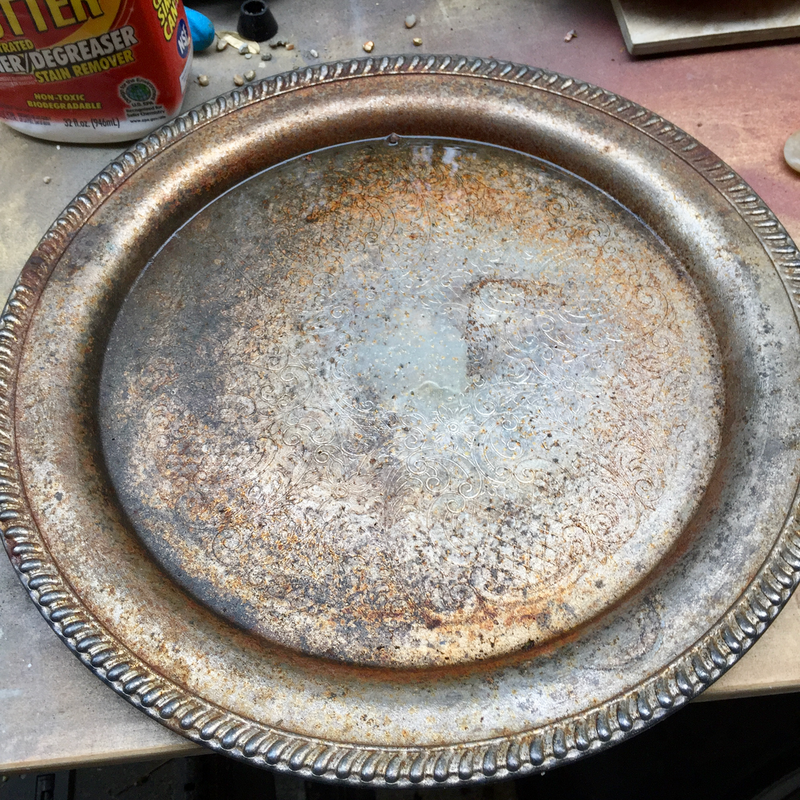
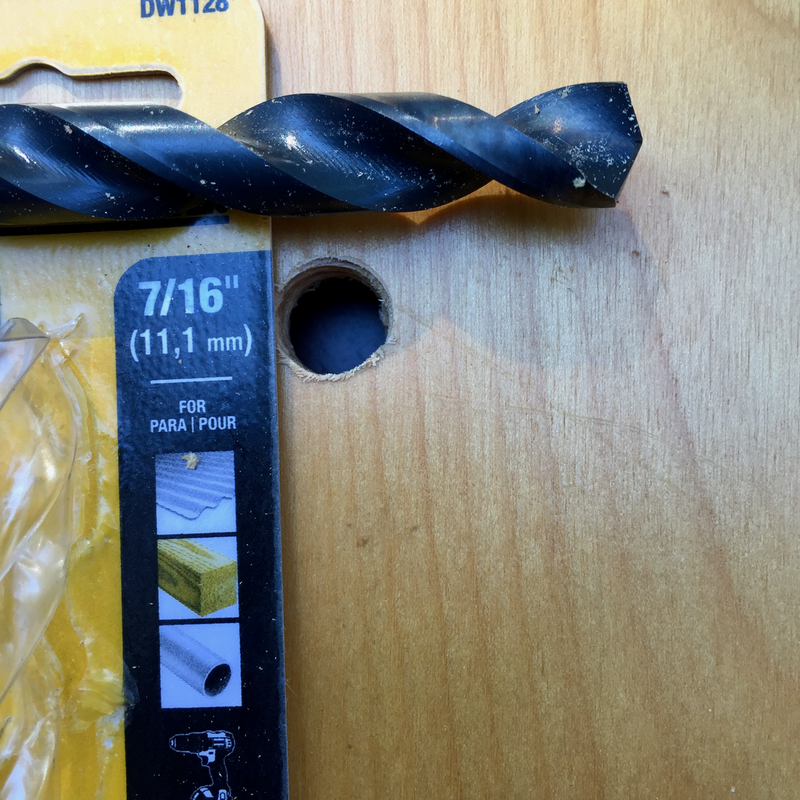
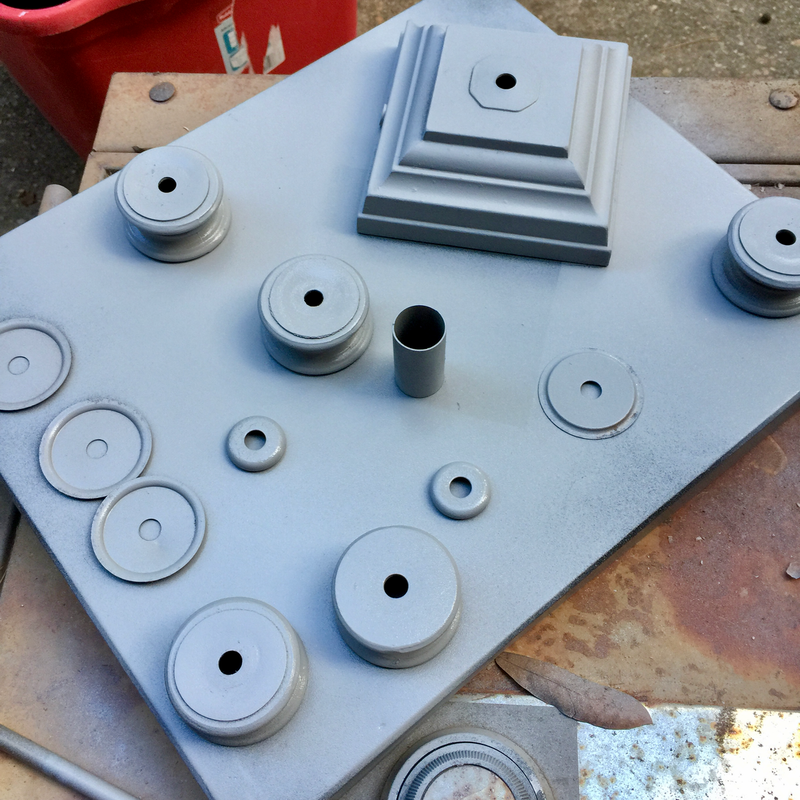
I decided to use wood platters and other circular wood objects as my layers with assorted lamp base parts as dividers between the layers. I also used a metal tray when I realized I needed a larger base and found I could drill through it easily enough. 
Materials:
For the base:
  • Old lamp
  • Assorted wood/metal circle items (these were all sourced from yard sales for next to nothing.) I used wood trays, a clock, silver plated serving tray, wood plate, etc. 
  • Assortment of lamp parts including the washers and nuts—I used parts from three different lamps
  • Krud Kutter to clean parts and scotch brite green scrubbing pad
  • Primer spray paint and Gold metallic spray paint
  • Drill/ Wrench
  • 7/16” drill bit
For the socket:
  • Socket (Amazon)
  • Cord with plug (Amazon)
  • Soldering iron (Amazon)
  • Solder and paste
  • Wire stripper (Amazon)
  • Needle nose pliers
  • Slotted screw driver
  • LED star light bulb (Amazon)
DIY Lamp Christmas Tree. MotherDaughterProjects.com
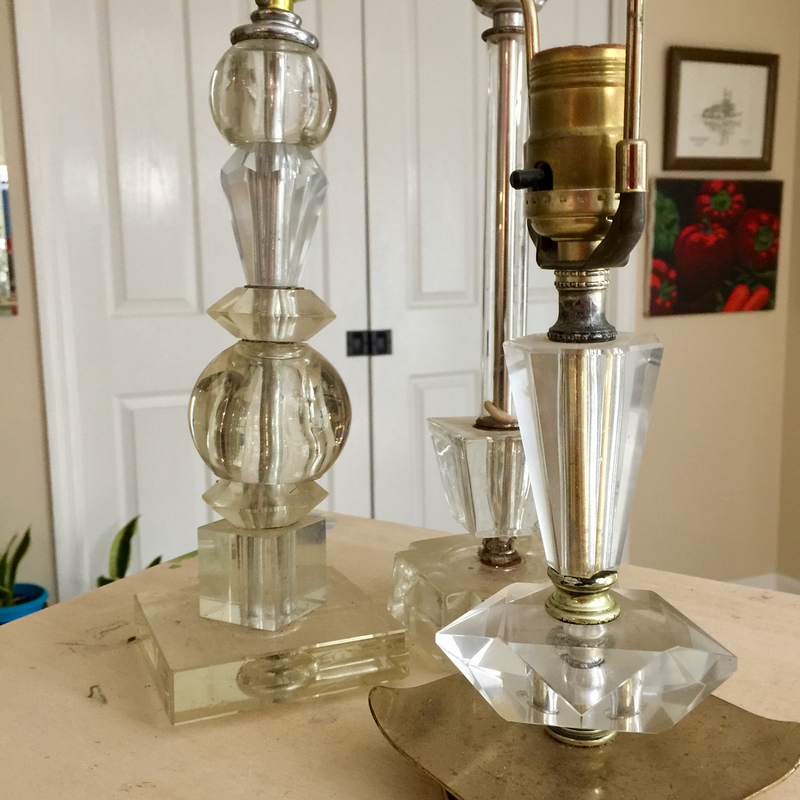
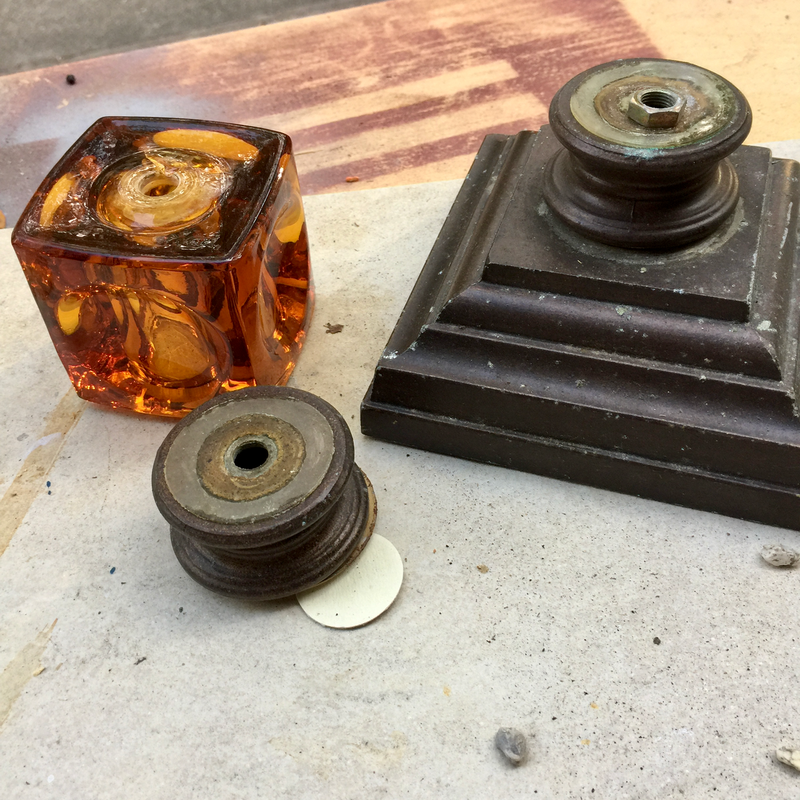
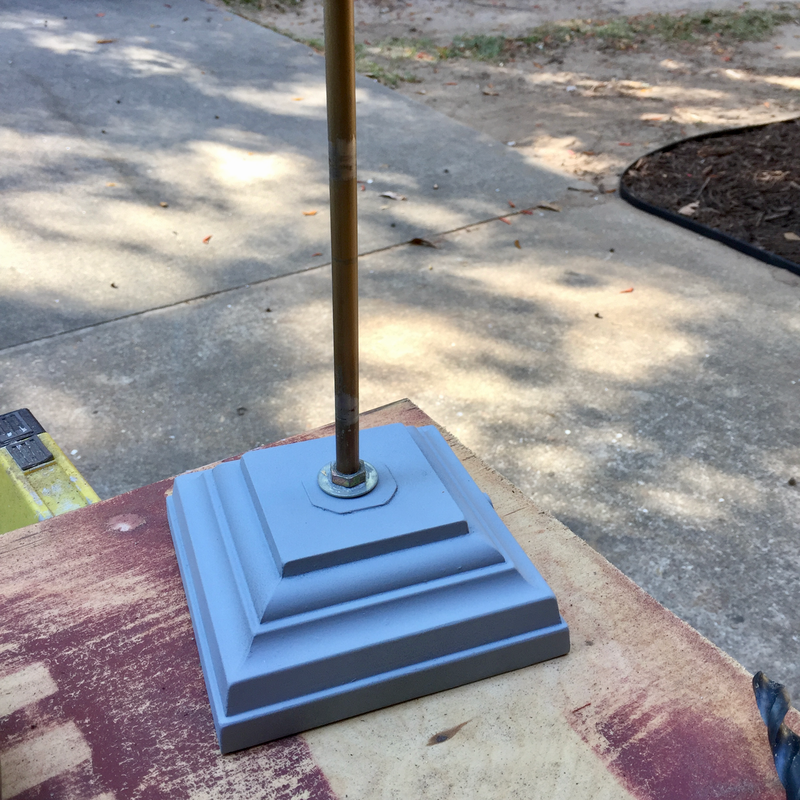
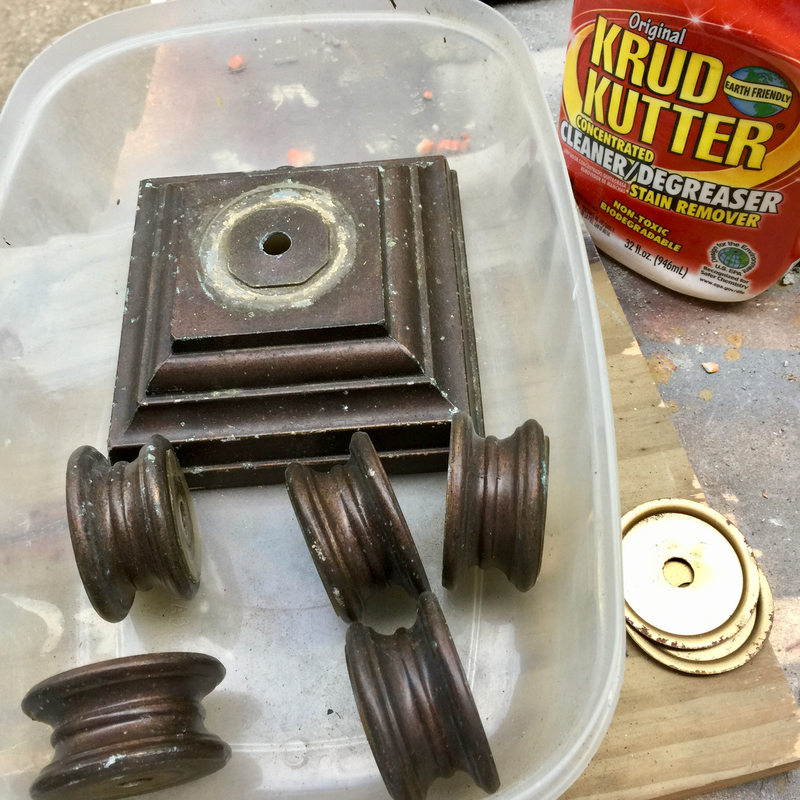
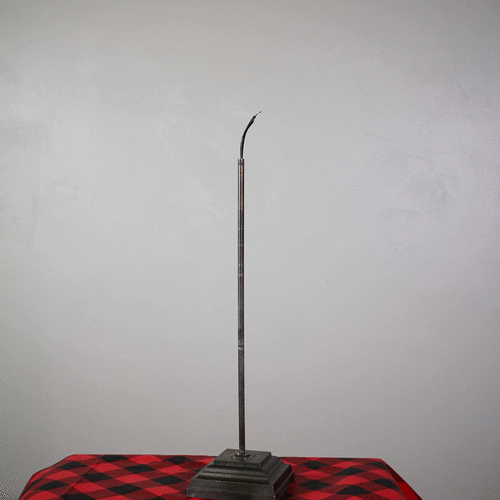
Disassemble all the lamps—you will need one base and stem and a number of additional parts for spacers. The parts will simply unscrew. Locate the nut at the bottom of the base and unscrew it. 
DIY Lamp Christmas Tree. MotherDaughterProjects.com
Gather wood/metal circles and the lamp parts to be used.
DIY Lamp Christmas Tree. MotherDaughterProjects.com
Drill holes into the centers of the wood or metal circles.
DIY Lamp Christmas Tree. MotherDaughterProjects.com
Dry fit the circles and lamp parts. (Note: The lamp stem has threaded ends at the top and bottom. The washer and nut on the outside top of the base in this picture and the same washer/nut combination inside the base will keep everything tight.)
DIY Lamp Christmas Tree. MotherDaughterProjects.com
​Once you’re pleased with the arrangement, clean, prime and paint all the parts.
DIY Lamp Christmas Tree. MotherDaughterProjects.com
To assemble, put a nut onto the stem all the way to the end of the screw thread, add a washer, put the stem down through the hole in the base, add a washer, and another nut. Tighten securely—you may need a pair of locking pliers or wrench to do this.
DIY Lamp Christmas Tree. MotherDaughterProjects.com
Prepare the lamp wiring. Split the wire along the natural center, pull apart about four inches or so, using the wire stripper, remove 1/2” of insulation. Twist the wire on each half, dip into the solder paste, and solder (soldering is optional).
DIY Lamp Christmas Tree. MotherDaughterProjects.com
Thread the wire through the hole in the side of the lamp base (not all lamps will have this) and up into the stem until about five inches stick out the top.
DIY Lamp Christmas Tree. MotherDaughterProjects.com
Start threading platters and spacers onto the stem. I used a spacer below the first platter because the base top was not completely flat and it needed to be. Adding the spacer gave me the flat surface I needed.
DIY Lamp Christmas Tree. MotherDaughterProjects.com
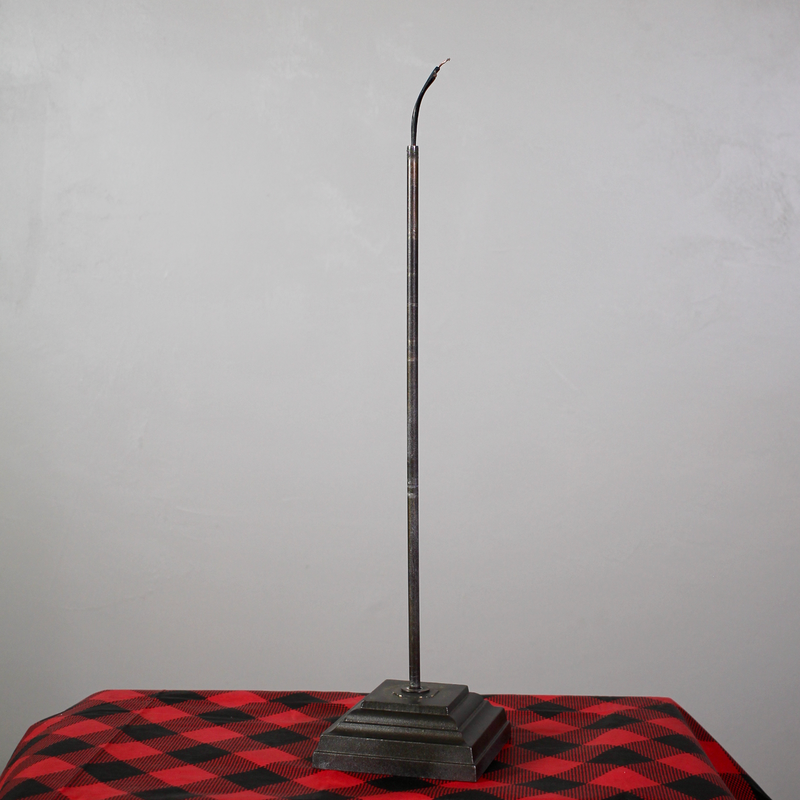
The spacers should end just below or somewhat past the top screw thread. This is important as there can be no space (the parts will not be able to screw down tight to keep the lamp base from moving). Have some additional small parts on hand in case your parts don’t come up or past this line. I needed an extra spacer because there was about 3/8” left below where the screw threads started. Add another nut to screw things into place.
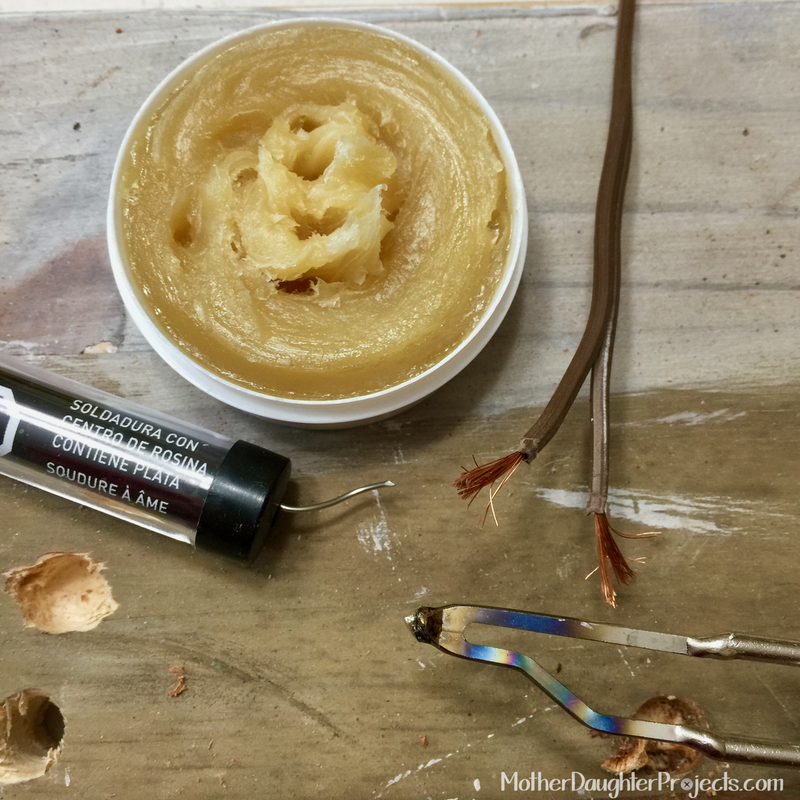
To wire, make a UL knot, identify the smooth (hot wire) and ribbed (neutral wire). Make a hook in the soldered ends of the wires, attach the smooth hook to the gold (brass) screw in a clockwise directions, screw down. Attach the ribbed wire to the silver screw. 
​
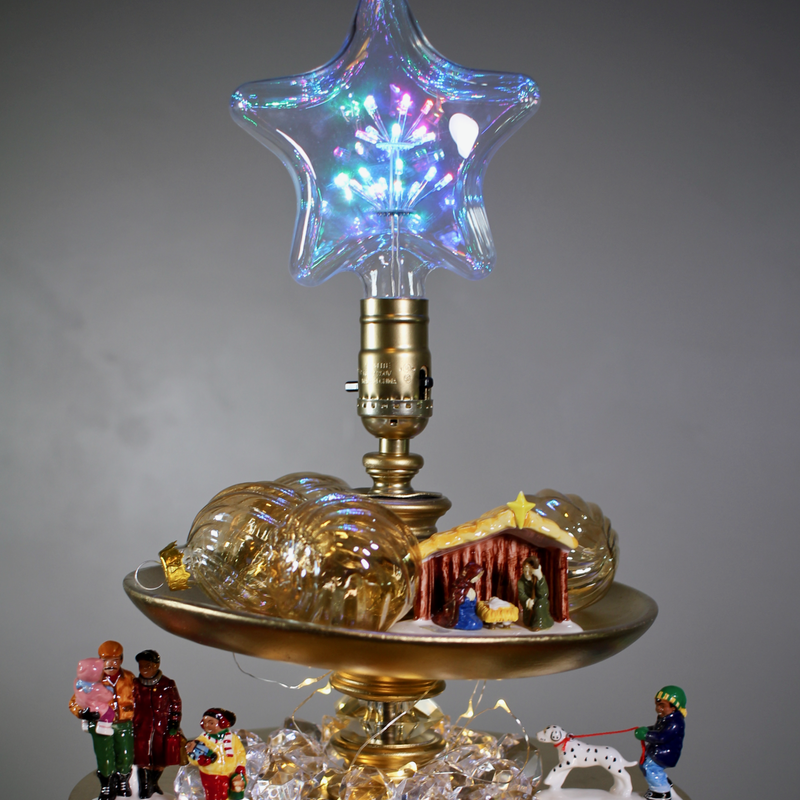
Screw in the lightbulb and accessorize as desired!
DIY Lamp Christmas Tree. MotherDaughterProjects.com
I’m very happy with the results of my unconventional tree and very happy I was able to use my ever growing stash of odds and ends! If you’re a collector of “stuff” then this is a project for you.

The tree can be used as decor at Christmas or without decoration or used as a serving tray. It can be used as winter decor with the substitution of an Edison bulb. It can even be repainted in a less festive color to extend it’s use. 

What unique materials can you think of to make a Christmas or holiday decor out of? Share the ideas with us below! #trylearnshare

Please note: We are not sponsored by any of the companies/products that we used. These products were picked and bought by us.

FYI: We are not professionals, and we don’t claim to be. This is what we found worked for our project. Yours may need a little different approach. Safety first!

FYI: Affiliate links are being used on this page. Purchasing via these links help support MDP!

Related Projects

Mother Daughter Projects
Holiday Pond Lights
Mother Daughter Projects
LED Lights vs. Incandescent
Mother Daughter Projects
Crate Christmas Tree
2 Comments
Michelle Rogers
7/6/2020 01:59:54 pm

I LOVE this DIY projects you made and would love to make one myself! Your creativeness and imagination are truly a gift!

Reply
Steph
7/8/2020 06:34:34 pm

Thanks Michelle!

Reply


Leave a Reply.

    MotherDaughterProjects.com

    Mother Daughter Projects
    ​
    Steph & Vicki

    We're homeowners sharing our DIY adventures as we learn to maintain, improve, decorate, and ​use tech in our homes.
    Share your projects with us here:  
    ​#trylearnshare
    MotherDaughterProjects.com
Mother Daughter Projects, LLC ∙ est. 2015 ∙ Tallahassee, FL by Vicki & Steph ∙ Privacy Policy