|
text by Vicki Sign up to get Mother Daughter Projects updates in your email! If you have sidewalks or driveways of a certain age you have these--wood expansion joints! These are important as they allow the concrete to expand and contract without cracking. Unfortunately, time and the elements take their toll on them. Eventually they rot and break and should be replaced. There are a number of reasons to replace them. Having a strong solid expansion joint helps with the following:
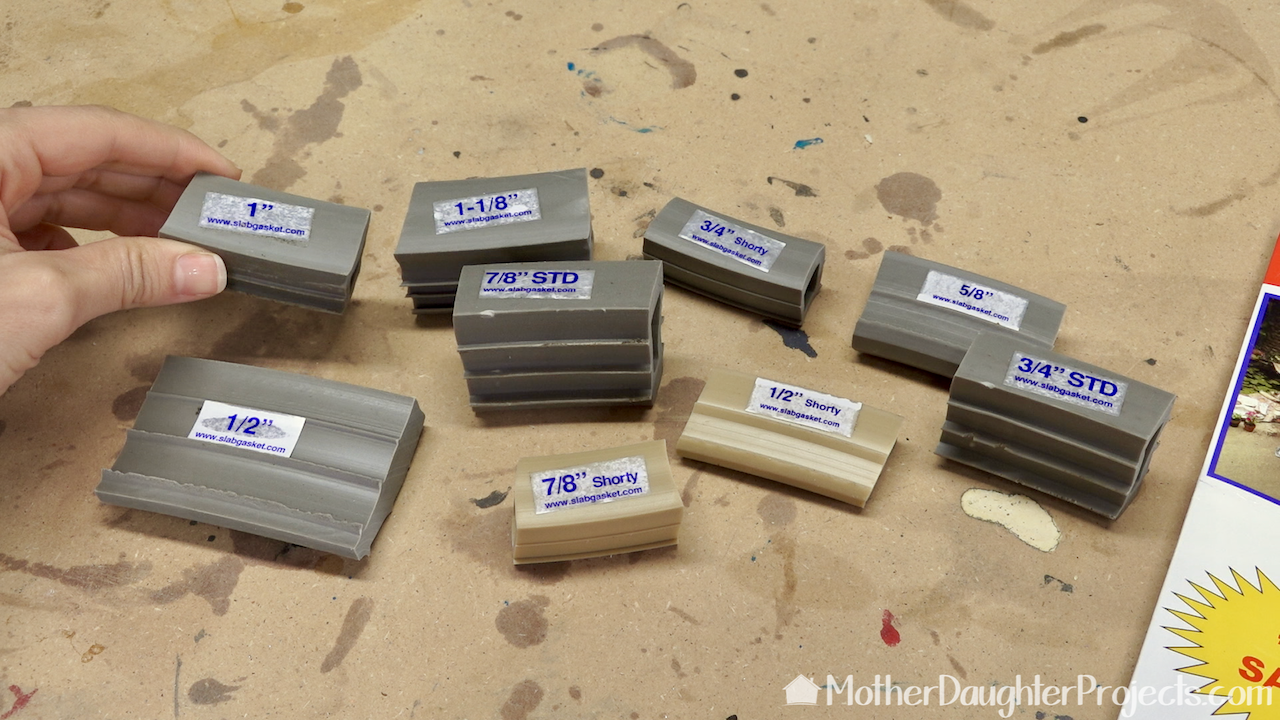
There are at least three methods to replace the wood expansion joints. Each has its pros and cons but we settled on flexible vinyl gaskets due because it was very homeowner friendly, required no special tools or drying time. Check out the UPDATE video, 3 years later
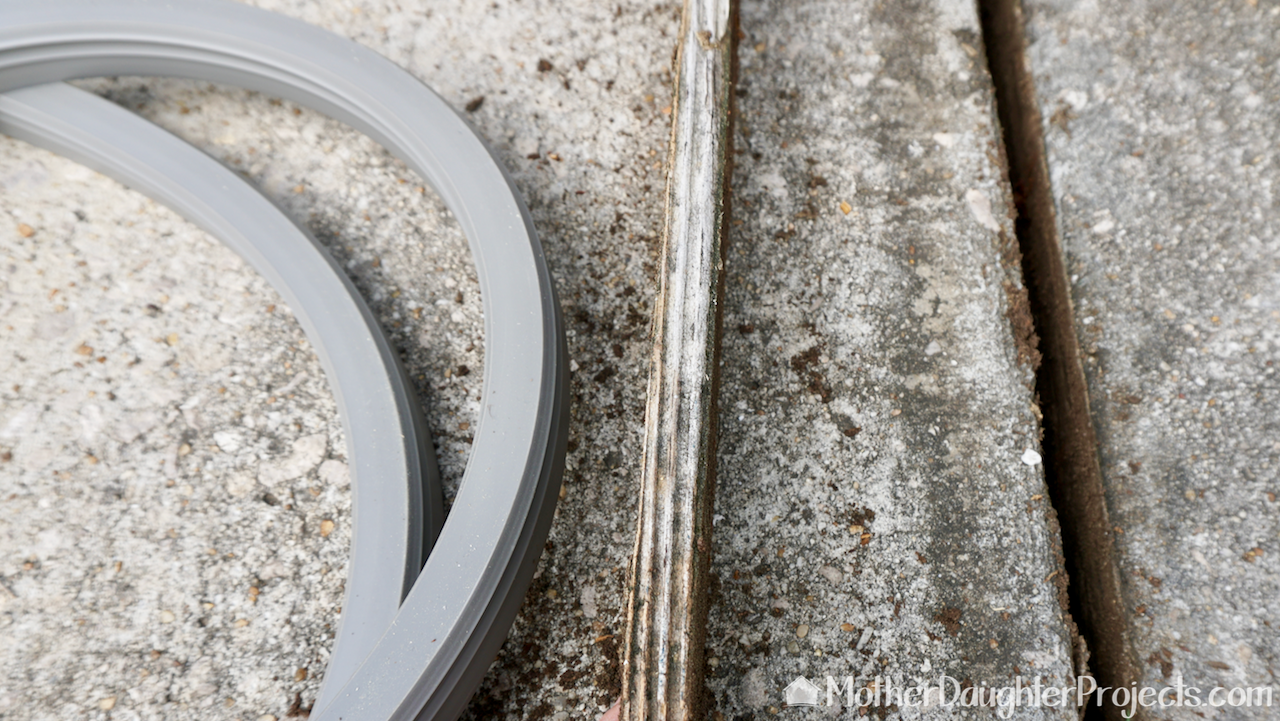 The replacement gasket is on the far left, the middle is the old wood from the expansion joint on the right. 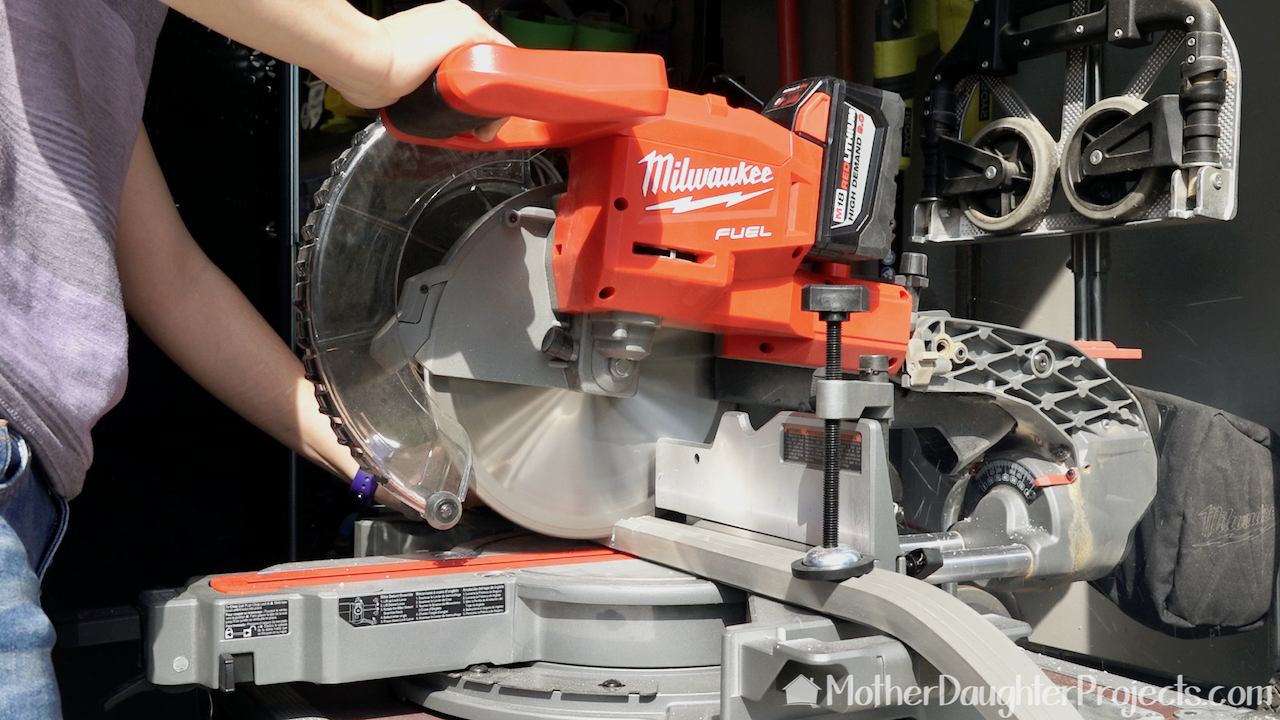 The gasket can easily be cut with heavy duty scissors or with a miter saw. Totally not necessary but it's handy to use so we did! 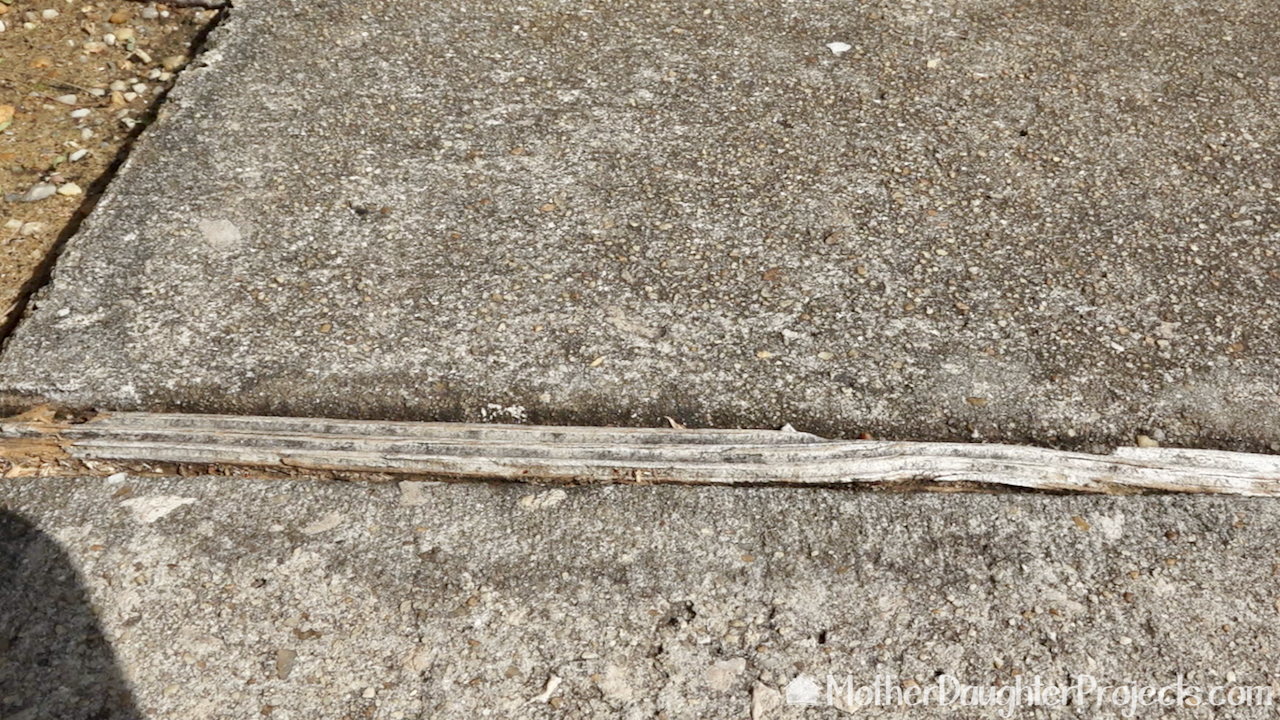 The wood in the expansion joint was looking really worn and was ready to be replaced. 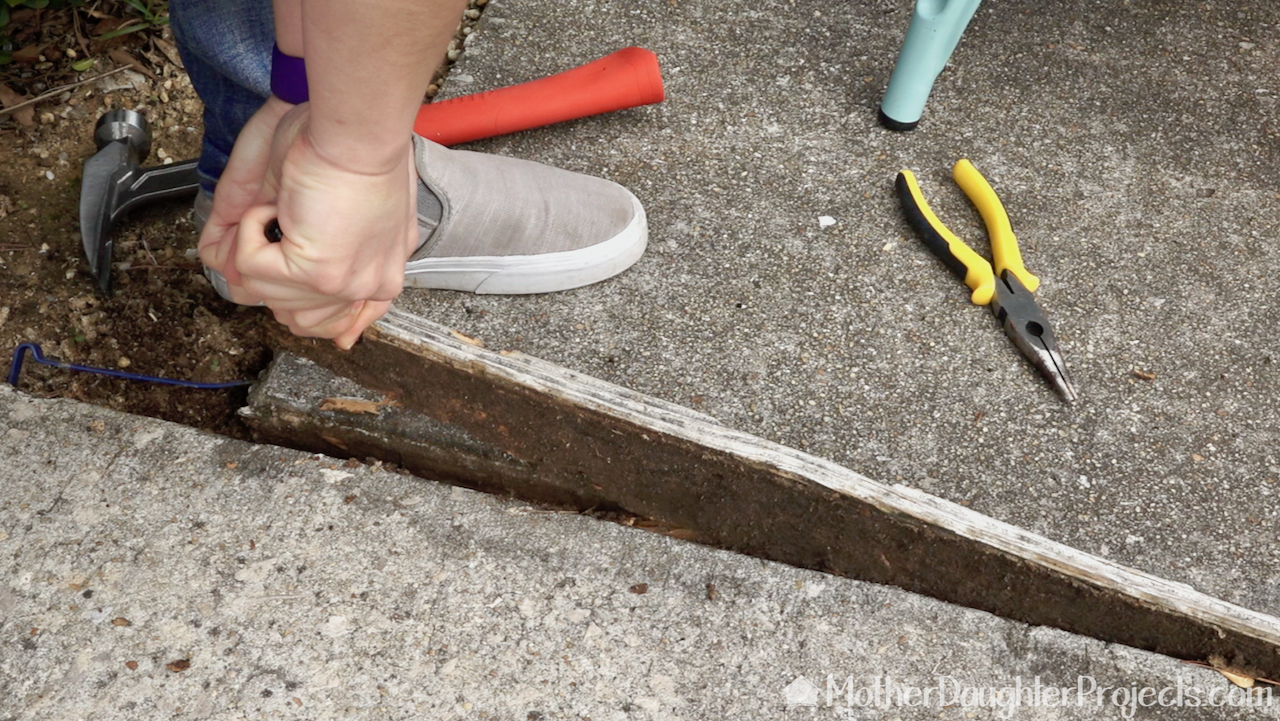 The first piece of wood needed a little nudging with a hammer and pry bar but came free in one piece. 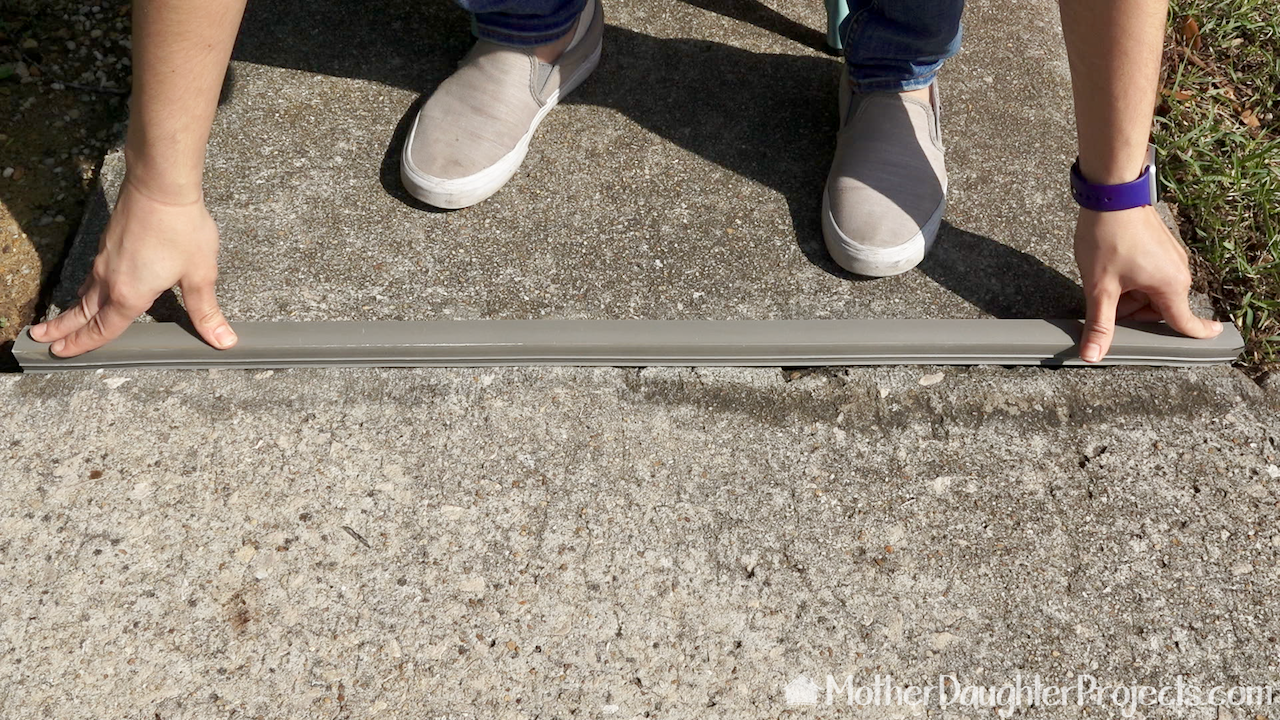 After cutting the new gasket to size it was placed into position. 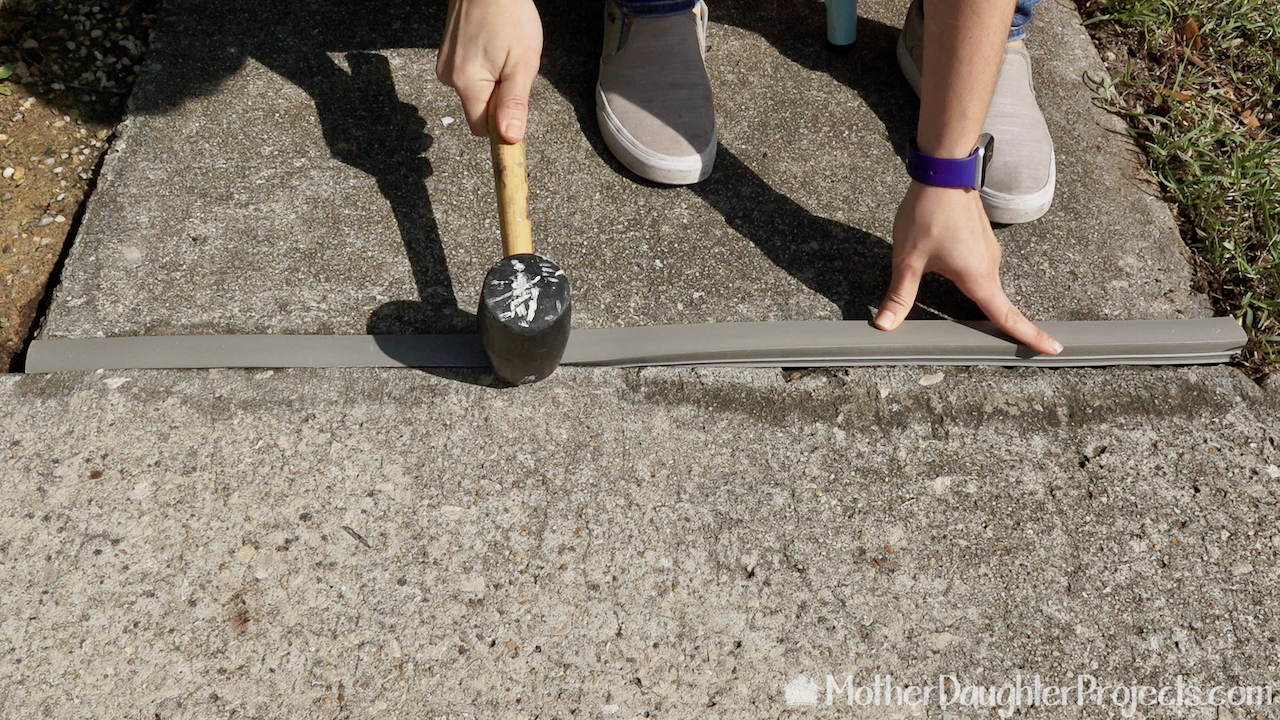 This one was a tight fit so it was encouraged to fit by a rubber mallet! 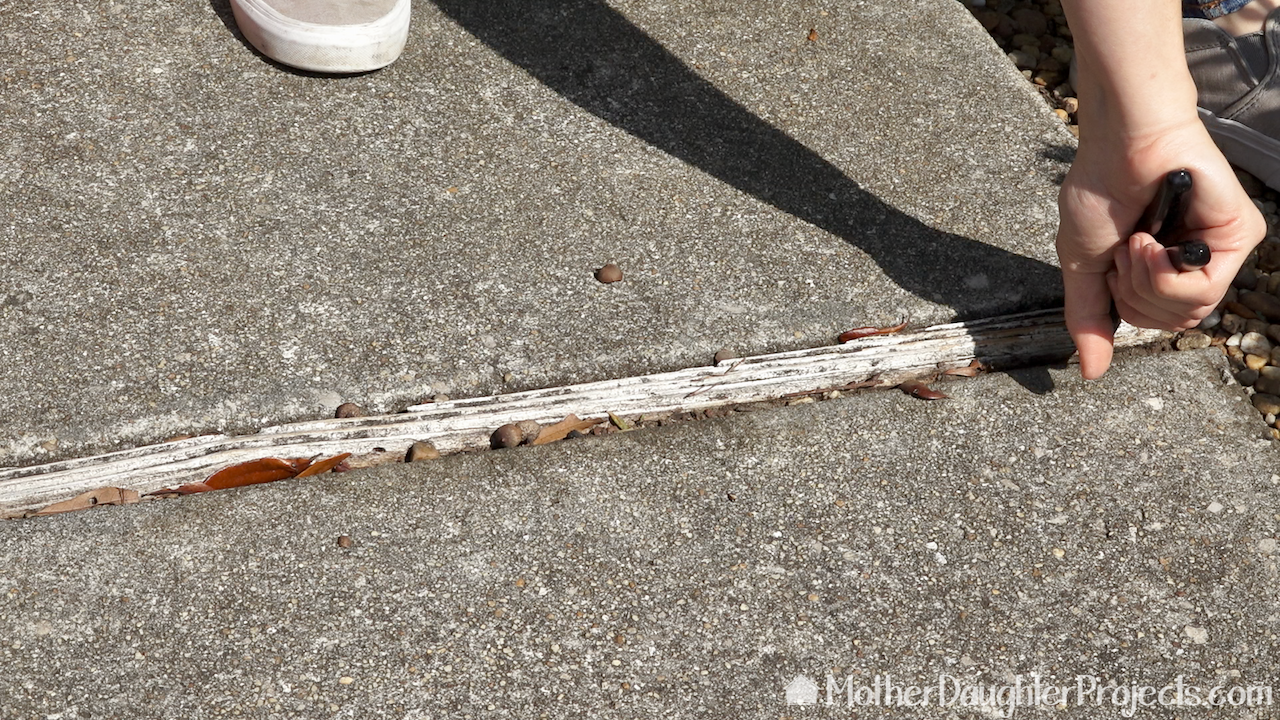 The next wood joint came out without any extra tools or force. 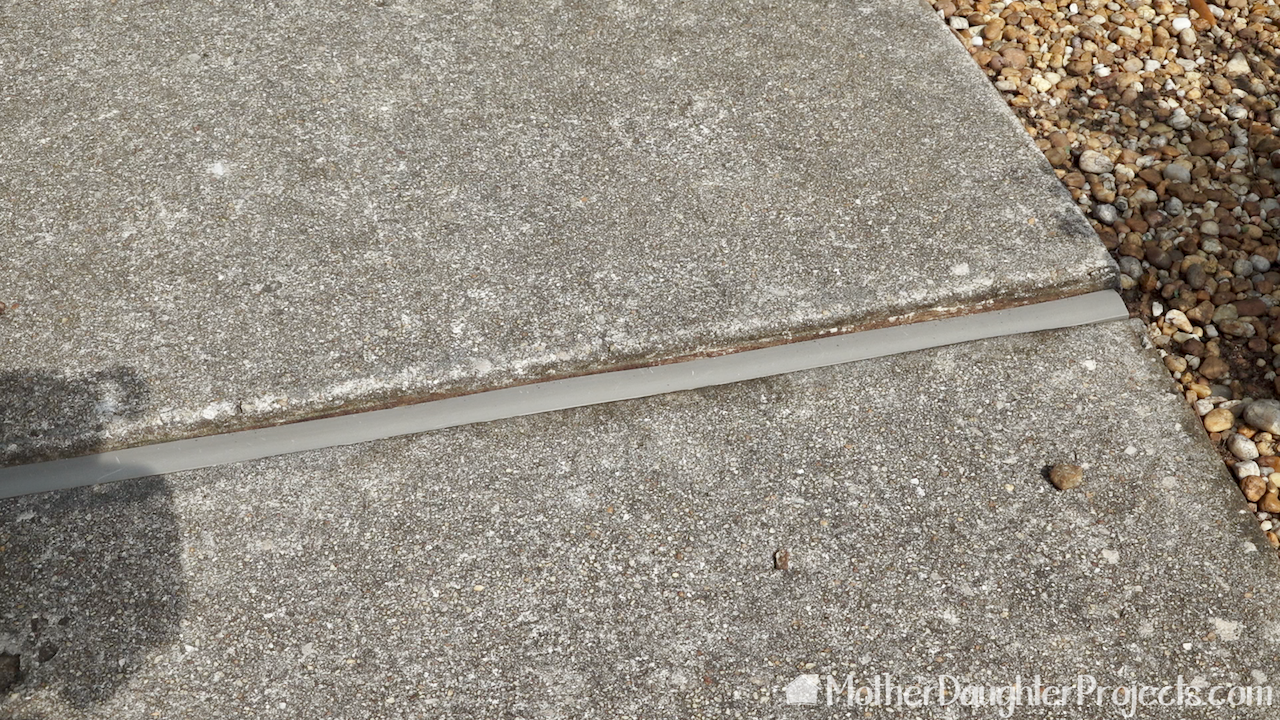 This joint was an easy fit. We considered grinding down that high concrete slab edge, but determined it really didn't pose a tripping hazard. 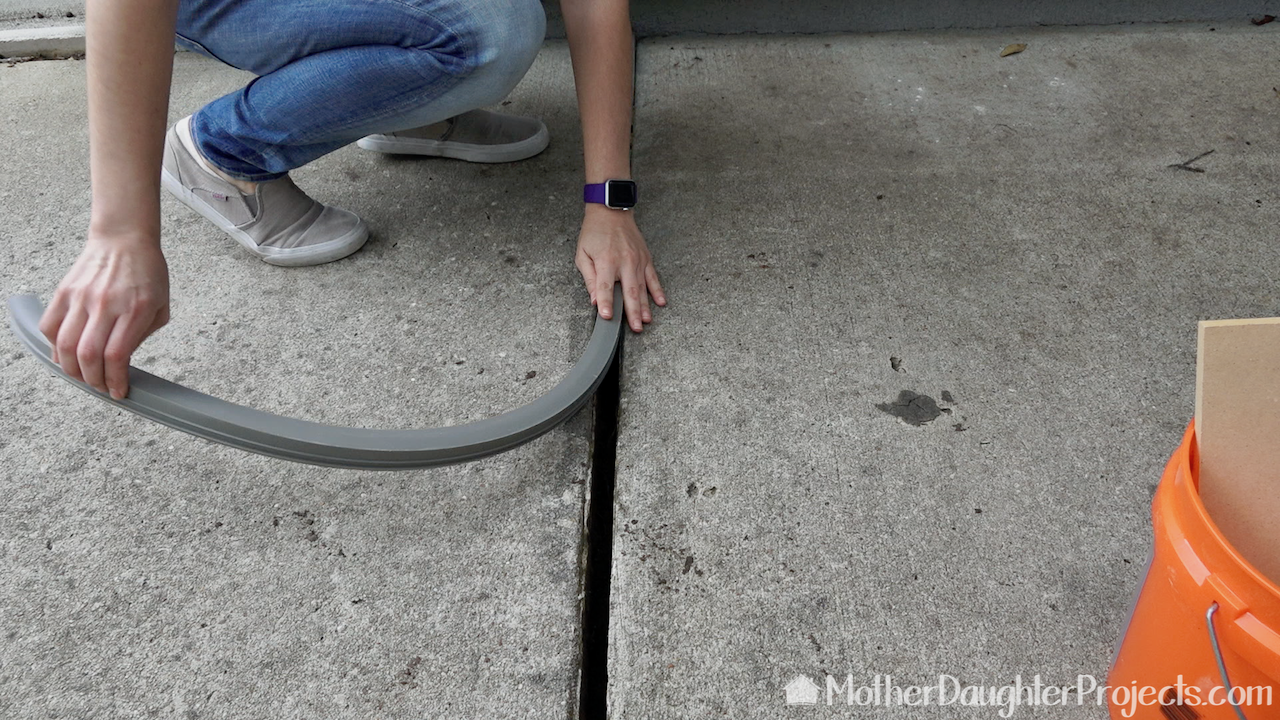 The third joint was the most challenging to repair as the wood was so rotten that it came out in lots of small pieces. The gasket fit in very nicely though. 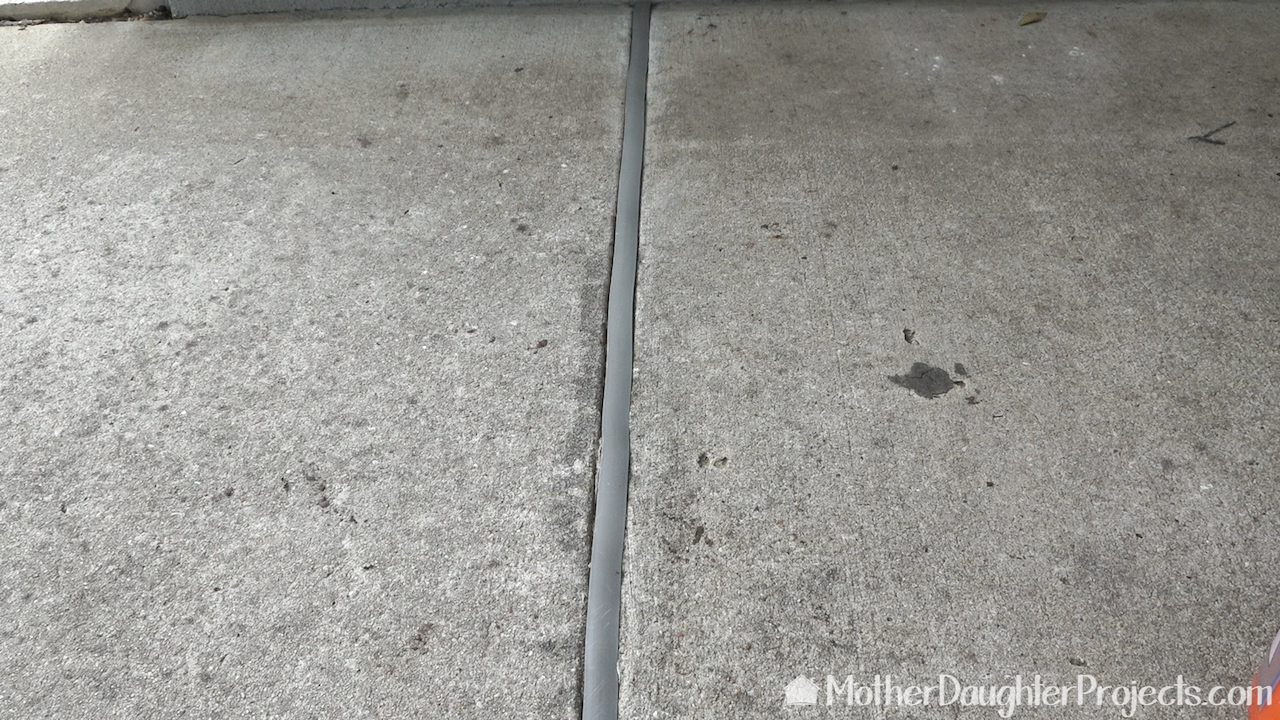 Such a great improvement over the rotten old wood!  The color of the new gaskets blends in so well you can hardly tell where they are! Are you wondering about the color of the concrete? The two tone color represents an experiment we did with the product Wet and Forget. The lighter had the product the darker did not. We will be doing a post about it. We were very pleased with the outcome of this maintenance project. It was a very doable DIY for us and I'm sure it would be for others. We especially like that it can be finished very quickly, needs few tools, and the results look really good!
Please note: We are not sponsored by any of the companies/products that we used. These products were picked and bought by us. FYI: We are not professionals, and we don’t claim to be. This is what we found worked for our project. Yours may need a little different approach. Safety first! FYI: Affiliate links are being used on this page. Purchasing via these links help support MDP! Related Projects
15 Comments
Raul
7/2/2018 03:05:25 pm
Thank you for your information on the concrete gasket, I have been trying different products and it is always very difficult to replace the expansion joints on the concrete because normally they are different in size and wood or other products requiere a lot of work.
Steph
7/2/2018 06:30:43 pm
You're welcome! Thanks for the kind words Raul.
mike
3/5/2019 05:23:32 pm
Thank you so musch for help
Mary
5/21/2019 06:47:42 pm
Hi, we are considering this product and would like to know how yours is holding up. I read some mixed reviews on this product especially regarding shrinkage issues... Would you still recommend this product? Thank you.
Steph
5/22/2019 08:29:28 pm
Hi Mary, I have not noticed any shrinkage issues. The only thing I see (I just went outside to look) is it's a little dirty. But that should come off with some cleaning. I've been really happy with it overall!
Mart
5/22/2019 08:56:30 pm
Thank you!!
James Martel
5/27/2020 07:32:25 pm
hi there - How about now, another year later? Is it still holding up pretty well?
Steph
5/27/2020 09:03:00 pm
Still holding up well!
Terri McClanahan
5/31/2019 10:59:03 am
Great video ladies! I am a DIYer also and am about to tackle this same project. Could you please tell me the brand name of the vinyl product you guys used? I couldn’t make it out on the video. Thanks in advance
Steph
6/2/2019 08:10:34 pm
Hi Terri- good luck with the project! Slab gasket is the brand, there is a link toward the top of this blog post.
Randi
6/24/2020 04:01:46 pm
Need material company for expansion joint repaiir.
Lorne
6/11/2019 06:00:46 pm
Great video! Thank you.
Steph
6/11/2019 08:56:22 pm
Thanks Lorne!
sandy BALDWIN
2/3/2022 01:41:27 pm
2-3-22 I really enjoy watching you two, wish my mother was still alive to do work like this.....be safe..
David Gadberry
5/21/2022 01:26:44 pm
I need 35 feet of 1" joints, in beige. Does it come in beige or can I paint it? Leave a Reply. |

Mother Daughter Projects
|