Mother Daughter Projects

  • Blog
  • About
    • Contact
    • Privacy Policy
  • Tools
    • Tool Tuesday
  • Maintenance
  • Improvement
  • Decor
  • Tech
  • Blog
  • About
    • Contact
    • Privacy Policy
  • Tools
    • Tool Tuesday
  • Maintenance
  • Improvement
  • Decor
  • Tech

DIY for Homeowners

Junk Organization for a Tiny Space

5/19/2016

2 Comments

 
​by Vicki      ​Sign up to get Mother Daughter Projects updates in your email!
Tiny Space Organization. MotherDaughterProjects.com
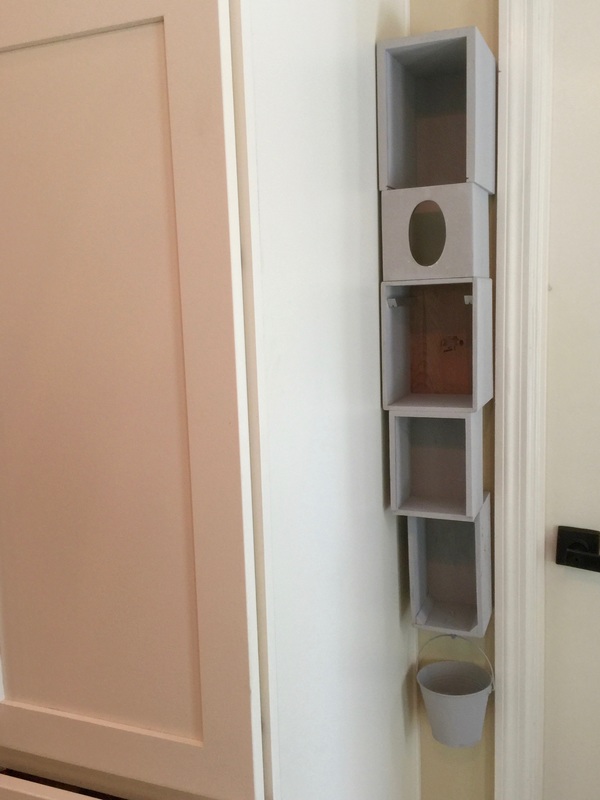
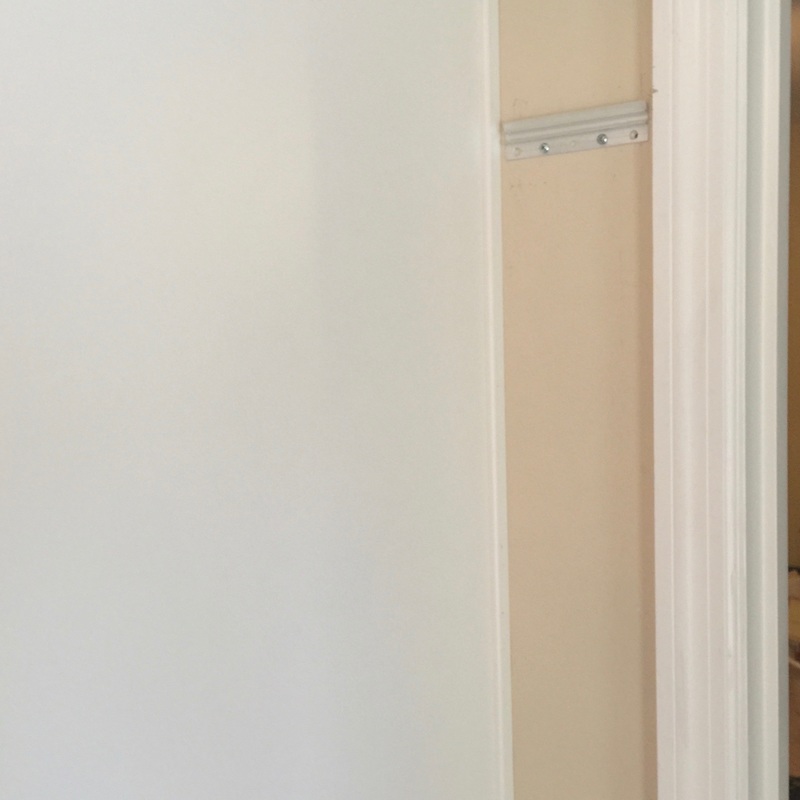
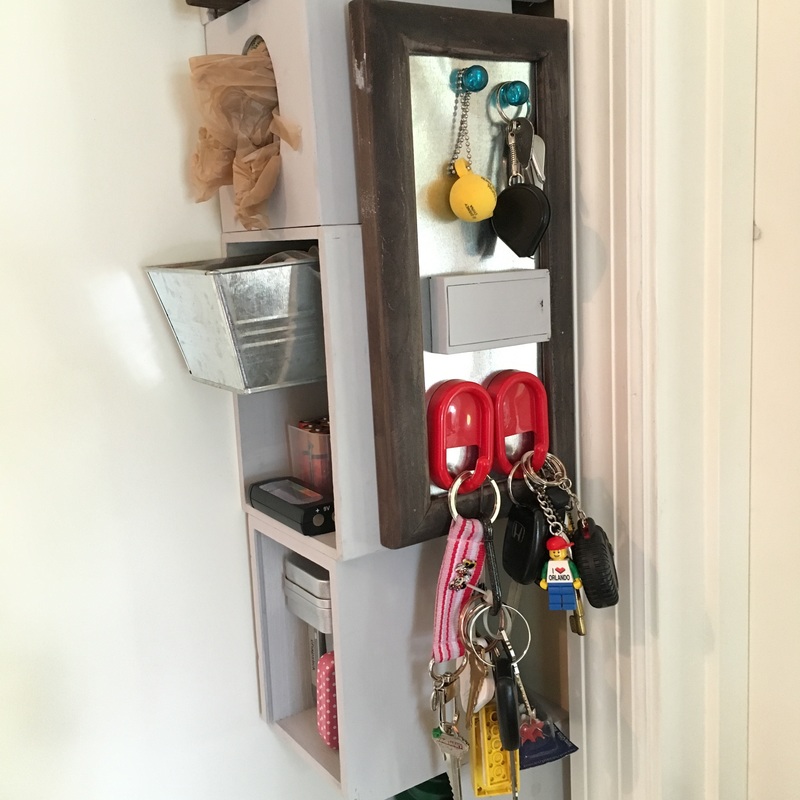
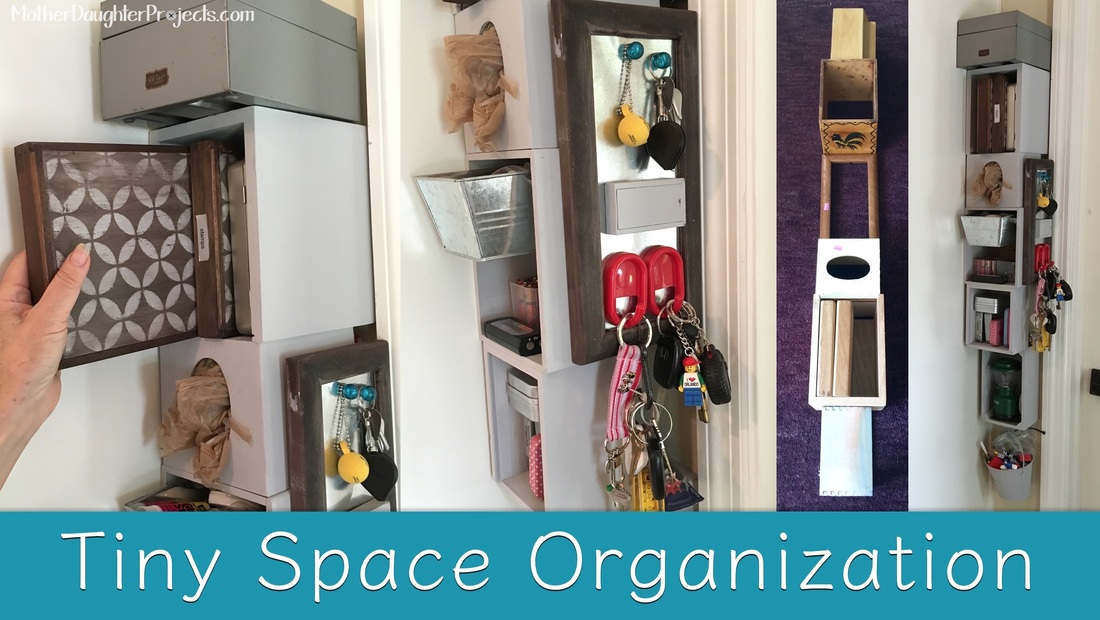
​When my kitchen was remodeled there was a tiny 5.5” space left between the cabinets and door to the master bedroom. That little space was just crying out for some kind of embellishment! 

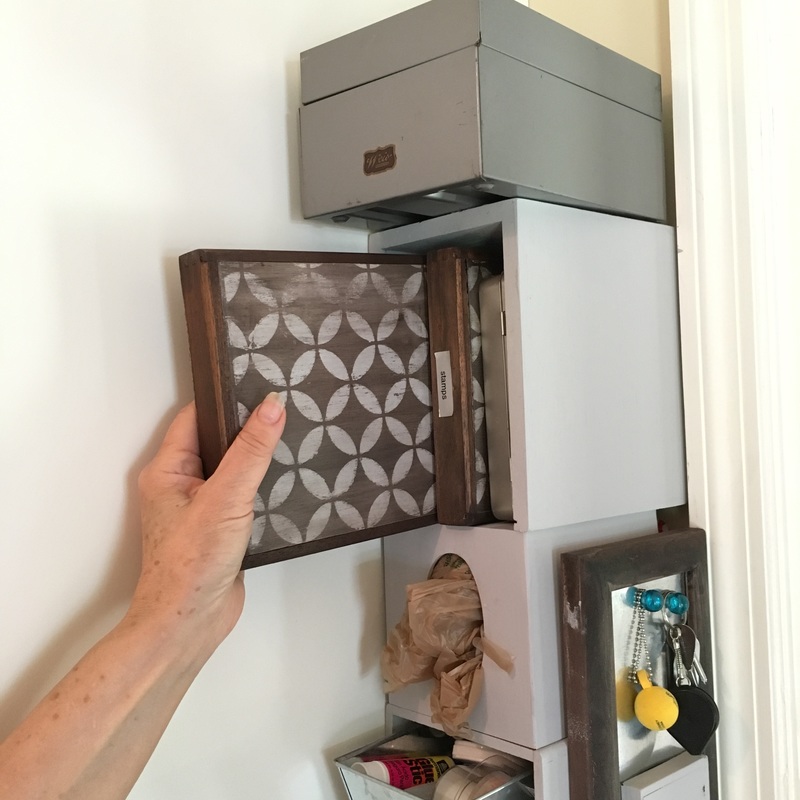
Steph & I made this a while back: the Intentional Junk Drawer. Since then I’ve been wanting a type of intentional junk drawer for my own home as Steph kept the one we made. 

I have a collection of wood boxes from various yard sales that I thought would be perfect to create some vertical storage in the tiny 5.5” space. Once the boxes were sorted by size, I set out to work!
Materials:
  • Wood boxes—mine needed to be no wider than 5.5”. Height or depth did not matter.
  • Paint
  • Glue (I used E6000)
  • French Cleat to hang

Accessories:
  • Wood frame with piece of flashing cut to size
  • Hinged metal boxes—like Altoid tins
  • Cup hook
  • Small bucket with handle
  • Plastic containers
  • 2 Matching cigar boxes
  • Magnet hooks

How-to Steps:

Tiny Space Organization. MotherDaughterProjects.com
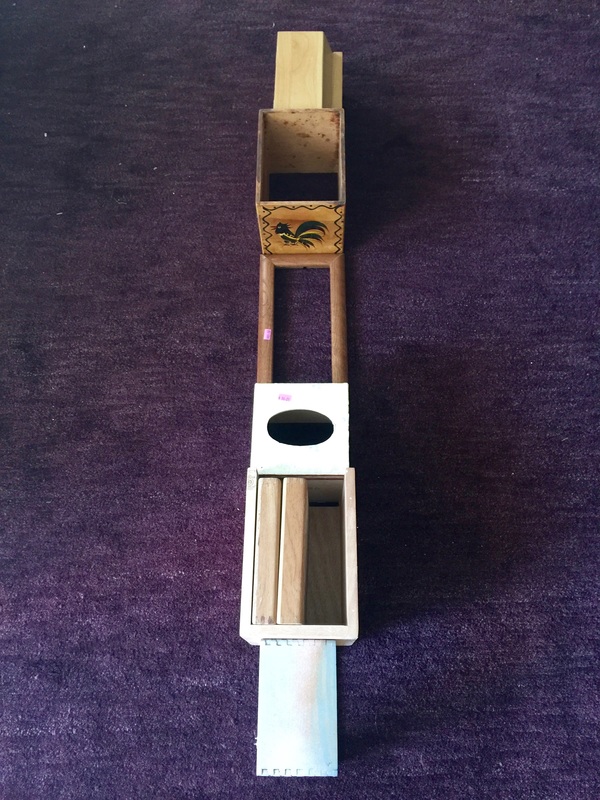
Lay out boxes in the arrangement that is most functional for your space.
Tiny Space Organization. MotherDaughterProjects.com
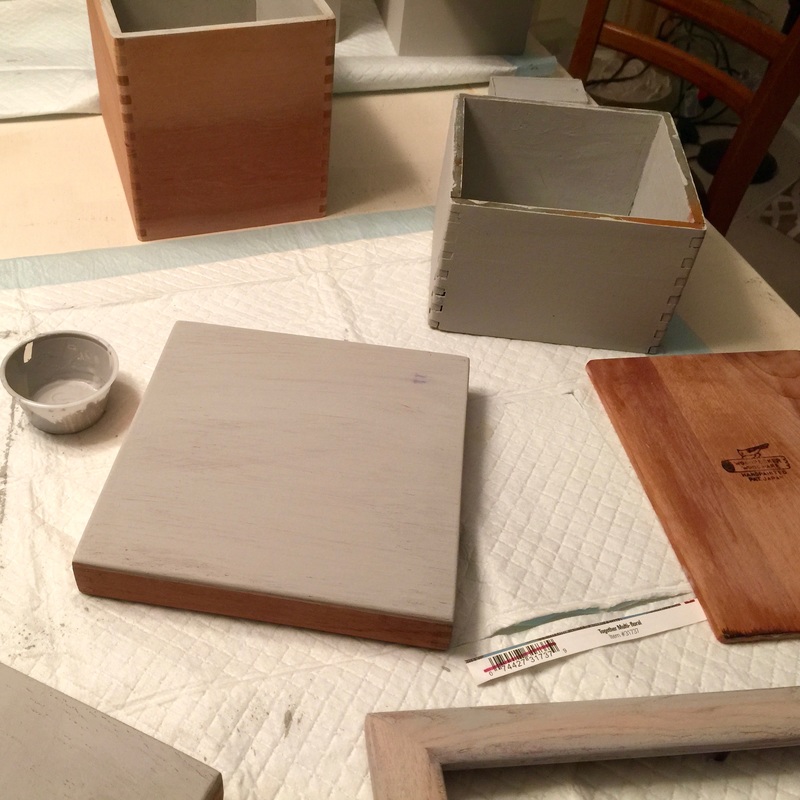
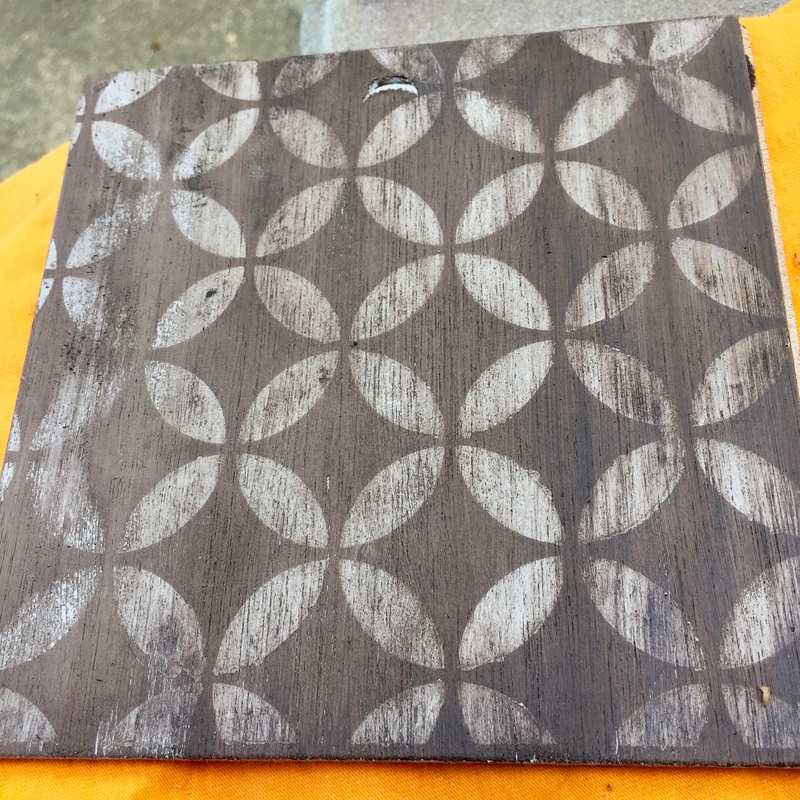
I painted inside and out with chalk paint.
Tiny Space Organization. MotherDaughterProjects.com
Mount the organizer to the wall with the french cleat. Follow the instructions on the package. This is the most secure way I have found to hang this on the wall.
Glue boxes together. I glued mine with the front edges lined up when I should have made sure the back edges were lined up. I ended up having to add another box to line up with the deepest box so that the arrangement would lay flat against the wall. There is a significant space behind one of the boxes because it is less deep than the one on the bottom and top of it which ended up being a good place to stash my sunglasses. The wood frames hide the other space issues. ​
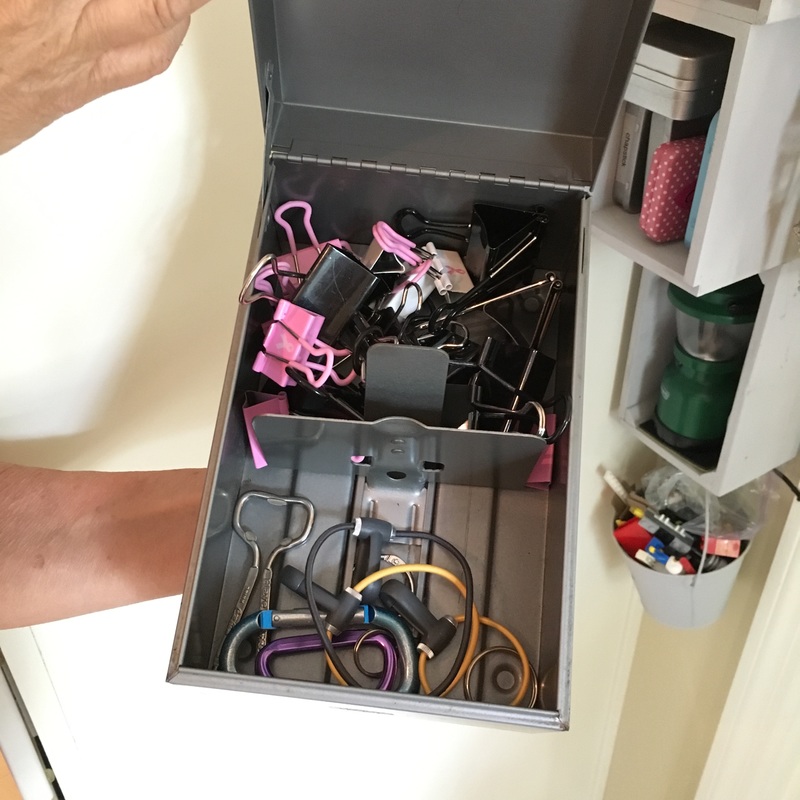
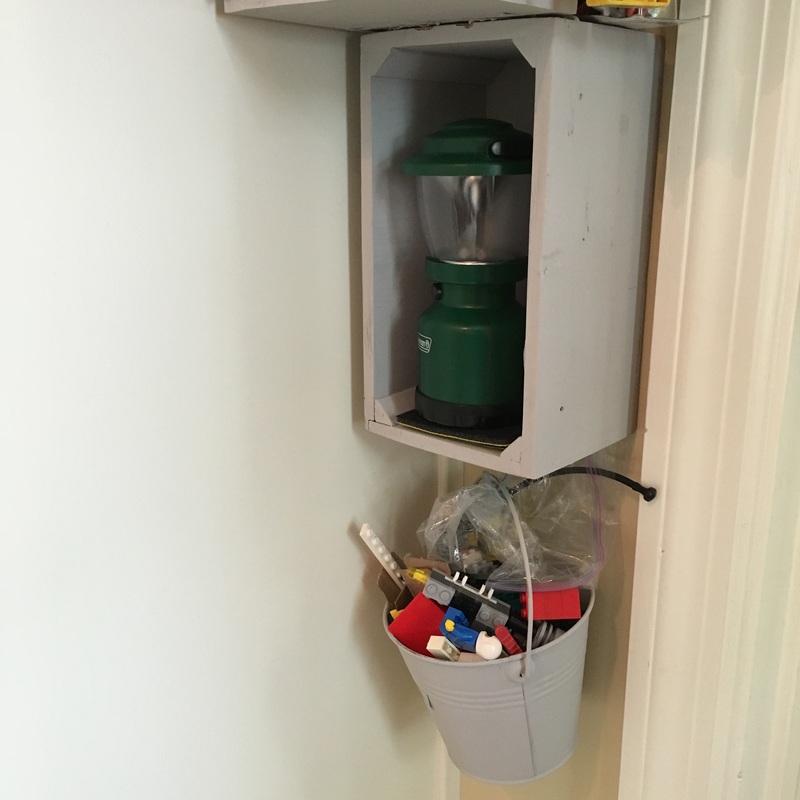
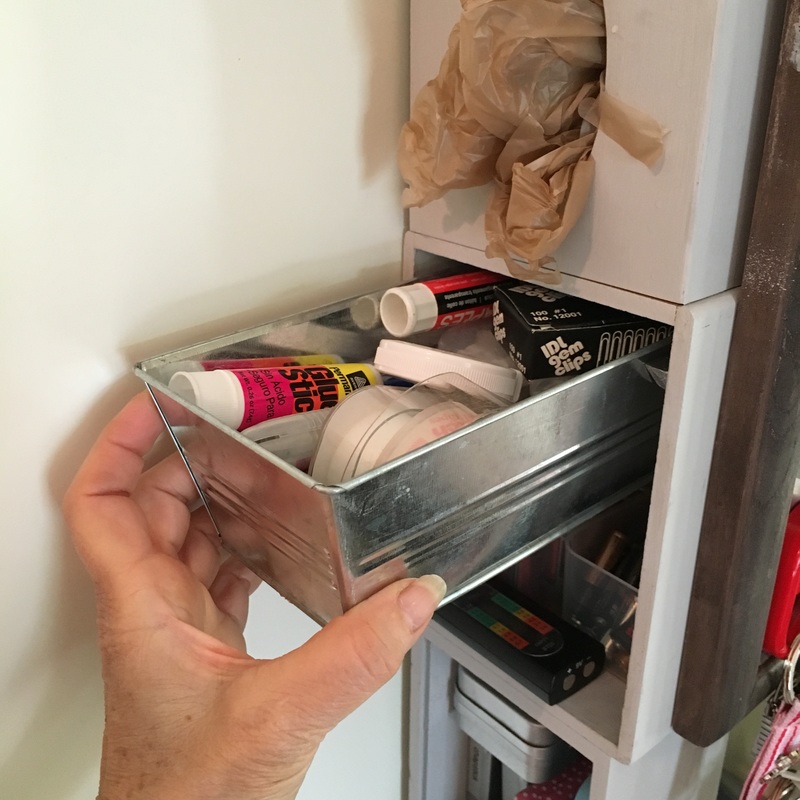
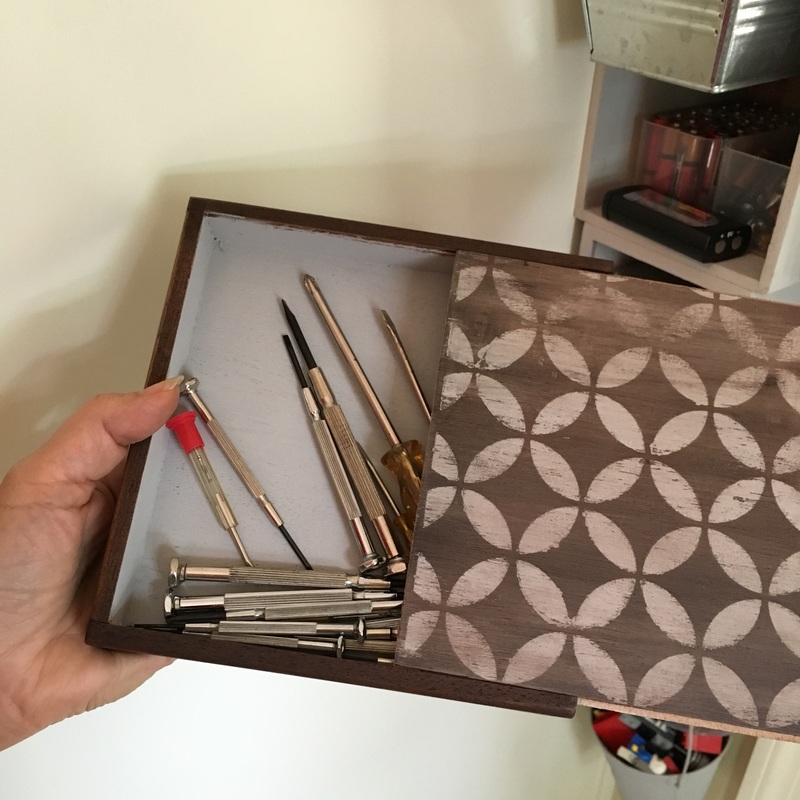
Tiny Space Organization. MotherDaughterProjects.com
Tin snips are used to cut a piece of flashing for the frame. Careful, it’s sharp! This is magnetic so perfect for magnets.
Tiny Space Organization. MotherDaughterProjects.com
This is a cigar box that has a sliding top that I chalk painted. I used a masking technique with a stencil on the top and wiped the entire thing with stain once the masking spray was dry. (I was experimenting with a Rust-oleum automobile spray used for protecting cars from small dings, but looks like has been discontinued, as a masking spray.) Once dry, the masking spray rubbed off exposing the chalk paint.
Tiny Space Organization. MotherDaughterProjects.com
What’s in the box?
  • Top: metal box houses overflow office supplies.
  • The next box holds two matching cigar boxes that have sliding lids.  One box holds small screwdrivers and the other stamps.
  • Tissue box: This hold plastic grocery bags.
  • This box features a sliding drawer with more office supplies and two boxes that house AAA and AA batteries plus a battery tester. 
  • The hinged metal tins are housed in the next box and hold tiny things like chapstick, mini glow sticks, etc.
  • A flashlight is housed in the last box specifically because I can never find a flashlight when I need one. I wanted a totally dedicated space for one.
  • A cup hook is screwed into the bottom of the last box. The bucket is for the collection of small toy parts which as a grandma, I’m always finding. 
  • Keys are hanging on the magnet hooks.
  • The space behind the yellow lego brick is where I keep my sunglasses. 
Tiny Space Organization. MotherDaughterProjects.com
Please note: We are not sponsored by any of the companies/products that we used. These products were picked and bought by us.

FYI: We are not professionals, and we don’t claim to be. This is what we found worked for our project. Yours may need a little different approach. Safety first!

Related Projects

Picture
The Intentional Junk Drawer
Picture
Clothespin Jewelry Hanger
Picture
Get Organize with Pegboard
2 Comments
Susan link
5/22/2016 11:29:19 am

Fantastic idea for a tiny space. I love how you repurposed items and took advantage of every inch of available space. Please come share your idea at Simple Organization Ideas. You can find it on the right side of my navigation bar. Ideas are featured each week and shared on social media.

Reply
Steph
5/23/2016 11:39:11 am

Thanks Susan! We will do that.

Reply


Leave a Reply.

    MotherDaughterProjects.com

    Mother Daughter Projects
    ​
    Steph & Vicki

    We're homeowners sharing our DIY adventures as we learn to maintain, improve, decorate, and ​use tech in our homes.
    Share your projects with us here:  
    ​#trylearnshare
    MotherDaughterProjects.com
Mother Daughter Projects, LLC ∙ est. 2015 ∙ Tallahassee, FL by Vicki & Steph ∙ Privacy Policy