Mother Daughter Projects

  • Blog
  • About
    • Contact
    • Privacy Policy
  • Tools
    • Tool Tuesday
  • Maintenance
  • Improvement
  • Decor
  • Tech
  • Blog
  • About
    • Contact
    • Privacy Policy
  • Tools
    • Tool Tuesday
  • Maintenance
  • Improvement
  • Decor
  • Tech

DIY for Homeowners

"Locket" Planter Box- Picture to Wood Transfer

4/10/2017

2 Comments

 
​​text by Vicki     ​Sign up to get Mother Daughter Projects updates in your email!
Learn how to build a basic planter box with a twist and personalize it by transferring pictures to wood. Check out this how-to tutorial!
Recently, we were asked by Kreg to create a sponsored Mother’s Day project for BuildSomething.com. Being that we are Mother Daughter Projects, what better team to ask than us?! We have purchased and used a number of Kreg products over the years, and jumped at the chance to add a project to Build Something! 

Check out the tutorial for how to transfer pictures to wood below!
Learn how to build a basic planter box with a twist and personalize it by transferring pictures to wood. Check out this how-to tutorial!
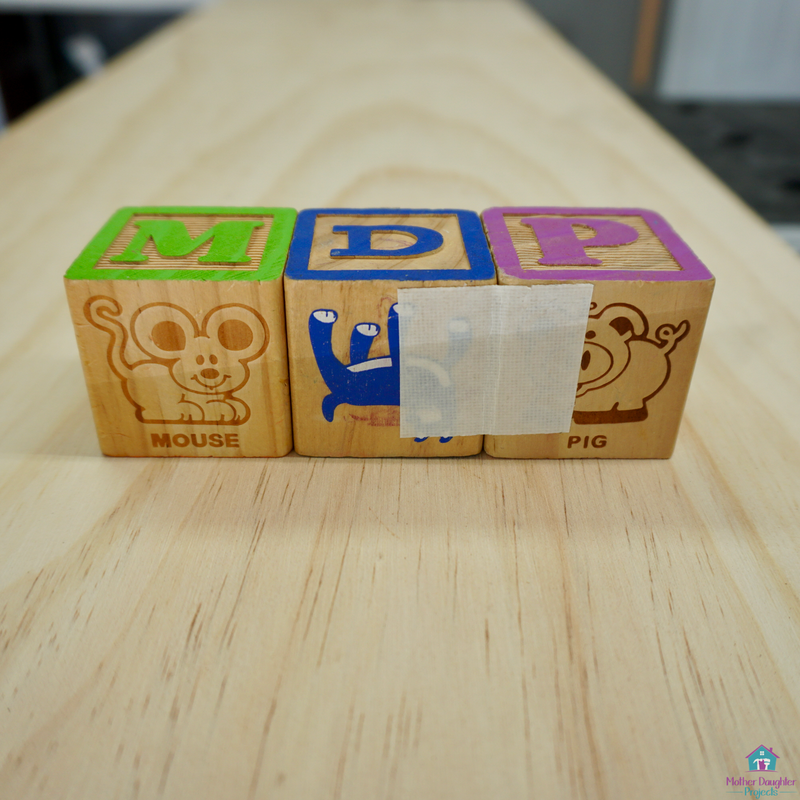
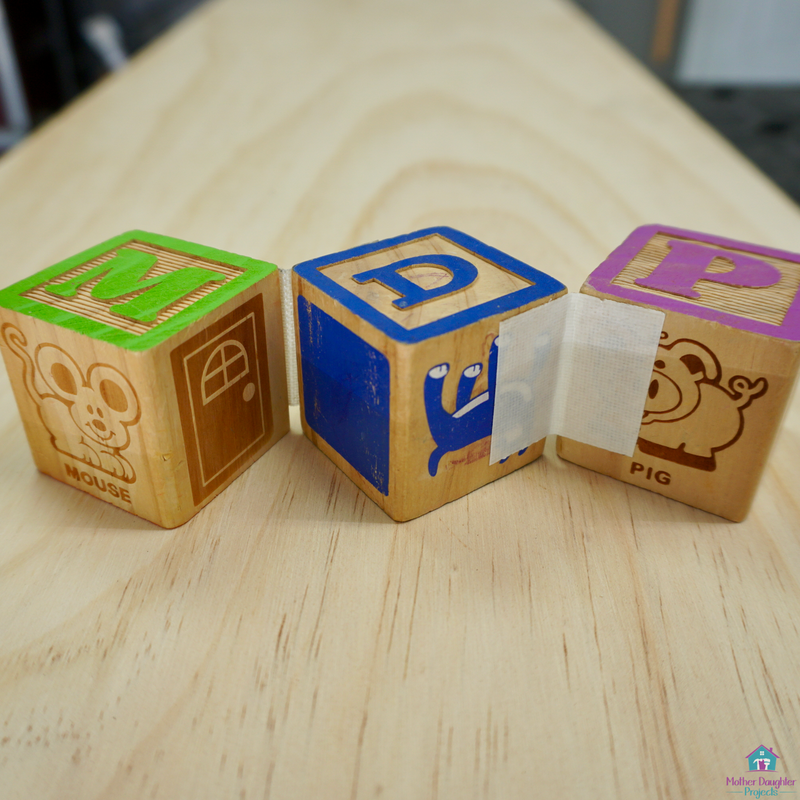
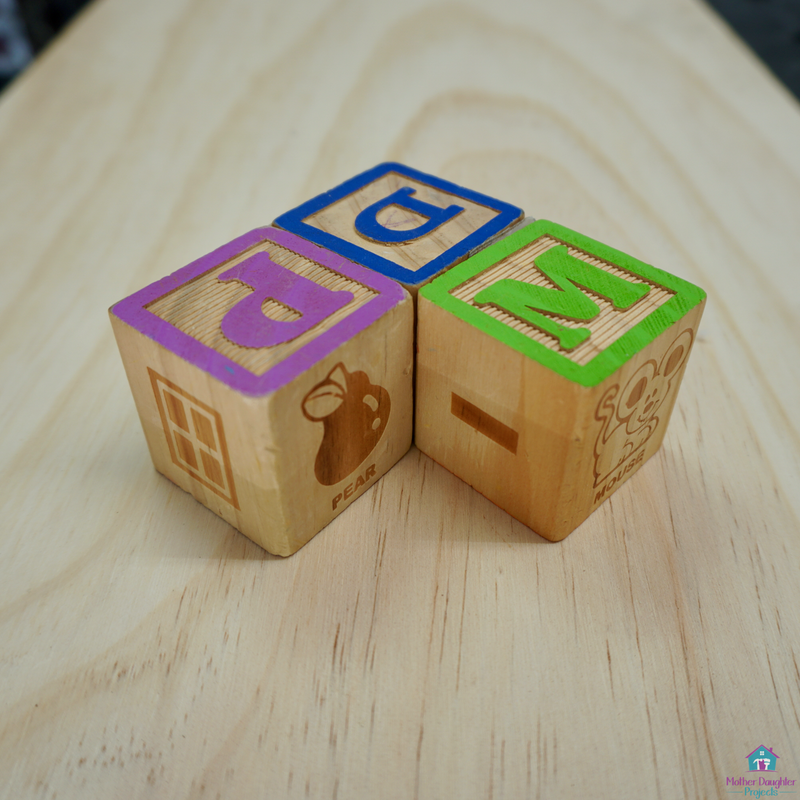
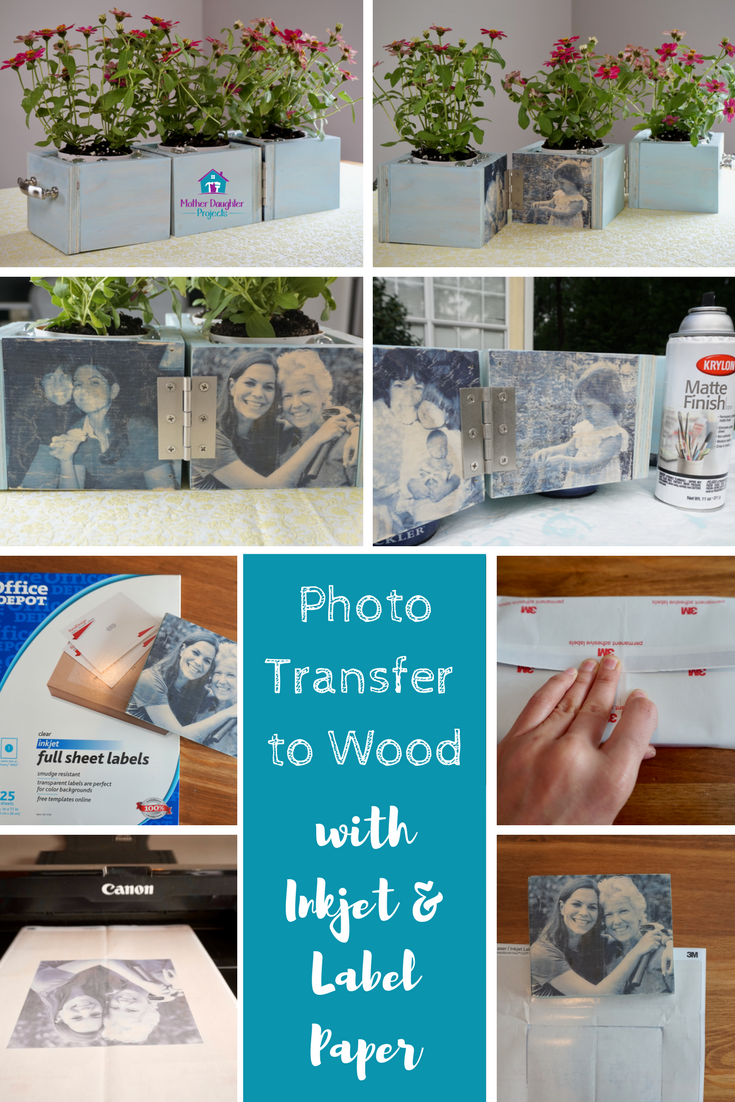
As we are both visual learners, we taped together three building blocks to help us design our project. We wanted a planter, but with a twist.

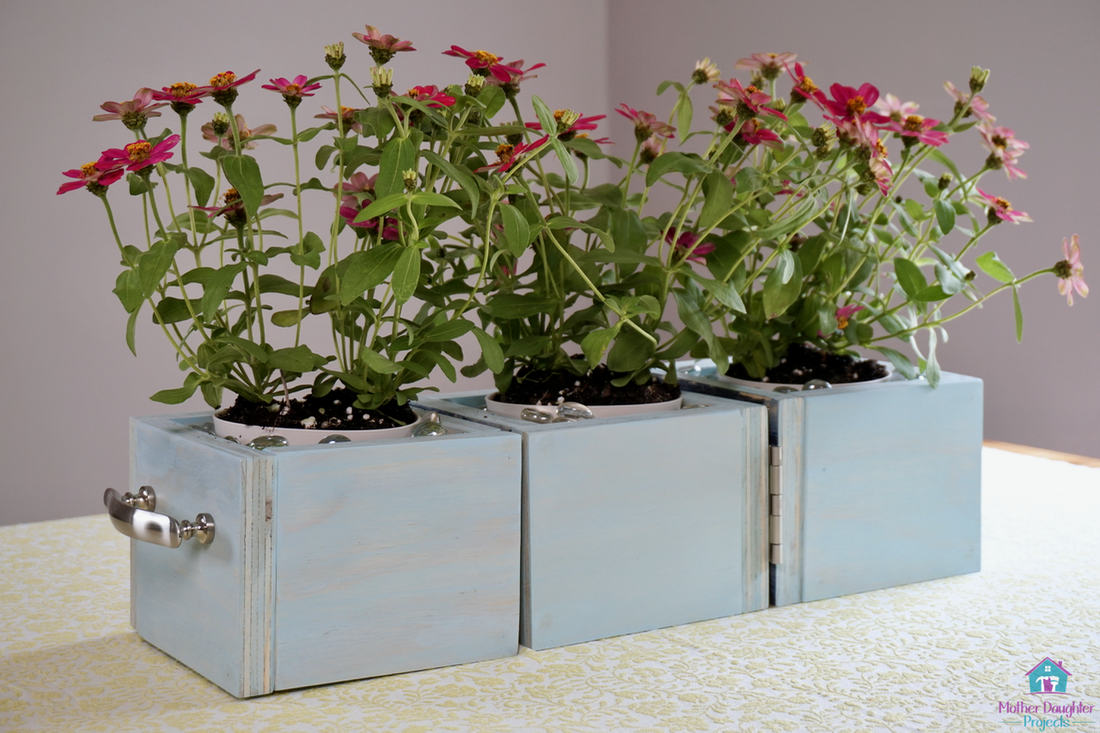
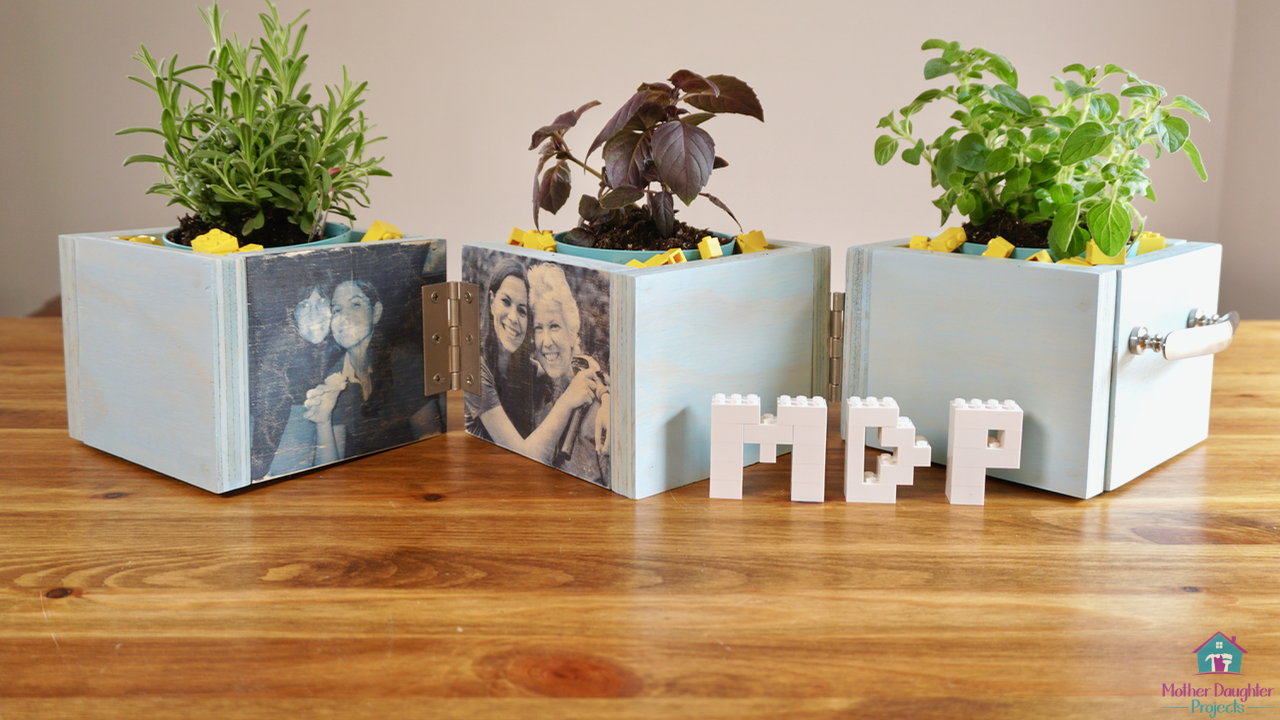
The three boxes function as a planter, but with the addition of hinges, it can be opened to different display option. The twist is the “locket” component. When the boxes are moved apart, two pictures on each side are revealed! Handles on each side makes it easy to move.
Learn how to build a basic planter box with a twist and personalize it by transferring pictures to wood. Check out this how-to tutorial!
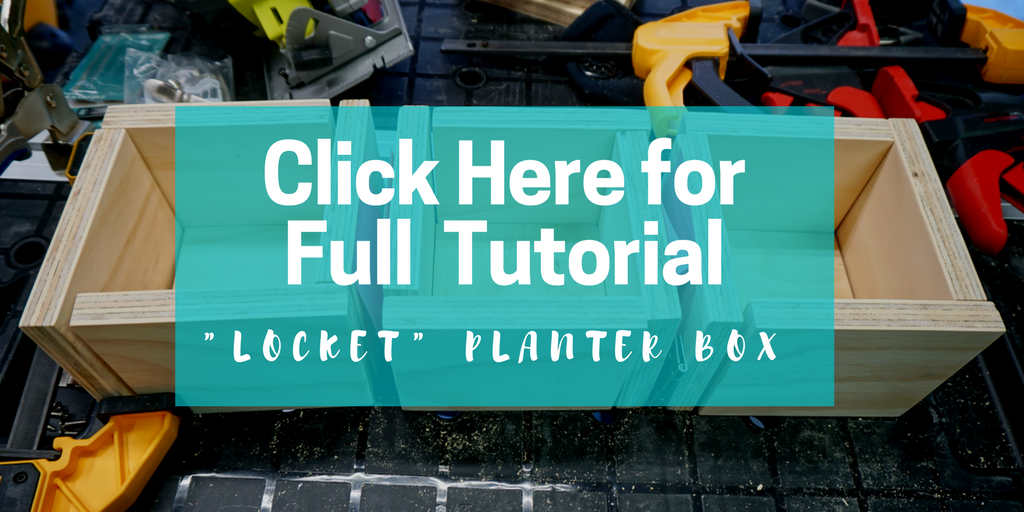
You can find full build instructions at BuildSomething.com, which is Kreg's DIY projects plan site! 
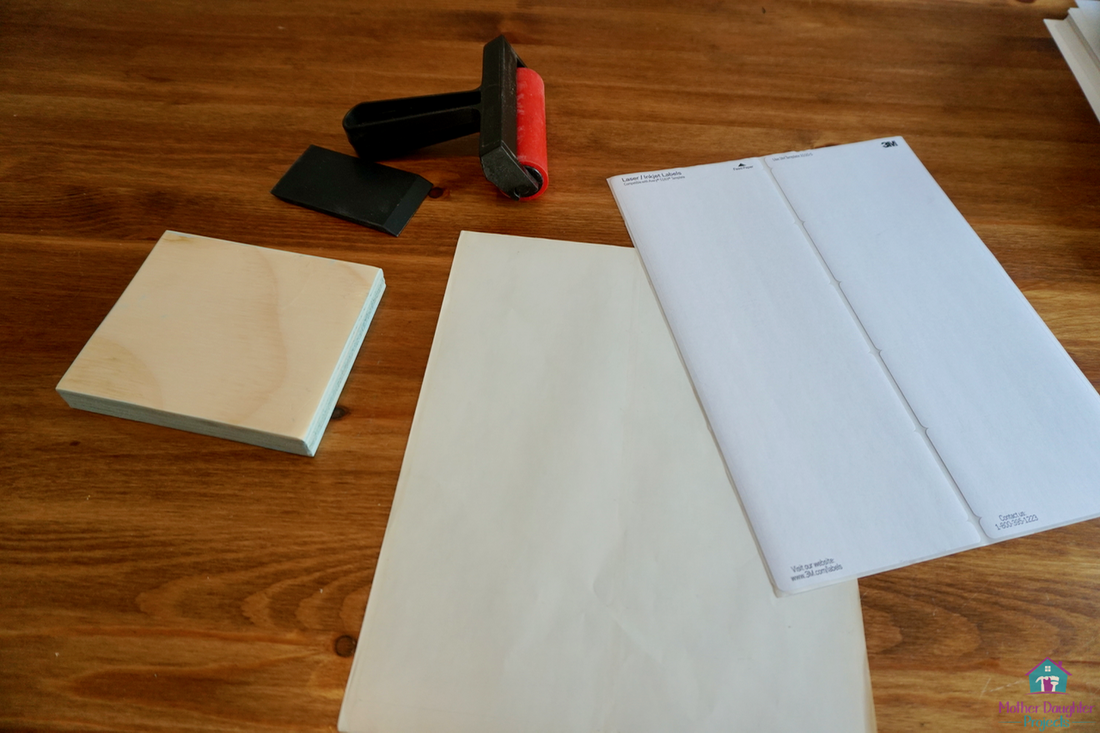
Learn how to build a basic planter box with a twist and personalize it by transferring pictures to wood. Check out this how-to tutorial!
Materials
  • Ink Jet printer (We used Canon iX6820)
  • Full size label sheet with the labels removed. If possible, leave the top and bottom paper on the label sheet. 
  • Brayer (Amazon)
  • Photos that have been sized to 4.5" tall X 5.25" wide. We also recolored our photos using photo editing software. We used Pixelmator.
  • Wood blocks that have been cut for the planter box project that have been sanded and are dust free
Learn how to build a basic planter box with a twist and personalize it by transferring pictures to wood. Check out this how-to tutorial!
 Step 1: Lay out the four blocks of wood in the order they will be built into the boxes. We used sticky notes to keep things in order. We wanted the baby pictures of Steph to open onto the same side and the newer pictures to open together on the opposite side. Also, it was helpful to mark the top of the block to be sure we oriented the picture correctly.
Learn how to build a basic planter box with a twist and personalize it by transferring pictures to wood. Check out this how-to tutorial!
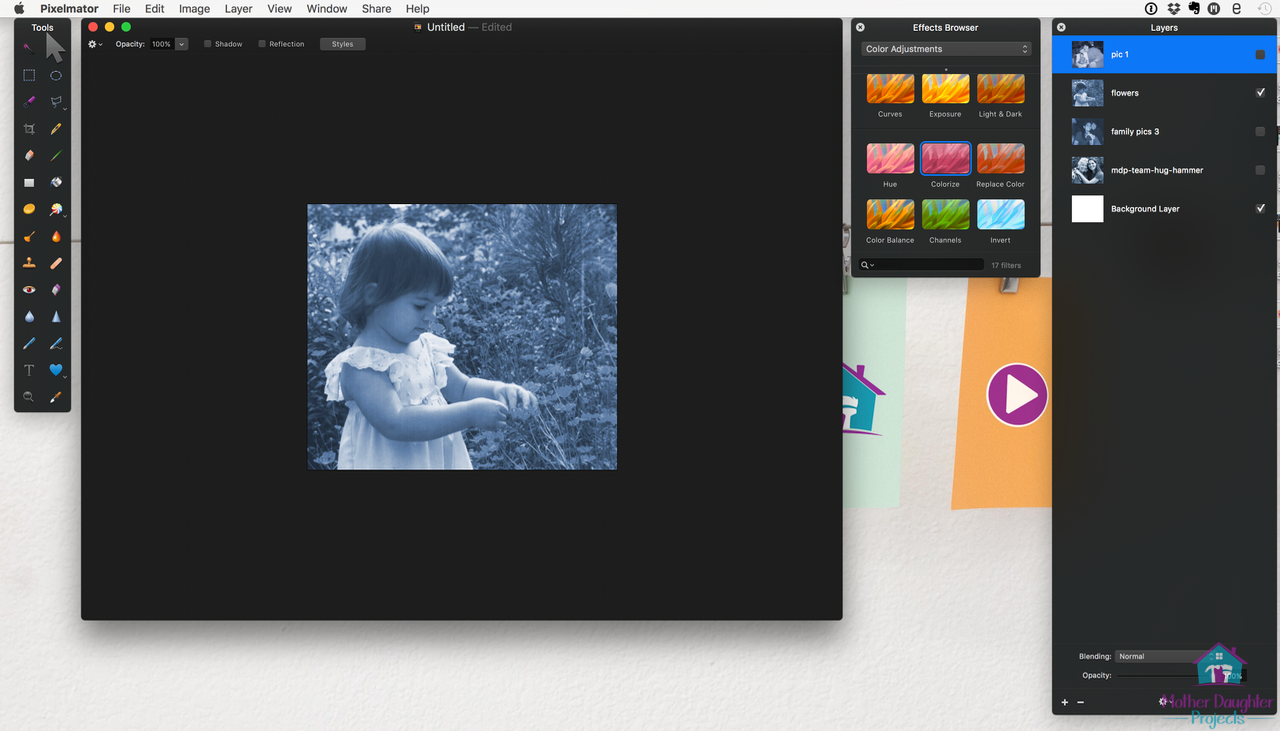
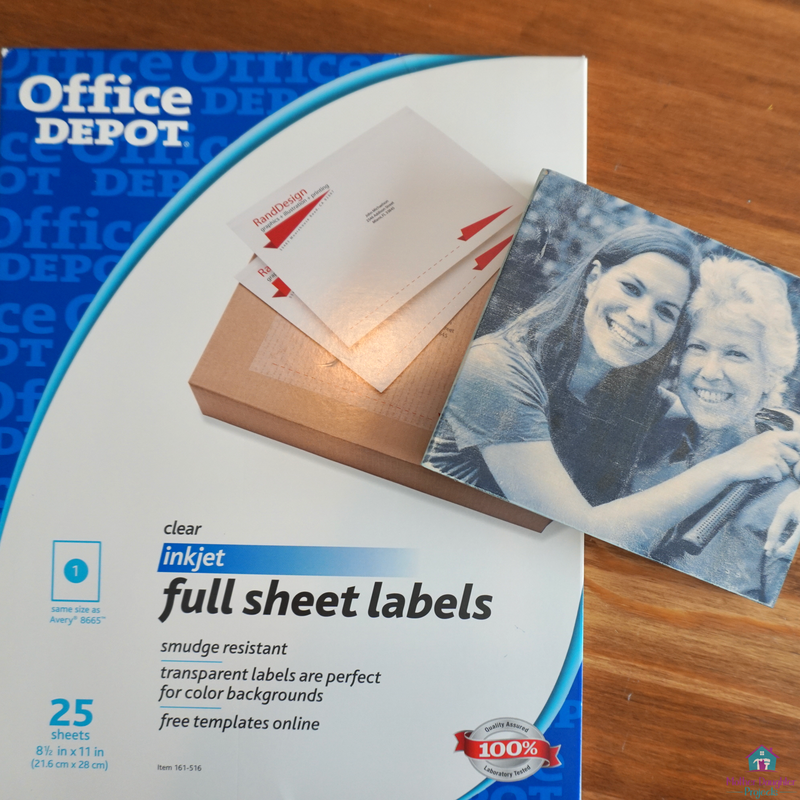
Step 2: We found four pictures we wanted to use and brought them into the photo editing software pixelmator on Steph's mac. You just need a program that you can size your pictures to the exact dimensions you need. You also want to reverse the photos so they show up correct when in place. We also colorized ours to a blue tint in the program.
Learn how to build a basic planter box with a twist and personalize it by transferring pictures to wood. Check out this how-to tutorial!
Step 3: Print one picture at a time. You have to work quickly so the ink does not dry before you apply it to the wood. Follow your printer’s instructions as to how to place your label paper. You want to print on the slick side (the side that the labels were removed from). We are using a Cannon and our instructions call to lay it face-up in the single feed paper tray located on the back of the machine.
Learn how to build a basic planter box with a twist and personalize it by transferring pictures to wood. Check out this how-to tutorial!
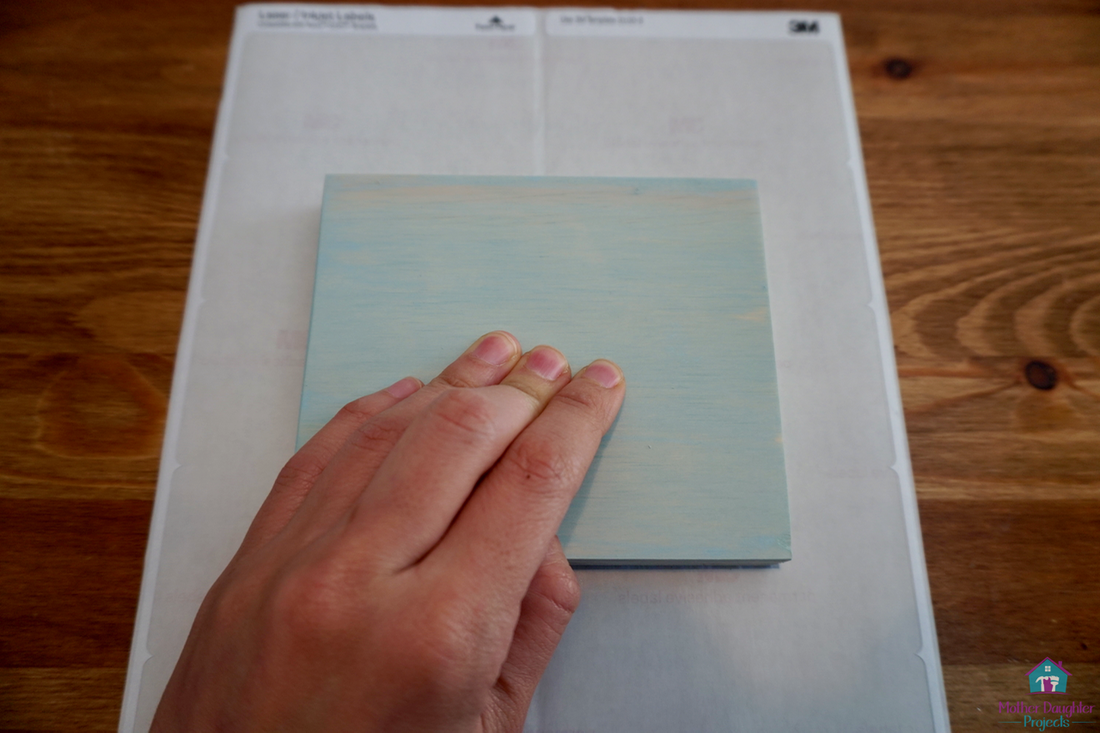
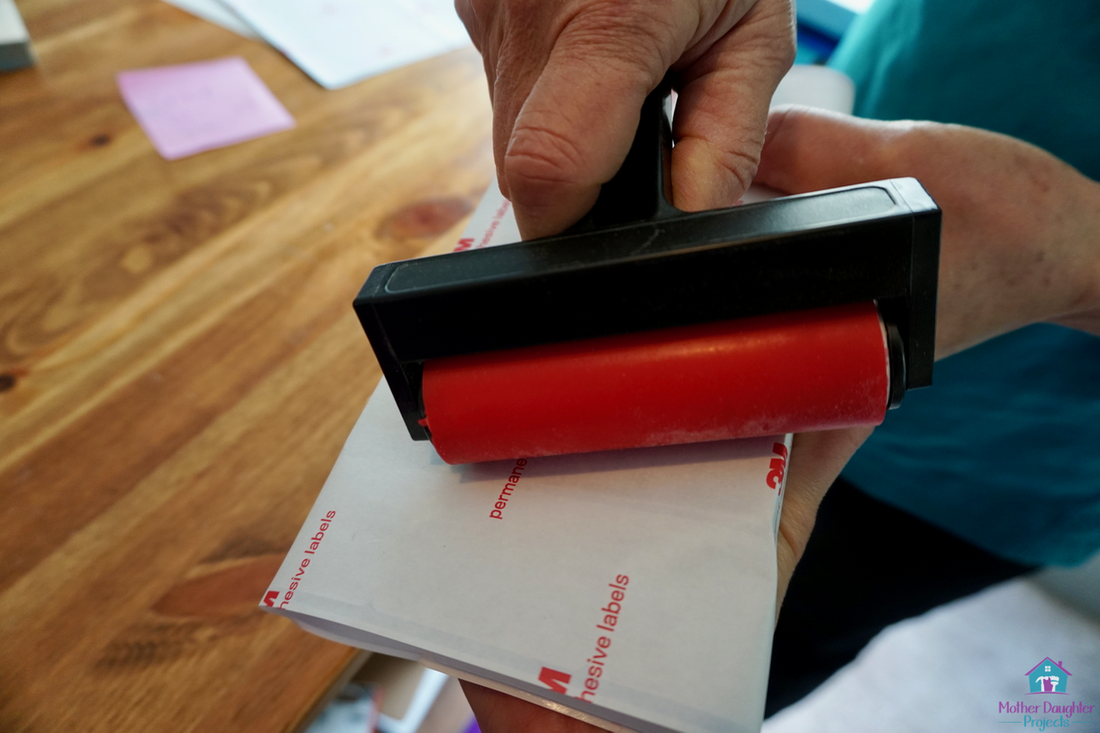
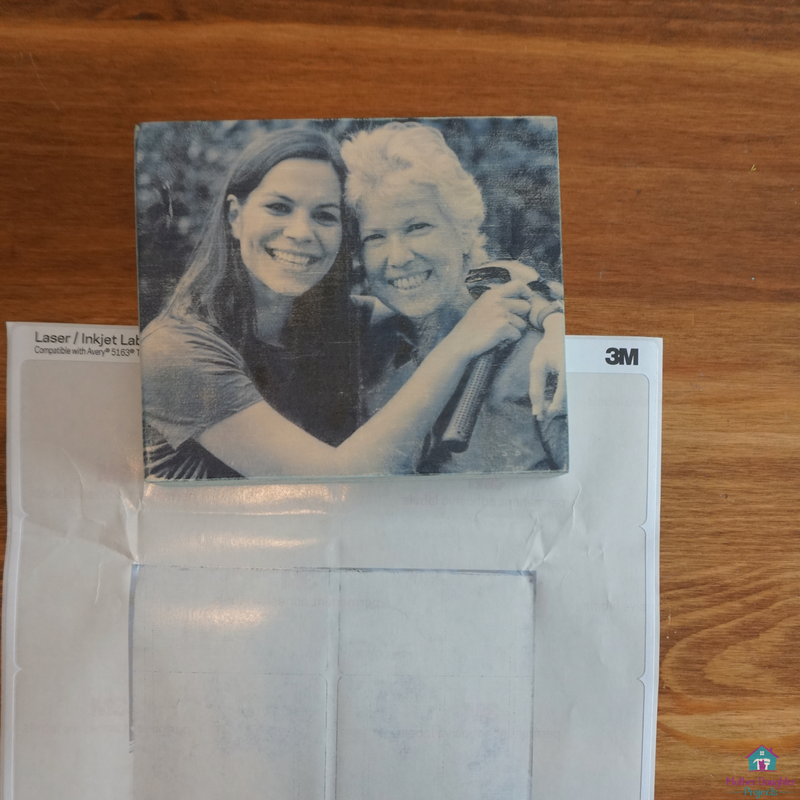
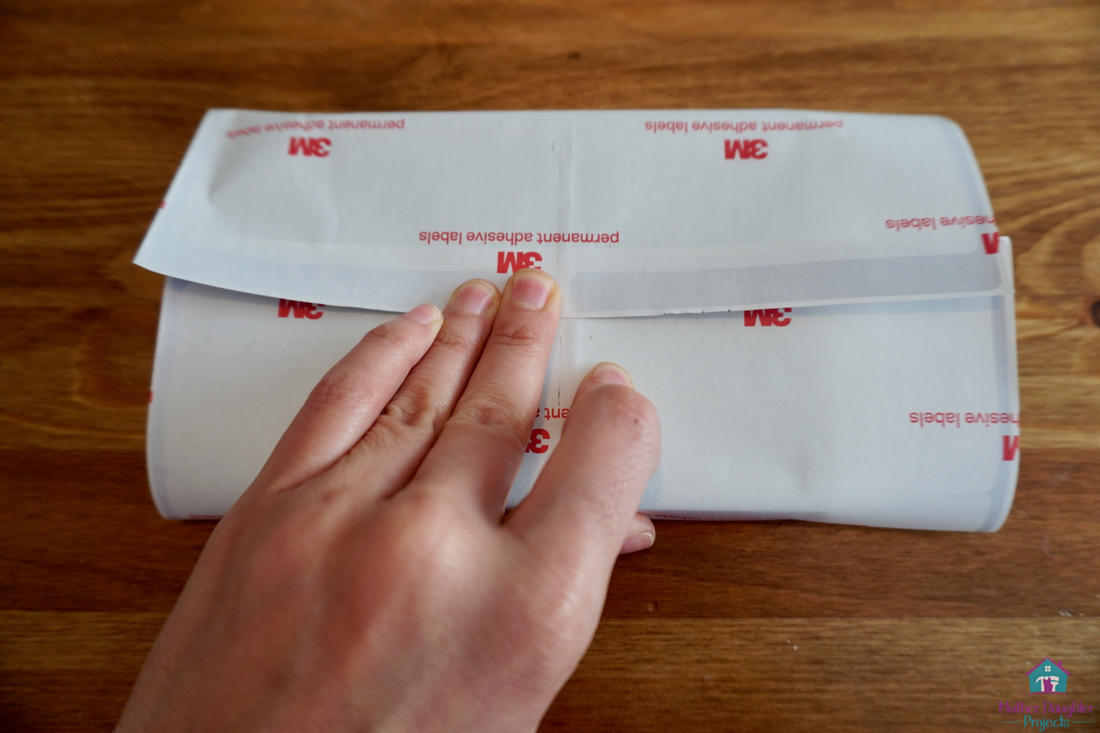
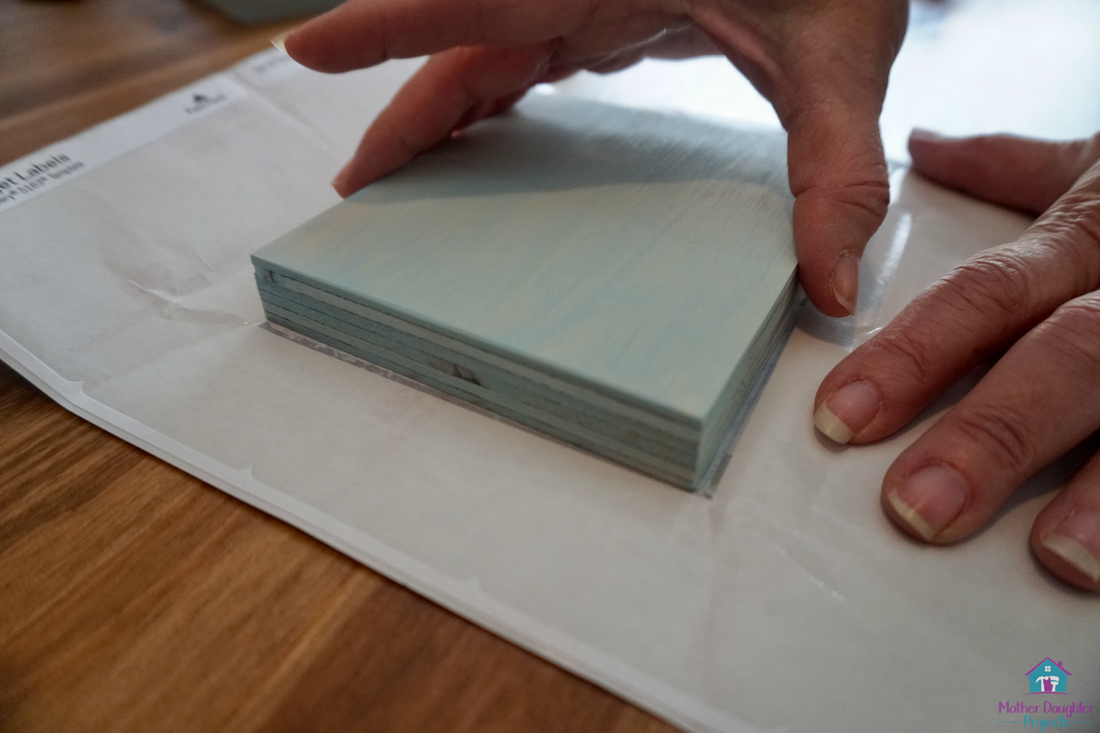
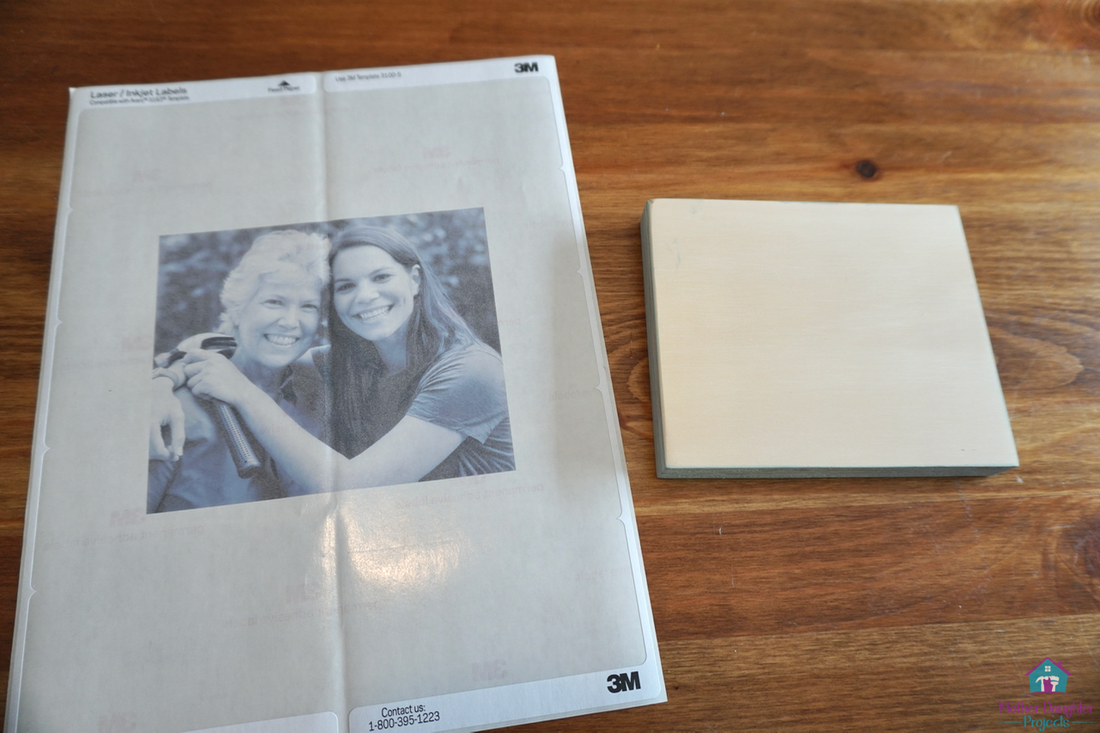
Step 4: We found it easier to lay the block of wood face down on the image rather than try to center the picture onto the top of the block. Working carefully and smoothly to insure you don’t smear the image. After centering the block of wood, we carefully wrapped the label paper around the block and turned it over and then brayed the image working from the center to the outside edges. 
Learn how to build a basic planter box with a twist and personalize it by transferring pictures to wood. Check out this how-to tutorial!
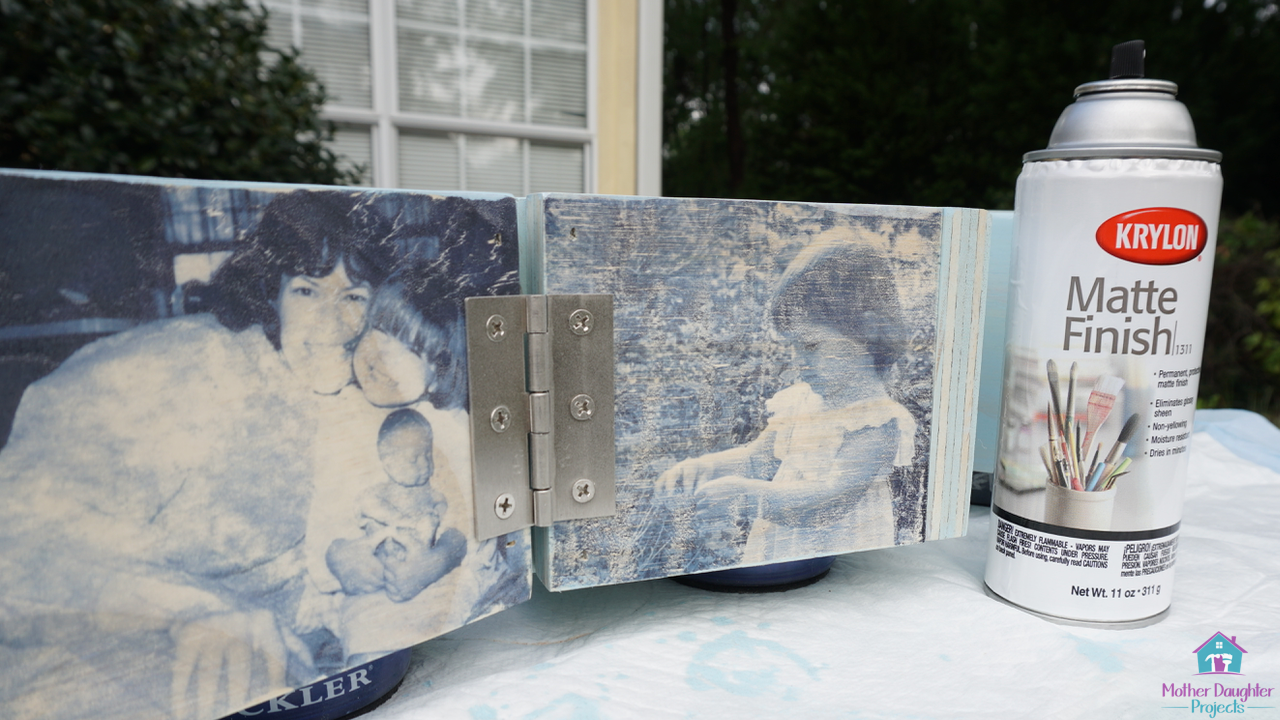
Step 5: Allow to dry. Spray to seal with matte clear spray. Tip- we found the best transfer was our newest picture that was a high quality large photo to start. For best results, use high quality photos.
Learn how to build a basic planter box with a twist and personalize it by transferring pictures to wood. Check out this how-to tutorial!
We are very grateful to Kreg’s Build Something for this opportunity to create a unique and creative gift for Mother’s Day. Even though we work on projects together everyday, it was pretty special to come up with a Mother’s Day project together, especially since we personalized our version of the box for ourselves! 

As we continue to tackle more and more building projects, we’ve added to our collection of Kreg joinery tools. The tools really make it possible for novice builders and more experience builders to have continued success with their projects.  
​
Take a look at Build Something to find inspiration for YOUR next build. 

FYI: Affiliate links are being used on this page. Purchasing via these links help support MDP!
Learn how to build a basic planter box with a twist and personalize it by transferring pictures to wood. Check out this how-to tutorial!
Picture

Related Projects

Picture
DIY Wood Tray
Picture
LED Lights vs. Incandescent
Picture
Small Yard Maintenance: Push Mower & Edger
2 Comments
Diana link
7/19/2017 11:07:54 am

I love it! such an amazing idea! I hope I will make some of these too.

Reply
Steph
7/19/2017 05:07:19 pm

Thanks Diana- glad you enjoy it!

Reply


Leave a Reply.

    MotherDaughterProjects.com

    Mother Daughter Projects
    ​
    Steph & Vicki

    We're homeowners sharing our DIY adventures as we learn to maintain, improve, decorate, and ​use tech in our homes.
    Share your projects with us here:  
    ​#trylearnshare
    MotherDaughterProjects.com
Mother Daughter Projects, LLC ∙ est. 2015 ∙ Tallahassee, FL by Vicki & Steph ∙ Privacy Policy