Mother Daughter Projects

  • Blog
  • About
    • Contact
    • Privacy Policy
  • Tools
    • Tool Tuesday
  • Maintenance
  • Improvement
  • Decor
  • Tech
  • Blog
  • About
    • Contact
    • Privacy Policy
  • Tools
    • Tool Tuesday
  • Maintenance
  • Improvement
  • Decor
  • Tech

DIY for Homeowners

Pipe and Pallet Shelf

5/26/2016

0 Comments

 
​​​Sign up to receive Mother Daughter Projects updates in your email!
Steph has been looking for some shelves in her office to hold supplies. We haven't used pipe or pallet wood before in a project so we thought shelves would be a great way to try both materials and get some cool shelves!

Watch the video above to see how this project came together.
Materials
  • Pallet (they come in different shapes and sizes- we used a pallet that had wood 5.5" wide)
  • Sawzall (to cut pallet) (link)
  • (2) 3/4" Plumbing Pipe 6" length
  • (2) 3/4" Flange
  • (2) 3/4" Cap (we priced out each item separately and found it cheaper to buy them in a set on amazon. Same pipes you would buy from the hardware store but it came all together in one package)
  • (16) Screws and anchors (link)
Pipe and Pallet. MotherDaughterProjects.com
Materials

How-to Steps:

Pipe and Pallet. MotherDaughterProjects.com
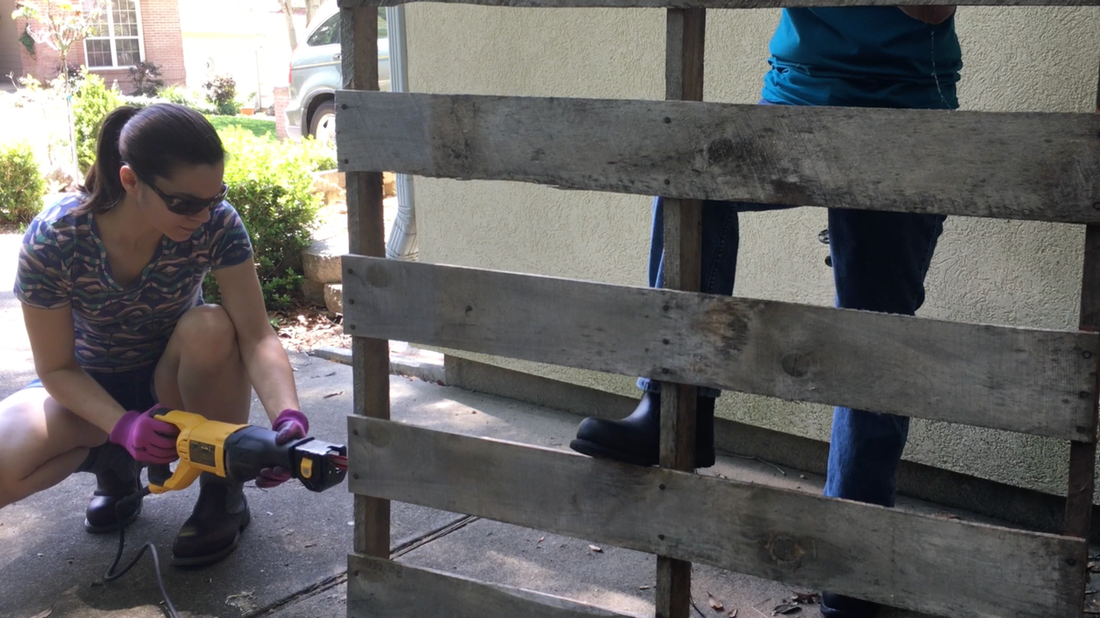
We deconstructed a pallet.
Pipe and Pallet. MotherDaughterProjects.com
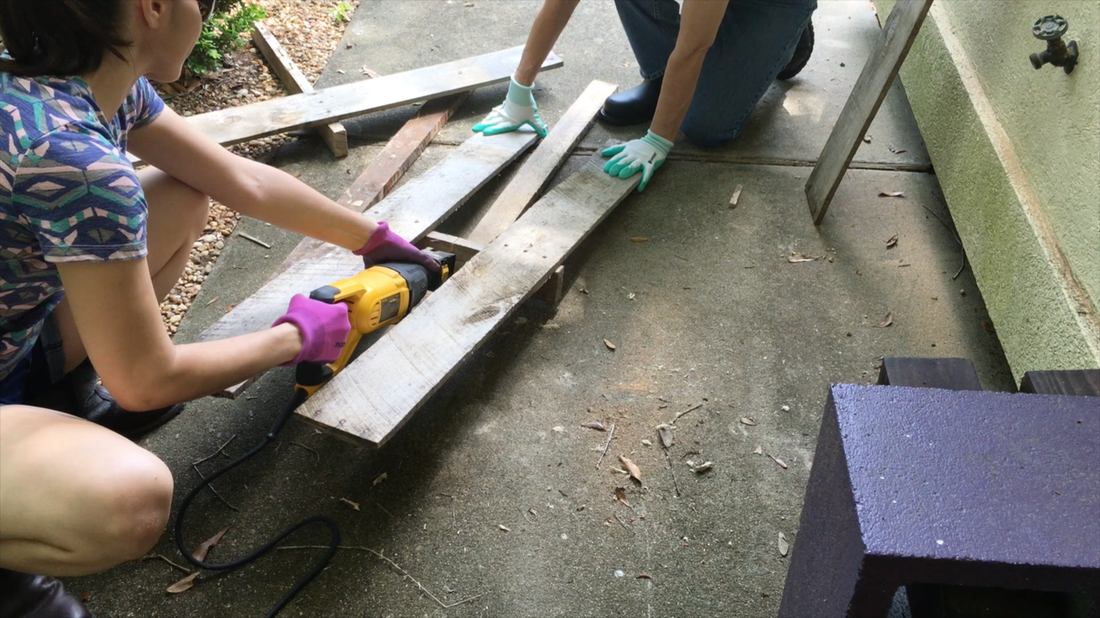
We cut the sides off with a sawzall then cut through the middle support, and cut the boards off.
Pipe and Pallet. MotherDaughterProjects.com
We sanded the boards.
Pipe and Pallet. MotherDaughterProjects.com
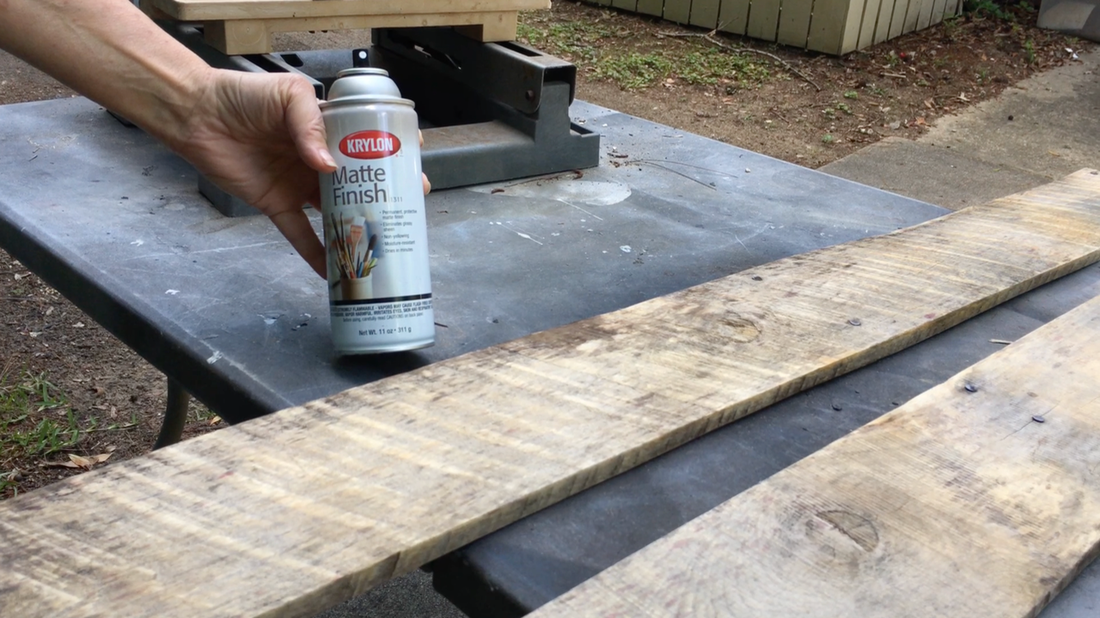
We used a matte finish to seal the wood.
Pipe and Pallet. MotherDaughterProjects.com
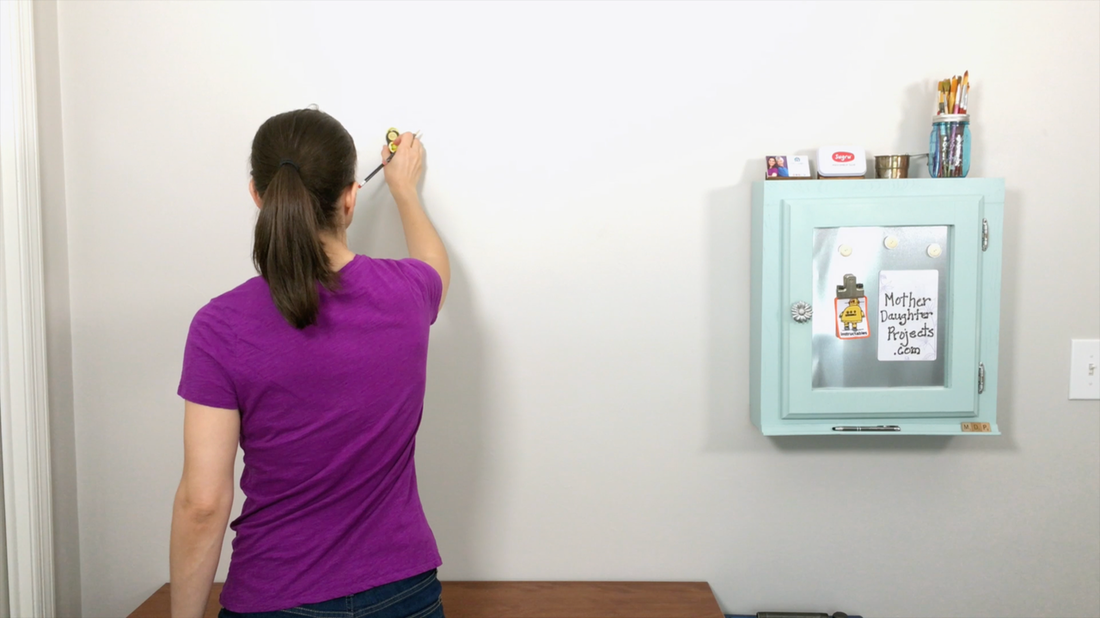
We marked the studs so we didn't accidentally screw into them.
Pipe and Pallet. MotherDaughterProjects.com
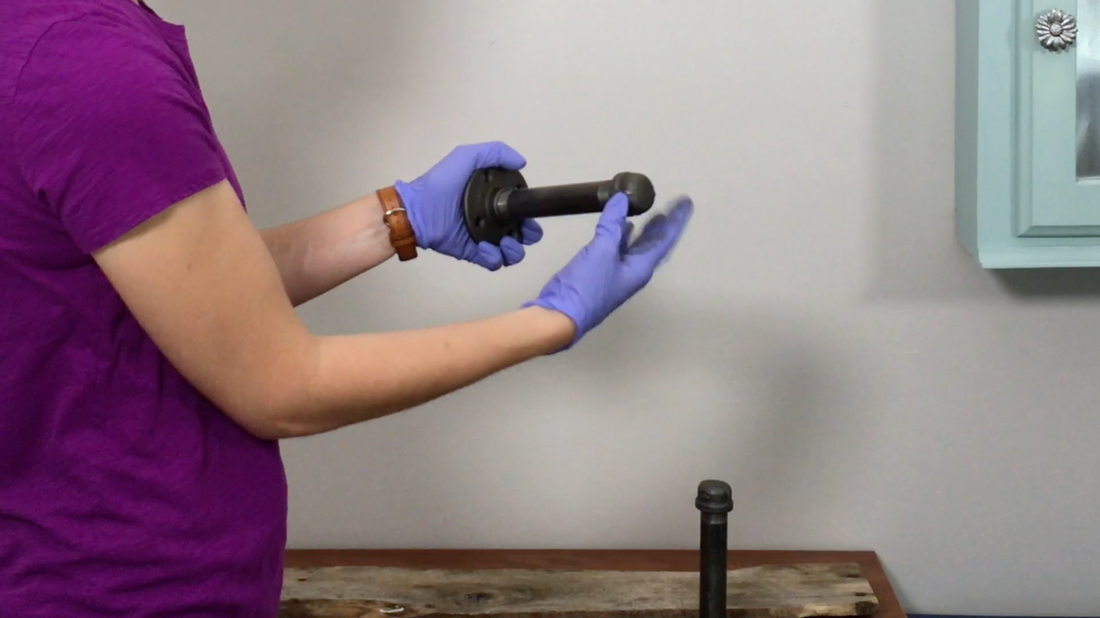
We attached the pipe pieces together and wore gloves because they were dirty.
Pipe and Pallet. MotherDaughterProjects.com
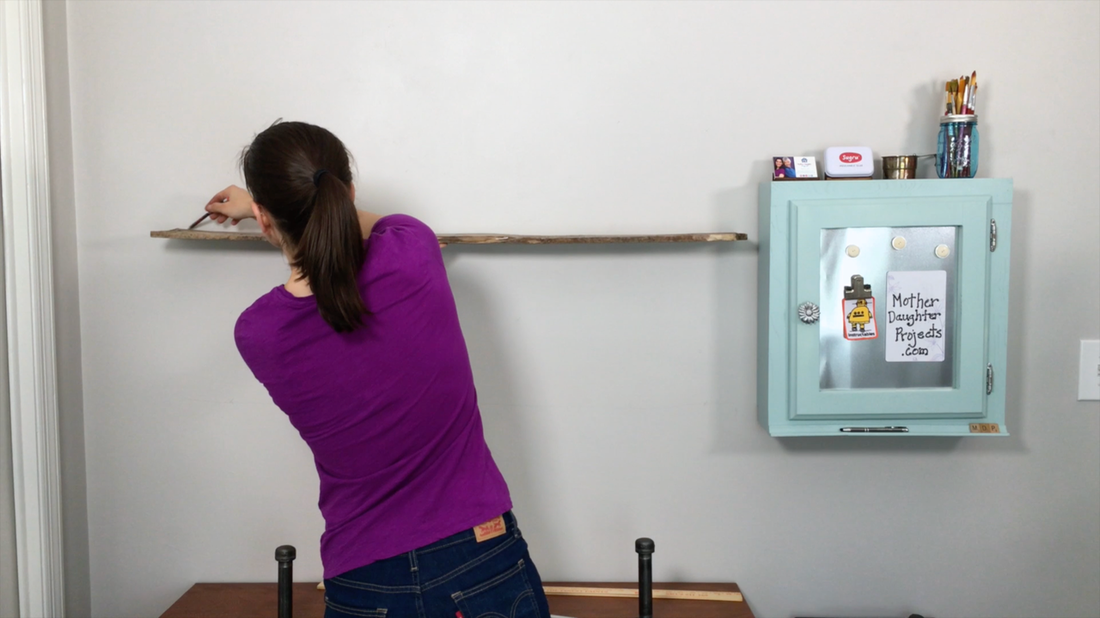
We did a rough mark of where we wanted the shelves to sit.
Pipe and Pallet. MotherDaughterProjects.com
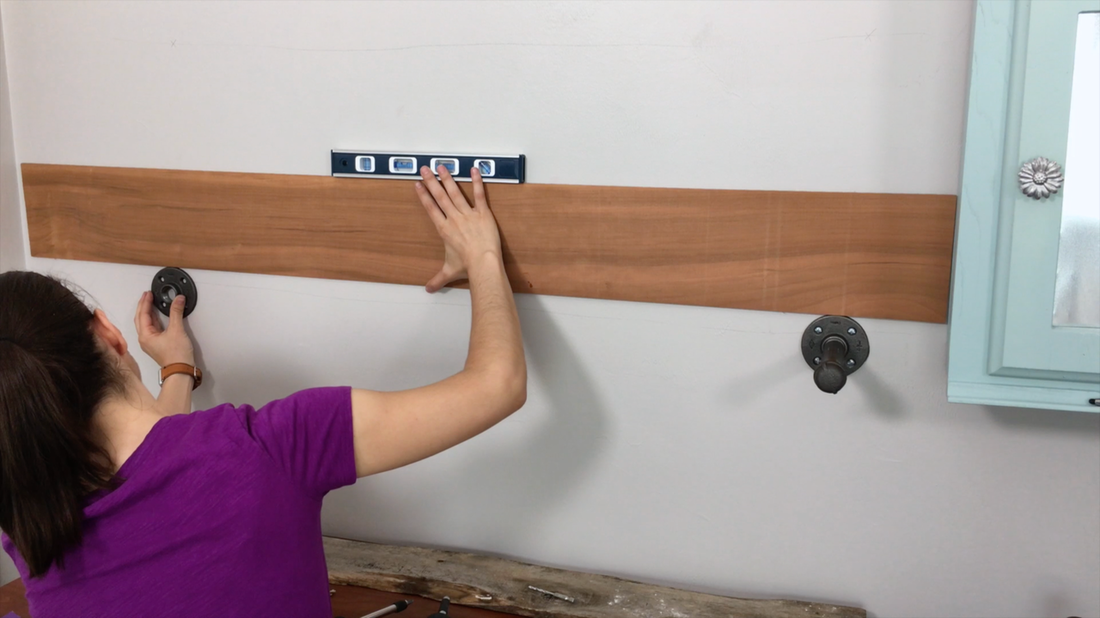
We used a straight edge to level both pipes.
Pipe and Pallet. MotherDaughterProjects.com
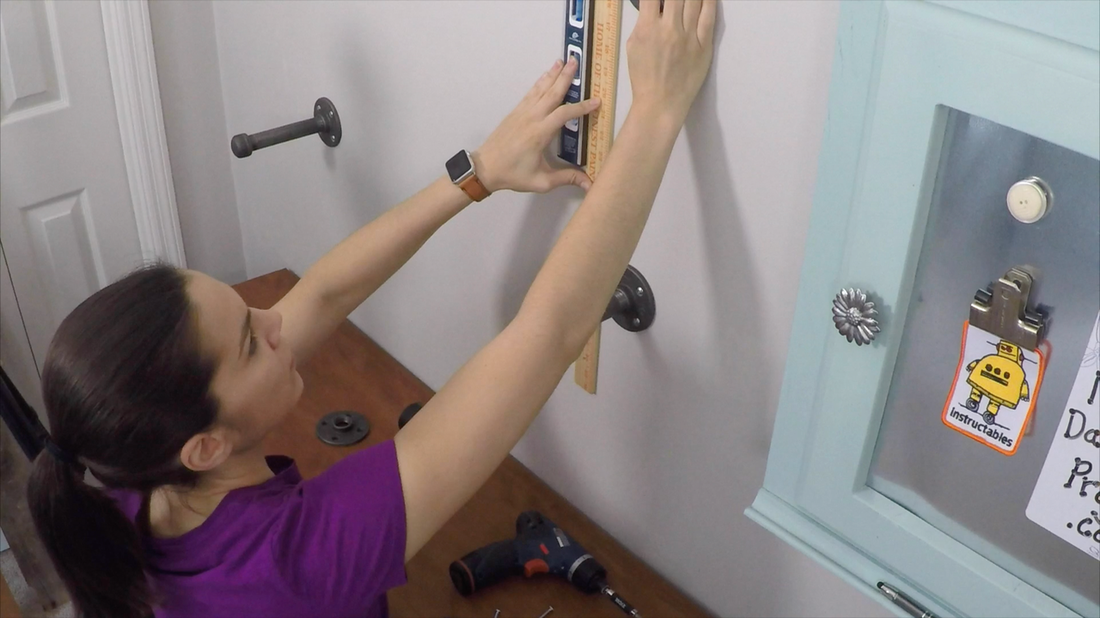
We used a straight edge and level to get the top pipes lined up.
Pipe and Pallet. MotherDaughterProjects.com
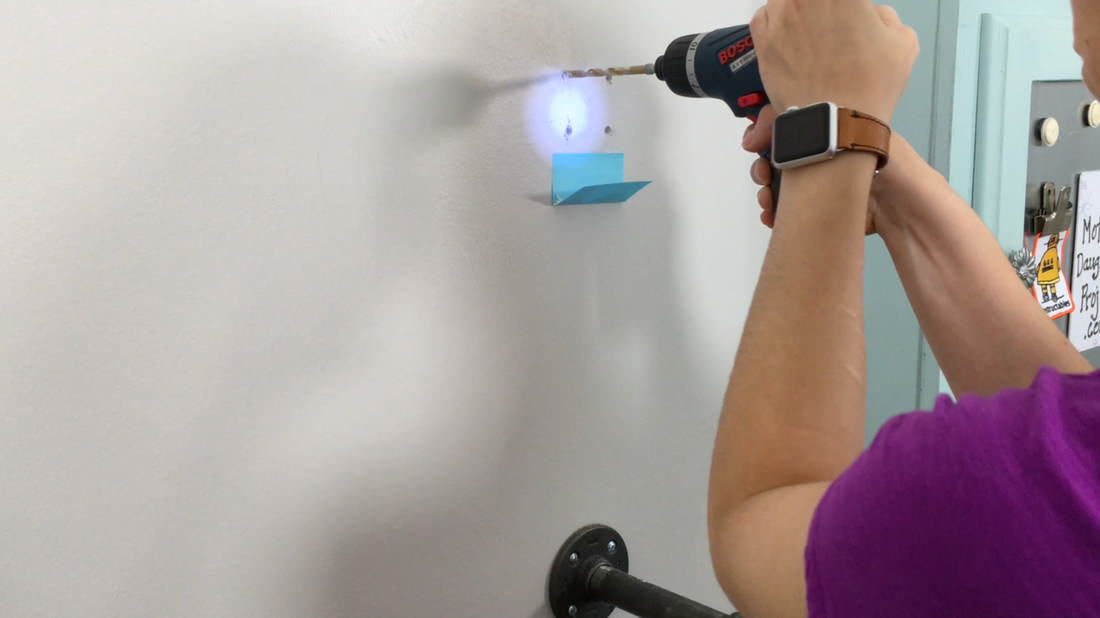
We drilled pilot holes.
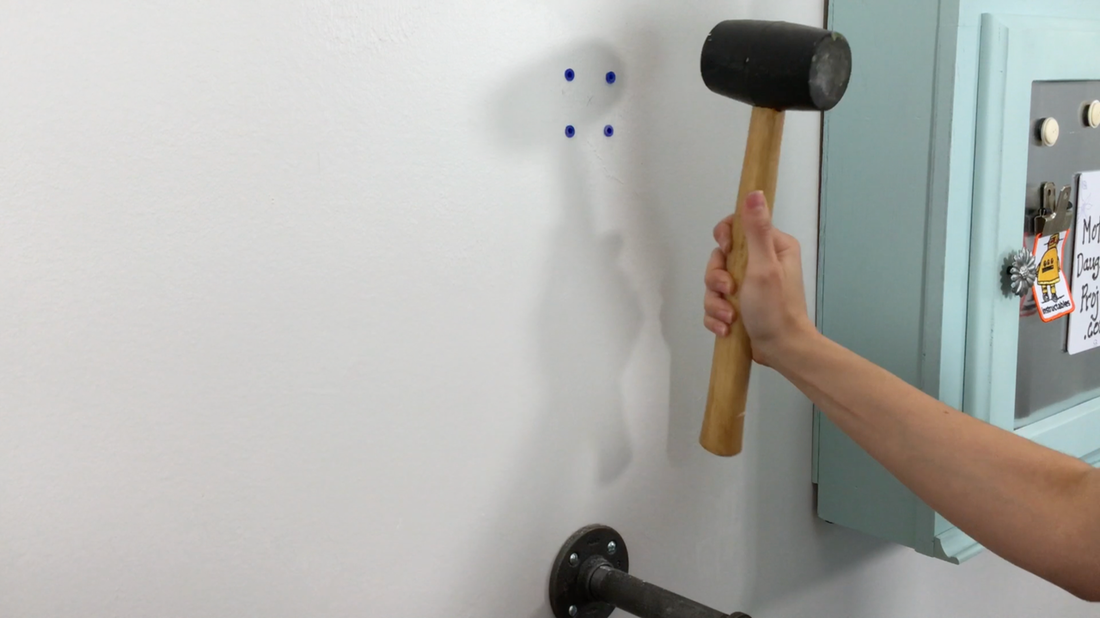
Pipe and Pallet. MotherDaughterProjects.com
Added wall anchors.
Pipe and Pallet. MotherDaughterProjects.com
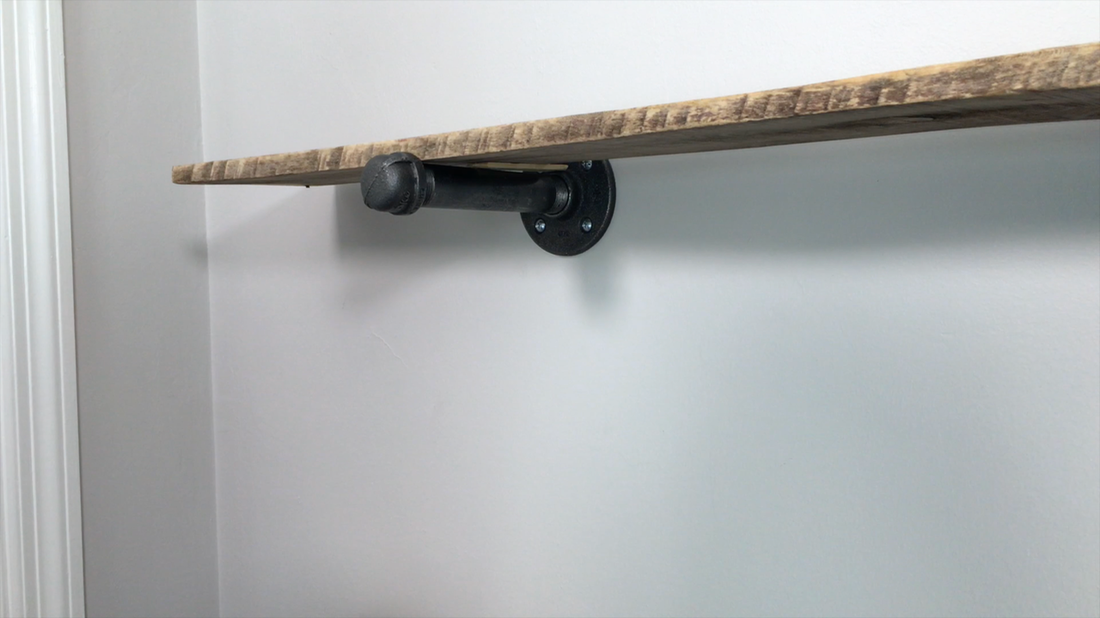
Screwed in the flange and attached the pipe to that.
Pipe and Pallet. MotherDaughterProjects.com
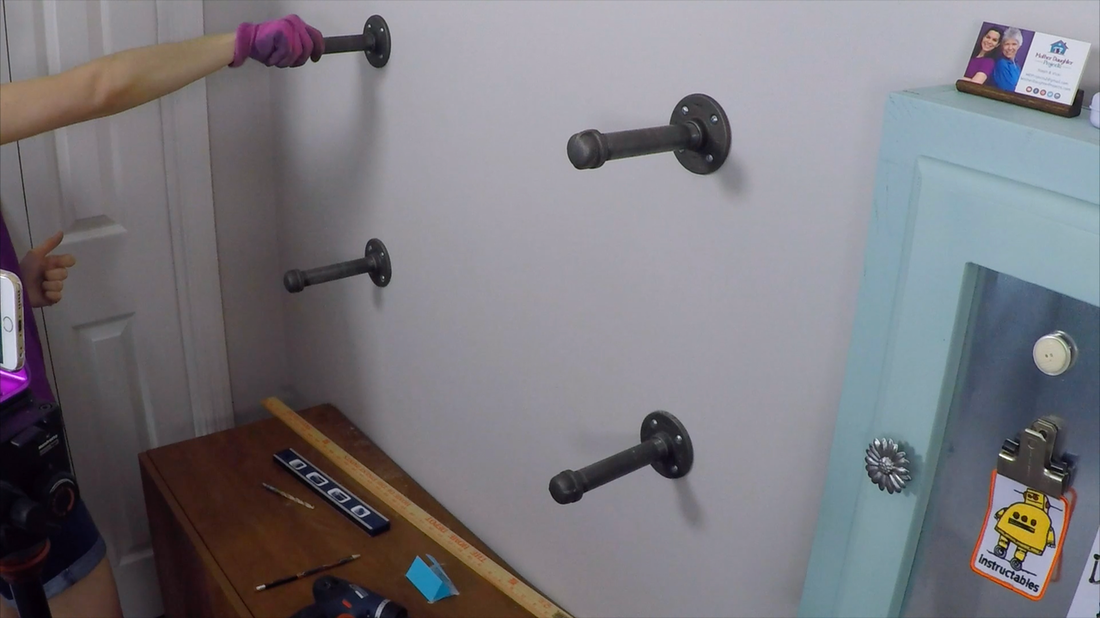
We made sure all the pipes were tight.
Pipe and Pallet. MotherDaughterProjects.com
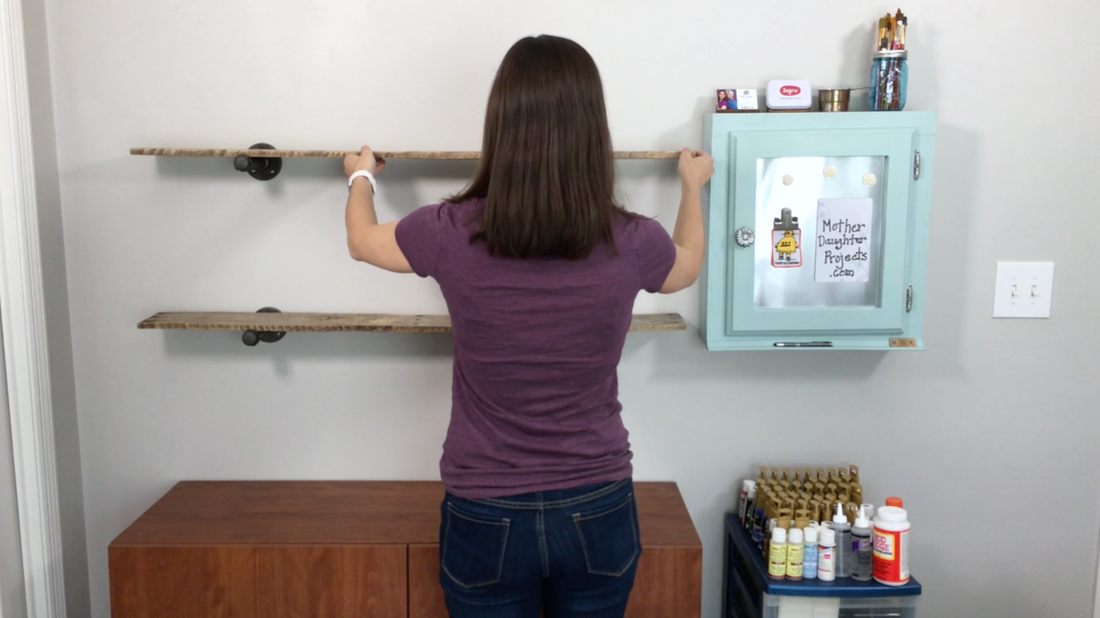
We added the pallet wood.
Pipe and Pallet. MotherDaughterProjects.com
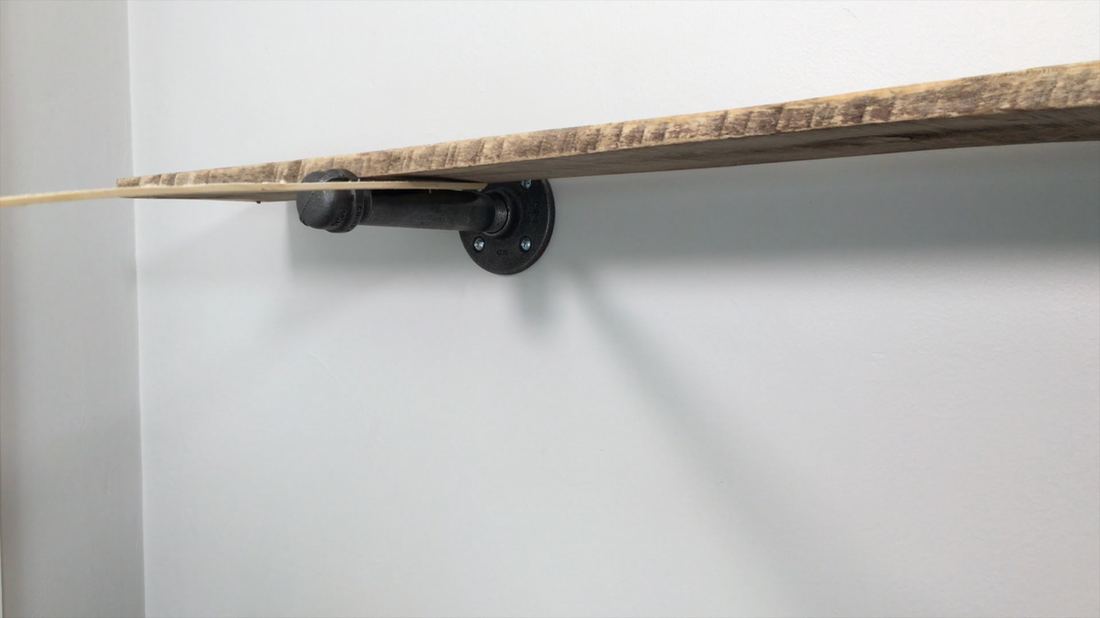
The top board did not lay flat so we added a wood shim.
Pipe and Pallet. MotherDaughterProjects.com
We hot glued the shim in place.
Pipe and Pallet. MotherDaughterProjects.com
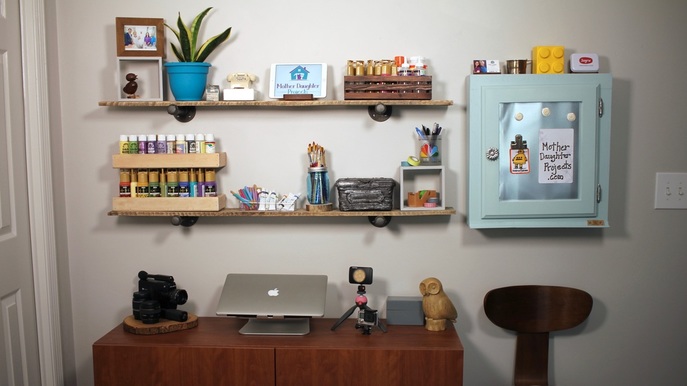
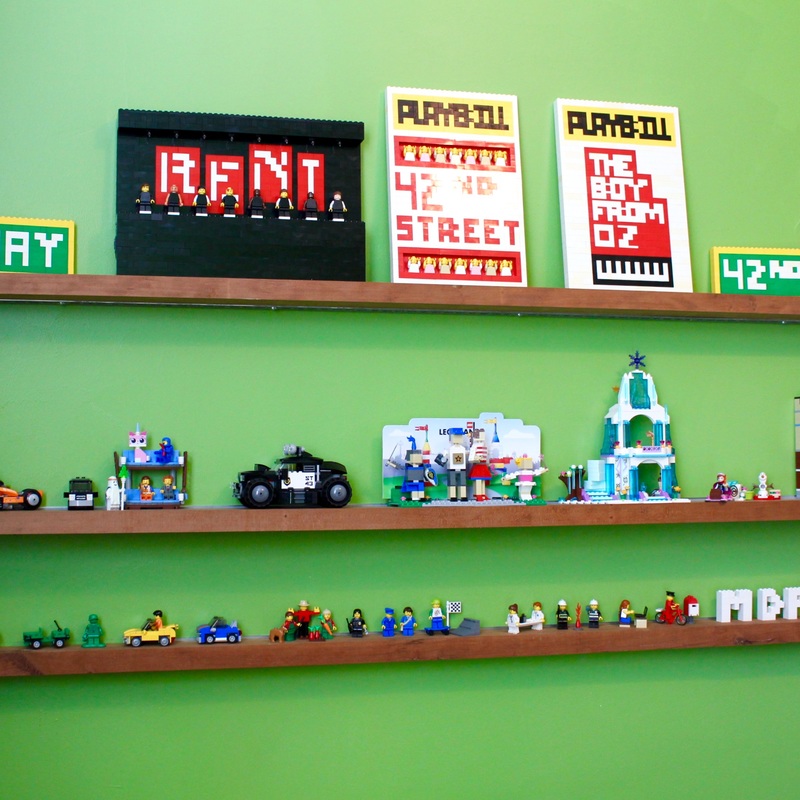
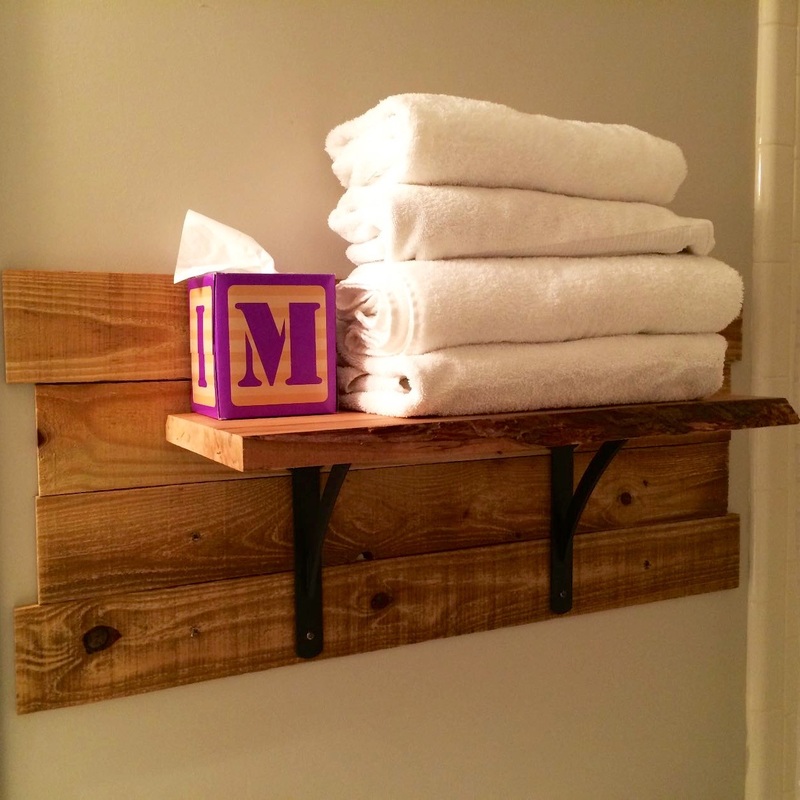
Then we filled the shelves!
Please note: We are not sponsored by any of the companies/products that we used. These products were picked and bought by us.

FYI: We are not professionals, and we don’t claim to be. This is what we found worked for our project. Yours may need a little different approach. Safety first!

FYI: Amazon/Home Depot affiliate links are being used on this page.

Related Projects

Picture
Floating Shelf for Small Items
Picture
Everything is AWESOME with a Lego Pallet Table
Picture
Live edge bathroom shelf
0 Comments


Leave a Reply.

    MotherDaughterProjects.com

    Mother Daughter Projects
    ​
    Steph & Vicki

    We're homeowners sharing our DIY adventures as we learn to maintain, improve, decorate, and ​use tech in our homes.
    Share your projects with us here:  
    ​#trylearnshare
    MotherDaughterProjects.com
Mother Daughter Projects, LLC ∙ est. 2015 ∙ Tallahassee, FL by Vicki & Steph ∙ Privacy Policy