Mother Daughter Projects

  • Blog
  • About
    • Contact
    • Privacy Policy
  • Tools
    • Tool Tuesday
  • Maintenance
  • Improvement
  • Decor
  • Tech
  • Blog
  • About
    • Contact
    • Privacy Policy
  • Tools
    • Tool Tuesday
  • Maintenance
  • Improvement
  • Decor
  • Tech

DIY for Homeowners

Re-screen a Porch

4/27/2015

0 Comments

 
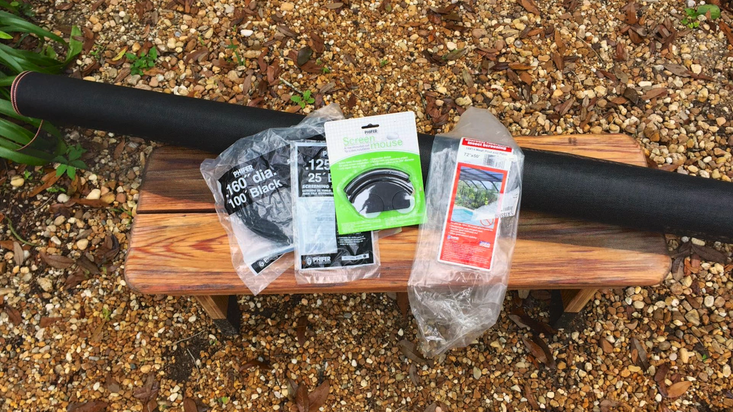
In this video we take you through the steps and techniques needed to re-screen Steph’s porch. After much research, Steph decided the project was doable for the two of us! 

Research ahead of time the kind of screen you want to use and then head off to the Big Box store for your supplies and tools. 

Also check out our project on Instructables.
Materials:
  • Screen—it comes in rolls
  • Spline—there are various diameters and lengths—the 100 yard bag was the most economical
  • Spline Mouse
Tools:
  • Stanley Pliers Set—used to pull the spline
  • Stanley Hook Set—used to pry away old spline. Please note: brace yourself as you remove the spline so you don’t lose your balance and wear gloves to avoid cuts.
  • Straight Edge Knife—used to cut screen to size, trim new screen, can also be used to cut spline
  • Scissors—another tool to cut screen/spline
  • Gaff tape
  • Cleaning supplies/caulk as your project requires—we found a few places that needed caulking and lots that needed cleaning!
How to re-screen--tools & supplies. MotherDaughterProjects.com
Need help finding the perfect screen for your porch?
Check out this quiz we found on phifer.com to help you find the screen for you!
How to re-screen--tools & supplies. MotherDaughterProjects.com
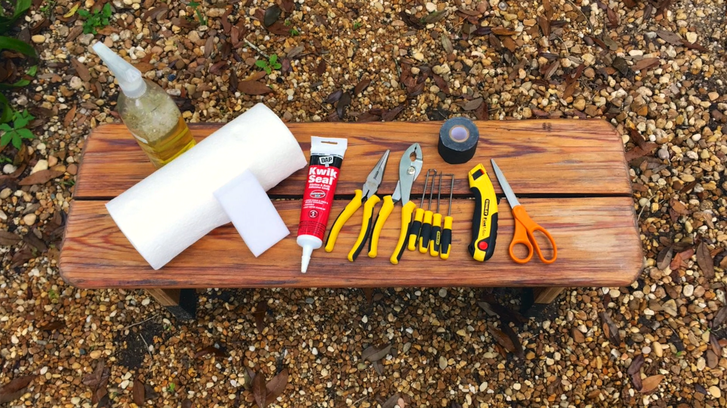
1. Gather your materials and tools and a helper. You will need a buddy to help keep the screen aligned and square as the spline is rolled into place.
How to re-screen--remove the old spline. MotherDaughterProjects.com
How to re-screen--cut screen to size. MotherDaughterProjects.com
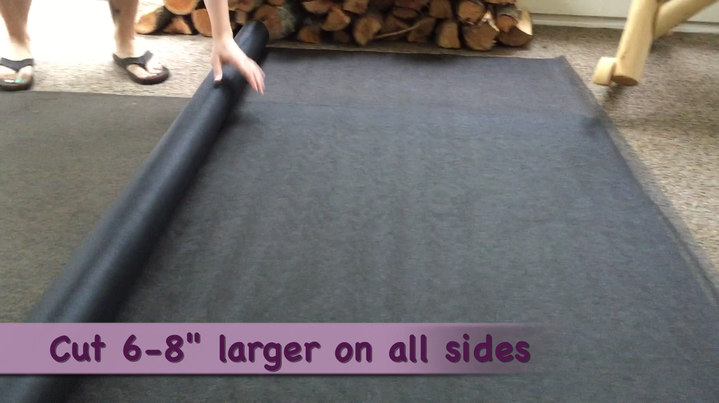
2. Remove the old screen and use it as a pattern to cut the new screen. Give yourself as generous amount of extra screen on all sides. The excess will be cut off after splining.
How to re-screen--clean & repair as you go. MotherDaughterProjects.com
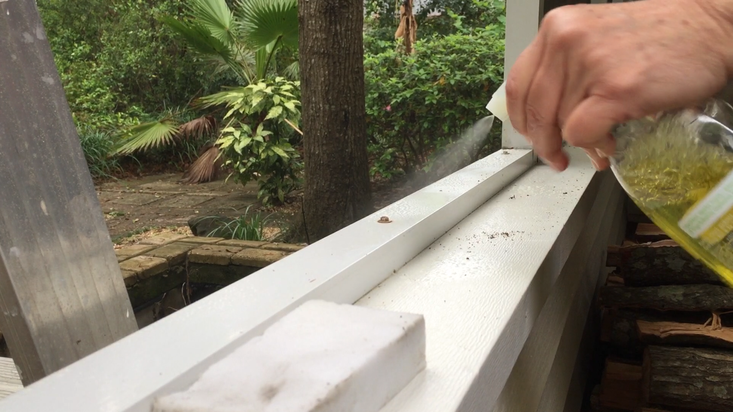
3. Clean the spline channel to remove dirt and debris. A magic eraser works well. Clean other surfaces as well, if needed.
How to re-screen--tape screen into place & have your DIY buddy help keep everything in place. MotherDaughterProjects.com
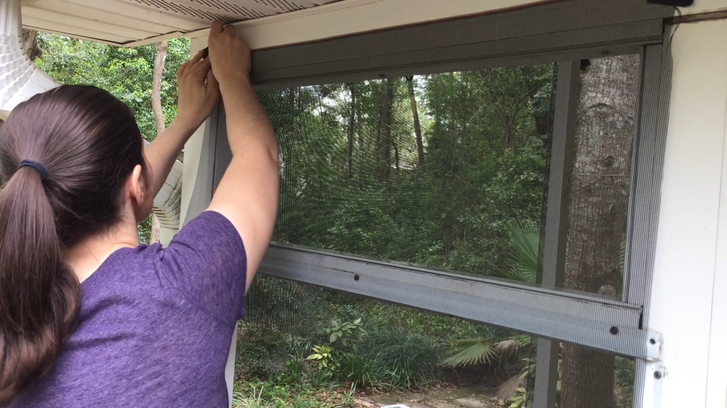
4. Tape the top of the new screen in place. Have your buddy help hold the screen in place.
How to re-screen--using a spline mouse, roll the spline into place.  MotherDaughterProjects.com
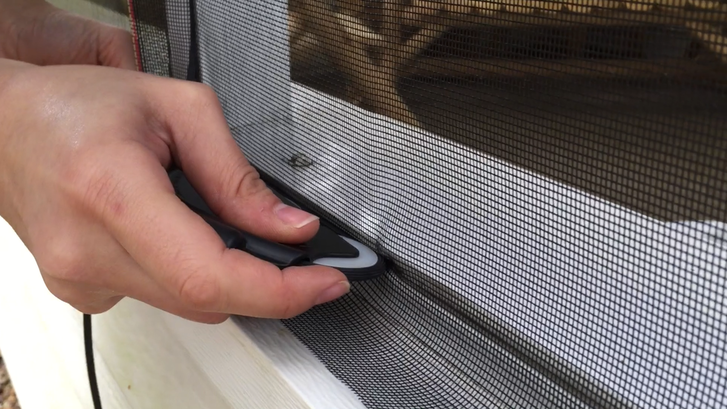
5. Using a spline mouse, roll the spline into place, lightly, then a second time to really secure. Cut off the spline end and tuck into place. Spline a side. Your buddy really needs to help hold the screen taut, making sure everything stays nice and square, and wrinkle free. Continue with the second side and bottom.
Picture
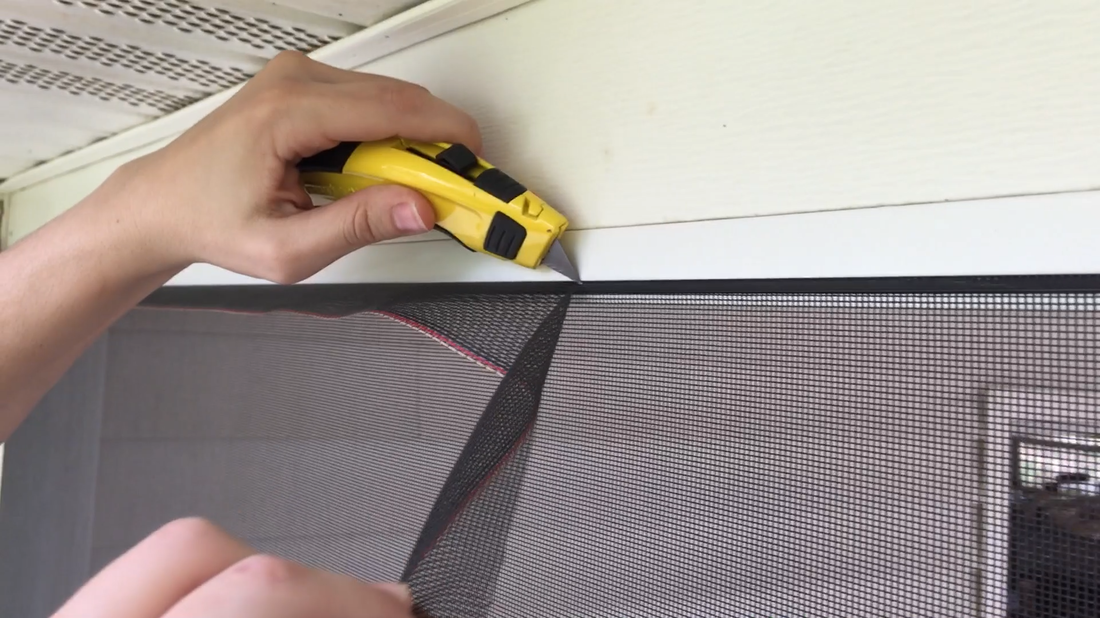
6. Trim the excess screen with a knife.
0 Comments


Leave a Reply.

    MotherDaughterProjects.com

    Mother Daughter Projects
    ​
    Steph & Vicki

    We're homeowners sharing our DIY adventures as we learn to maintain, improve, decorate, and ​use tech in our homes.
    Share your projects with us here:  
    ​#trylearnshare
    MotherDaughterProjects.com
Mother Daughter Projects, LLC ∙ est. 2015 ∙ Tallahassee, FL by Vicki & Steph ∙ Privacy Policy