Mother Daughter Projects

  • Blog
  • About
    • Contact
    • Privacy Policy
  • Tools
    • Tool Tuesday
  • Maintenance
  • Improvement
  • Decor
  • Tech
  • Blog
  • About
    • Contact
    • Privacy Policy
  • Tools
    • Tool Tuesday
  • Maintenance
  • Improvement
  • Decor
  • Tech

DIY for Homeowners

Rustic Industrial Pallet Headboard with Pipe Lights

11/6/2017

7 Comments

 
​text by Vicki     Sign up to get Mother Daughter Projects updates in your email!
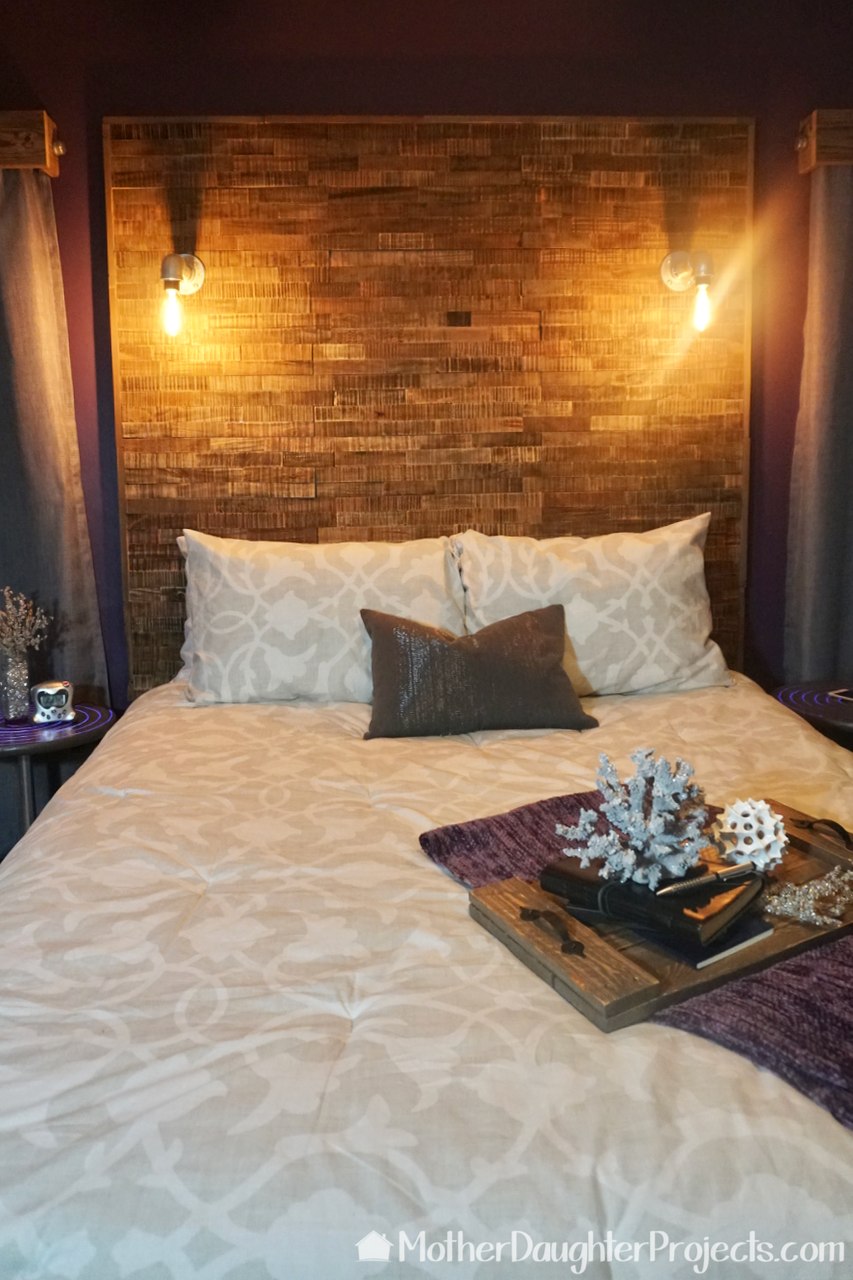
At a conference this past summer we were introduced to a new product from the Aspect Tile Company--a peel and stick pallet tile! We were already familiar with their peel and stick stone tile as we had used it to tile Steph's kitchen backsplash. That was a really successful project so we knew working with the new wood tile would produce good results as well. 

Each workshop attendee got 30 sq ft of the tile of their choice- and we had to go with the wood! We tossed around several ideas as to what to do with the wood tile but ultimately decided to make a headboard for Steph's bed. 

The tile can be stuck to the wall, but we wanted to be able to remove the headboard when she decides to move, so we built a frame on which to attach the tile. 
See how to use peel and stick wood tile to make a rustic/ industrial headboard. Mix pallet board and metal/steel pipes for this great bedroom decor!
Materials:
  • 30 sq ft Peel & Stick Wood Tile (Aspect Tile)
  • (5) 2x4 (Home Depot)
  • 4x8' Utility panel (Home Depot)
  • Pallet Wood
  • 1 1/4" Pipe, flange, and elbow (Home Depot)
  • LED edison bulb (Home Depot)
  • French Cleat (Amazon)
  • (2) Light cables (Amazon)
  • Wood Glue
Tools:
  • DeWalt Brad Nailer (Home Depot)
  • Diablo 2 1/2" Hole Saw (Amazon)
  • Kreg Pocket Hole Jig (Amazon)
  • Ryobi Circular Saw (Home Depot)
  • Ridgid Miter Saw (Home Depot)
See how to use peel and stick wood tile to make a rustic/ industrial headboard. Mix pallet board and metal/steel pipes for this great bedroom decor!
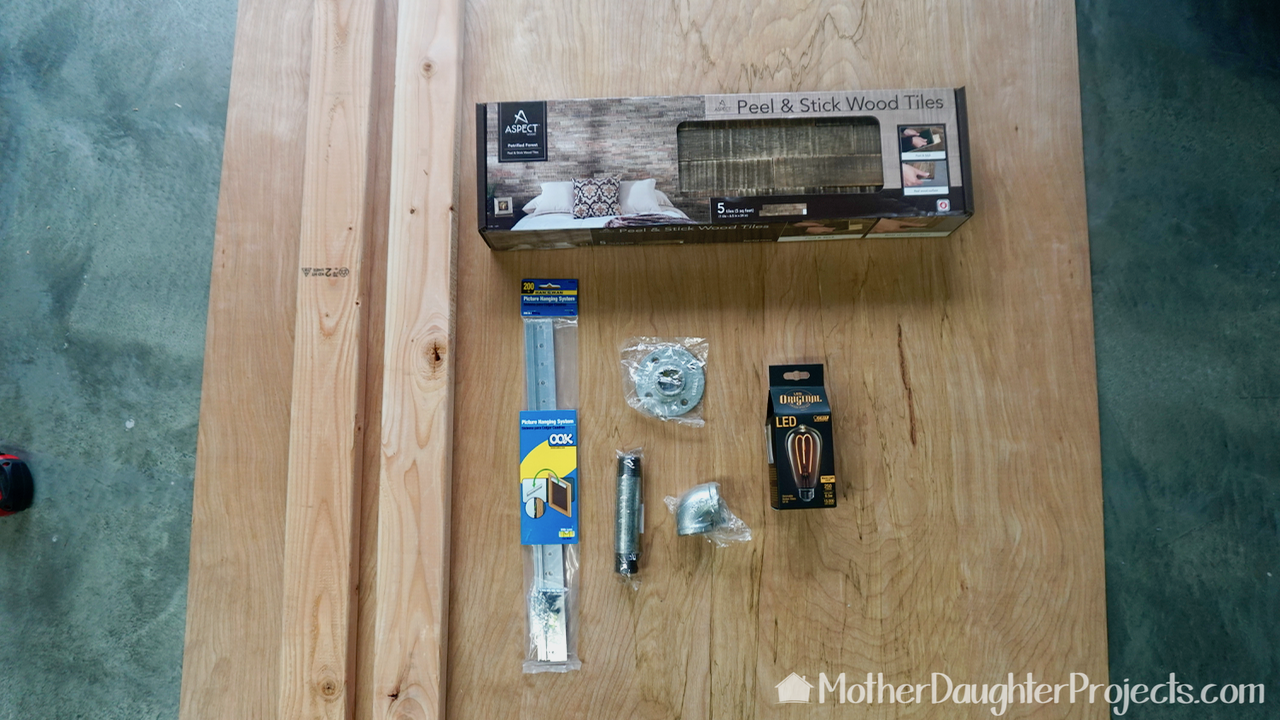
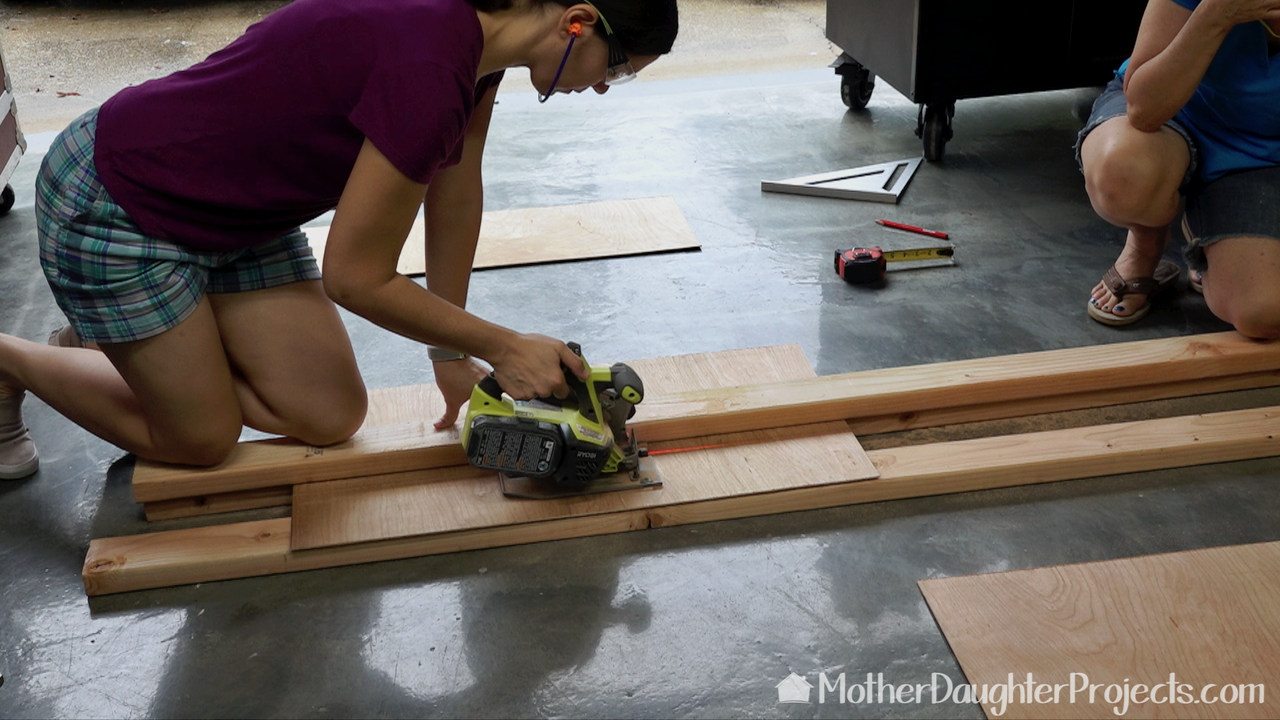
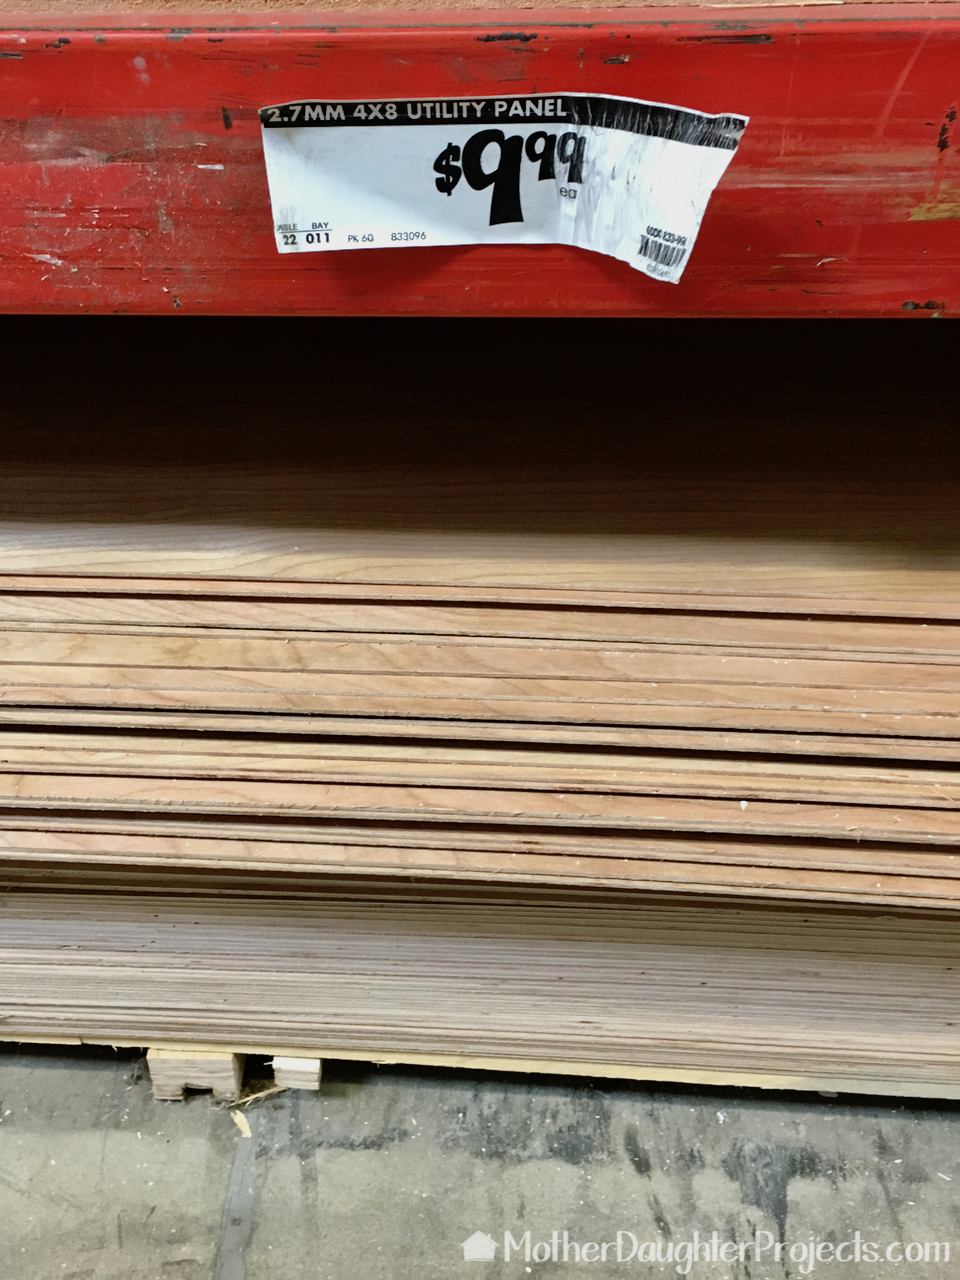
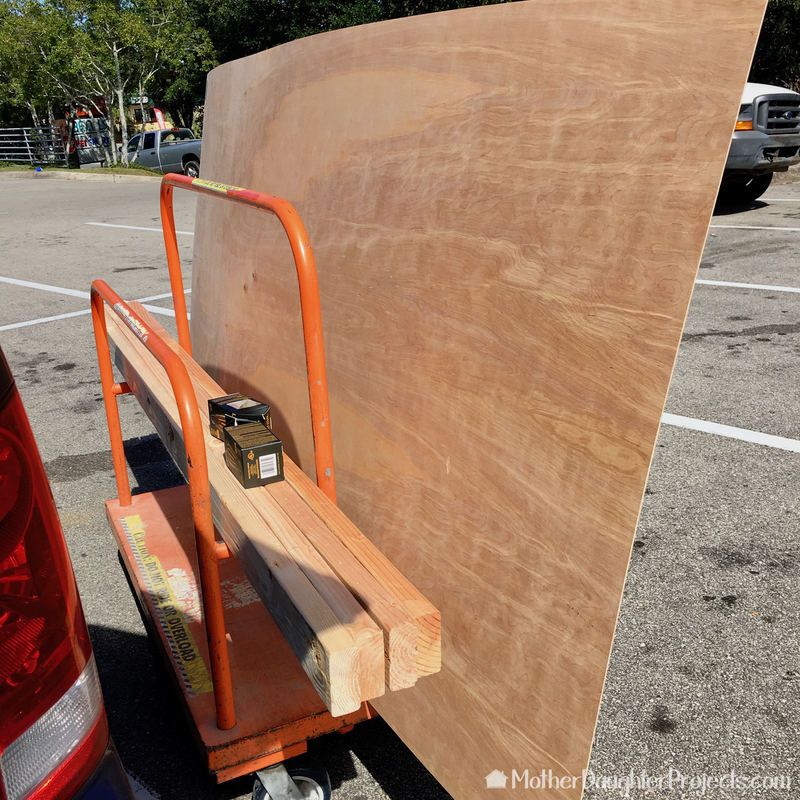
We determined the size of the headboard based on the height and width of the tile. We had thirty tiles, so we made it three tiles wide by 10 tiles high. This was perfect. We cut the utility board to size with a circular saw.
See how to use peel and stick wood tile to make a rustic/ industrial headboard. Mix pallet board and metal/steel pipes for this great bedroom decor!
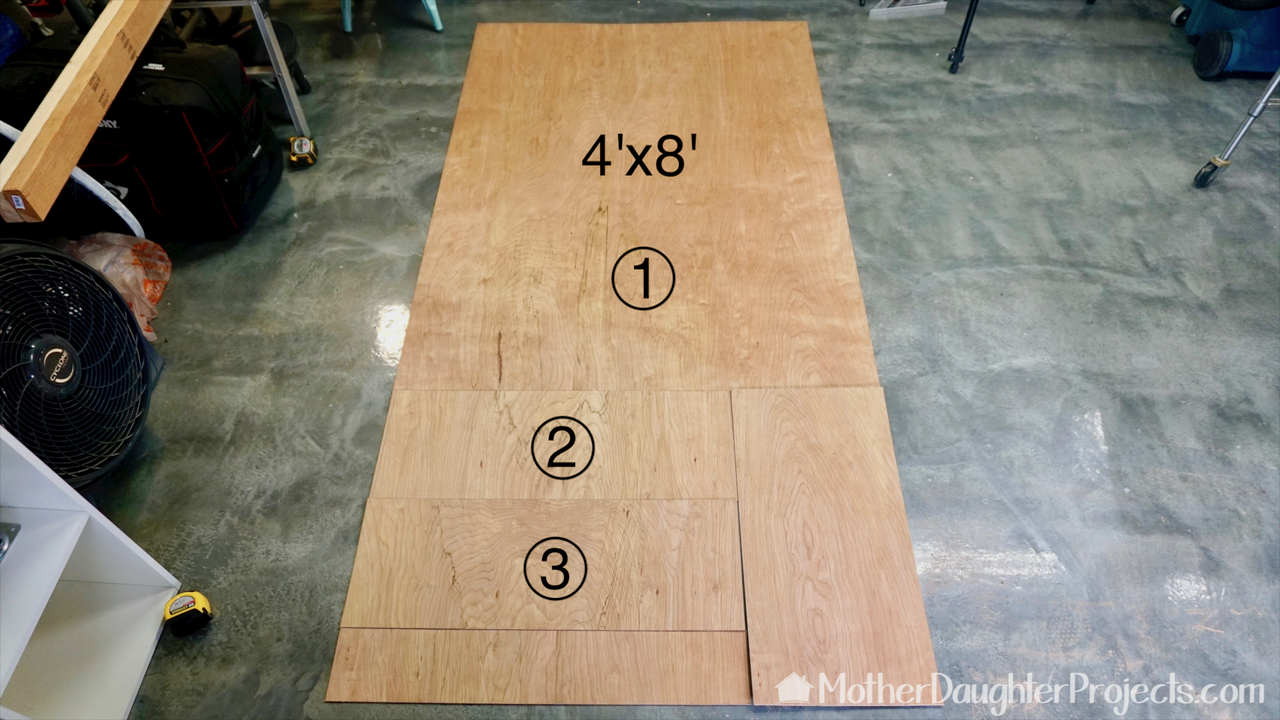
We used cuts 1, 2, and 3 for the backing which was attached to 2x4s.
See how to use peel and stick wood tile to make a rustic/ industrial headboard. Mix pallet board and metal/steel pipes for this great bedroom decor!
The 2x4s were cut to size. We used pocket holes to join the wood together.
See how to use peel and stick wood tile to make a rustic/ industrial headboard. Mix pallet board and metal/steel pipes for this great bedroom decor!
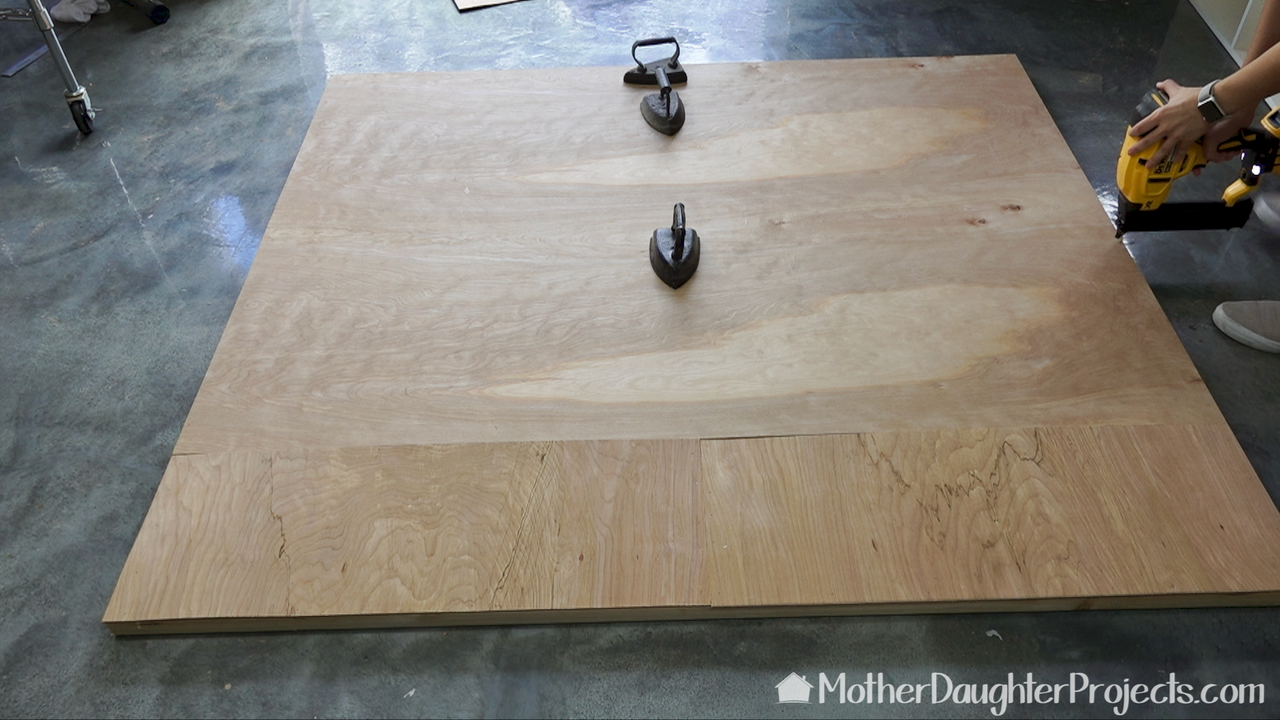
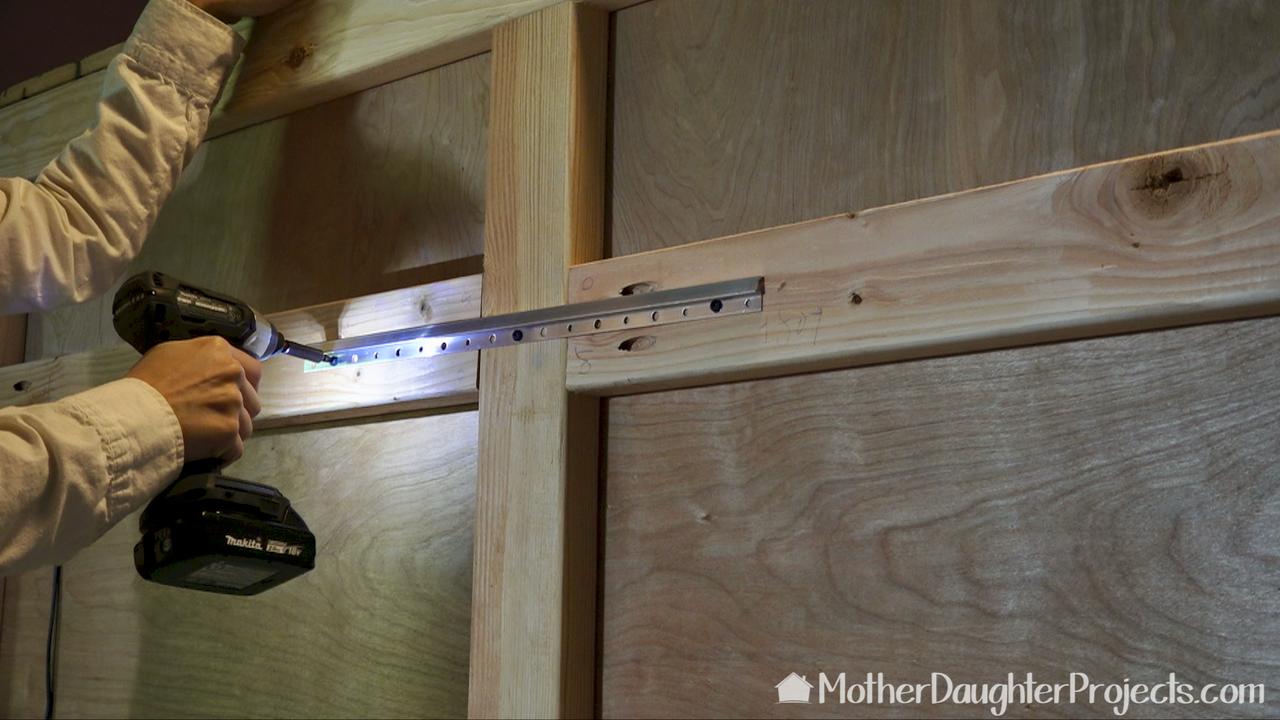
The utility board was glued and brad nailed to the 2x4s. Note, we went back and added additional 2x4s under that horizontal seam for extra support of the utility board. This also added a strong place to eventually add the French cleat. We use those vintage cast iron irons as weights when we need to add a little weight to something that is drying.
See how to use peel and stick wood tile to make a rustic/ industrial headboard. Mix pallet board and metal/steel pipes for this great bedroom decor!
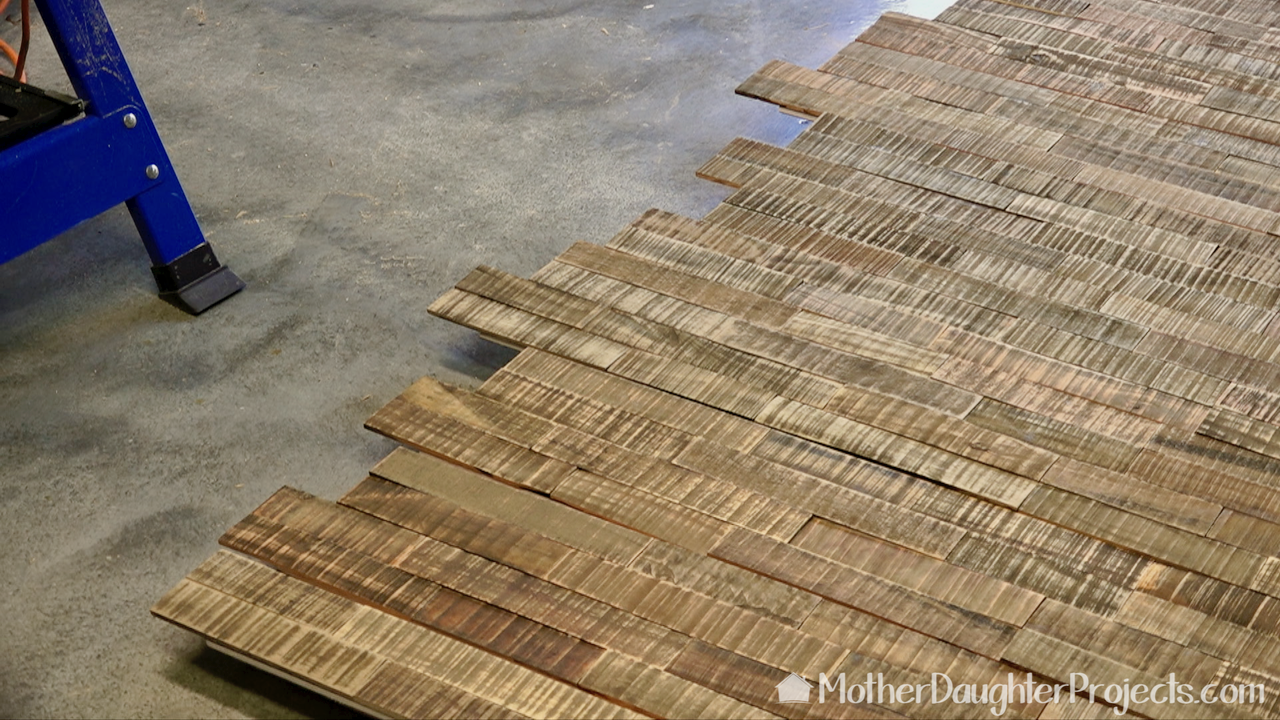
Dry fitting the tiles. The side tiles needed to be cut and this was easy to do with the miter saw.
See how to use peel and stick wood tile to make a rustic/ industrial headboard. Mix pallet board and metal/steel pipes for this great bedroom decor!
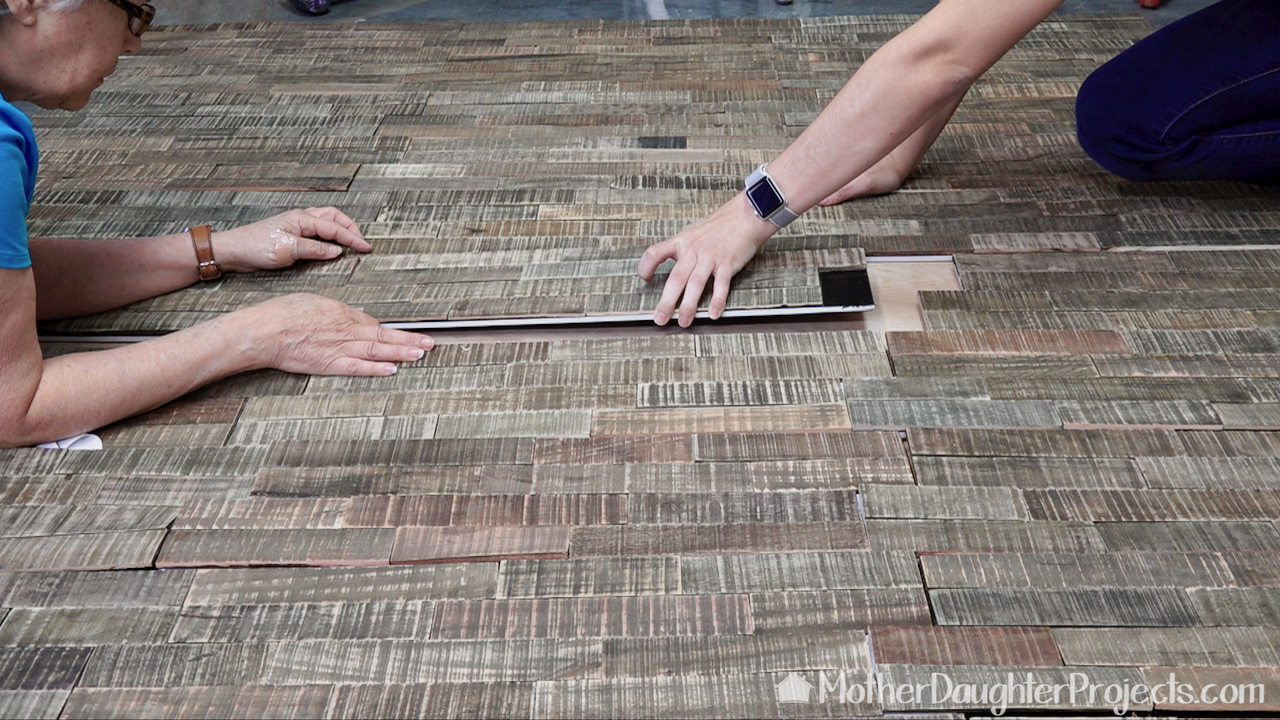
Sticking the tiles into place. Literally, Peel and Stick! That black area on the tile is where the next one fits snuggly into the one already in place.
See how to use peel and stick wood tile to make a rustic/ industrial headboard. Mix pallet board and metal/steel pipes for this great bedroom decor!
Because the 2x4 edge and the tile edge showed, we cut pallet wood to size to cover this.
See how to use peel and stick wood tile to make a rustic/ industrial headboard. Mix pallet board and metal/steel pipes for this great bedroom decor!
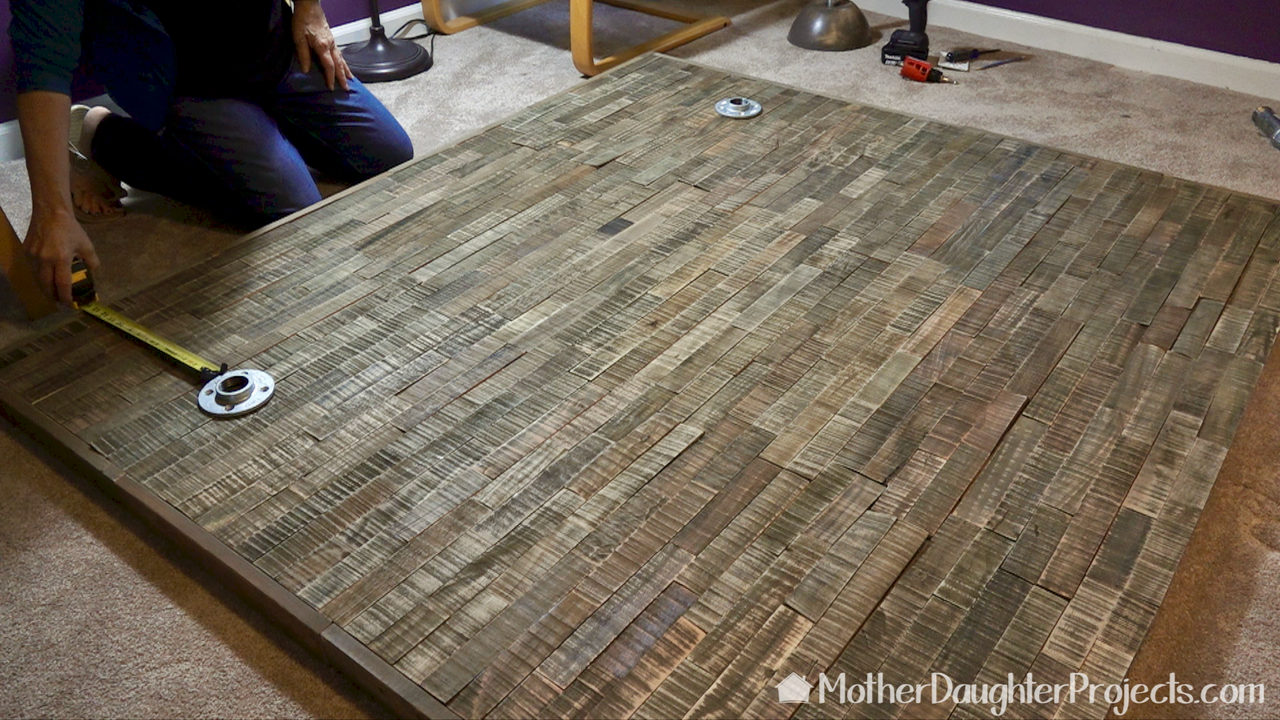
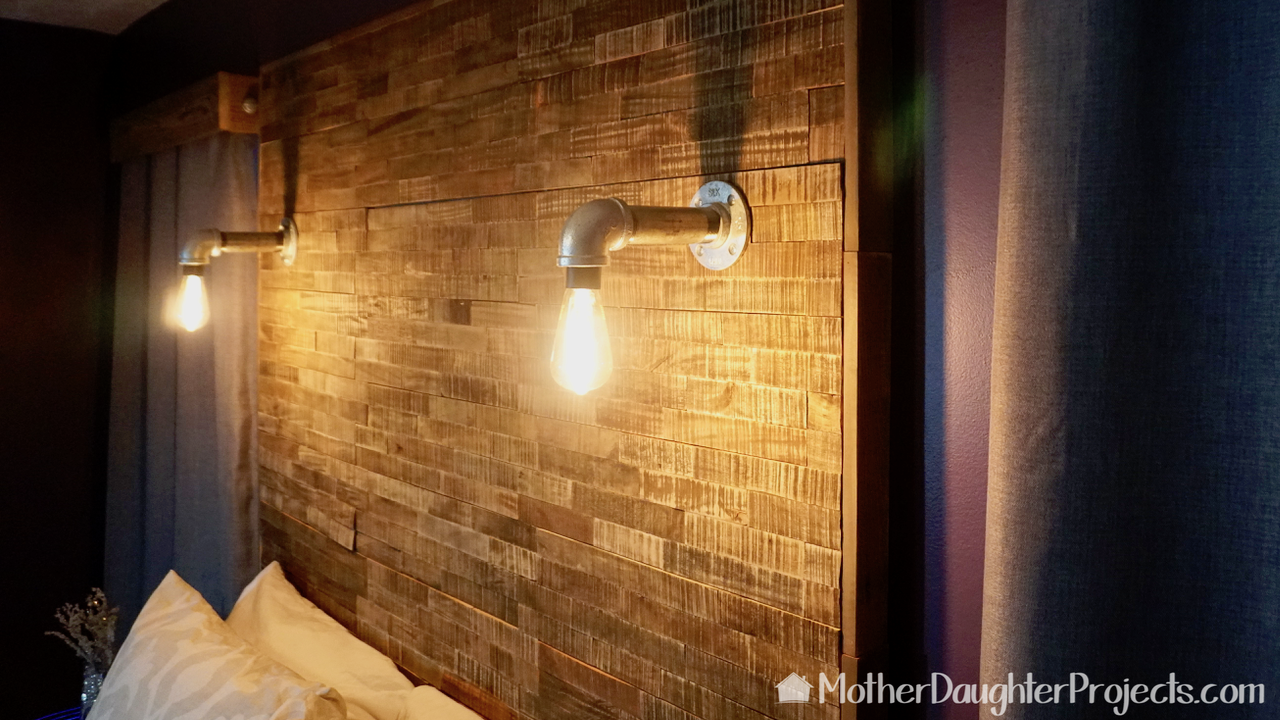
After the headboard was finished we marked the placement of the pipe lights or sconces.
See how to use peel and stick wood tile to make a rustic/ industrial headboard. Mix pallet board and metal/steel pipes for this great bedroom decor!
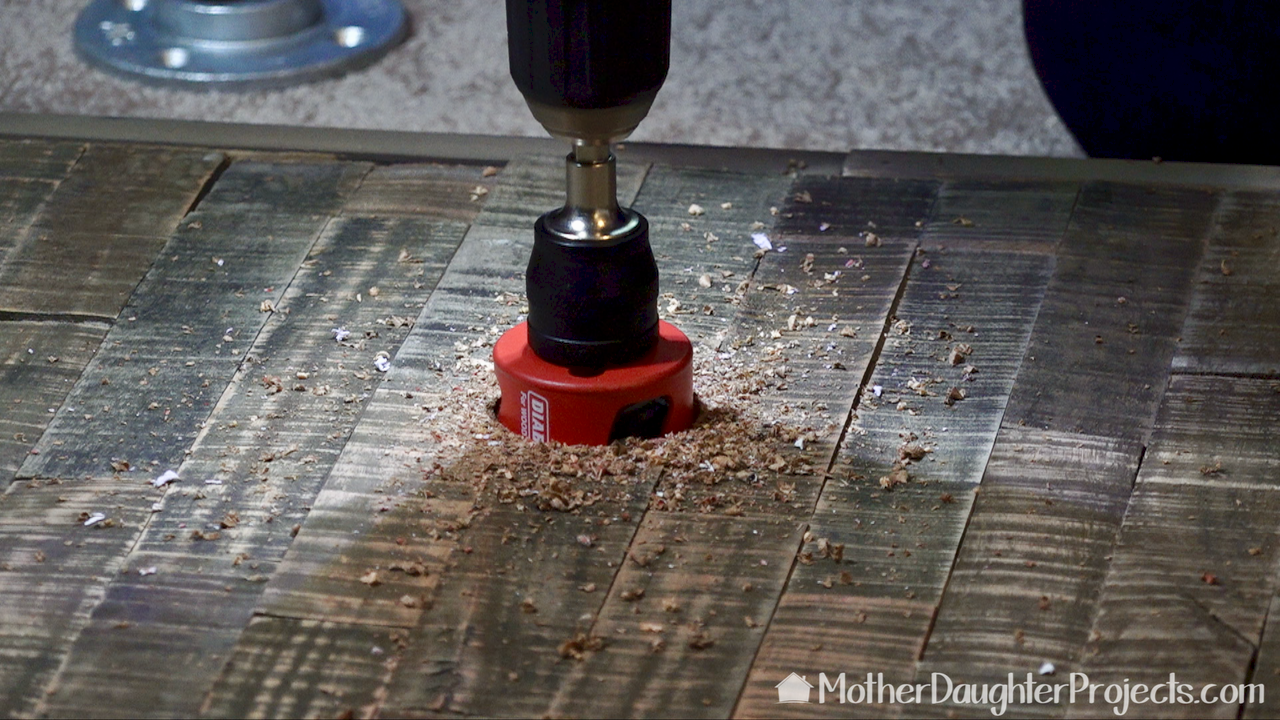
We used a Diablo hole saw to create the hole.
See how to use peel and stick wood tile to make a rustic/ industrial headboard. Mix pallet board and metal/steel pipes for this great bedroom decor!
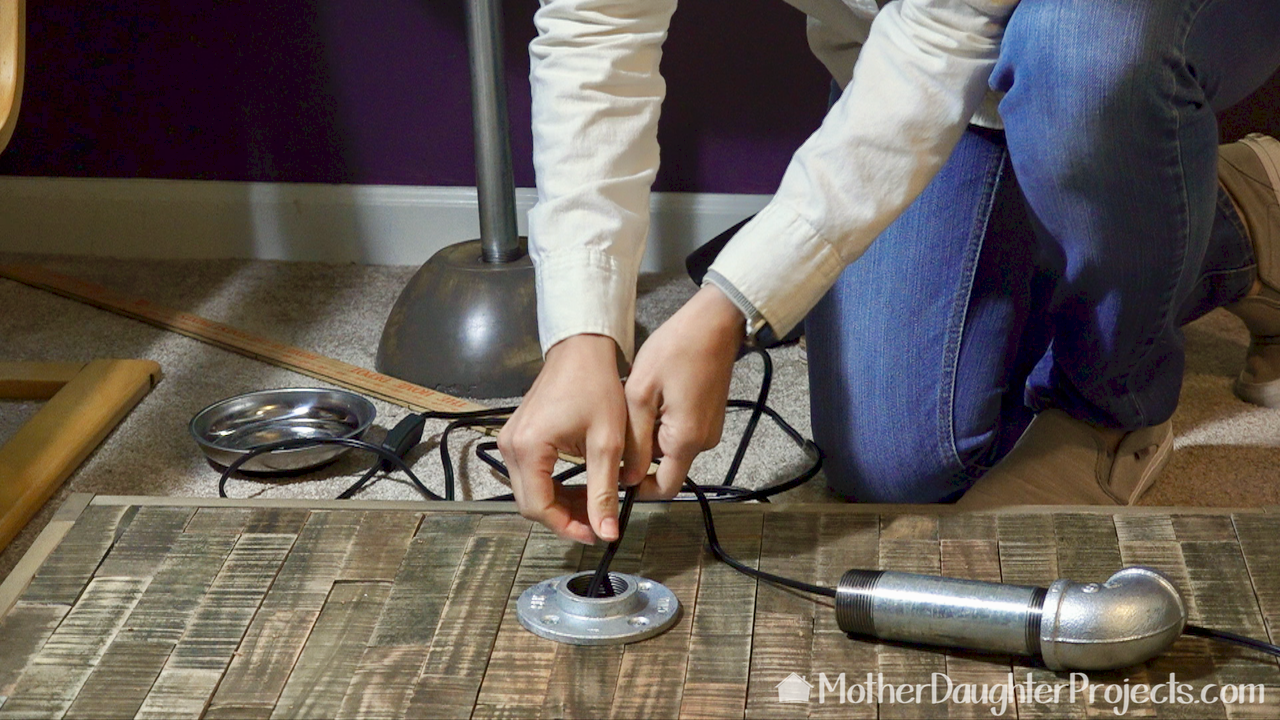
After screwing the flanges into place, we threaded the light kit through the pipe fittings into the newly created hole under the flange. The pipe was then screwed into the flange.
See how to use peel and stick wood tile to make a rustic/ industrial headboard. Mix pallet board and metal/steel pipes for this great bedroom decor!
We screwed part of the French cleat into the back of the headboard.
See how to use peel and stick wood tile to make a rustic/ industrial headboard. Mix pallet board and metal/steel pipes for this great bedroom decor!
The second part was attached to the wall. We then lifted the headboard onto the wall.
See how to use peel and stick wood tile to make a rustic/ industrial headboard. Mix pallet board and metal/steel pipes for this great bedroom decor!
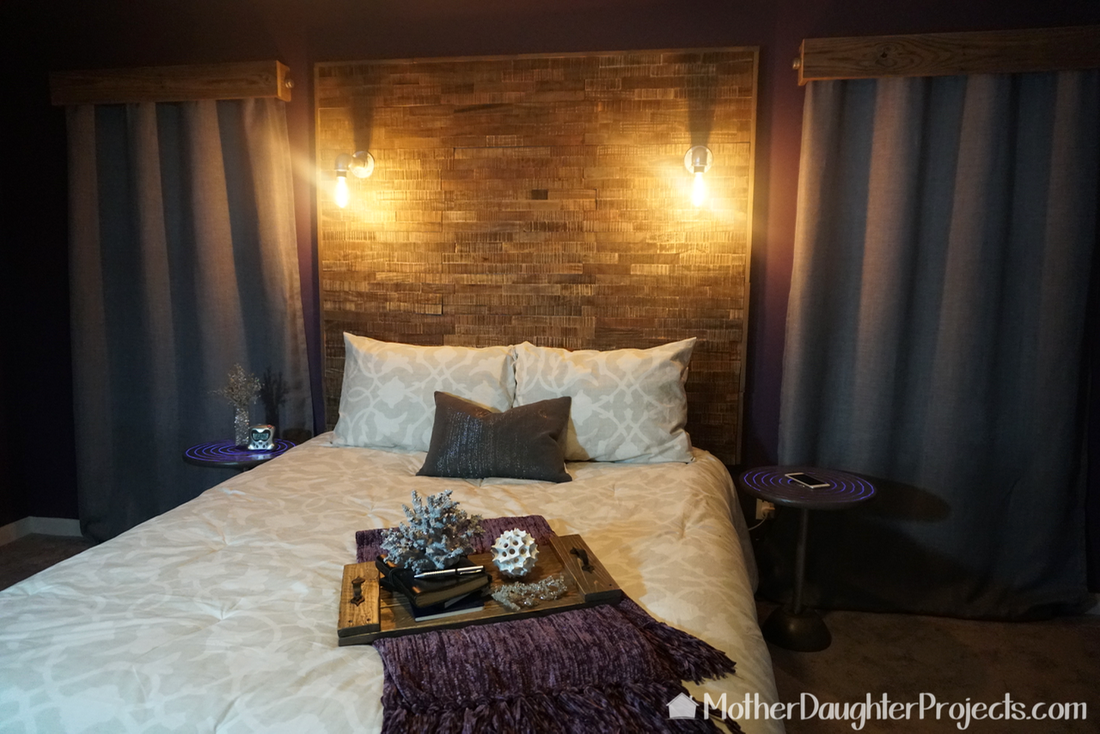
After the headboard was in place, we decided the windows were looking a little bare so we made pallet wood valances. The wood rod (a 1" dowel) ends are capped with metal pipe caps to continue the rustic industrial theme! 

The headboard and lights came together just as planned- though we ultimately tweaked the lights just a bit. Originally, they were going to hang, but we decided we liked the socket tucked up into the pipe elbow. 

The peel and stick tile was very easy to work with. It would have been quite a chore to have made this out of pallet wood. Also, this was 85 to 90 pounds--I can't imagine how heavy one of pallet wood would have been!

What do you like to make from pallet wood? Where would you use peel and stick pallet wood tile? Let us know in the comments below!
See how to use peel and stick wood tile to make a rustic/ industrial headboard. Mix pallet board and metal/steel pipes for this great bedroom decor!
Picture
 Please note: We are not sponsored by any of the companies/products that we used. We did receive the Aspect Wood Tile for free from the Aspect company.
​
FYI: We are not professionals, and we don’t claim to be. This is what we found worked for our project. Yours may need a little different approach. Safety first!

FYI: Affiliate links are being used on this page. Purchasing via these links help support MDP!

Related Projects

Picture
DIY Wireless Charging Neon Nightstand
Picture
5 Ways to a SMARTER Light Switch
Picture
Peel and Stick Kitchen Backsplash
7 Comments
Denise Robinson
11/7/2017 10:00:47 am

I love it. I also love the fabric bed frame. Y'all are amazing 😊

Reply
Steph
11/8/2017 09:59:08 am

Hi Denise- thanks so much! My box frame actually just has a queen sized fitted sheet on it :)

Reply
Bivens Rinehart
12/7/2017 01:59:50 pm

I LOVE what you have done with the peel and stick tile. You have inspired se real idea for me. Thank you for sharing!
The whole barroom looks fabous!

Reply
Steph
12/9/2017 08:26:34 am

You're welcome Bivens! So happy it inspired you :)

Reply
Barbara
3/9/2018 09:24:32 am

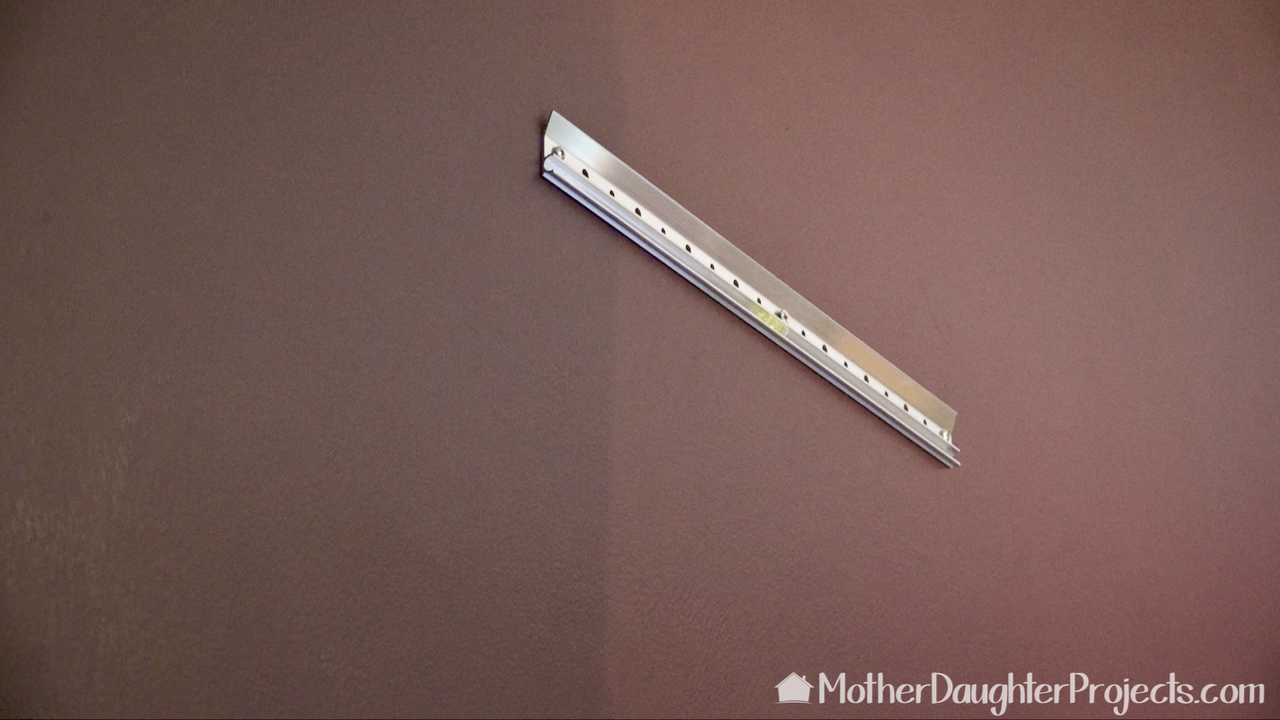
So, did that one little French cleat hold 90 pounds?? I like that!

Reply
Steph
3/9/2018 09:28:36 am

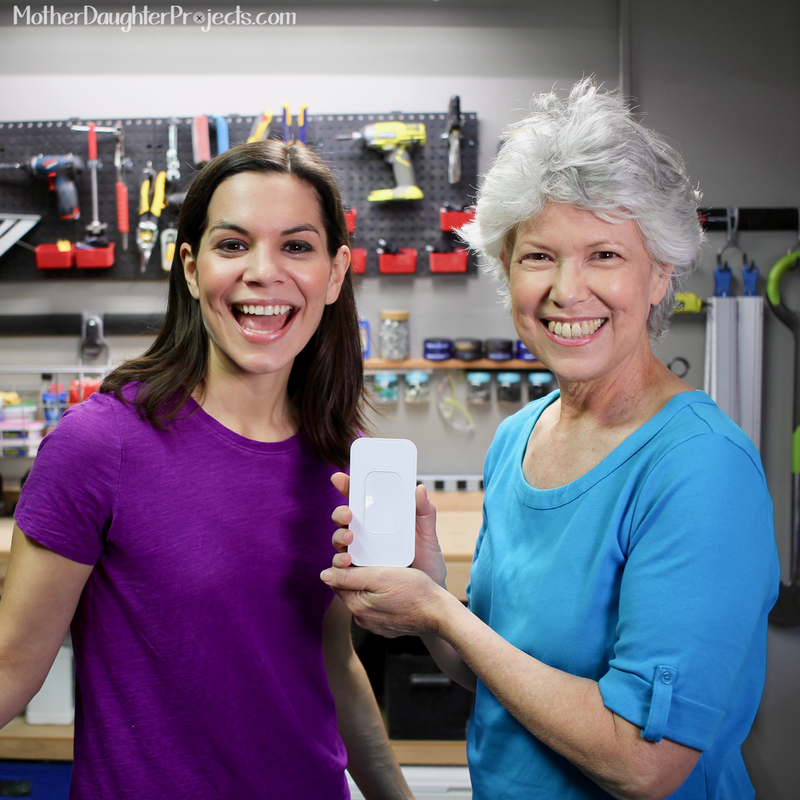
Hi Barbara- yes, it's still holding up well! The cleat we used is rated for 200lb.

Reply
Barbara
3/10/2018 08:58:42 am

It is beautiful... Lovely.

Reply


Leave a Reply.

    MotherDaughterProjects.com

    Mother Daughter Projects
    ​
    Steph & Vicki

    We're homeowners sharing our DIY adventures as we learn to maintain, improve, decorate, and ​use tech in our homes.
    Share your projects with us here:  
    ​#trylearnshare
    MotherDaughterProjects.com
Mother Daughter Projects, LLC ∙ est. 2015 ∙ Tallahassee, FL by Vicki & Steph ∙ Privacy Policy