|
text by Vicki Sign up here to join our weekly email newsletter!
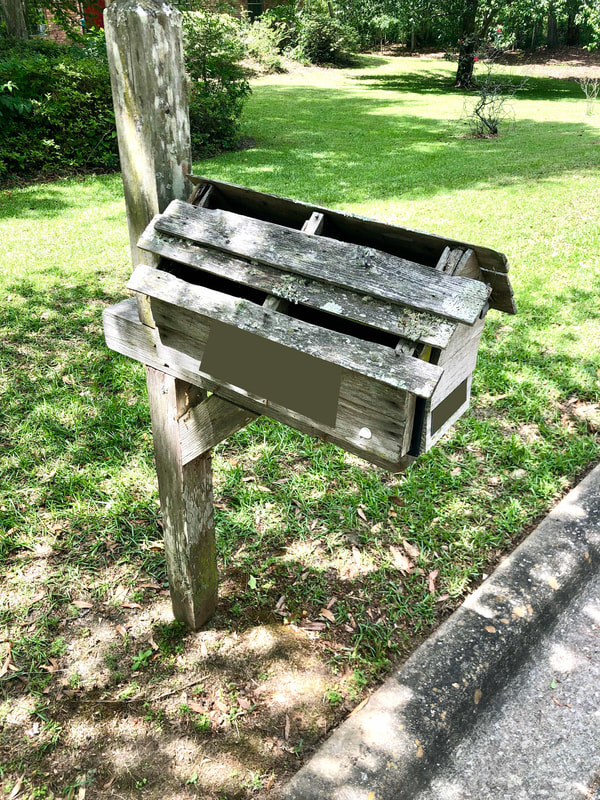
This is one of those projects that was overdue, way overdue! I live in a neighborhood where most all the mailboxes are brick or stucco, and then there was my falling down, cedar trimmed box. Yikes, I'm really surprised my Homeowners Associated never sent me notice to replace it!
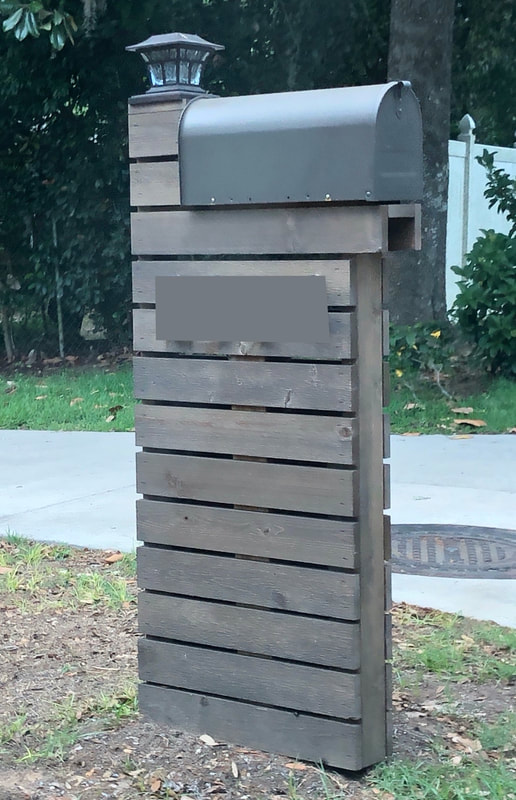
Since we have no bricklaying skills to build a brick mailbox, we set off to find a style we liked and could build with our skillset. On our weekly COVID-19 lockdown Sunday drives through the neighborhood, we spotted the perfect candidate. We took lots of pictures, but resisted the urge to actually get out of the car to take measurements.
Materials:
Tools:
Cut List
4x4 posts (3-1/2in x 3-1/2in actual)
1x4 boards (3/4in x 3-1/2in actual)
Mailbox dimensions
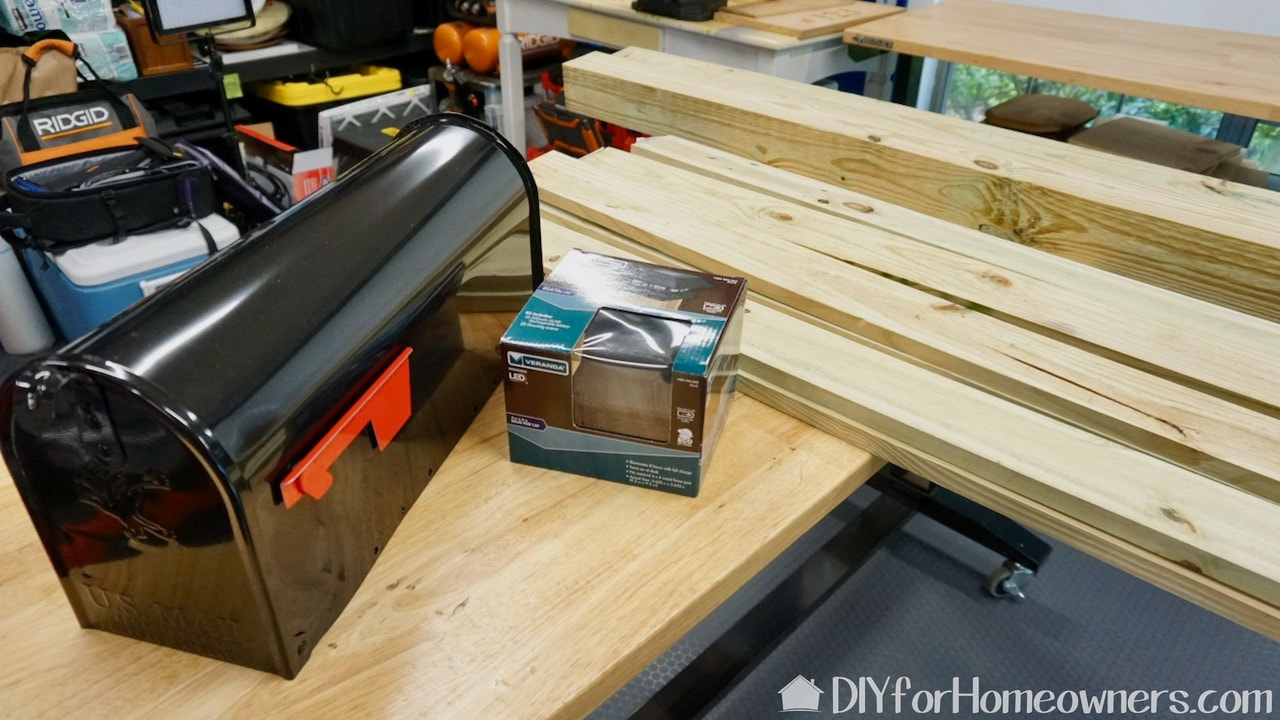
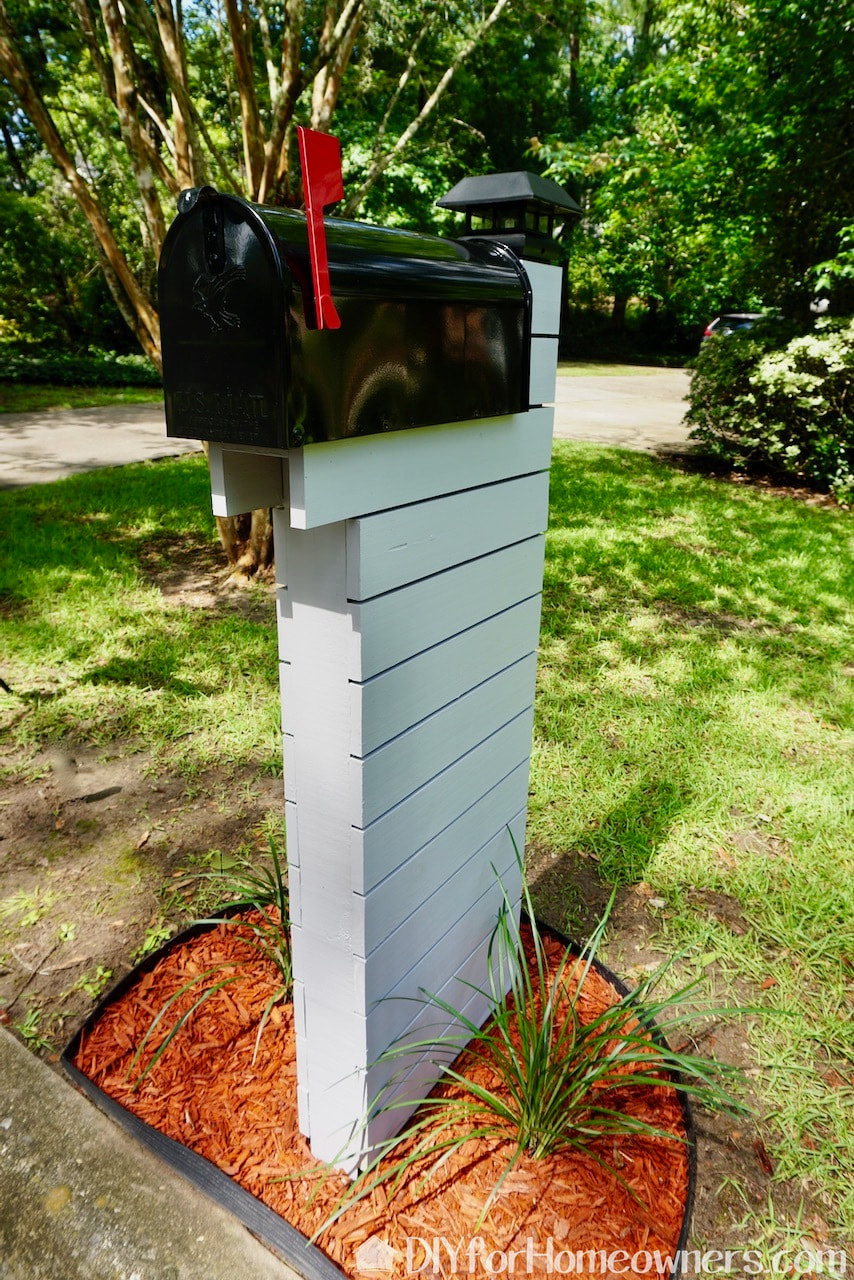
Here are the supplies that will eventually be my new modern mailbox: pressure treated lumber, a solar post light, and simple, no frills box.
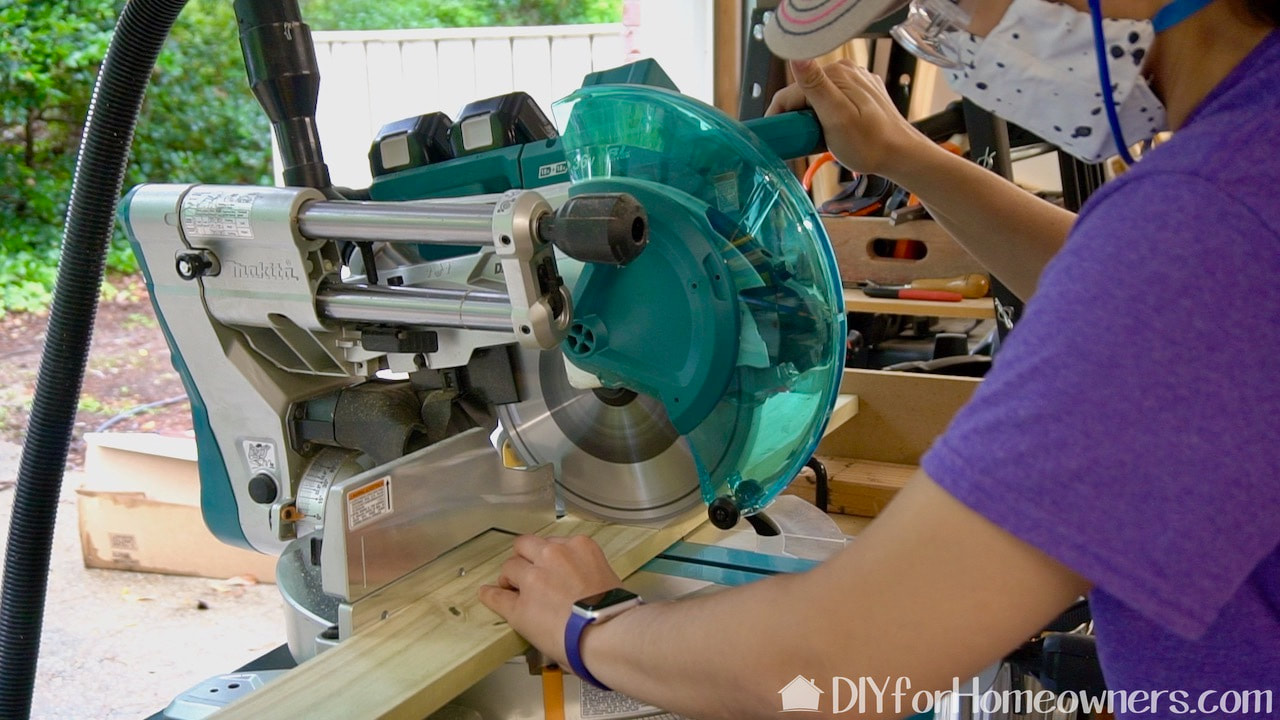
There was a lot of math going on to determine the width and height of the box. It really would have been easier if we could have measured our inspiration box. Basically, the size is based on the length and height of the box itself and the number of slats that are in the inspiration photo. We set up a fence on the miter saw to cut all the slats since we needed so many. This speeds up the cutting as we only had to measure once.
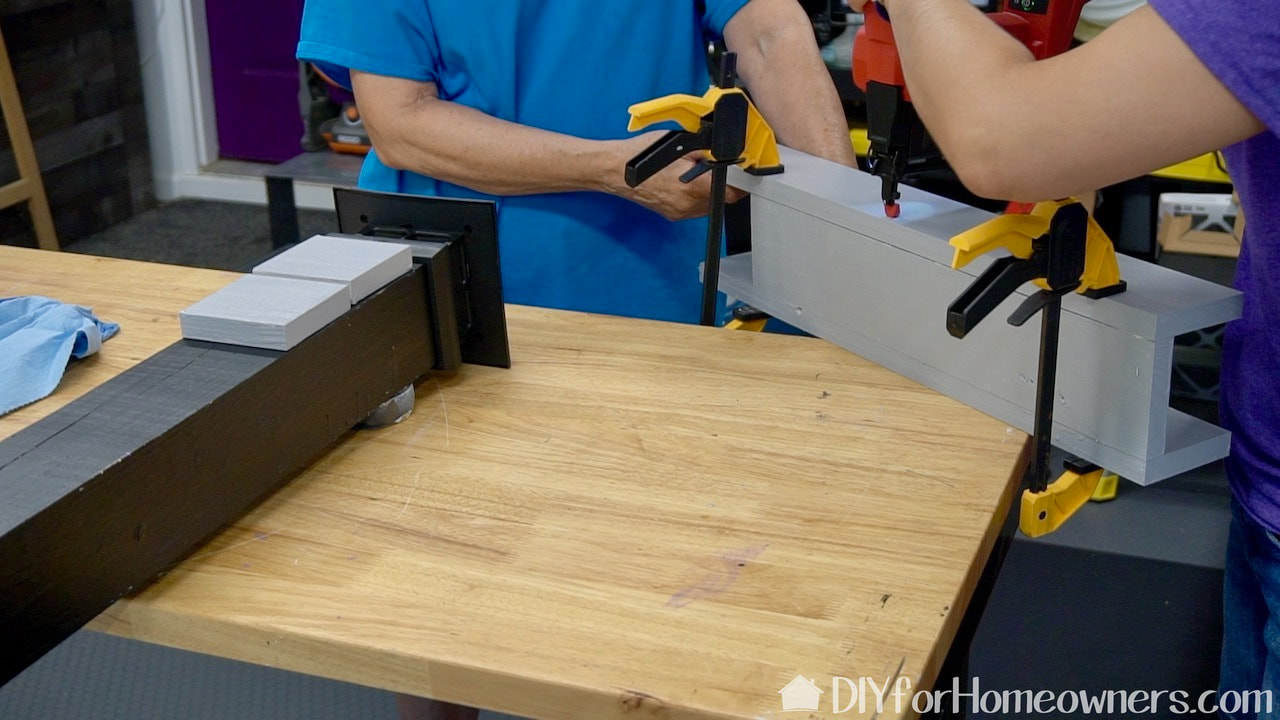
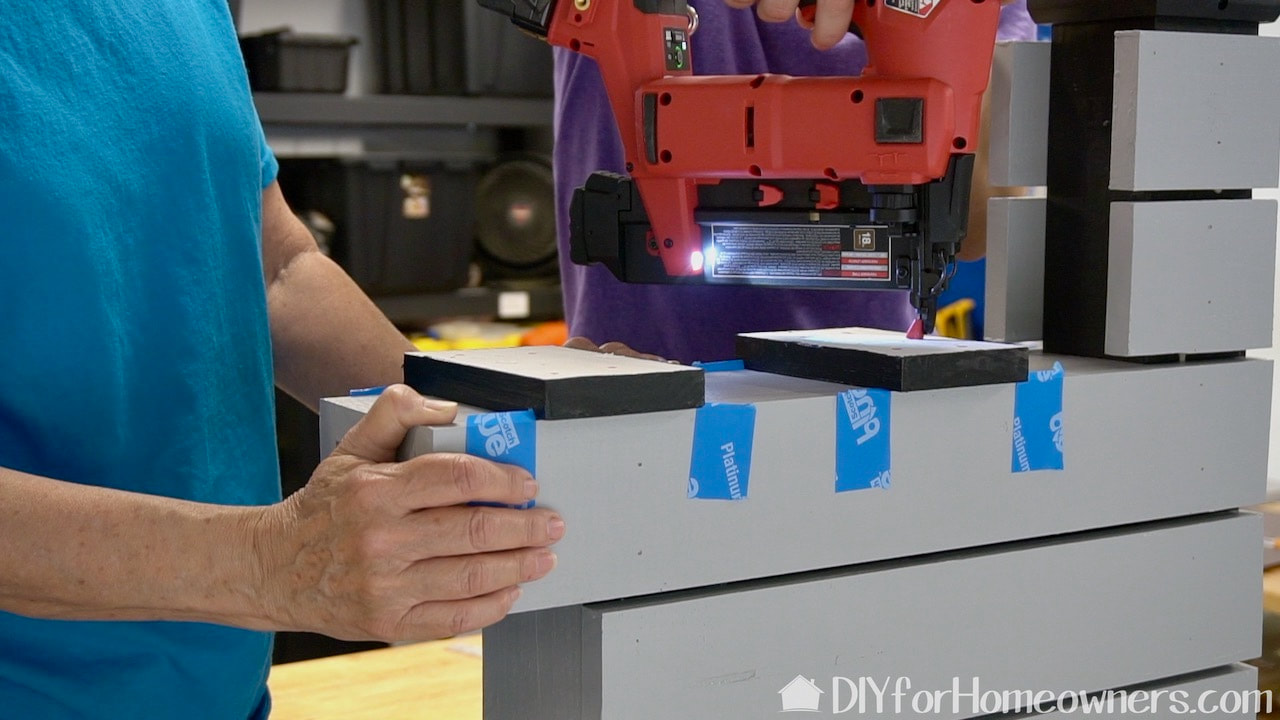
While Steph was home editing a video or something, I painted all the slats and posts. We debated on stain verses paint but decided on paint since we already had enough on hand. "You know, use what you have!" Here we are assembling the top of the mailbox where the box will sit. We are using outdoor wood glue and brad nails for the construction.
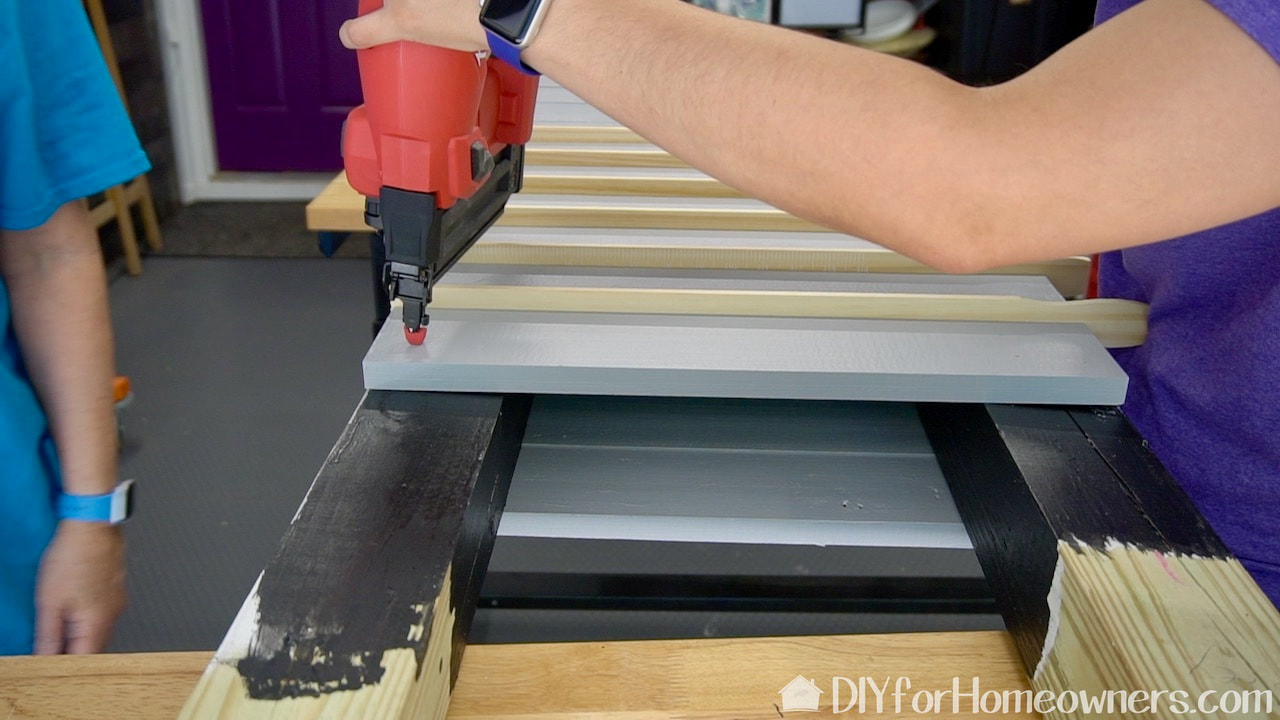
Here ware using a Milwaukee brad nailer to attach the slats. Those are large 5-gallon paint sticks that we are using as spacers between the slats. They worked perfectly. You can buy in a package of three for 98 cents.
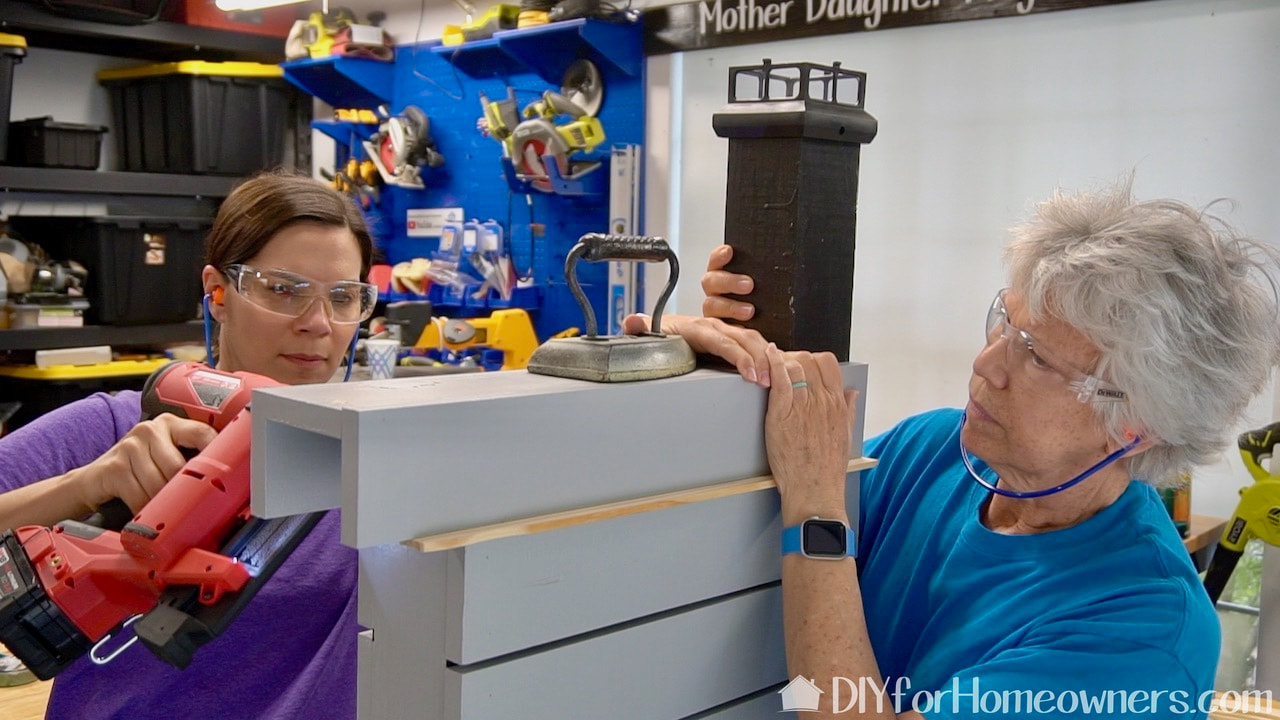
Once all the slats were attached it was time to attach the top box support. Again, we used the paint sticks for spacing.
These scrap pieces of wood were nailed into place to provide a place to screw the box into the top support.

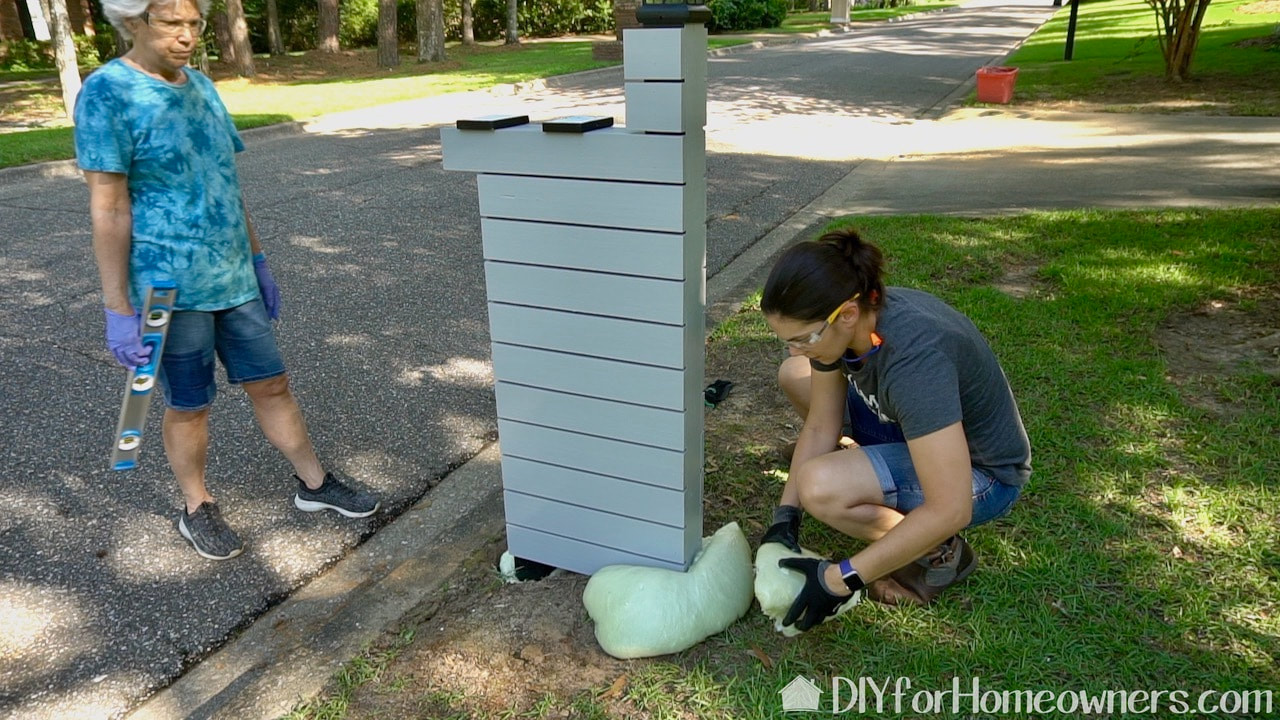
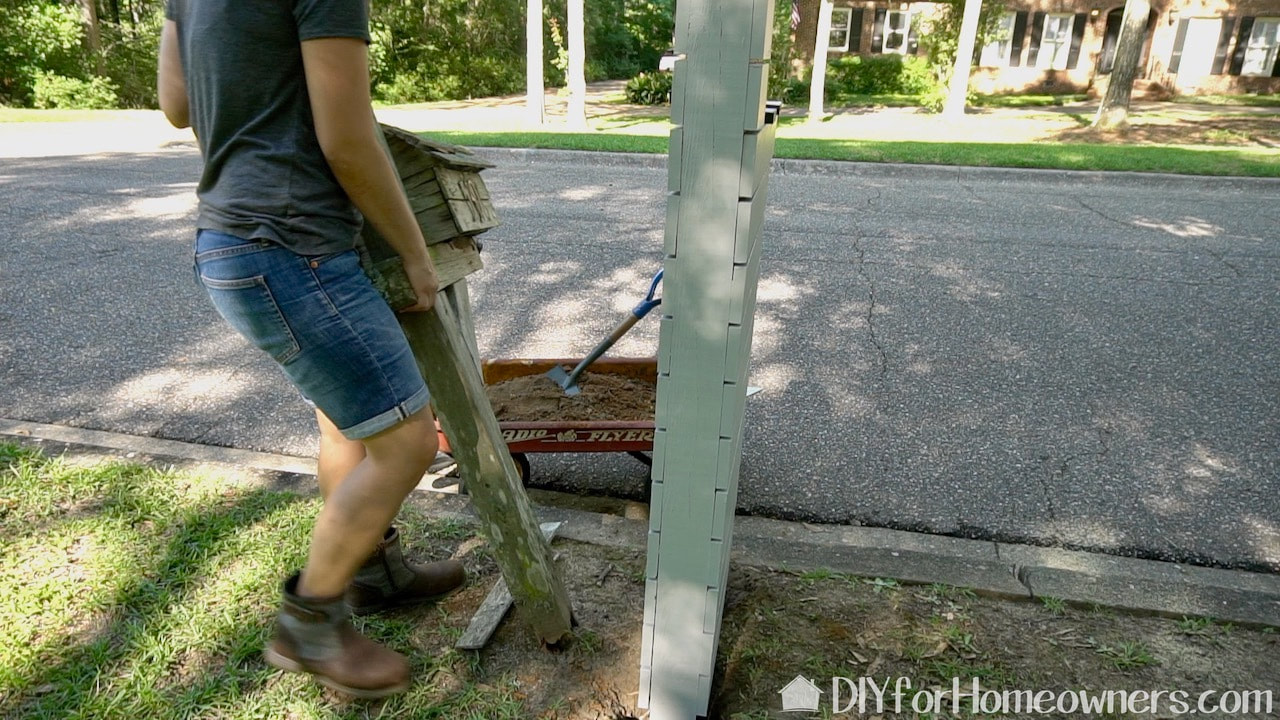
Now on to digging the holes for the mailbox. The dirt here in north Florida has a lot of clay in it so it is really hard. Plus, it had not rained in weeks so digging the holes was challenge. Ironically, it rained the day after which would have been nice for digging but it made for a muddy mess on our newly installed mailbox! Anyway, we used a variety of tools to break up and remove the dirt.
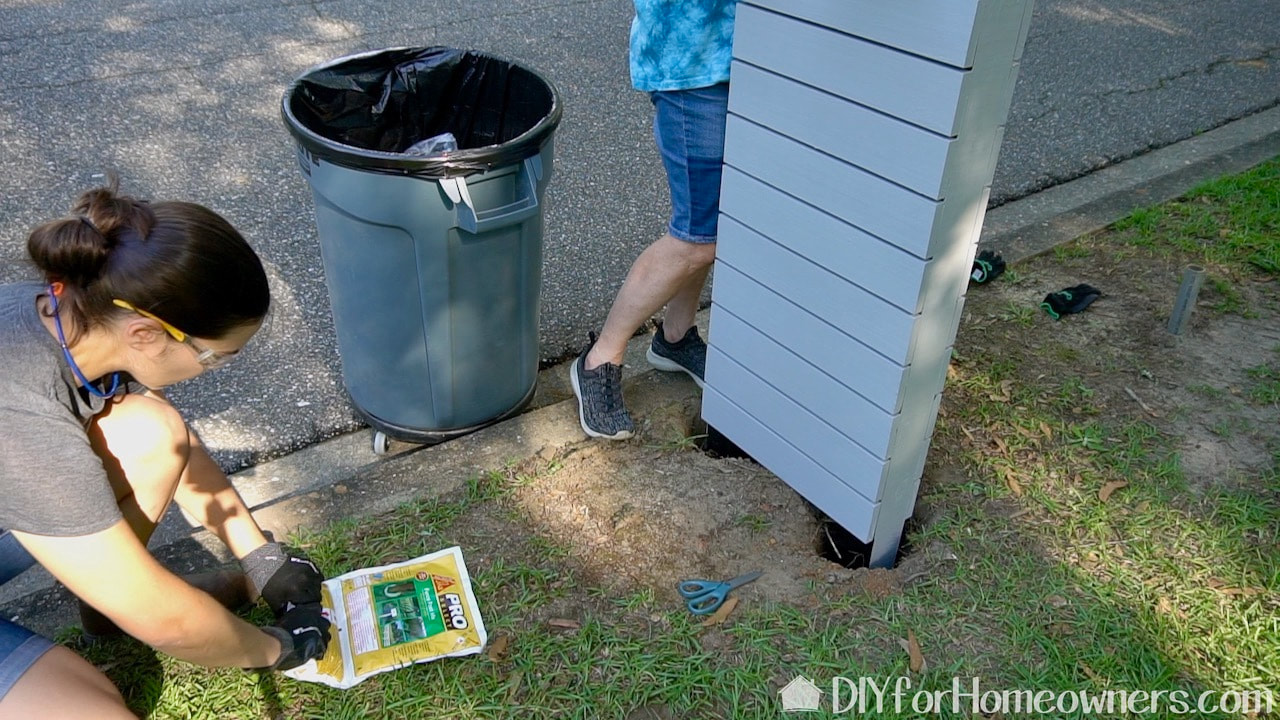
When placing a mailbox, be sure to follow all United States Postal regulations. There are distance and height requirements. Here Steph is prepping the fence hole fill while I keep the mailbox level. This stuff has a VERY short work time, so plan ahead. The material is very liquid but sets up quickly.
Oops, Steph put a little too much in the first hole. No worries, it was fairly easy to clean up once it cured.
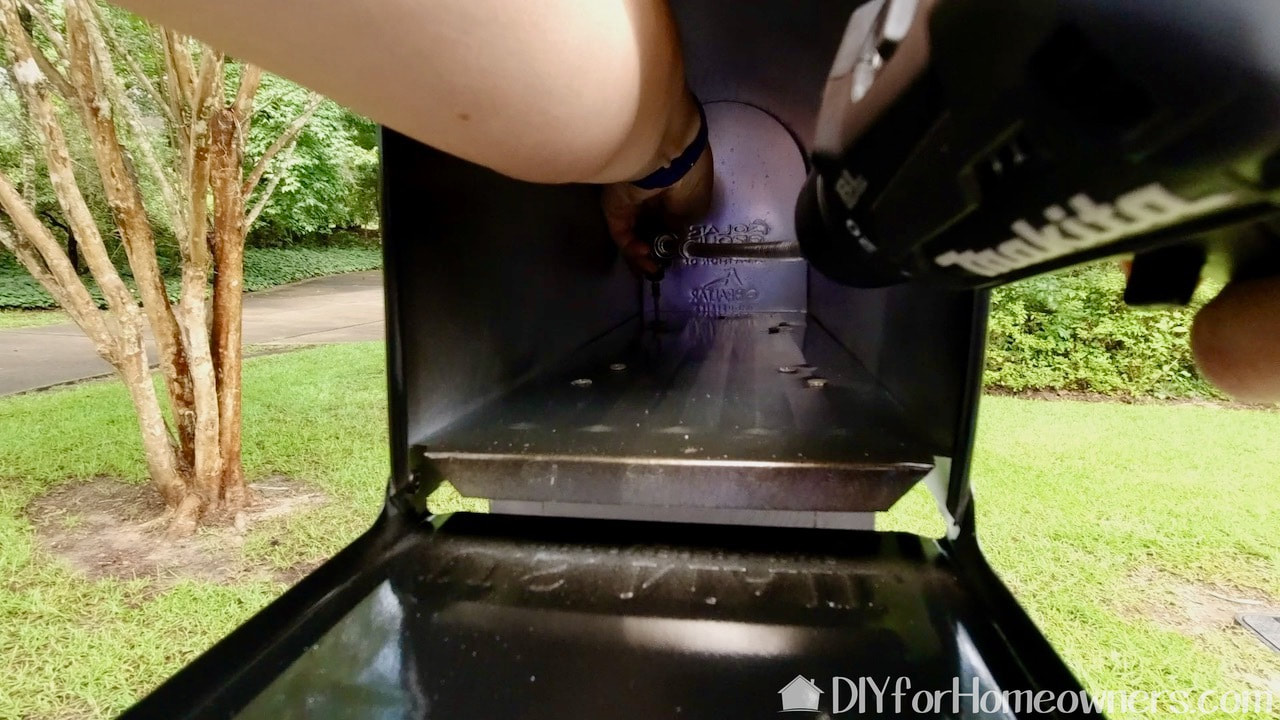
Securing the box to the post was a little tricky but with a flexible shaft and right angle drill chuck, Steph got the job done.
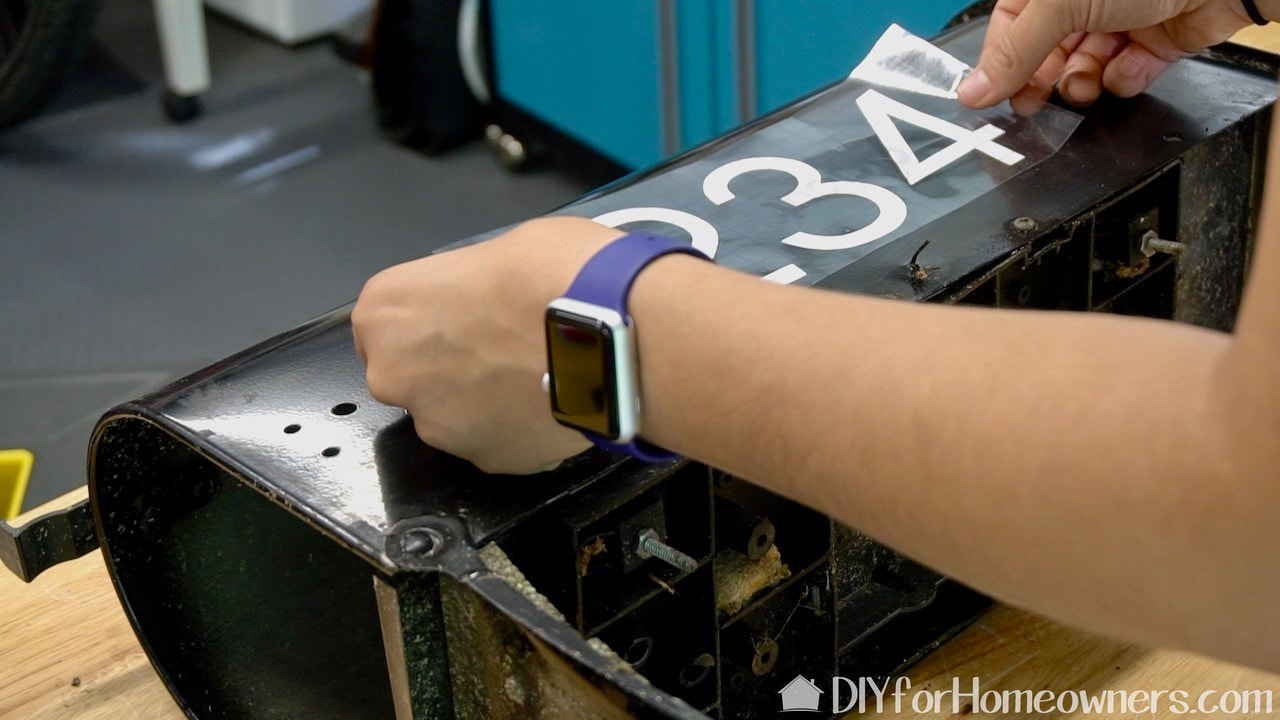
We actually had purchased numbers but decided to save a bit of money and make them out of outdoor vinyl. Plus, we had decided we wanted them on the box instead of on the slats. Here Steph is demonstrating how to apply the numbers. They are cut on a Cricut Maker, a transfer sheet is applied and then burnished onto the side of the mailbox.
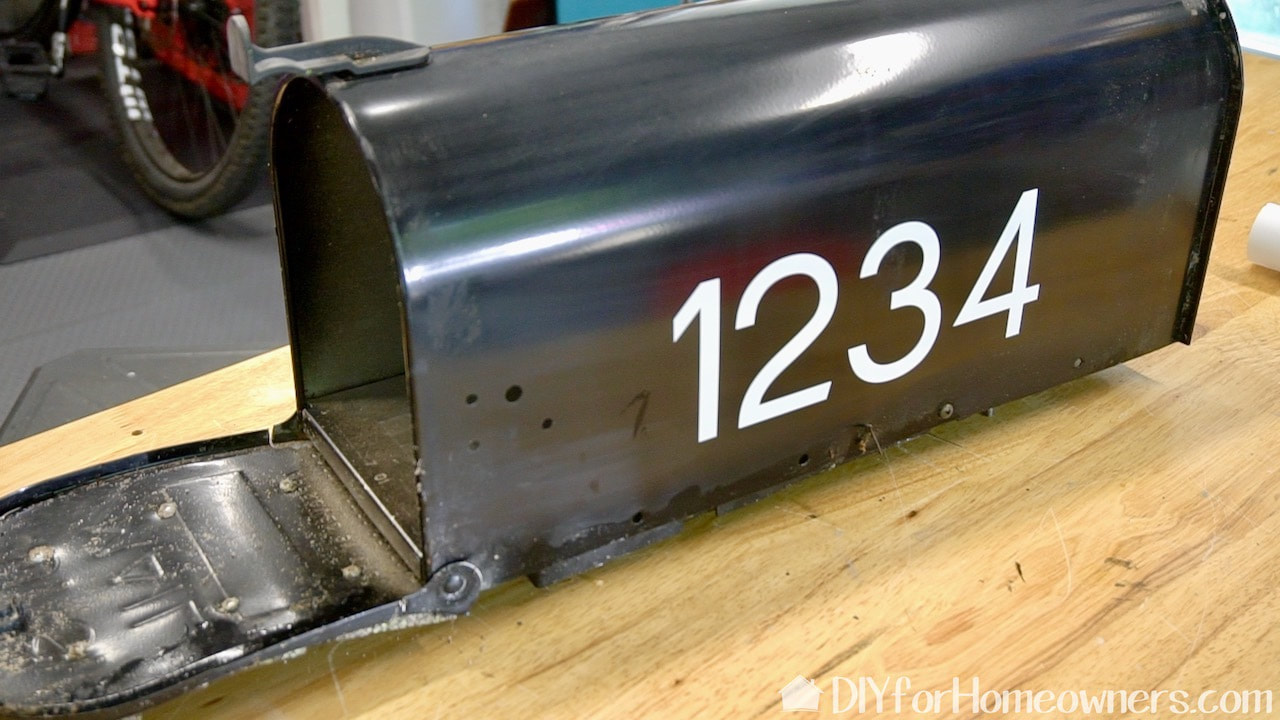
The number we applied to the actual mailbox were cut from grey vinyl to coordinate with the paint color. I love this modern, clean font. (This is just an example of what we did on the final mailbox.)
With hardly any effort, the old mailbox gave up without a fight!

This just makes me SMILE!
You know what else made me smile! A few days after we put the old mailbox on the curb for trash pickup, I noticed the box had been moved. Upon closer inspection, I noticed all the hardware had been stripped off. Evidently, someone needed the flag, and door closing hardware! I'm glad someone was able to use the parts.
Please note: This is not a sponsored post. FYI: We are not professionals, and we don't claim to be. This is what we found worked for our project. Yours may need a little different approach. Safety first! FYI: Affiliate links are being used on this page. Purchasing via these links help support MDP! Related Projects
2 Comments
Anne Rimler
7/26/2023 08:14:08 am
I've had this post pinned for over 2 yrs. I finally get to say THANKS! I have my own version of this mailbox build now! I love the results!
Steph
7/27/2023 08:15:33 am
Congrats on the build! Thanks for sharing!! Leave a Reply. |

Mother Daughter Projects
|