|
text by Vicki Sign up here to join our weekly email newsletter!
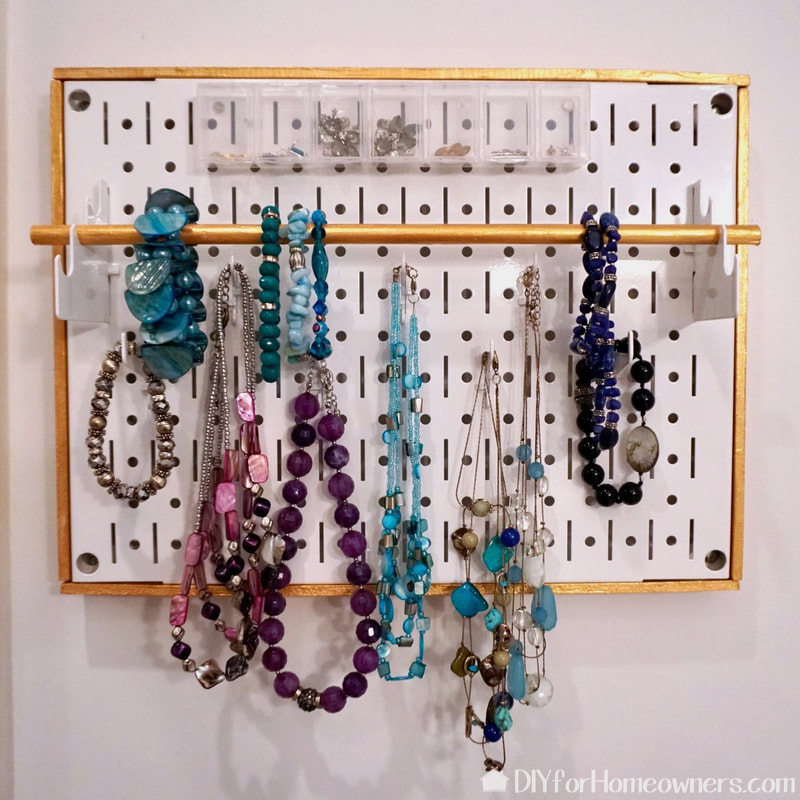
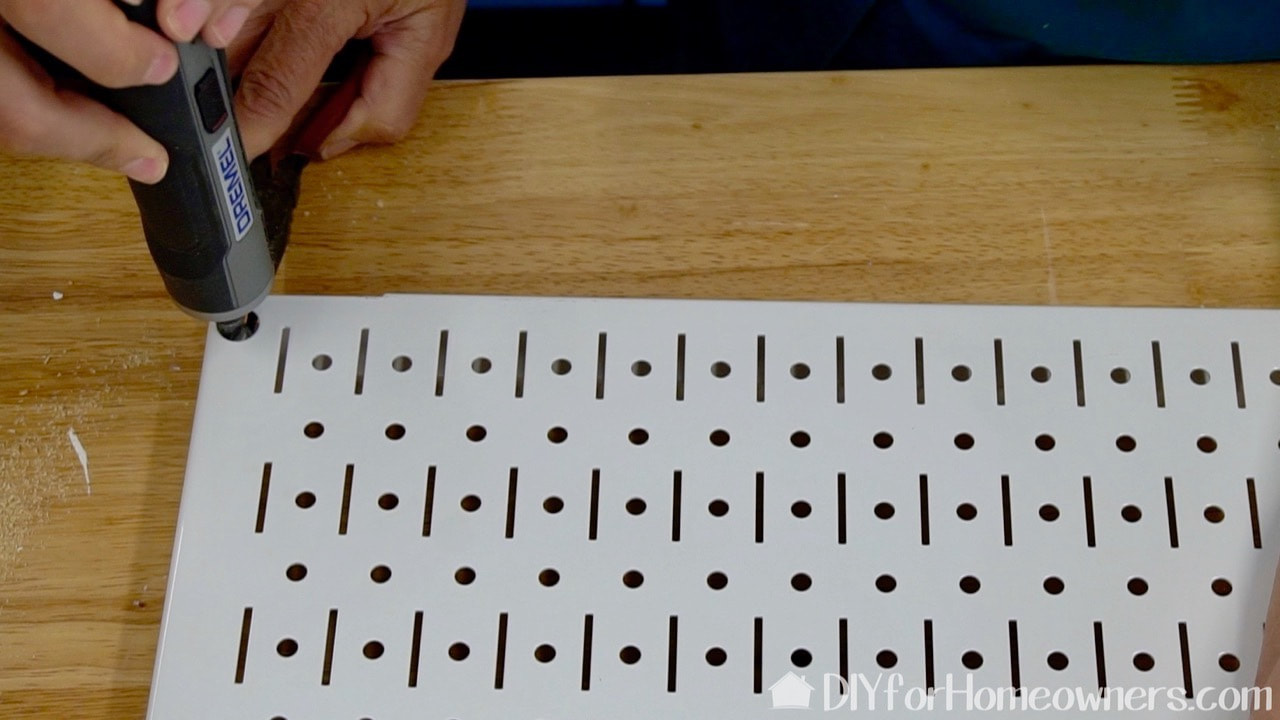
The newest addition to the ever growing inventory of Wall Control products is their new “fun size” pegboard panel. It’s a cute 16” wide by 12” tall, just right for small spaces requiring needing a bit of organization.
Although the panels come in several colors, we chose white as I wanted to use it in my white bathroom as a fun jewelry organizer. We decided to add a frame, but you could just attach the panel to a wall, add pegs to fit the jewelry you want to store and display and call it done! Take a look at how we added a simple frame to the “fun size” panel. 
The materials for this project are readily available and requires no advanced power tools. We are using a miter box and hand saw to make all the cuts. The "star" is the new "fun size" Wall Control panel!
Materials/Tools:
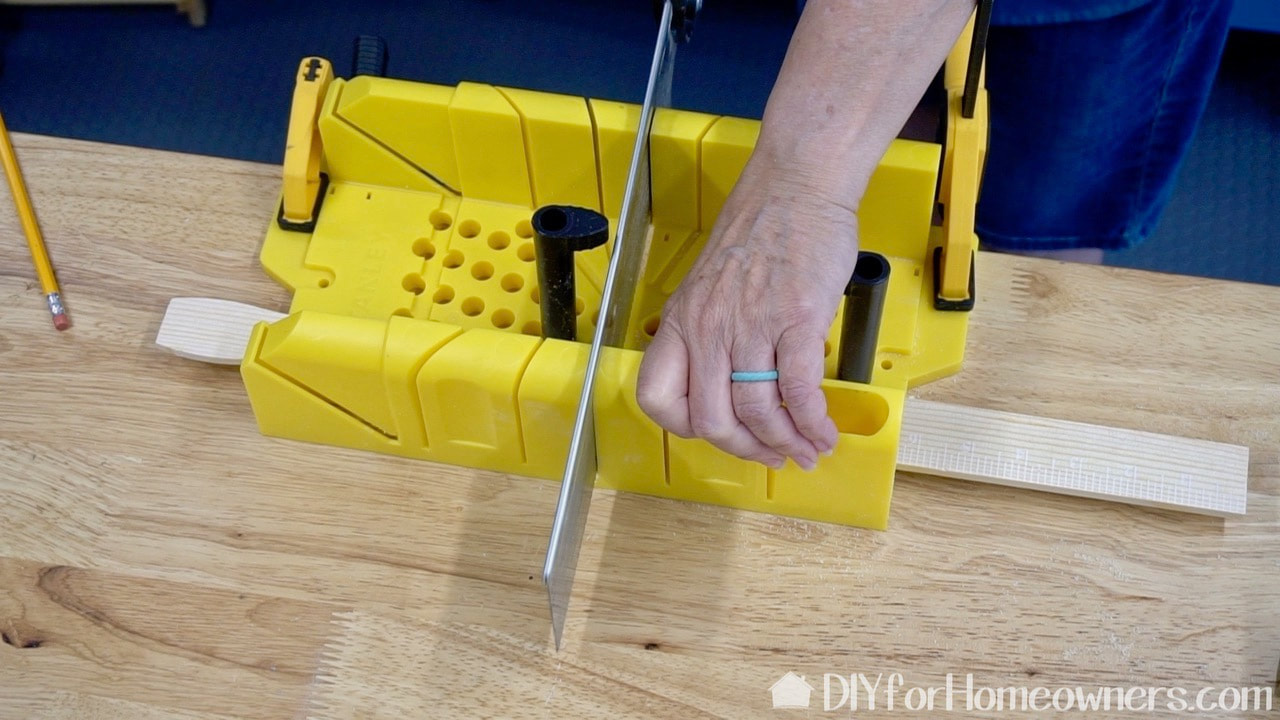
The paint sticks and wood dowel are easily cut with the hand saw. Tip: When using a miter box, clamp it to your work surface to keep it from moving.

The dowels are for the back top and bottom, and the paint sticks will make up the frame. Tip: I didn't measure the length of the side pieces correctly. That vertical piece on the top and bottom is a fraction wider than the sides. To simplify things, just measure the vertical and horizontal sides and cut the paint stick pieces to those measurements.
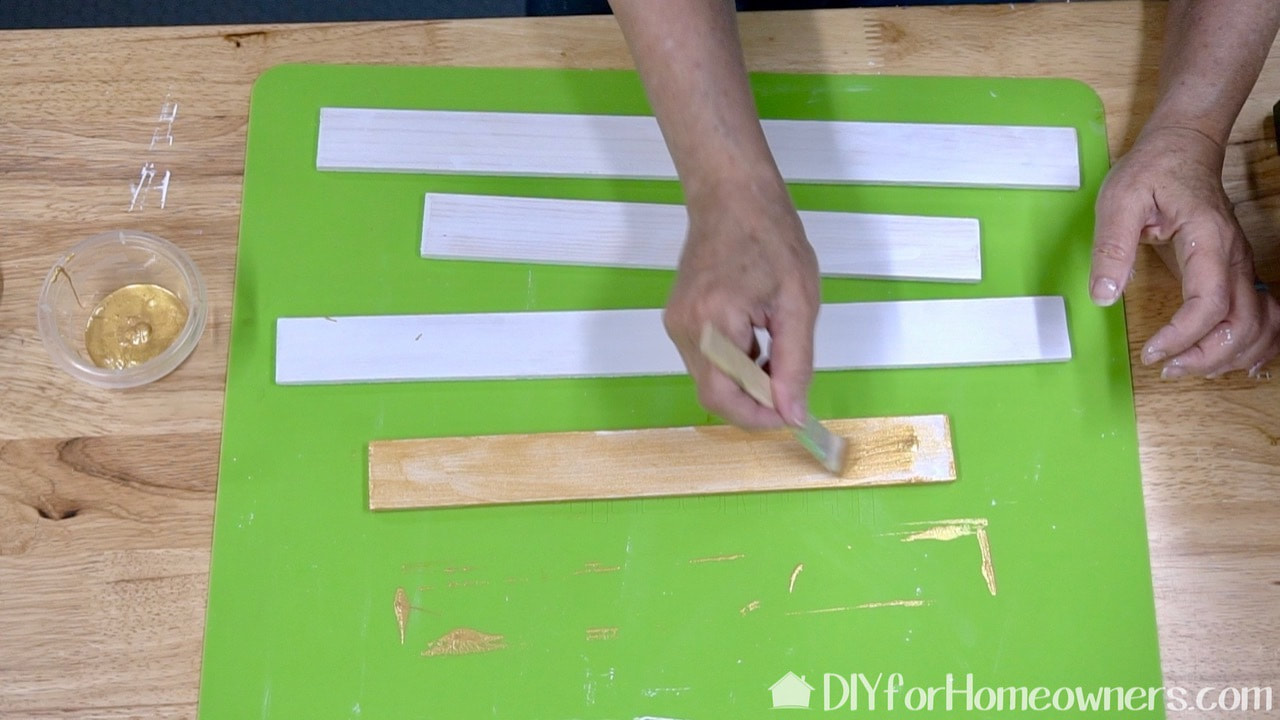
Sand the edges just to clean them up. I'm using a white gesso as base coat on the sticks. The metallic paint will cover better if you base coat first. That is a Surebonder silicone mat for hot glue, but I find it useful for anything sticky. Nothing sticks and it is easy to clean up!
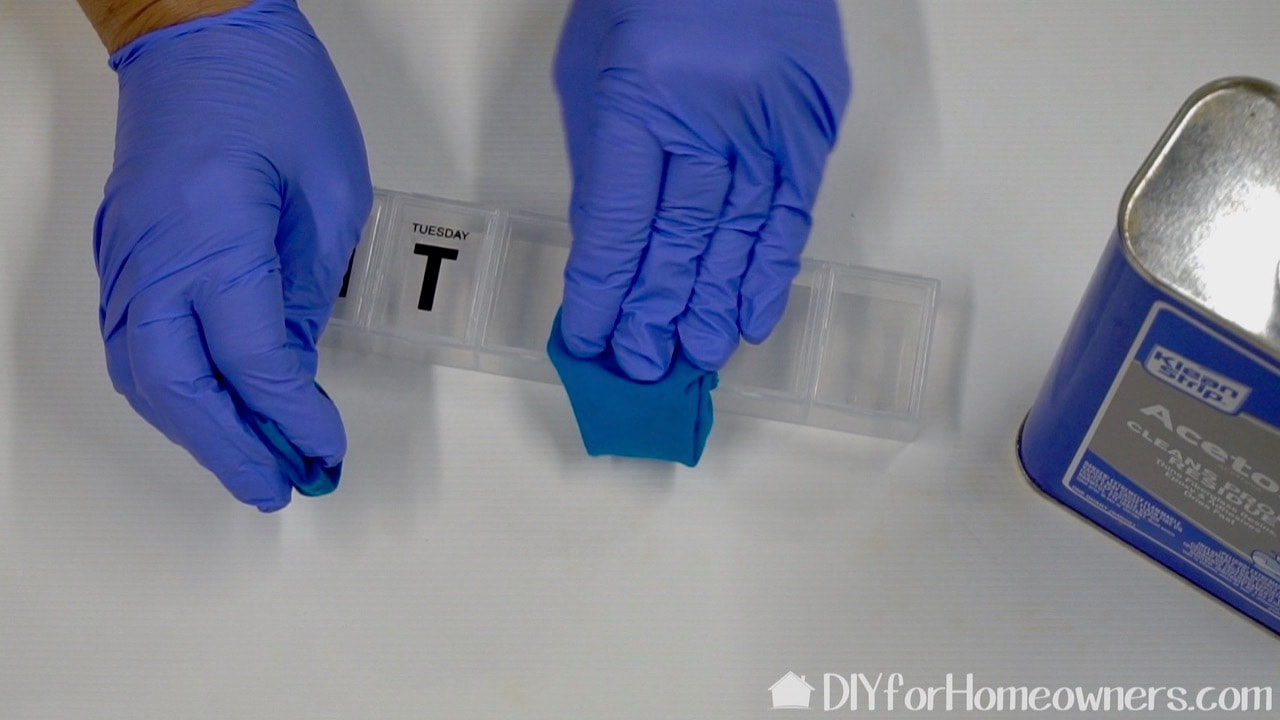
Since I have a lot of earrings that need to be stored, I'm using this pill box organizer. The printing comes off easily with acetone. I added rare earth magnets with E600. I used four, but two would have been sufficient. The Wall Control panel is metal so magnets will stick to it.
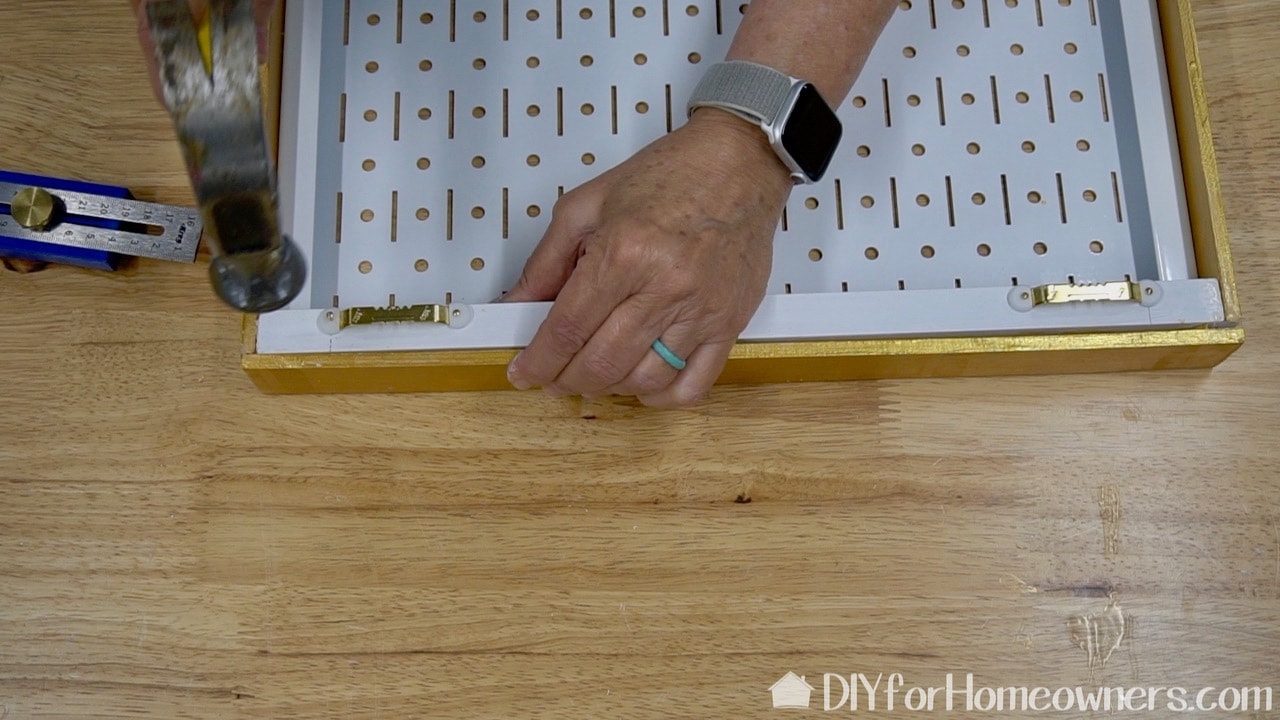
Assembly time! Those wood dowels are attached to the panel with screws using the existing mounting holes. We searched our stash for screws that would work and found some screws that are thin but with wide tops that worked perfectly. They are actually screws for outdoor chair webbing. If you can't find these, then a thin screw used with a washer could work. We predrilled a pilot hole and then screwed them in. Tip: It was a little tricky to work with the small screw, but holding it with a pair of needle-nose pliers did the trick.
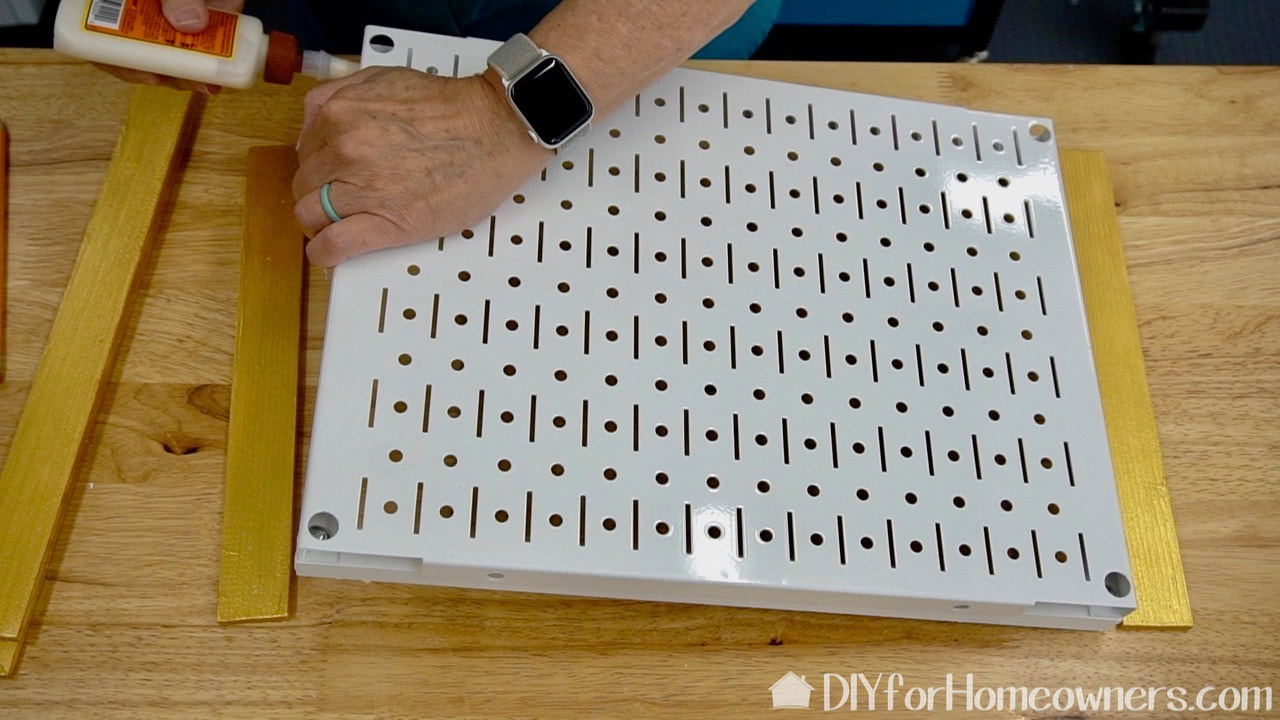
Although we used wood glue, I would probably use a contact cement here to attach the frame sides to the Wall Control panel. We clamped everything, but we didn't let it dry long enough! Tip: If needed, a small nail could be used to help secure the sides to the wood dowel.
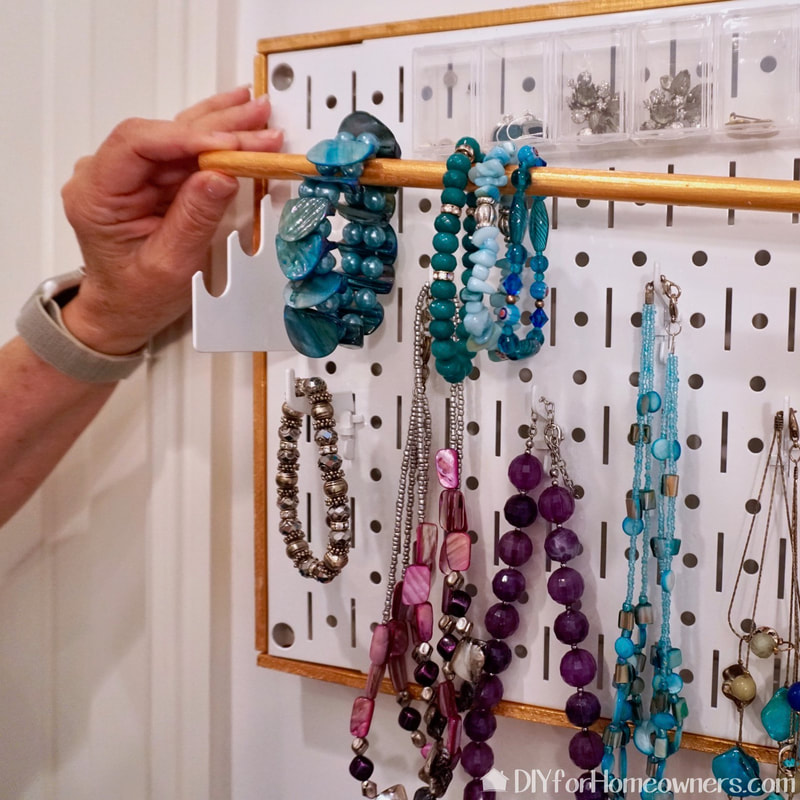
We added two picture hangers to the top dowel. These are super easy to use as they already have the nails attached. You simply hammer them into place.
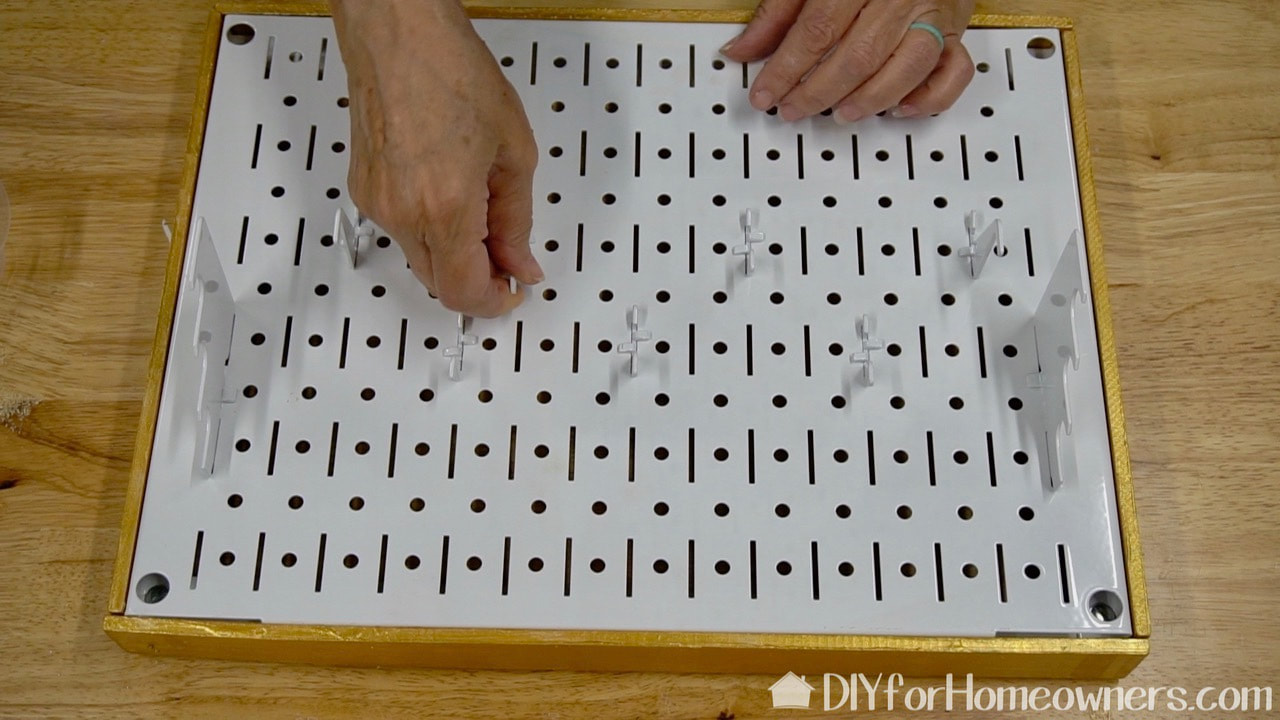
The kinds of hooks you use depends on what you are organizing. I used mainly short length hooks as well as a set of rod hanging hooks.
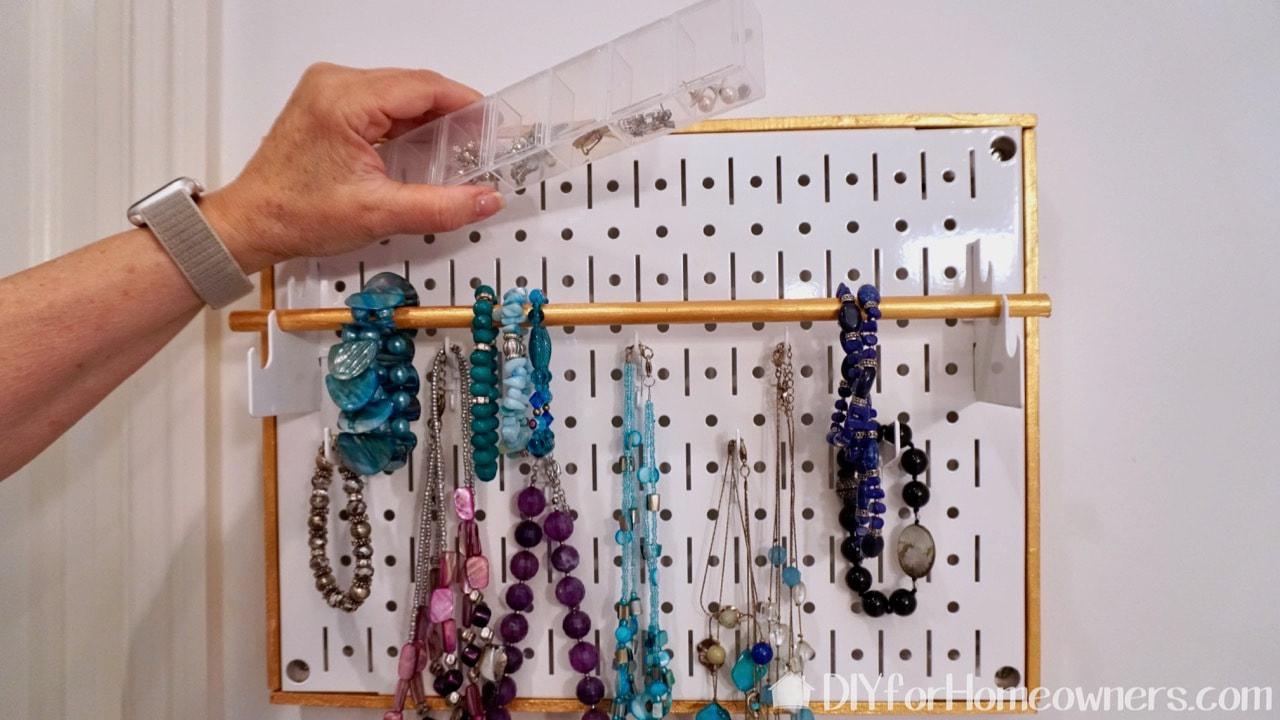
Here it is finished! Bracelets hang on the rod, smaller items go in the plastic case and necklaces go on the short hooks. We put two nails into the wall on which the frame hangs on.
Please note: This is not a sponsored post, but Wall Control provided the panel we used in this project. We are Wall Control Ambassadors.
FYI: We are not professionals, and we don't claim to be. This is what we found worked for our project. Yours may need a little different approach. Safety first! FYI: Affiliate links are being used on this page. Purchasing via these links help support MDP!
2 Comments
pam
5/3/2019 02:42:57 pm
"go sports" from the $5 pizza commercial
Steph
5/3/2019 05:13:17 pm
haha :) Leave a Reply. |

Mother Daughter Projects
|