|
text by Vicki Sign up to get Mother Daughter Projects updates in your email!
This post is sponsored by The Home Depot.
Around this time of year, it's become a tradition to come up with an alternative Christmas tree idea. This year is no exception!
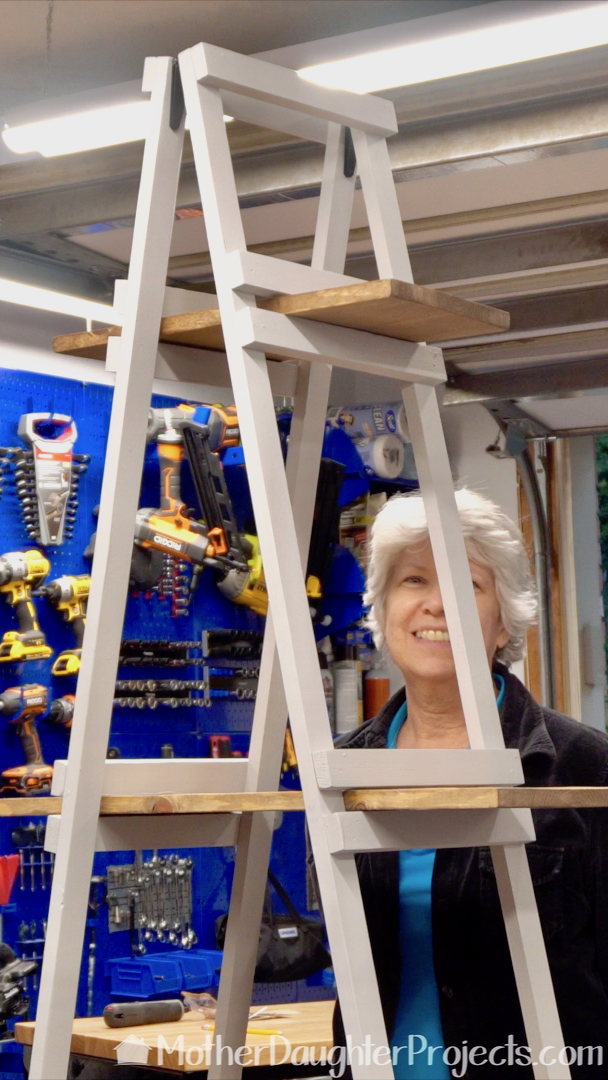
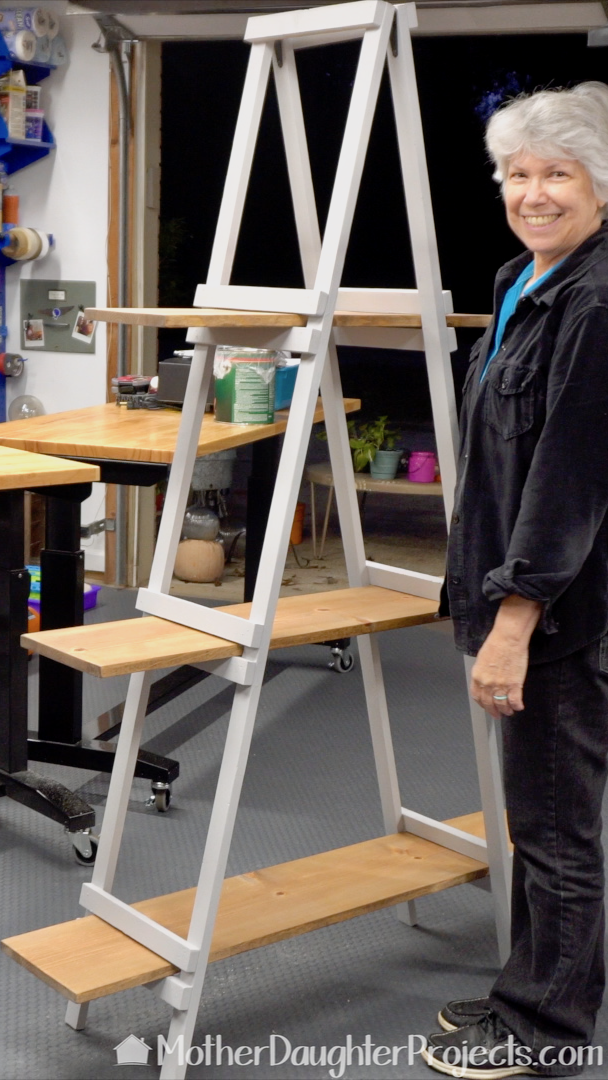
The inspiration for this year's tree is from a visit to Epcot at Walt Disney World. Steph took the boat ride in the Land Pavilion and saw their version of a ladder tree, which became the model for ours. Take a look at how it came together!
Materials:
Tools:
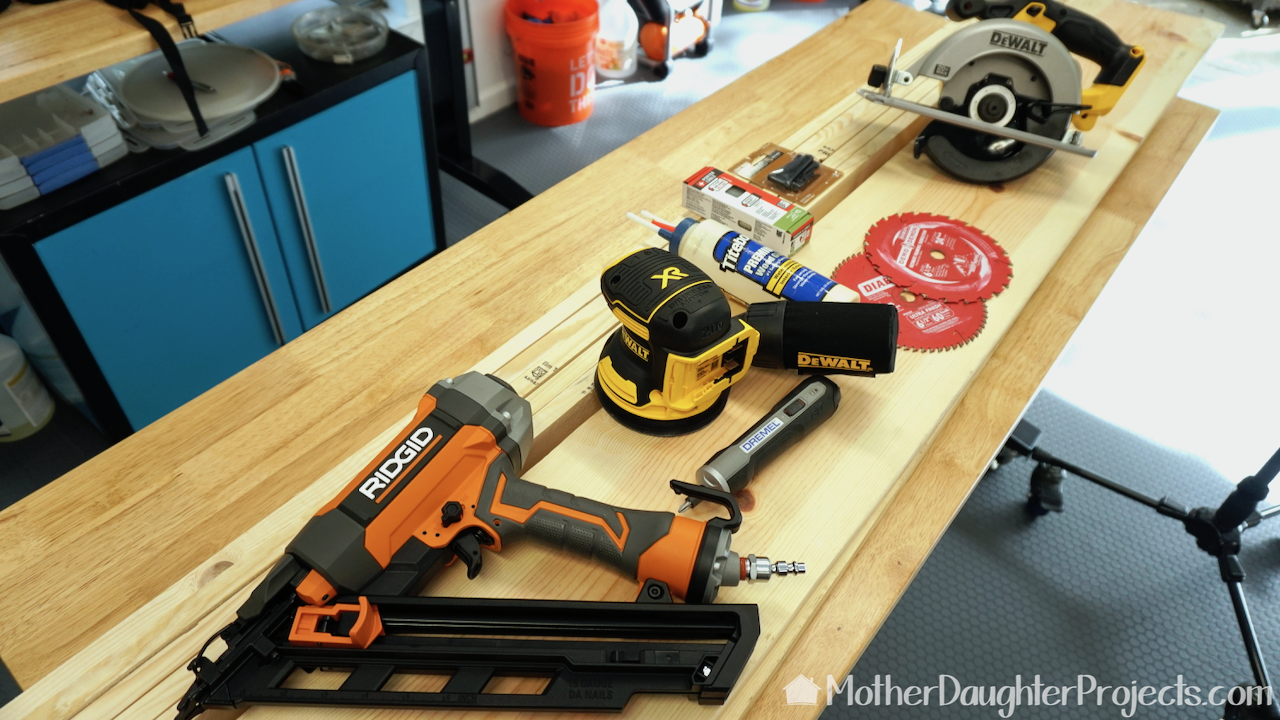
We got to try out a number of new tools on this build including the Ridgid framing nailer, DeWalt battery powered circular saw, and the new Dremel electric screwdriver.
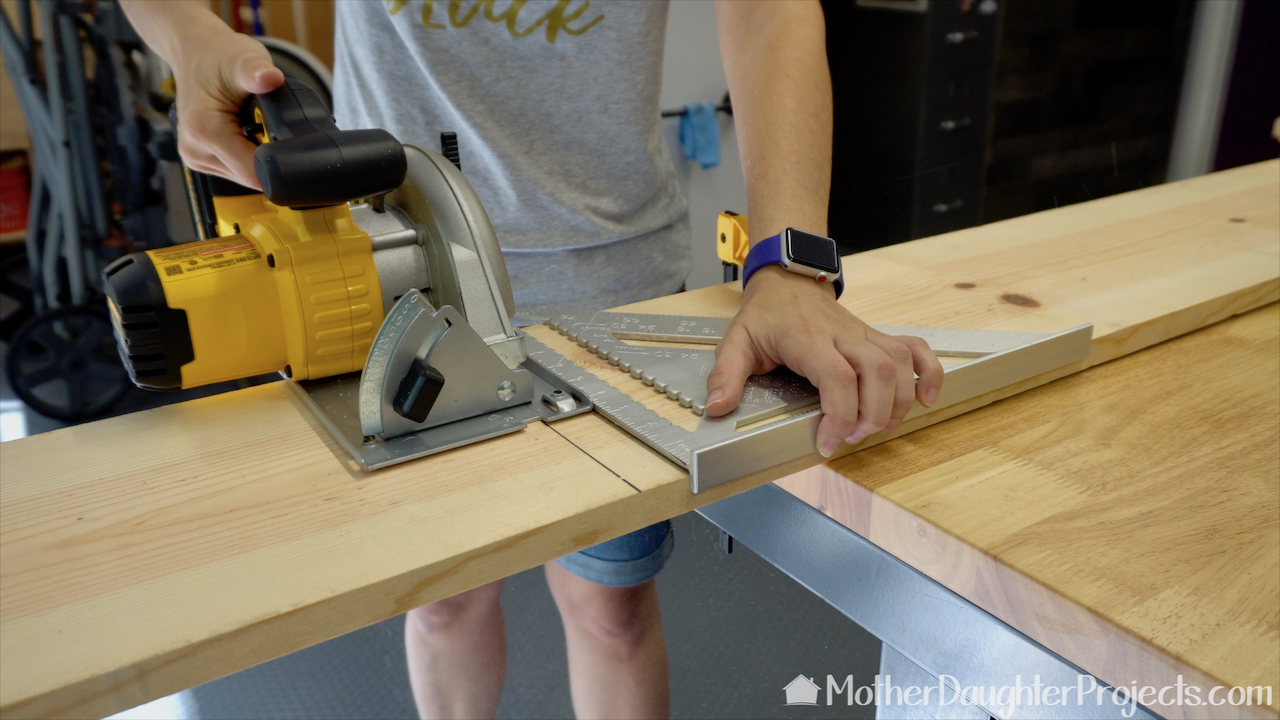
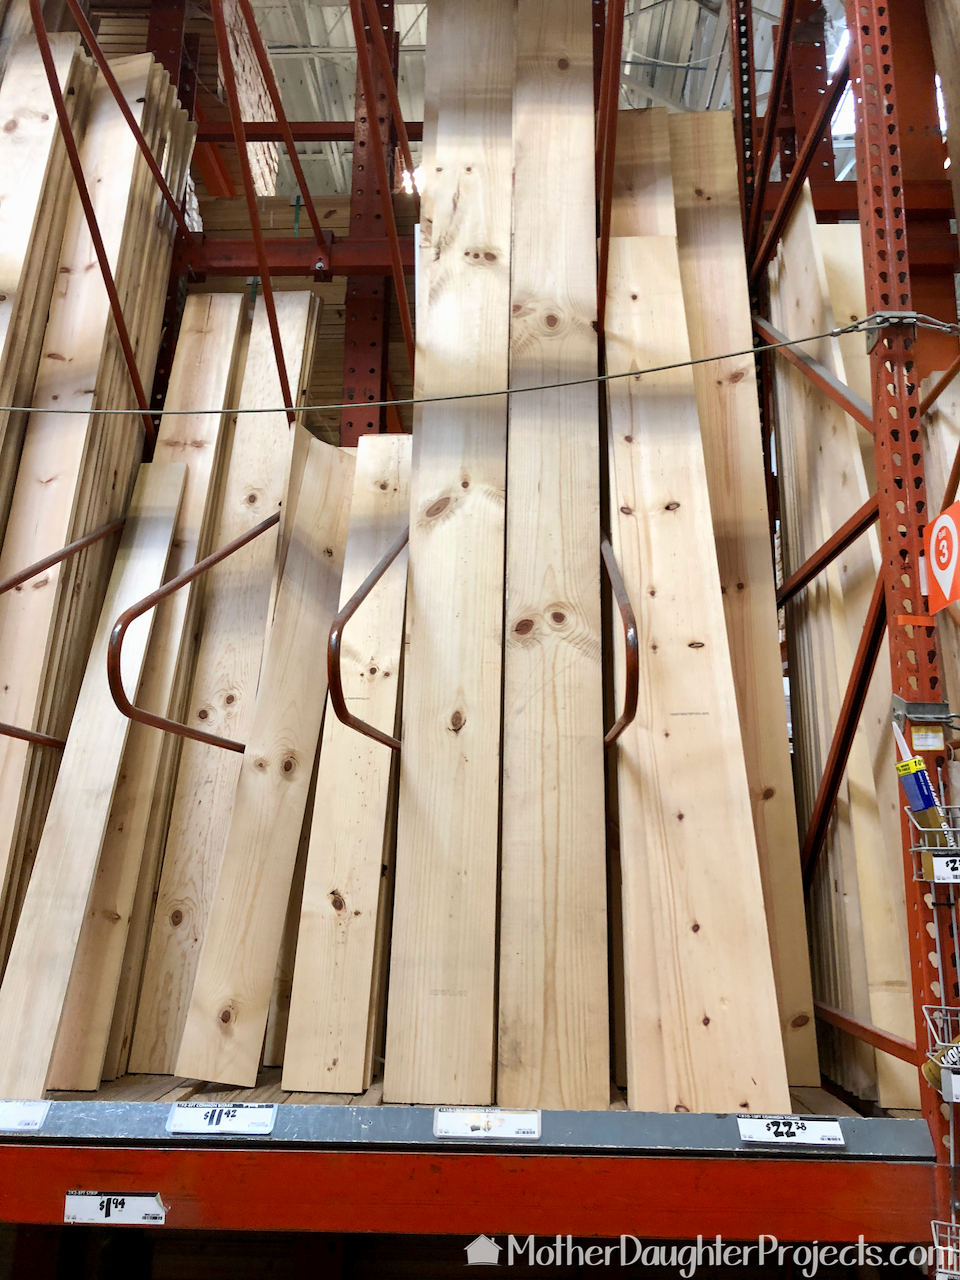
The first step was to measure and cut the shelves from the 12' board. We actually cut four, but only used the 4', 3 1/2', and 2 1/2' boards. The DeWalt circular saw was fitted with the Diablo blade to make the cuts. A good tip is to use a large metal carpenter's square to help keep your cut straight. It acts like a fence to aide in cutting.
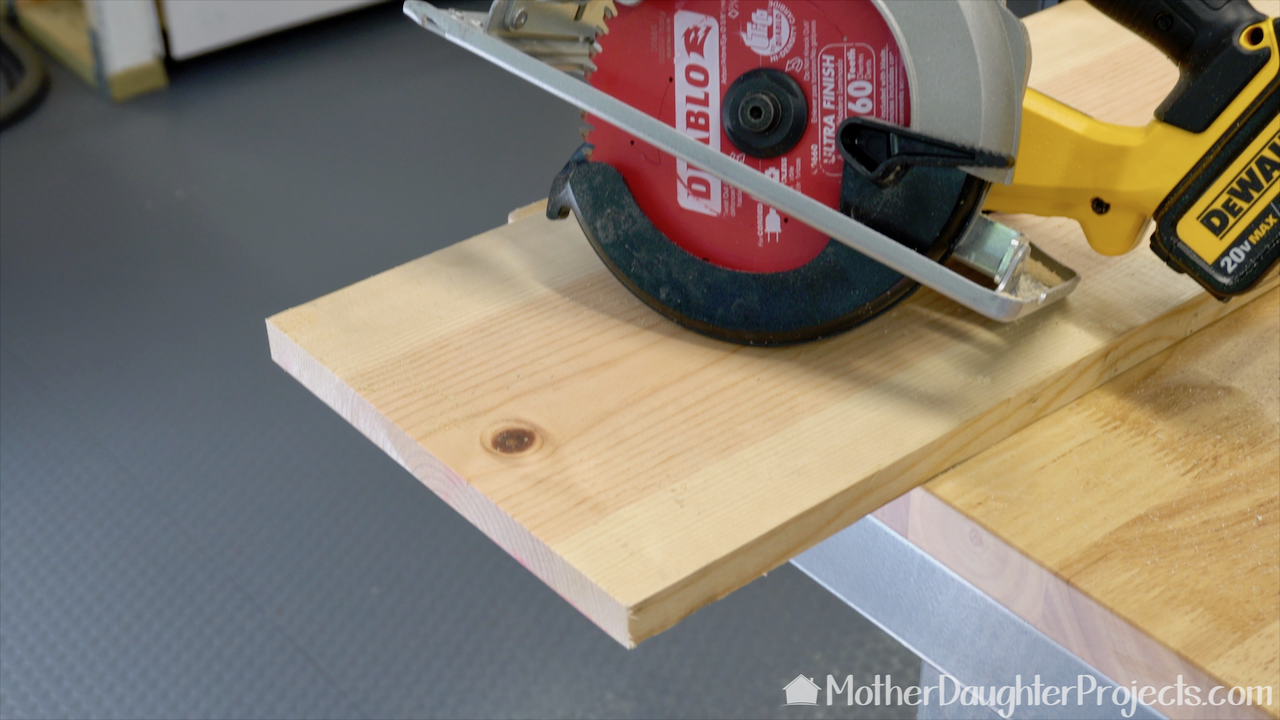
A good quality blade insure a nice clean cut. Tip: be sure you install the blade in the proper direction. Made sure the arrow on your blade guard is the same direction as the arrow on the blade.
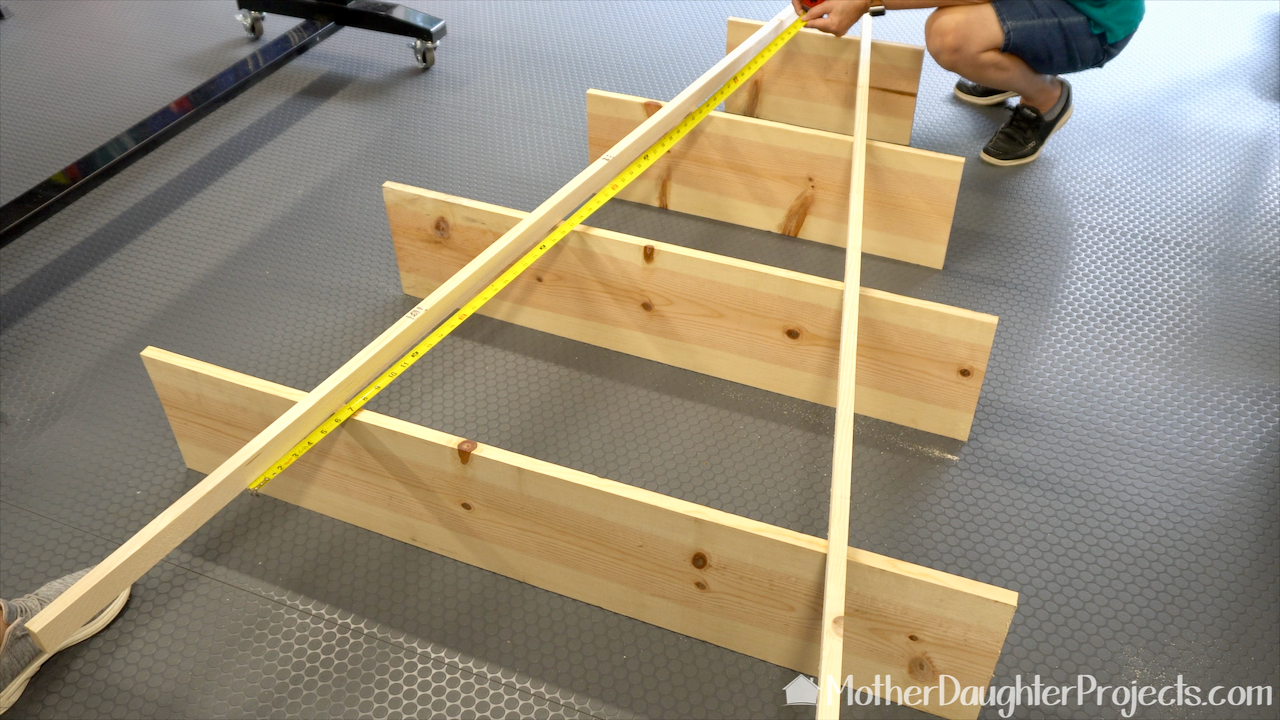
Before cutting the legs to length, we placed the boards on the floor to determine the spacing we wanted.
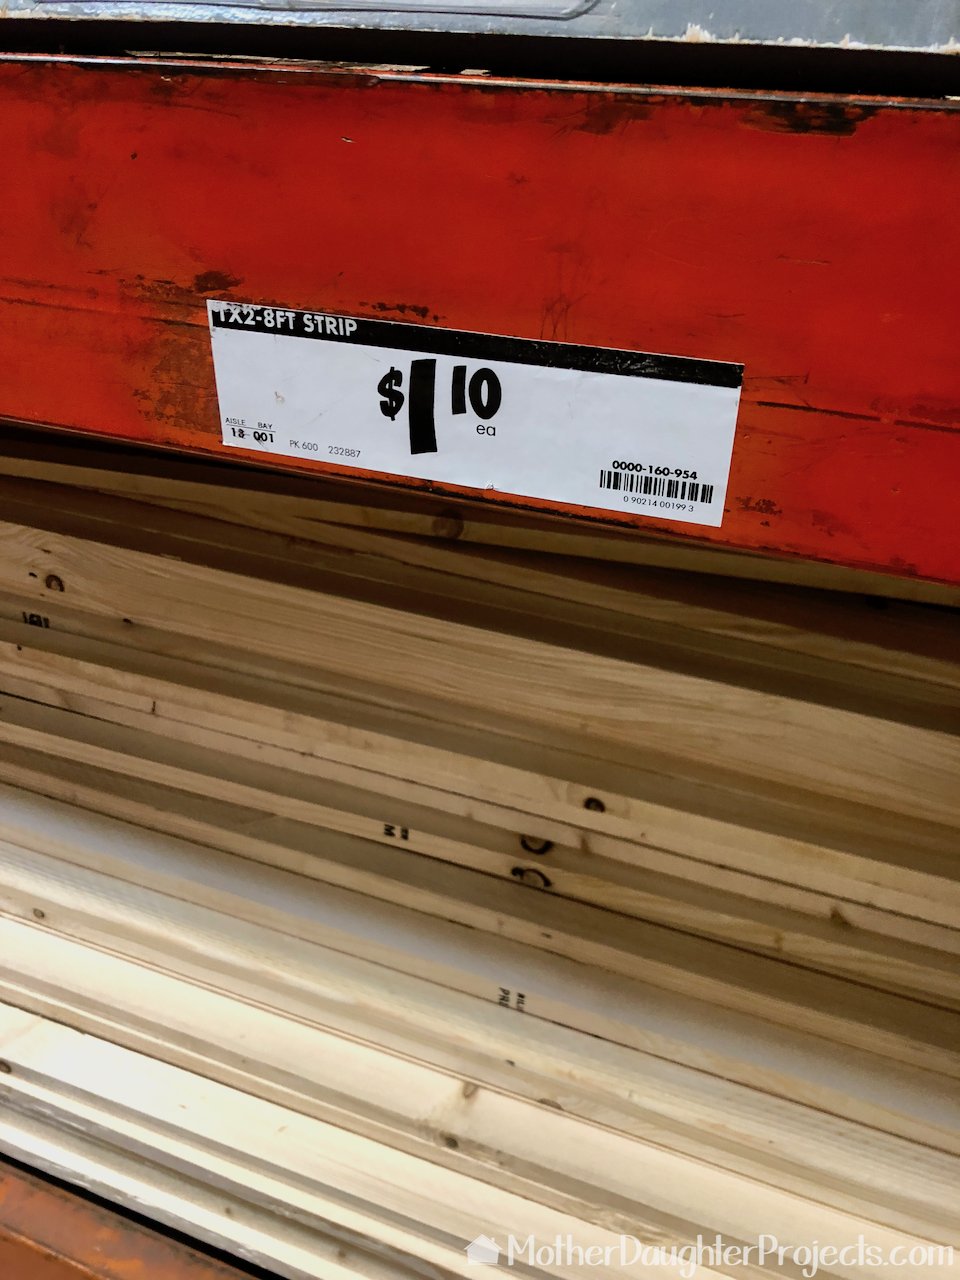
The 8' strips were cut (4) to 70" and (14) to 13" for the cross bars.
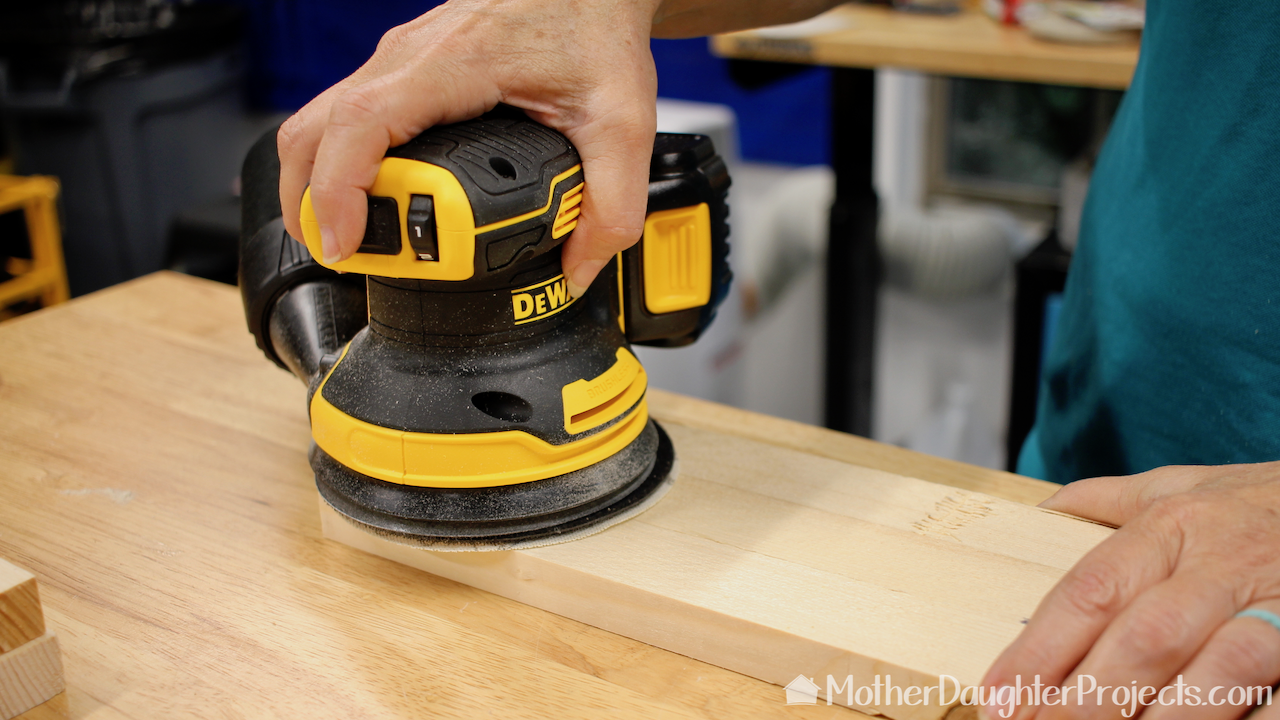
This DeWalt battery powered orbital sander is small but powerful. You can change the speed based on what you are sanding. The Diablo SandNet discs we really like, fit perfectly. I never thought a battery powered sander would replace my corded one, but this one has!

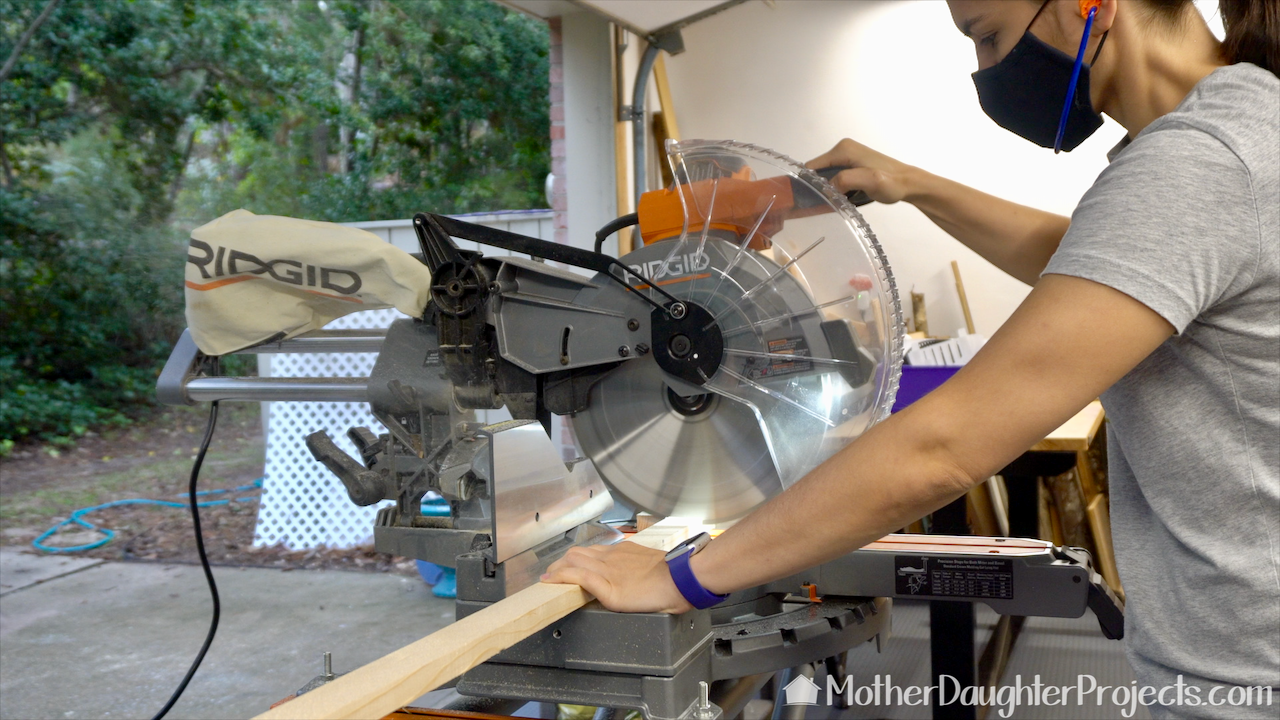
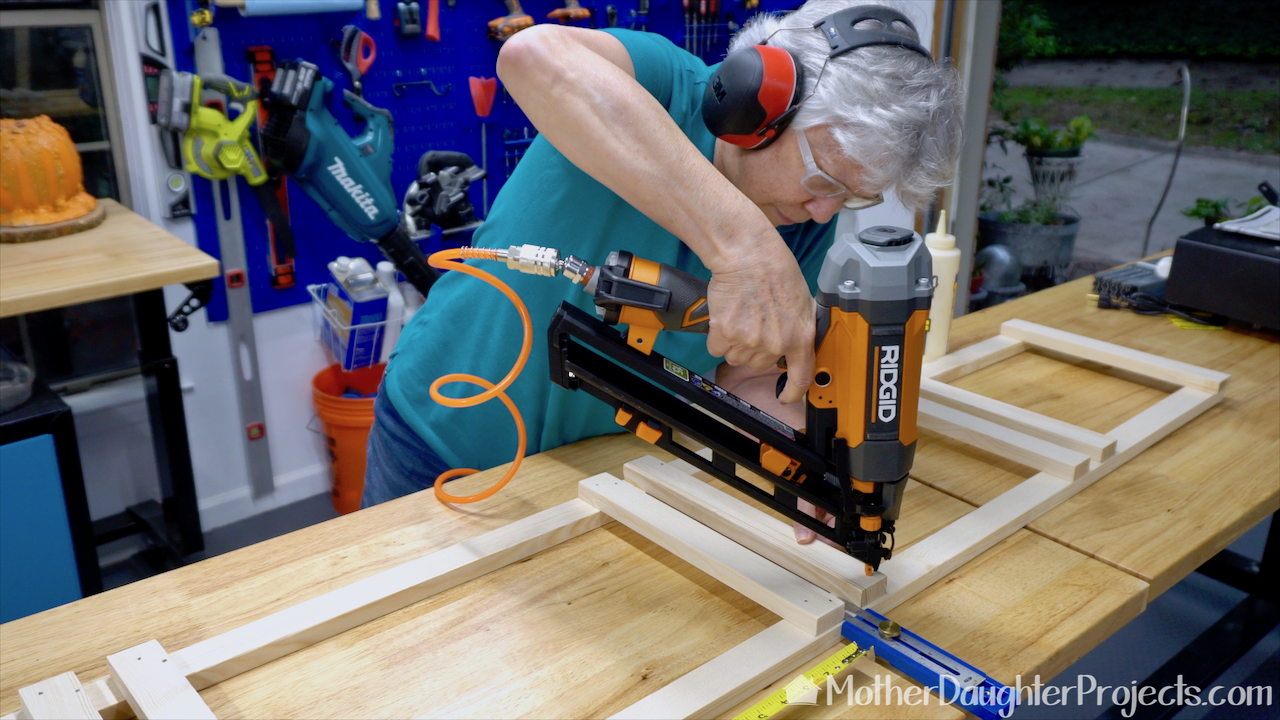
Once all 14 of the 13" long cross bars were cut, we started to assemble. All the pieces were glued and then nailed into place.
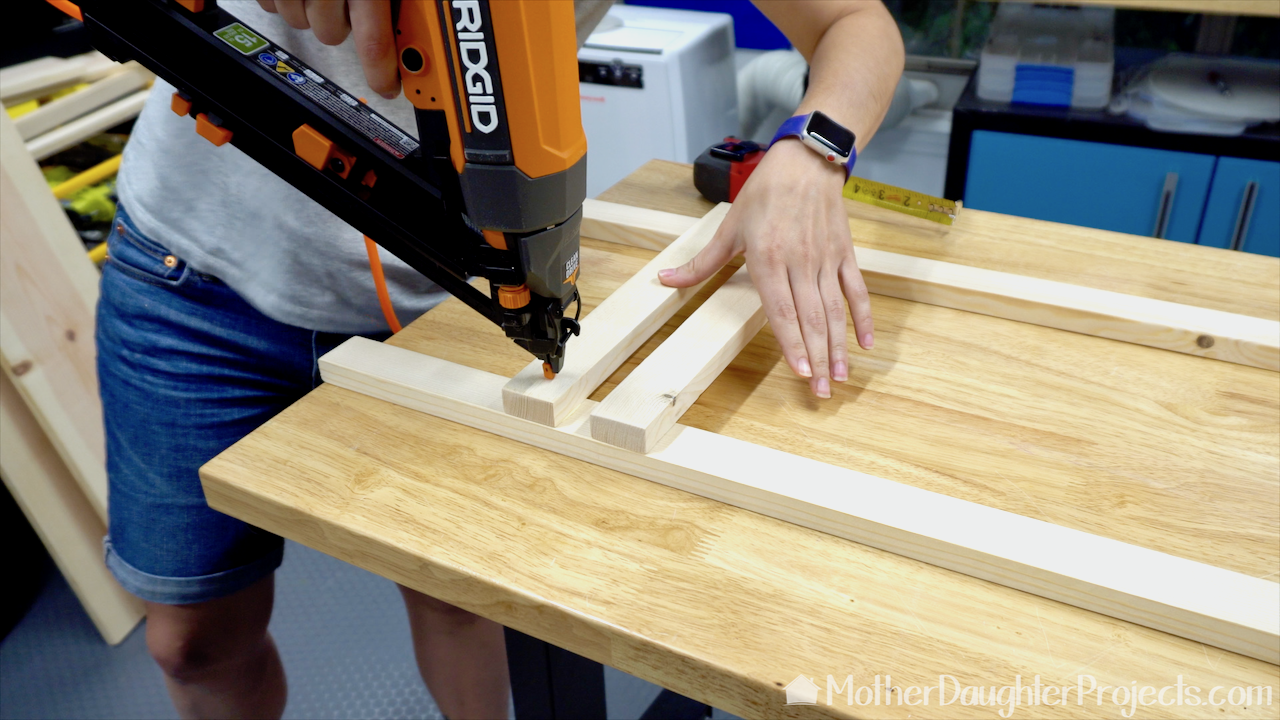
We used the Ridgid pneumatic (powered by a compressor) finish nailer to secure our cross bars to the legs. The two cross bars are 1" apart, although we think 1 1/2" might have been better. The design of this ladder lends itself to customization by the builder. You can build more or fewer shelves depending on what you are displaying.

This is the Ridgid compressor we used. Because of the large tank capacity, we were able to drive all the nails before it ever had to refill.
I had to get in on the action. This looks like a big, scary tool, but it was so much fun to use! There's a bit of weight to it, but that's not really an issue even for a weakling like me!
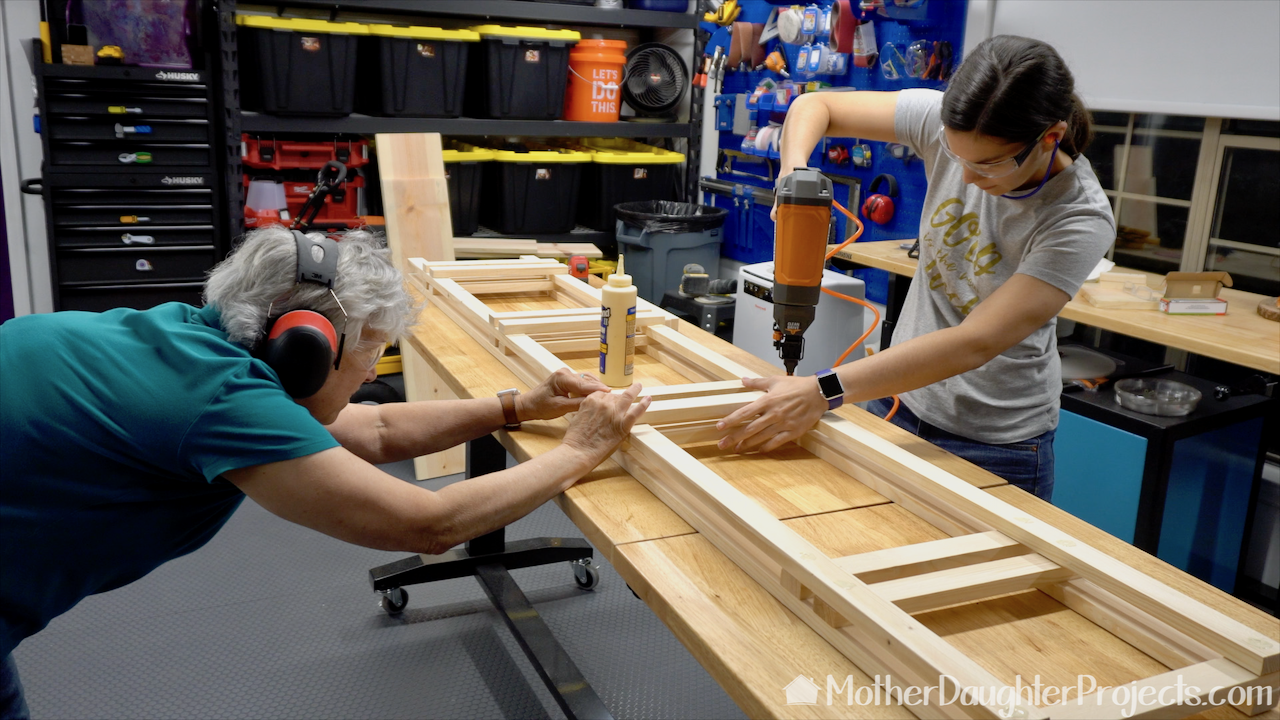
The second ladder section went together really quickly. We put the new parts on the top of the one we finished and just eyeballed the placement of the cross bars. This technique seemed to work well enough.

Prior to staining, we used a pre-stain conditioner on the shelves. It made such a difference in the way the stain went on. We also stained the bottoms of the shelves, but didn't use the conditioner. The bottoms, which you won't see on the finished tree, did not take the stain evenly at all. The conditioner is really worth the extra effort.
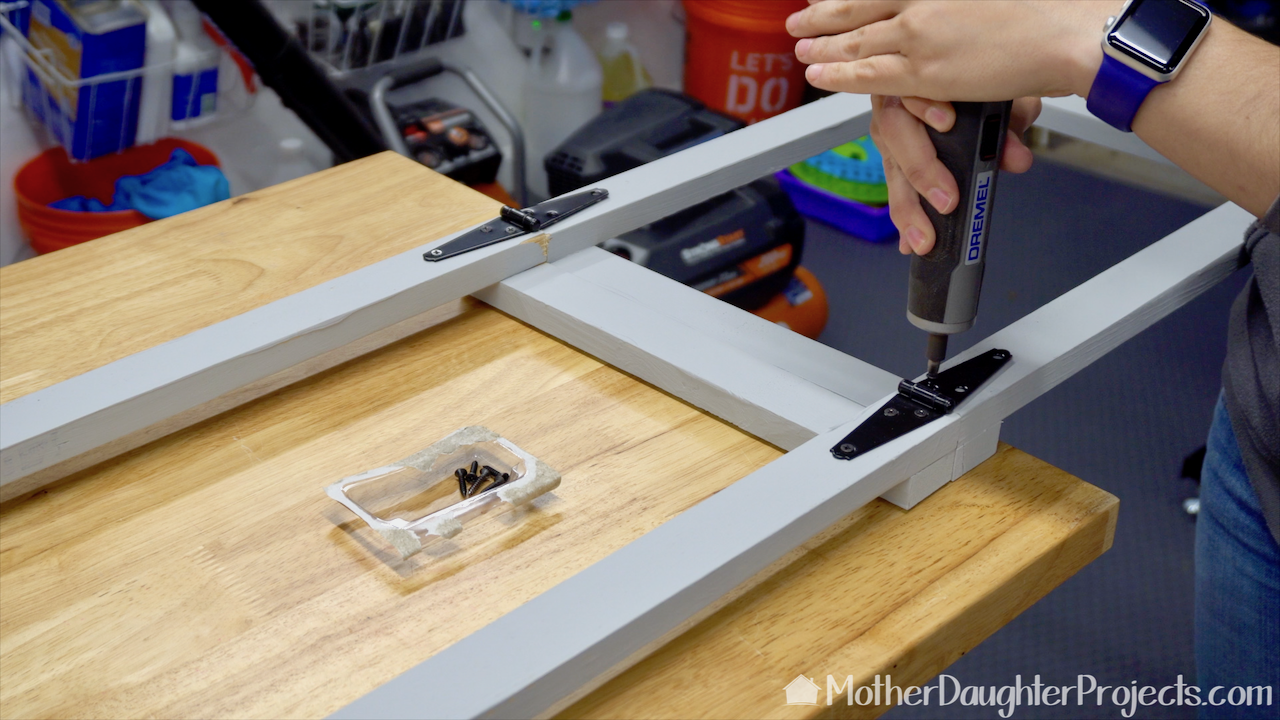
We added hinges so that the tree would fold for storage. We used the brand new Dremel electric screwdriver. It is so cool! To use it, you just press down and it automatically drives the screw! It is rechargeable via a USB cable.
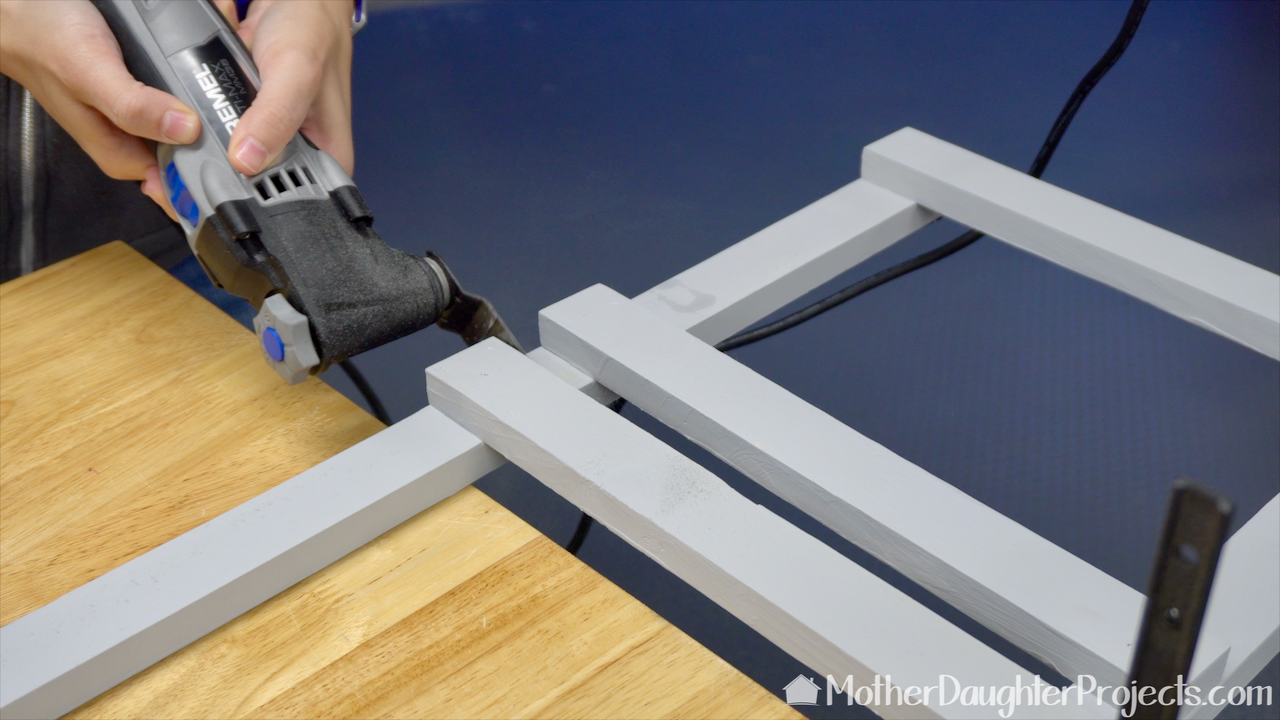
Cutting the top off

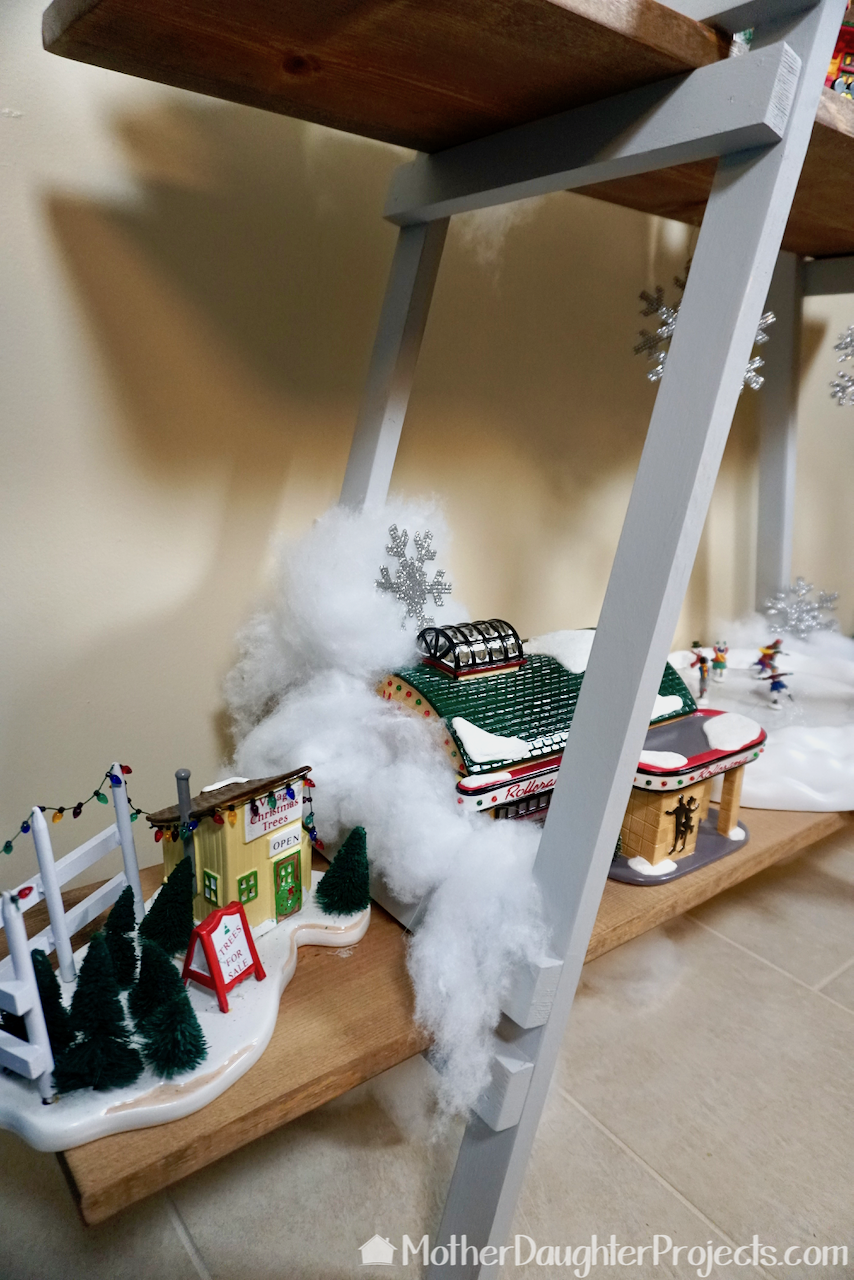
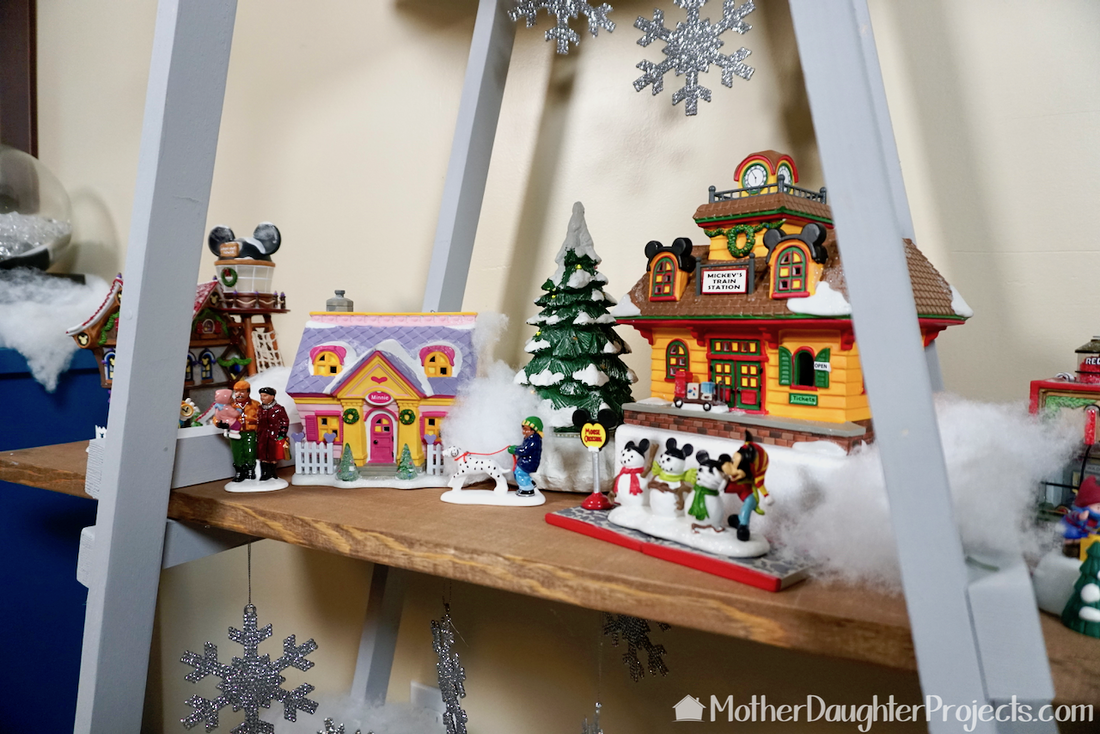
The tree is the perfect display place for my Christmas village.
I really like this year's alternative Christmas tree, especially since it gets to stay at my house this year! I'll be looking forward to swapping out my Christmas decor for my plants that need to winter inside.
What would you display on a ladder tree? We acknowledge that The Home Depot is partnering with us to participate in the ProSpective 2018 Campaign. As a part of the Program, we are receiving compensation in the form of products and services, for the purpose of promoting The Home Depot. All expressed opinions and experiences are our own words. Our post complies with the Word Of Mouth Marketing Association (WOMMA) Ethics Code and applicable Federal Trade Commission guidelines. FYI: We are not professionals, and we don’t claim to be. This is what we found worked for our project. Yours may need a little different approach. Safety first! FYI: Affiliate links are being used on this page. Purchasing via these links help support MDP! Related Projects
19 Comments
Steph
11/22/2018 02:18:41 pm
Thanks Carol!
David
11/5/2019 04:43:05 pm
The first step was to measure and cut the shelves from the 12' board. We actually cut four, but only used the 4', 3 1/2', and 2 1/2' boards. The DeWalt circular saw was fitted with the Diablo blade to make the cuts. A good tip is to use a large metal carpenter's square to help keep your cut straight. It acts like a fence to aide in cutting. WHAT ARE THE 4 DIFFERENT SIZES OF THE BOARDS. I know you only used 3 but can i have the measurements of the boards please. very nice ladder, you both make a great team
Vicki
11/6/2019 11:42:15 am
The board is a 12 feet and is 1" x 10" cut to 4 feet, 3 1/2feet, and 2 1/2 feet lengths. Hope that helps. Vicki
Rosina Savva
11/10/2019 10:56:10 pm
I am in the process of doing this project but used a stain that takes only 1 coat and dries in 1 hr and didn't need the stain prep.
Steph
11/11/2019 08:12:23 am
Great! Good luck with the project. We would love to see the project when you're done! https://www.motherdaughterprojects.com/trylearnshare
Tara
3/14/2020 04:39:07 pm
Hi - do the furring strips support a decent amount of weight? I’ve tried using them before and found them very ‘bendy’.
Steph
3/16/2020 08:18:05 pm
They did here. They do have bend when used in longer strips, but they worked fine in short sections.
Luann
4/12/2020 12:11:29 pm
Sorry...I am a little confused....when you decided your ladder was too tall & you cut the top of the ladder off, did you then have to remove & reinstall the hinges? Also, I am following up on the 11-5-19 question.....there are 4 boards on the original ladder, I understand you took the top board off but what are the measurements for that top 4th board? Unless I am reading directions wrong, it does not seem clear to me. Thank you! Great project!
Sonia
9/25/2020 05:01:39 pm
The fourth shelf must be 2 feet.
vicki
9/16/2021 12:32:02 pm
Yes, we reinstalled the hinge. That fourth board we did not use was probably 1 1/2 feet.
Cynthia Hampton
9/15/2021 07:28:36 am
Can you tell me what the measurements are of the finished project please?
vicki
9/16/2021 12:33:03 pm
I don't have the exact measurements, but the longest board is four feet wide. It is probably just under six feet tall.
Cyndi
7/2/2022 01:06:01 pm
Thank you
Neno
7/5/2022 10:49:39 am
We do not own a nail gun. How do you suggest fastening the crossbars? Nails or screws? Length?
Steph
7/5/2022 02:44:42 pm
Screws would probably be easiest.
Patrick Goff
12/3/2022 02:33:43 pm
Curious what the angle was you used to cut the bottom of the long pieces so they would sit flush on the ground?
Vicki
12/3/2022 05:13:29 pm
I looked back at the post and saw that we didn't angle the legs so they don't actually sit flush to the ground. You could angle them, but it works fine without cutting angles.
Patrick Goff
12/4/2022 10:02:15 am
Thanks. Leave a Reply. |

Mother Daughter Projects
|