Mother Daughter Projects

  • About
    • Contact
    • Privacy Policy
  • Maintenance
  • Improvement
  • Decor
  • Tech
  • Tools
  • About
    • Contact
    • Privacy Policy
  • Maintenance
  • Improvement
  • Decor
  • Tech
  • Tools

DIY for Homeowners

Concrete Bookends & Tealights

8/29/2016

0 Comments

 
​text by Vicki     ​Sign up to get Mother Daughter Projects updates in your email!
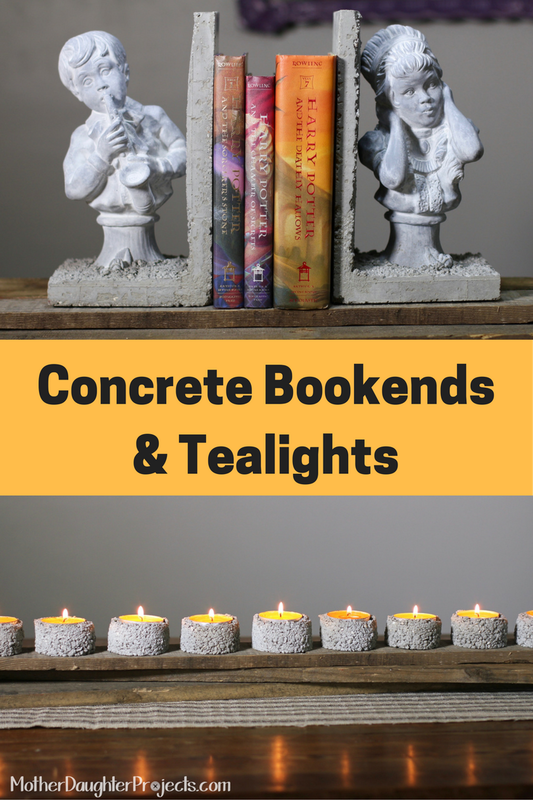
We were so pleased with our first concrete project that we decided to make more! Concrete really lends itself to creative expression. 

The same weekend I found the silicone bundt pan we used in the concrete lamp, I also found these vintage 1971 statues. At .50 cents for the pair, I knew they were coming home with me as I thought they might lend themselves to a concrete makeover of some sort. 
Concrete Bookends. MotherDaughterProjects.com
Materials/Tools:
  • Concrete (already sifted of large rocks)
  • Plastic mixing bowls
  • Trowel
  • Water
  • Plastic building bricks (We used faux Duplos)
  • Plexiglass scrap
  • Hardware cloth
  • Tin snips
  • Gloves

  • Rockler Gluing Brush
  • Plastic wrap
  • Quikcrete Quick-setting cement
  • Vintage statues (there are lots of these on eBay)
  • Flat gray spray paint
  • White Milk Paint
  • T-shirt rags
Concrete Bookends. MotherDaughterProjects.com
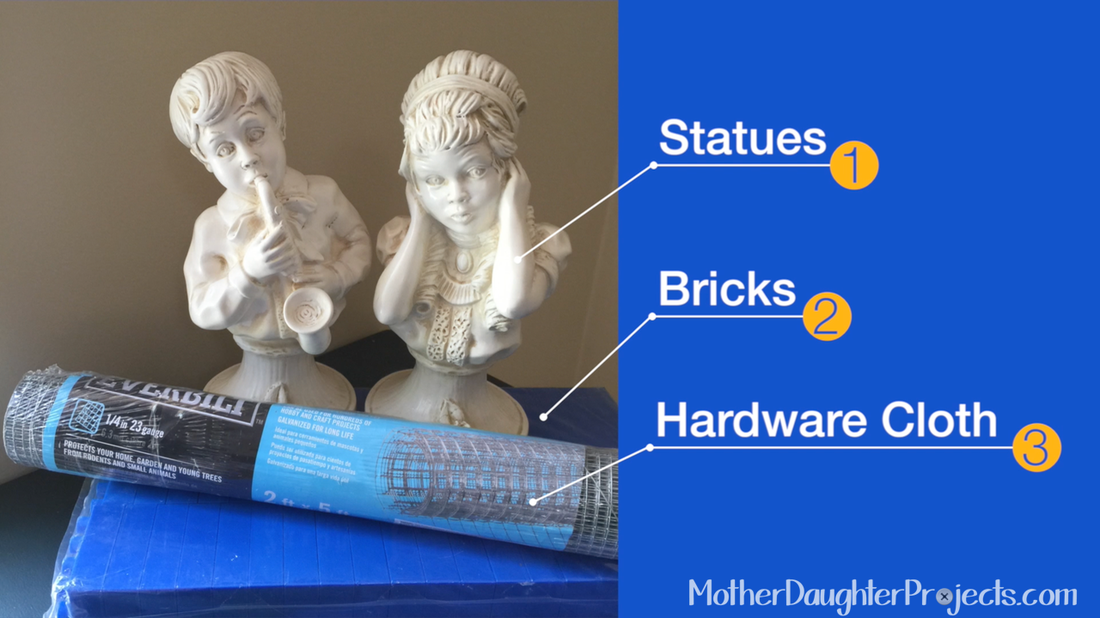
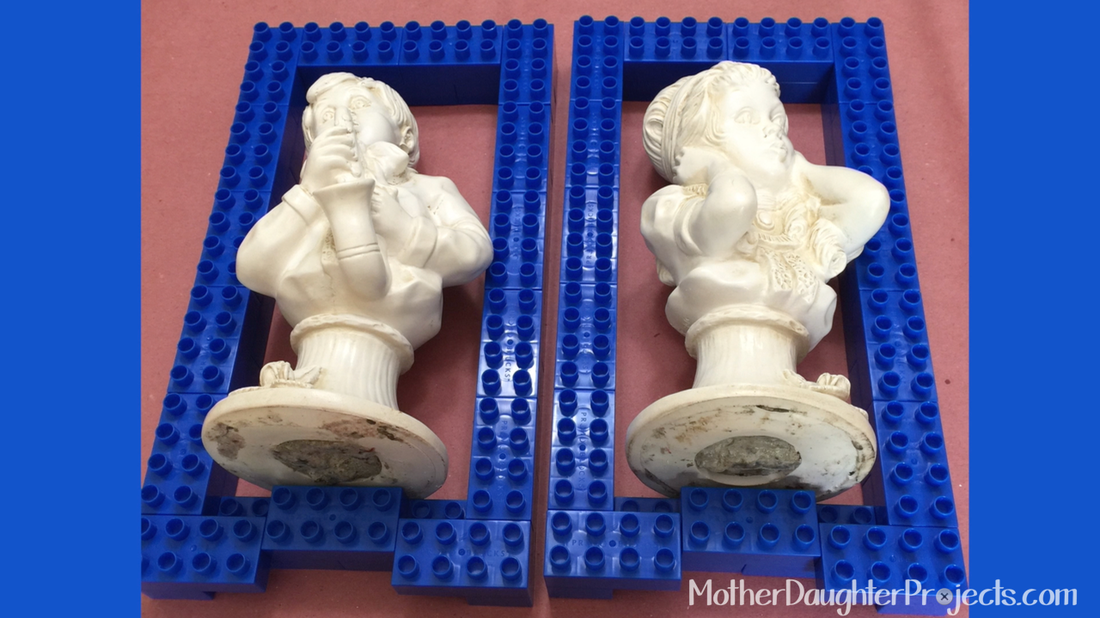
Create the concrete molds. Lay statues on side to determine height and width of mold.
Concrete Bookends. MotherDaughterProjects.com
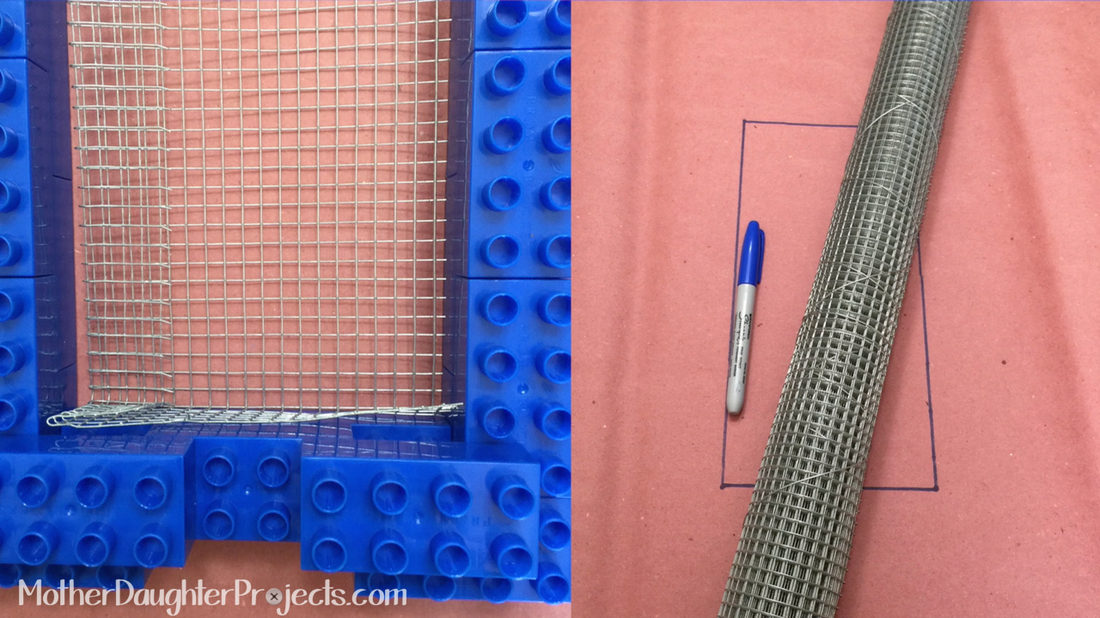
Cut the hardware cloth slightly smaller than the interior of the mold but about one inch taller. Bend the extra length into an “L” shape.
Concrete Bookends. MotherDaughterProjects.com
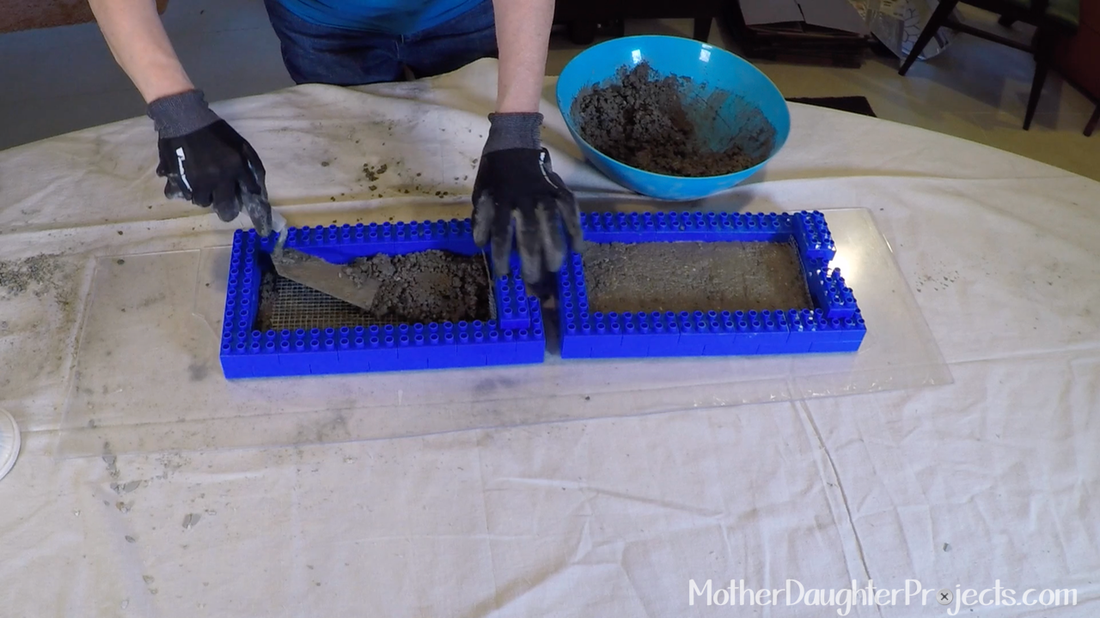
Mix up the concrete. Place the mold onto a scrap of plexiglass. Spread a thin layer of concrete into the mold and lay the hardware cloth into the mold with the short part of the “L” facing up and even with the side of the mold. Continue to add concrete evenly into the mold one brick high.
Concrete Bookends. MotherDaughterProjects.com
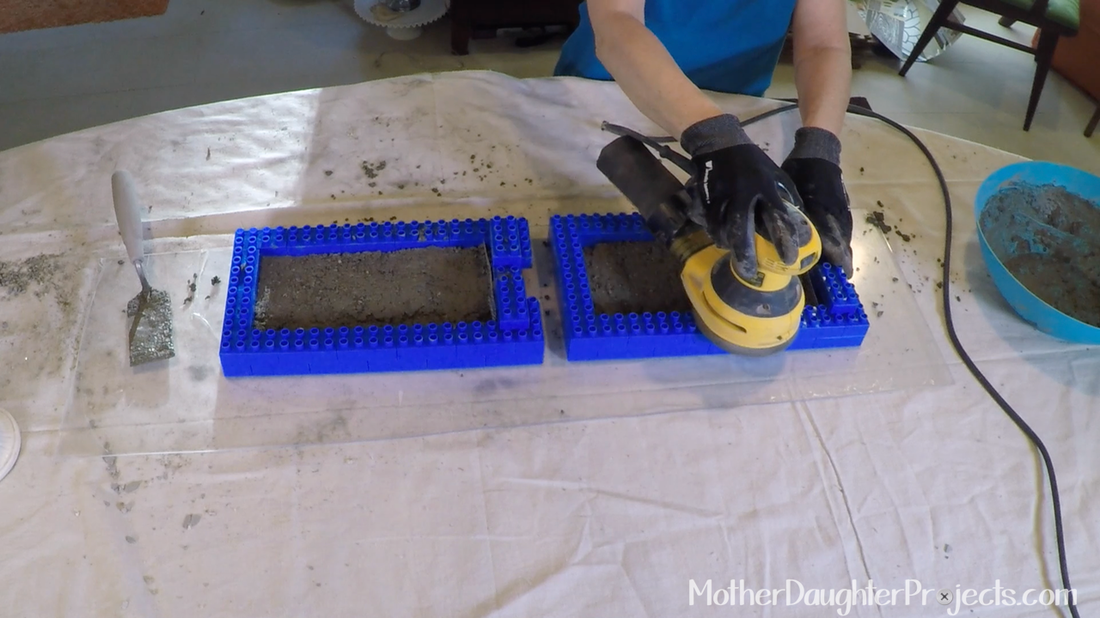
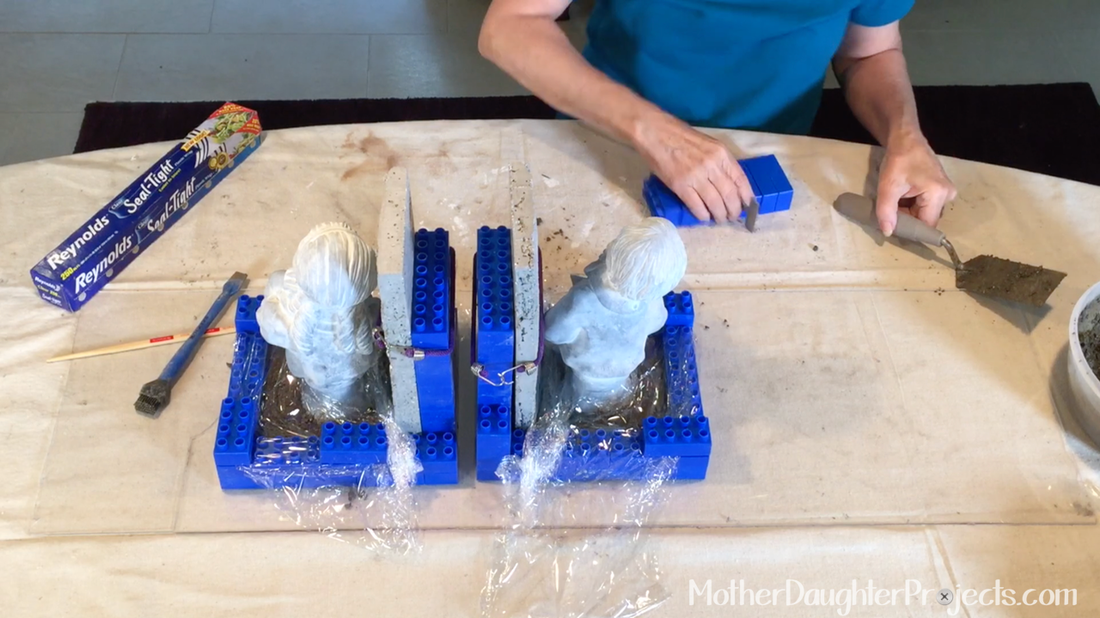
Vibrate with a sander (no sandpaper attached) to remove air bubbles and cover with plastic wrap.
Concrete Bookends. MotherDaughterProjects.com
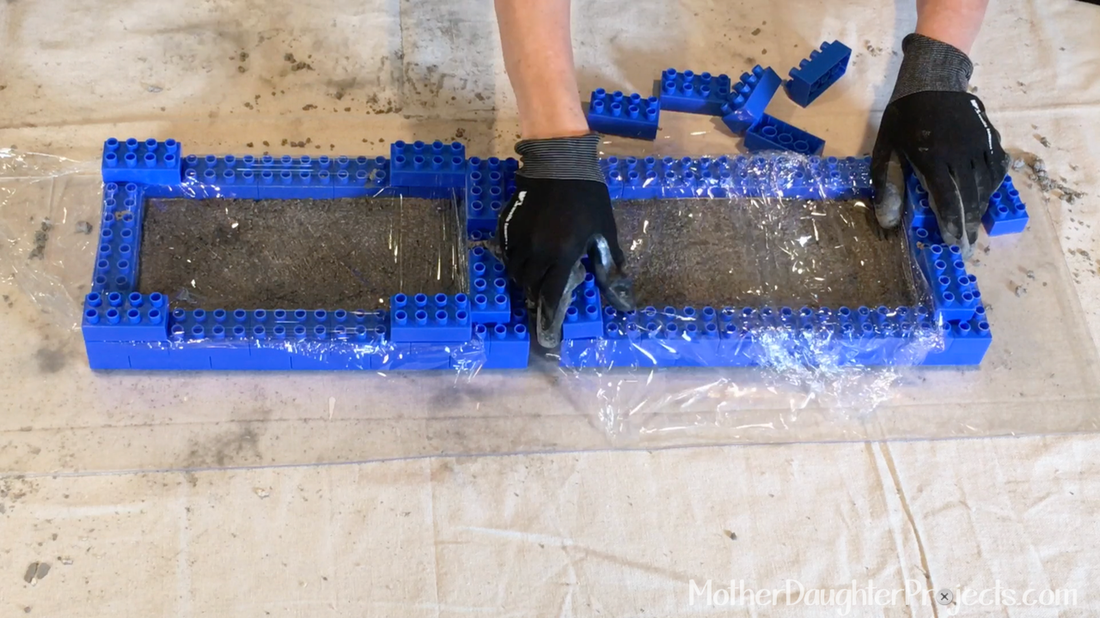
Remove from mold after 20 hours.
Concrete Bookends. MotherDaughterProjects.com
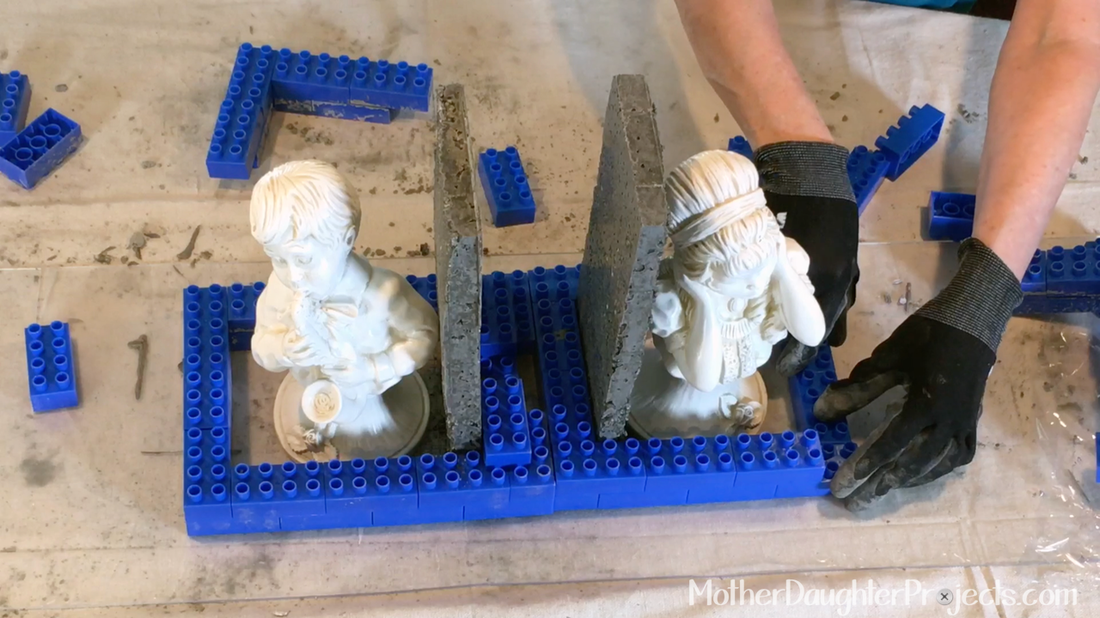
Place this piece vertically into the mold with the exposed edge of the hardware cloth at the bottom, add the statue and adjust the size of the mold.
Concrete Bookends. MotherDaughterProjects.com
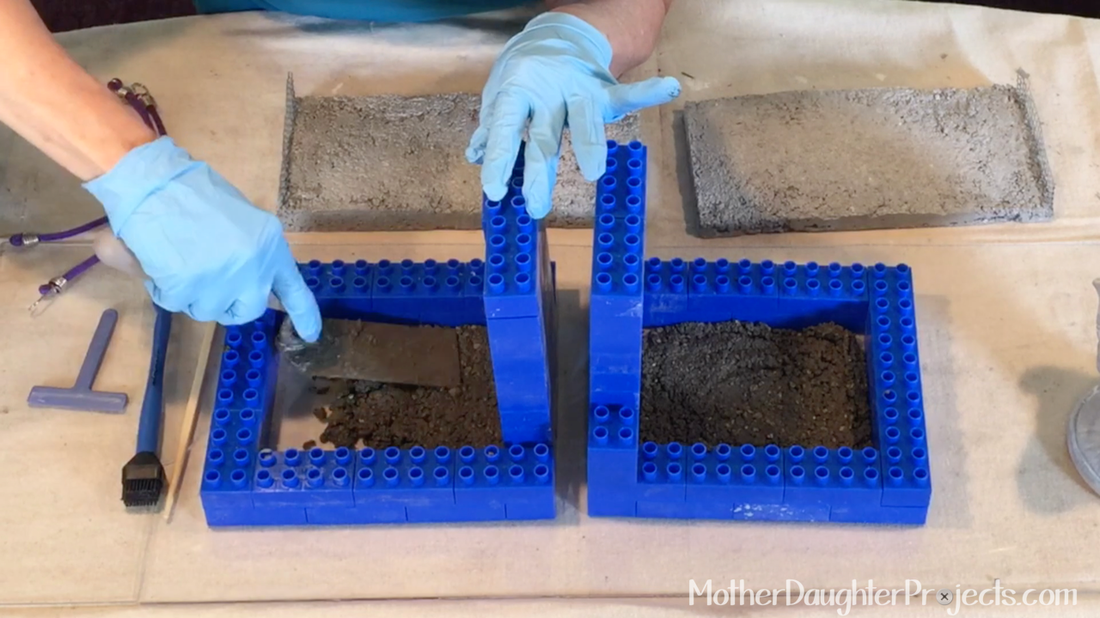
Add a thin layer of concrete to the molds.
Concrete Bookends. MotherDaughterProjects.com
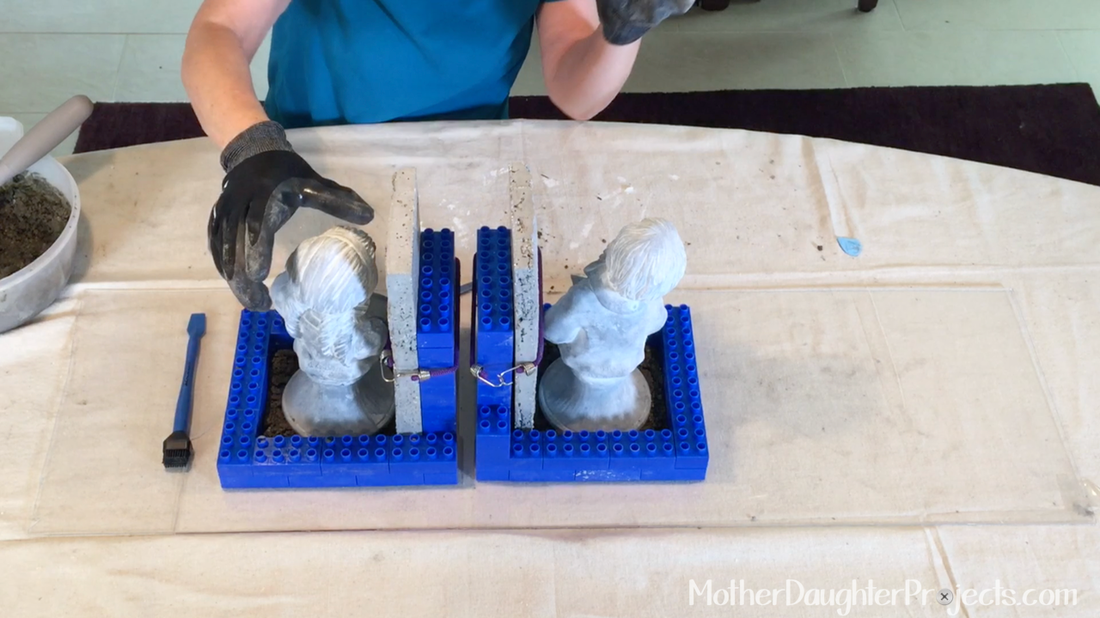
Place vertical concrete and statues back. Add concrete to the base and smooth.
Concrete Bookends. MotherDaughterProjects.com
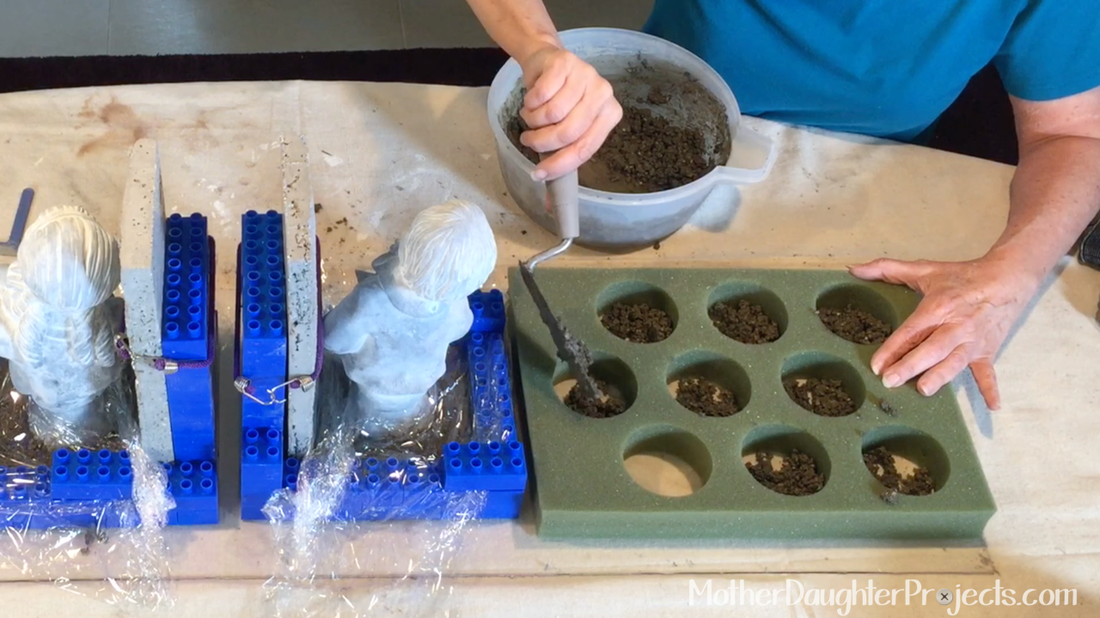
With the leftover concrete, we made concrete candle holders using the foam insert from some Harry & David peaches and some large tealights we got from Ikea.
Concrete Bookends. MotherDaughterProjects.com
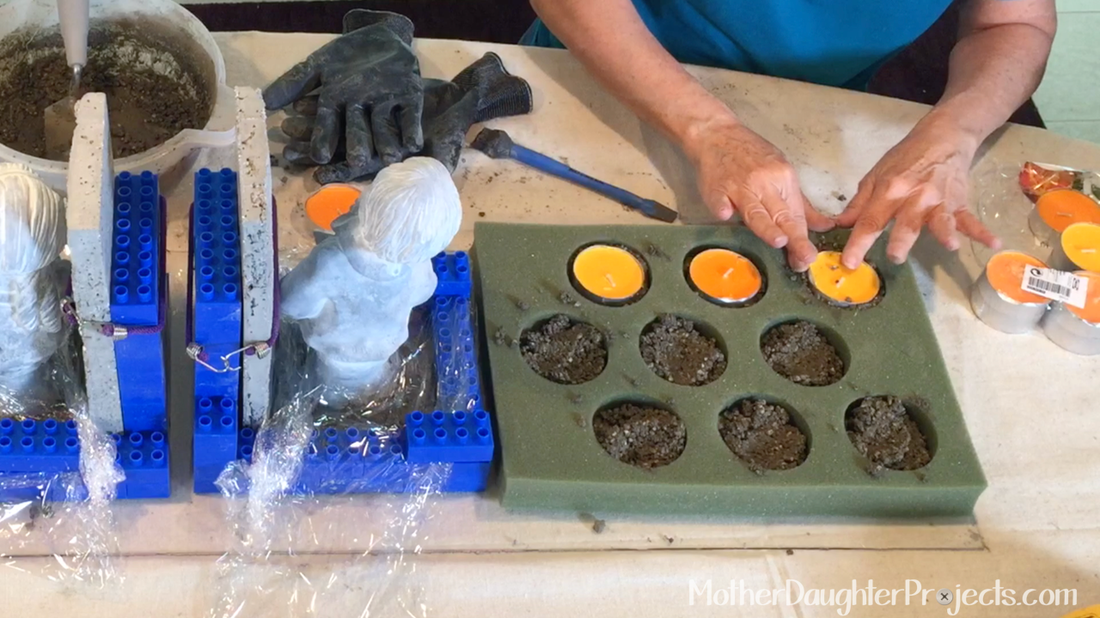
We simply mixed up the concrete, added a thin layer to the foam inserts which was sitting on the same plexiglass as the bookends. We then mixed in additional rock that we previously sifted out to see what kind of look they would produce and added this layer to the foam inserts.
Concrete Bookends. MotherDaughterProjects.com
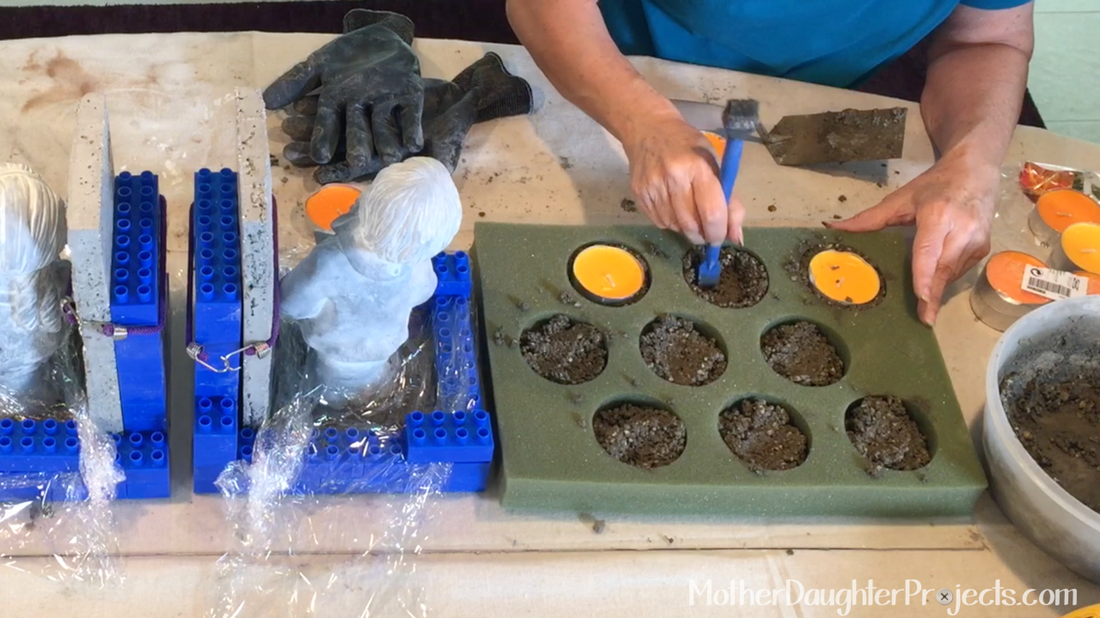
The Rockler gluing brush helped to carve out spaces for the tealights to nestle into. Once all the inserts were filled, the whole thing was covered with plastic wrap.
Concrete Bookends. MotherDaughterProjects.com
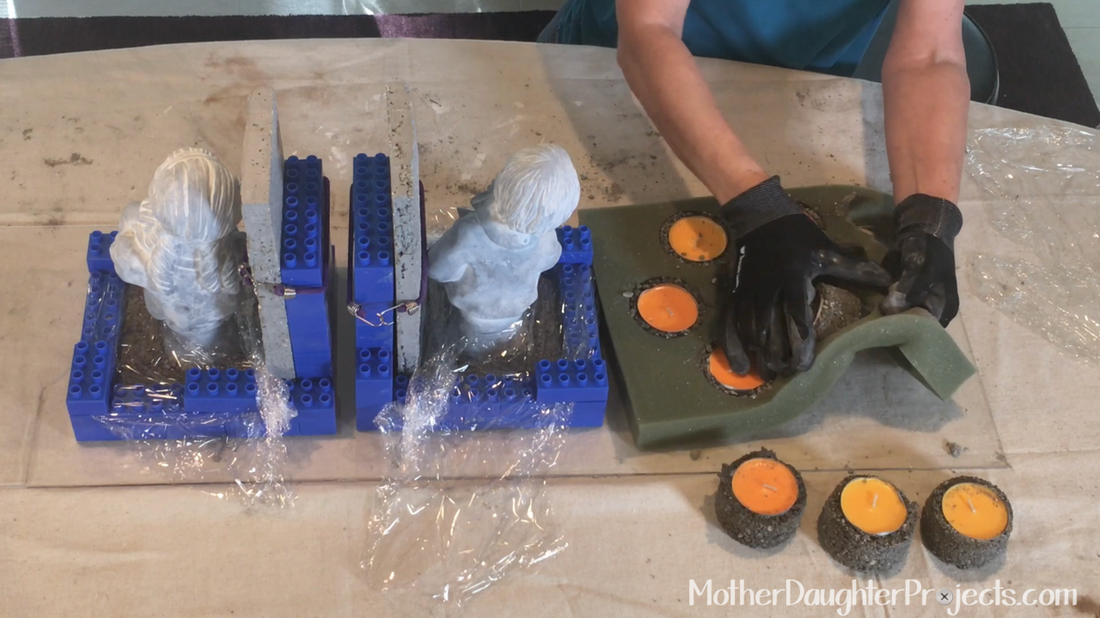
20 hours later, we removed them from the molds.
Concrete Bookends. MotherDaughterProjects.com
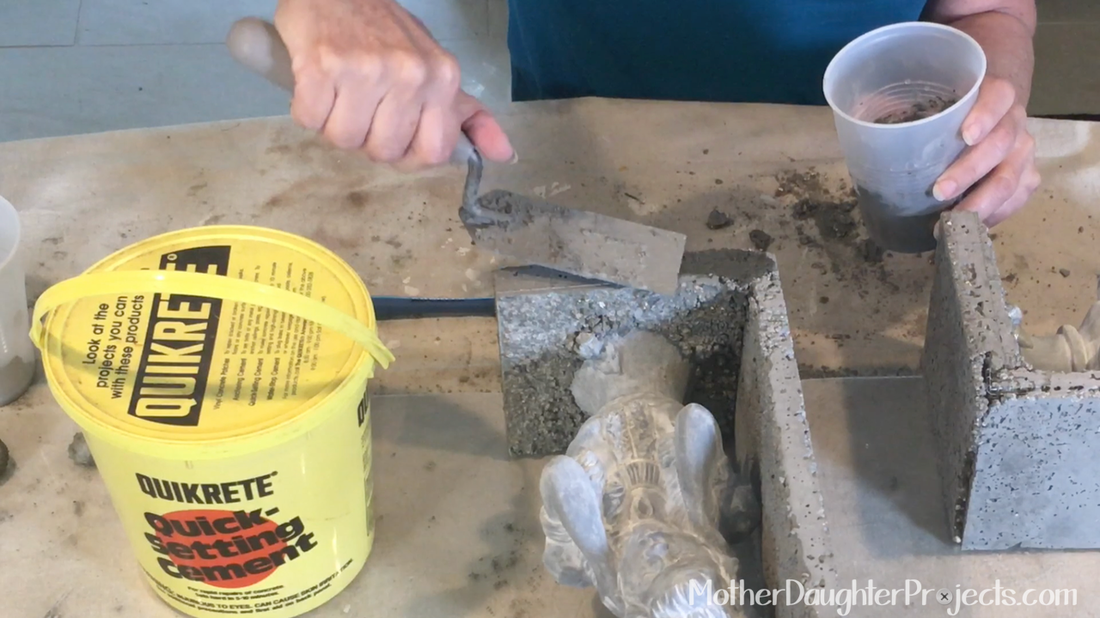
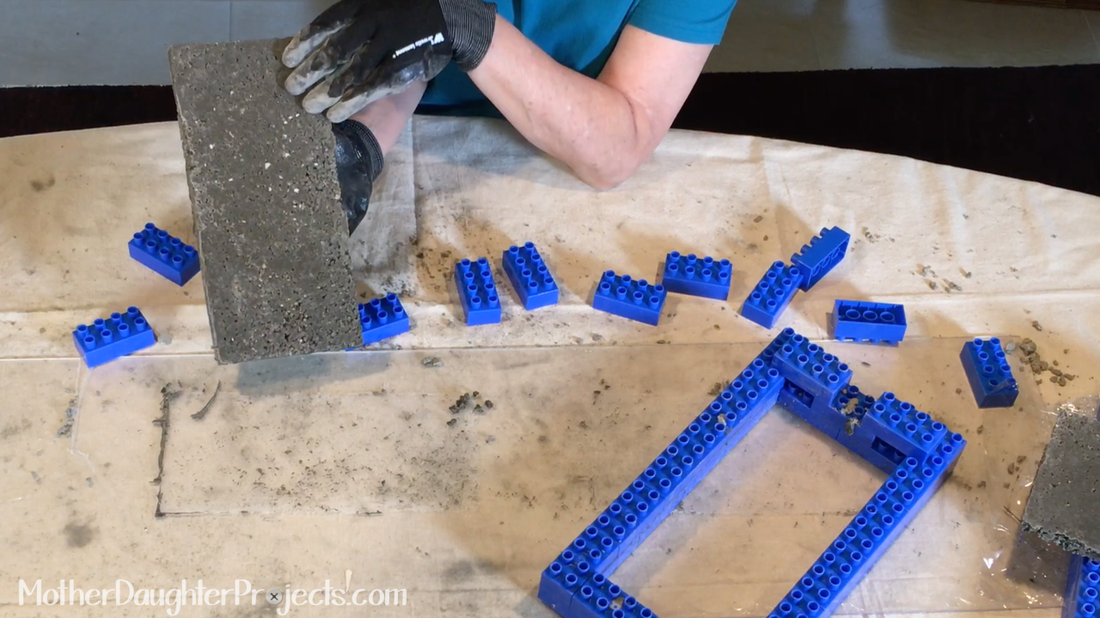
We removed the bookends from the molds and noticed they need a little extra concrete in some places. We used a quick-setting cement to fill in.
Concrete Bookends. MotherDaughterProjects.com
I fully intended for the bookends to live on top of my piano since they are music themed, but for some reason they ended up staying at Steph’s house! :)

The tea light candleholders were so easy and the foam insert actually worked quite well. Once you start working with concrete, you will  start to see everyday objects in terms of their concrete casting potential. 

What would you use as a concrete mold?

Please note: We are not sponsored by any of the companies/products that we used. These products were picked and bought by us.

FYI: We are not professionals, and we don’t claim to be. This is what we found worked for our project. Yours may need a little different approach. Safety first!

FYI: Affiliate links are being used on this page. Purchasing via these links help support MDP!

Related Projects

MotherDaughterProjects.com
Concrete Light Bulb Lamp
MotherDaughterProjects.com
DIY Bucket A/C
MotherDaughterProjects.com
Garbage Disposal Fix
0 Comments


Leave a Reply.

    MotherDaughterProjects.com

    Mother Daughter Projects
    ​
    Steph & Vicki

    MotherDaughterProjects.com
Mother Daughter Projects, LLC ∙ est. 2015 ∙ Tallahassee, FL by Vicki & Steph ∙ Privacy Policy