Mother Daughter Projects

  • Blog
  • About
    • Contact
    • Privacy Policy
  • Tools
    • Tool Tuesday
  • Maintenance
  • Improvement
  • Decor
  • Tech
  • Blog
  • About
    • Contact
    • Privacy Policy
  • Tools
    • Tool Tuesday
  • Maintenance
  • Improvement
  • Decor
  • Tech

DIY for Homeowners

Concrete Light Bulb Lamp

8/25/2016

5 Comments

 
​text by Vicki     ​Sign up to get Mother Daughter Projects updates in your email!
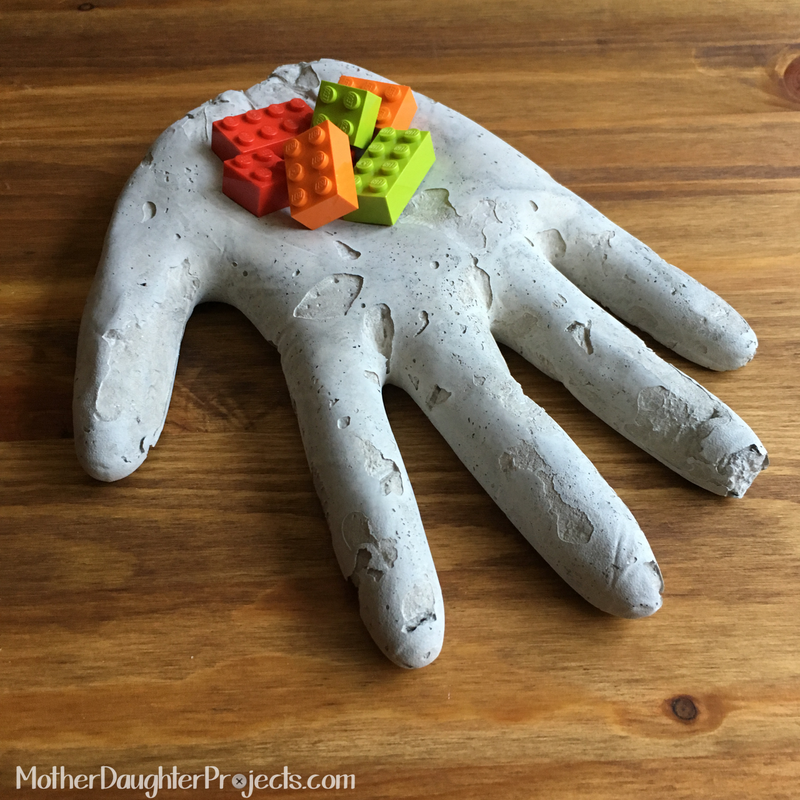
​One of the classes Steph took at the Haven DIY Conference was learning how to cast with concrete. The class, sponsored by Quikrete, was taught by blogger, Ben of Home-Made Modern, the guru of all things concrete! Steph made this fun concrete hand in the class (see below).
Concrete Light Bulb Lamp. MotherDaughterProjects.com
Once home, we decided to put into practice what she had learned. Steph also took a concrete class on the DIY website Instructables.com. 

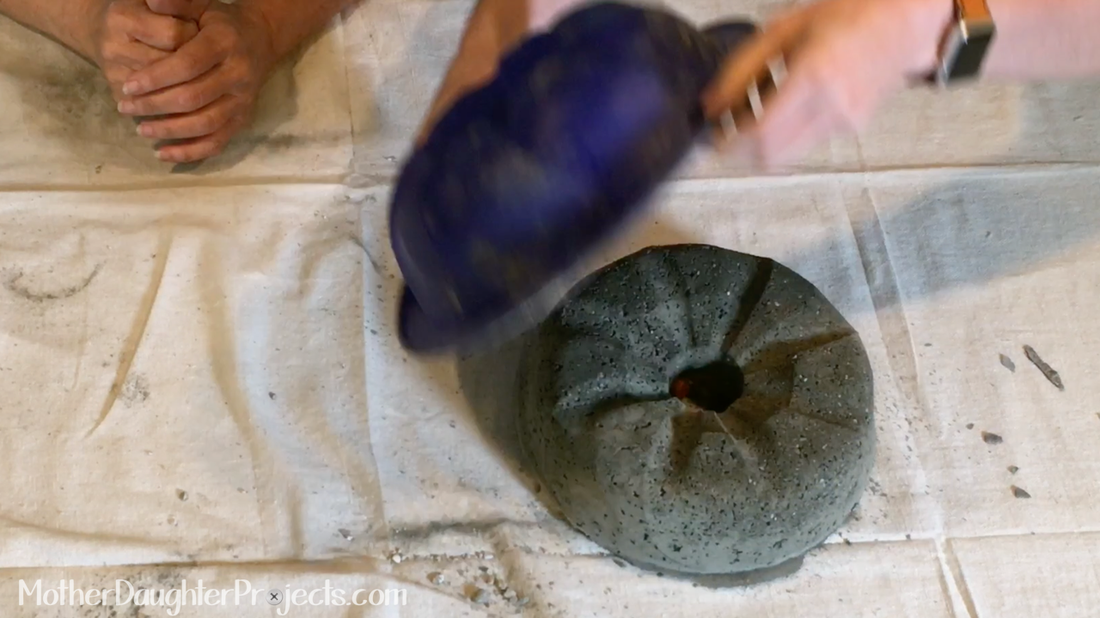
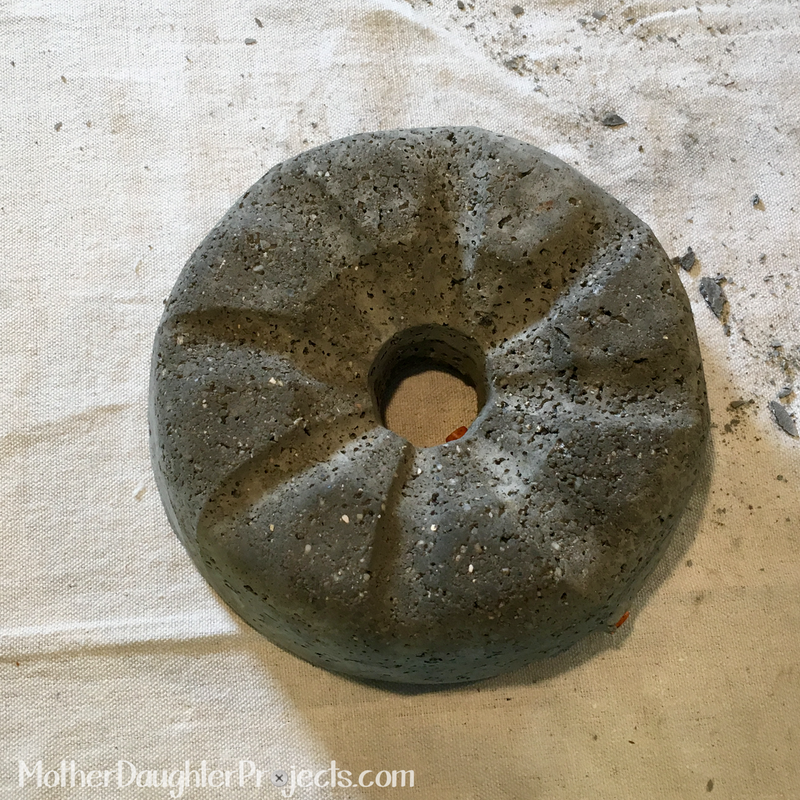
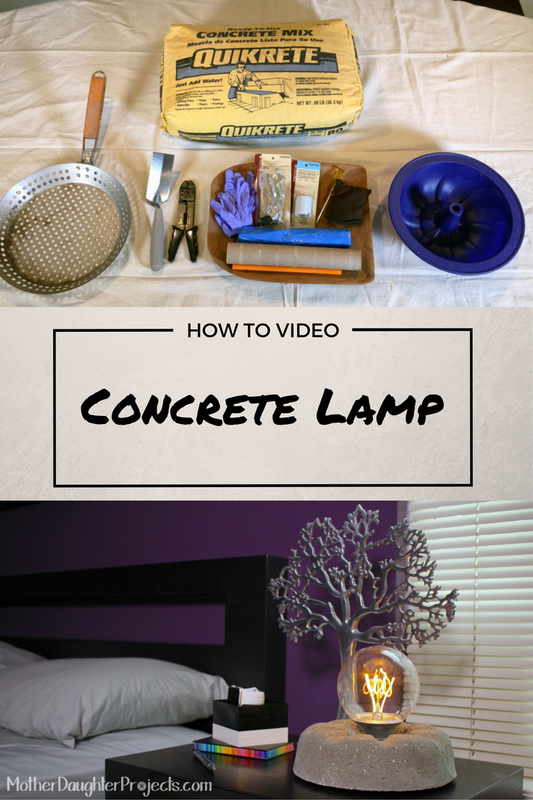
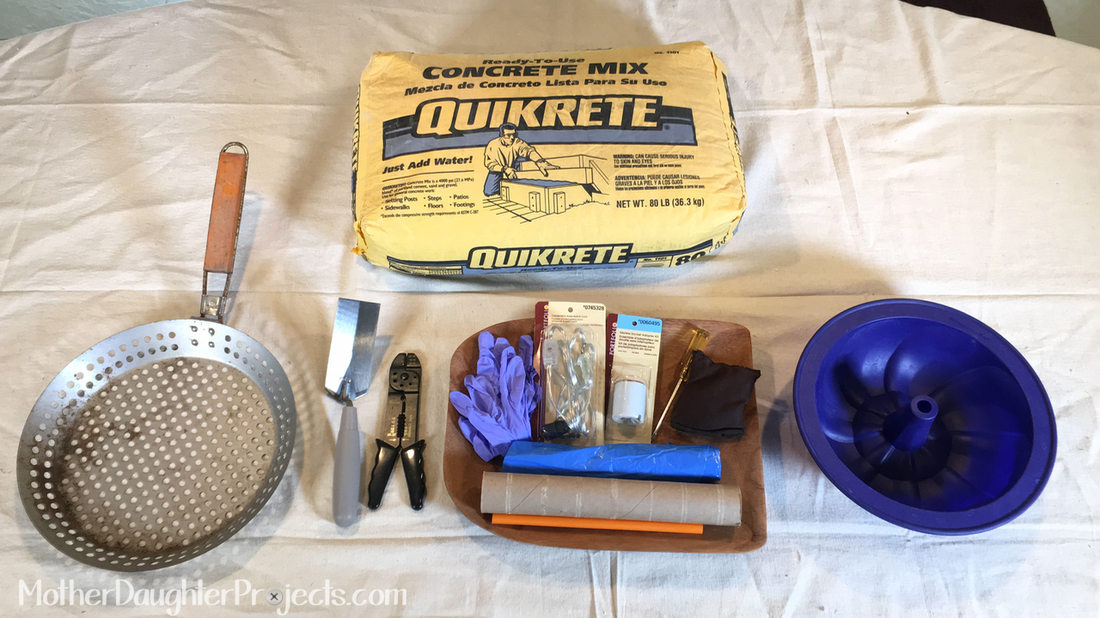
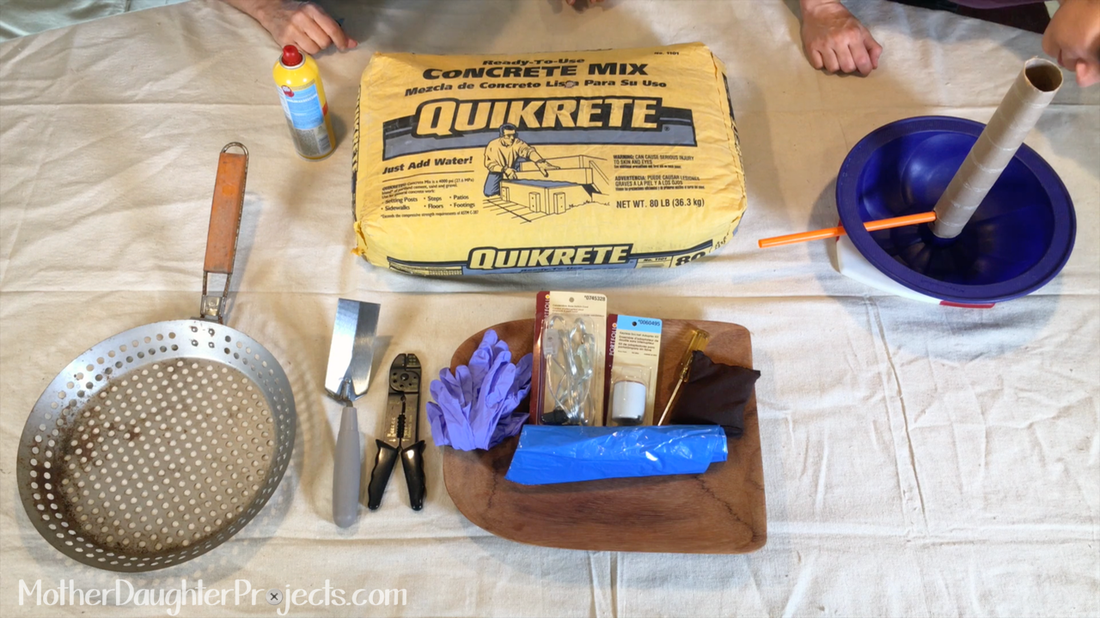
We decided to make a light bulb lamp utilizing an Edison bulb we got at Ikea and a silicone bundt pan I found at a yard sale for .25!
  • We couldn't find the concrete we wanted locally, so we went with the basic Quikrete Ready-to-Use Concrete Mix with the intention of making it work by sifting out the larger rocks. At $5 for an 80lb bag, the price can’t be beat!
  • Note: mix concrete outside as it’s dusty and dirty. It left a thin layer of concrete dust where we worked and beyond inside my house. 
Concrete Light Bulb Lamp. MotherDaughterProjects.com
Materials/Tools:
  • Quikrete Concrete Mix
  • Water
  • Trowel (we got the smallest trowel available and it worked very well to mix up small batches of concrete)
  • Disposable plastic bowls (we used one to mix in, and a couple to sift into and another to hold the rocks we sifted out)
  • Sifter (we used an old basket fryer)
  • Drop cloth/plastic garbage bags
  • Plastic wrap
  • Paper towel cardboard tube
  • Hot glue (optional)
  • X-acto knife​
  • Something to scoop concrete with (we used a tuna can after our plastic cup fell apart)
  • Sander or other tool that vibrates
  • Cooking spray like Pam
  • Gloves/face mask
  • Silicone bundt pan
  • Bean bag 
  • Large diameter drinking straw 
  • Lamp Cord
  • Lamp socket
  • Self-stick felt
  • Edison LED bulb
Concrete Light Bulb Lamp. MotherDaughterProjects.com
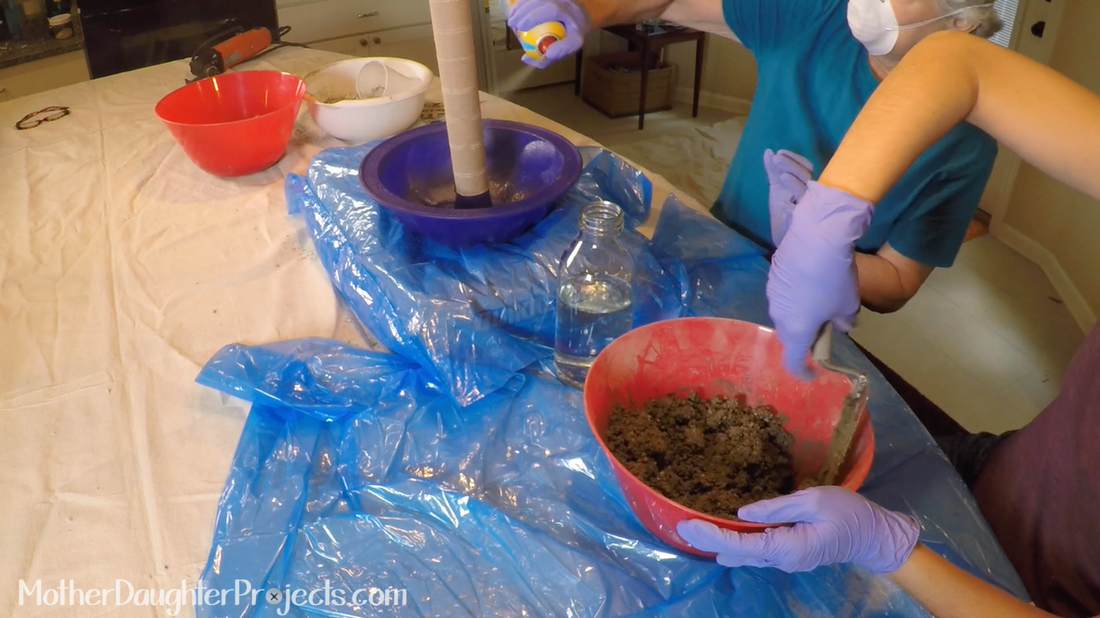
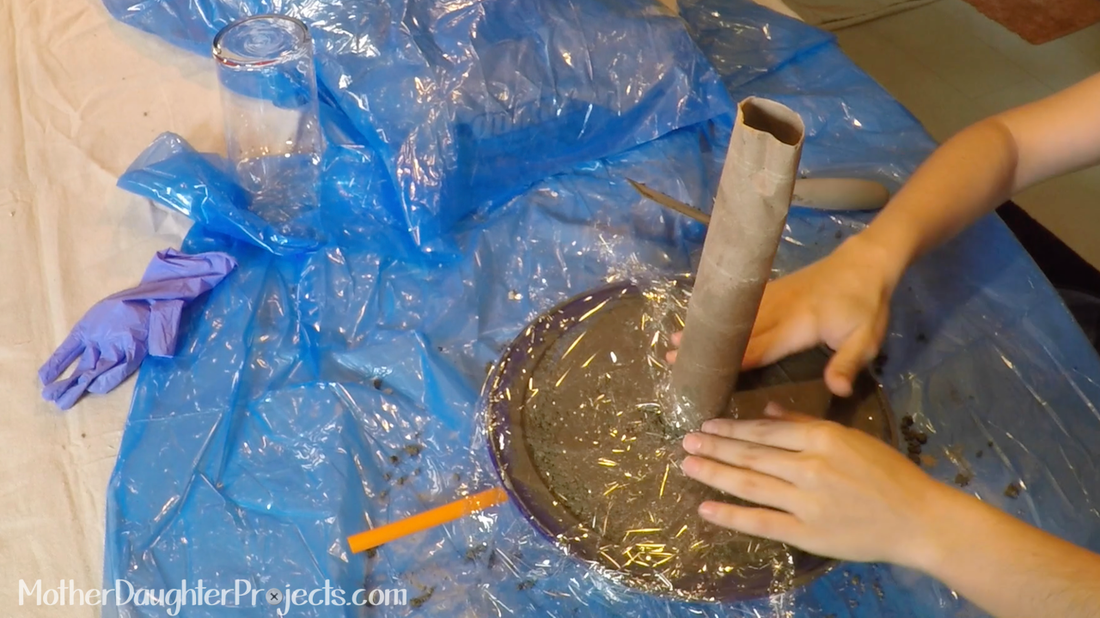
Prepare the silicone mold. Place the cardboard tube over the center. Cut a hole near the edge of the mold and slide the straw through to the middle. Cut a hole in the cardboard tube. 
Concrete Light Bulb Lamp. MotherDaughterProjects.com
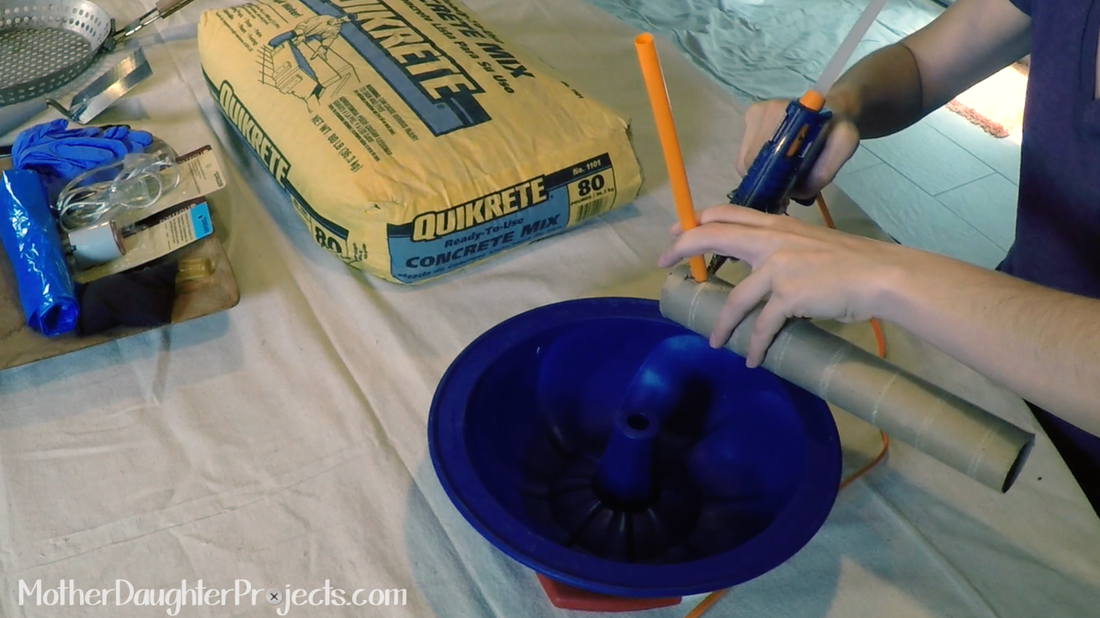
Hot glue into place if needed. We hot glued the straw into place on the outside of the mold as the mold started to tear. (The straw is gong to serve as a tunnel in which the cord will be run through the concrete.) 
Concrete Light Bulb Lamp. MotherDaughterProjects.com
Picture
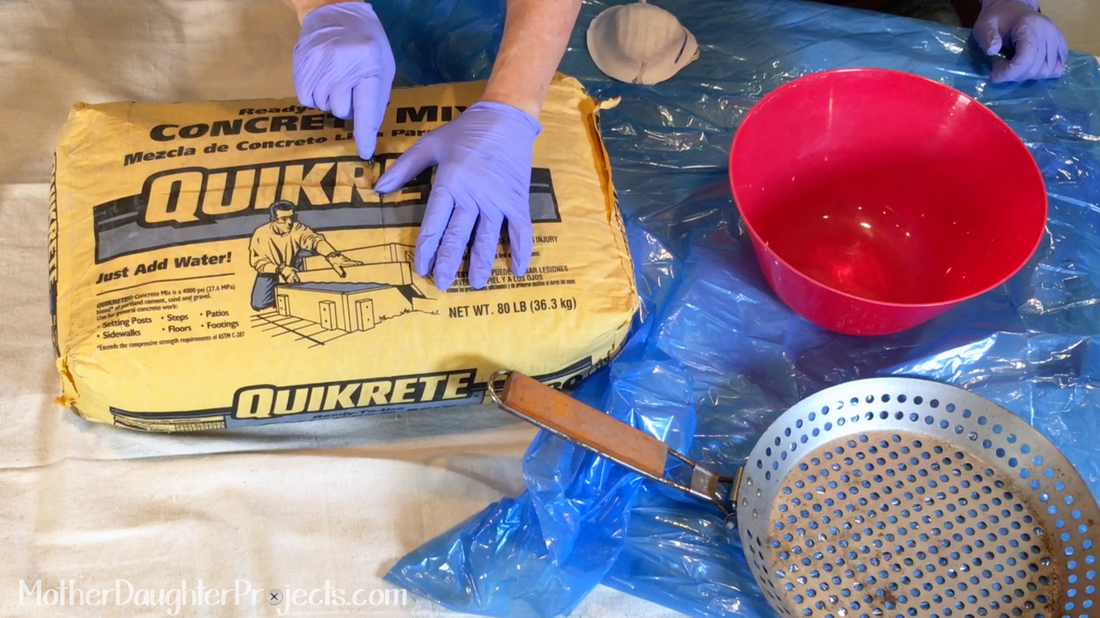
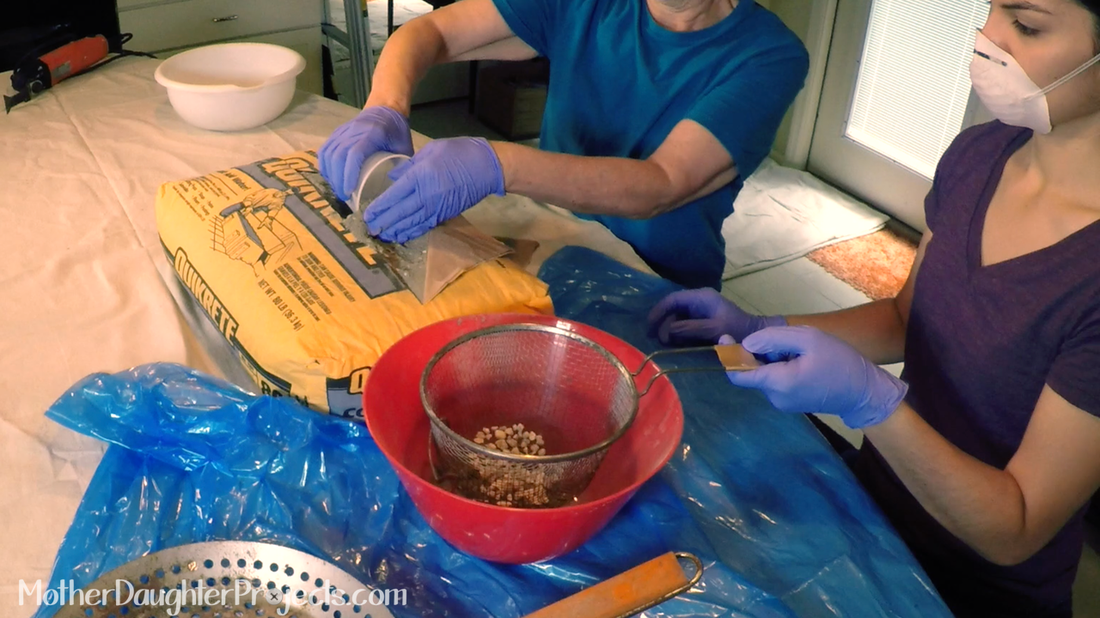
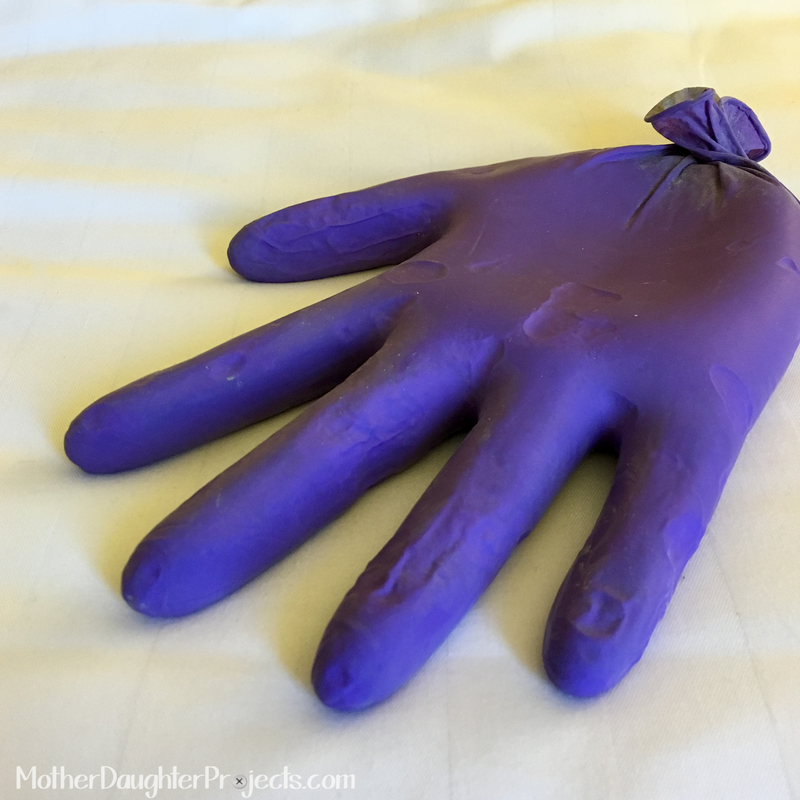
Wearing gloves and face mask, use the sifter to sift out the rocks. Place the amount of concrete you want to use in a clean plastic bowl—we used about six cups at a time.
Concrete Light Bulb Lamp. MotherDaughterProjects.com
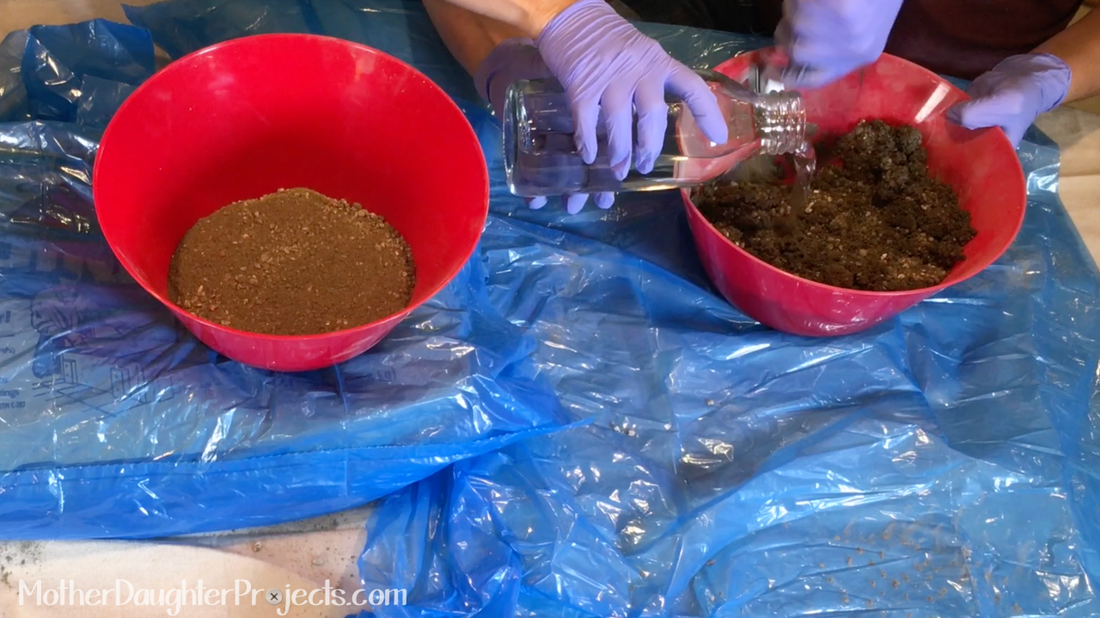
Add just enough water to make a stiff batter like consistency—kind of like brownies. Don’t add too much water. Use the trowel to mix.
Concrete Light Bulb Lamp. MotherDaughterProjects.com
Spray the inside of the bundt pan with cooking spray. This will help the mold slip right off when the concrete is cured. 
  • We placed a bean bag underneath the center of the pan to keep the middle part from collapsing and flattering out. It worked well.
  • Using the trowel, start filling the mold, patting it down as you go. Be careful around the straw so it stays on place. Mix up additional concrete as needed and continue to fill.
Concrete Light Bulb Lamp. MotherDaughterProjects.com
Using the sander without sandpaper or multi-tool, place it on the edge of the mold to help move air bubbles to the surface.
Picture
Cover the bowl with plastic wrap and leave undisturbed for 20 hours.
Concrete Light Bulb Lamp. MotherDaughterProjects.com
At the end of 20 hours, remove the cardboard tube, and the concrete from the mold. 
Concrete Light Bulb Lamp. MotherDaughterProjects.com
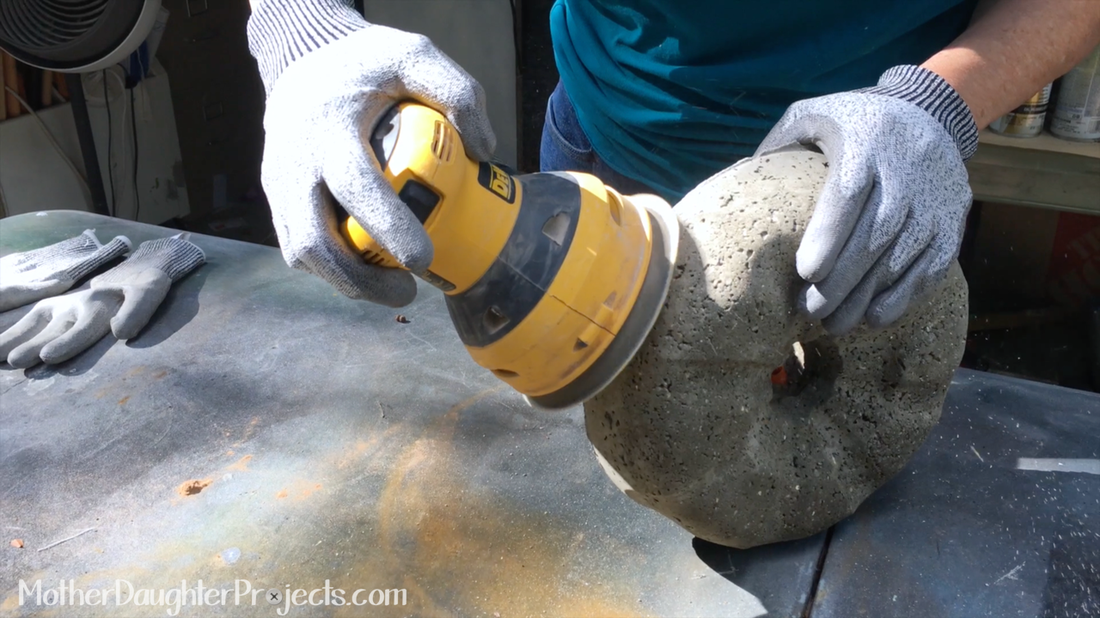
Use 60 grit sandpaper to remove any rough edges. Clean up the straw ends so the outside part is flush with the side of the concrete.
Concrete Light Bulb Lamp. MotherDaughterProjects.com
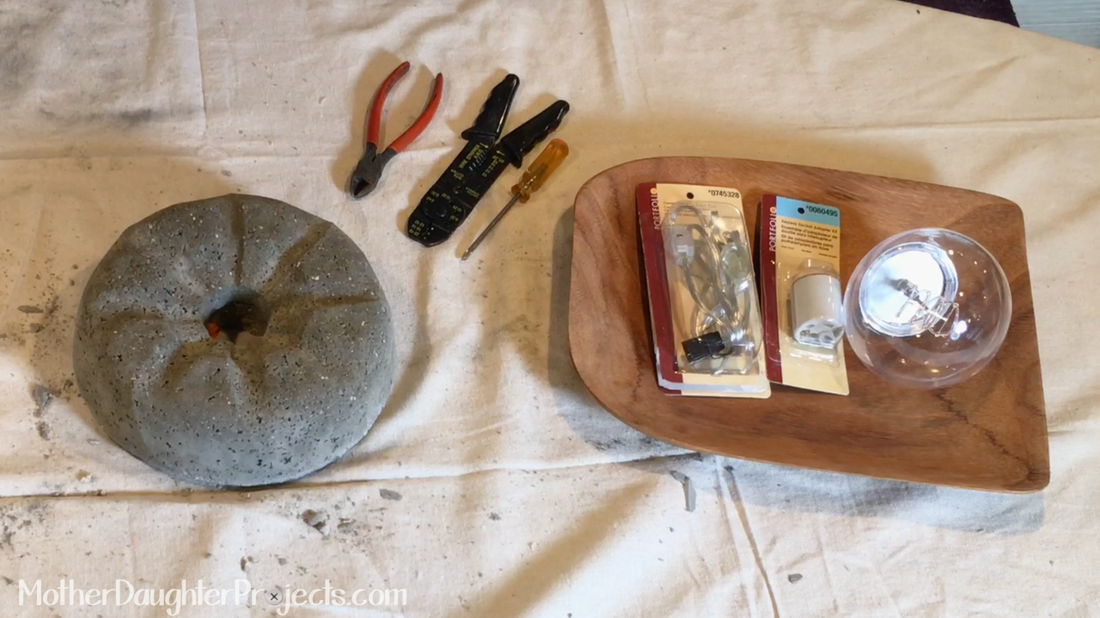
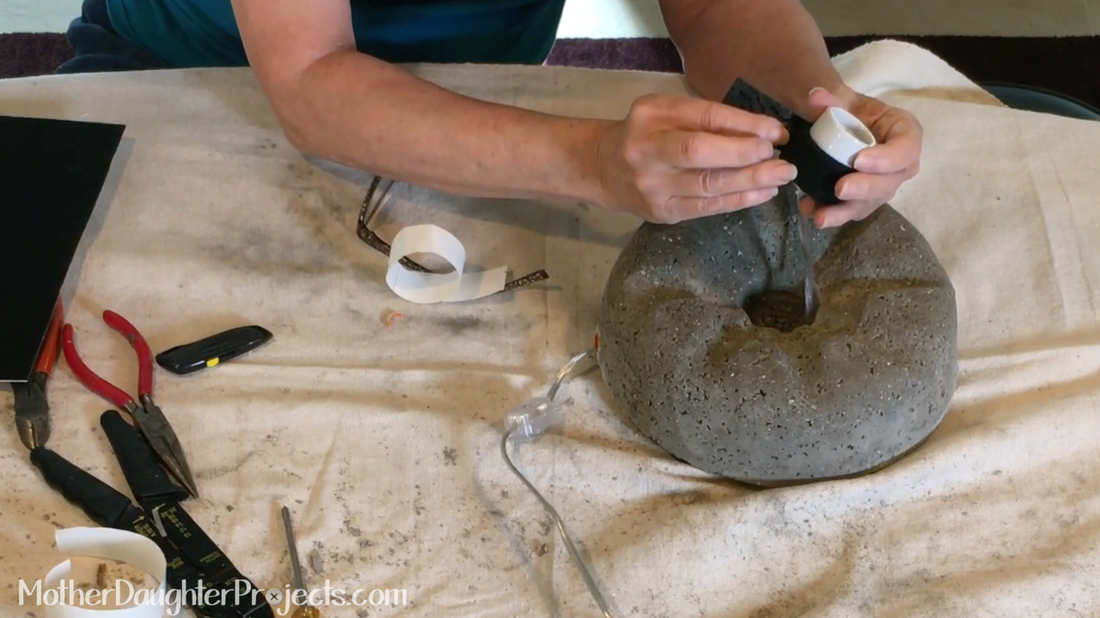
Wire the lamp socket. 
Picture
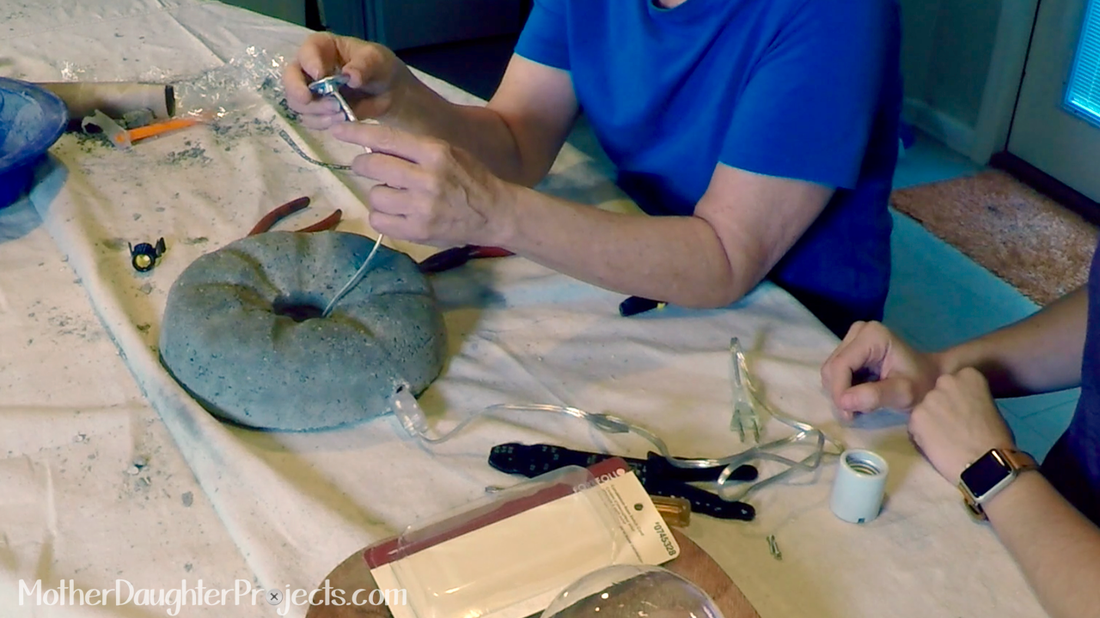
Thread the cord through the straw from the outside. Remove the bottom from the socket and thread this onto the cord.
Concrete Light Bulb Lamp. MotherDaughterProjects.com
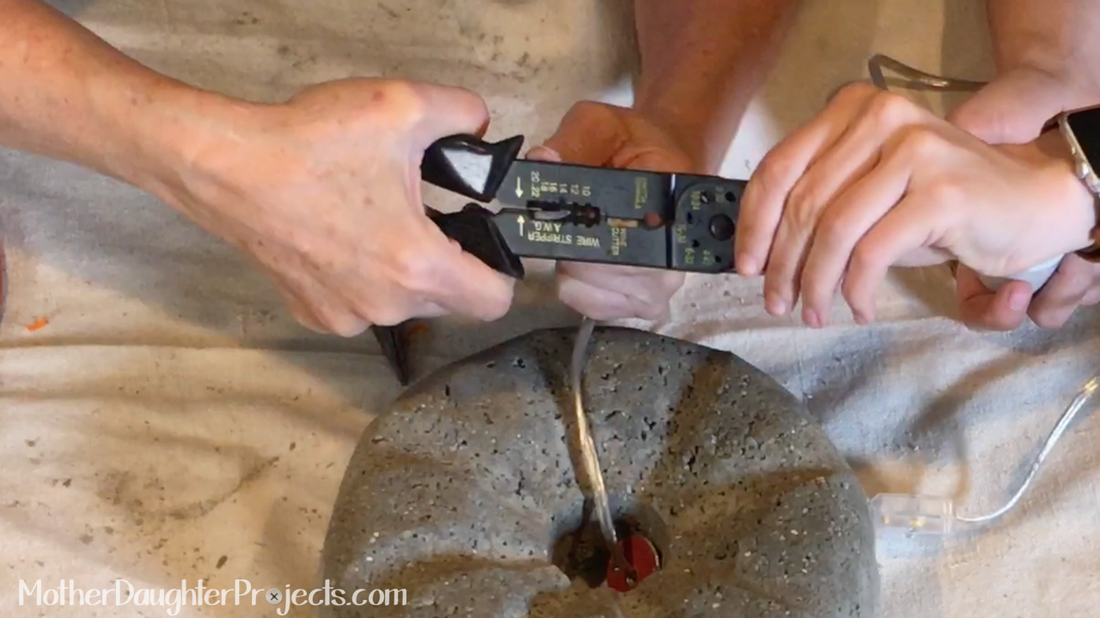
Identify the hot and neutral wires and wire the socket—the ribbed half of the wire is the neutral. This connects to the silver screw in the socket and the smooth half of the cord is the hot wire and connects to the brass wire. Do some research if you’re new to wiring a socket. It’s not hard but you need to be sure to connect the wires correctly.
Concrete Light Bulb Lamp. MotherDaughterProjects.com
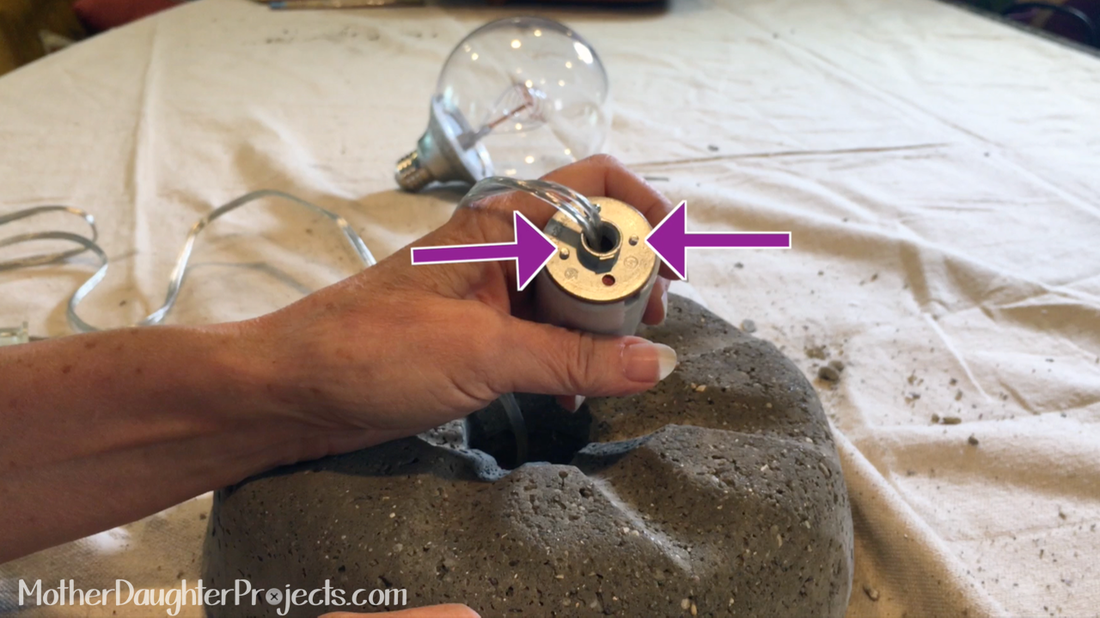
Replace the bottom of the socket—put the socket into the center of the concrete base.
Concrete Light Bulb Lamp. MotherDaughterProjects.com
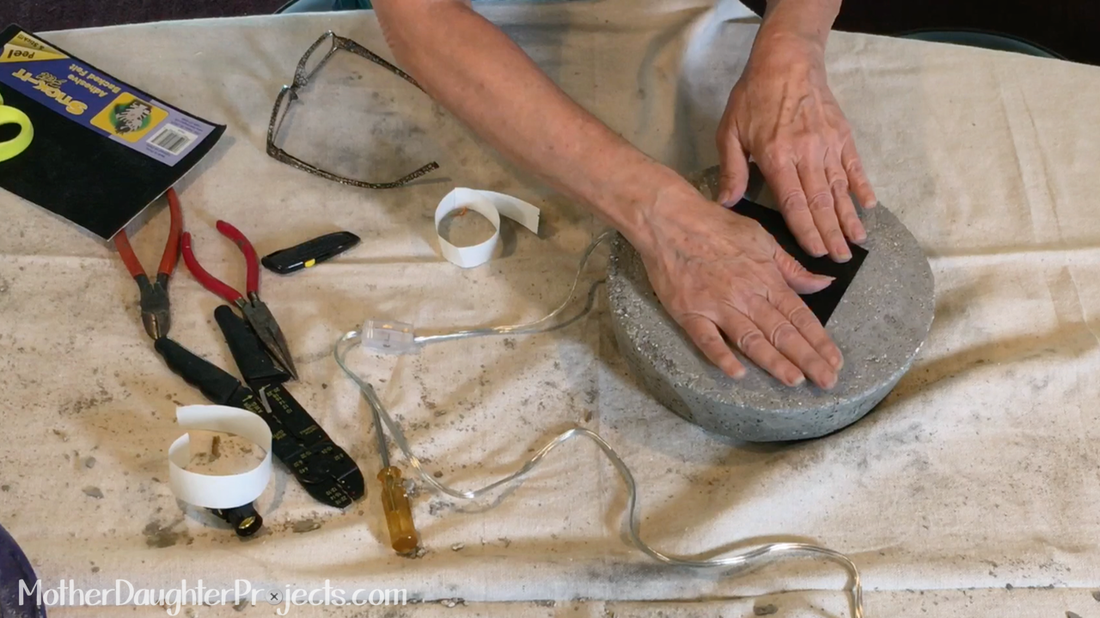
We found the socket would not stand up straight in the center so we added some stick-on felt to the bottom of the socket to add some thickness—this worked well—we also added a piece of felt to the bottom to keep it from scratching the surface it's placed on. You could also use electrical tape to add thickness to the outside of the socket.
Concrete Light Bulb Lamp. MotherDaughterProjects.com
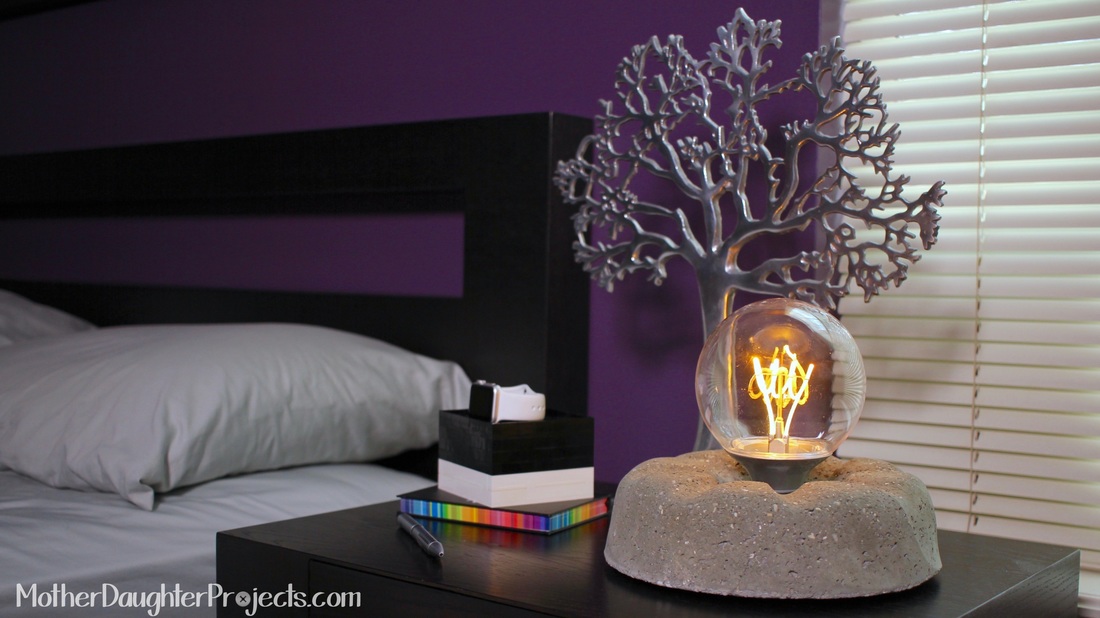
Screw in the bulb and you are done! This is a perfect lamp for Steph's nightstand. The weight makes sure she will not accidentally knock over the light in the dark.

For more on what we learned watch our how-to video at the top of the 
post!
Concrete Light Bulb Lamp. MotherDaughterProjects.com
Concrete is one of those materials that just sparks creativity. I find myself looking at objects as sources of molds in which to cast concrete—silicone baking pans, silicone ice cube trays, glass globes and vases, even the insert that came with my Harry & David peaches look like a mold! 

What material sparks your creativity? What would you make from concrete? What do you think would make a great mold? 

Find out what we are doing next on instagram #trylearnshare!
Please note: We are not sponsored by any of the companies/products that we used. These products were picked and bought by us.

FYI: We are not professionals, and we don’t claim to be. This is what we found worked for our project. Yours may need a little different approach. Safety first!

FYI: Affiliate links are being used on this page. Purchasing via these links help support MDP!

Related Projects

Mother Daughter Projects
DIY Outdoor Globe Lights
Mother Daughter Projects
Smart Lights for Homeowners
Mother Daughter Projects
Metallic Garage Floor Coating
5 Comments
Katie Jones link
8/30/2016 09:36:25 am

Looks great ladies! Wire strippers are my favorite! ;)

Reply
Steph
8/30/2016 11:21:10 am

Thanks Katie!

Reply
PurpleButterfly link
12/15/2016 06:57:03 am

What a great idea!
This would also make a great gift.

I also love the tree beside the lamp.
Where can I get one?

Reply
Steph
12/15/2016 11:08:52 am

Thanks! haha...we have been asked that about the tree a few times. We got it at a yard sale so not sure where they got it from :(

Reply
FM Architettura link
4/5/2017 01:46:00 am

I just found this blog and have high hopes for it to continue. Keep up the great work, its hard to find good ones. I have added to my favorites. Thank You.

Reply


Leave a Reply.

    MotherDaughterProjects.com

    Mother Daughter Projects
    ​
    Steph & Vicki

    We're homeowners sharing our DIY adventures as we learn to maintain, improve, decorate, and ​use tech in our homes.
    Share your projects with us here:  
    ​#trylearnshare
    MotherDaughterProjects.com
Mother Daughter Projects, LLC ∙ est. 2015 ∙ Tallahassee, FL by Vicki & Steph ∙ Privacy Policy