|
text by Vicki Sign up to get Mother Daughter Projects updates in your email!
This post is sponsored by The Home Depot as a part of The Home Depot’s ProSpective Campaign.
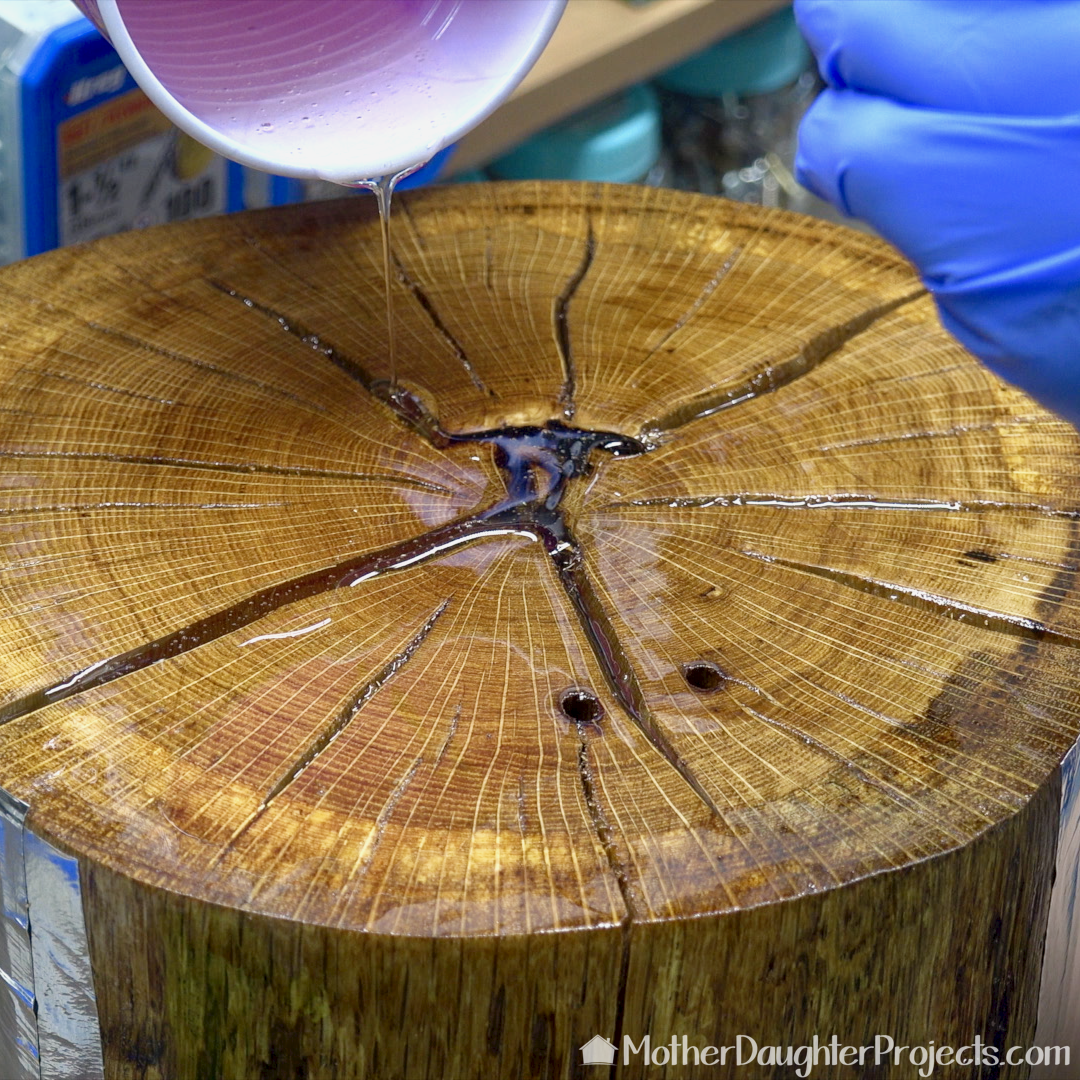
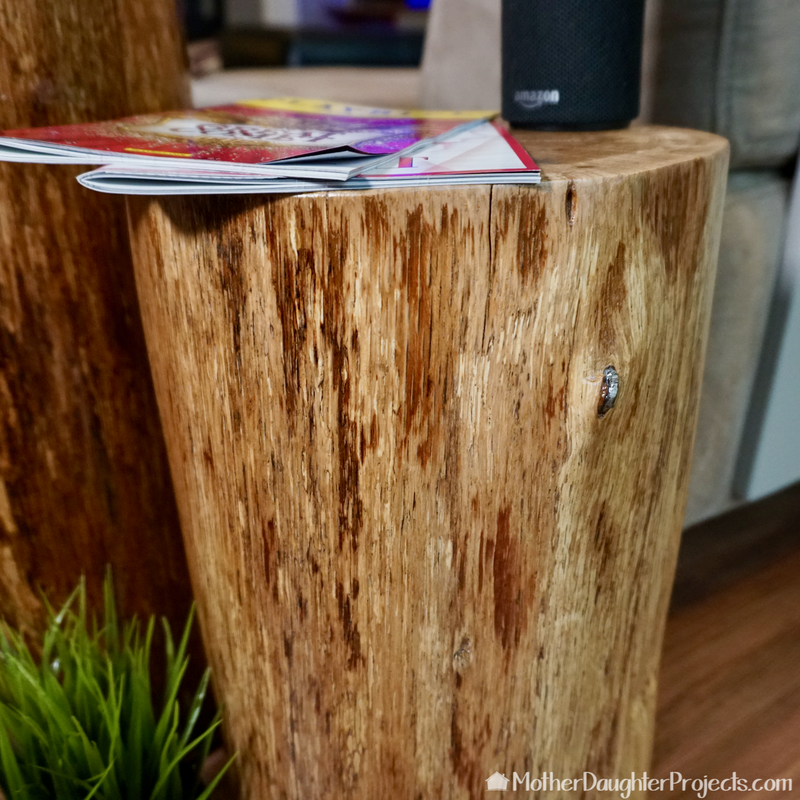
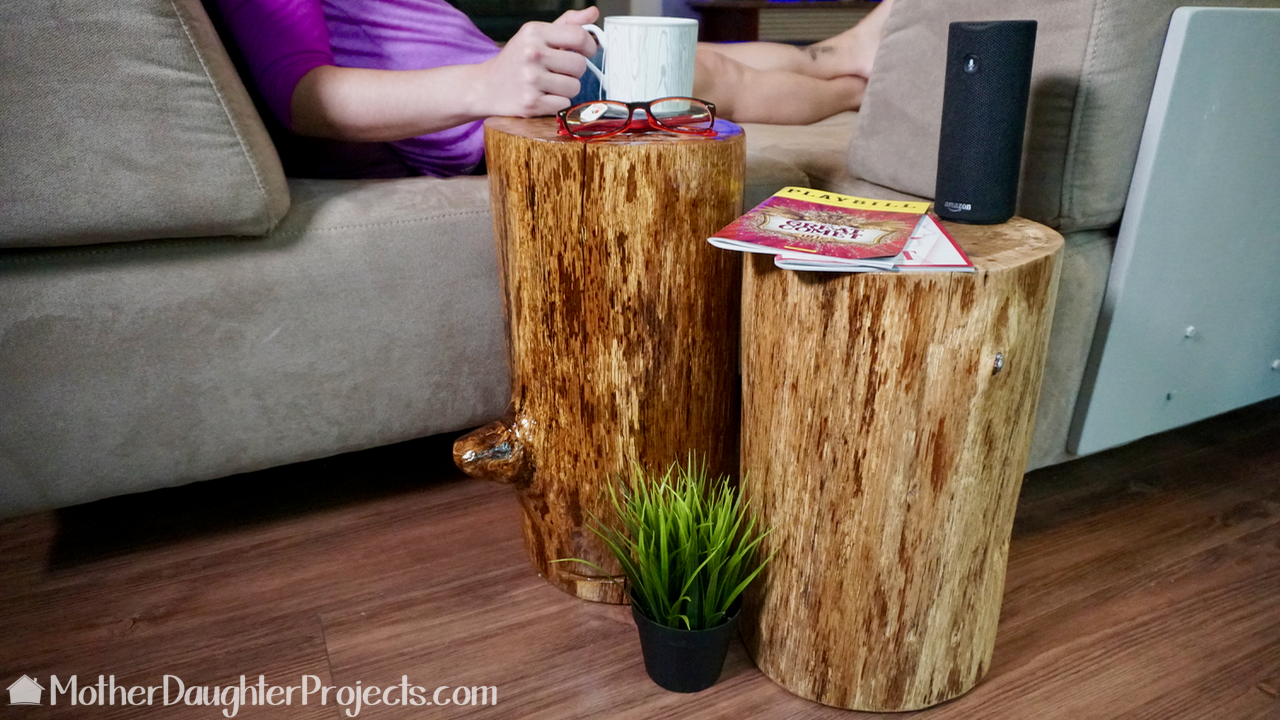
There's nothing like natural elements to make your home decor feel warm and welcoming! You can add those elements with flowers, greenery, a water feature, or natural wood furniture and accessories like these end tables made from tree stumps.
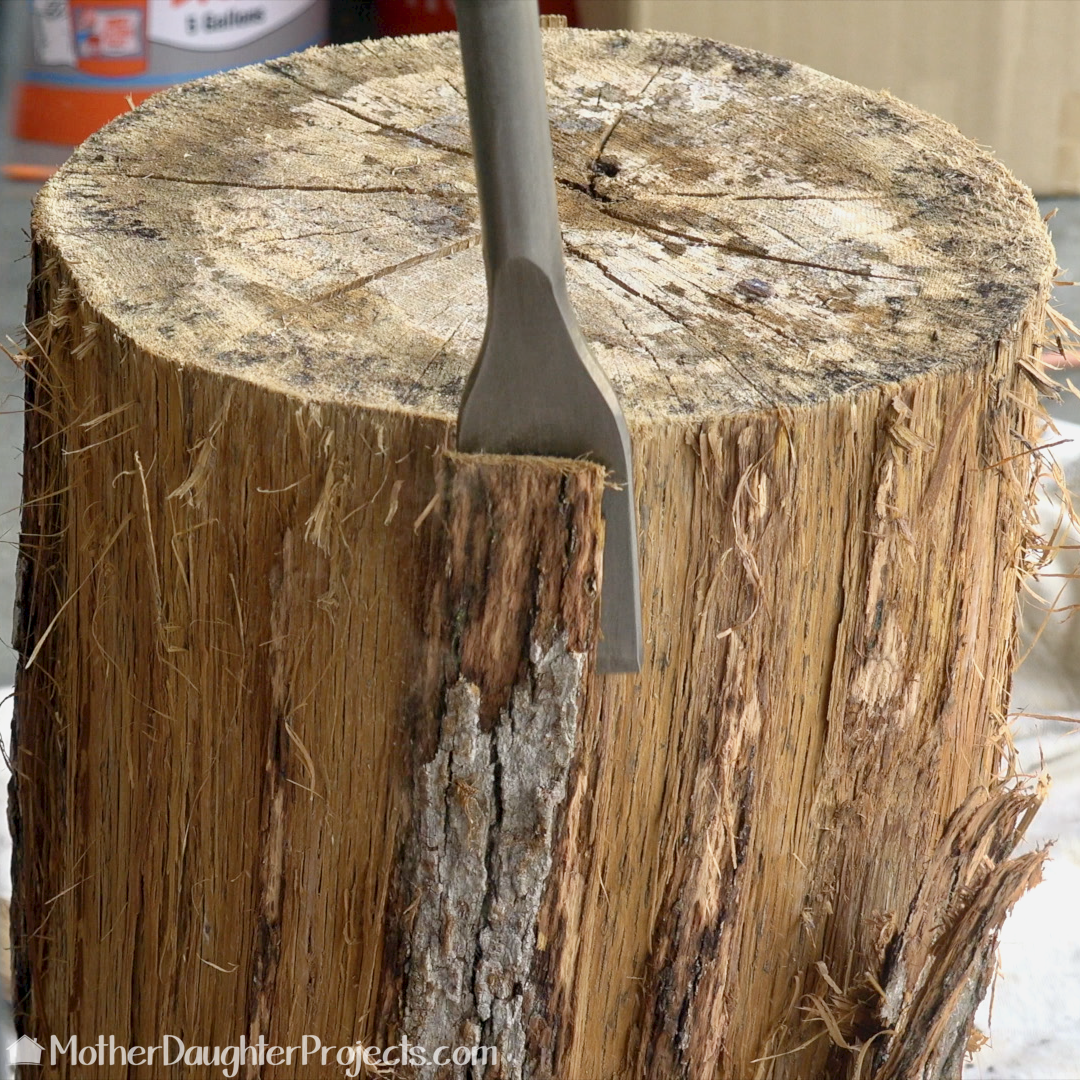
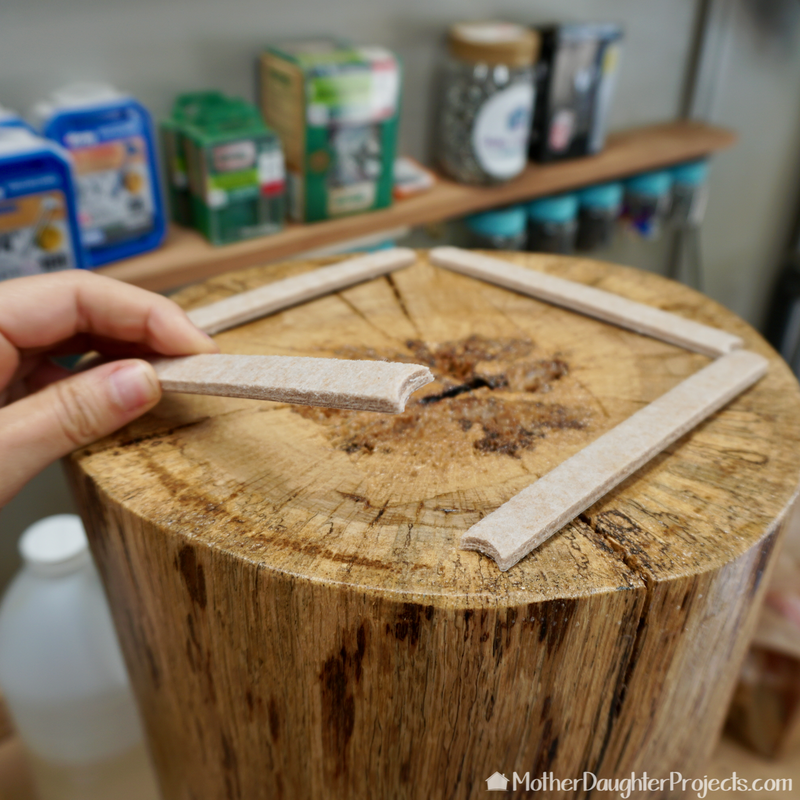
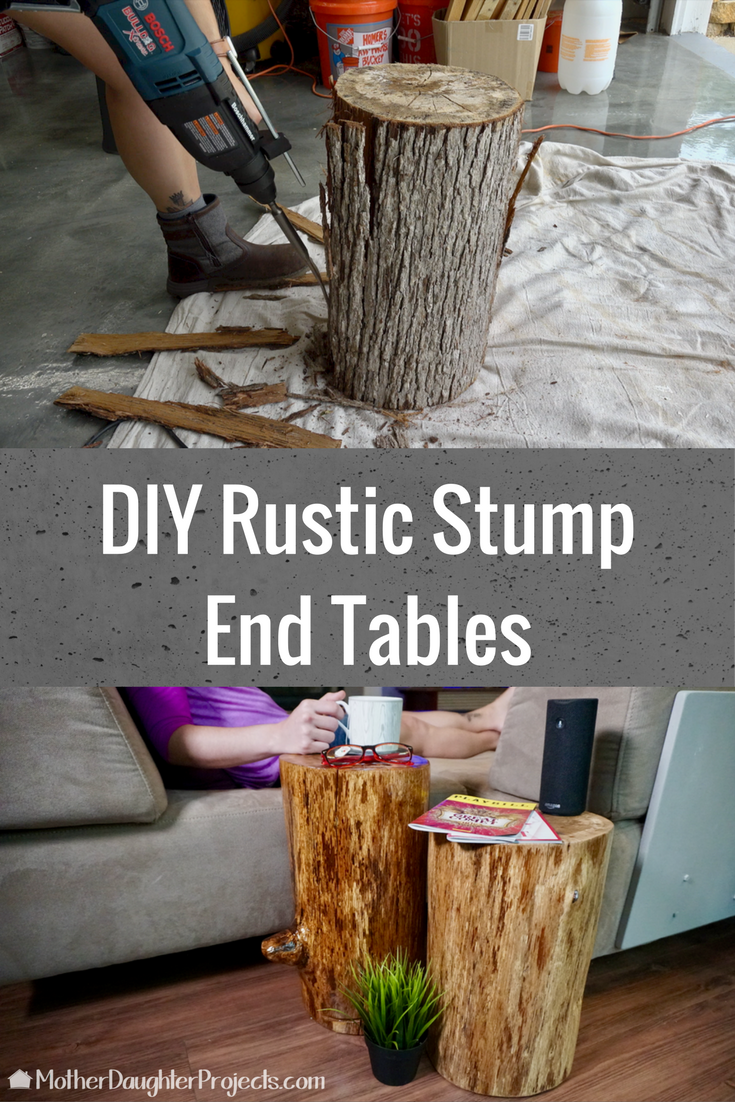
We would not consider this project to be quick and easy as it requires a lot of time from start to finish. It's doable for even a beginner though. It really depends on the tools that you have at your disposal. For example, if you hand chisel the bark off the stump, this will require way more effort and time than if you use a mechanical technique. Use what you have and make it your own! If it takes a couple of weeks to finish, then enjoy the process of really creating with your own hands and then enjoying the fruits of your labor. No matter how you get there, these natural wood end tables are well worth the time and effort.
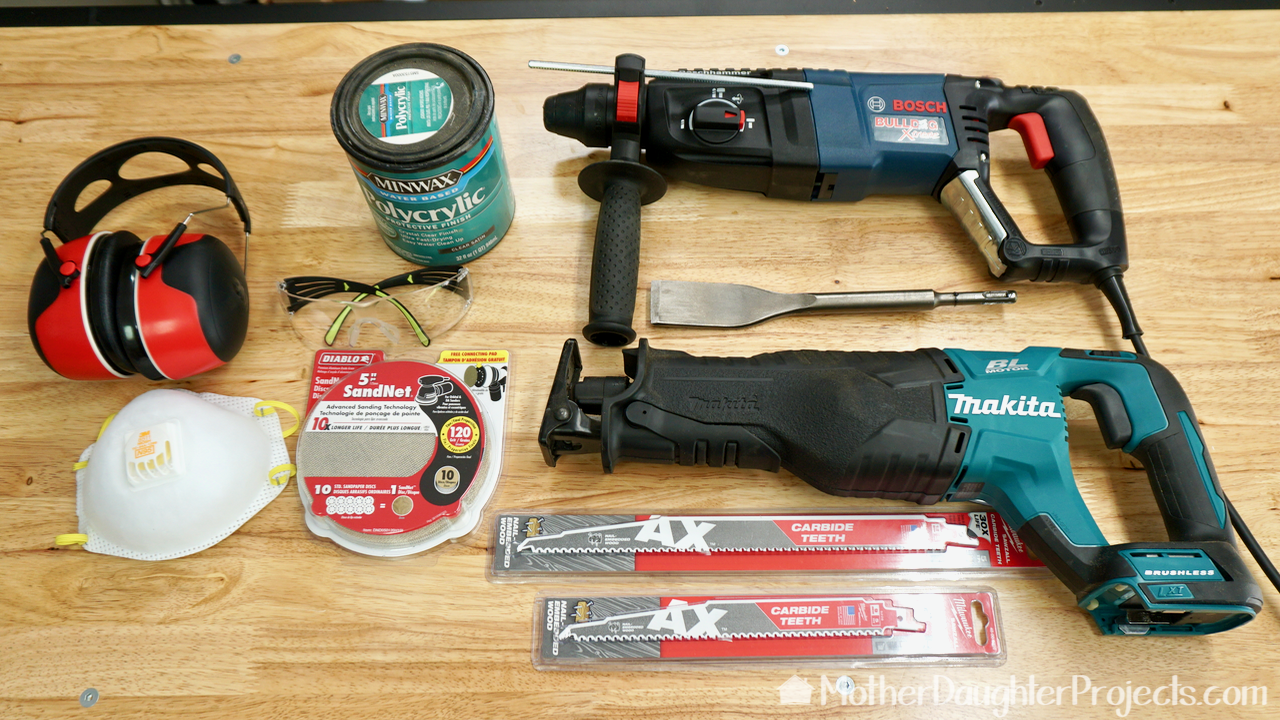
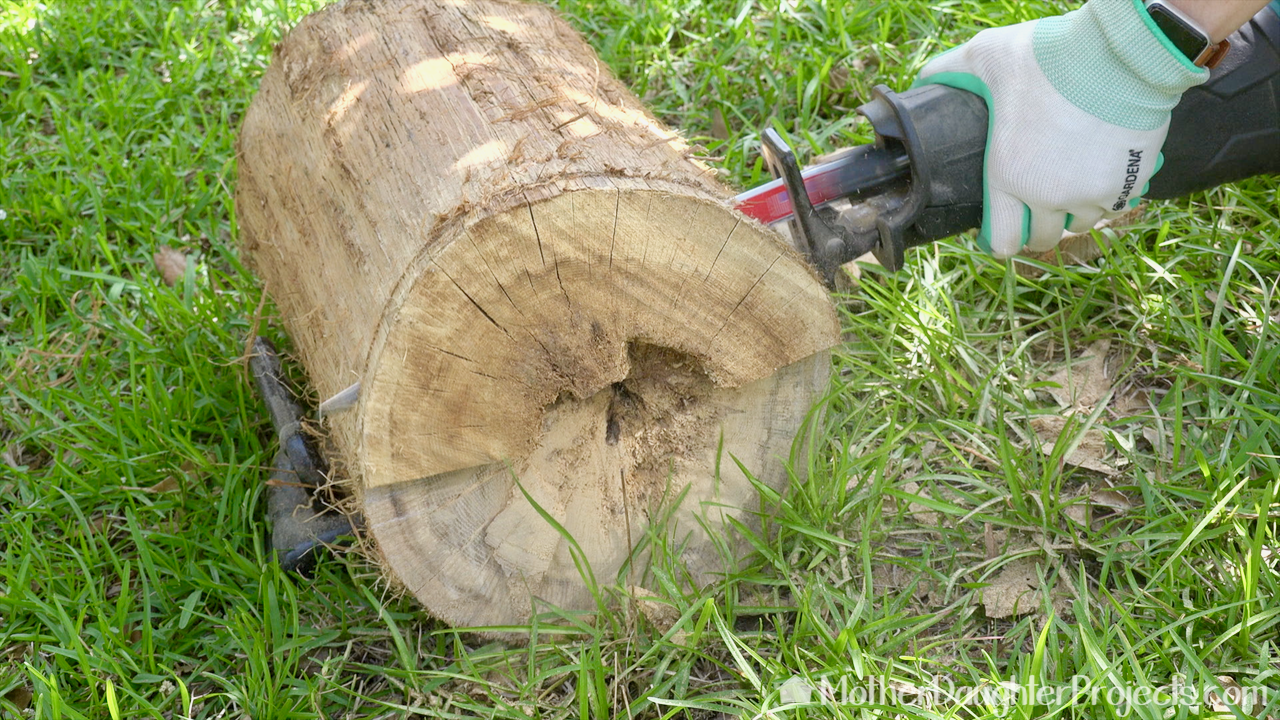
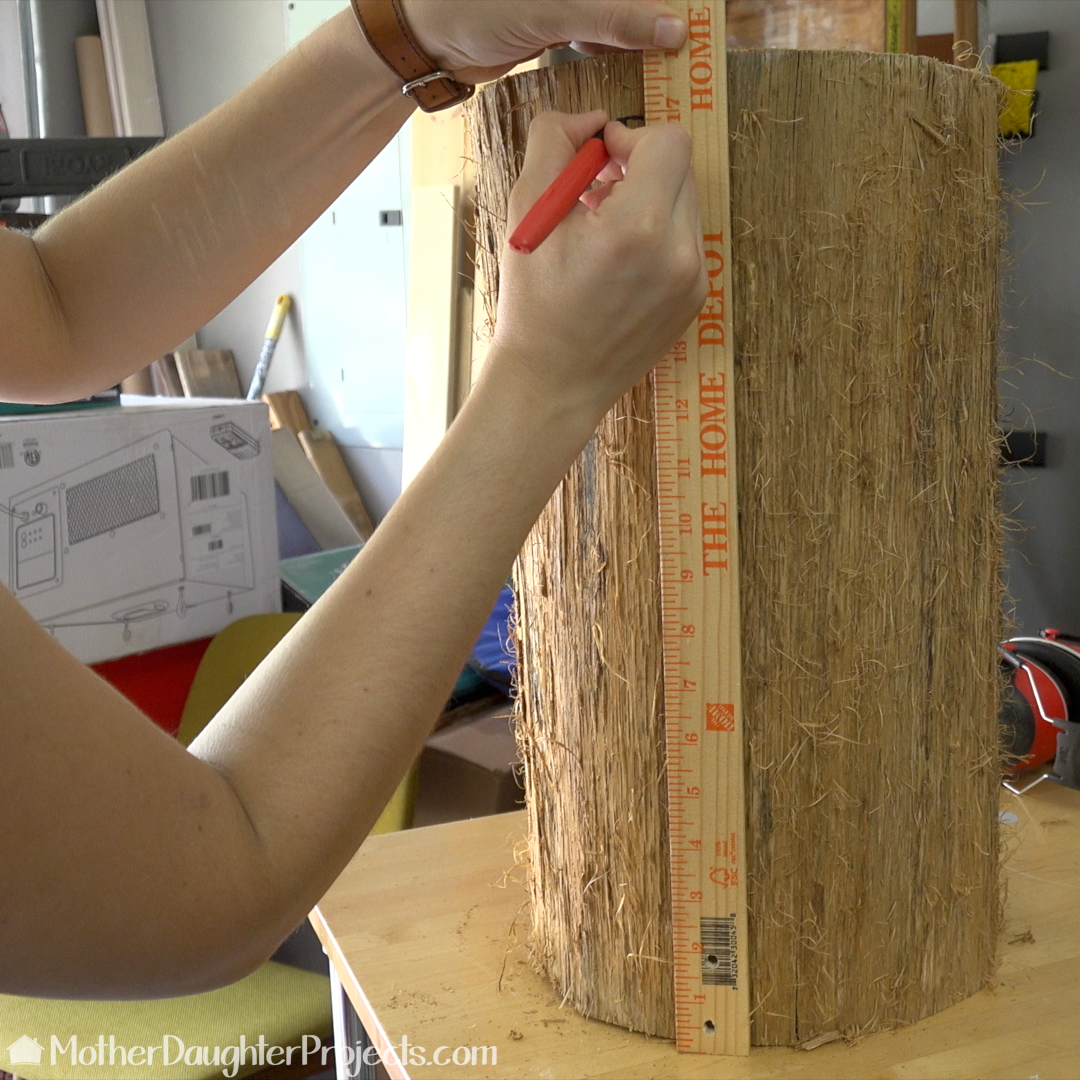
A chain saw would have been the first tool of choice, but ours wimped out! We used a Makita reciprocating saw with a Milwaukee 9" cutting blade to cut the end straight.
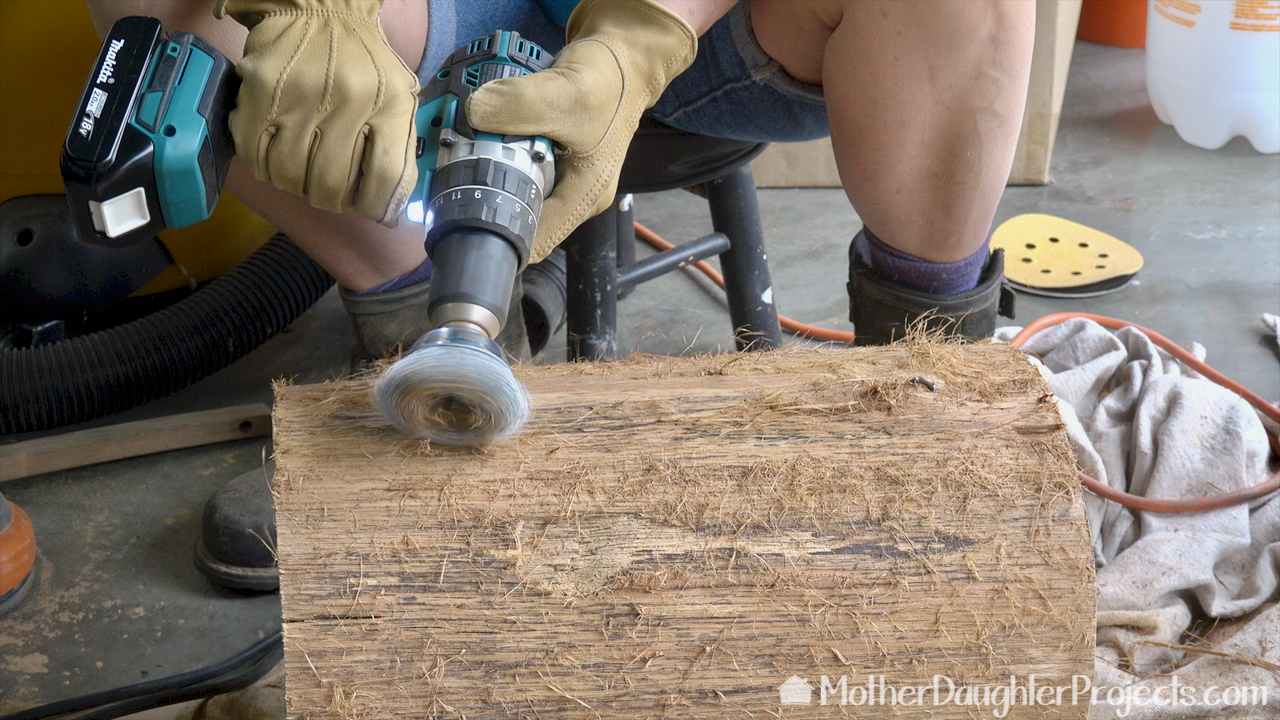
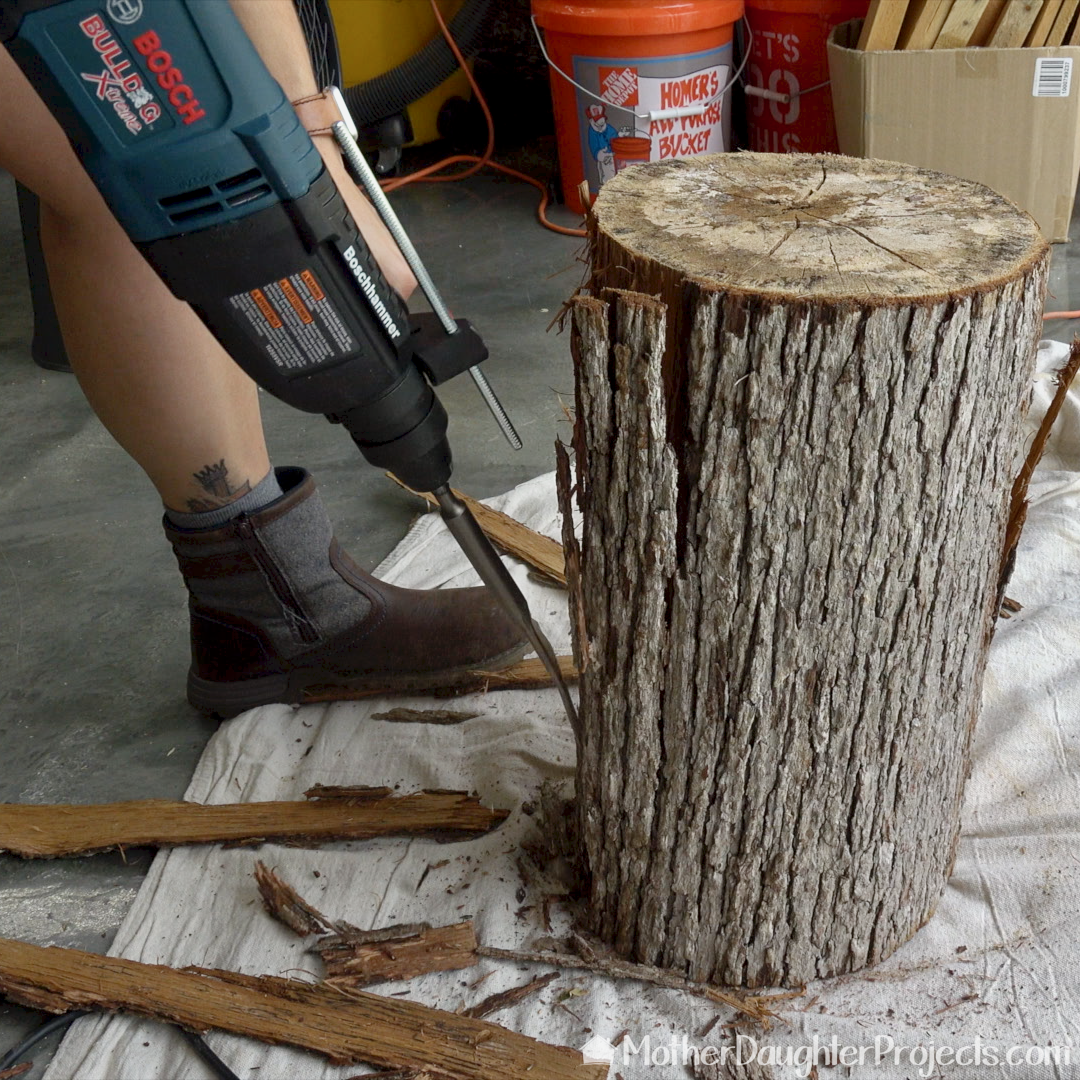
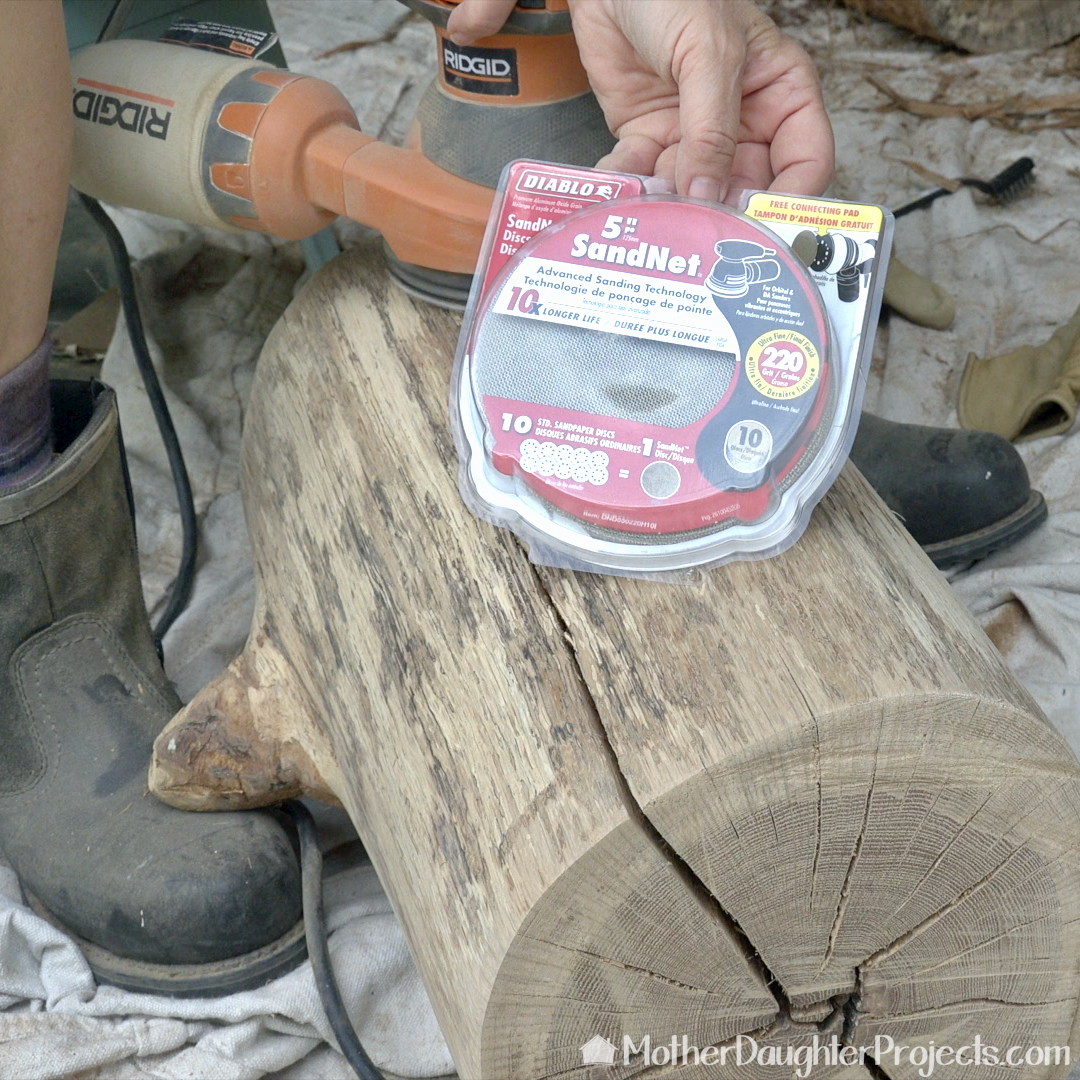
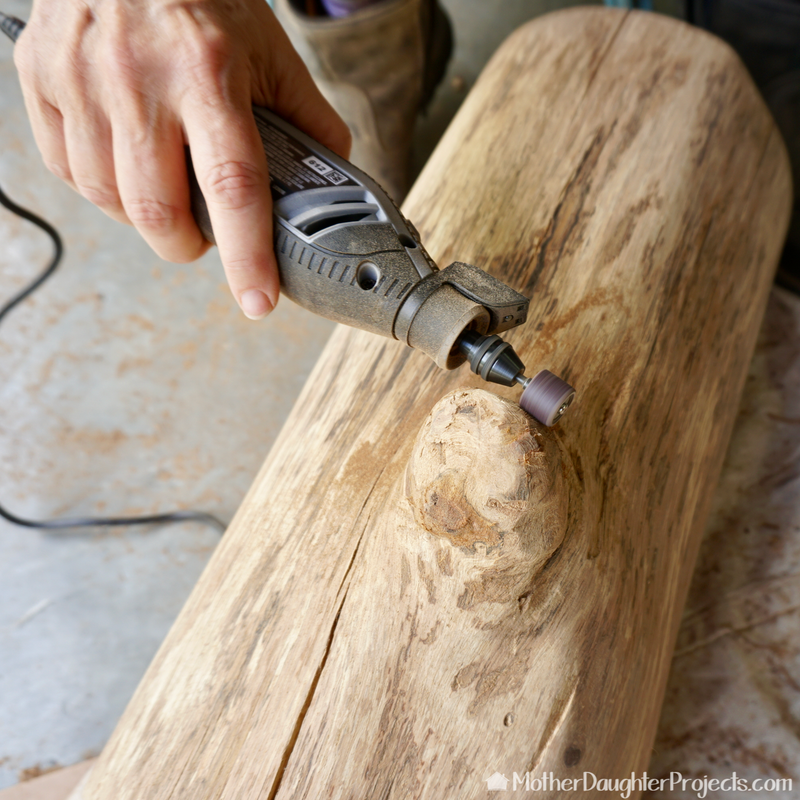
Once the bark is removed, you're left with a lot of woody fibers that take a lot of effort to remove. We tried using a wire cup attached to a Makita drill/driver to help remove some of the fibers prior to sanding.
What a treat it was for us to be able to use the Bosch rotary hammer on this project--it's an awesome tool! If you're a newsletter subscriber, you know that we've become fast friends with our UPS driver as he's the one that has been delivering all these tools from The Home Depot. When we showed him the rotary hammer, he kind of gave us a look and indicated that it might be a little much for us to handle! We actually were a little apprehensive about using it after that comment, but found it to be a very manageable tool.
We also throughly enjoyed the Makita tools used in this project. The reciprocating saw is especially noteworthy in that its power and performance exceeded our existing corded one. That surprised us. Makita also has a super fast battery charging system. What do you think of these stump end tables? Would you DIY this or buy? Let us know in the comments below!
We acknowledge that The Home Depot is partnering with us to participate in the The Home Depot ProSpective Campaign. As a part of the Program, we are receiving compensation in the form of products and services, for the purpose of promoting The Home Depot. All expressed opinions and experiences are our own word. Our post complies with the Word Of Mouth Marketing Association (WOMMA) Ethics Code and applicable Federal Trade Commission guidelines.
FYI: We are not professionals, and we don’t claim to be. This is what we found worked for our project. Yours may need a little different approach. Safety first! FYI: Affiliate links are being used on this page. Purchasing via these links help support MDP! Related Projects
7 Comments
Steph
6/9/2017 09:31:01 pm
Thanks Jessica! 7/4/2017 10:37:58 am
We always have excess stumps and/or other tree parts that we'd be willing to just give away (we're not local to you) - but honestly, you could just ask a nearby arborist or tree service guy to give you a hand, and maybe even borrow a couple tools for a day!
Steph
7/4/2017 11:21:12 am
That's great to know, thanks!
Lynn Garrison
3/14/2023 11:35:31 am
which finishing method did you like better? Poly or the epoxy?
Steph
3/15/2023 08:40:21 am
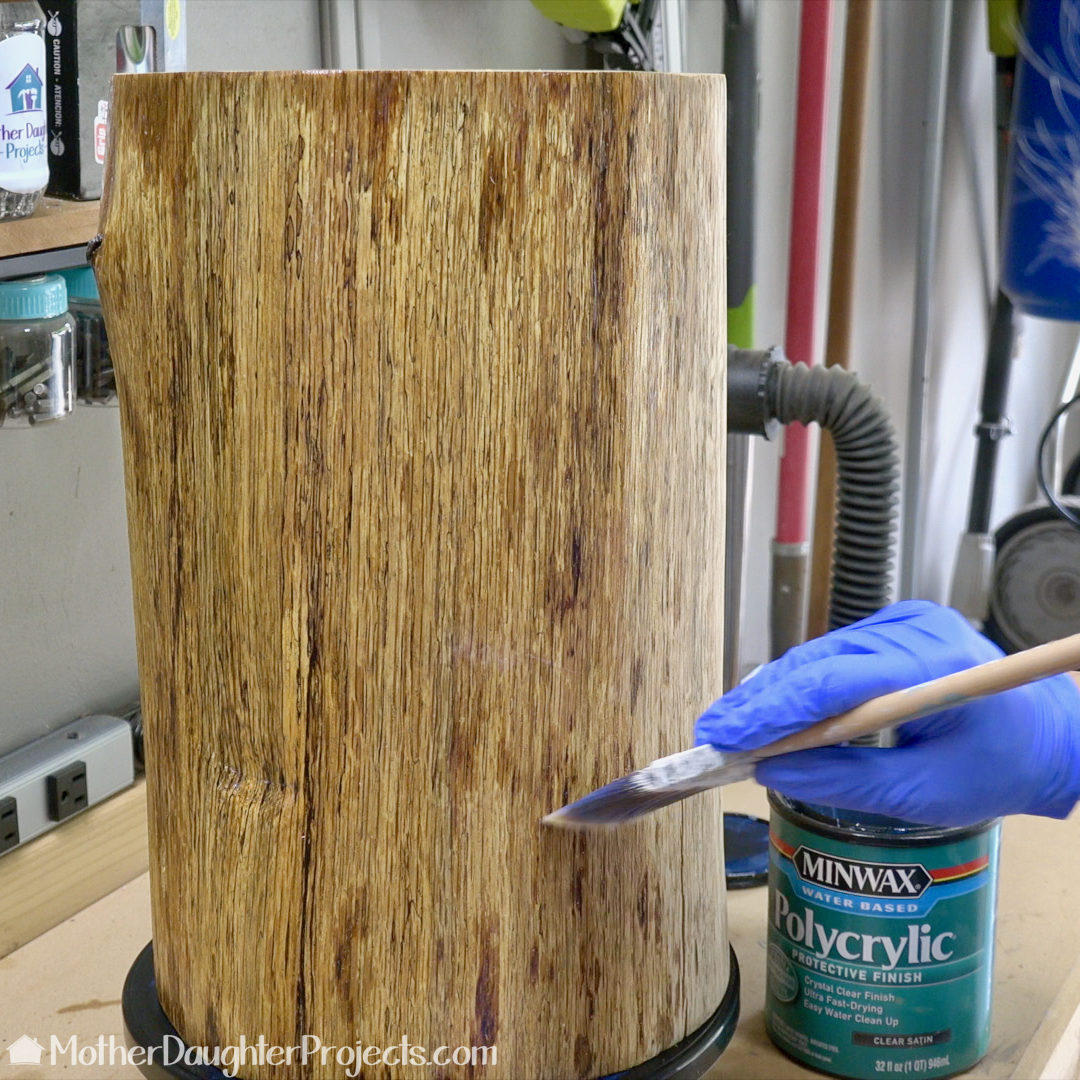
They both worked well, but if I had to pick probably the poly. Leave a Reply. |

Mother Daughter Projects
|