Mother Daughter Projects

  • Blog
  • About
    • Contact
    • Privacy Policy
  • Tools
    • Tool Tuesday
  • Maintenance
  • Improvement
  • Decor
  • Tech
  • Blog
  • About
    • Contact
    • Privacy Policy
  • Tools
    • Tool Tuesday
  • Maintenance
  • Improvement
  • Decor
  • Tech

DIY for Homeowners

DIY Wall Sconce for Battery Powered Candles

12/30/2016

5 Comments

 
text by Vicki     ​Sign up to get Mother Daughter Projects updates in your email!
Learn how to make a wall sconce using an old frame and battery powered candle!
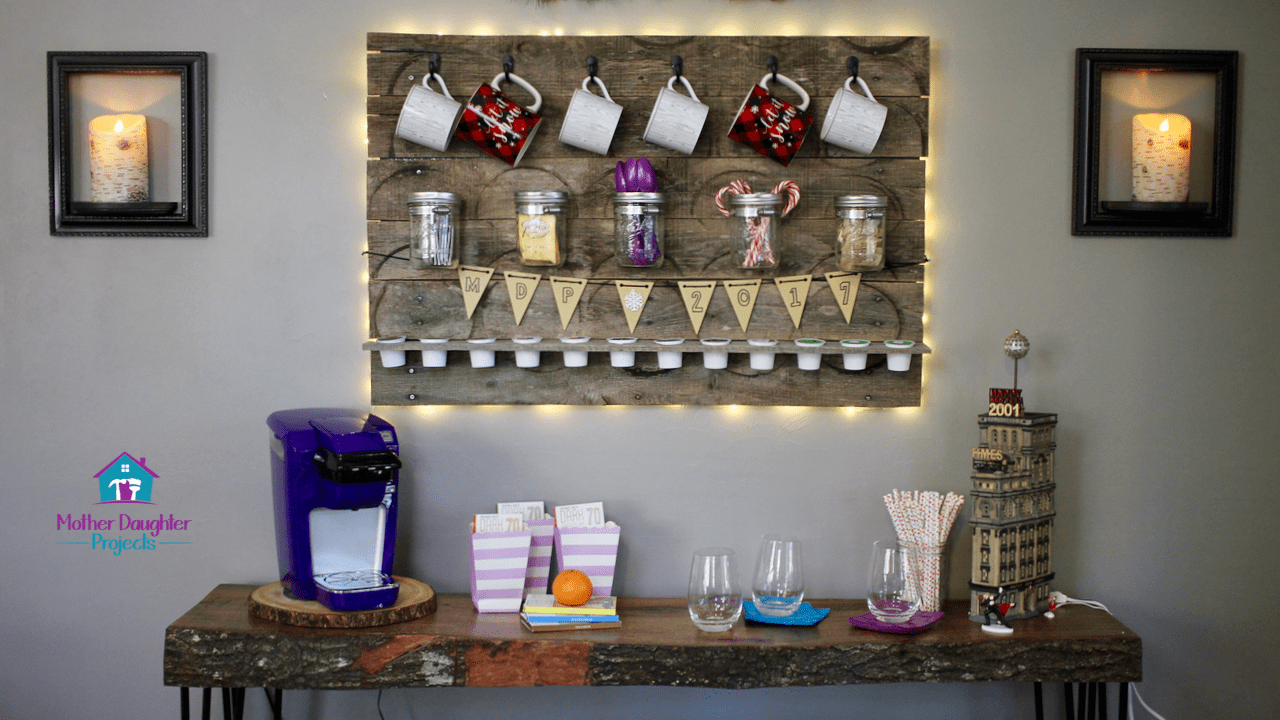
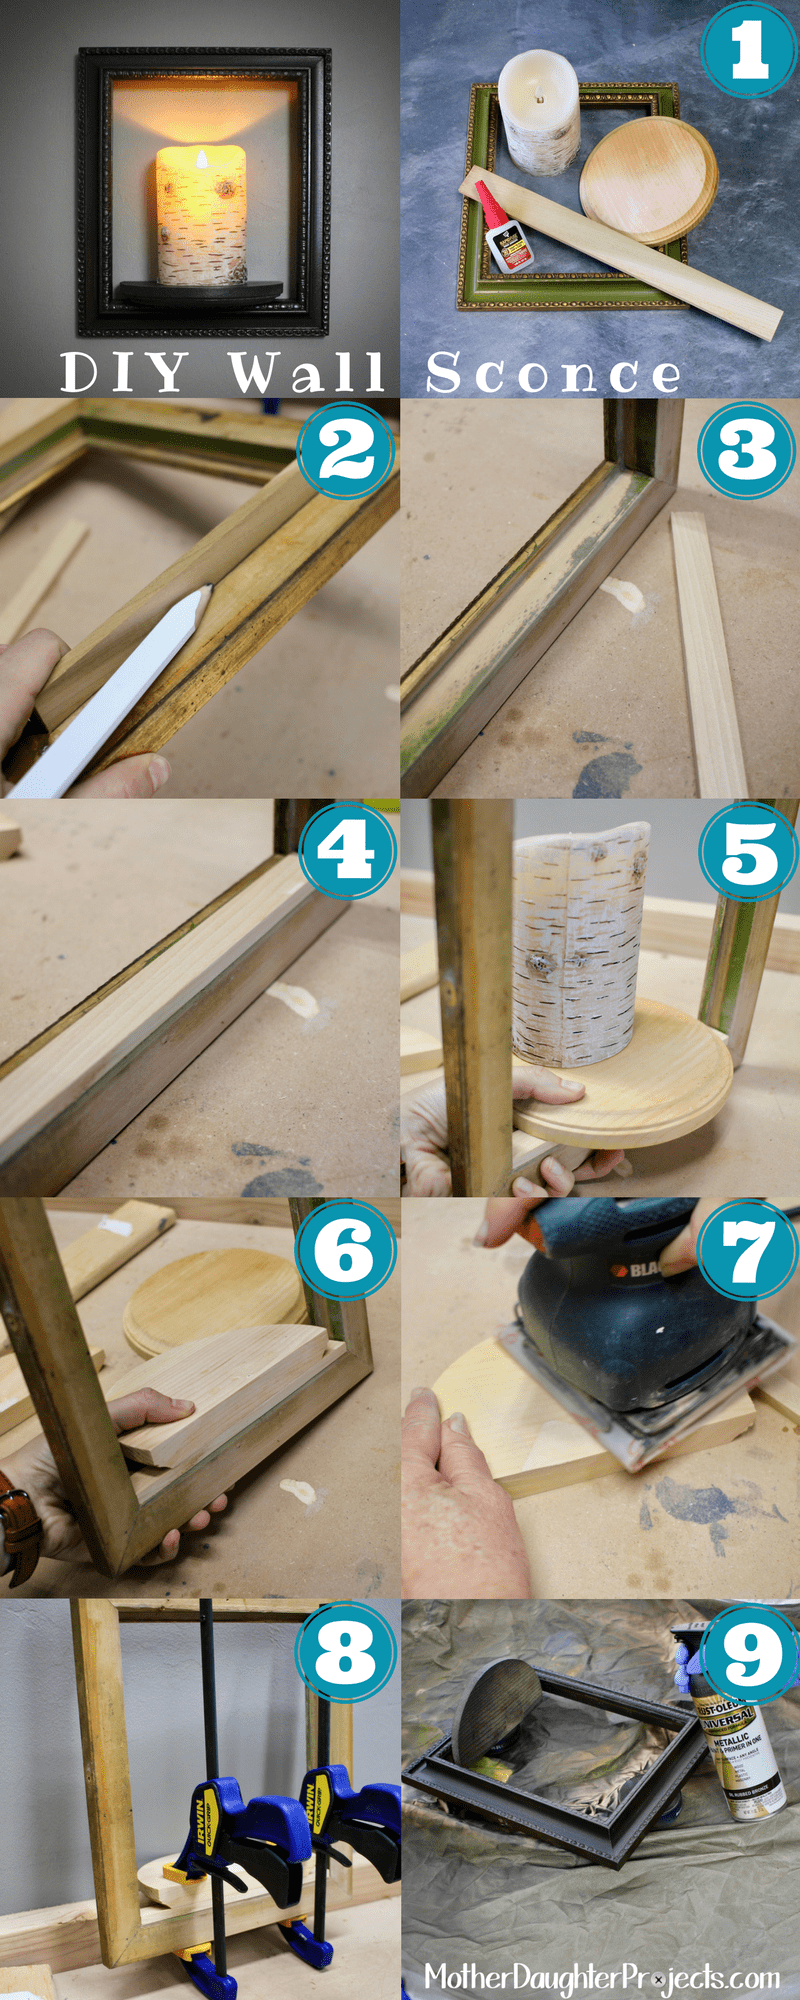
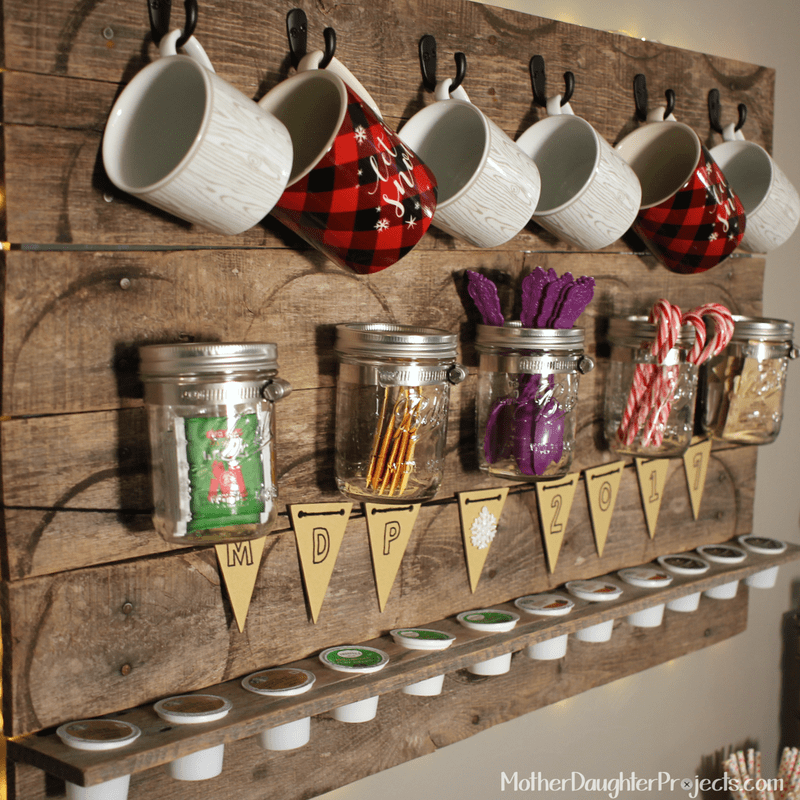
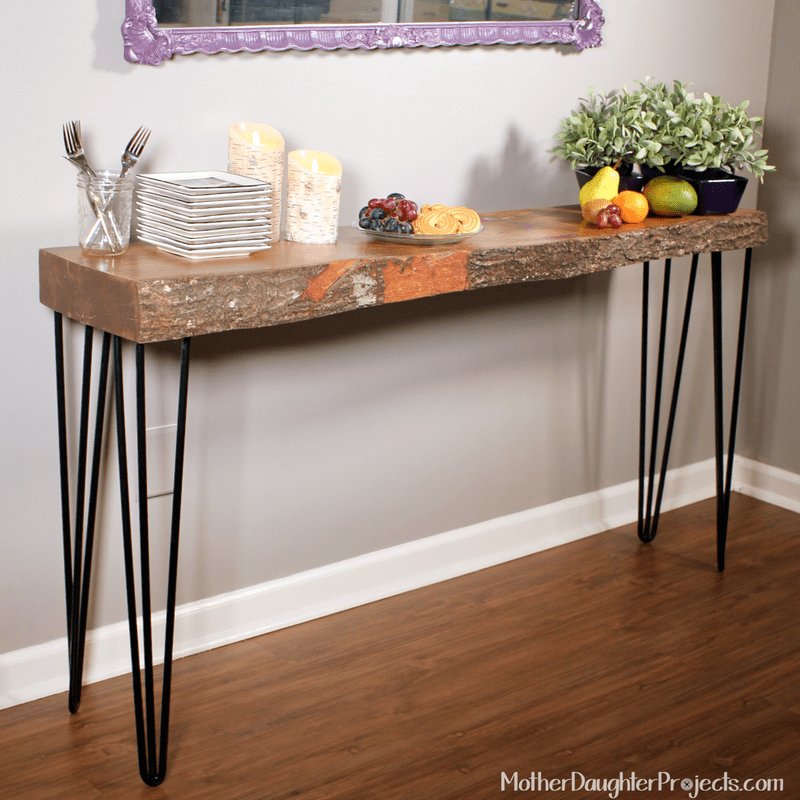
With the addition of our new live edge buffet table, the space above was needing some refreshing. We installed a coffee/tea drink station and then decided we needed new candle sconces. Steph has had traditional candles and sconces in these spaces, but we decided to utlilzed her new Luminara battery powered candles and create sometimes new for the space. 
We started with two matching vintage frames, along with scrap wood, and a couple of wood craft rounds--all found in my garage! Here's how we put together this quick project: 

Materials:
  • 2 matching frames
  • 2 wood craft rounds
  • Thin scrap wood (You need a piece that will sit flush with the inside the frame edge--where the glass would normally sit)
  • RapidFuse glue (Amazon)
  • 2 Luminara candles (Jo-Ann)
  • Saw, Spray Paint, Sandpaper​ 
Learn how to make a wall sconce using an old frame and battery powered candle!
Step 1: Gather your materials. Clean the frame if necessary.

​Step 2: Mark where to trim the wood piece, cut with saw (we used a miter saw). 

Step 3: Sand the inside edge where the piece of wood will fit.

Step 4: Glue this wood piece in place with RapidFuse.

Step 5: Determine the fit of the craft wood round. Place the candle on the circle and mark the cut. 

Step 6: Cut the circle to fit. Note: after determining how much to cut, we decided to turn the wood round upside down in the final placement.

Step 7: Sand the round.

Step 8: Glue and clamp into place. You could also add a few nails through the top for extra support.

Step 9: Spray paint and let dry. Add a picture hanger if your frame did not have one.

Because we had all the supplies on hand that we needed, this was a quick project to complete. These are a modern take on traditional wall scones but utilizing battery operated/remote controlled candles. ​
Please note: We are not sponsored by any of the companies/products that we used. These products were picked and bought by us.

FYI: We are not professionals, and we don’t claim to be. This is what we found worked for our project. Yours may need a little different approach. Safety first!

FYI: Affiliate links are being used on this page. Purchasing via these links help support MDP!

Related Projects

Mother Daughter Projects
Pallet Coffee & Tea Drink Station
Mother Daughter Projects
LED Lights vs. Incandescent
Mother Daughter Projects
Live Edge Wood GLOW Table
5 Comments
Kay Douglas
2/4/2017 11:00:05 pm

I don't have a web site or I would have included. I so admire this project and have luminara candle. If you have a subscription list, I want to be added on.

Reply
Steph
2/5/2017 01:54:06 pm

Thanks Kay! We will add you to the email list. We send out weekly updates with the latest projects.

Reply
Betty Hangs
3/8/2017 12:07:00 pm

The finished board that you see, there is an eye look above the middle row far left

Reply
Carol Lincoln
10/2/2018 09:41:25 am

This is great..I love crafts..
love your ideas...Did I mentuin I love crafts..

Reply
Steph
10/2/2018 05:20:34 pm

haha...we love them too!

Reply


Leave a Reply.

    MotherDaughterProjects.com

    Mother Daughter Projects
    ​
    Steph & Vicki

    We're homeowners sharing our DIY adventures as we learn to maintain, improve, decorate, and ​use tech in our homes.
    Share your projects with us here:  
    ​#trylearnshare
    MotherDaughterProjects.com
Mother Daughter Projects, LLC ∙ est. 2015 ∙ Tallahassee, FL by Vicki & Steph ∙ Dedicated to Tyler, Andrew & Ava ∙ Privacy Policy