|
We presented another edition of "Fast DIY" this week on Workshop Wednesday. After two years out in the Florida weather, our concrete pumpkins were in need of a little refreshing. We decided to take them from 'happy' to creepy with a concrete makeover! Take a look at the little Quikrete makeover we did! 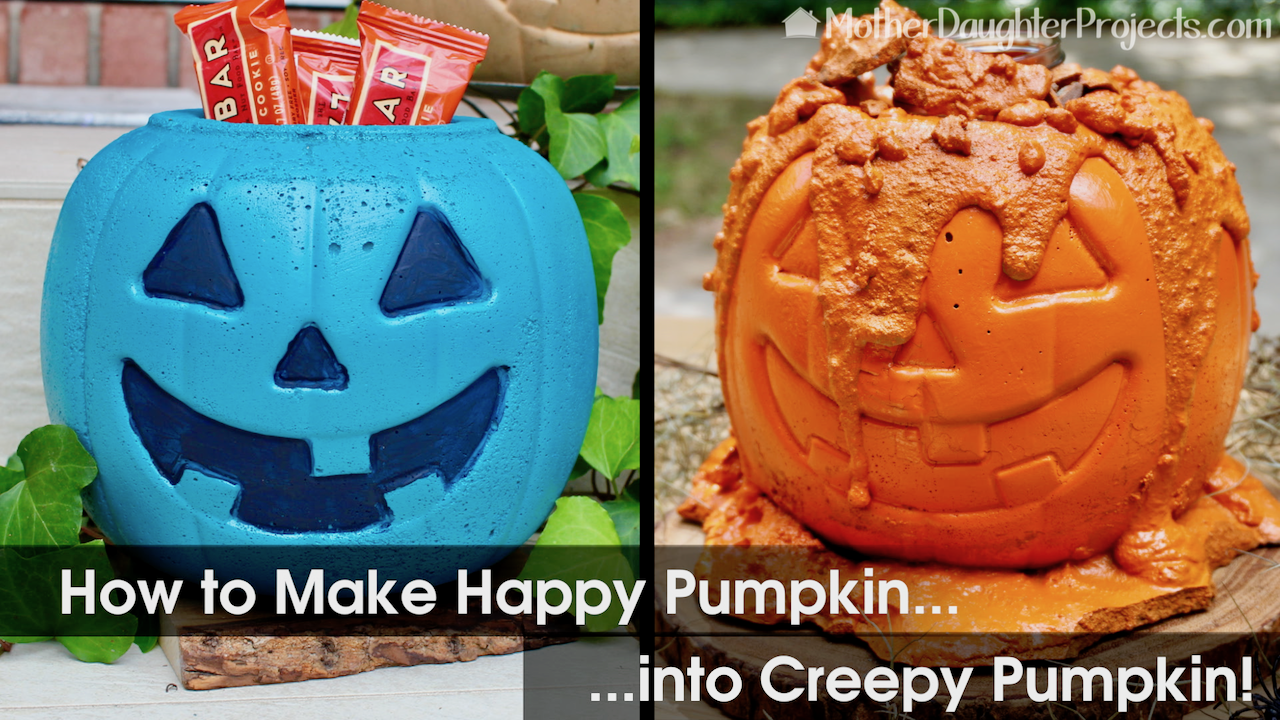 Materials:
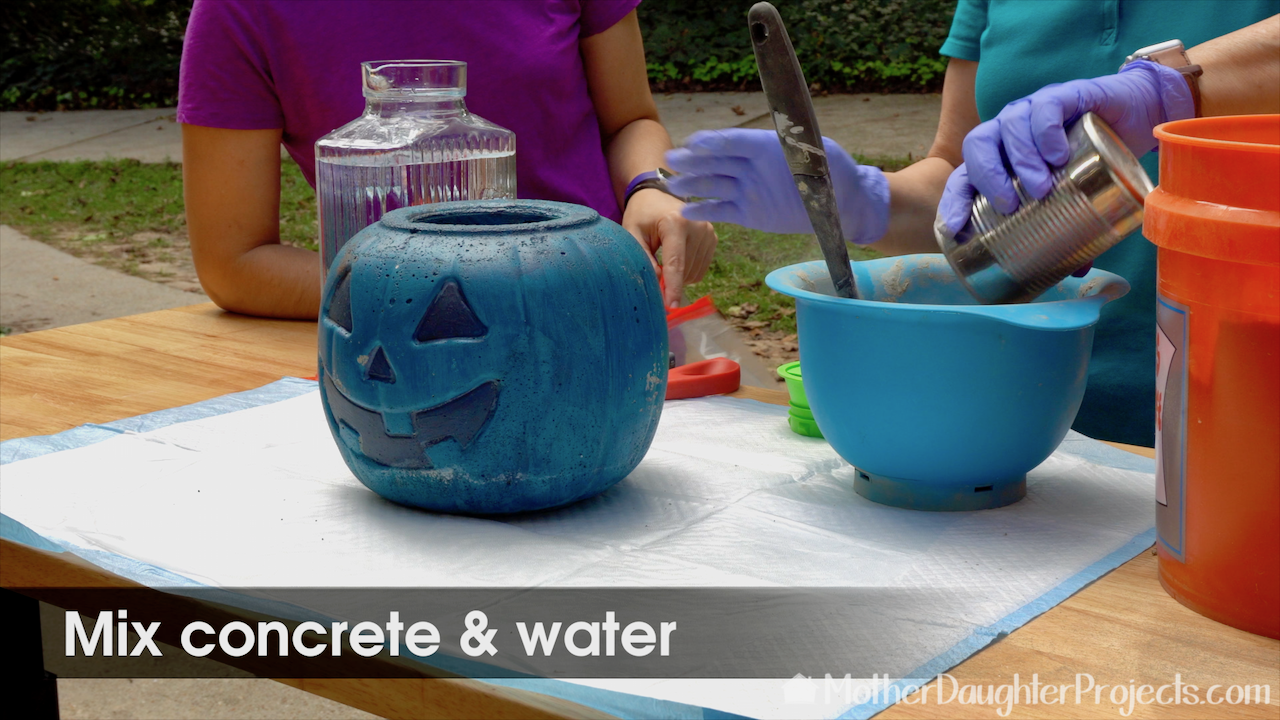 We protected our work surface with a puppy pad covered with press 'n seal wrap. This wrap is slightly sticky on one side so it holds well on the puppy pad surface. The concrete will not stick to the plastic surface. Mix the Quikrete with water until it forms a brownie batter like consistency. Work outdoors and wear gloves, mask, and goggles for protection from concrete dust. 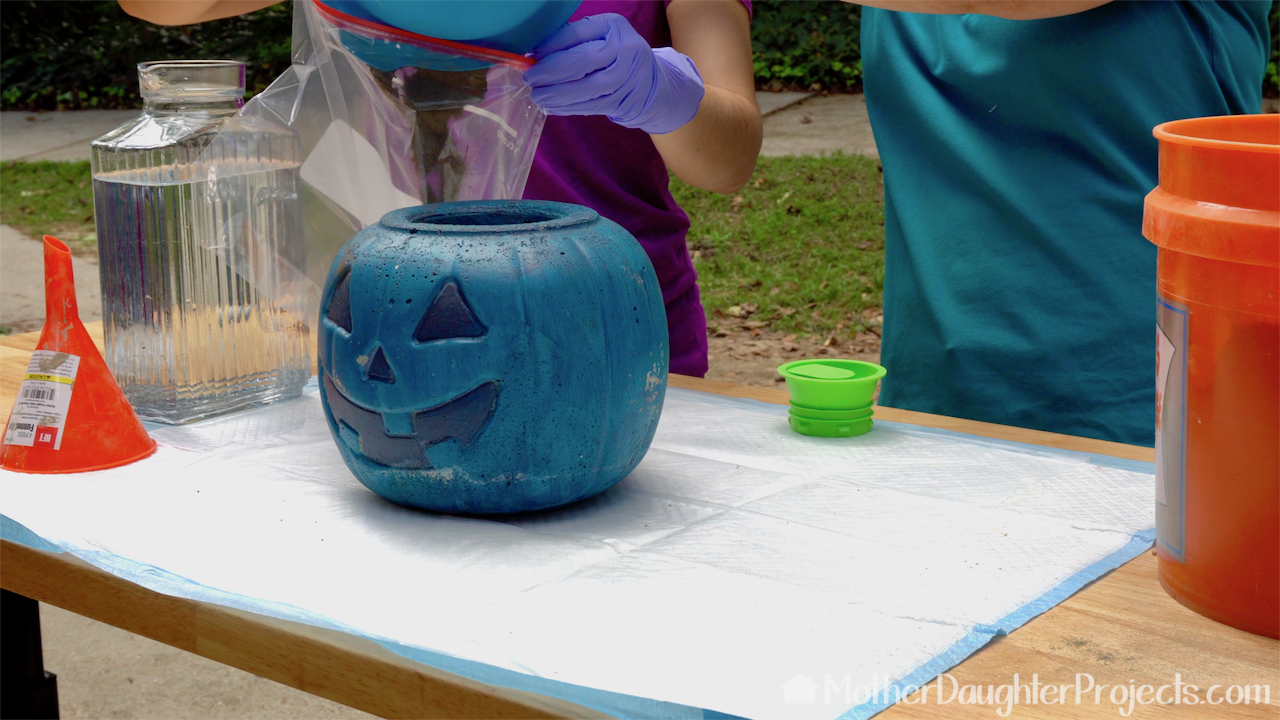 Cut across one corner of the bottom of the plastic bag. Fill the bag with the mixed concrete. 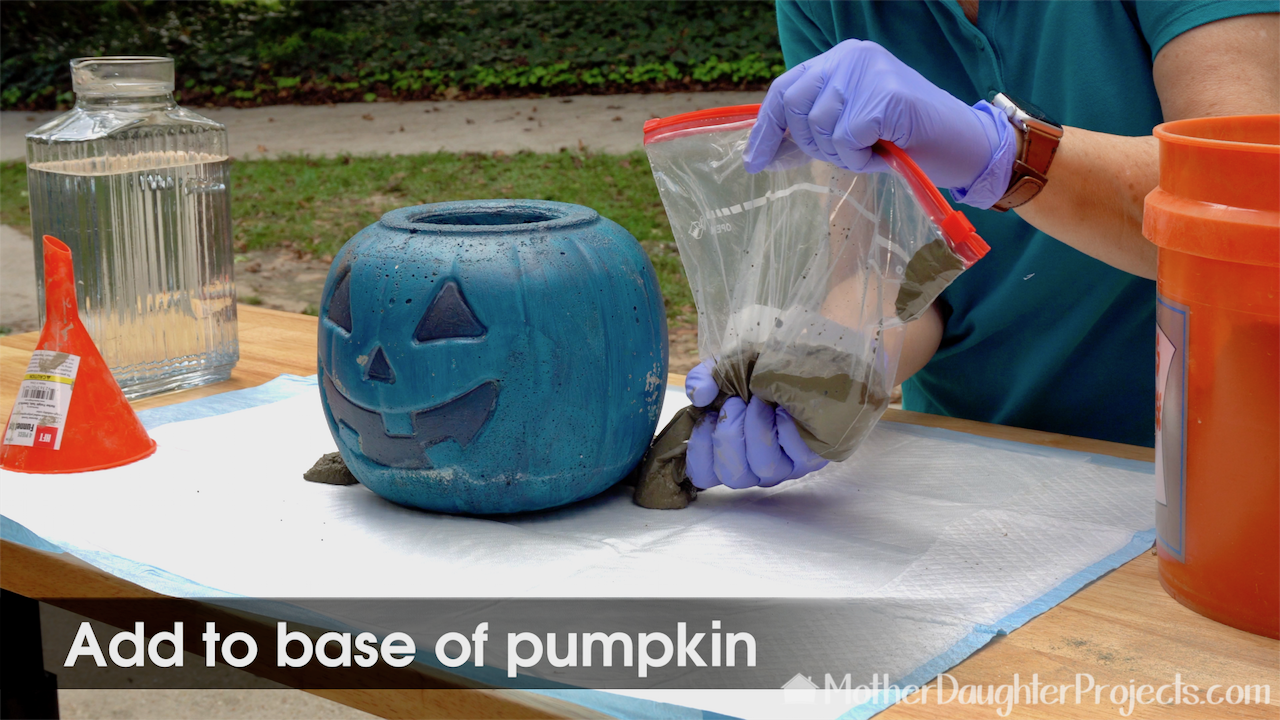 Pipe the concrete around the base of the pumpkin. After piping around the entire pumpkin, go back and move the concrete as close to the base of the pumpkin as possible. 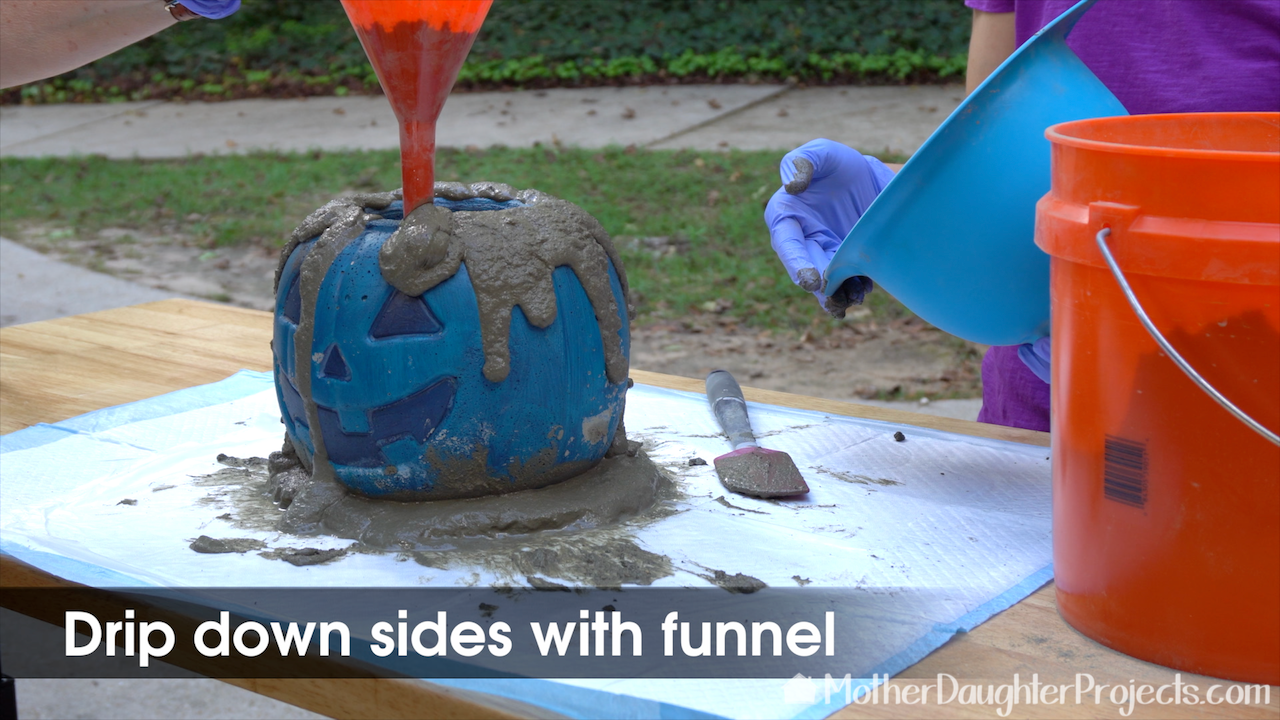 This next step is best completed with a buddy. Mix up another batch of concrete, but make it a bit runnier. It will need to be able to move through a funnel. Hold the funnel at the top of the pumpkin. The other person pours the concrete into the funnel. Allow the concrete to drip down all around the pumpkin.  Lastly, add drops of concrete randomly around the pumpkin to create 'warts.' 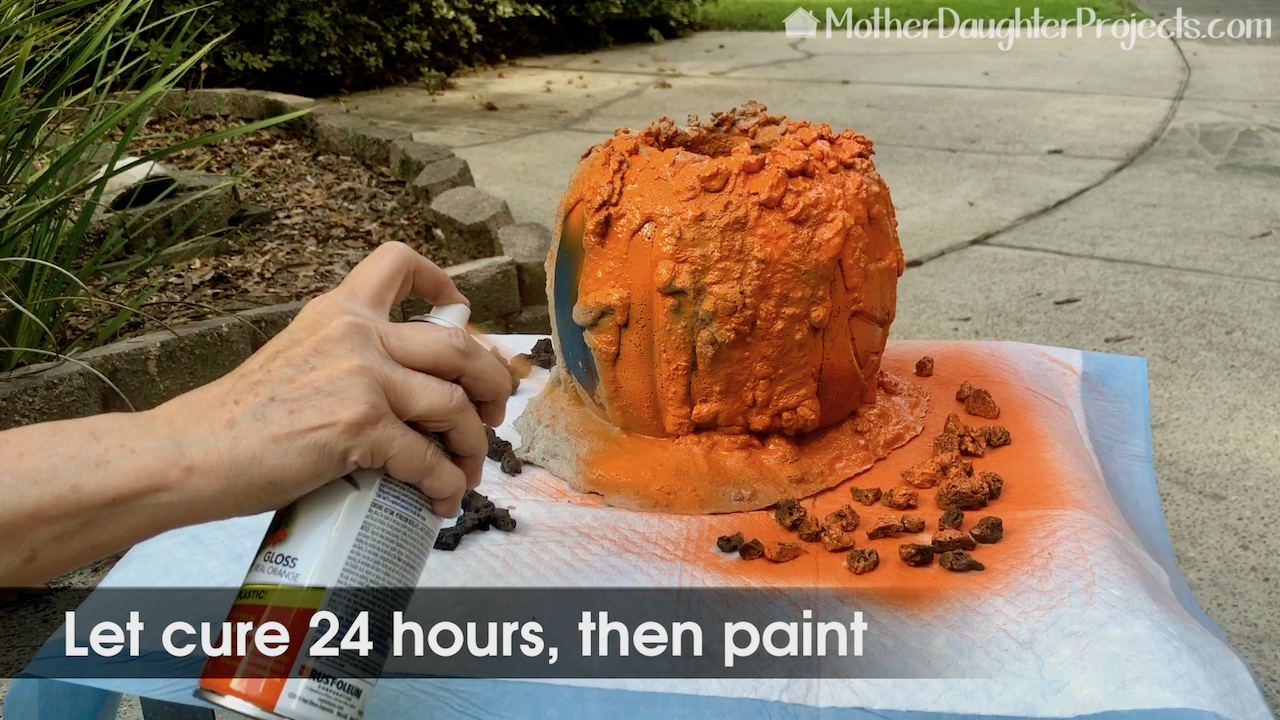 Allow the pumpkin to dry at least 24 hours before spraying with the color of your choice--traditional orange or perhaps teal to recognize those with food allergies.* Spray any concrete bits left over or small rocks to use at the top of the concrete, if you plan on using a candle. 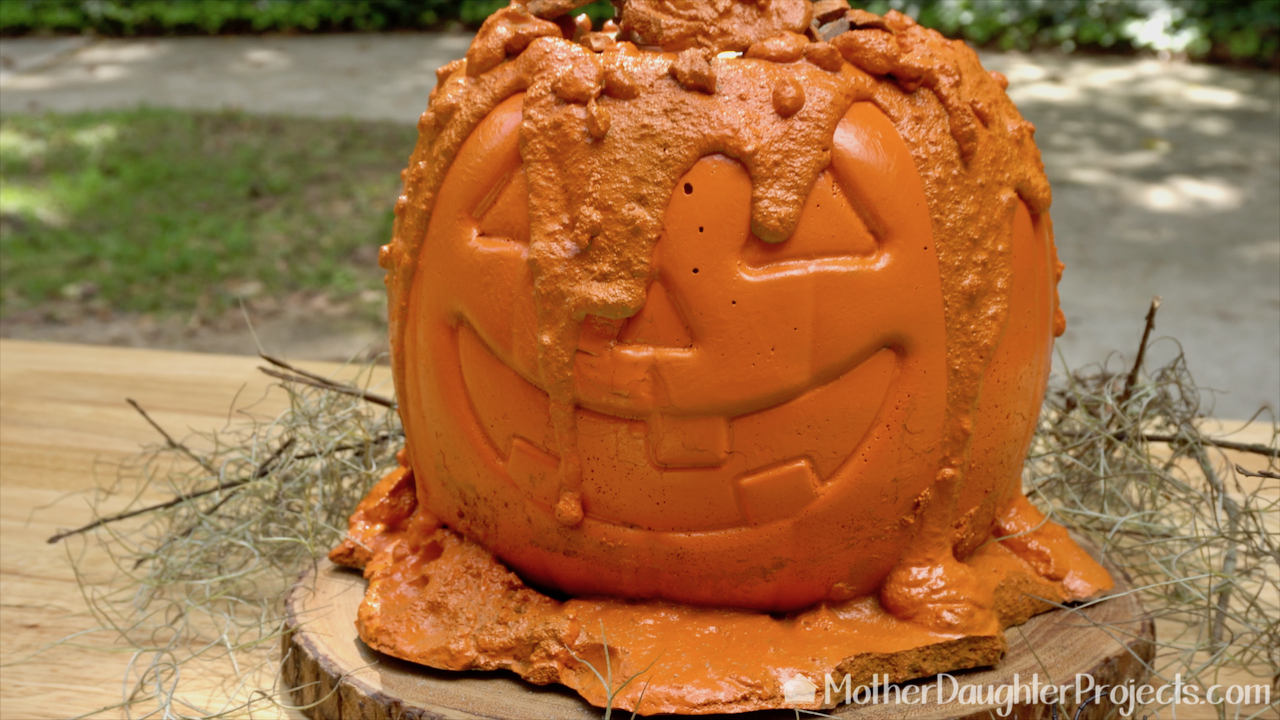 This little guy is ready for inclusion in our 2018 Halloween display! * About the Teal Pumpkin Project Putting a teal pumpkin on your doorstep means you have non-food treats available, such as glow sticks or small toys. This simple act promotes inclusion for trick-or-treaters with food allergies or other conditions. (from FoodAllergy.com)
2 Comments
Yoyo
10/11/2018 11:04:38 am
Yes, I have noticed your colors for a long time now, I think it’s clever! Great job on the projects and the pumpkins! I look forward to your videos.
Steph
10/15/2018 09:58:53 am
Hi Yoyo, so happy you noticed! Thanks for watching :) Leave a Reply. |

Mother Daughter Projects
|
