|
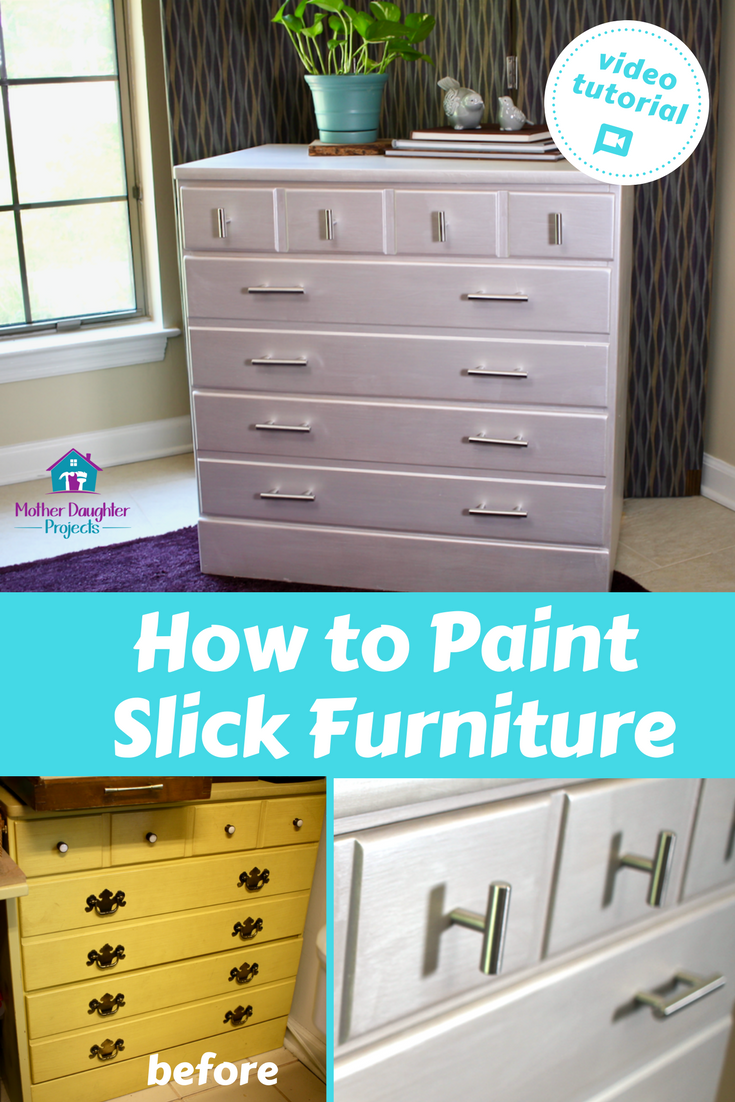
text by Vicki Sign up to get Mother Daughter Projects updates in your email! Dixie Belle paint is Florida based, as are we, and they recently reached out to us to try their products. Since I was not familiar with their inventory, I took a bit of time to check out what they had as well as watch a few videos. In my exploring, I found a product called Slick Stick. It was an 'Aha' moment! Back in 1991 when Steph was in kindergarten, I found some bedroom furniture through the newspaper classified ad. That was a time way before Facebook Marketplace and Craigslist! Used furniture was a little harder to source back then. Anyway, she used it for a long time and even moved the desk to her new house in 2013. The desk is long gone, but I still had the dressers and hutch pieces at my house. I had been very reluctant to get rid of them since they are so well built. I always thought I'd do something with them, but was stymied because the tops were Formica (plastic laminate) with plastic edging. I never knew what would work on these to allow me to paint. Back to that 'Aha' moment--the Slick Stick would work and I finally could paint and reuse the furniture! 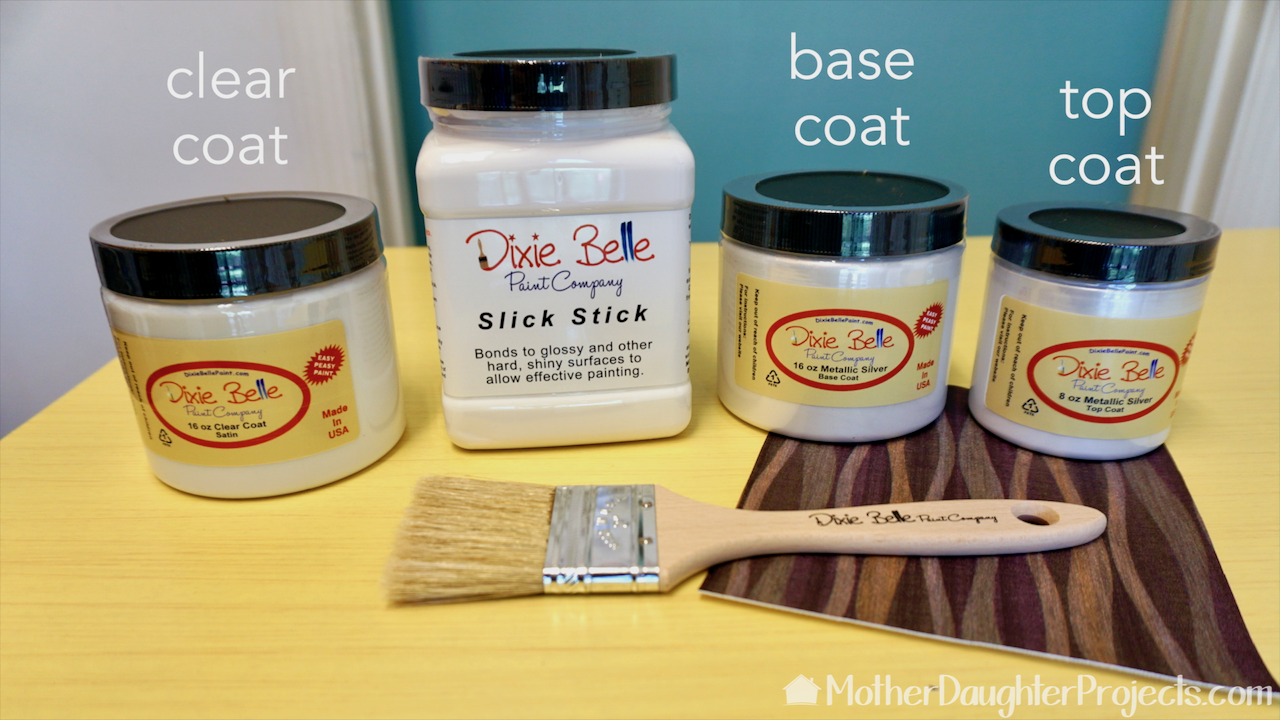 That piece of vinyl in the foreground of the picture was the inspiration for the color top coat I chose. It has a little bit of silvery white in it which I wanted to bring out. I did that by choosing the Dixie Belle Metallic Silver top coat. There are three steps to this painting process: base coat or Slick Stick, top coat, and finally the clear coat. Materials/ Tools:
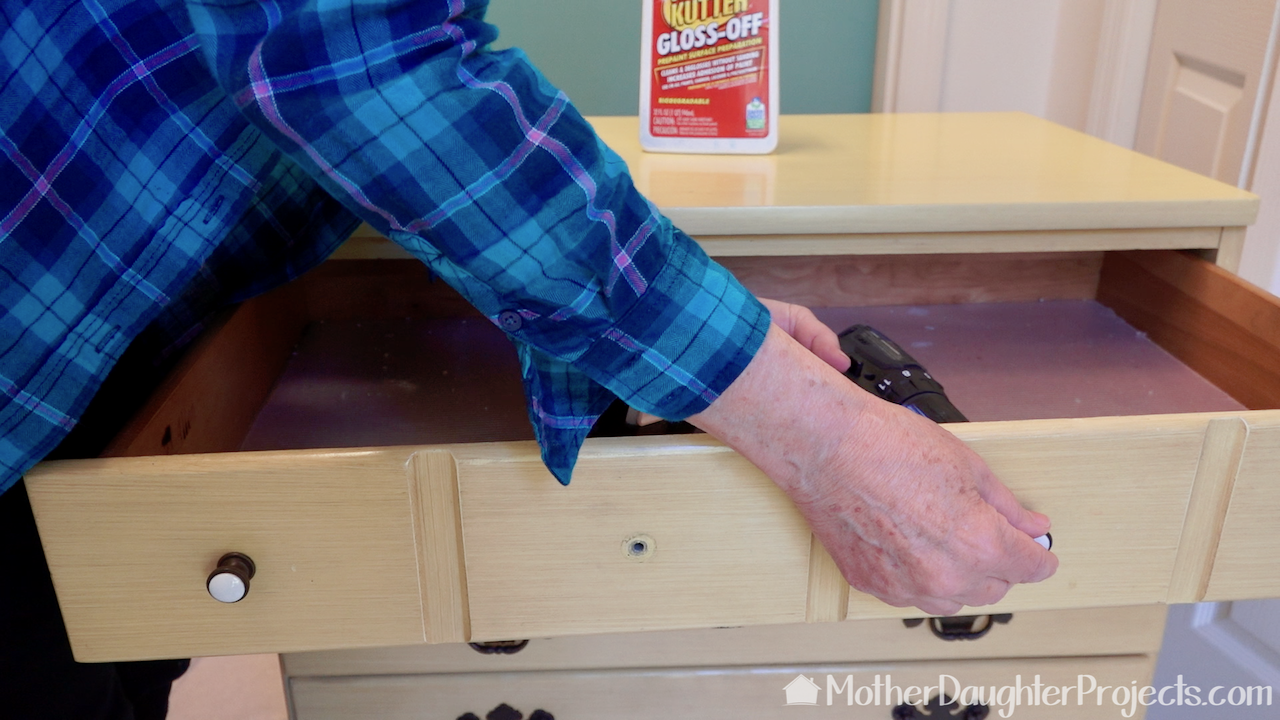 The first step in any painting project is prepping the furniture piece. All the hardware is removed and the piece is cleaned. Dixie Belle does have it's own specialized cleaning product, White Lightening. I did not have a sample of this to use so I used my go-to cleaner, Krud Kutter. I used a magic eraser and Krud Kutter as well as Scotch Brite pads to clean the piece. The nice things about using a mineral based paint like Dixie Belle is the minimal prep needed for a piece of furniture. Usually only a good cleaning is necessary, no sanding or stripping. 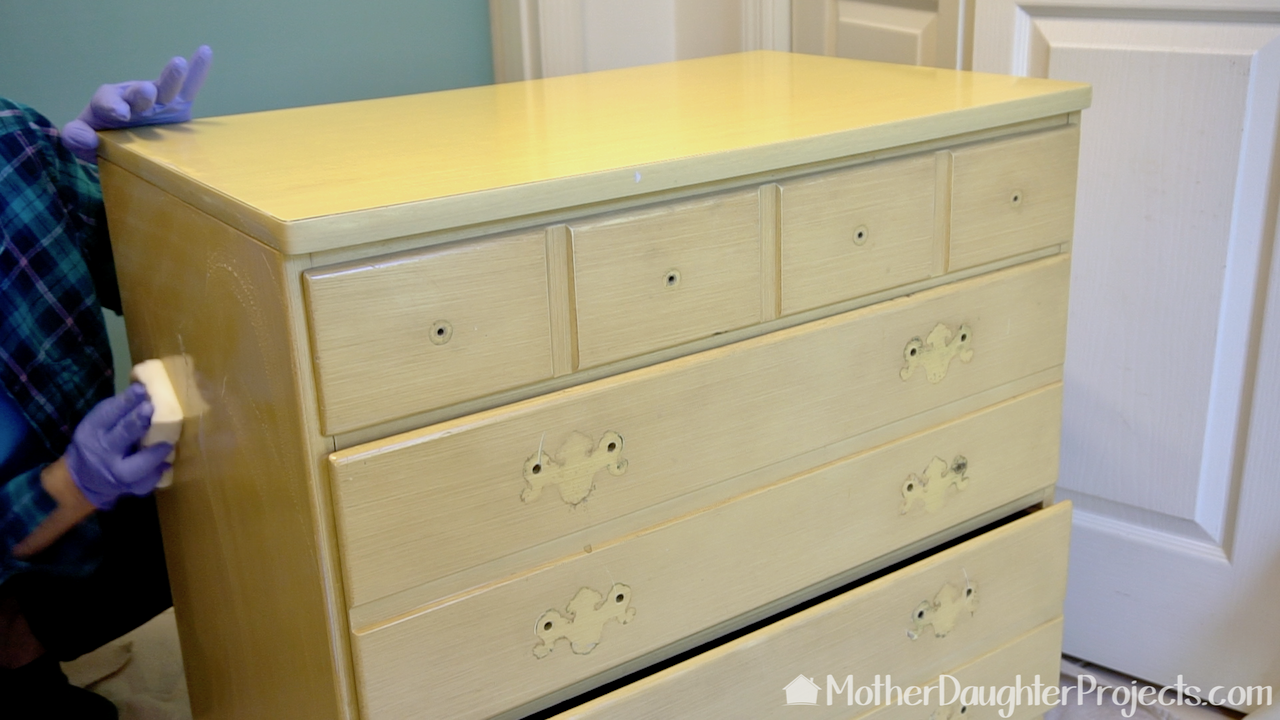 The magic eraser (or generic version) does a great job getting the piece clean. 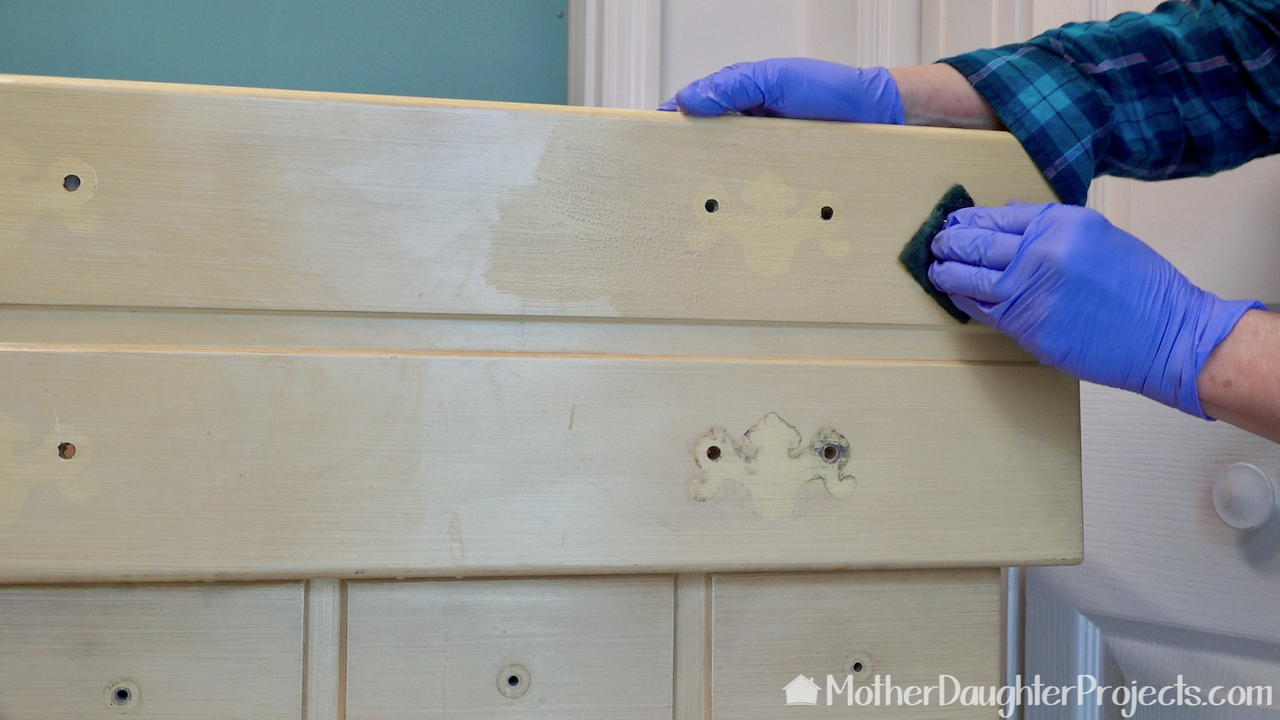 I was a little concerned I might have to do a little sanding to smooth down those areas under the drawer pulls and handles. I scrubbed a little more vigorously with a Scotch Brite pad and everything smoothed out perfectly. Tip: I buy the green pads at The Home Depot. They are really large. I cut them into eighths for easier use. 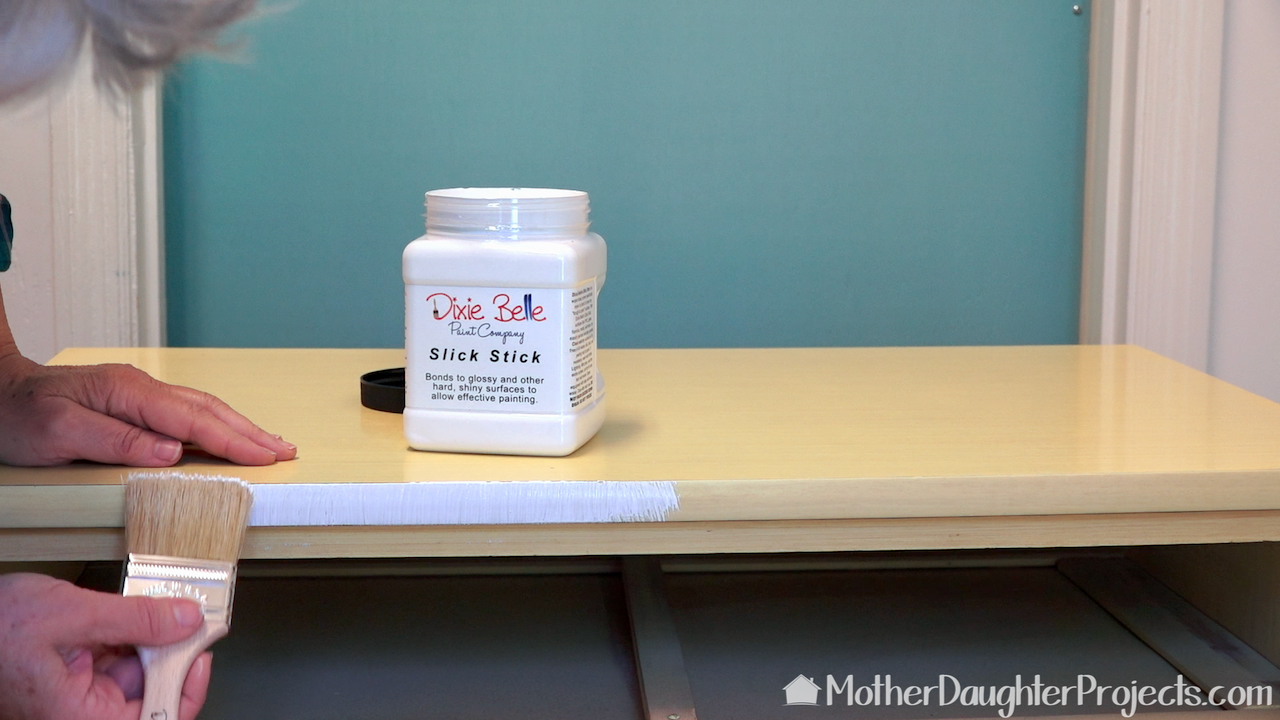 The first step was to apply the Slick Stick to the plastic trim and plastic laminate top. Dampen the brush before painting. 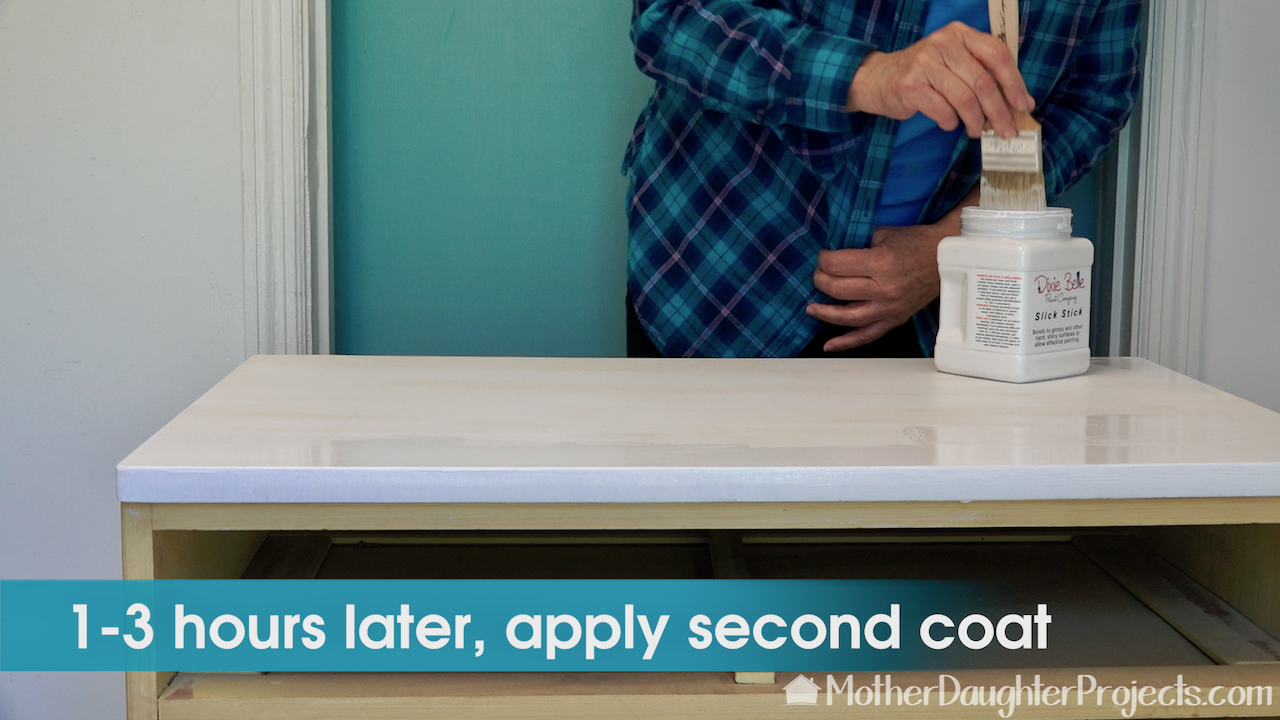 Once the Slick Stick was dry, I applied a second coat. The final coat needs to dry overnight or 24 hours. 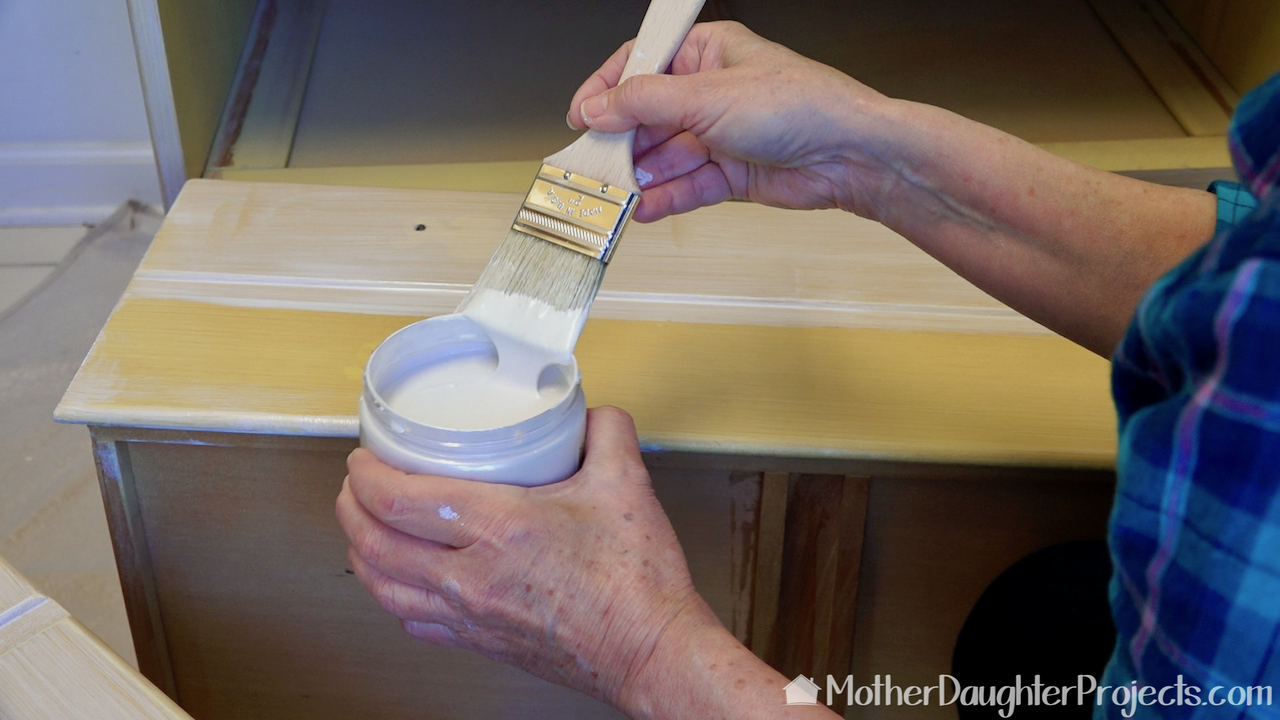 While the Slick Stick was drying, I started the first of three layers of base coat on the sides and drawers of the furniture. Again, dampen the brush before starting. 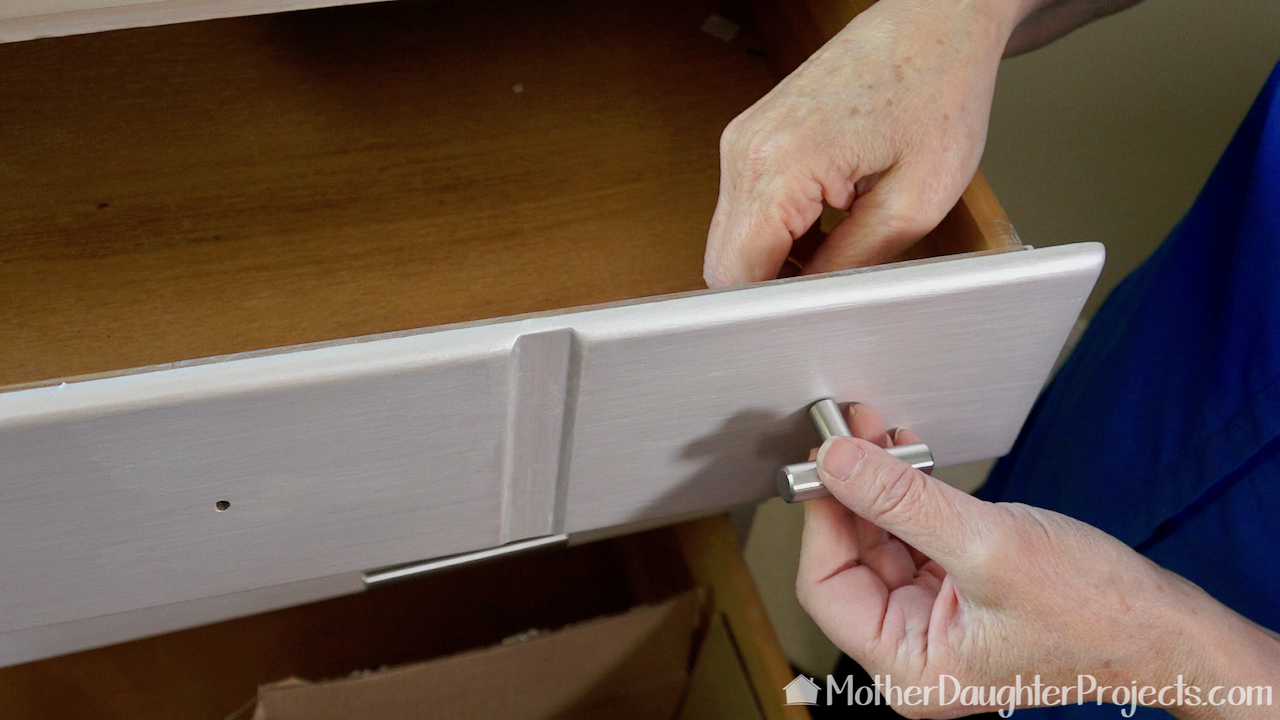 After the base coat, I applied two coats of the metallic silver and then one coat of the clear top coat. 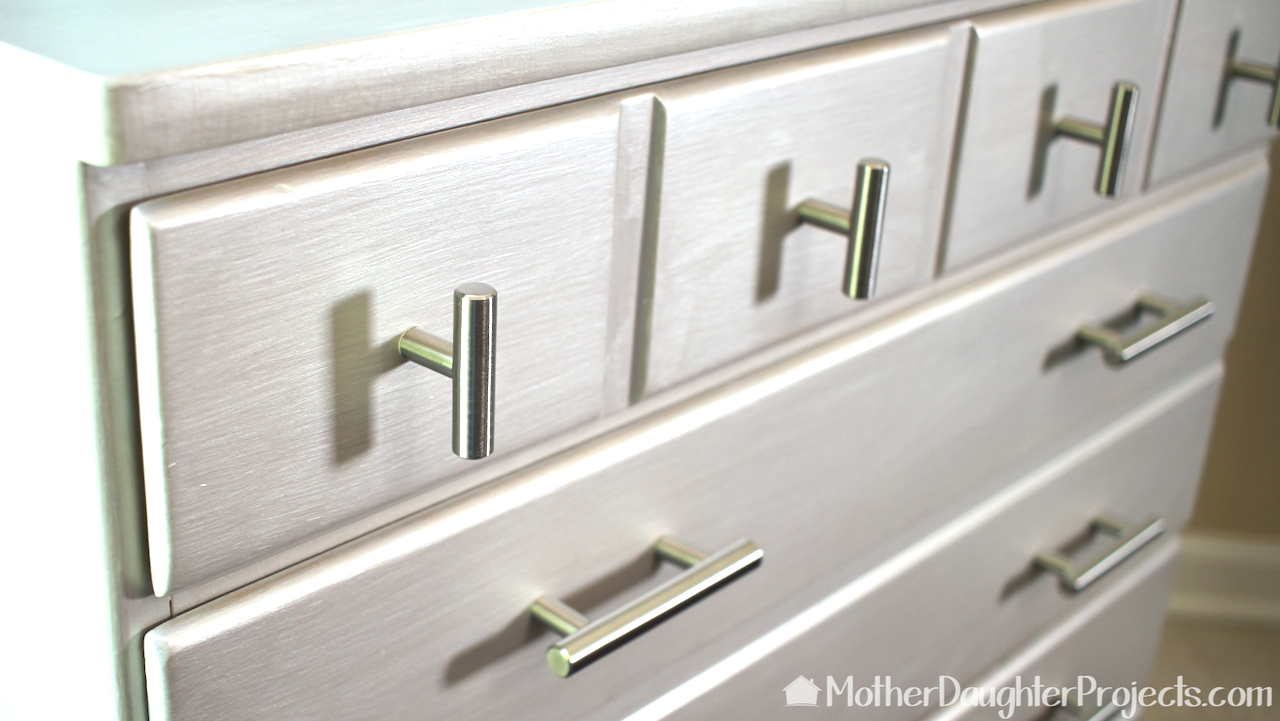 I considered spray painting the old hardware, but decided on something more modern. I am very happy with these knobs and handles and love the updated look it gives the dresser.
Looking at this picture, I noticed that the dresser is pretty reflective. That silver metallic finish is going to look different depending on the adjacent colors in the room. This is actually staged in my dining room, although the piece now 'lives' in my bedroom. Look how it has picked up the color of the purple rug and is reflected in the surface! One of the big advantages of using a mineral or chalked based paint is the cure time. When you paint with a latex paint, the cure time is a least 30 days before it stops feeling sticky. With the Dixie Belle paint, the cure time is minimal meaning you can start using it pretty much right away. For example, if I had put that decor on top of a freshly painted latex piece, it would have stuck to the surface and possibly damaged it. Latex painted furniture is much more fussy and delicate. The only downside I can see using a mineral or chalk based paint are brush strokes. This is not unique to Dixie Belle. Any mineral or chalk based paint I have ever used produces the same result. You have to be okay with a little imperfection in the surface of the painted piece. This project started with the discovery of the Slick Stick. It makes me so happy that I found a product that would work on my difficult to paint furniture! Do you have a piece of furniture you want to paint but don't know what to use? Share with us! Please note: We are not sponsored by Dixie Belle but they did provide the product we used for free. Thanks Dixie Belle! FYI: We are not professionals, and we don’t claim to be. This is what we found worked for our project. Yours may need a little different approach. Safety first! FYI: Affiliate links are being used on this page. Purchasing via these links help support MDP! Related Projects
12 Comments
Vicki
4/25/2018 03:08:50 pm
We are very happy with how it turned out. Can't wait to get started on the matching dresser! ~Vicki
Mary Ann Monteforte
4/25/2018 12:58:28 pm
You had me at NO sanding, lol!! Absolutely gorgeous!!
vicki
4/25/2018 03:09:16 pm
I know!!! ~Vicki 4/25/2018 04:21:45 pm
What a transformation!! Went from old, colonial and boring to sleek and modern!! Great Job and SO easy!!!
Vicki
4/25/2018 04:37:15 pm
Thank you. I am so pleased with the outcome. This is Ethan Allen furniture so it was worth waiting for the right product to come along to reinvent it! ~Vicki
Tammara
4/25/2018 05:17:52 pm
Get job! Love the new look and colour, very modern. Do you think if you used a small (hotdog) roller for the front of the drawers and side it would eliminate the brush strokes? You can barely see the brush strokes but I was curious if you used a roller would the outcome be different?
vicki
4/27/2018 07:39:58 am
I was wondering the same thing as I would much prefer to use a roller. I'm going to contact the company to see what they say. I'll follow up when I've gotten an answer.
Melanie Callaway
4/26/2018 07:30:48 pm
I have several pieces similar to the dresser you painted/updated. I’m ready to tackle them now after watching your video. Thanks!!!
Vicki
8/7/2018 09:53:33 am
Great suggestion. I'll try that next time.
Annette Smith
9/23/2019 03:20:13 pm
Hi, cannot get this in the UK, can you suggest anything else that I could use, please. Leave a Reply. |

Mother Daughter Projects
|