|
text by Vicki Sign up here to join our weekly email newsletter!
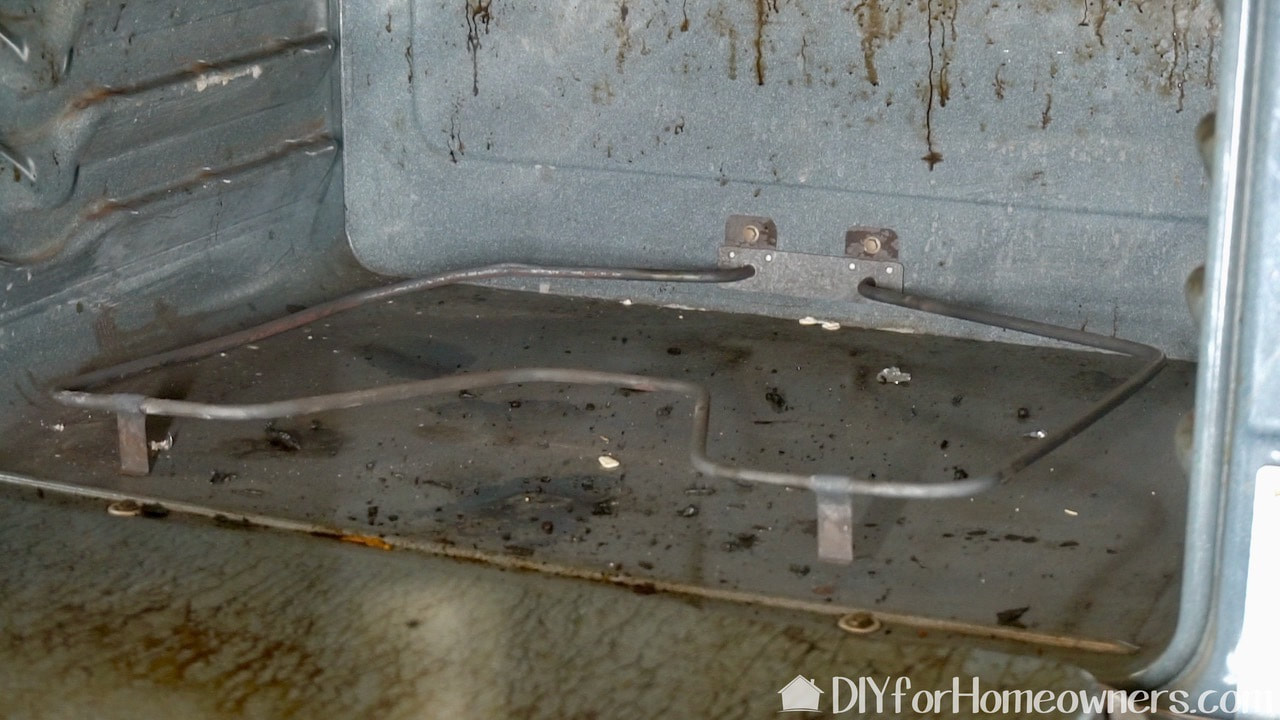
Like many have done during this season of COVID-19, we have been cooking all our meals at Steph's house. Her oven, which is 16+ years old, has been getting a workout. While baking bacon for our favorite BLT sandwich, we realized the oven was on but not getting hot enough to cook. It was then we realized the oven bake element had failed and lunch was going to be late!
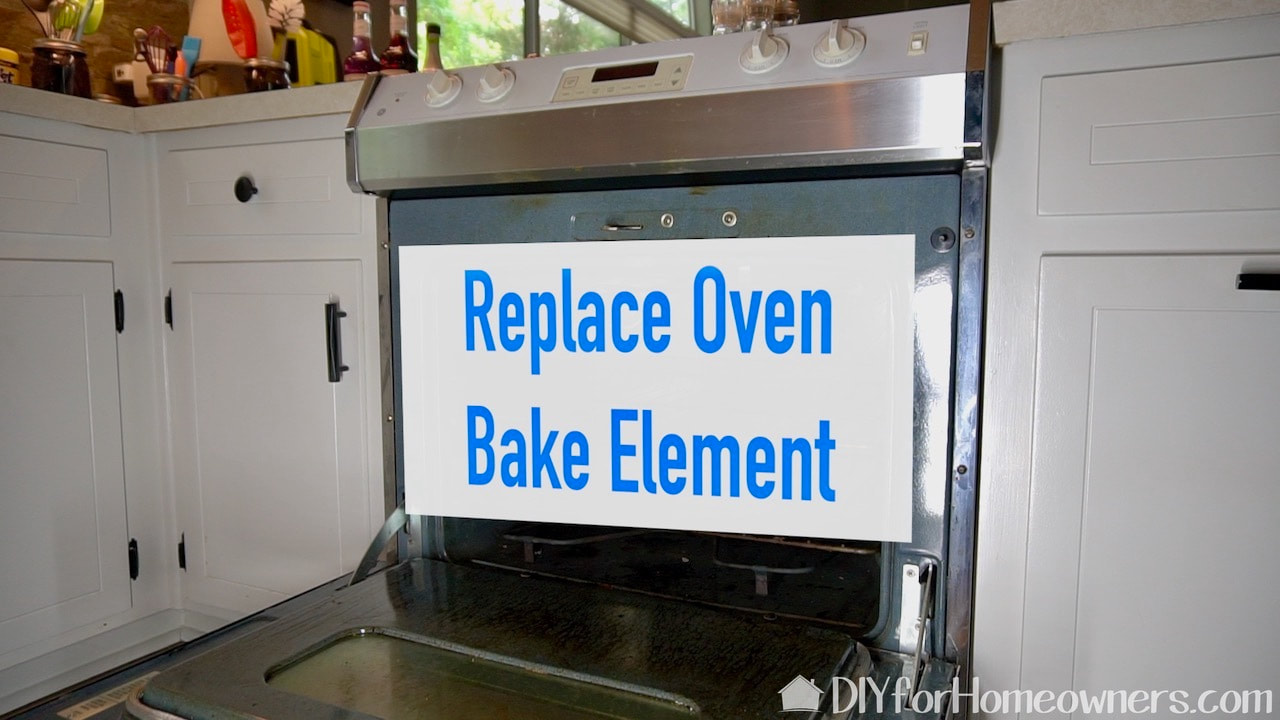
Although, I never had replaced an oven bake element, I knew it was possible. We did a lot of online research to see how it was done. The hard part was finding the correct part. This oven is so old that the owner's manual does not appear online and a replacement part number does not seem to exist. We had to make an educated guess on the part we needed based on the size and shape of the old element.
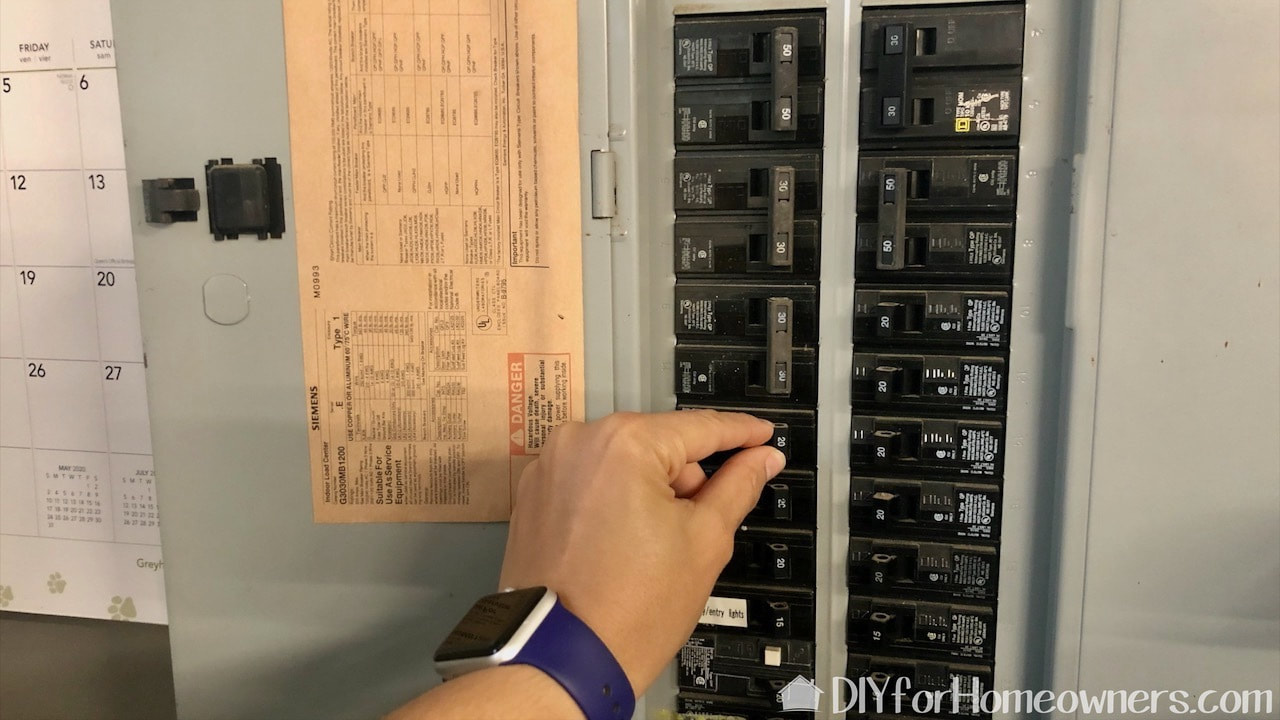
Once we had the correct part, it was time to remove the old one and install the new one. Always turn off the power at the box before attempting to work on anything electrical!
Time to get started. First off, it would have been extremely helpful to have been able to remove the door. We didn't realize this was possible until long after we had replaced the part. Basically, for this oven, the door is opened to the broil position and simply lifted up and off the hinges. I don't know if that works for all oven doors but it was super simple!
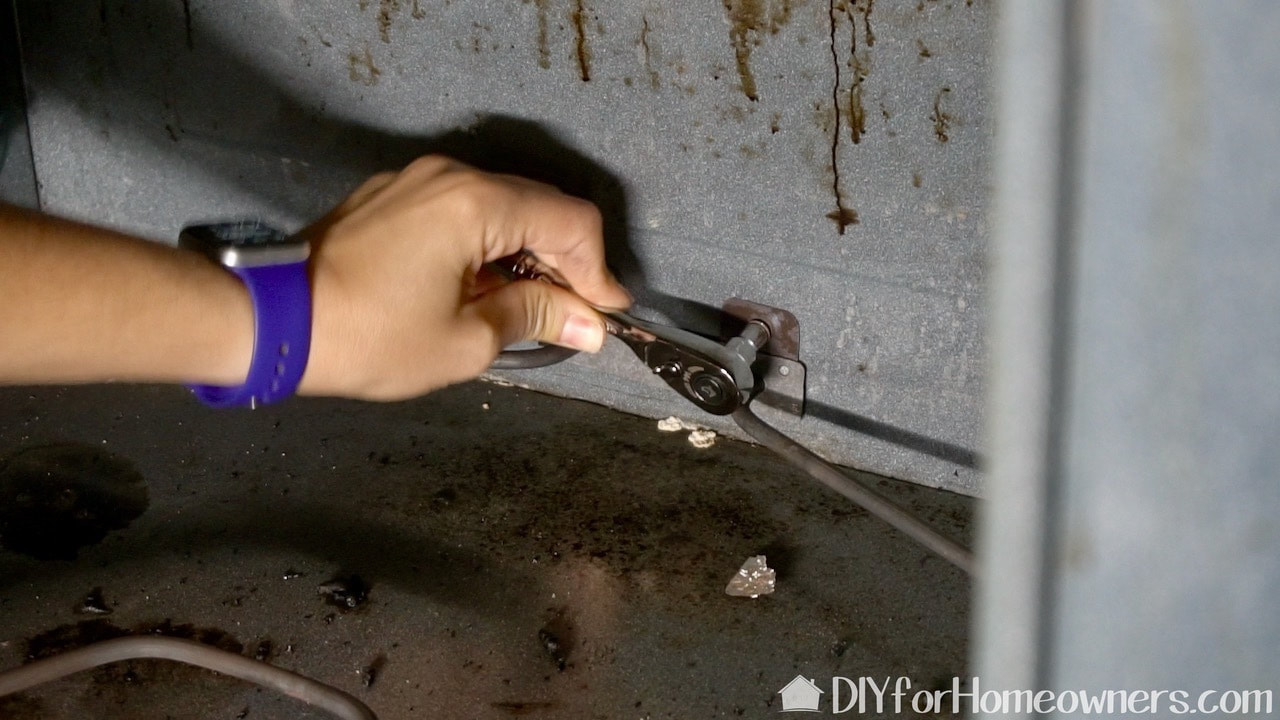
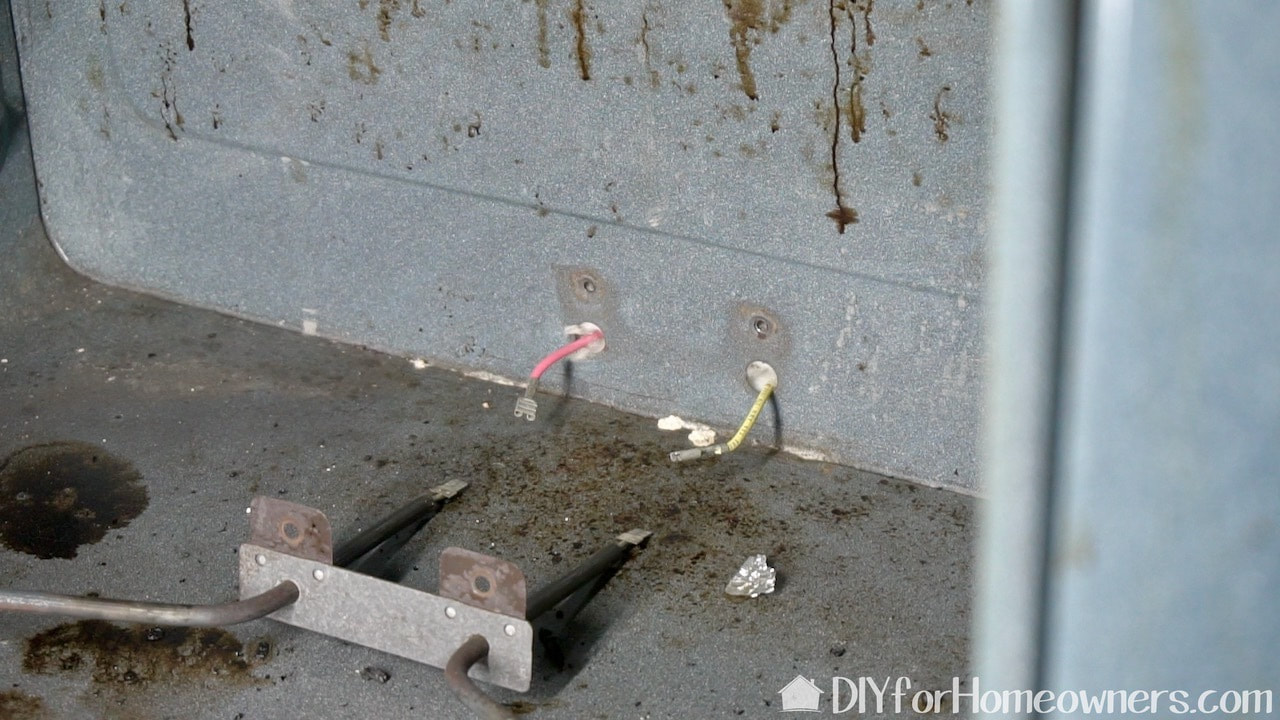
We used a socket wrench to remove the two screws holding the element to the oven wall. Save those screws because you'll need them. We took the opportunity to clean them with WD-40 while they were out.
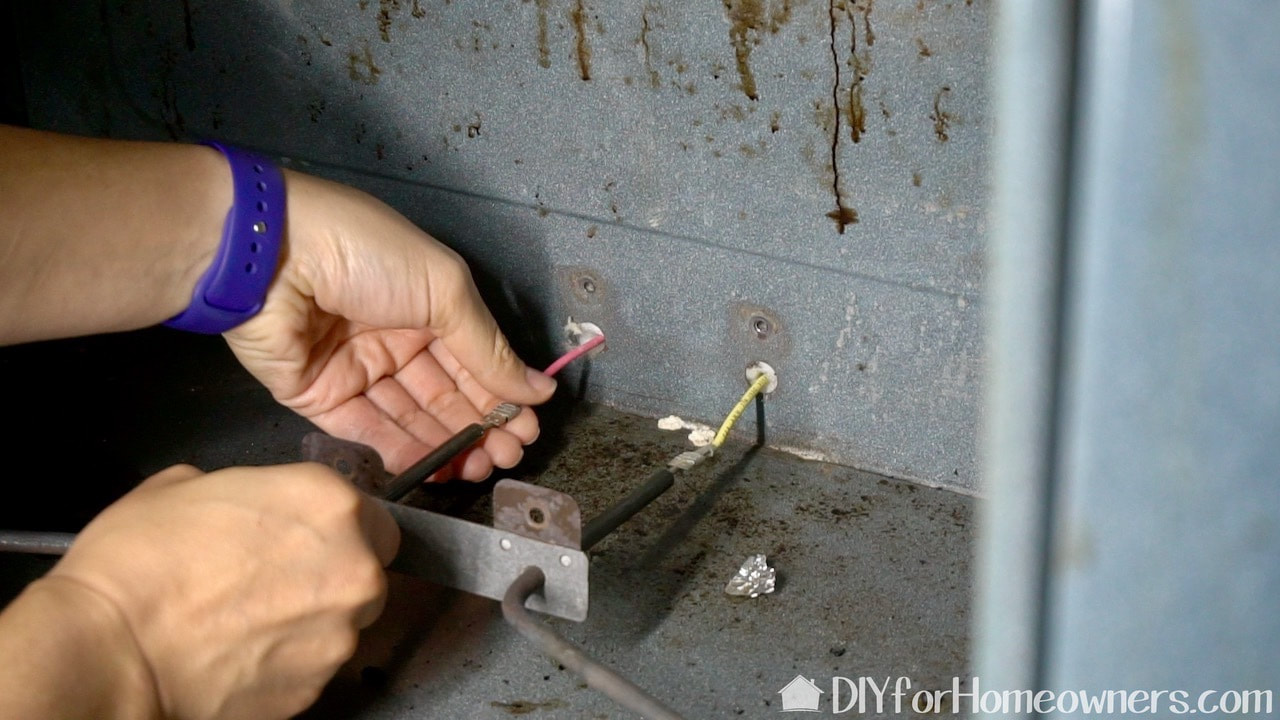
Gently pull the element away to expose the wires. Disconnect the wires.
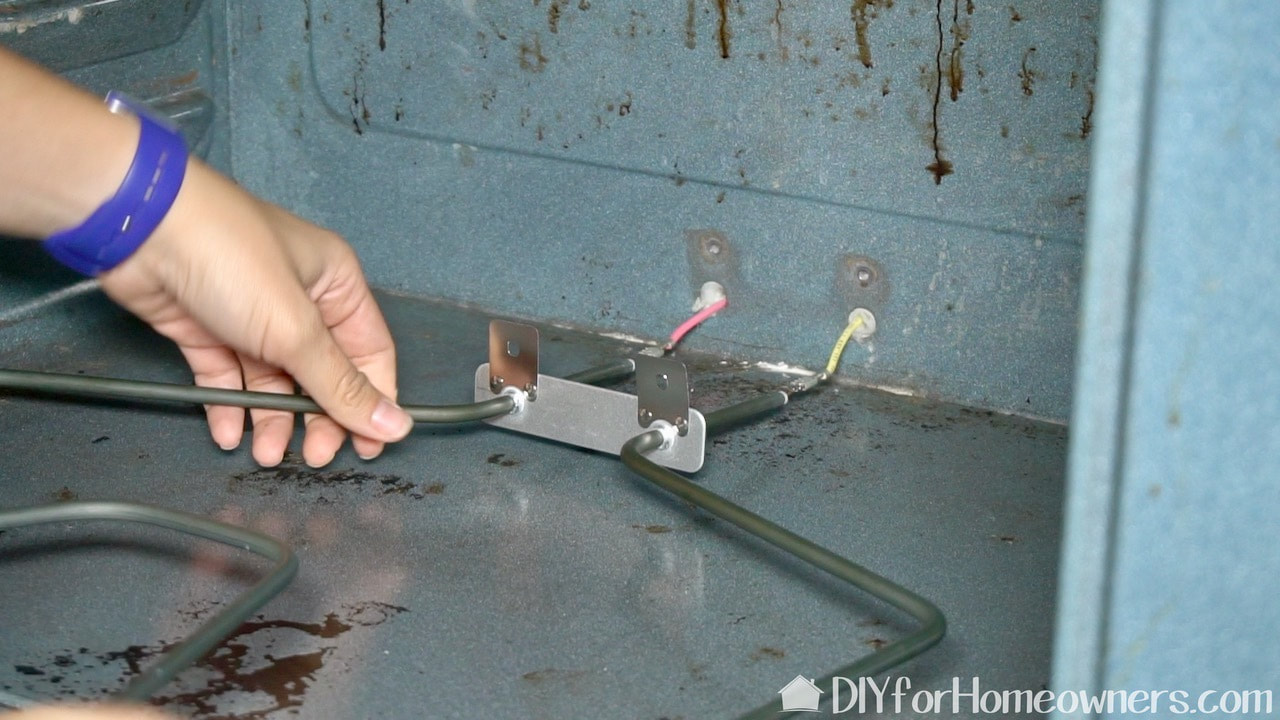
This is how it will look when the wires are disconnected. Tip: This would have been a good time to do a good clean of the inside of the oven. I wish we had since it is easier to clean it with the element out.
Connect the new element to the existing old wiring. Gently push the wires in and replace the two screws.
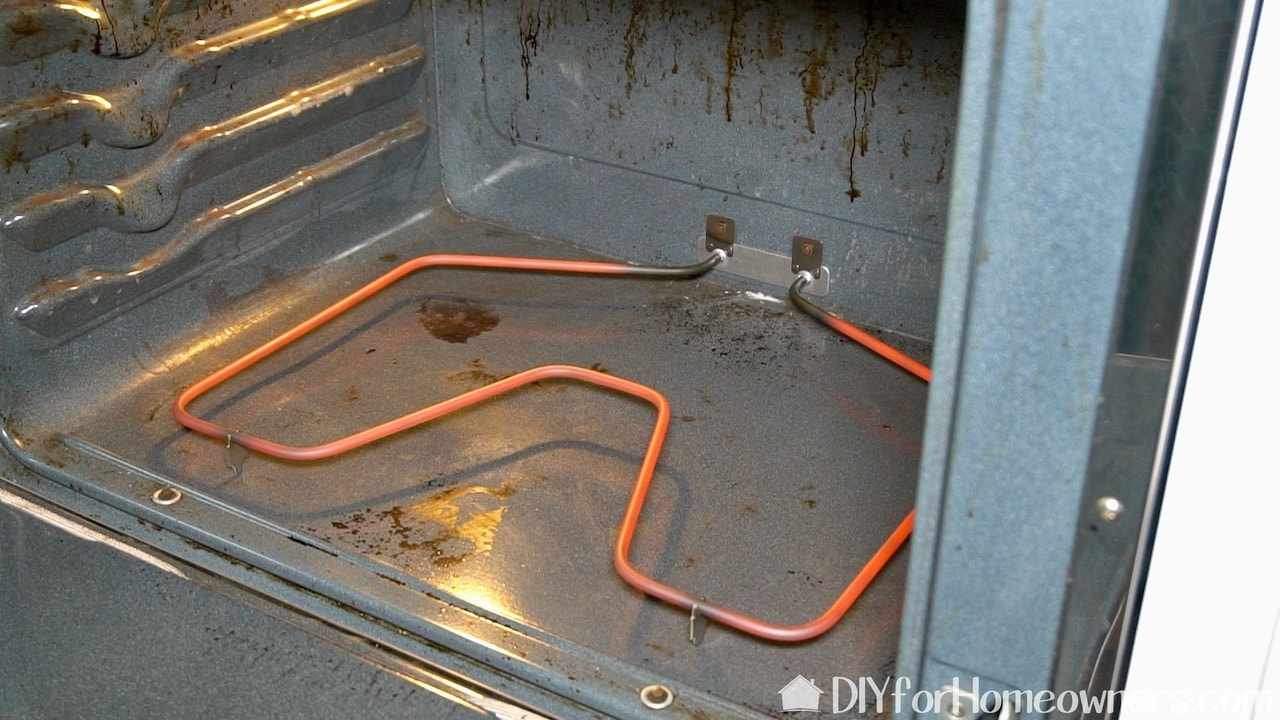
Turn the power back on, turn on the oven and test your work! Look at that beautiful red glow! It totally worked!
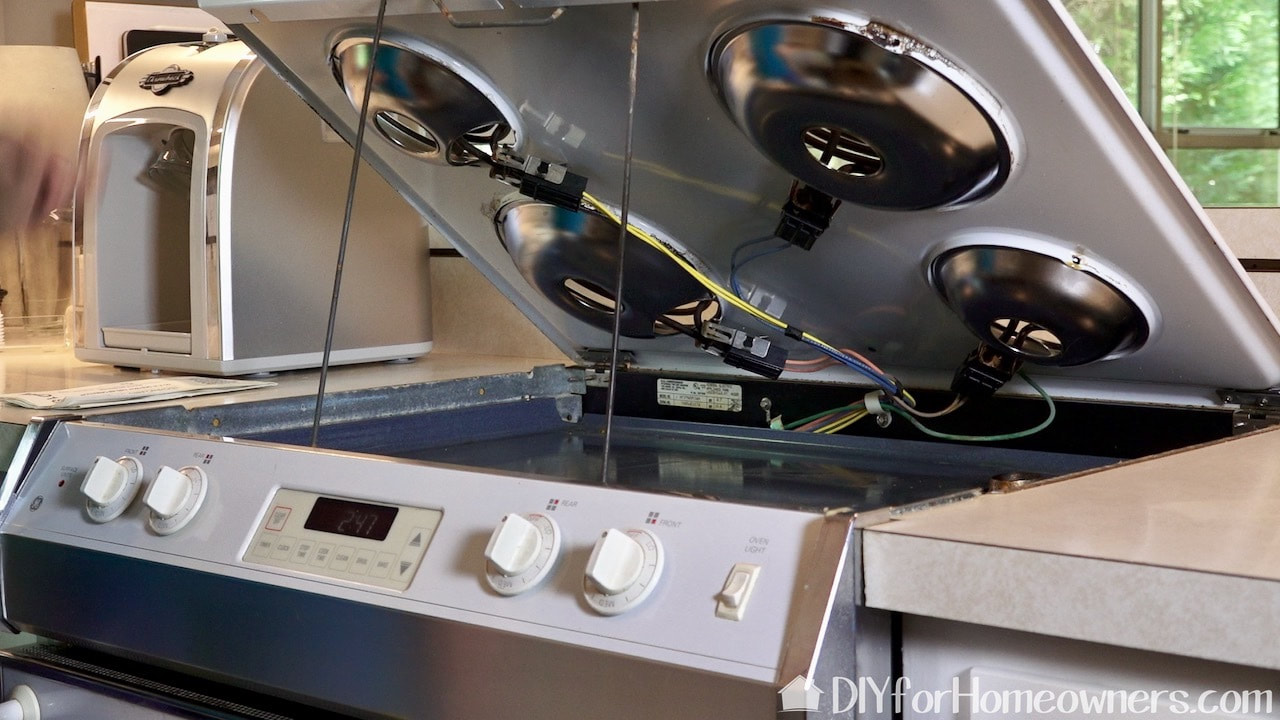
Did you know the top of a drop in range opens? Steph accidentally discovered this little trick. It lifts so that it can be cleaned easily beneath the burners. We also found a folded piece of paper with information about the appliance stuck in the very back in the back left hand corner. That's were we learned the trick about the door being removable. There was also a label in there with the model number of the appliance.
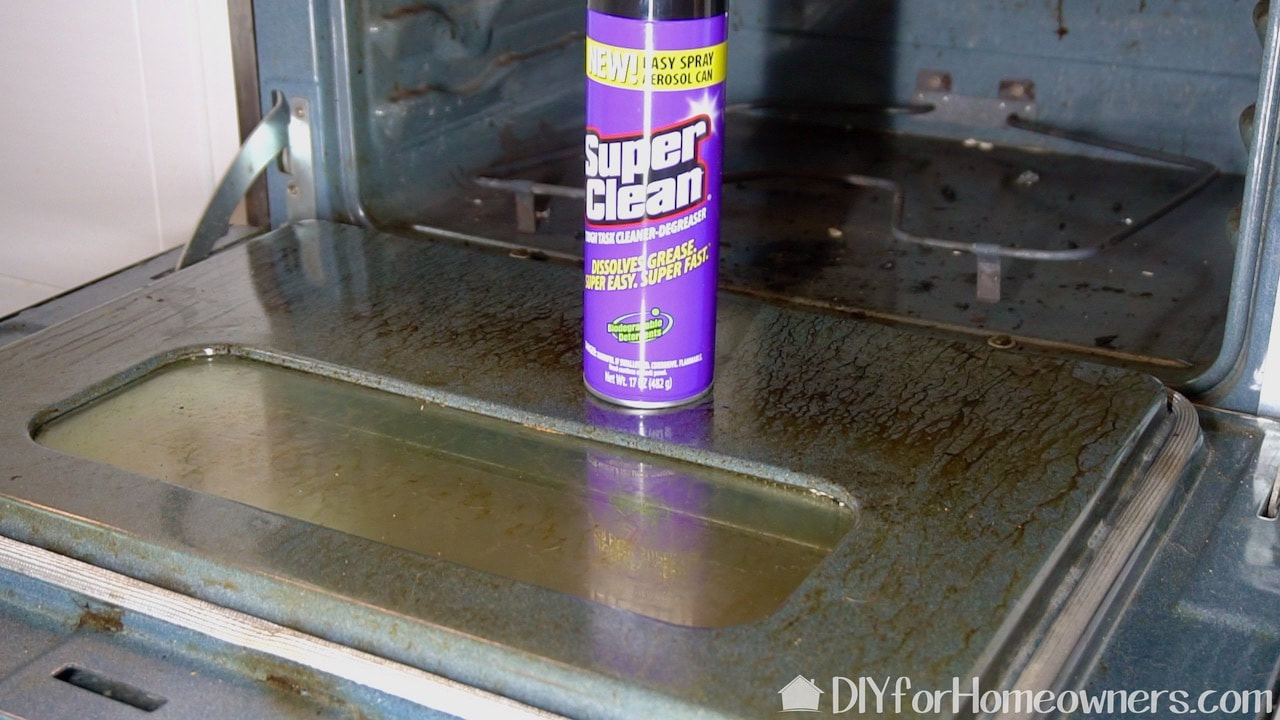
Super Clean sent us a selection of their cleaners to try. We thought the oven door would be the perfect opportunity to give the foam spray a try.
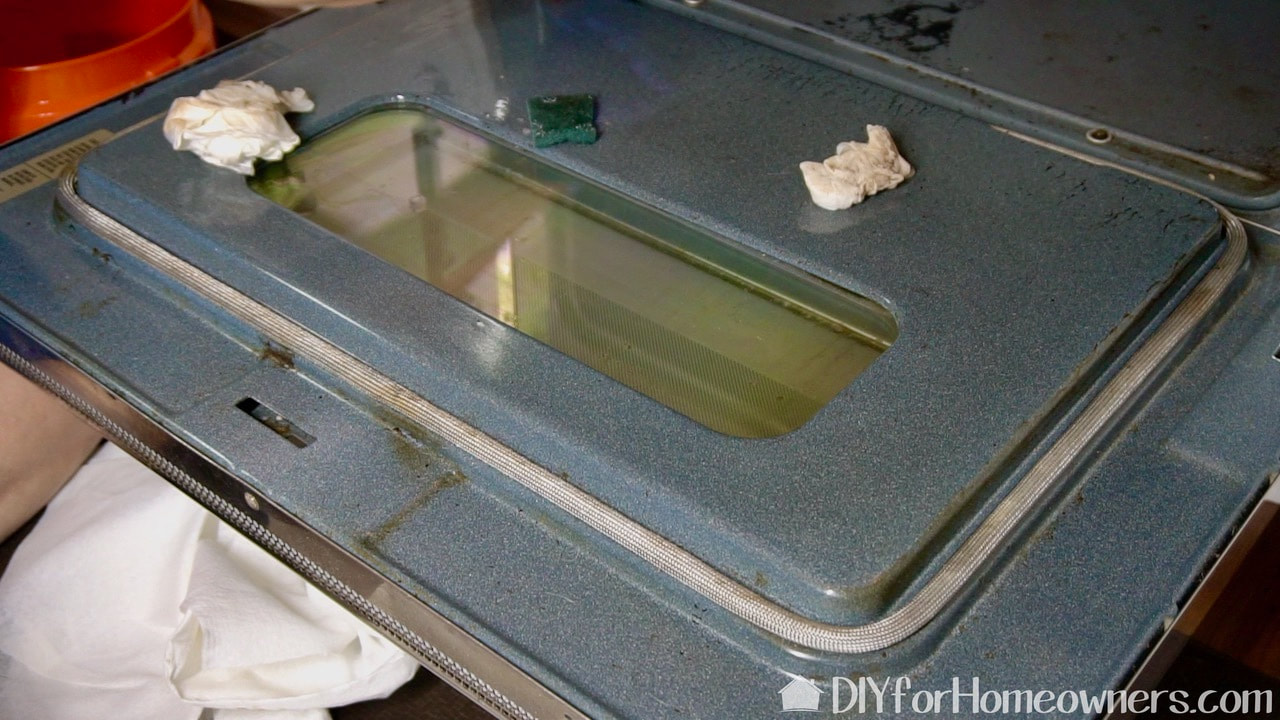
It was really impressive how well Super Clean foam worked to dissolve the dirt, grease, and gunk on this door. It took almost no effort to get it clean.
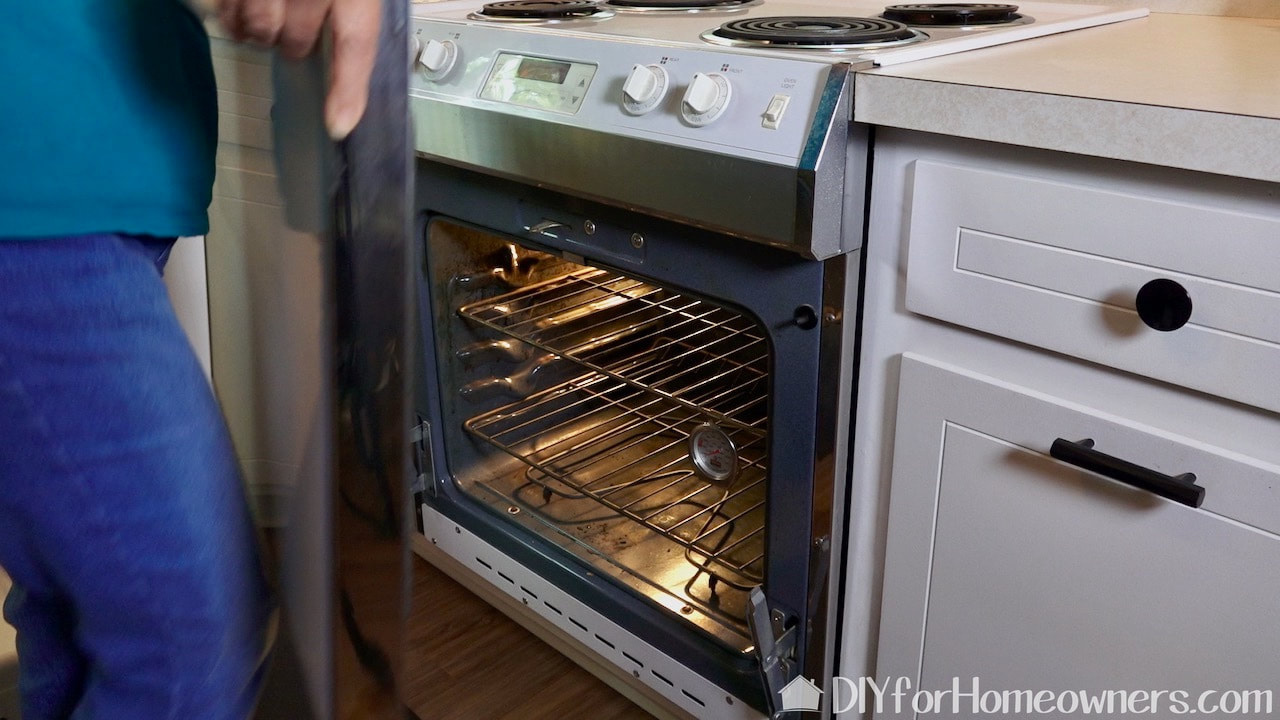
So the door comes off--who knew!!!! Basically, for this oven, the door is opened to the broil position and simply lifted up and off the hinges. I don't know if that works for all oven doors but it was super simple!
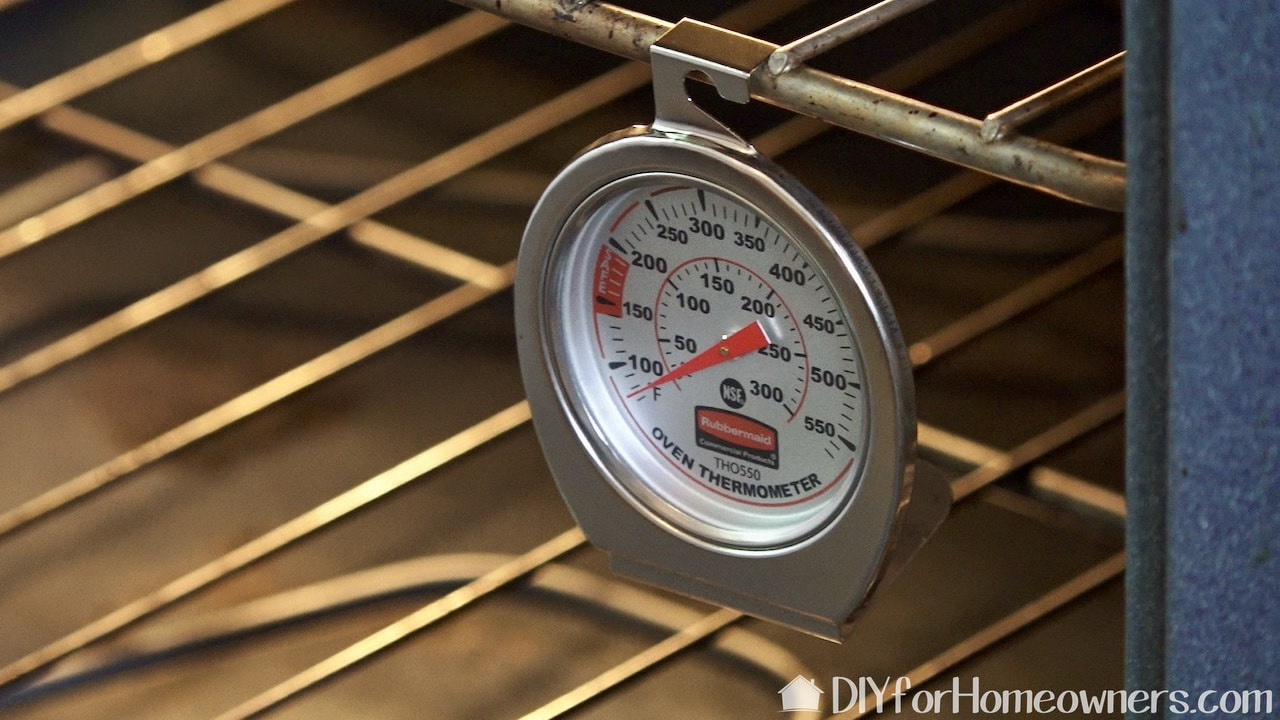
One last tip. You can buy an inexpensive oven theormether to see if your oven is working properly. If it's not heating like it should, check your owner's manual to make adjustments. If it’s a big difference you probably need to change out the baking element or check to see if the oven temperature sensor is working.
With this simple and inexpensive fix, Steph does not have to replace her drop-in range anytime soon. All the burners work, so it should be fine for a long time. It's very gratifying to be able to fix something rather than replace!
Please note: This is not a sponsored post. FYI: We are not professionals, and we don't claim to be. This is what we found worked for our project. Yours may need a little different approach. Safety first! FYI: Affiliate links are being used on this page. Purchasing via these links help support MDP! Related Projects
0 Comments
Leave a Reply. |

Mother Daughter Projects
|