|
text by Vicki Sign up here to join our weekly email newsletter!
This post is sponsored by The Home Depot.
As part of The Home Depot ProSpective Tool Campaign, we got a chance to try out the new Milwaukee M18 Quik-Lok Outdoor Tool System. Milwaukee is fairly new to the outdoor tool market, but as newbies in the field, they've come out strong with this latest offering!
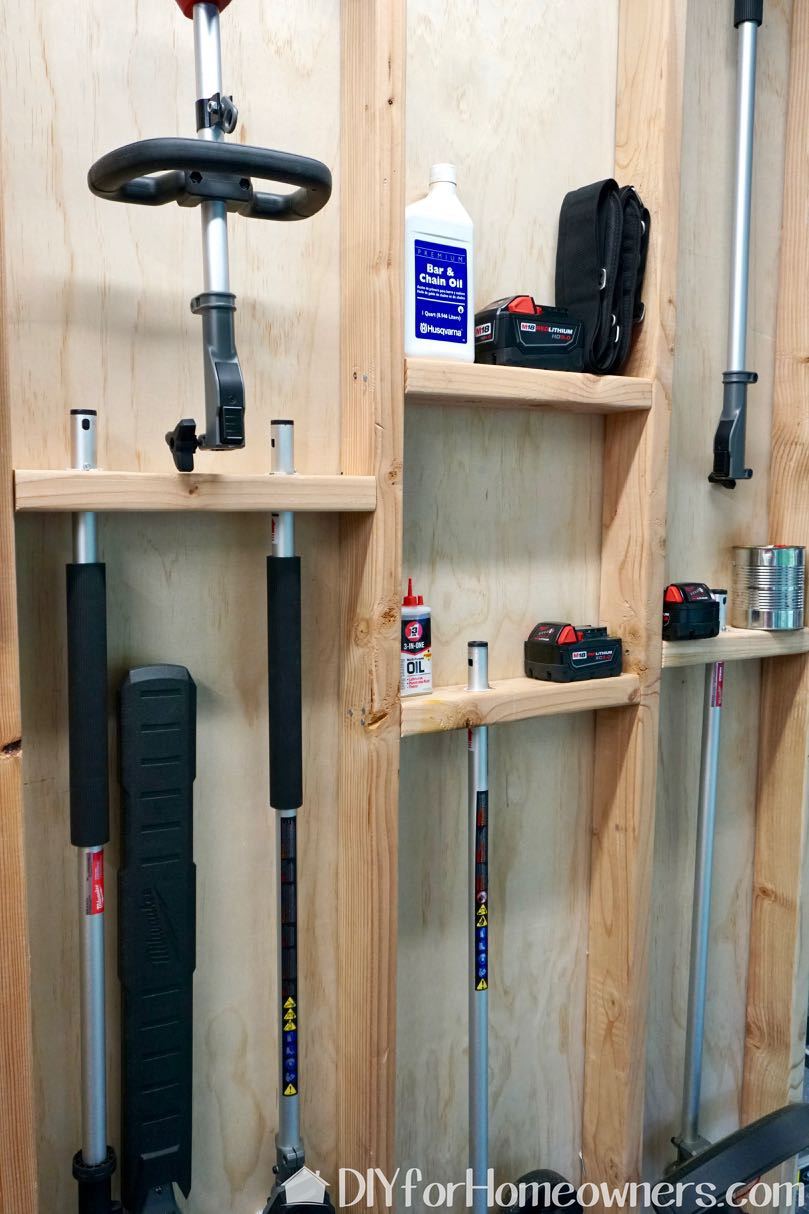
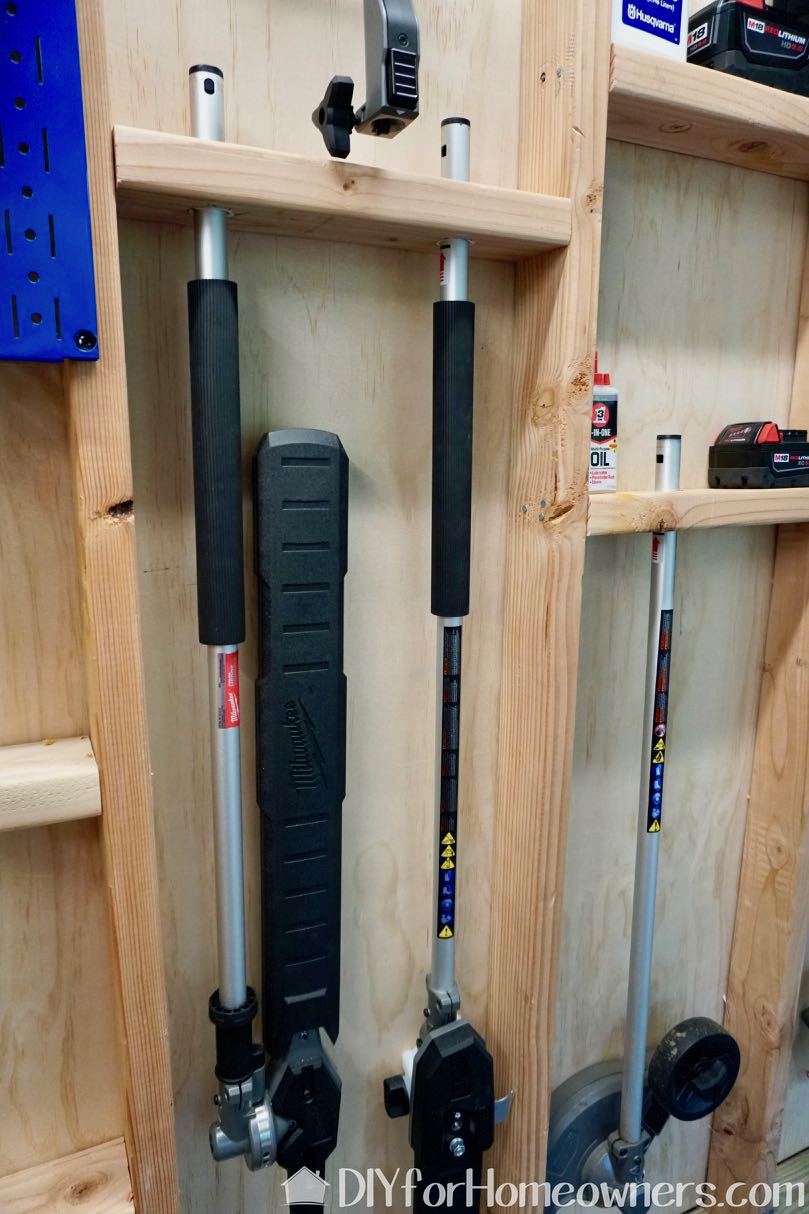
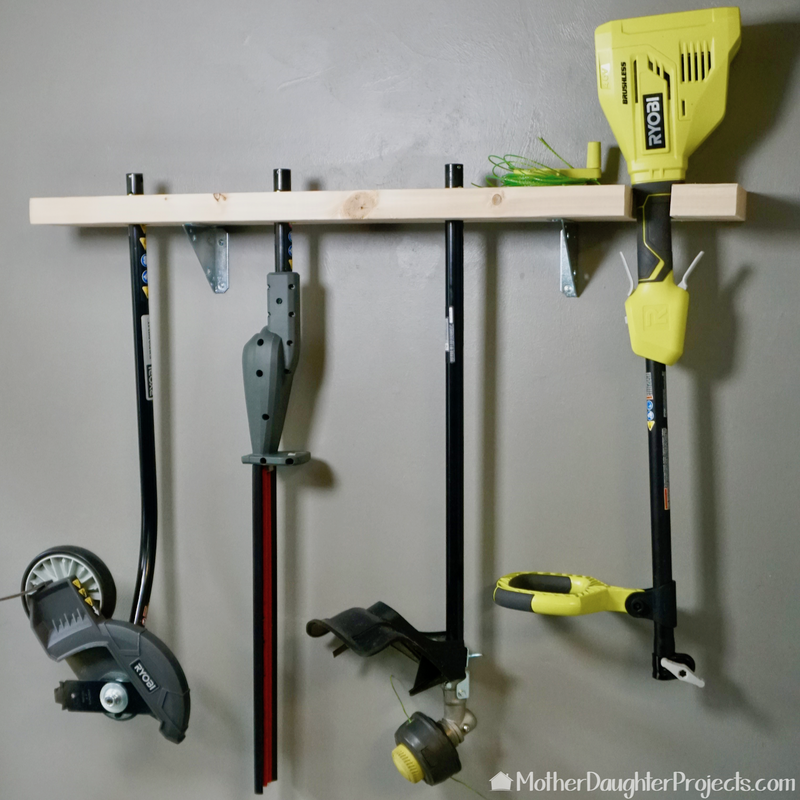
The system utilizes a power head that can be used with four different outdoor tools and extension pole. The power head is sold with the string trimmer, which according to our small sampling of readers on Facebook, is the most popular garden tool! The edger, pole saw, and hedger trimmer as well as the extension pole are all sold separately. We tried them out on an episode of Workshop Wednesday which you can see here. We got a chance to try out the tools, but were perplexed as to how we were going to store them. Steph came up with a really simple way to store another brand of outdoor tools and adapted the idea for the Milwaukee system. That girl is really smart! 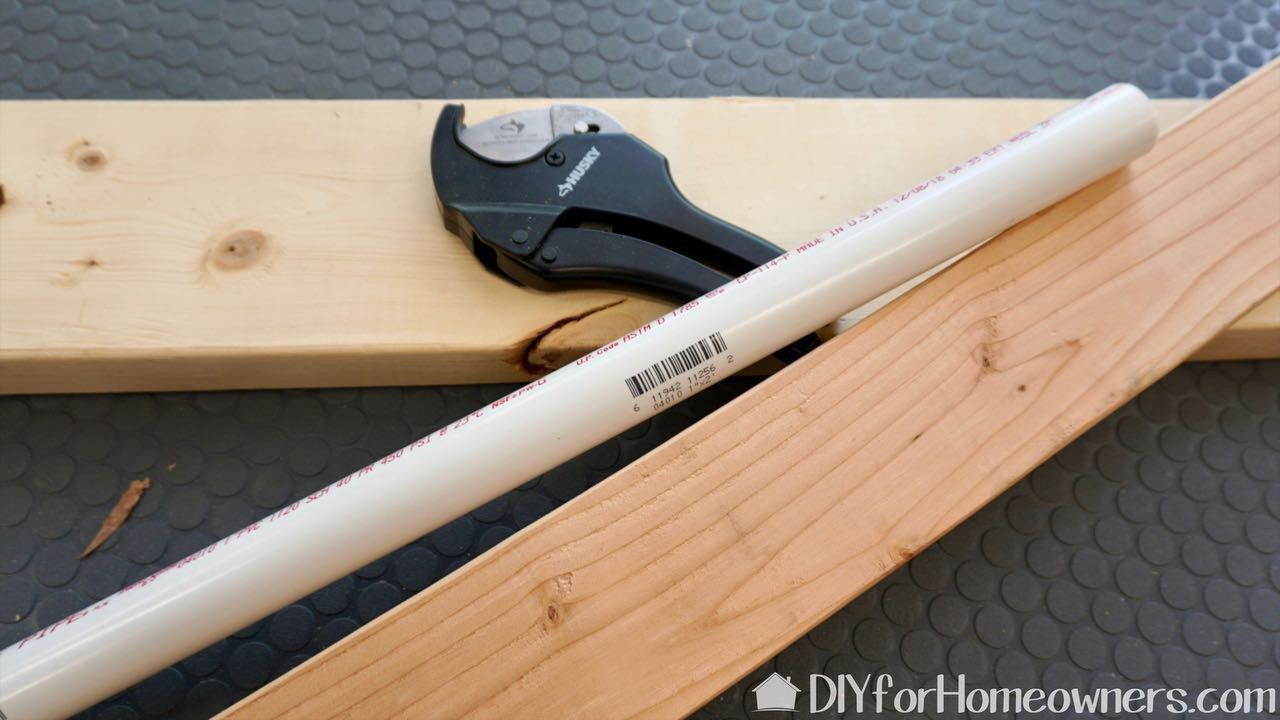
As far as storage systems go, this one is fairly inexpensive. You'll need a 2x4, a 2x6 and some PVC pipe. In theory, this could probably be made with scraps you already have in your garage!
Materials/Tools:
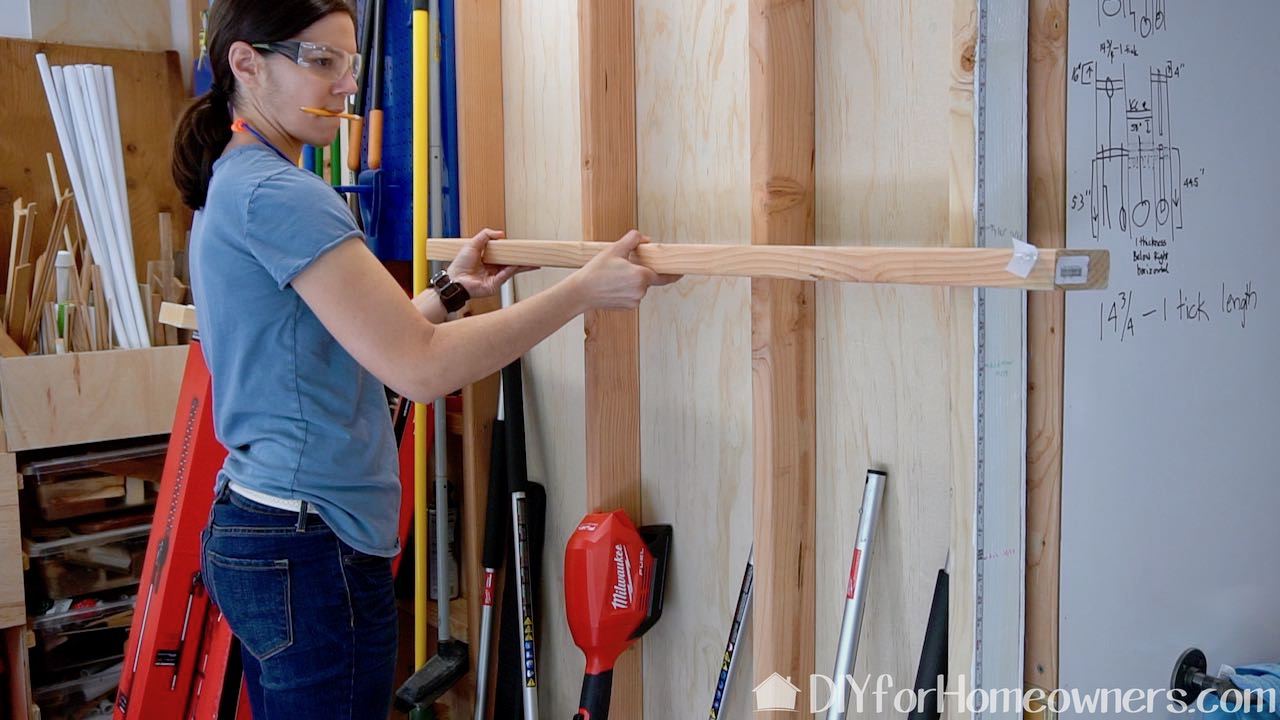
The storage system is going to be constructed within our unfinished wall. Here Steph is measuring the width between the studs to get an exact fit. You can see our little diagram in the right of this pic with rough measurement for the placement of the 2x4 holders.
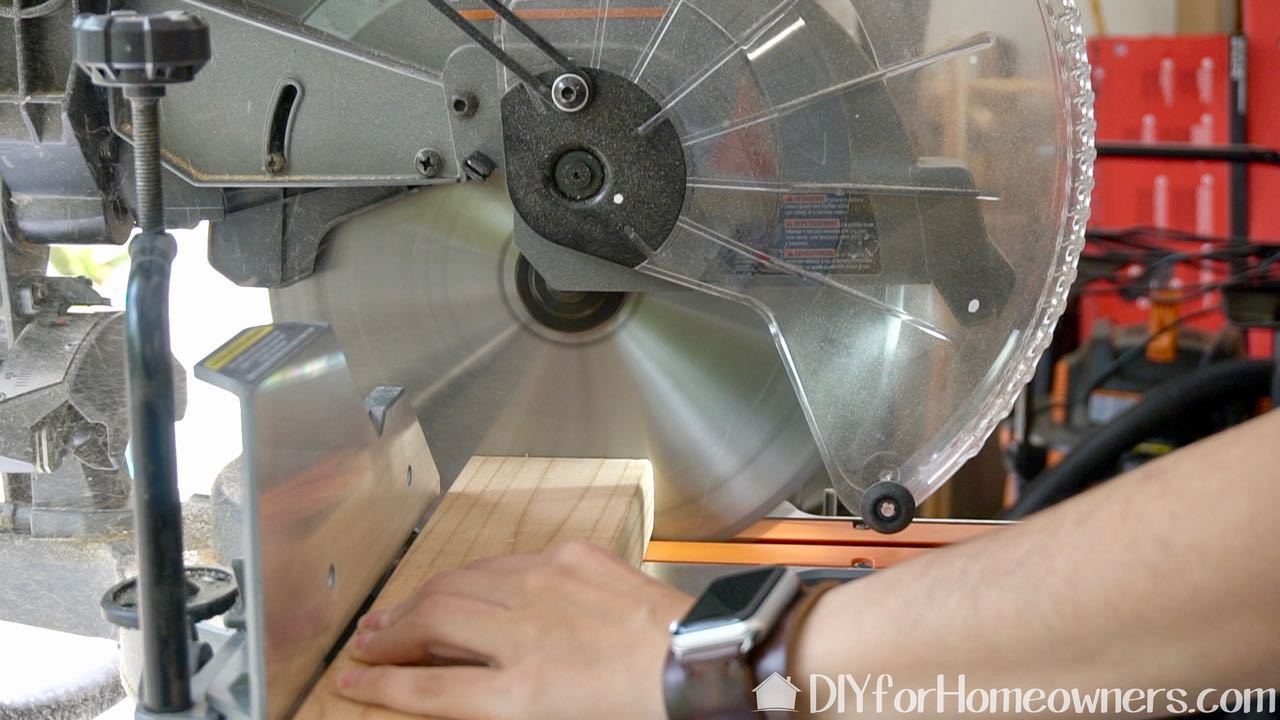
Steph cut all the 2x4s to length on the miter saw.
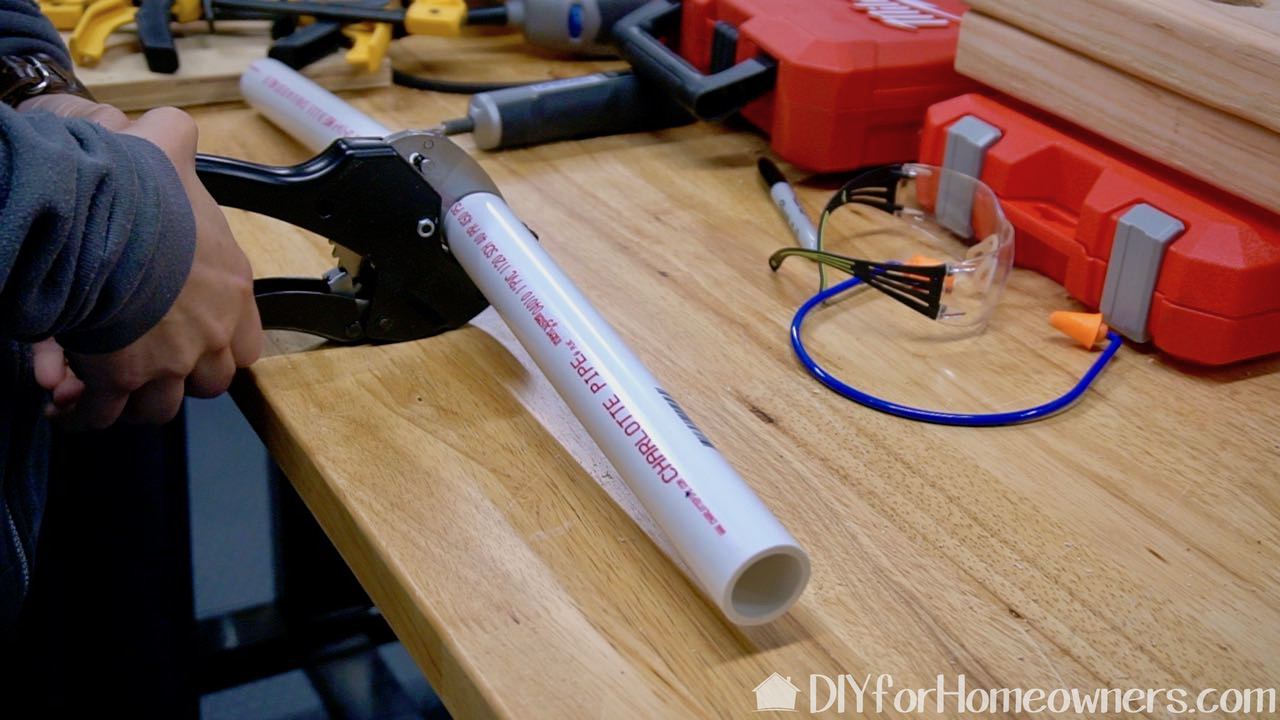
We usually cut PVC on the miter saw, but when it comes to cutting shorter lengths, that seems a bit dangerous. This Husky Ratcheting PVC cutter is a much safer option. This cutter cuts pipe up to 1 1/4 inch. This is 1" PVC pipe.
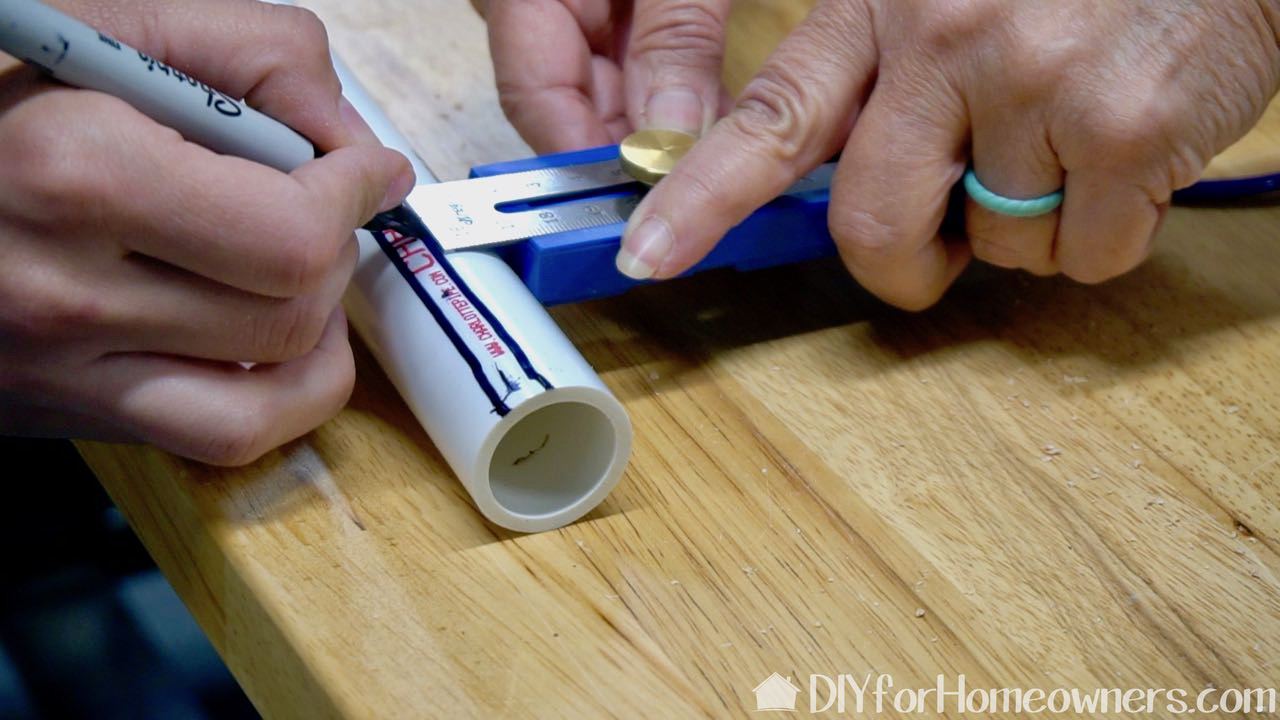
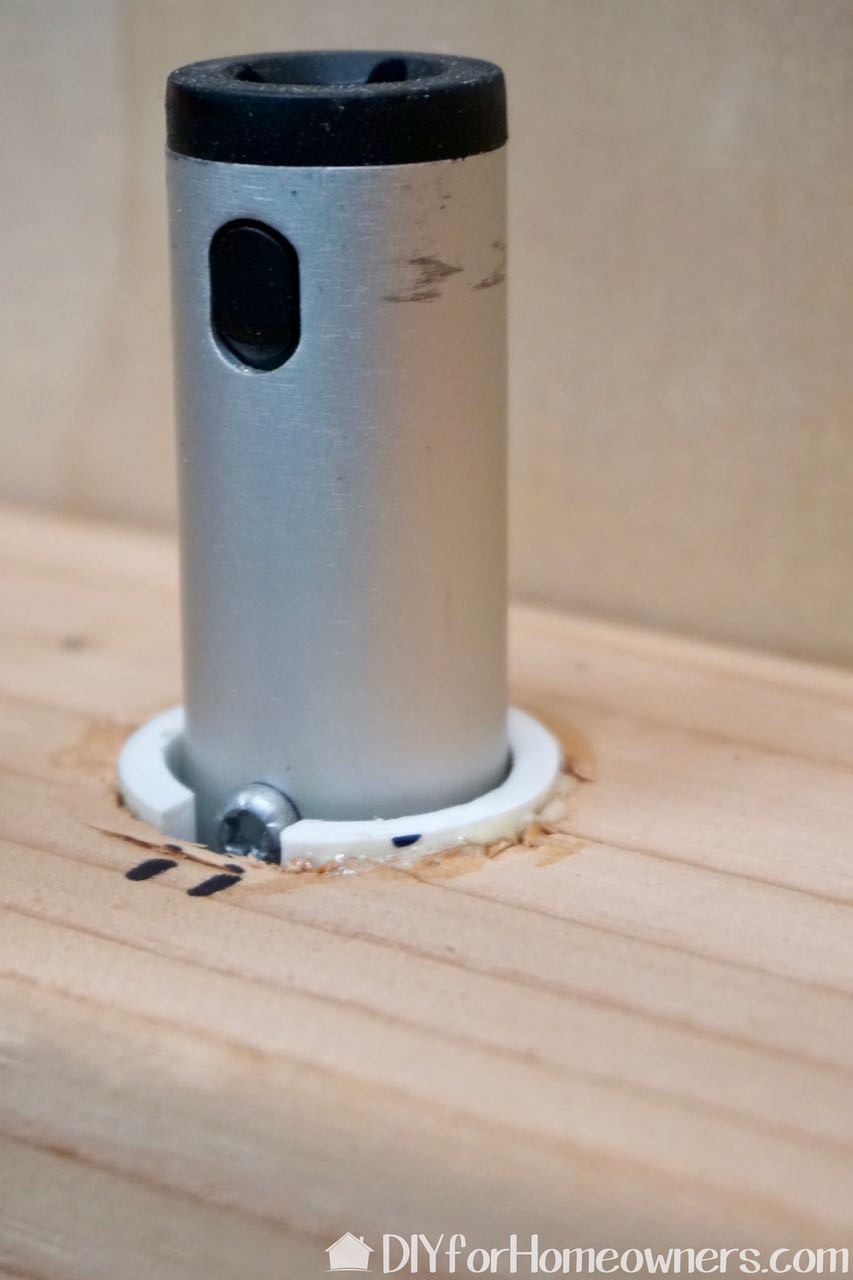
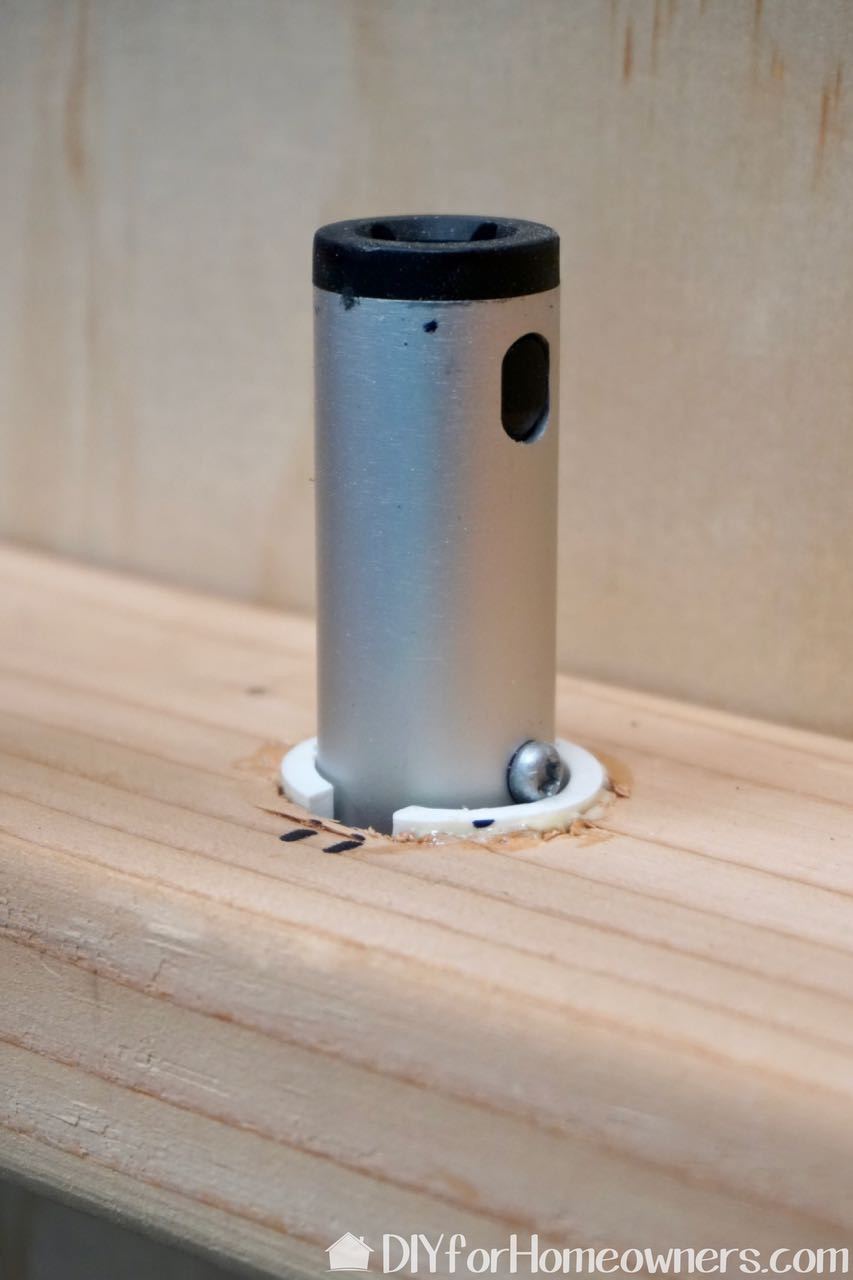
In order for the tool attachments to hang, we are going to make use of a small bump on the connecting end of each tool. Basically, the tool will go up through the PVC pipe via a notch that we cut out, and then be turned past the notch to hang from that bump just past the notch. There's a picture below that shows this clearly. Here we are marking the PVC for the notch.
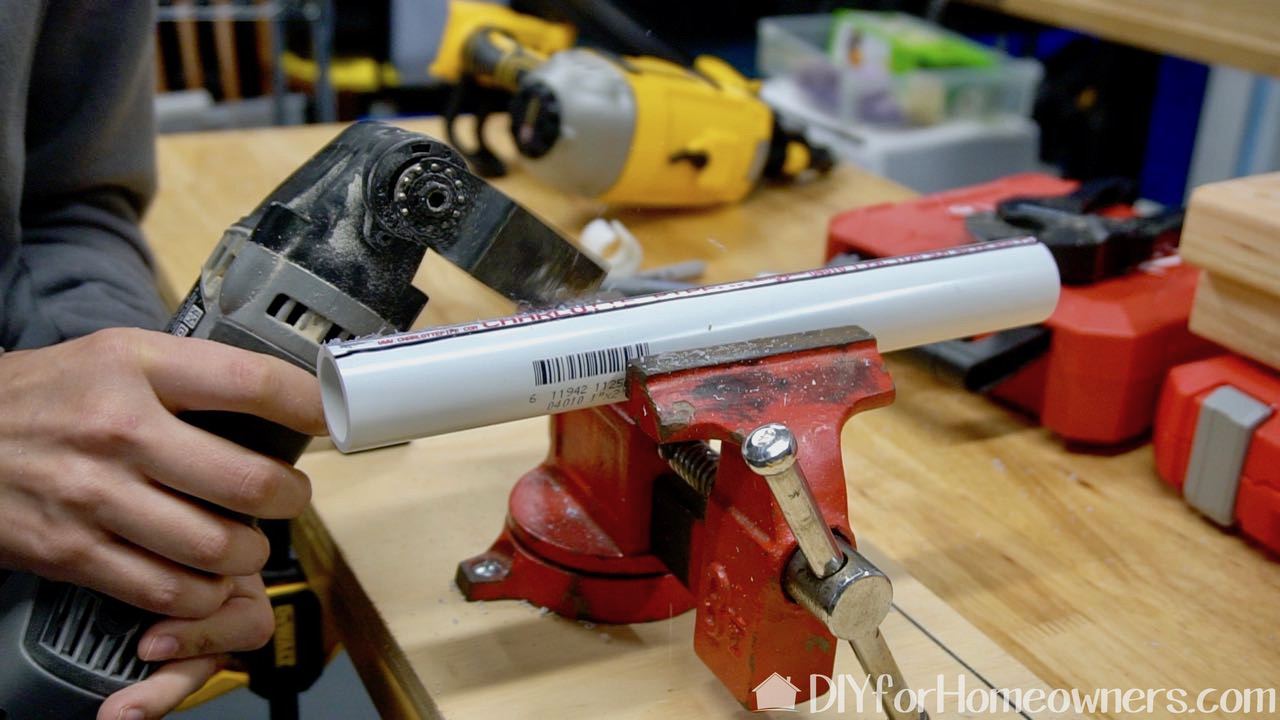
Cutting the notch from the PVC pipe with a Dremel Multi-Max.
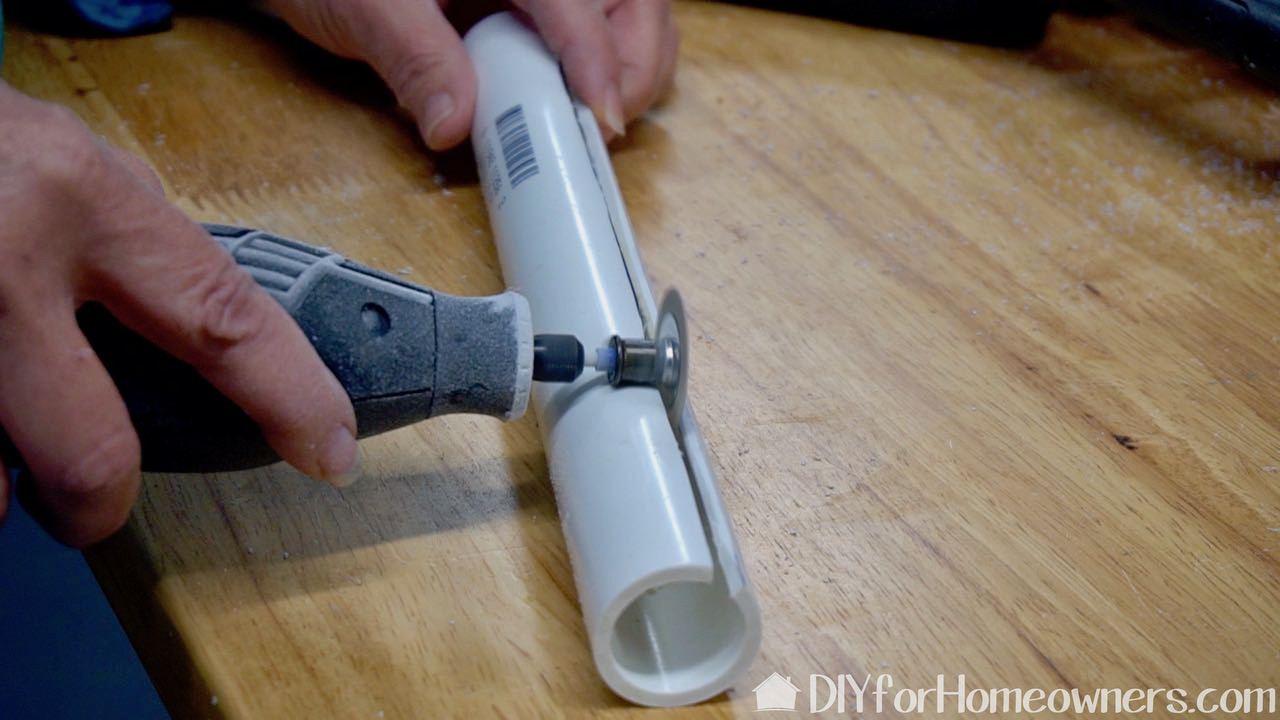
We used a Dremel rotary tool fitted with a sanding disk to sand down the rough edges.
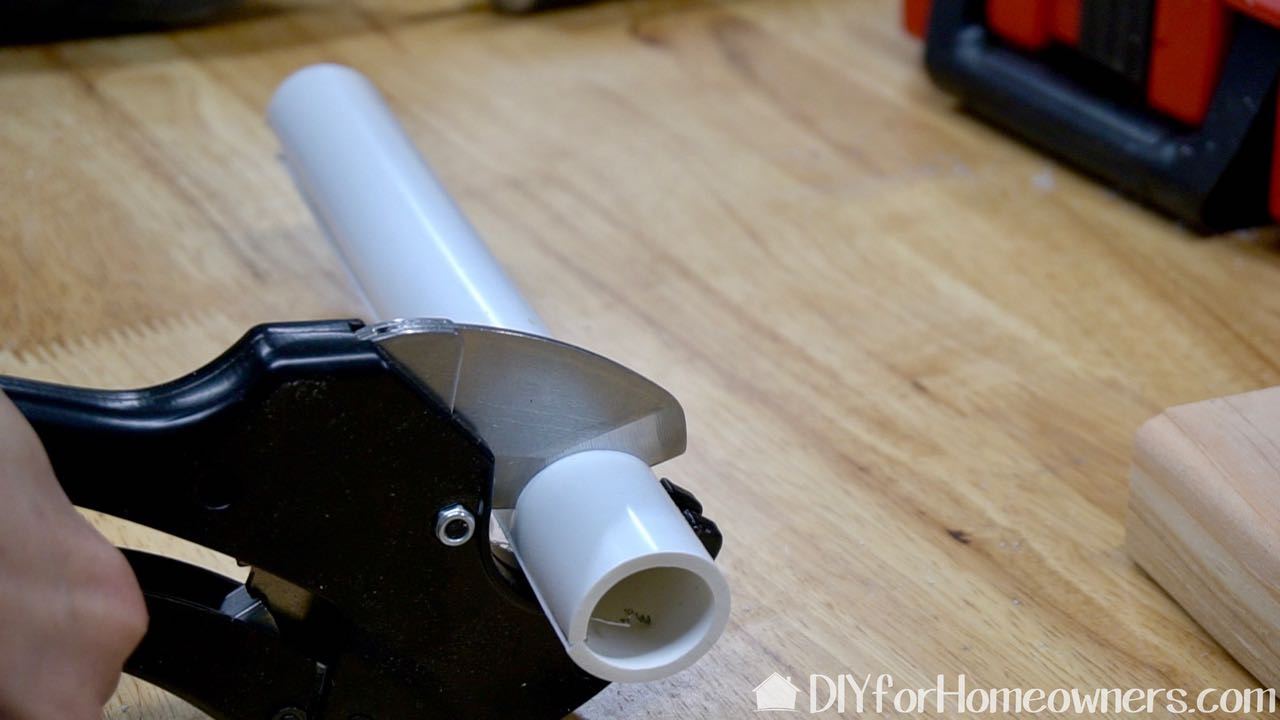
Cutting the individual pieces of PVC pipe. Watch the video see how we dealt with the problem of the PVC collapsing as we cut it.
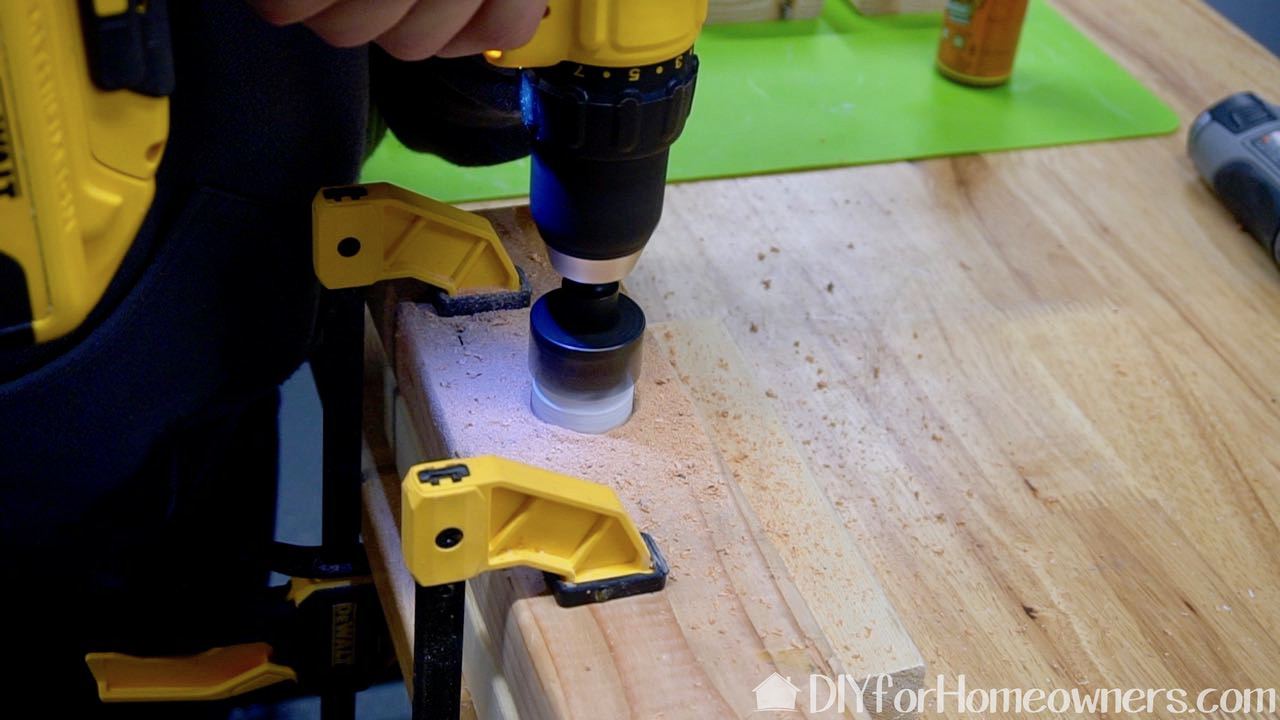
Cutting the holes in the individual tool shelves. Tip: use high quality hole saws. We used both Milwaukee and Diablo brands in this build. This is a 1-3/8in hole saw and for the powerhead we used 2-1/8in.

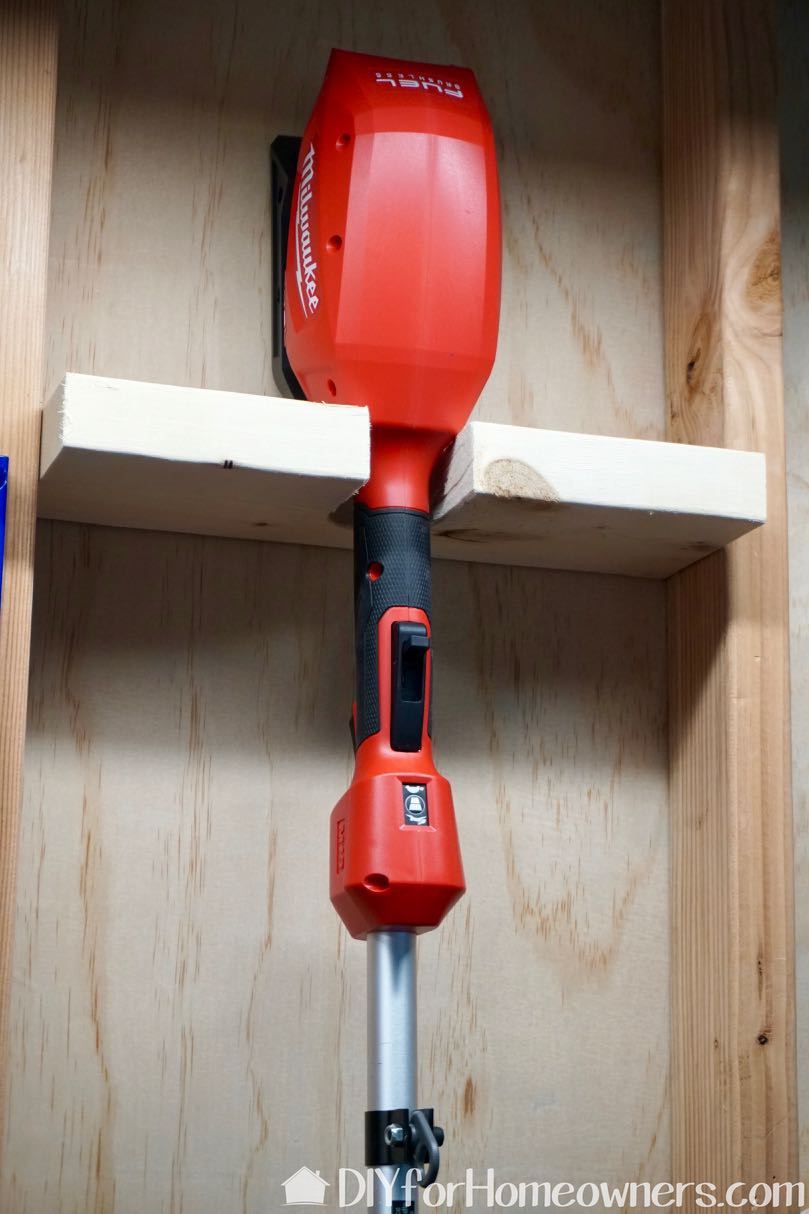
A bonus with this storage system, is the power head can remain in place on the wall, while attachments are swapped out. It's easier than putting the tool on the floor to make the changes. Once the attachment is in place the powerhead can be lifted from its holder.
When we built this wall for the garage makeover in 2018, we anticipated it would hold yard tools and more. We purposely left the studs exposed so that we could expand our storage capacity via built-ins into the wall. Never did we imagine, it would be the perfect set up for storing this new expandable Milwaukee outdoor tool system.
We acknowledge that The Home Depot is partnering with us to participate in the ProSpective 2018 Campaign. As a part of the Program, we are receiving compensation in the form of products and services, for the purpose of promoting The Home Depot. All expressed opinions and experiences are our own words. Our post complies with the Word Of Mouth Marketing Association (WOMMA) Ethics Code and applicable Federal Trade Commission guidelines. FYI: We are not professionals, and we don’t claim to be. This is what we found worked for our project. Yours may need a little different approach. Safety first! FYI: Affiliate links are being used on this page. Purchasing via these links help support MDP! Related Projects
0 Comments
Leave a Reply. |

Mother Daughter Projects
|