Mother Daughter Projects

  • Blog
  • About
    • Contact
    • Privacy Policy
  • Tools
    • Tool Tuesday
  • Maintenance
  • Improvement
  • Decor
  • Tech
  • Blog
  • About
    • Contact
    • Privacy Policy
  • Tools
    • Tool Tuesday
  • Maintenance
  • Improvement
  • Decor
  • Tech

DIY for Homeowners

Mini Kitchen Makeover: Painting Cabinets & More

10/12/2017

2 Comments

 
text by Vicki     Sign up to get Mother Daughter Projects updates in your email!

This post is sponsored by The Home Depot as a part of The Home Depot’s ProSpective Campaign.
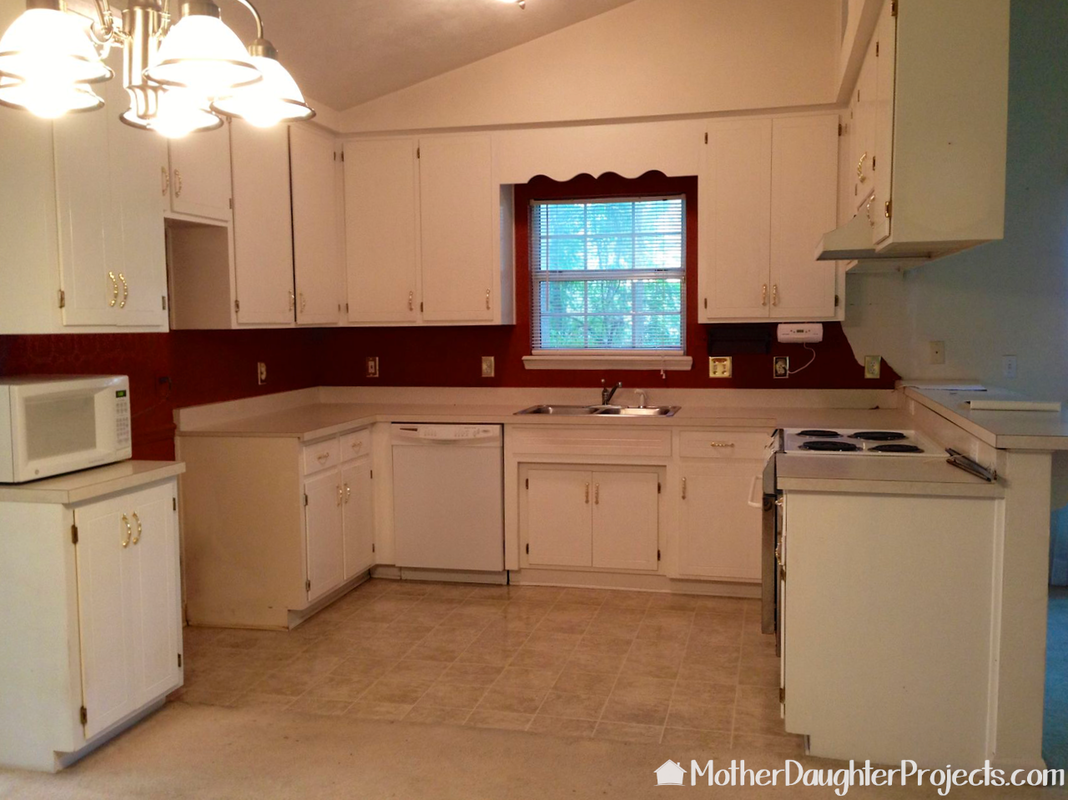
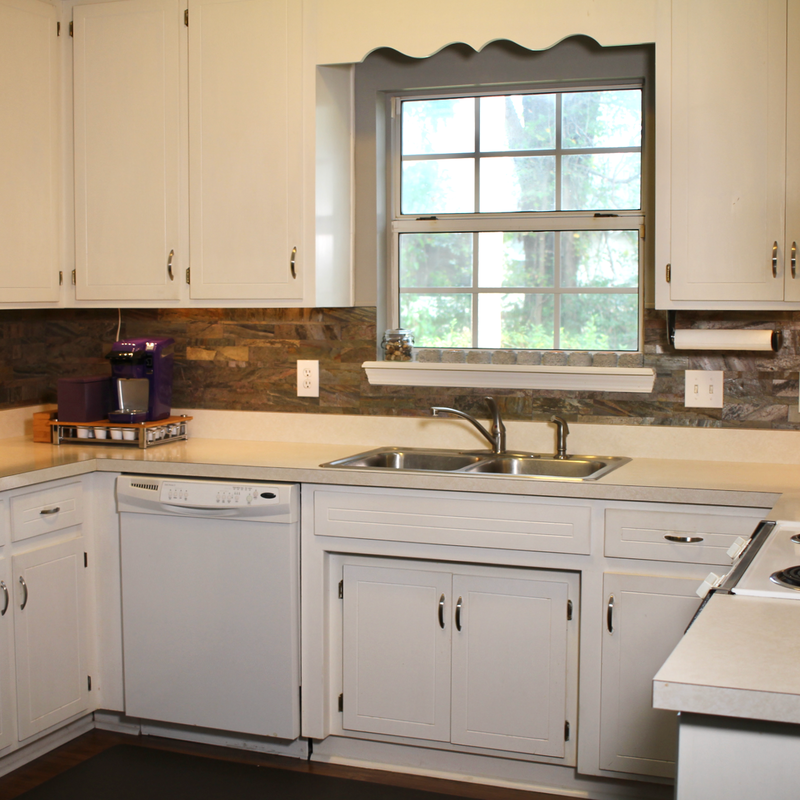
Steph's kitchen has been a work in progress since she bought her house. The kitchen was really in need of updating as nothing had been done to it since it was built. Actually, it was pretty overwhelming to go through the list of what needed to be done.

When she first moved in, we did the bare minimum before we ran out of steam to do anything else. We cleaned everything, took down the wallpaper and painted, put down new flooring, and swapped out the 90's gold handles for sleeker silver ones. We labeled the cabinets and drawers in anticipation of taking them down and painting, but that project never got started!

Four years later, a partnership with The Home Depot and Liberty Hardware, gave us the push we needed to complete the long overdue projects!
Learn how to do a mini kitchen makeover by painting kitchen cabinets with latex paint, installing a pull out trash can, and installing DIY light fixtures.
The kitchen as it looked move in day
Learn how to do a mini kitchen makeover by painting kitchen cabinets with latex paint, installing a pull out trash can, and installing DIY light fixtures.
The kitchen before the mini makeover

Materials:


  • Behr paint- Weathers white in semi-gloss

  • Liberty Hardware Hinges (Home Depot)

  • Liberty Hardware Pulls (Home Depot)

  • Liberty Hardware Knobs (Home Depot)

  • Rev-a-Shelf Trash Pull Out (Home Depot)

  • Krud Kutter deglosser (Home Depot)

  • Diablo SandNet Sandpaper (Home Depot)

Tools:


  • Kreg hardware jig (Home Depot)

  • Makita wet/dry vacuum (Home Depot)

  • Ridgid orbital sander (Home Depot)

  • Milwaukee framing hammer (Home Depot)

  • Milwaukee Shockwave Impact Duty Steel Driver Bit Set (Home Depot)

  • Husky magnetic bowl (Home Depot)

  • Ridgid Foldout Panel Light (Home Depot)

  • Painter's Tape

  • Purdy paint brush and foam roller

  • Dremel with cutting attachment

What we did in the mini makeover:
  • Paint: all the doors, drawers and frames were painted as well as the inside of the cabinets 
  • Cabinet liners: lined the cabinet bottoms that tend to get wet to protect them, especially the one under the sink that had a lot of damage from dampness. 
  • Under cabinet lights: we replaced a set of under cabinet lights for a brighter and sleeker look 
  • Hinges: because the existing hinges were still the old brass ones, we swapped them out for new matte black ones (a surprisingly easy fix)  
  • Handles: we replace the old silver handles with Liberty Hardware matte black geometric ones
  • Knobs: we decided to trade out the drawer handles to knobs. Because we were painting the cabinets, this was a good time to do this as the old holes could be patched, sanded and painted to 'disappear.' 
  • Trash can: We installed a Rev-a-Shelf trash can pullout in a bottom cabinet. Again, because we were painting the cabinets, we could drill new holes for new handle placement then patch and paint. We also patched the existing hinge holes.
  • Light fixture: the 90's overhead fixture had to go! We used a geometric trash can as the shade and a purchased light kit. It was a quick swap out. You can see if come together in the video to the right.

A post shared by Vicki & Steph (@motherdaughterprojects) on Oct 13, 2017 at 11:34am PDT

Learn how to do a mini kitchen makeover by painting kitchen cabinets with latex paint, installing a pull out trash can, and installing DIY light fixtures.
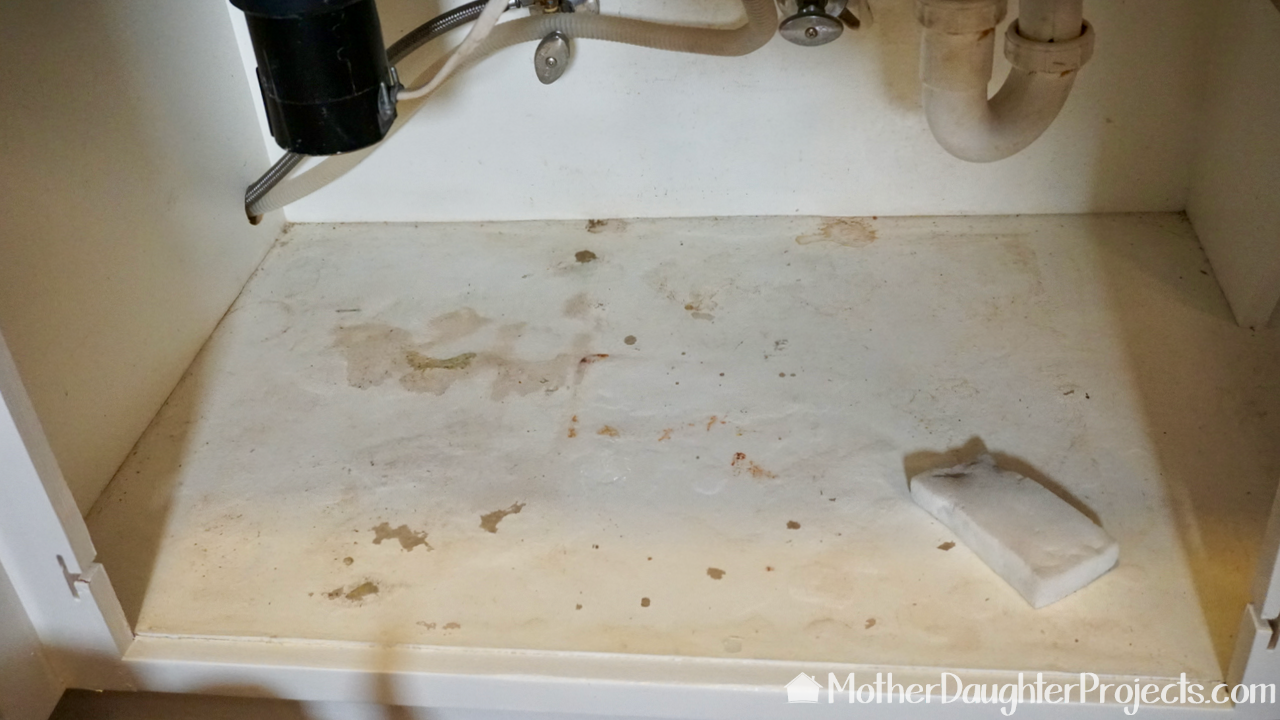
In bright lighting, it was easy to see that the cabinets and drawers were in pretty rough shape.
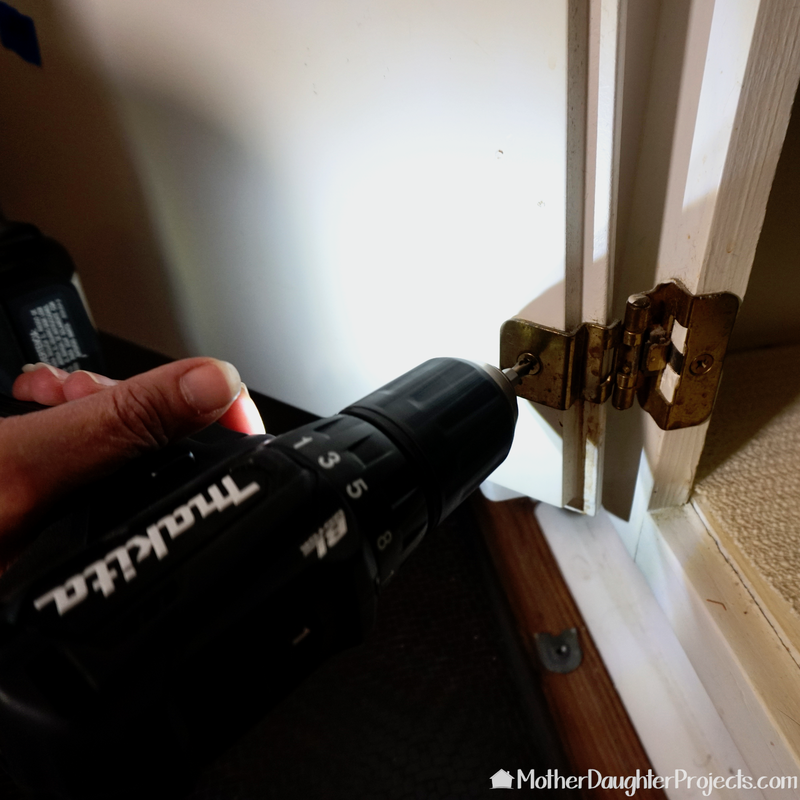
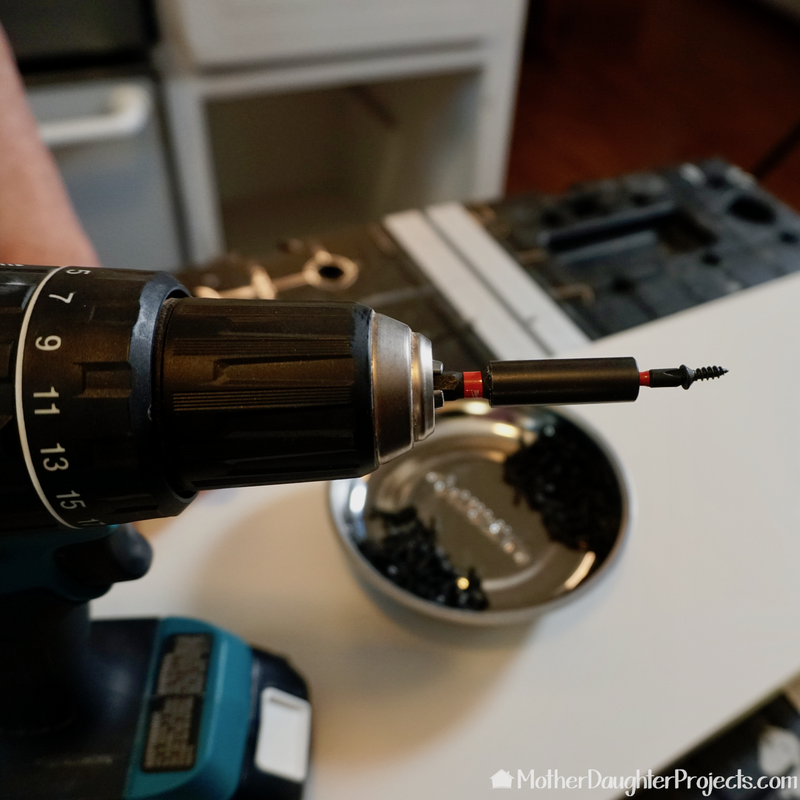
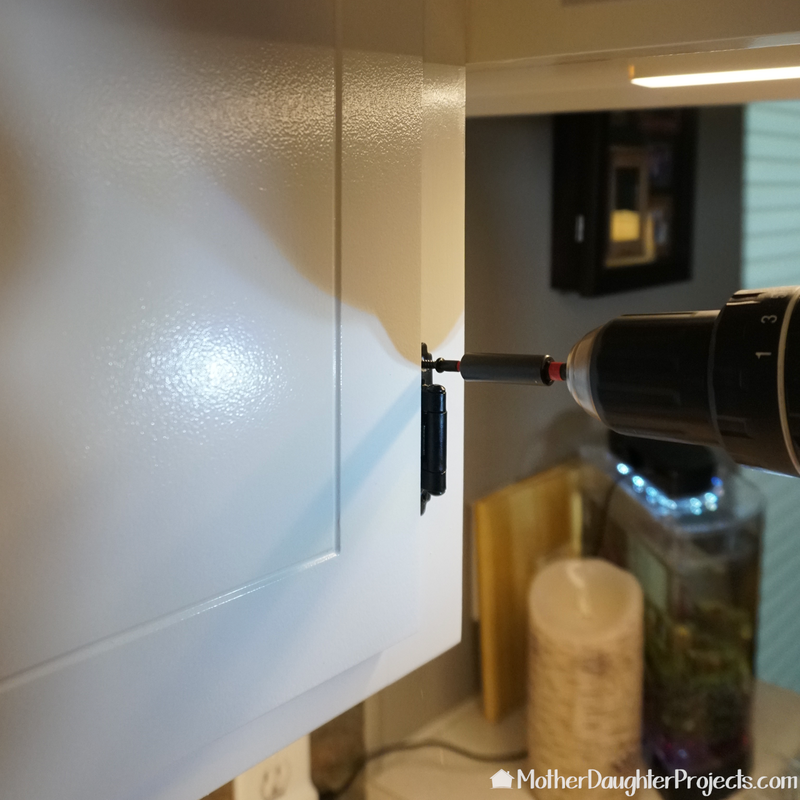
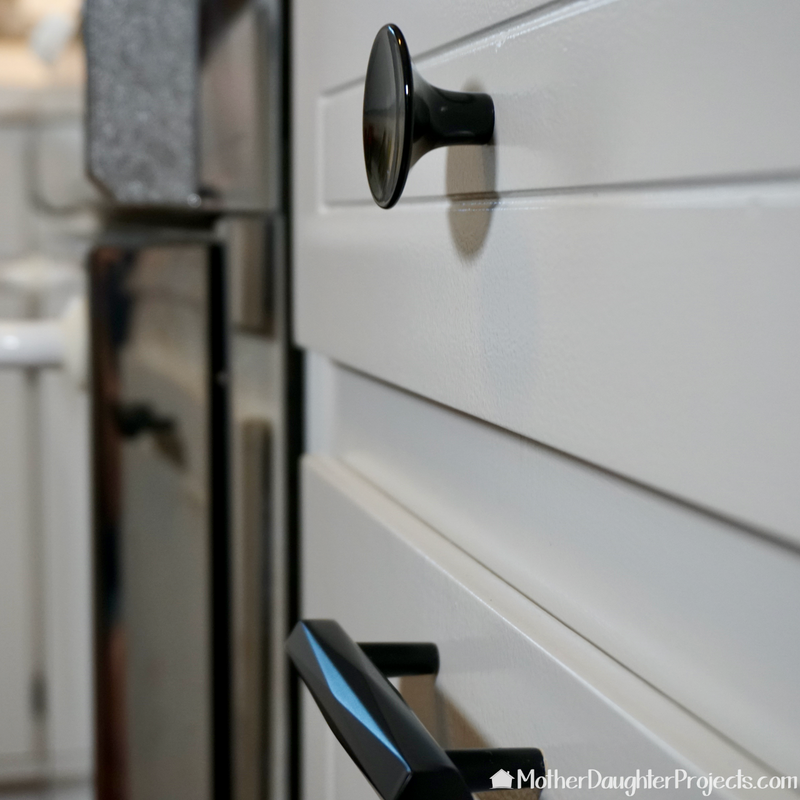
To learn more about the handle and knob install, see our post here.
Learn how to do a mini kitchen makeover by painting kitchen cabinets with latex paint, installing a pull out trash can, and installing DIY light fixtures.
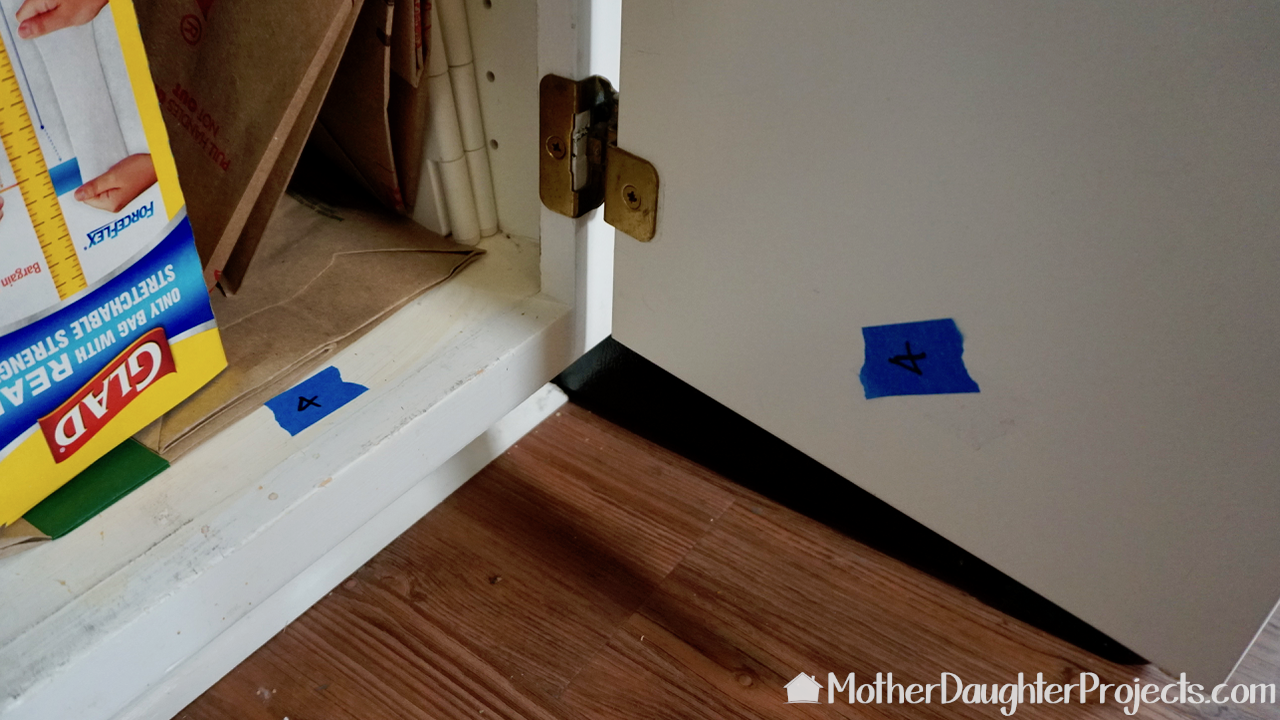
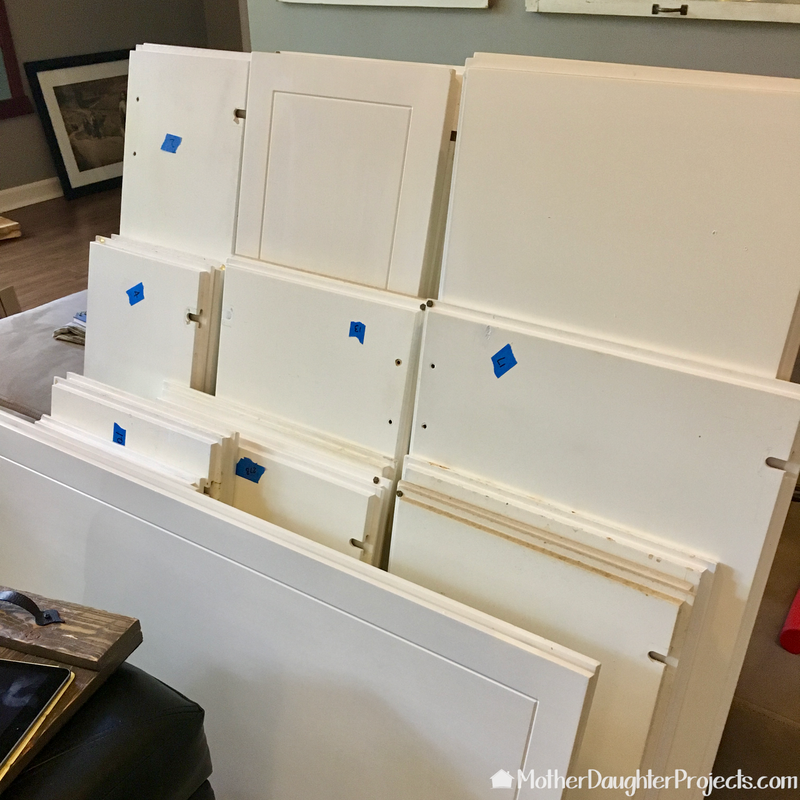
To keep everything easy to replace, we took the time to number all the cabinets, doors, and drawers. We used painter's tape for this. Don't skip this step!
Learn how to do a mini kitchen makeover by painting kitchen cabinets with latex paint, installing a pull out trash can, and installing DIY light fixtures.
Removing all the hinges and hardware from the doors and drawers.
Learn how to do a mini kitchen makeover by painting kitchen cabinets with latex paint, installing a pull out trash can, and installing DIY light fixtures.
All the doors ready for cleaning, sanding, and painting.
Learn how to do a mini kitchen makeover by painting kitchen cabinets with latex paint, installing a pull out trash can, and installing DIY light fixtures.
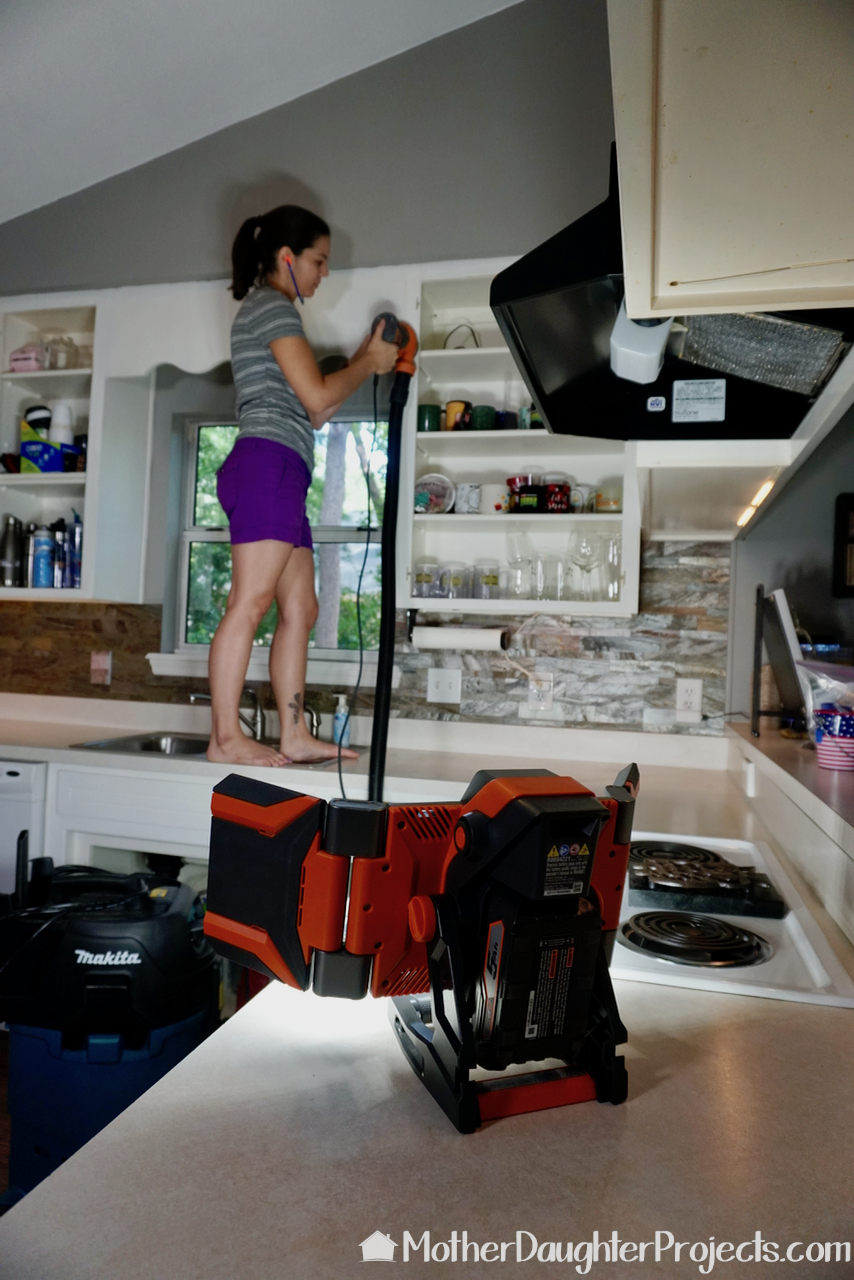
We brought in our Mikita wet/dry vac from the garage to use with the Ridgid sander fitted with SandNet from Diablo. This step would have been a mess if we had not had the dust collection and SandNet that works so efficiently with it. We had virtually no dust from using a sander inside the house. Also, we used the Ridgid Foldout Panel light to brighten up Steph's dark kitchen. I need all the light I can get when I work! It's lightweight and adjustable to add light where needed.
Learn how to do a mini kitchen makeover by painting kitchen cabinets with latex paint, installing a pull out trash can, and installing DIY light fixtures.
The cabinets needed to be painted inside and out!
Learn how to do a mini kitchen makeover by painting kitchen cabinets with latex paint, installing a pull out trash can, and installing DIY light fixtures.
Under the sink cabinet. So much water damage!
Learn how to do a mini kitchen makeover by painting kitchen cabinets with latex paint, installing a pull out trash can, and installing DIY light fixtures.
Speaking of the fridge--it was easy to move out of the way to paint behind it.
Learn how to do a mini kitchen makeover by painting kitchen cabinets with latex paint, installing a pull out trash can, and installing DIY light fixtures.
With a little bit of paint it was so much better!
Learn how to do a mini kitchen makeover by painting kitchen cabinets with latex paint, installing a pull out trash can, and installing DIY light fixtures.
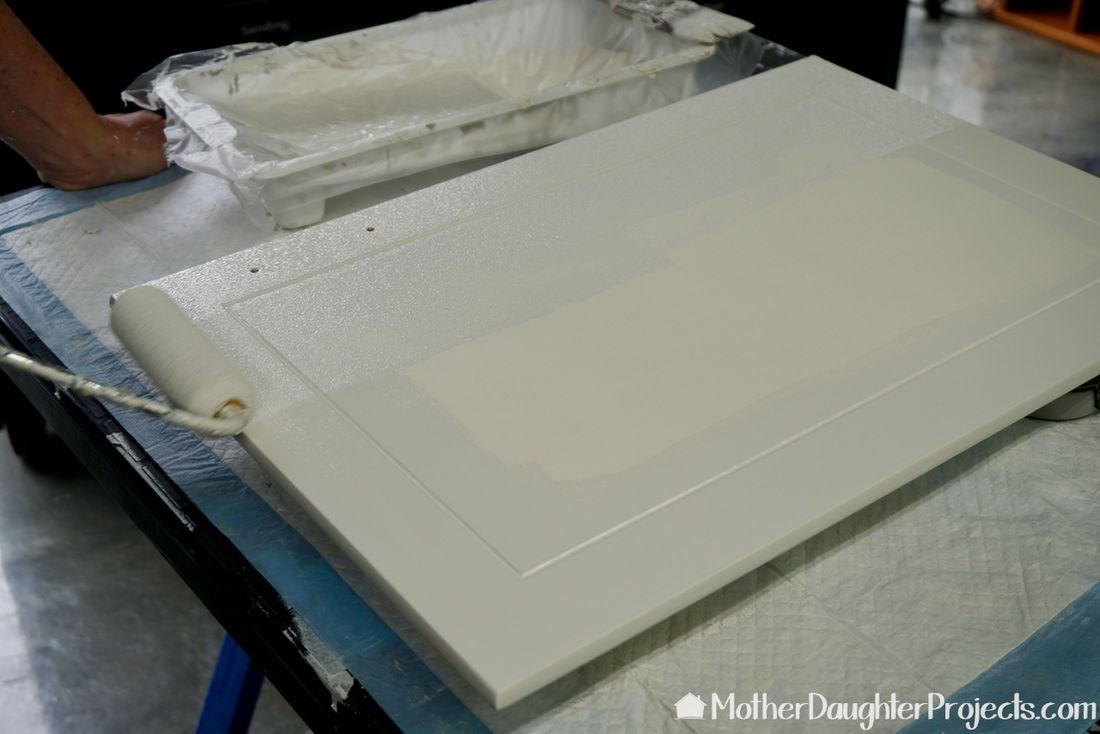
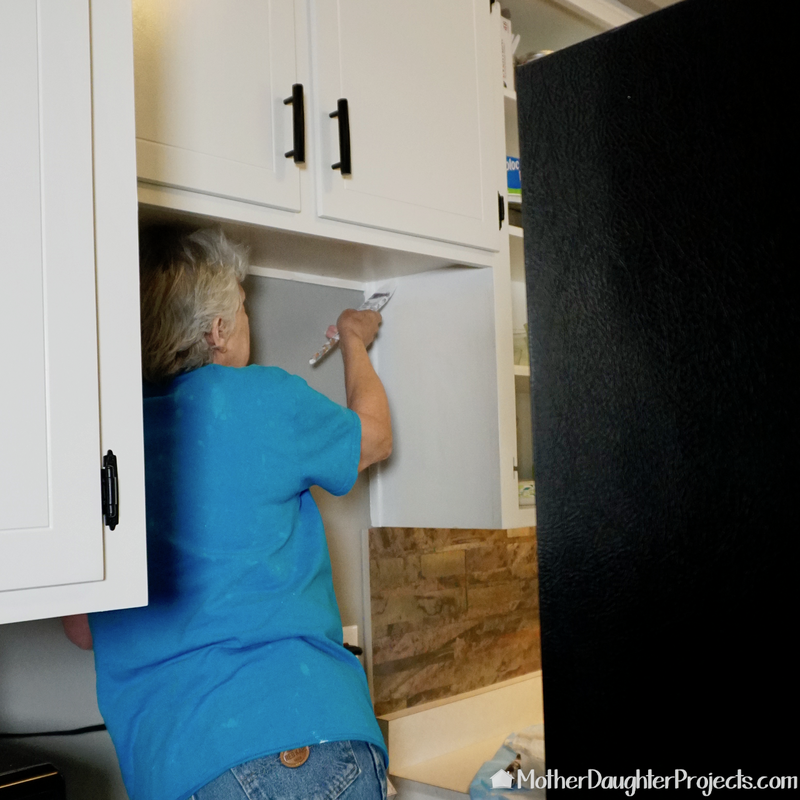
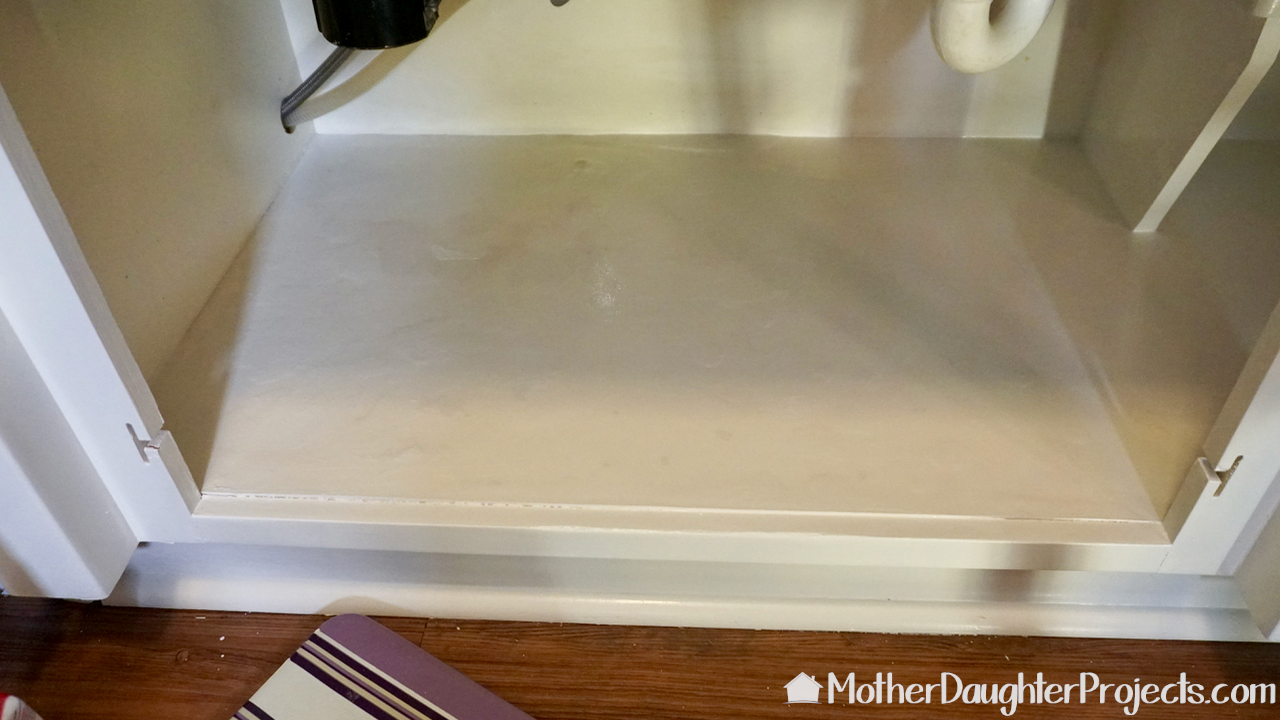
We originally planned to spray the doors, but our sprayer turned out to be defective. With no time to get another, we decided to brush and roll the cabinets which turned out to work very well.
Learn how to do a mini kitchen makeover by painting kitchen cabinets with latex paint, installing a pull out trash can, and installing DIY light fixtures.
Two handy tools--Milwaukee magnetic bits and Husky magnetic bowl.
Learn how to do a mini kitchen makeover by painting kitchen cabinets with latex paint, installing a pull out trash can, and installing DIY light fixtures.
The magnetic bowl kept the two sizes of screws separated.
Picture
These Milwaukee bits are a must!
Learn how to do a mini kitchen makeover by painting kitchen cabinets with latex paint, installing a pull out trash can, and installing DIY light fixtures.
We used a level and a paint stick, at the bottom of the door, to make sure everything was level and correctly placed.
Learn how to do a mini kitchen makeover by painting kitchen cabinets with latex paint, installing a pull out trash can, and installing DIY light fixtures.
The magnetic tip on the driver bit made easy work when rehanging the doors.
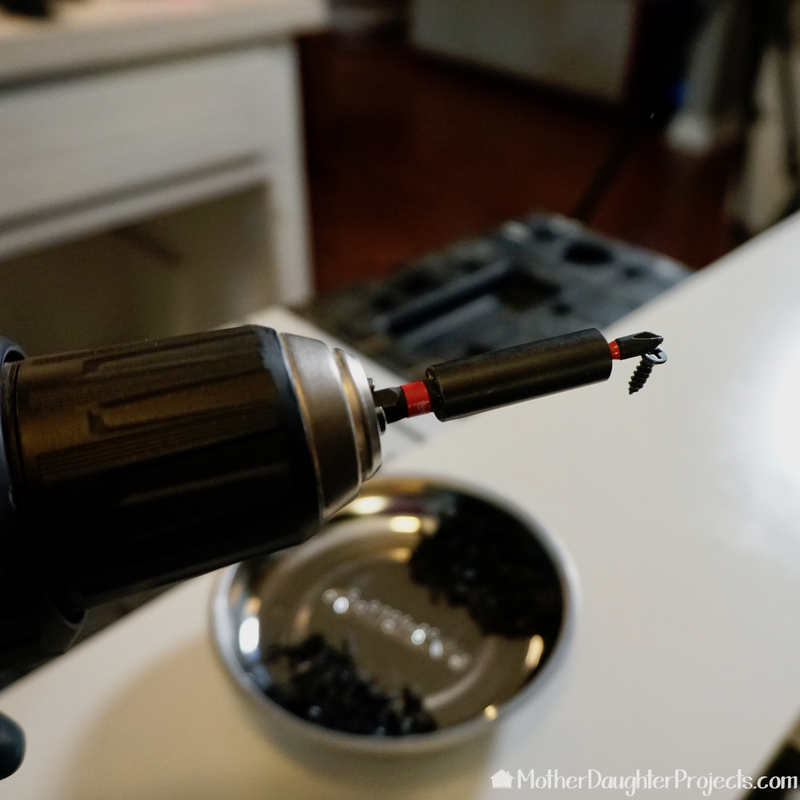
To free up floor space we took the time during the mini makeover to install a Rev-a-Shelf pullout trashcan in one of the lower cabinets. This is definitely an easy upgrade, especially if you are planning to paint at the same time. 
Learn how to do a mini kitchen makeover by painting kitchen cabinets with latex paint, installing a pull out trash can, and installing DIY light fixtures.
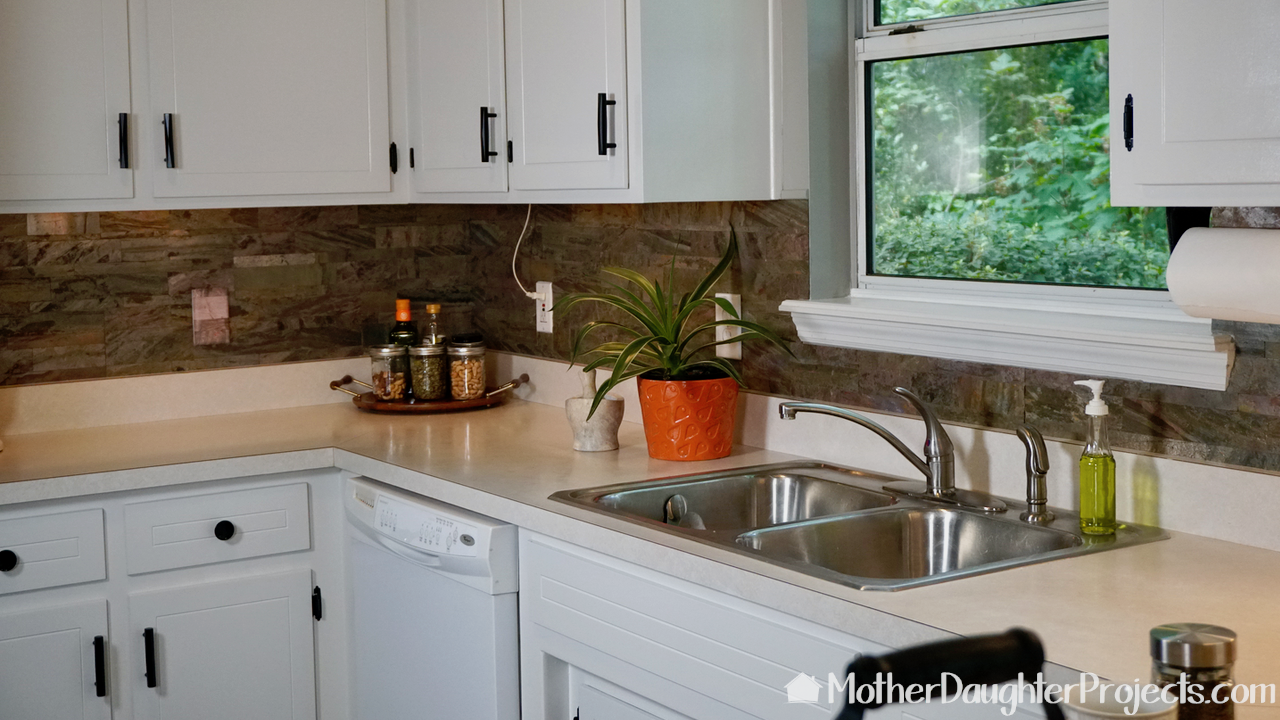
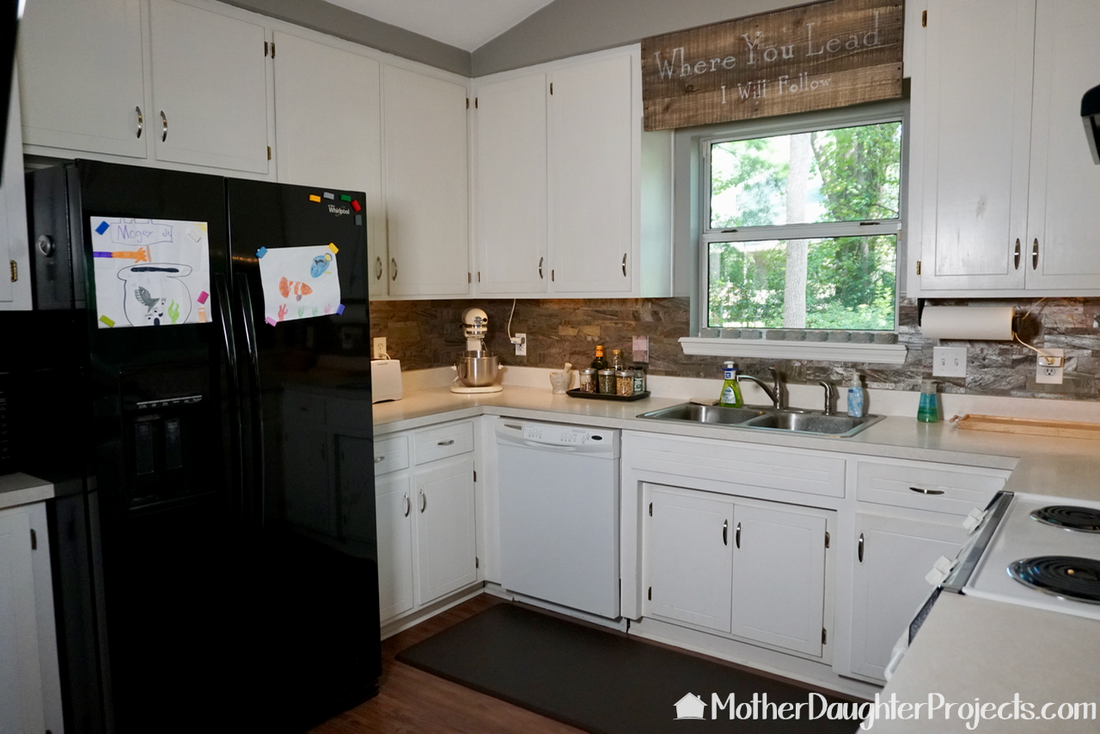
All finished! It's always fun to step back and admire a project once it's finished. It's amazing what a little paint, beautiful hardware and new lighting adds to a space. This mini makeover has certainly added value to Steph's basic builder's grade kitchen. 

What is on your kitchen makeover list? What do you need to give yourself the push to get started? Let us know in the comments below!
We want to thank The Home Depot for providing the following products for this post: Liberty hardware pull and knobs, Rev-A-Self, Ridgid folding panel light, Makita wet/dry vac, and Diablo SandNet discs.

We acknowledge that The Home Depot is partnering with us to participate in the The Home Depot ProSpective Campaign. As a part of the Program, we are receiving compensation in the form of products and services, for the purpose of promoting The Home Depot. All expressed opinions and experiences are our own words. Our post complies with the Word Of Mouth Marketing Association (WOMMA) Ethics Code and applicable Federal Trade Commission guidelines. 

FYI: We are not professionals, and we don’t claim to be. This is what we found worked for our project. Yours may need a little different approach. Safety first!

FYI: Affiliate links are being used on this page. Purchasing via these links help support MDP!

Related Projects

Picture
Peel & Stick Stone Tile
Picture
Update Your Kitchen in Under 30 min
Picture
Upcycle Vintage Windows with Simple Fairy Lights
2 Comments
Liz C.
10/26/2017 02:15:44 pm

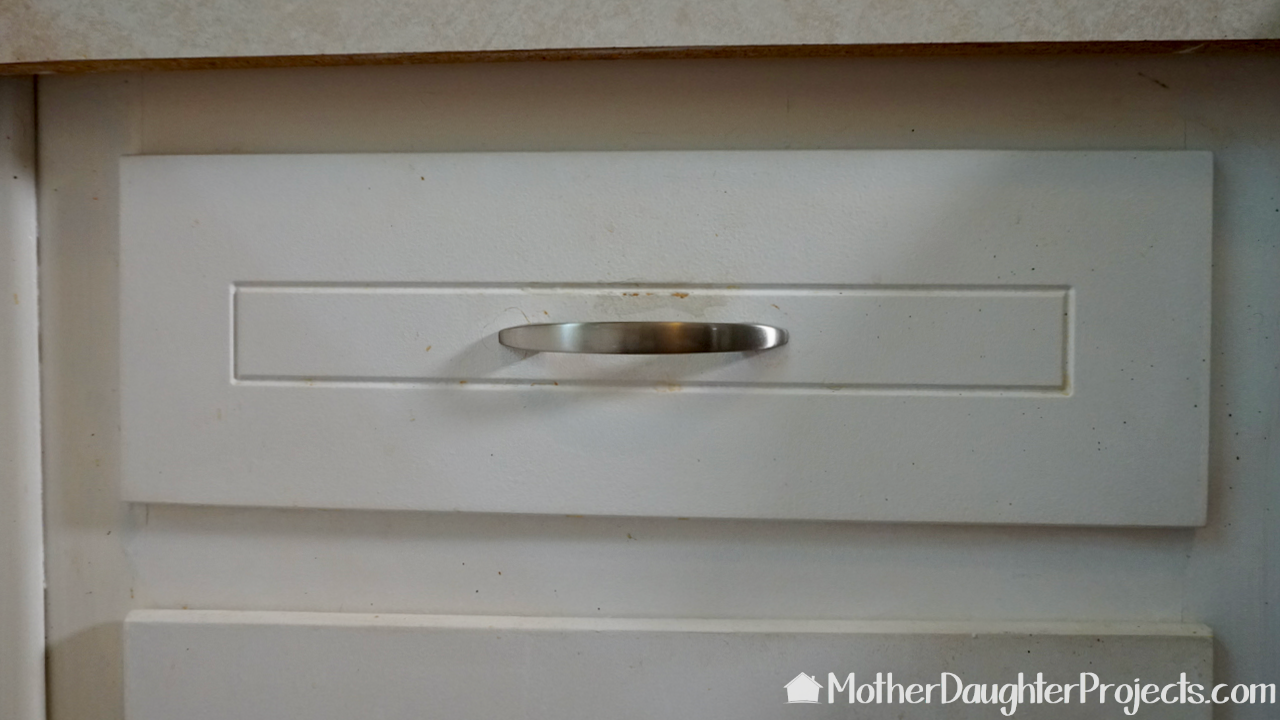
My question is regarding using the stir stick when re-hanging the cupboard doors. You placed the stick at the bottom, between cabinet and the lower part of the door? I'm assuming this was to make sure you have enough room for the bumper? Could you clarify this for me please?
p.s. you ladies do great work!

Reply
Vicki
10/26/2017 03:39:22 pm

Hi Liz! Many cabinet doors are flat so they lay flat against the cabinet frames. These cabinets were not like that. The edges were routed out so part of the cabinet fit into the frames while a little edge fit flat on the cabinet frames. We needed to "lift" the bottom of the cabinet doors to get them to fit (so they wouldn't drag or fit tight). We used the paint stick under the bottom edge to lift them slightly up away from the bottom of the cabinet frame. The paint stick thickness was perfect for helping to get the correct spacing.

Reply


Leave a Reply.

    MotherDaughterProjects.com

    Mother Daughter Projects
    ​
    Steph & Vicki

    We're homeowners sharing our DIY adventures as we learn to maintain, improve, decorate, and ​use tech in our homes.
    Share your projects with us here:  
    ​#trylearnshare
    MotherDaughterProjects.com
Mother Daughter Projects, LLC ∙ est. 2015 ∙ Tallahassee, FL by Vicki & Steph ∙ Privacy Policy