|
text by Vicki Sign up here to join our weekly email newsletter!
This post is sponsored by The Home Depot.
Since we've been with The Home Depot ProSpective campaign, we've had the opportunity to try many different tools. Some have been different brands of the same tool like drills, others are tools we've never tried before like the scroll saw.
With this Husky Tap and Die set, we're totally starting from scratch! Not only did we need to research what you can do with it, but how it works! It's been fun to research the possibilities and learning how to use it. We had a plan to use it, but in the meantime, we found an actual real-life application for it. Follow along as we share how we SUCCESSFULLY used it! 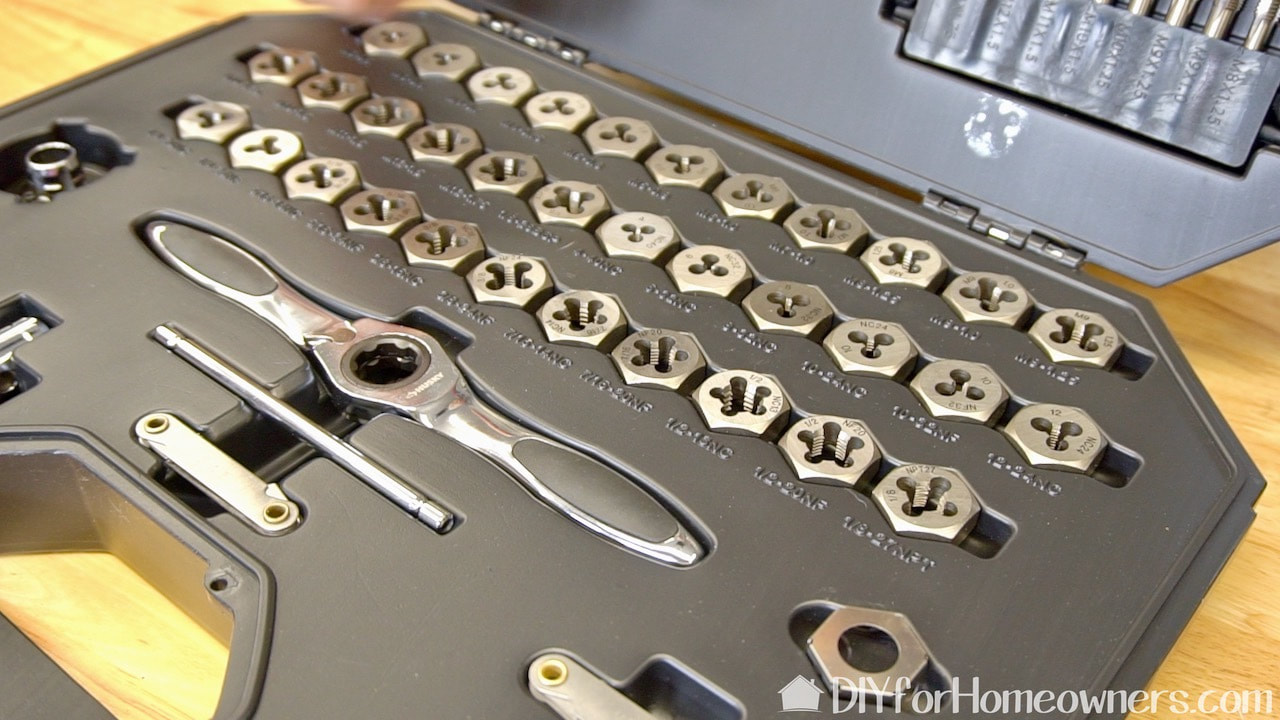
There are a whole lot of unfamiliar terms associated with this tap and die set! Researching this was like decoding an entire different language--tap, die, pitch gauge, ratcheting T-Handle--the list goes on! What you see in the picture are dies. The dies come in metric and SAE sizes. The dies are for cutting threads in the outside of a cylinder of metal--like you'd see on a bolt or screw.
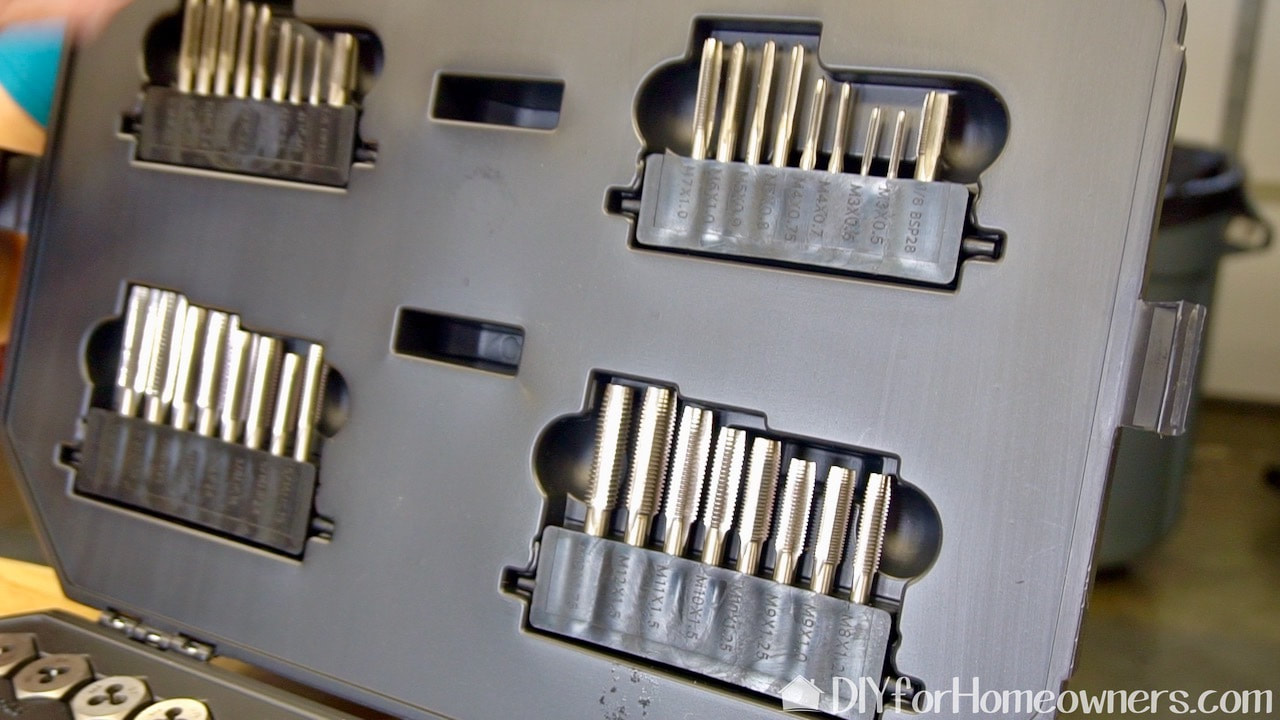
These are taps. They make threads inside a hole. If you have a photo or video camera, it has a hole in the bottom where you can screw it onto a tripod. This hole has threads in it that were made with a tap. The taps also come in metric and SAE sizes.

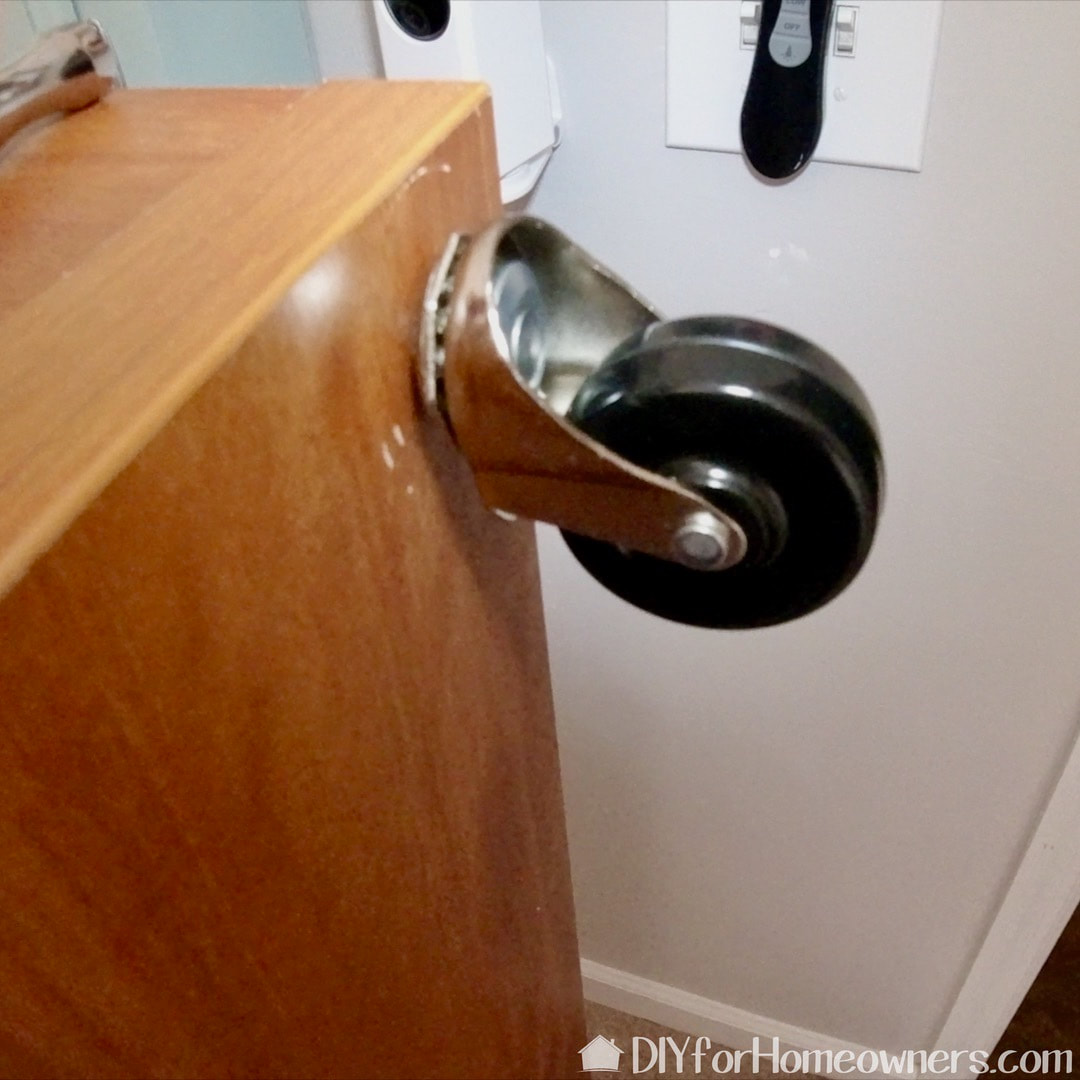
Here's our real-life application for using the Husky Tap and Die set. Steph decided she wanted to put casters on a piece of furniture in the studio. When Steph wants to do something she wants to get it done ASAP. (I'm more of a procrastinator!) Anyway, we went to Home Depot to find casters and found some that looked like they'd fit. When we tried to put them in the existing screw holes, they got stuck! They were too big. Rather than take the time to look for another option, I suggested we try to adjust them with the tap and die set to make them fit.
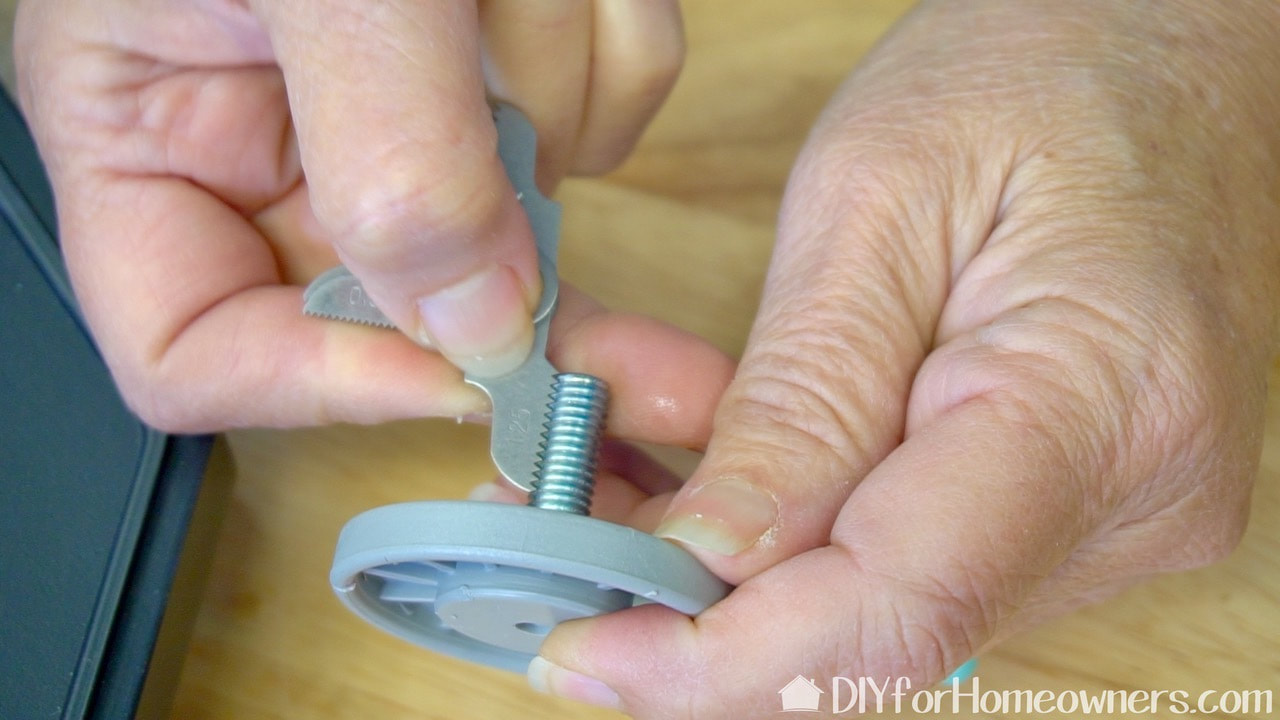
The first step is to determine which die to use. This is the original "foot" from the cabinet. The screw threads are in metric measurements. The casters we are using are SAE. We want to cut new threads in the caster that will fit into the metric screw holes. Here I'm using the metric pitch gauge to determine the size of the die we need to use. You simply use trial and error with the various gauges to find a match with the existing threads. The number on the gauge tells you the die you need. In this case we needed a M1.25.

The handle is assembled and the die dropped into place. There is an included 4mm Hex Key to lock the die into place.
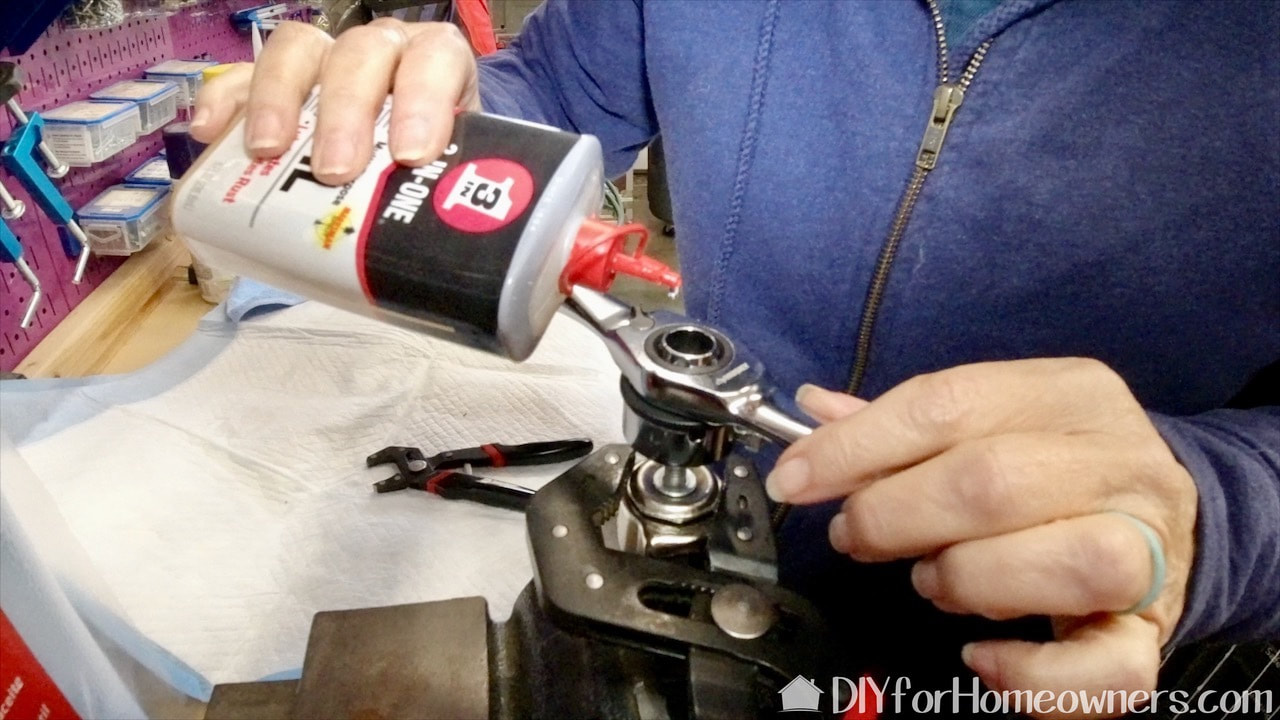
We put the caster into a vice and Steph used a pair of pliers to keep it from moving. To cut the new threads, the die is screwed into place. Once it 'catches', a little oil added to help with the cutting process. The procedure is to cut all around and then go backwards half a turn to help keep the newly cut shards out of the way.
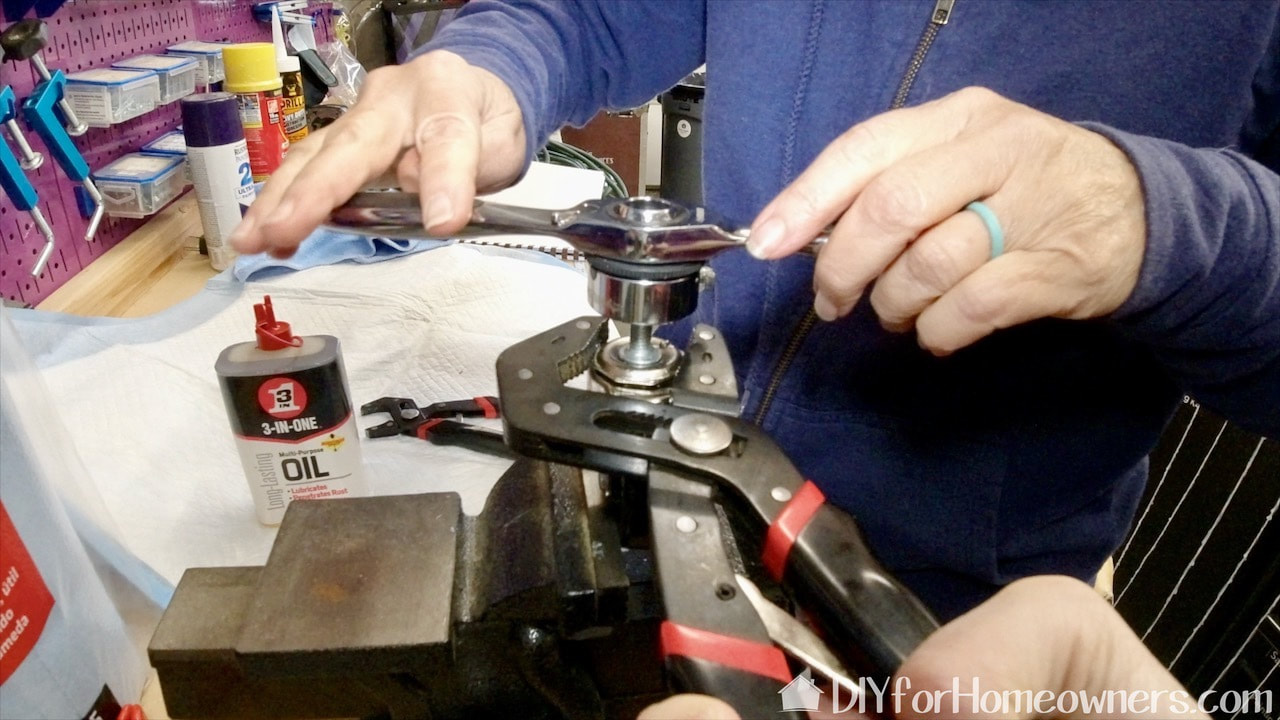
It only took a few minutes to completely cut the new threads. The hardest part was keeping the caster from moving!
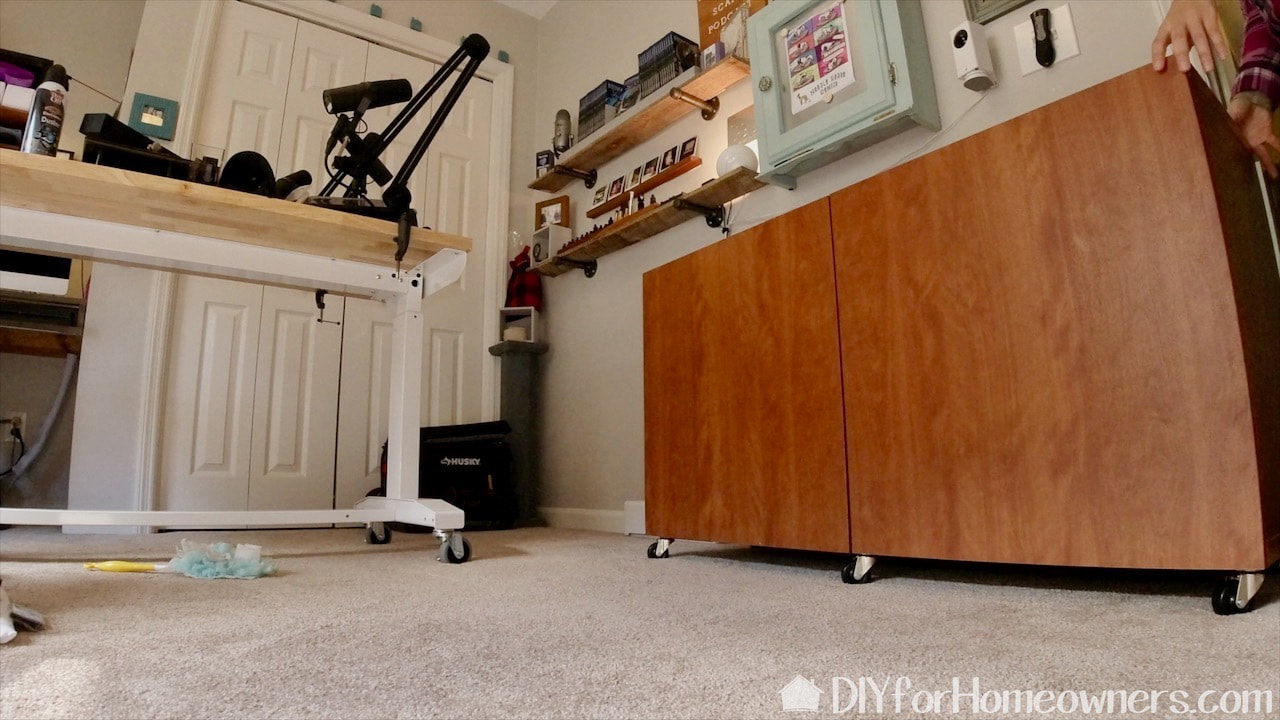
We finished the remaining casters, put them in place and admired our work!
So much of DIYing is problem solving. In every build or repair there is always a situation that requires problem solving. That moment can be the most frustrating, difficult part--but it usually ends up being the most educational, satisfying part of a project.
This was one of those projects. What should have been a simple change out of feet on this cabinet for casters turned out to be anything but! Putting the first caster into place and having it get stuck was like, "why can't anything be simple?" But that moment of frustration turned into creative problem solving which turned into using a tool that was new to us that turned into a moment of sheer empowerment when it worked! This simple project is going to be forever one of my favorites! What tool have you used that has given you that feeling of empowerment? Let us know in the comments below! We acknowledge that The Home Depot is partnering with us to participate in the ProSpective 2019 Campaign. As a part of the Program, we are receiving compensation in the form of products and services, for the purpose of promoting The Home Depot. All expressed opinions and experiences are our own words. Our post complies with the Word Of Mouth Marketing Association (WOMMA) Ethics Code and applicable Federal Trade Commission guidelines. FYI: We are not professionals, and we don’t claim to be. This is what we found worked for our project. Yours may need a little different approach. Safety first! FYI: Affiliate links are being used on this page. Purchasing via these links help support MDP! Related Projects
0 Comments
Leave a Reply. |

Mother Daughter Projects
|