|
text by Vicki Sign up here to join our weekly email newsletter!
This post is sponsored by The Home Depot. THD provided the Husky products used in this post.
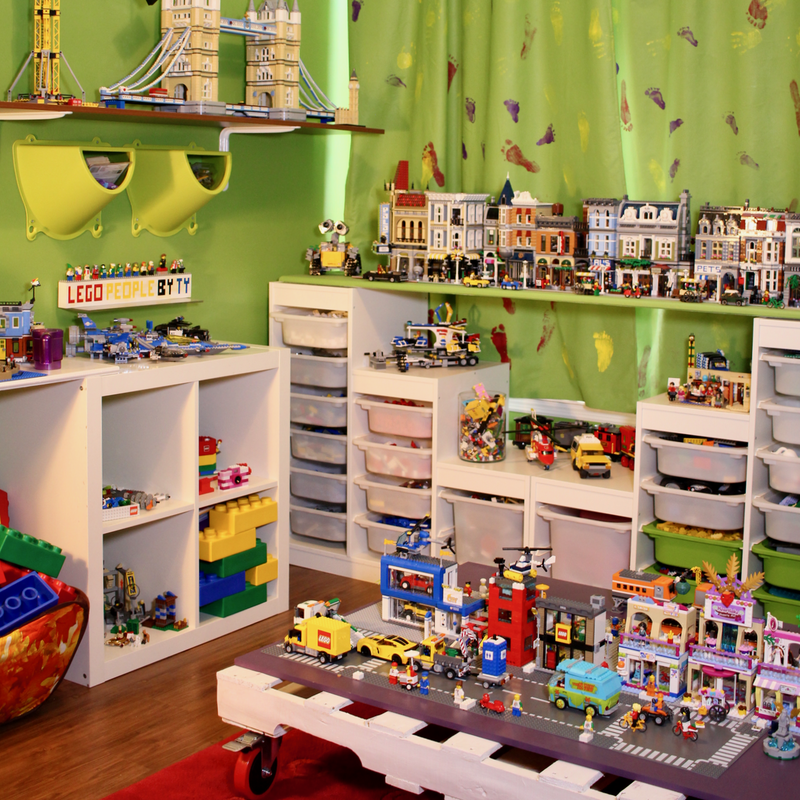
Steph had the idea to build the ultimate Lego display and storage wall. With help from Wall Control, her dream became a reality!
When she was brainstorming ideas, it became clear that Wall Control panels and a variety of hooks and accessories would be perfect for the wall. As brand ambassador's for Wall Control, we emailed our plans and they provided all the Wall Control products used in this project. Thanks team! Take a look at how it all came together. 
Materials:
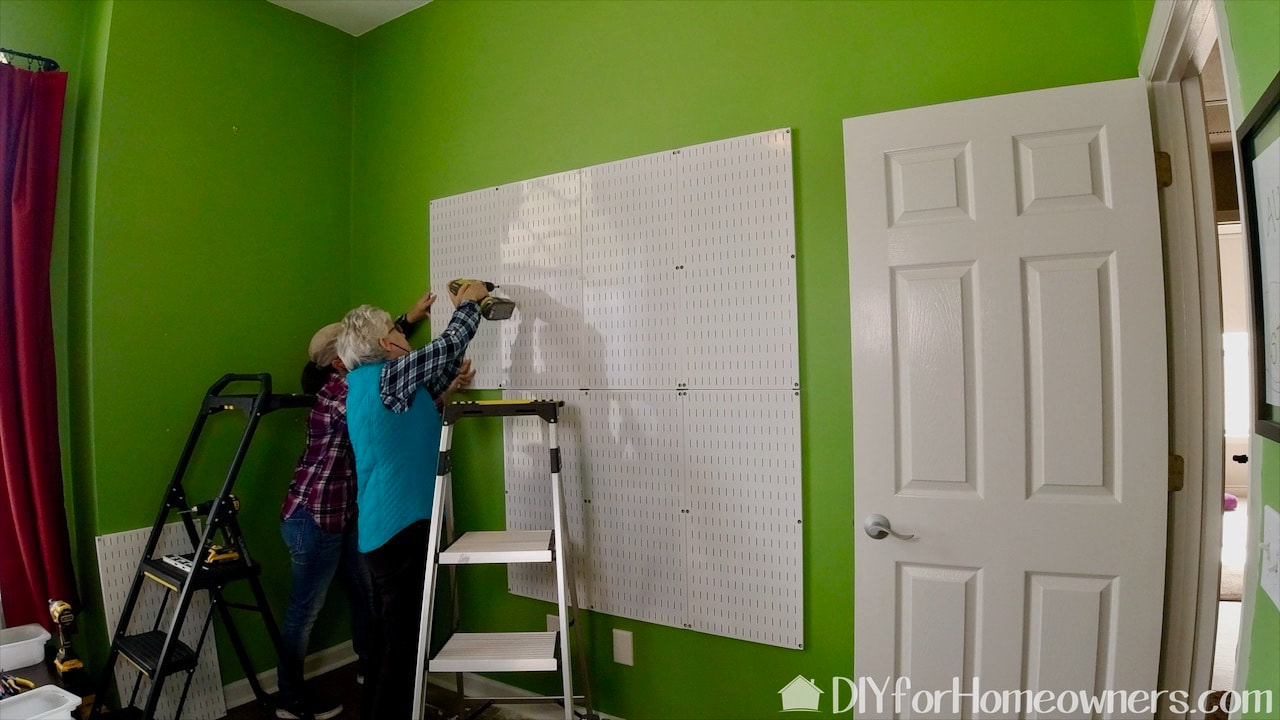
We've gotten pretty efficient at putting up Wall Control panels. This is the sixth set we've put up in our homes! Yes, we like it that much. The process is pretty simple and made even easier when you work as a team. One of us holds the panel in place, while the other one marks the screws hole placement. We like to put a spade bit into the hole and tap it with a rubber mallet. It leaves a mark in the center making it really easy to do the next step which is to drill the holes for the anchors that go into the drywall. This step is not necessary if the panel placement ends up on a stud. Absolutely none of ours ended up on a stud! We have the luxury of owning more than one set of drills, so we each got a set, one with a drill bit and one with a driver bit. This doubled the speed in which we installed the panels!
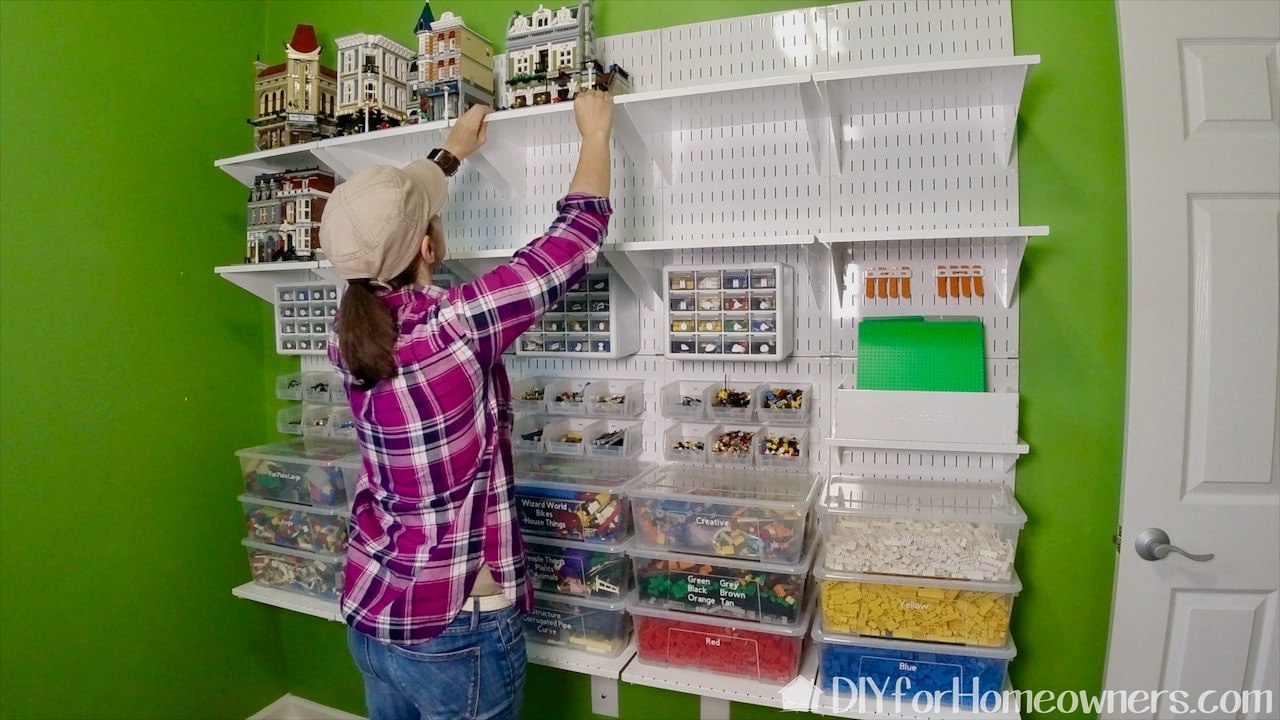
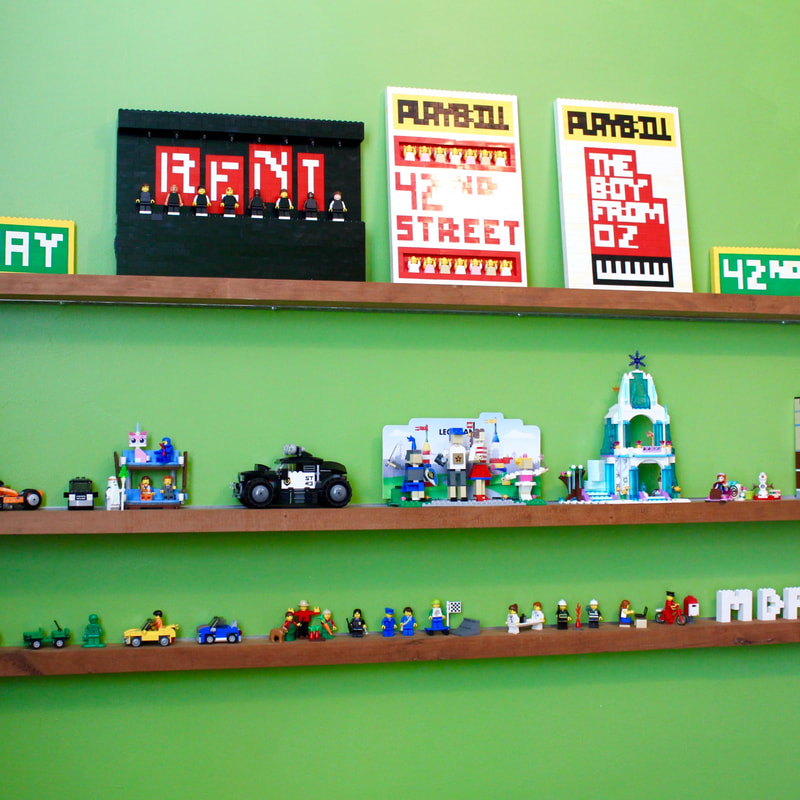
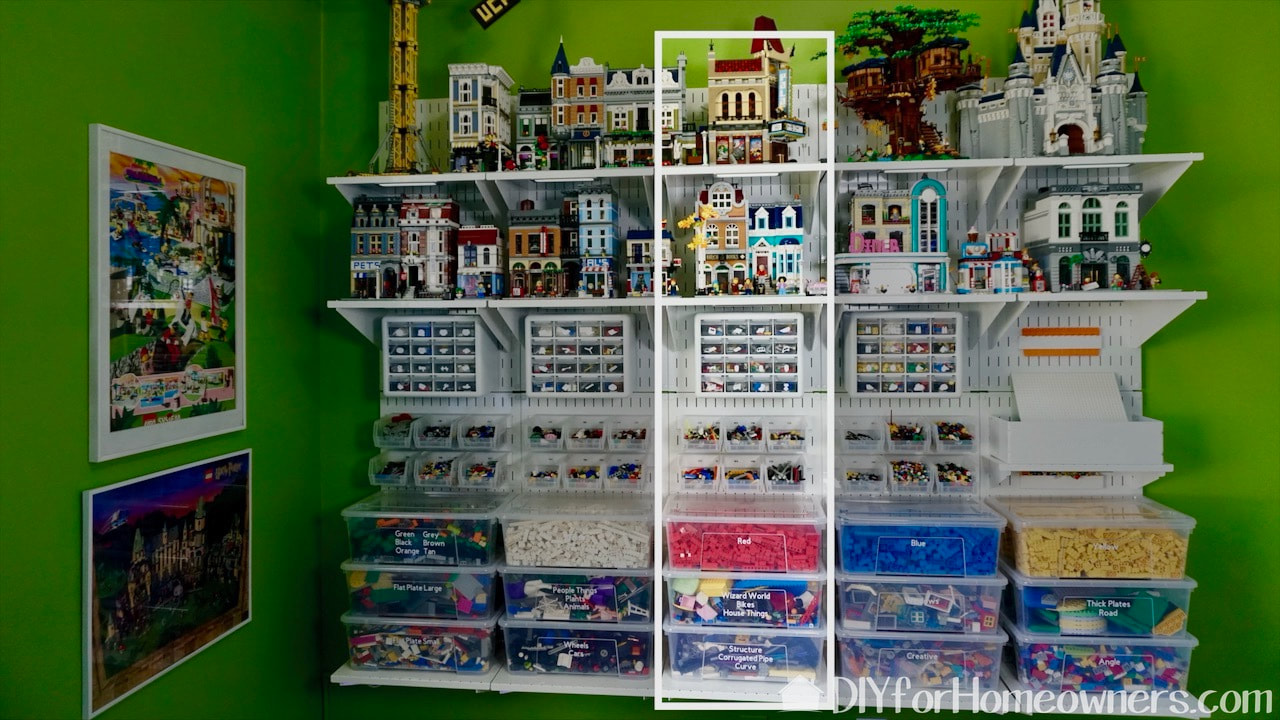
The wall serves as space to store completed sets and as storage for bricks. Smaller pieces find homes in drawers and open bins, while other pieces are stored in lidded clear plastic containers.
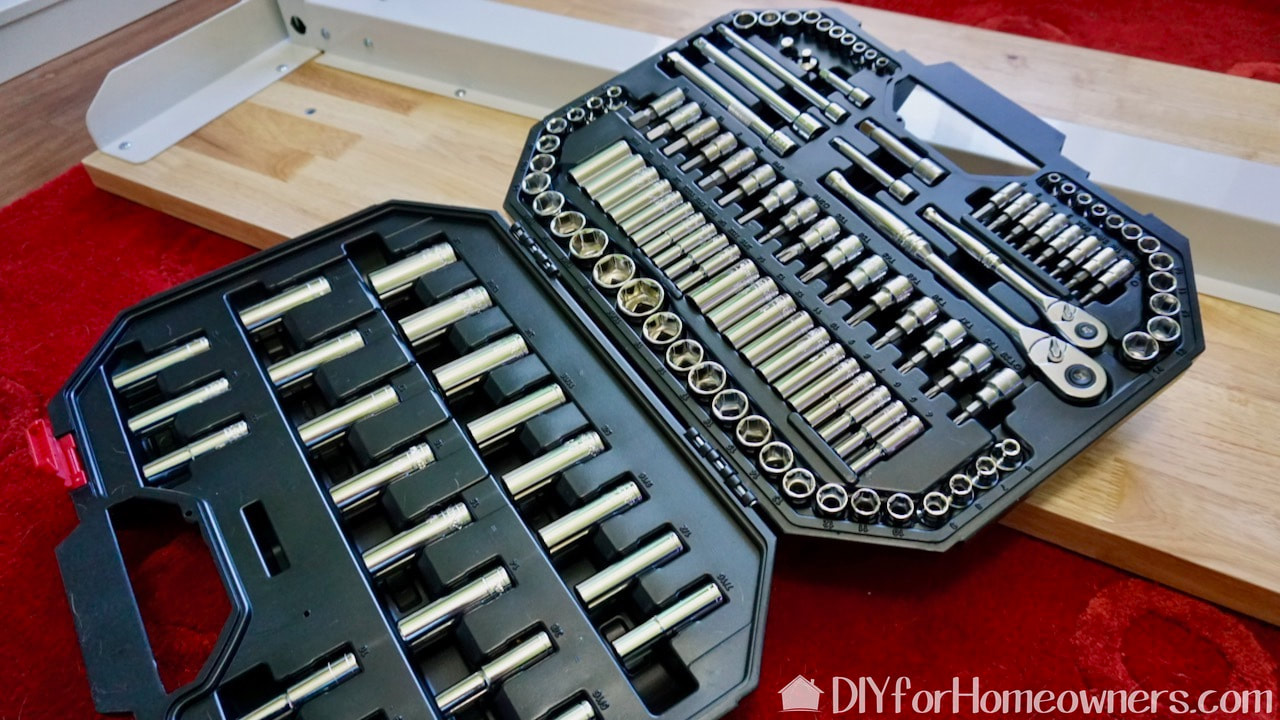
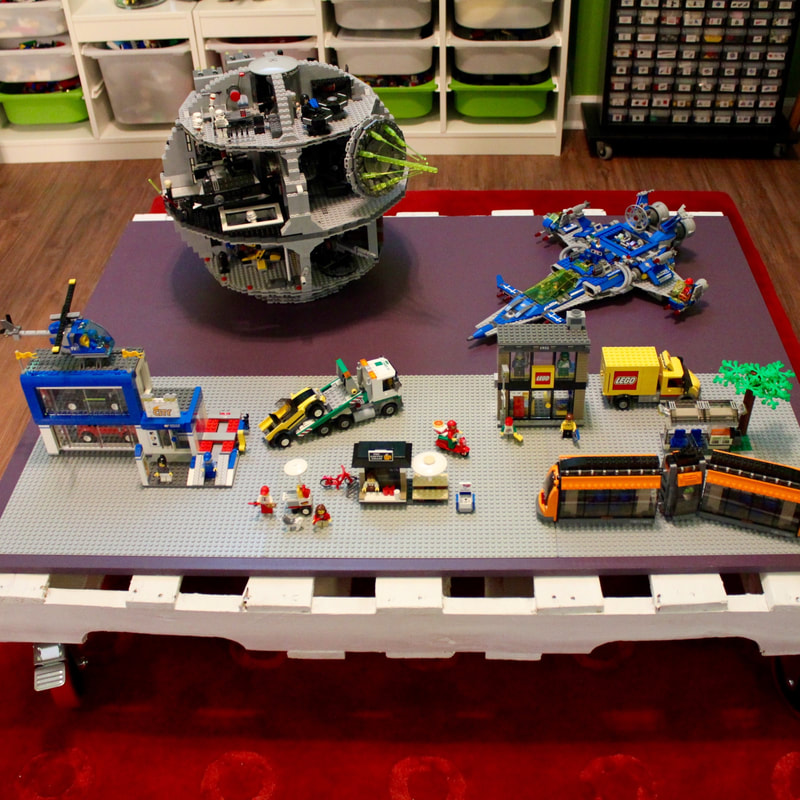
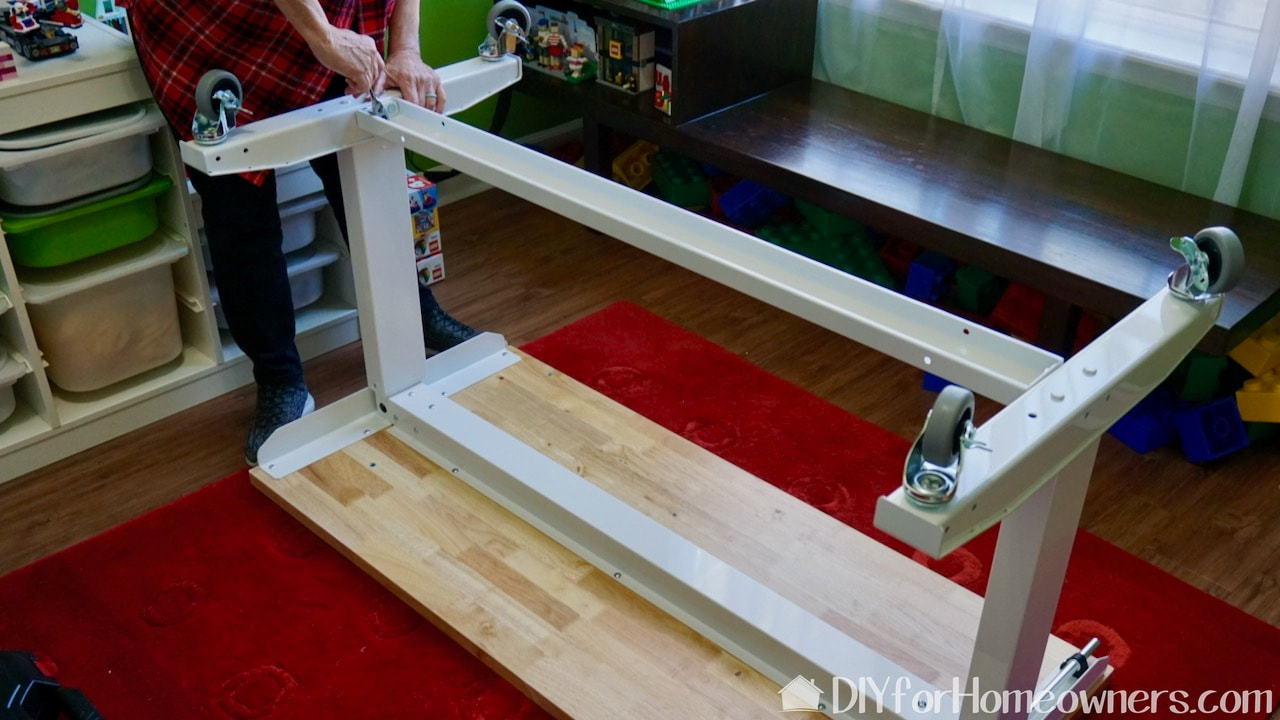
One of the first projects we did when MDP was founded was a pallet Lego table. Well, the grandkids/niblings have moved away meaning Steph could now have an adult size table in the Lego room. We decided a white Husky worktable with drawers would be perfect. Sometimes you can get these already assembled from The Home Depot, but ours came unassembled. We make use of this Husky socket set to complete the assembly.
The socket set has two sizes of handles. I chose the smallest one which fit easily into this tight space.
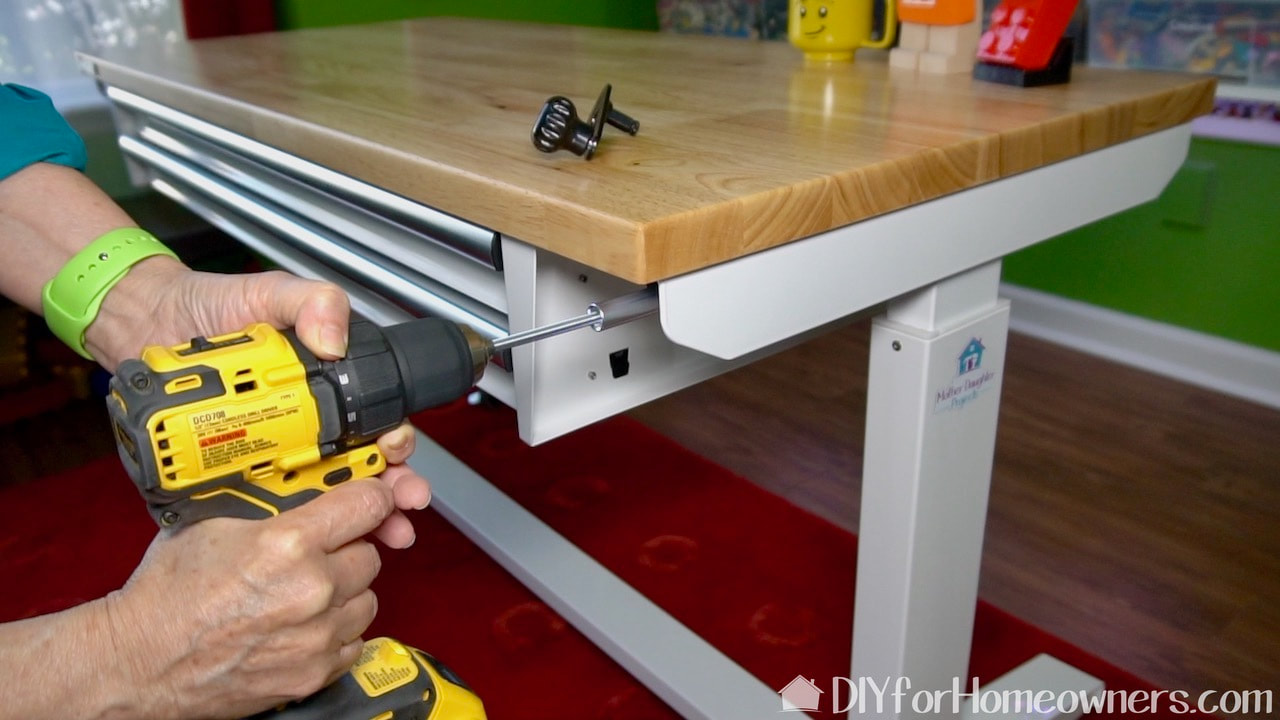
Here's a little nifty hack we came up with! We gave our worktable a little power lift! We realized that with the right size hex head screw, we could put it in a drill and be able to raise and lower the table super fast. Note: A couple of months ago, we took the top off another Husky worktable and replaced it with Steph's dining room table top. We often have to move Steph's dining room table which was difficult. Steph thought the mobility of the Husky worktable and adjustable height would work perfectly. And you know what, it does! We actually came up with the power lift idea because once the dining room table was on the Husky base the hand crank could not be use as the table top hung over the crank. The drill/hex head screw works perfectly.
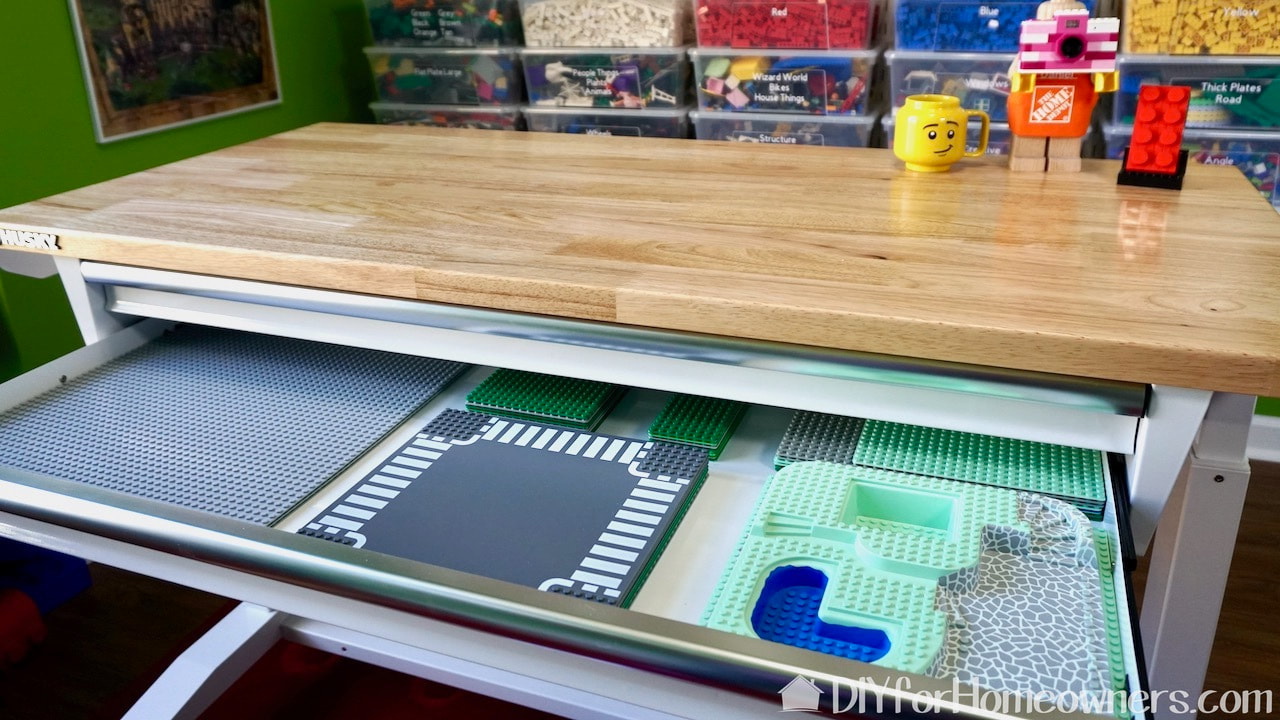
Not all Husky worktables have drawers but this one does and it's perfect for holding various sizes of building plates.
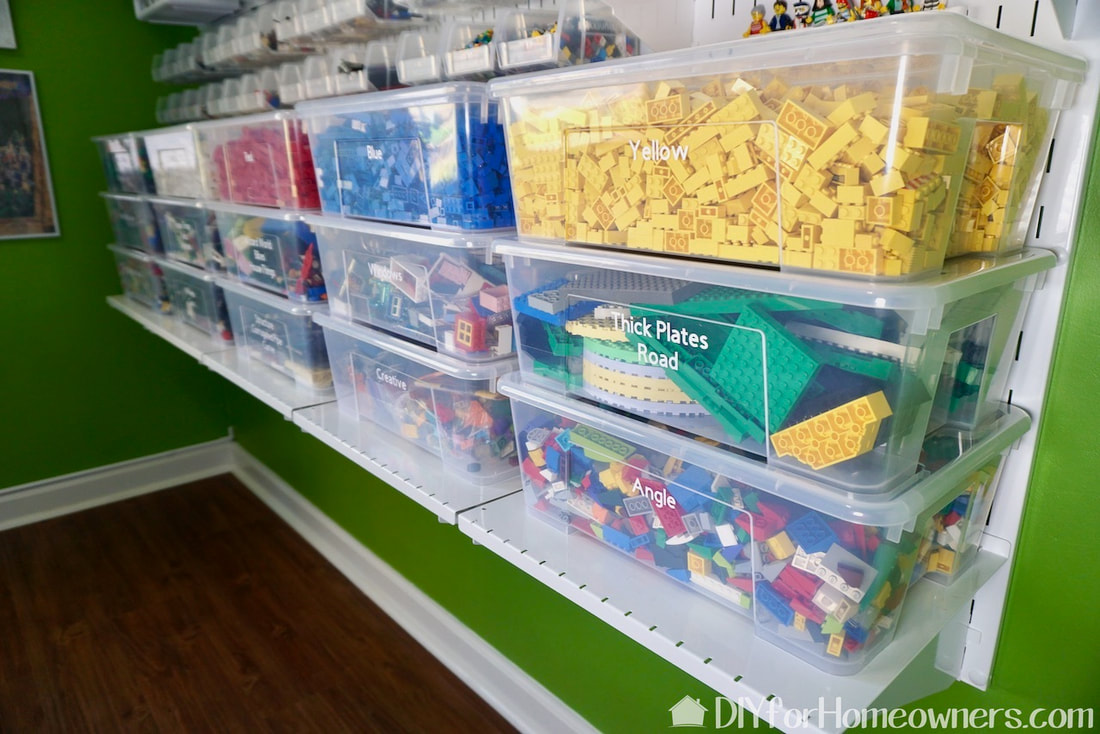
Clear bins makes it easy to see what is inside.
Steph found various Lego piece images online and used them to create these silhouettes on the Cricut Maker from white vinyl.

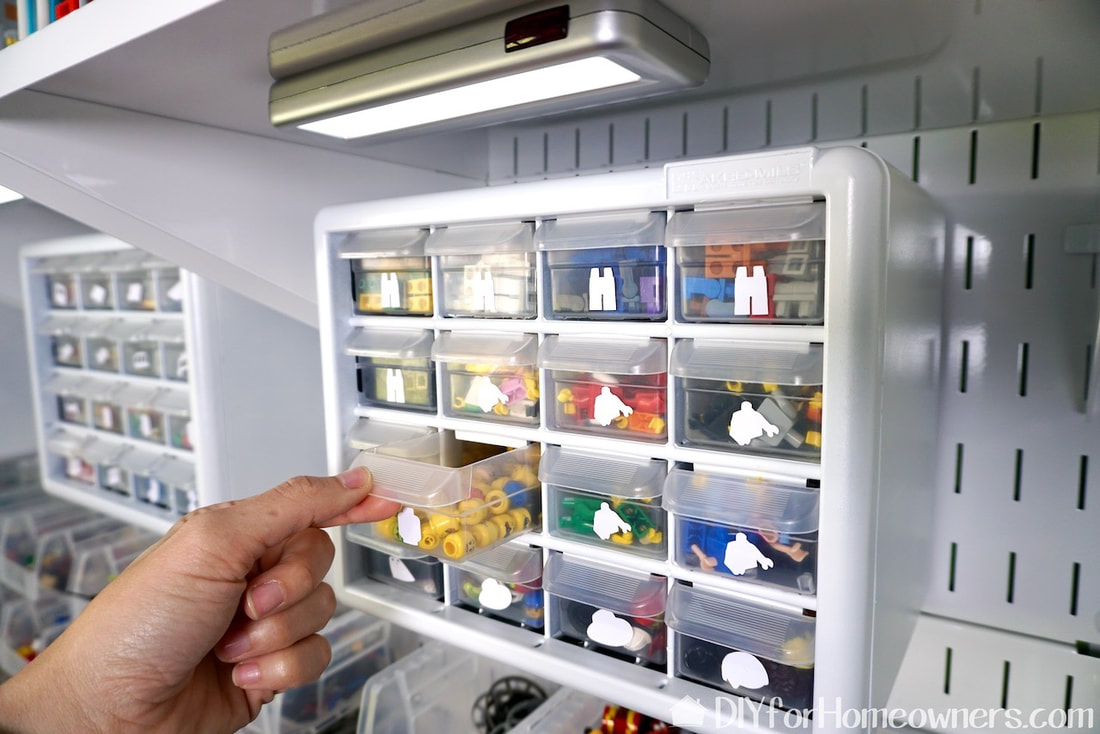
The multi-drawer boxes are from Wall Control. They only come in black so we spray painted them a glossy white. We used Rust-Oleum spray paint that can be used on plastic. We sprayed these well ahead of when we needed to install them so they'd have plenty of time to cure. Note: Prior to spray paining, I cleaned the box part with Krud Kutter Gloss-Off applied with a Scotch Bite green pad.
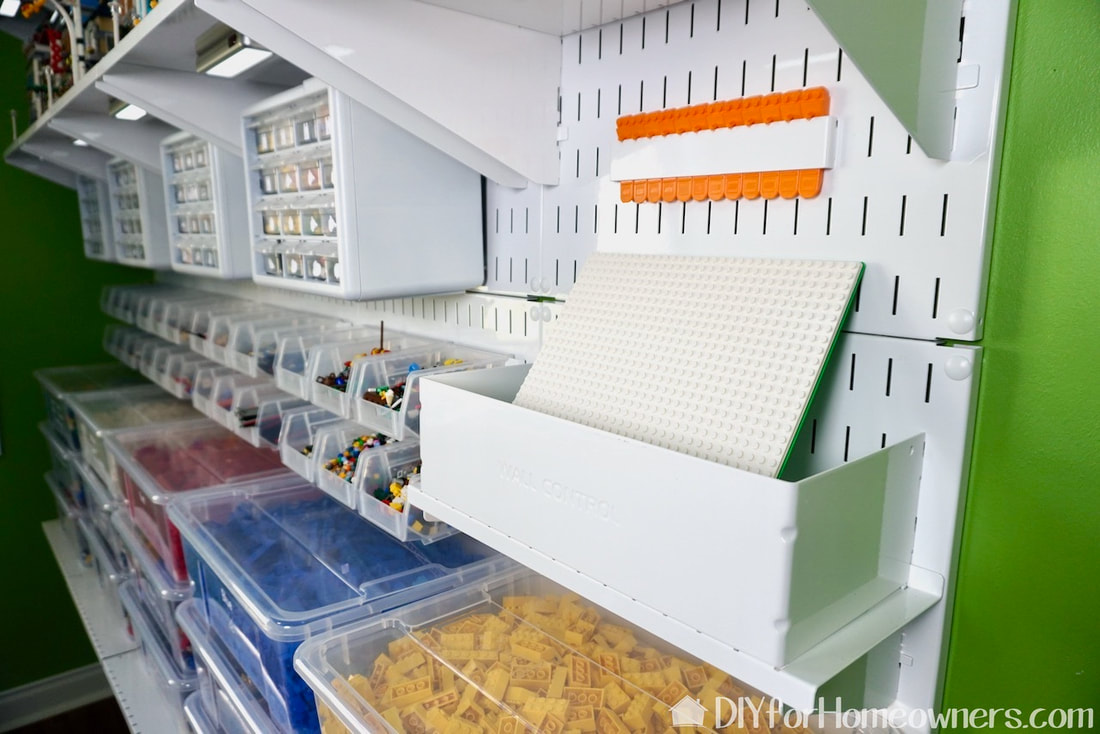
There are two new Wall Control products shown here. On the right side of the pic are two white plastic covers. These are screw hole plugs that cover the screw holes. The second is the shelf guard that holds the building plates. It helps to contains the things that might have a tendency to fall off a shelf. We love the look of both of these. Also of note, although not new, is the 8" slotted metal pegboard hanger. You'll see in the video that Steph made use of these in a most delightful way. See if you can spot them in the video.
Now if your Lego collection is not quite as extensive as Steph's or you don't have the budget for an entire wall, then start with just one section and add on as your collection grows.
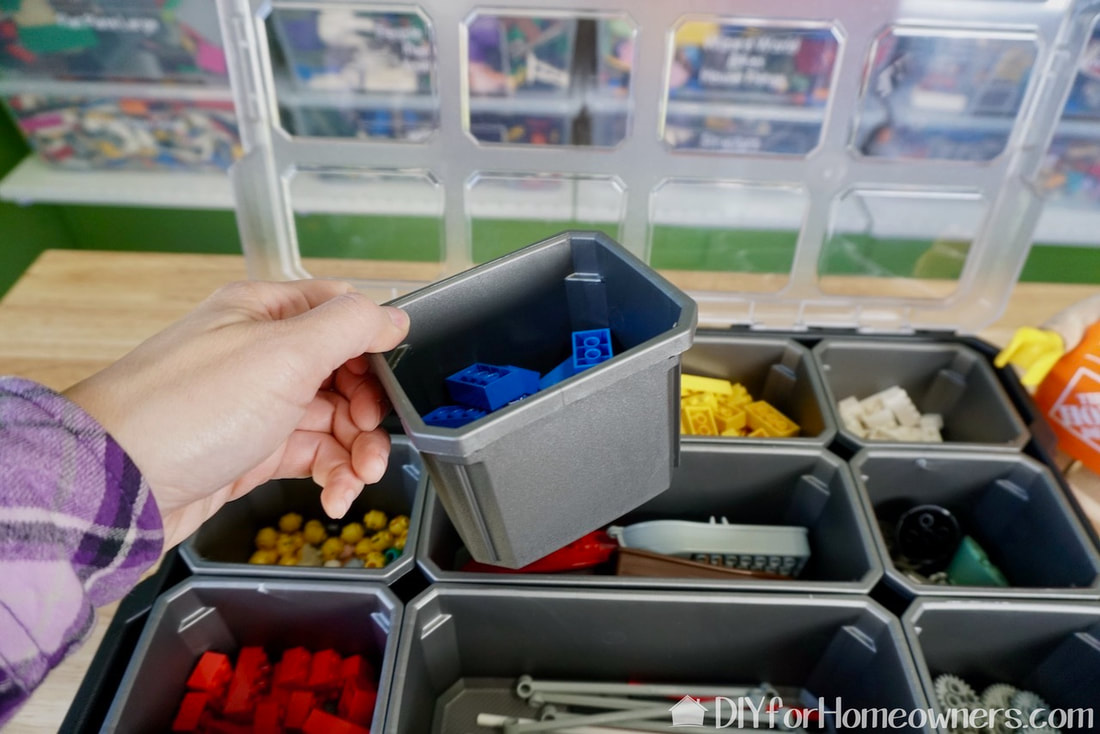
For a smaller collection, this Husky 10-compartment portable storage box might be just the thing. When it comes to this kind of box, whether you're storing Lego or screw, the individual containers need to be removable. I know this because I've had boxes where the compartments don't come out and it's very inconvenient! These boxes stack as well so they could be used in place of the large clear plastic boxes.
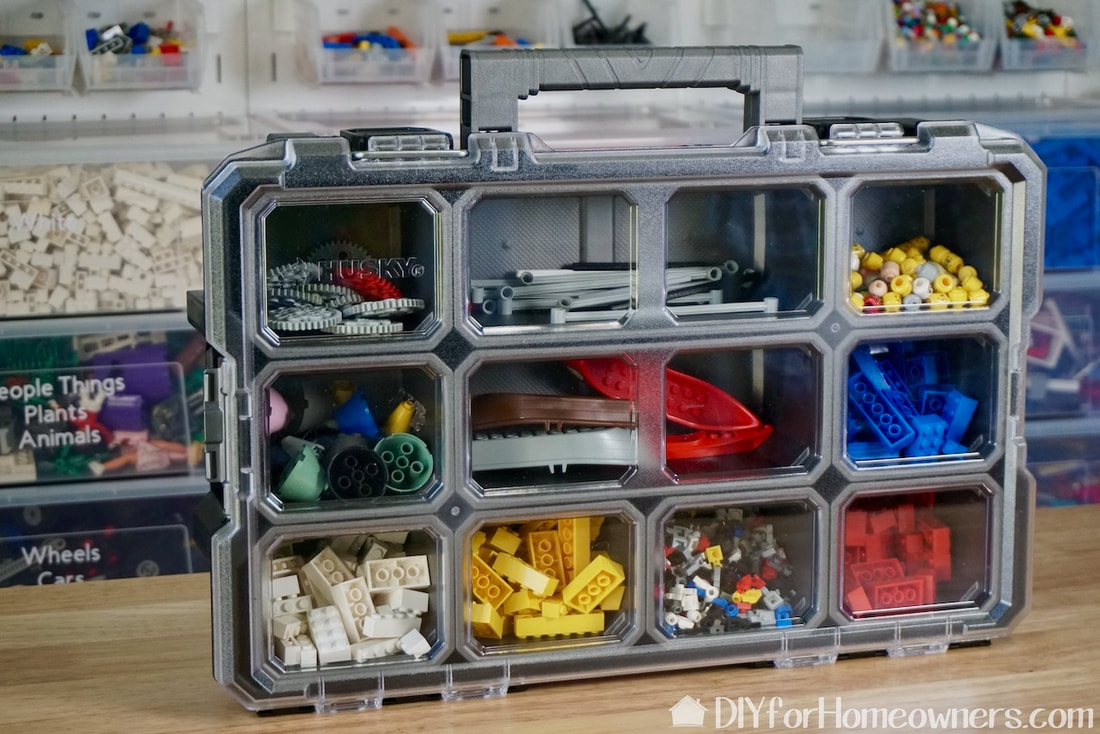
These Husky boxes are also perfect for on-the-go Lego building! If my grandkids still lived in town, I'd make up one of these for each of them! (Wouldn't I be the coolest grandma ever!)
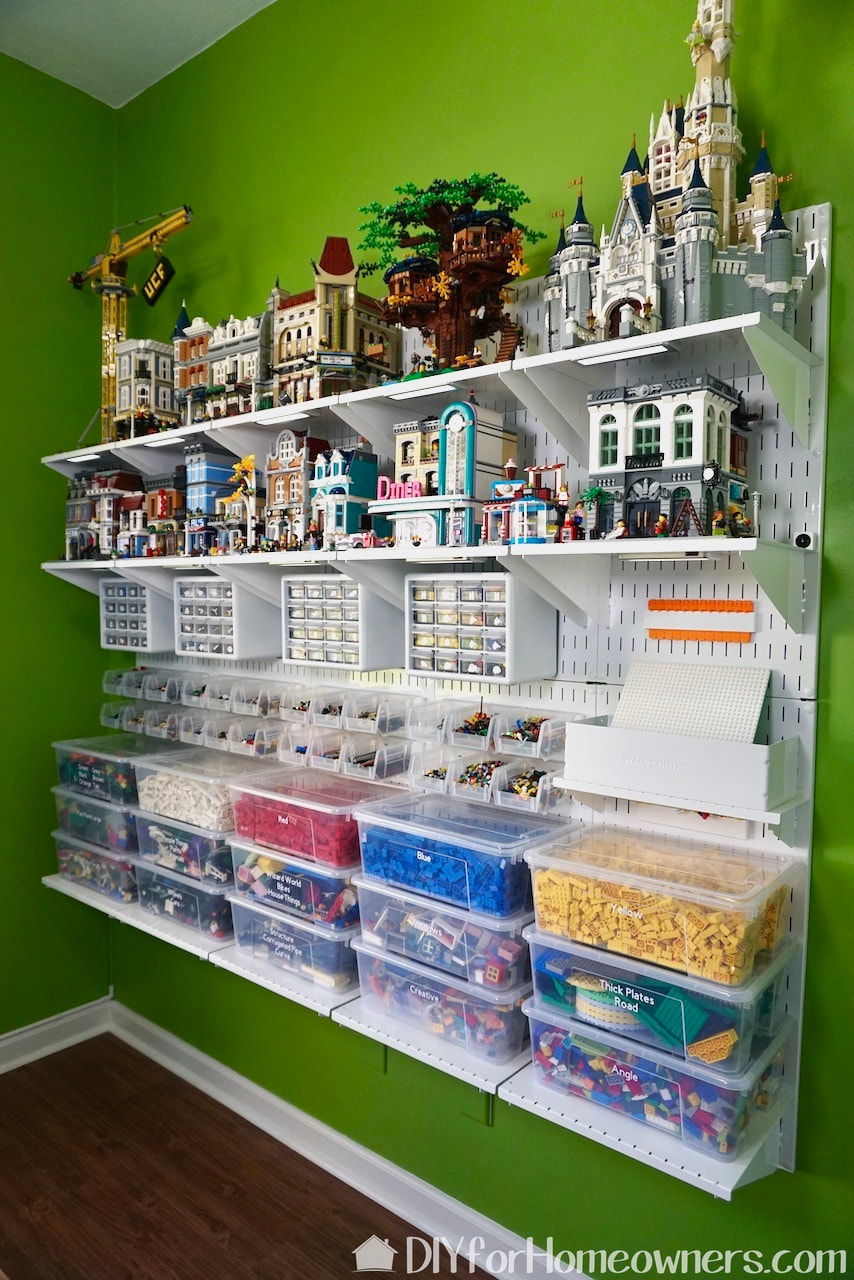
The finished Lego wall is pretty AWESOME!
We acknowledge that The Home Depot is partnering with us to participate in the ProSpective 2019 Campaign. As a part of the Program, we are receiving compensation in the form of products and services, for the purpose of promoting The Home Depot. All expressed opinions and experiences are our own words. Our post complies with the Word Of Mouth Marketing Association (WOMMA) Ethics Code and applicable Federal Trade Commission guidelines.
FYI: We are not professionals, and we don’t claim to be. This is what we found worked for our project. Yours may need a little different approach. Safety first! FYI: Affiliate links are being used on this page. Purchasing via these links help support MDP! Releated Projects
17 Comments
Hanna
1/16/2021 10:36:23 pm
Hi, what kinda clear bins (the large ones at the bottom) you used with the wall control? I am currently trying to organize my sons legos and found you post! I just love it so much!! Thank you so much!
Steph
1/17/2021 04:23:57 pm
Hi! Those are the SAMLA
Jess
1/17/2021 09:34:10 pm
How deep are the shelves you used? Thanks!
Steph
1/18/2021 10:58:48 am
They are 12". There is a banner toward the top of this post with a downloadable PDF with links to all the materials we used!
Richard
8/11/2021 09:18:16 pm
Great setup! I now have a new idea for my Lego wall. What kind of lights are those under the shelves? They look wireless.
Steph
8/12/2021 08:23:54 am
Here's a link to them: https://amzn.to/3CIkk0n
Mary Beth
8/31/2021 03:58:51 am
You have created an awesome Lego room! Curious to know how you stored the Lego instruction books? Also, do you have a list of the separated Lego pieces (what is in each bin) and how you decided what went into each bin?
Steph
8/31/2021 09:54:40 am
Hi Mary Beth! I currently store my instruction books in IKEA KUGGIS Box with lid, white10 ¼x13 ¾x6 ". I store these in the IKEA KALLAX Shelf unit. I don't have a list, but sets I want to keep together that I have taken apart, I put in large ziplock bags and keep in big clear bins. All the separated bricks on the wall are from sets I will not put together again, or just bought bricks. Hope that helps!
Deni
2/5/2022 11:07:48 pm
Some of my sets are deeper than 12”. Does the shelving come deeper than 12”? For example the Grand Piano is 13.5” deep. Beautiful job by the way!
Steph
2/6/2022 10:09:22 am
Hi Deni, 12" is the widest shelf, but you may be able to add wood to the top to make a deeper shelf for those sets. How do you like the Grand Piano? I've been thinking of buy that one!
Deni
5/18/2022 11:34:36 am
Thanks for responding! The Grand Piano is beautiful although mine doesn’t play longer than +/- 10 seconds. Will have to figure it out.
Steph
5/7/2023 08:14:35 am
The labels I made and cut out with our Cricut Maker, which is a vinyl cutting machine.
Amanda
11/8/2023 11:25:57 am
I was trying to checkout on wall control.com and it says the coupon code MDP15 is not accepted. Do you have a new code?
Steph
11/8/2023 01:08:07 pm
Sorry, yes the code is just MDP now.
Winnie
7/7/2024 03:27:10 am
I love the 12” shelves. I
Steph
7/7/2024 10:14:43 am
The 12" shelves are part of the Wall Control pegboard system: https://www.wallcontrol.com/12in-deep-slotted-metal-pegboard-shelf-assembly-blue/?aff=13 Leave a Reply. |

Mother Daughter Projects
|