|
text by Vicki Sign up here to join our weekly email newsletter! The very first piece of vintage furniture that I purchased right out of college was a desk with chair. My first job was in a small north Florida town where I sublet an apartment for two months. My unit was tacked onto the back of a home and featured the smallest bathtub ever. Bonus, it had no shower so I had to connect a handheld sprayer to the tub faucet for a very rough facsimile of an actual shower. Bonus, it also had mice! That gives you a good idea why I was only there two months. Anyway, the garage apartment was occupied by a lady that moved while I lived in the third apartment. She sold all her furniture and I was given the opportunity to pick from the leftovers. The second apartment tenant made sure he had first dibs on everything. Evidently, he was an antiques collections so he got "all the good" stuff! Not sure what he got, but I was very happy with the desk and a couple of end tables that I purchased. I used that desk for years until the chair fell apart when I then stored them both in the garage. At one point I did try to refinish it but didn't follow through. The Builder's Challenge gave me the push I needed to finally repair and refinish the pieces one and for all! 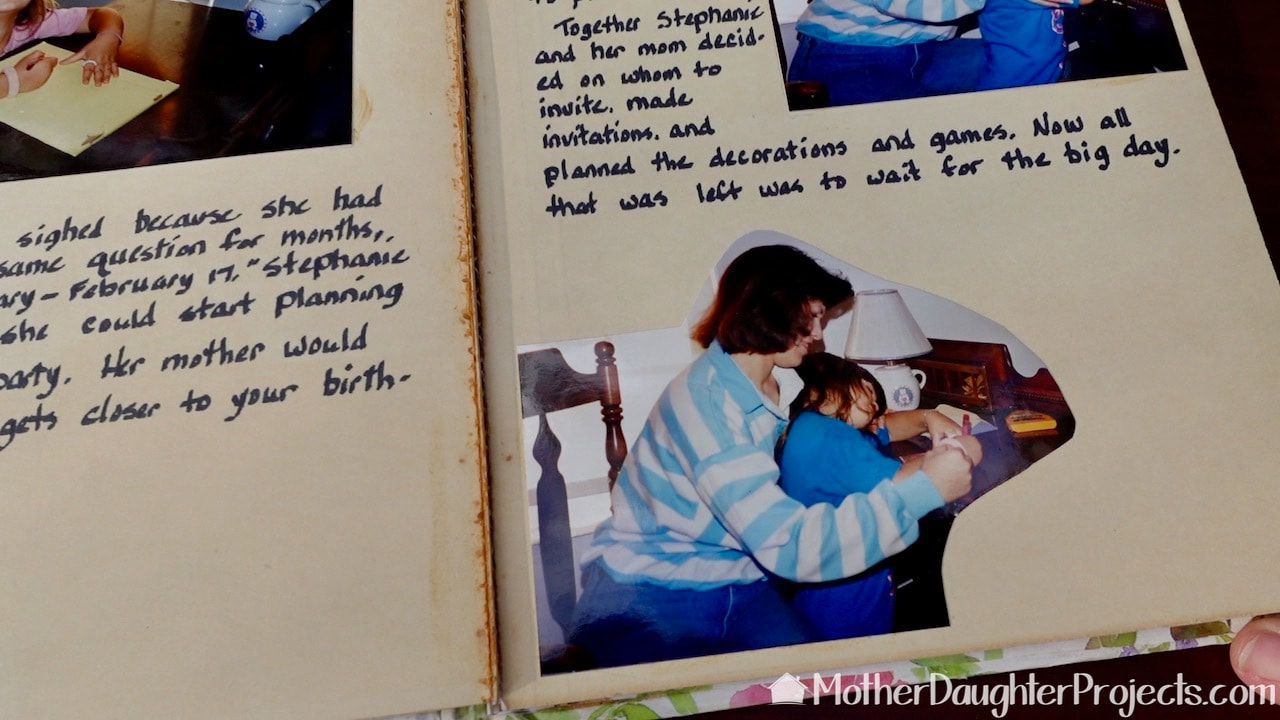 There's a lot of memories tied up in the desk so I didn't just want to throw it away. When Steph was four I made her a birthday book and in the book are pictures of her sitting at the desk "helping." 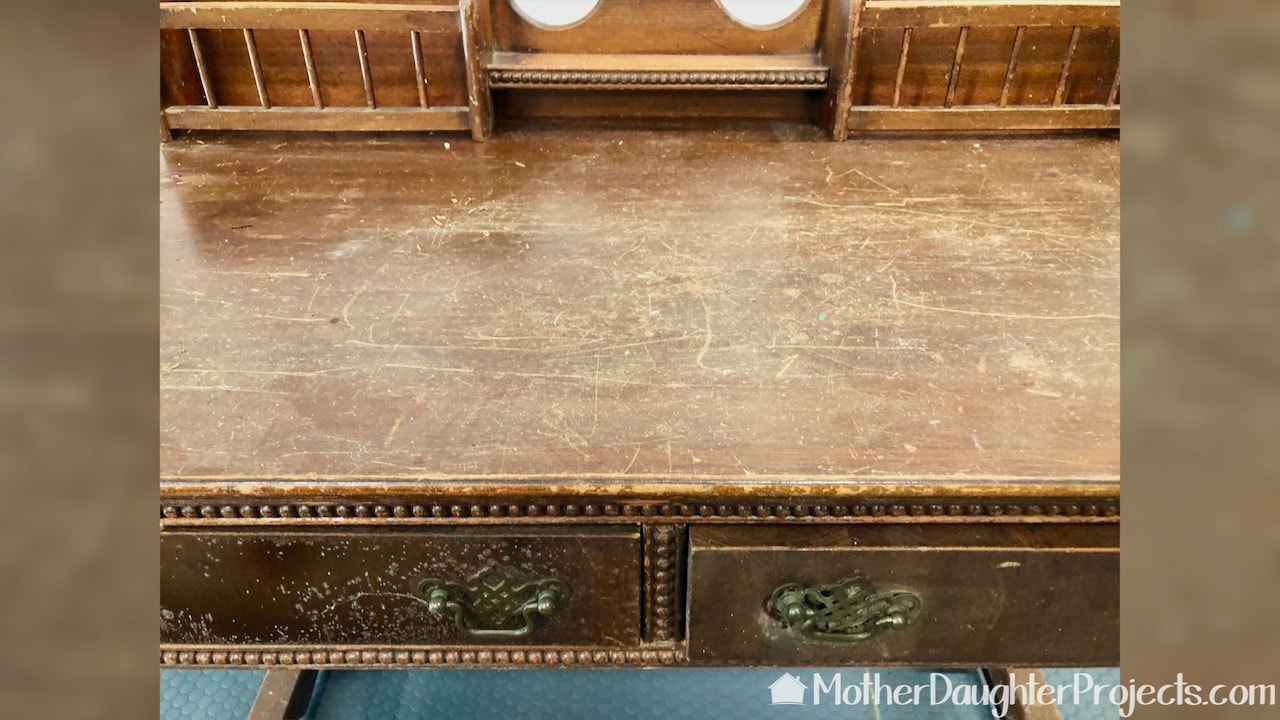 This was in really rough shape--lots of dirt, damage to the finish, mold, mildew, spider webs and just general grossness! I went into the refinish knowing that I wanted to keep the wood natural and not paint it. That idea is what drove all the decision on the refinish. 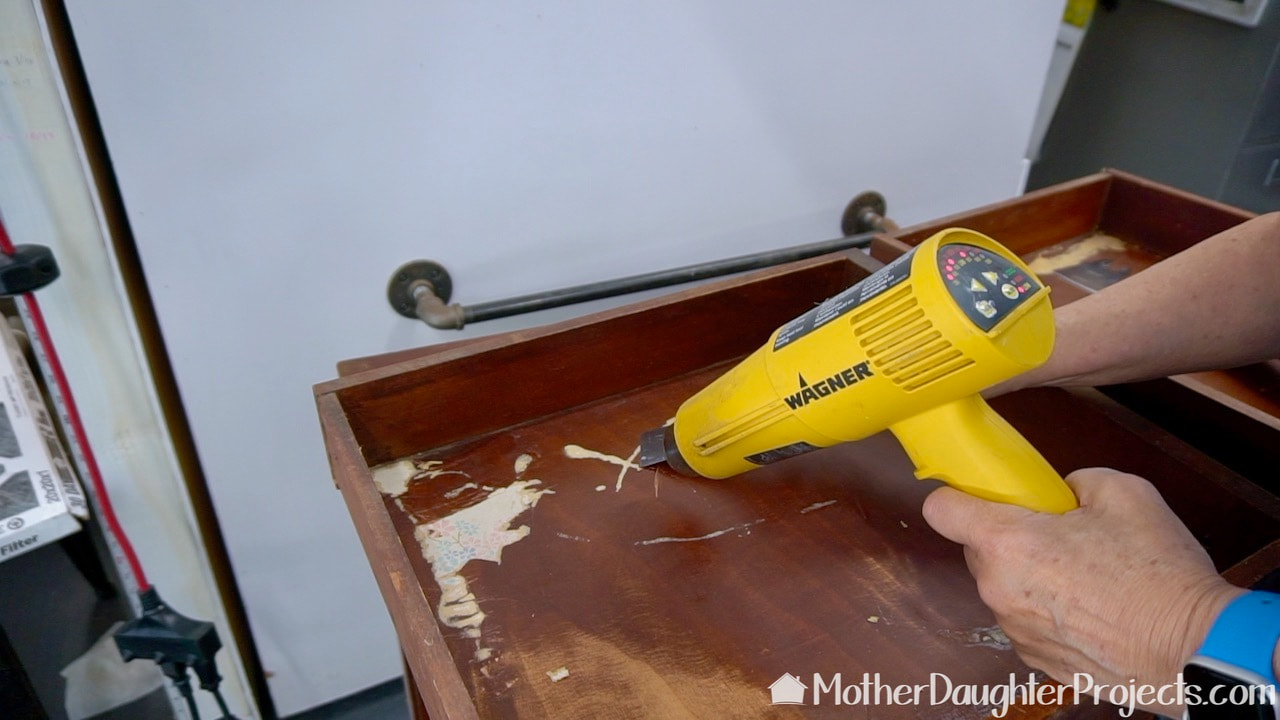 I started with something simple--removing the ancient wall paper lining of the drawers. I used a heat gun and scraper to help remove it. Since I was unable to cleanly remove anything, later on I decided to paint and epoxy inside the drawers. 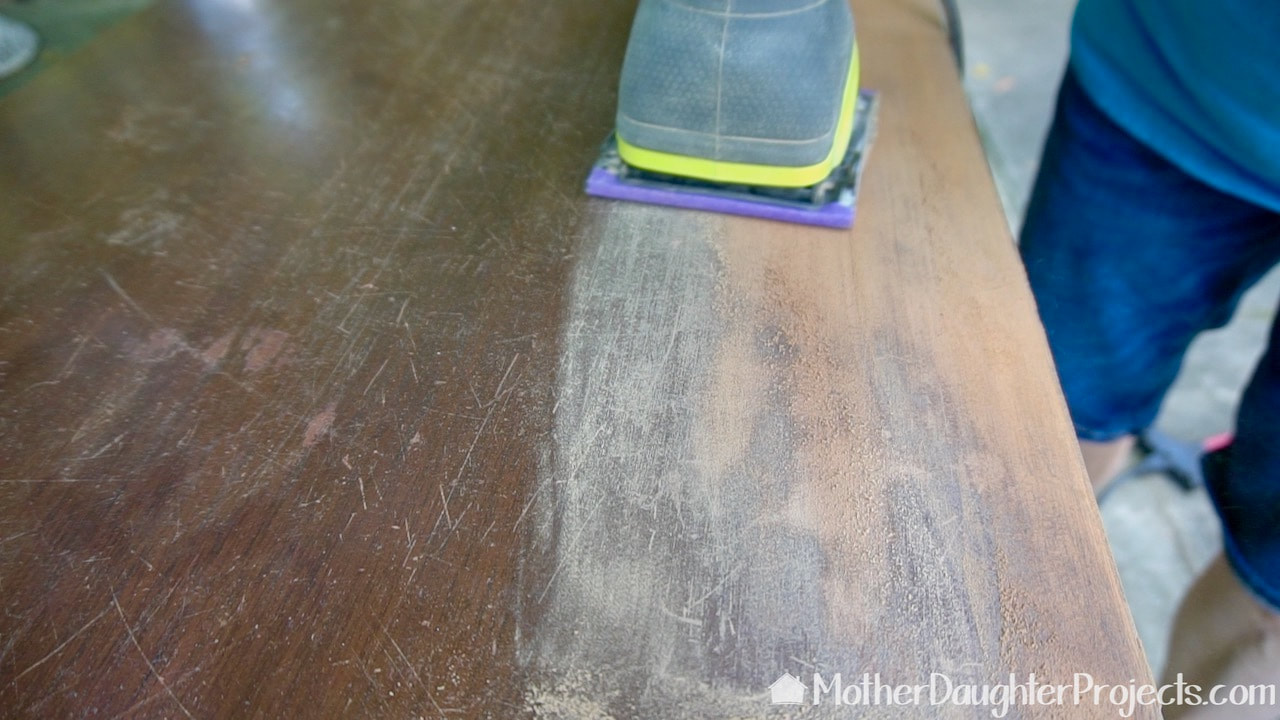 I tried lots of methods to removing the finish including hand scraping, hand sanding, mechanical sanding, and paint remover. In retrospect, it would have been way easier to just clean the piece and paint everything! But since I wanted to stain it, I persevered in the finish removal process! 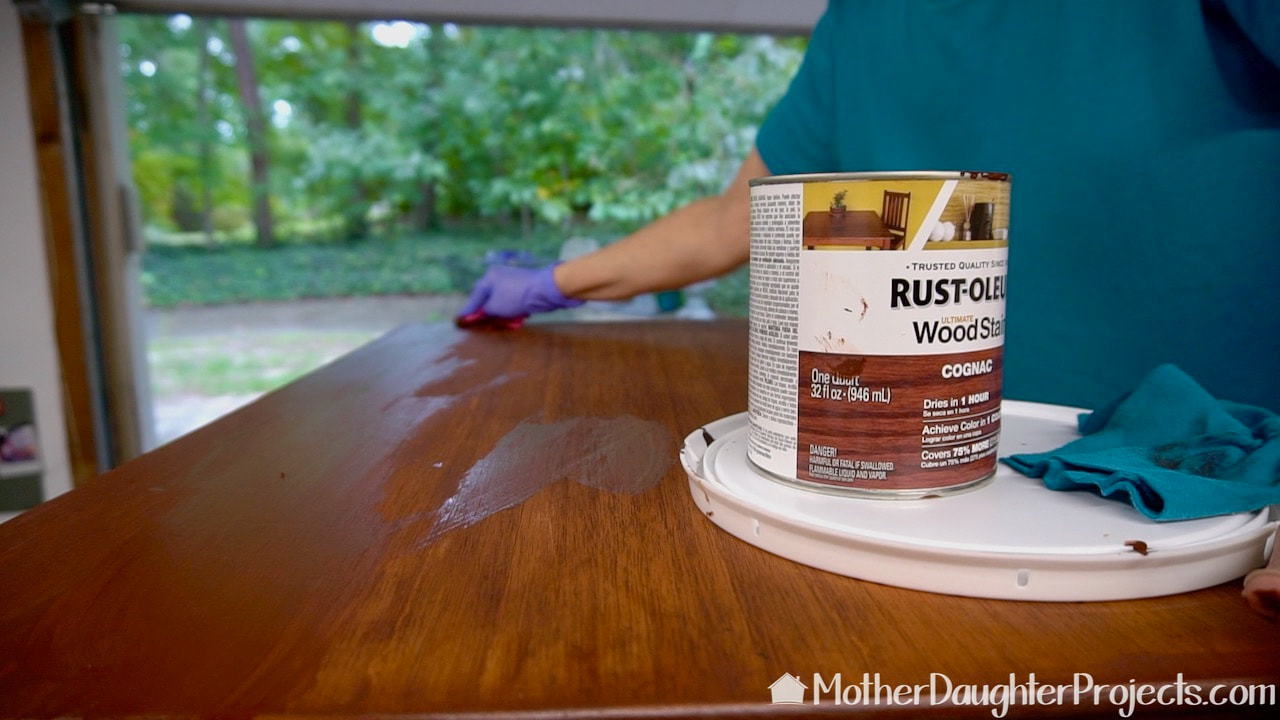 This stain did a great job covering all the color variations in the wood. The biggest problem with the stain were the days and days of humid weather we had after staining. It probably took a week for the stain to fully dry!  The chair was not salvageable to stain so I chose this spray paint in vintage teal in keeping with the time period of the desk. 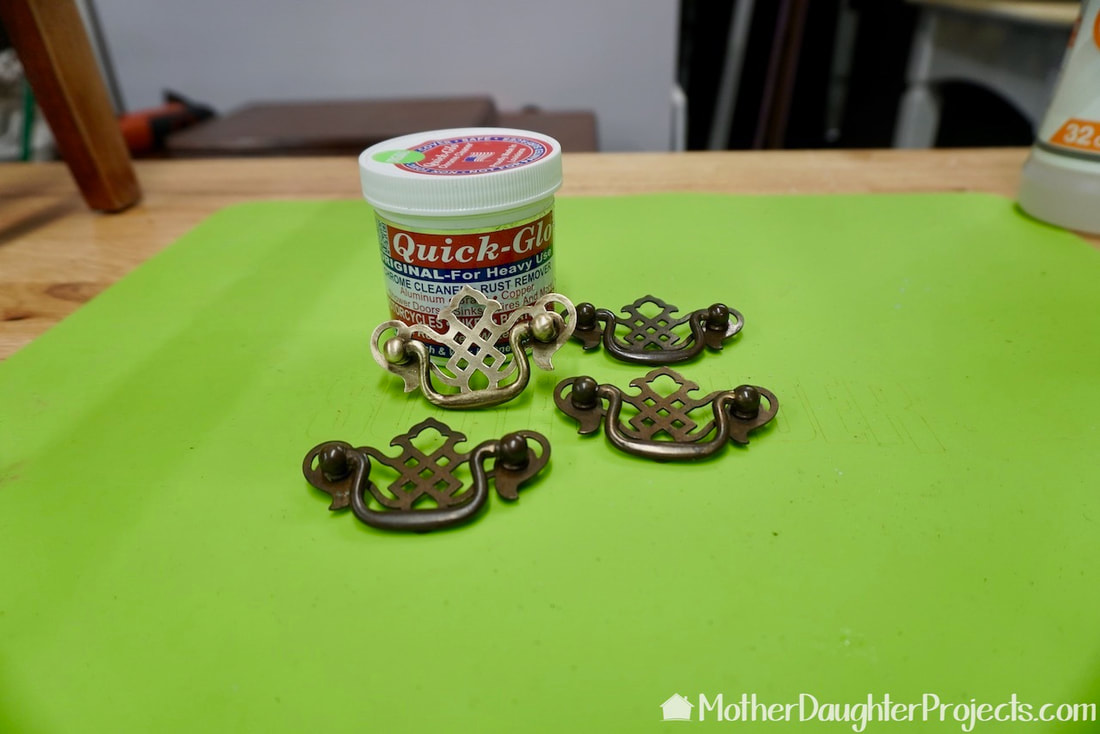 The drawer handles and brass desk feet were cleaned and shined with Quick-Glo using a felt wheel on a Dremel Rotary tool. 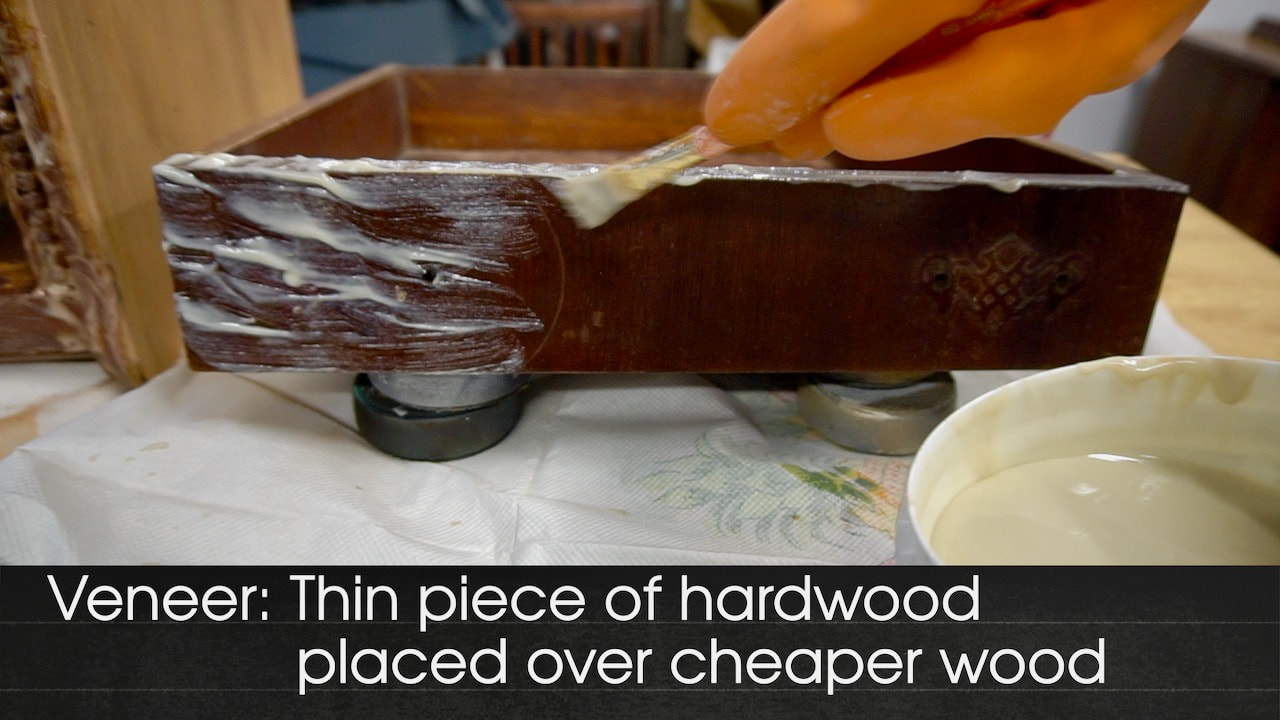 The two desk drawers are veneer. I didn't want to take a chance and sand through them so I decided to use a paint remover on the finish...  ...what a mess! After 24 hours, the remover did not work at all! I did end up sanding very carefully and lightly with 400 grit sandpaper to clean up the drawer fronts. 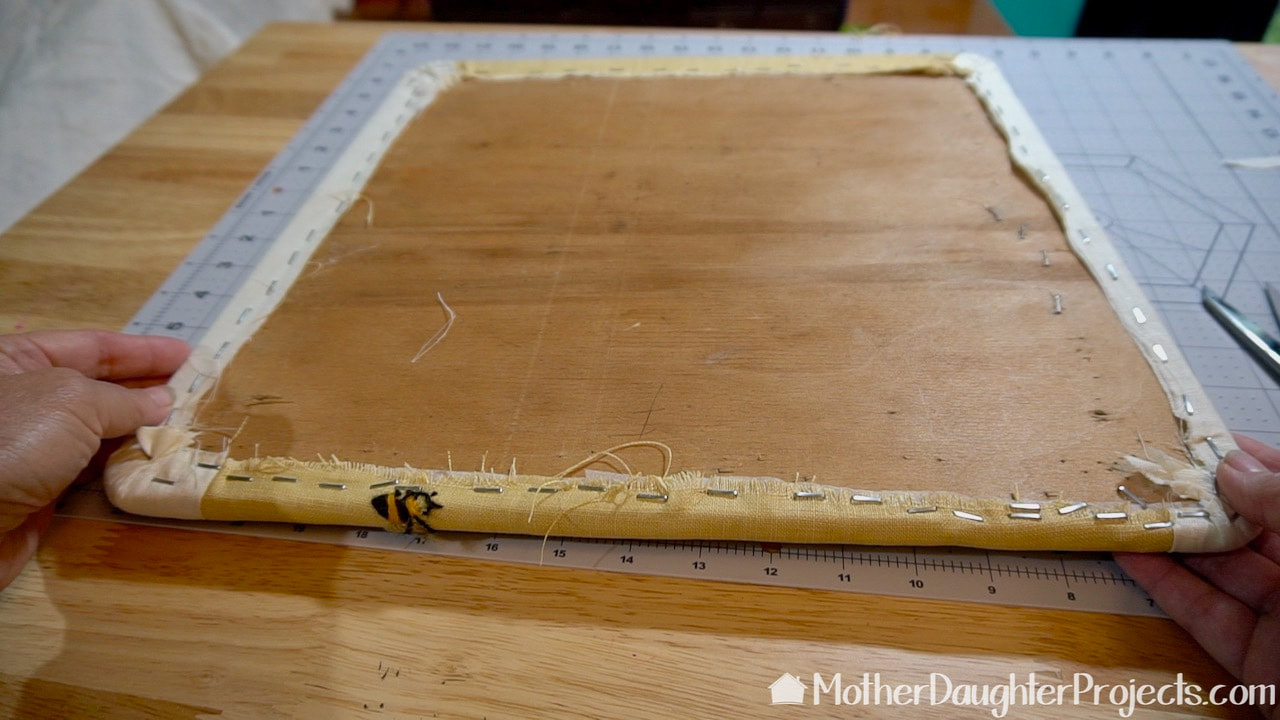 The old upholstery of the chair bottom was removed and a vintage piece of embroidery was added. The piece was not wide enough so I added vintage linen to the sides. I used a Surebonder staple gun to add the new upholstery. 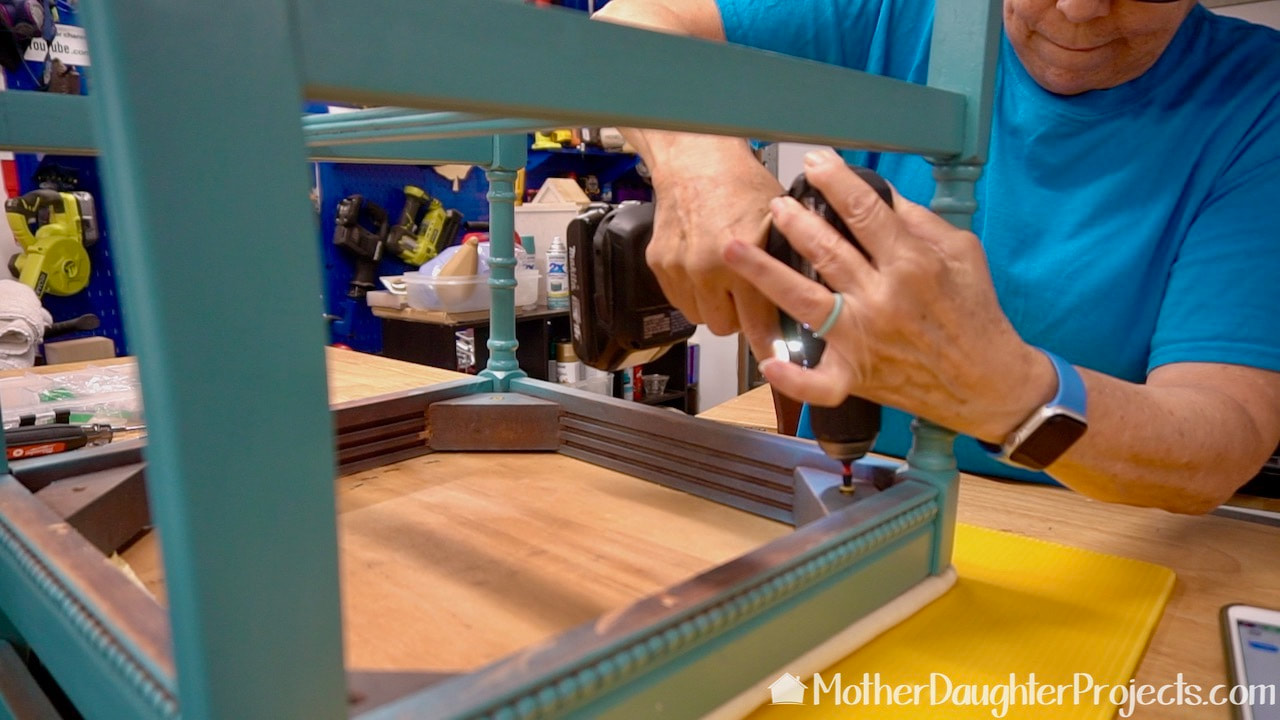 The newly upholstered seat was screwed into place through the chair bottom corner braces. 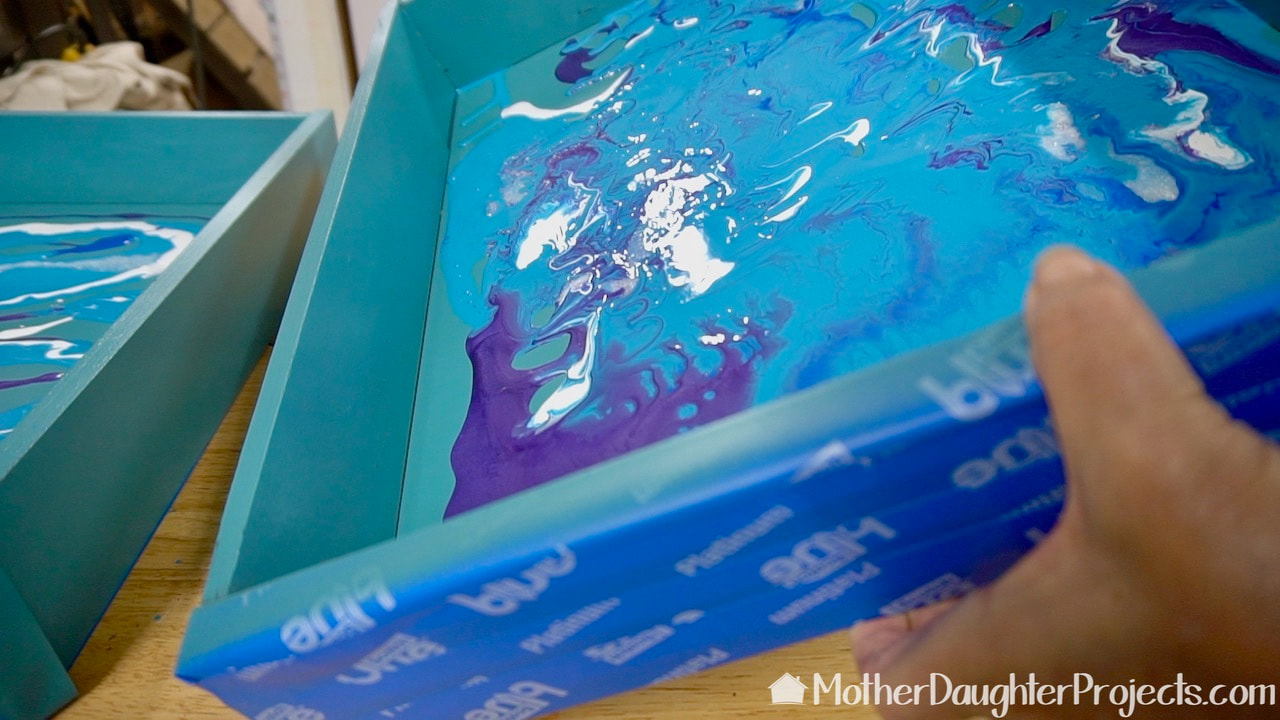 To finish the drawers I used the same vintage teal spray paint and then used a variety of DecoArt paints to paint pour inside the drawers. 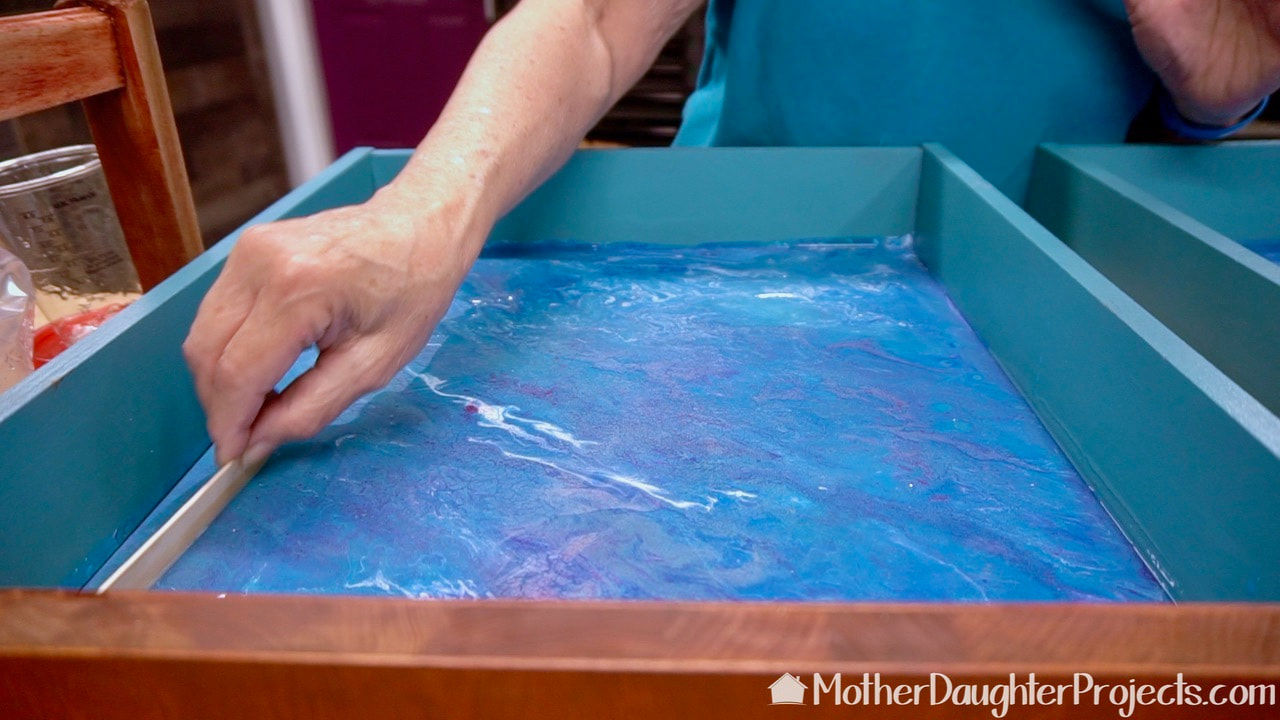 A coat of resin epoxy assures the drawers will be easy to clean. 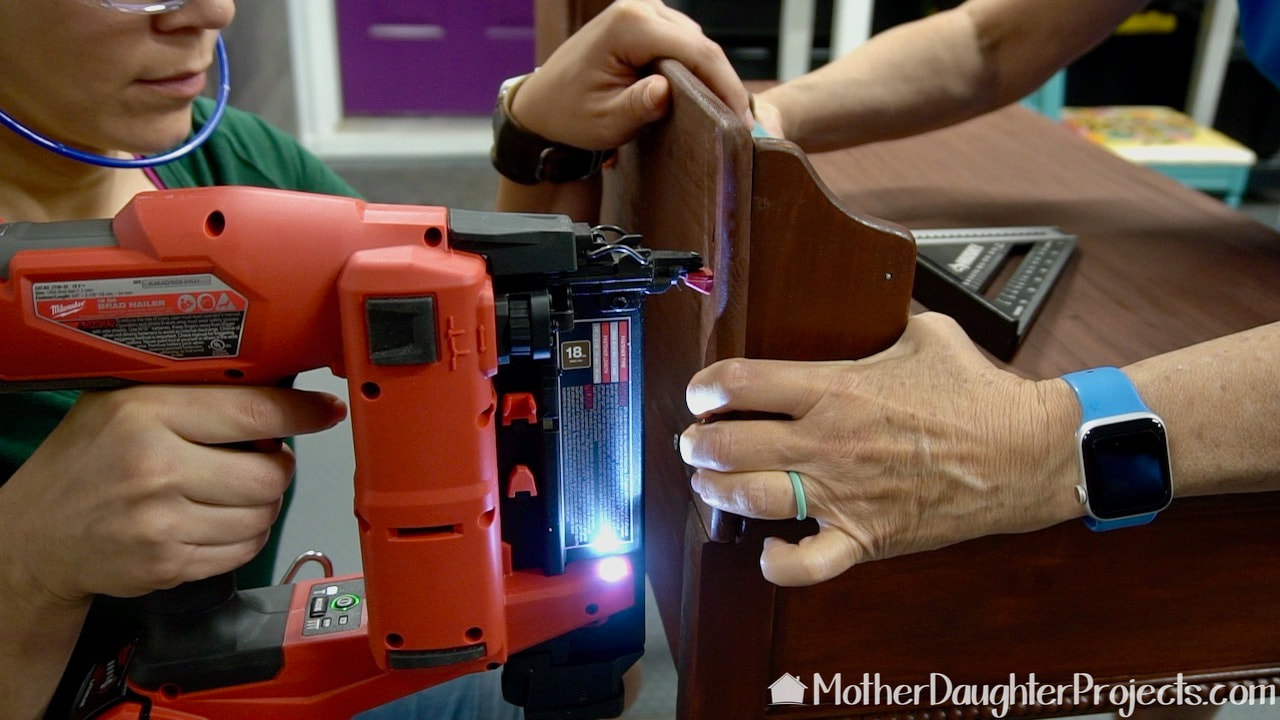 Steph helped reattach the desk organizer to the desk back as well as to help reassemble the organizer parts which I took apart for refinishing. 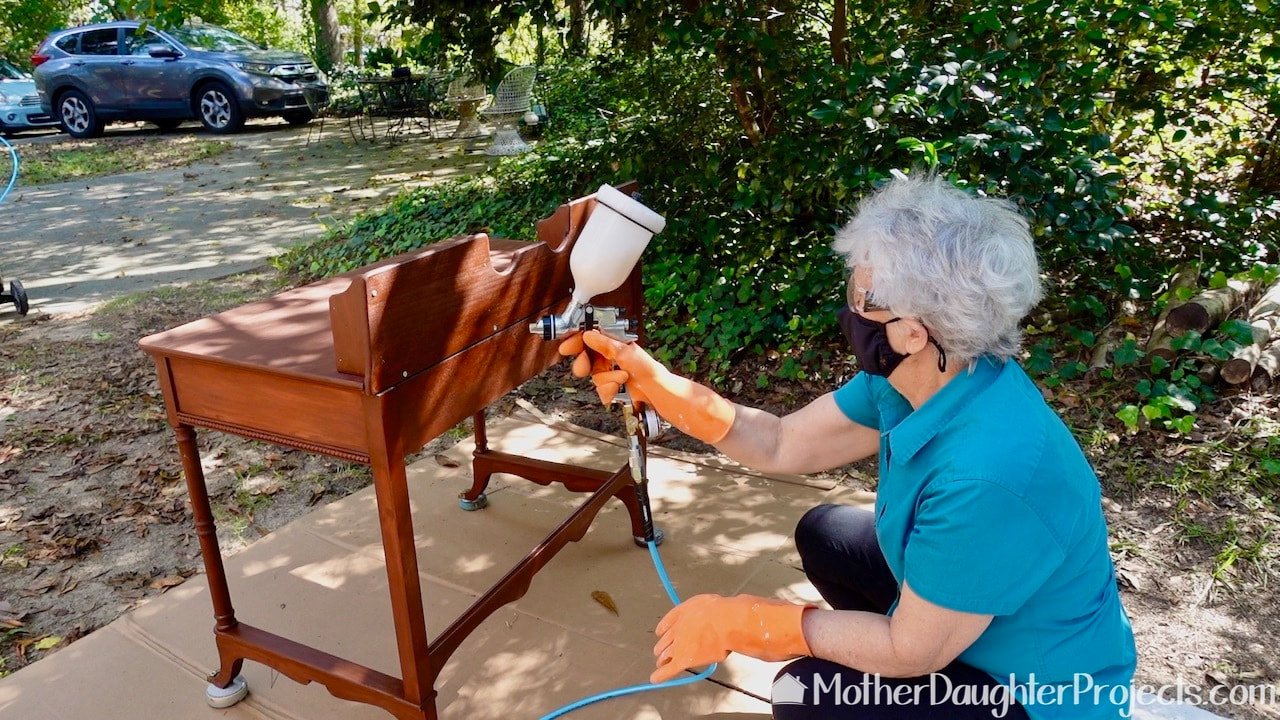 Lastly, we used a Husky HVLP sprayer to spray a finish on the desk. 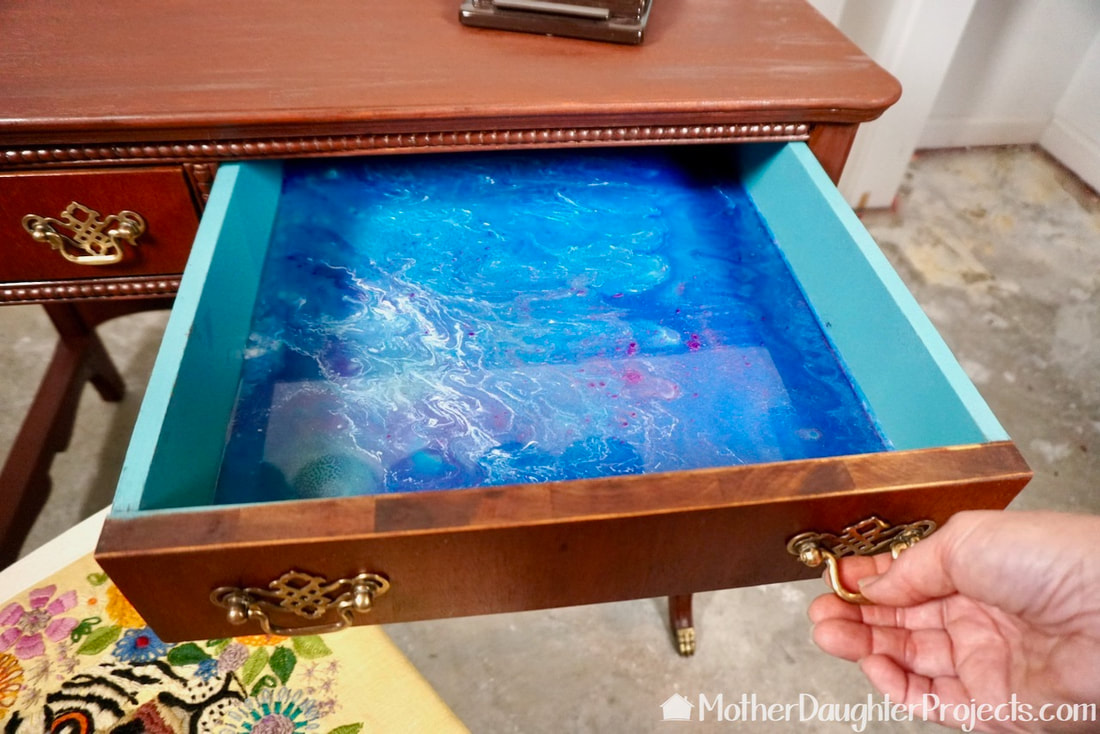 All finished! I love the unexpected color and design in the drawers. 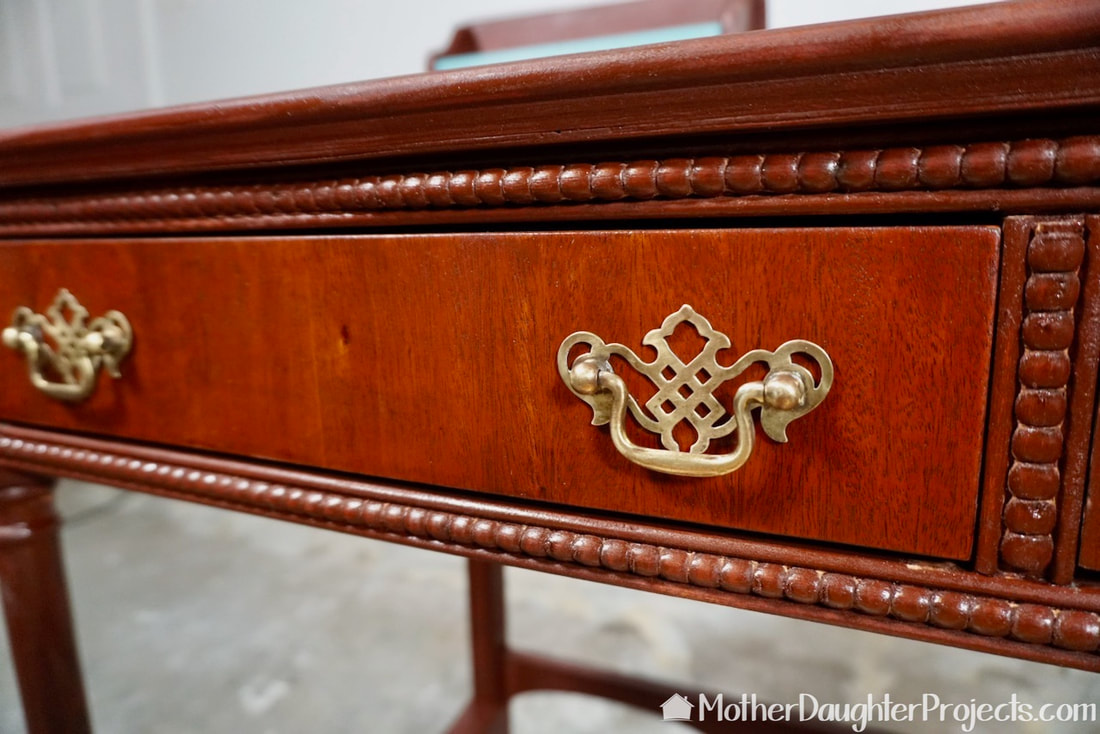 I was happy I was able to preserve the veneer on the fronts of the drawers. 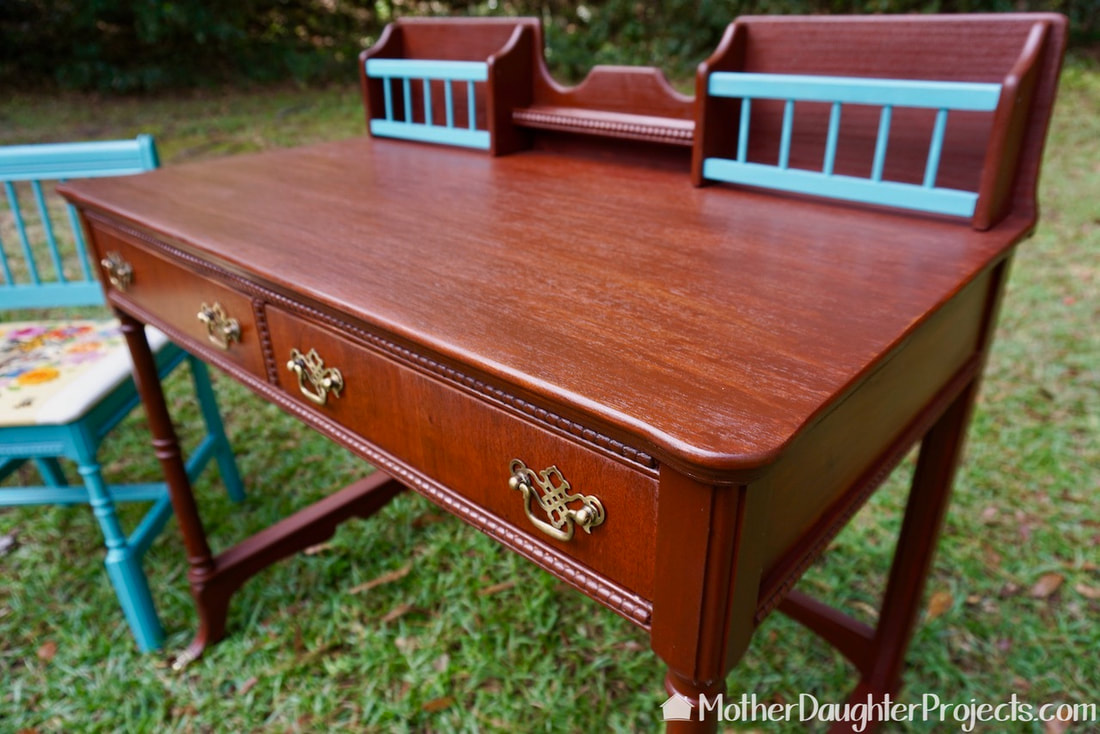 After! Can't wait fo find a place for this beauty!  And just because I took the time to put together a list of ALL the things used in this project, I've added them here for you to read. It's a lot. There were many learning opportunities about what worked and didn't work. Safety:
Cleaning:
Finish Removal:
Assembly & Finish:
Drawer Paint Pouring:
Misc:
Please note: This is not a sponsored post. FYI: We are not professionals, and we don't claim to be. This is what we found worked for our project. Yours may need a little different approach. Safety first! FYI: Affiliate links are being used on this page. Purchasing via these links help support MDP! Related Projects
1 Comment
Sandi
11/5/2020 11:38:02 am
Great job! Leave a Reply. |

Mother Daughter Projects
|