|
text by Vicki Sign up here to join our weekly email newsletter!
This post is sponsored by The Home Depot.
Several years ago, I found a small collection of vintage magazines including copies of Woman's Day at a yard sale. I eagerly read through them marveling at the advertisements, the article topics, extensive pull-out recipe sections, and the crafts! Oh, the crafts!
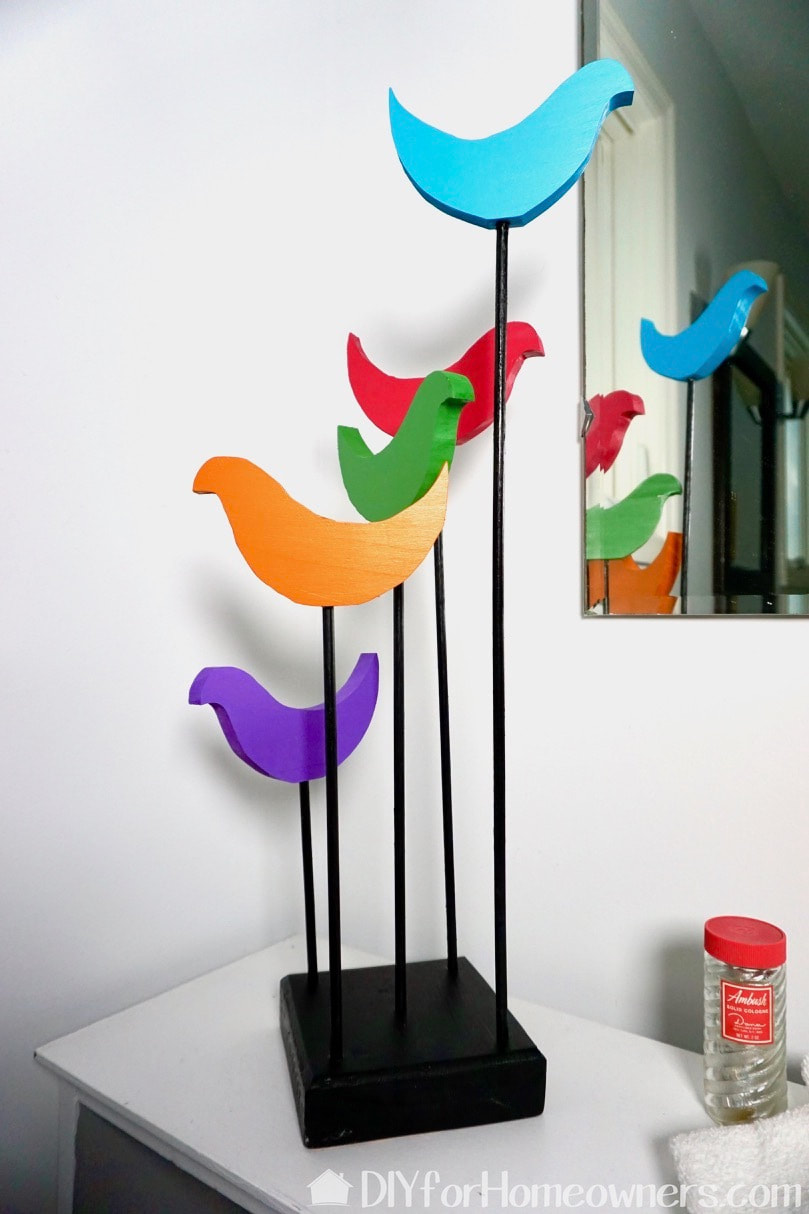
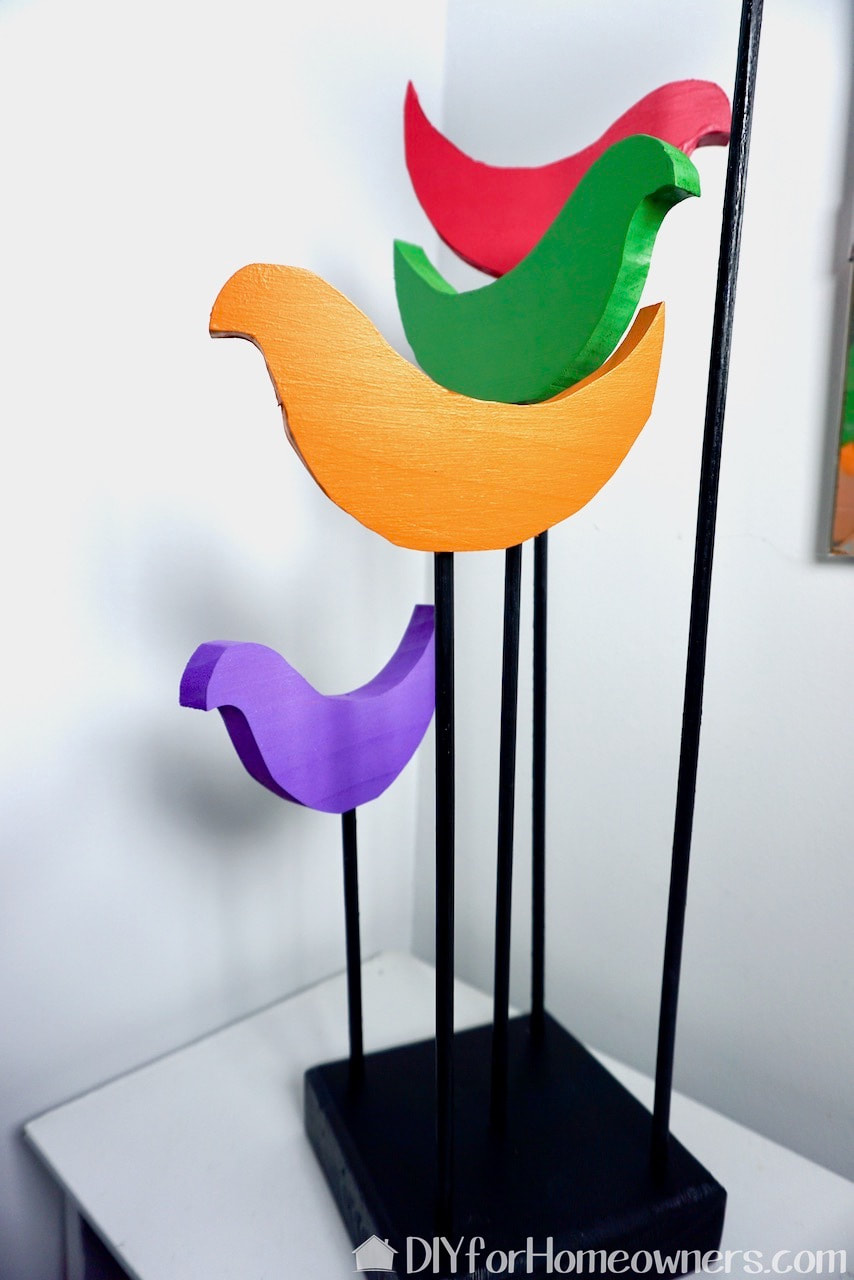
The issue that really caught my attention was Woman's Day, November 1964. (Let's see...I was 11 at the time of publishing, in the 6th grade, it had been a year since president Kennedy was killed, and I was in 4-H where I was learning to sew and cook.) In that issue was an article on 100 Christmas gifts to make--everything from scarves to woodworking. Every one of the 100 things were similar in that they offered scant instructions. In the sixties, I guess they assumed you already knew all the things! The mid-century bird sculpture was the one thing that I knew I wanted to make, but without the proper tools, this had to wait! 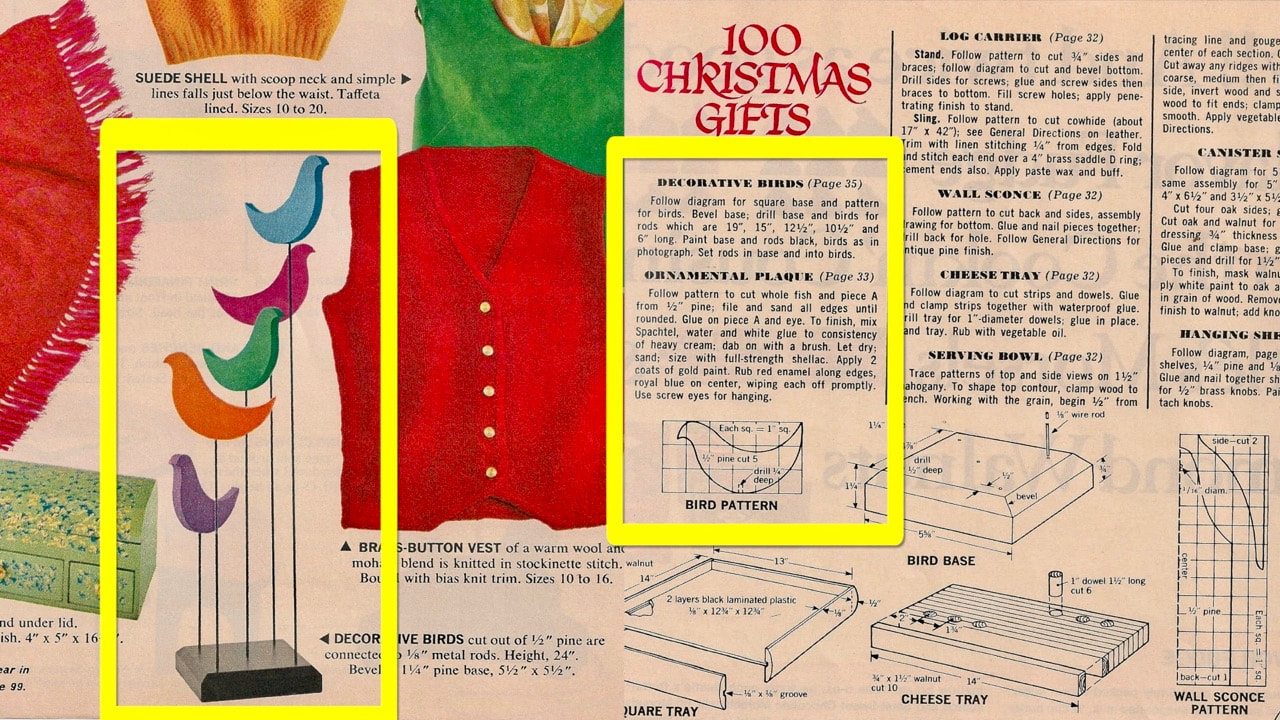
Those birds! Those "instructions" though! Let me write them out so you can see just how brief they are: Follow diagram for square base and patterns for birds. Bevel base; drill base and birds for rods which are 19”, 15”, 12.5”, 10.5” and 6” long. Paint base and rods black, birds as in photograph. Set rods in base and into birds.
Materials/ Tools:
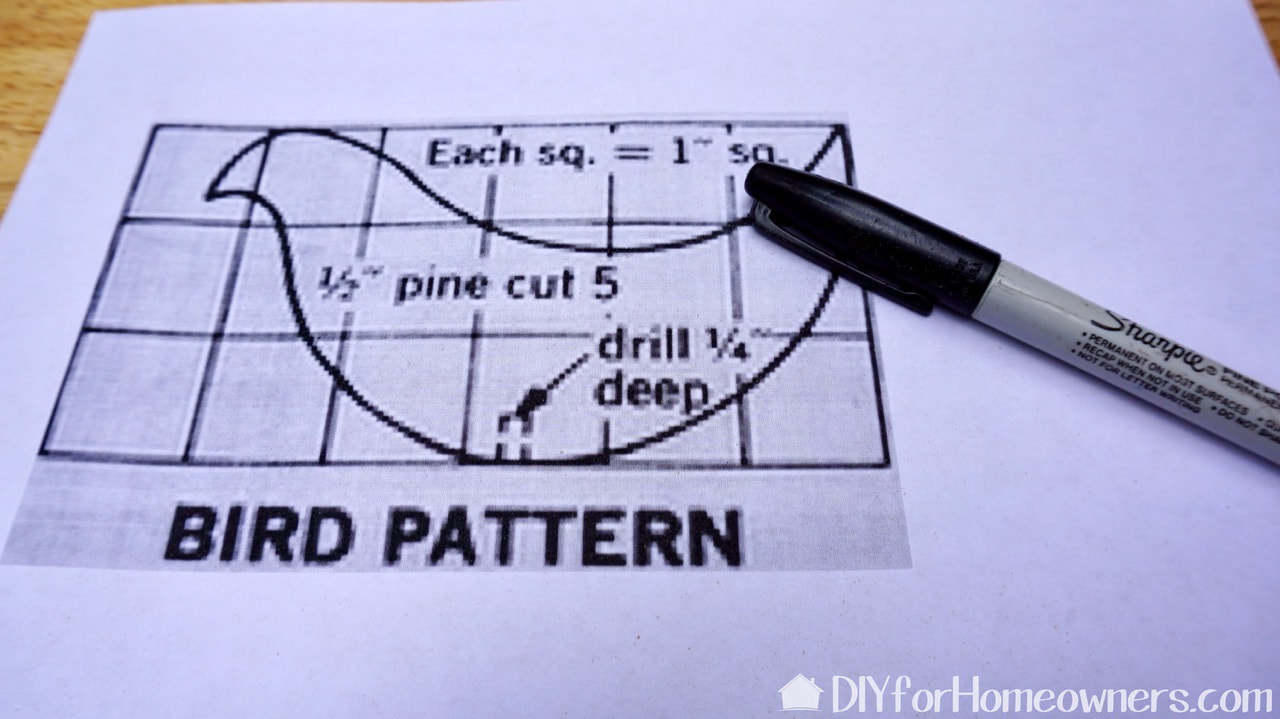
I started by enlarging the tiny picture from the magazine. Because it was so highly pixilated, I went over the edges with a sharpie which did seem to help. I scanned the magazine image and isolated just the part I wanted with photo editing software. I copy pasted the now .jpg into Pages, which is a Mac word processing program. This program has ruler guide so I lined up one edge and just enlarged it so that each of those squares equaled to one inch. Back in the day, you'd draw out the design on paper marked off into one inch square--slow but effective!

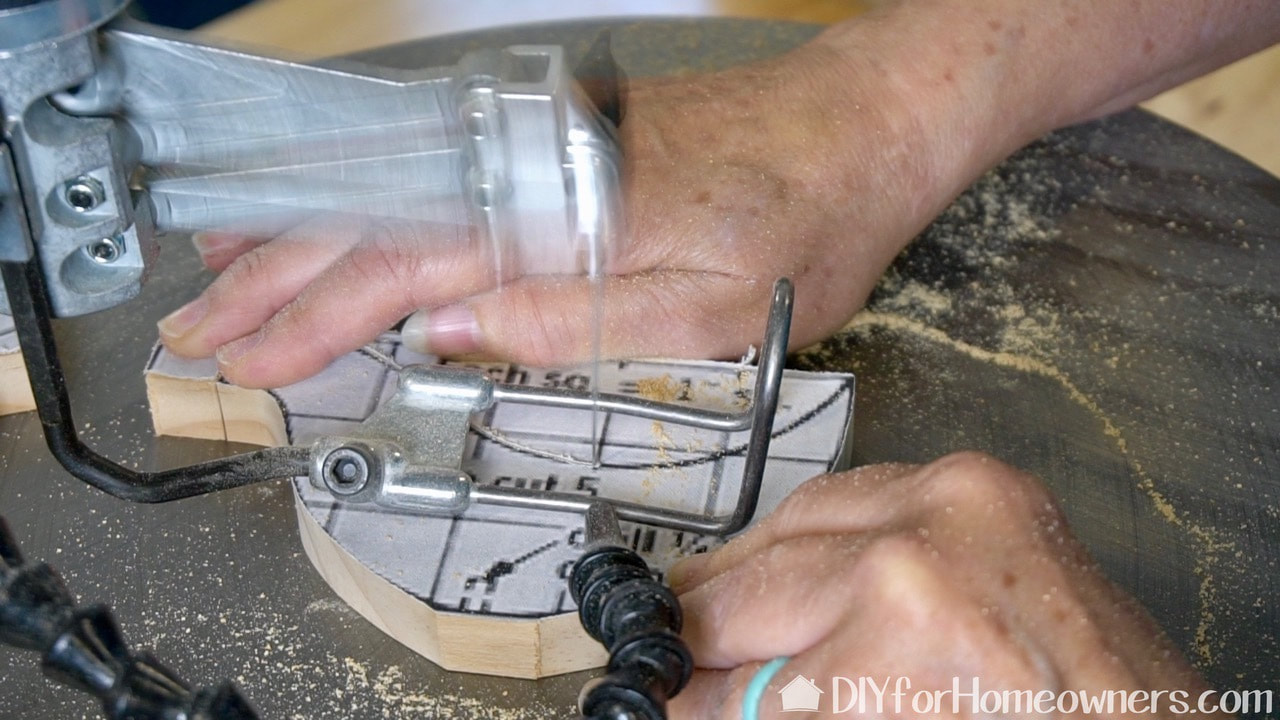
This is a technique I learned at the introductory scroll saw class I took this summer. Cut clear contact paper and apply it to the piece to be cut. Use spray adhesive on the back of the pattern and apply it over the contact paper. This insures no adhesive is left on the wood. Tip: I was using contact paper that was old and had spent a fair amount of time in a hot garage. It was extremely difficult to use. Sometimes it's better to just buy new and not hassle with the old! The other tip is how to get the backing started so you can get it off. I find it very difficult to peel off a corner, so I use an Exacto knife and lightly score just the paper backing. This makes it easy to get the backing to peel away. Be careful not to cut through the plastic itself!
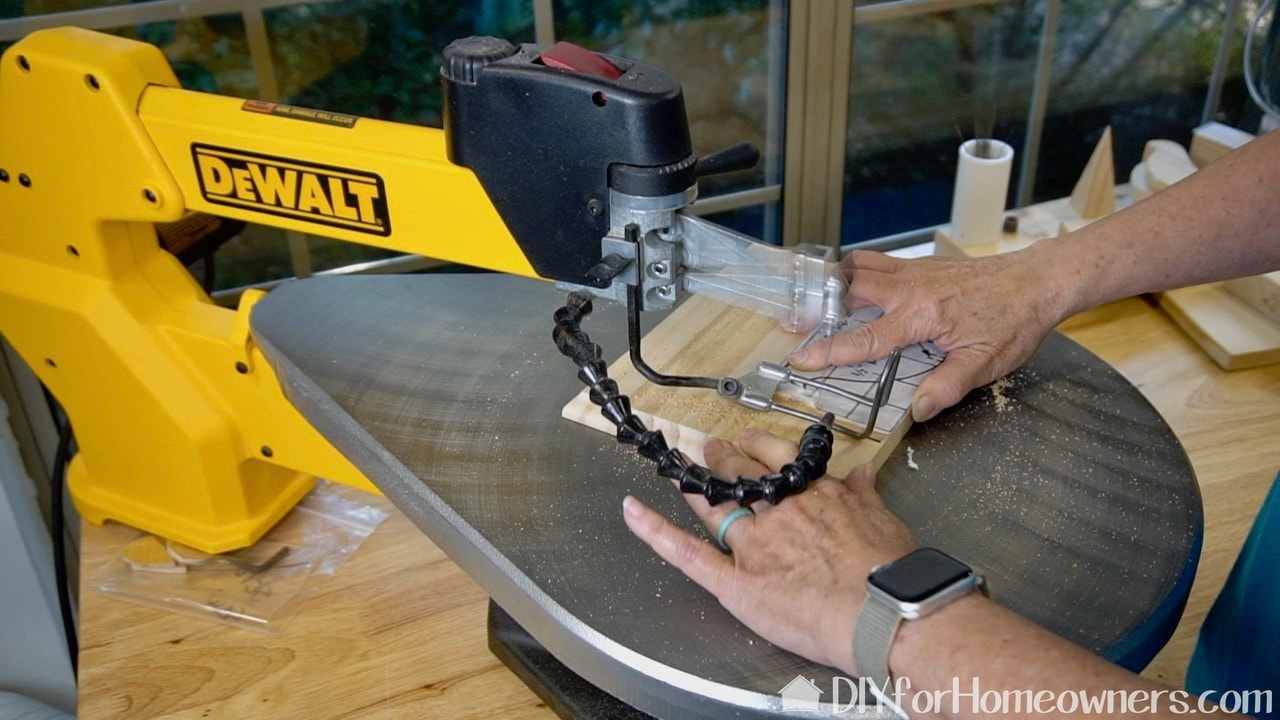
Now, on to cutting! I'll not try to cover scroll saw basics here, but the idea is to keep the blade on the cutting line. I did find that when I started to get off the line, it was best to stop and regroup or just point the blade to the outside edge of my project and head away from the pattern. As a beginner, I'm finding that it's okay to change directions when needed and to come at a cut from a different angle. It doesn't have to be one seamless cut. And, it doesn't have to be perfect!
I think why I like this so much is it is very much like a sewing machine and I love to sew! Just remember to keep your fingers away from the rapidly moving blade! This DeWalt scroll saw is one of the best saws on the market. Everything I've read has given it very good reviews. It's very heavy, which is a good thing as it provides a sturdy platform on which to scroll.
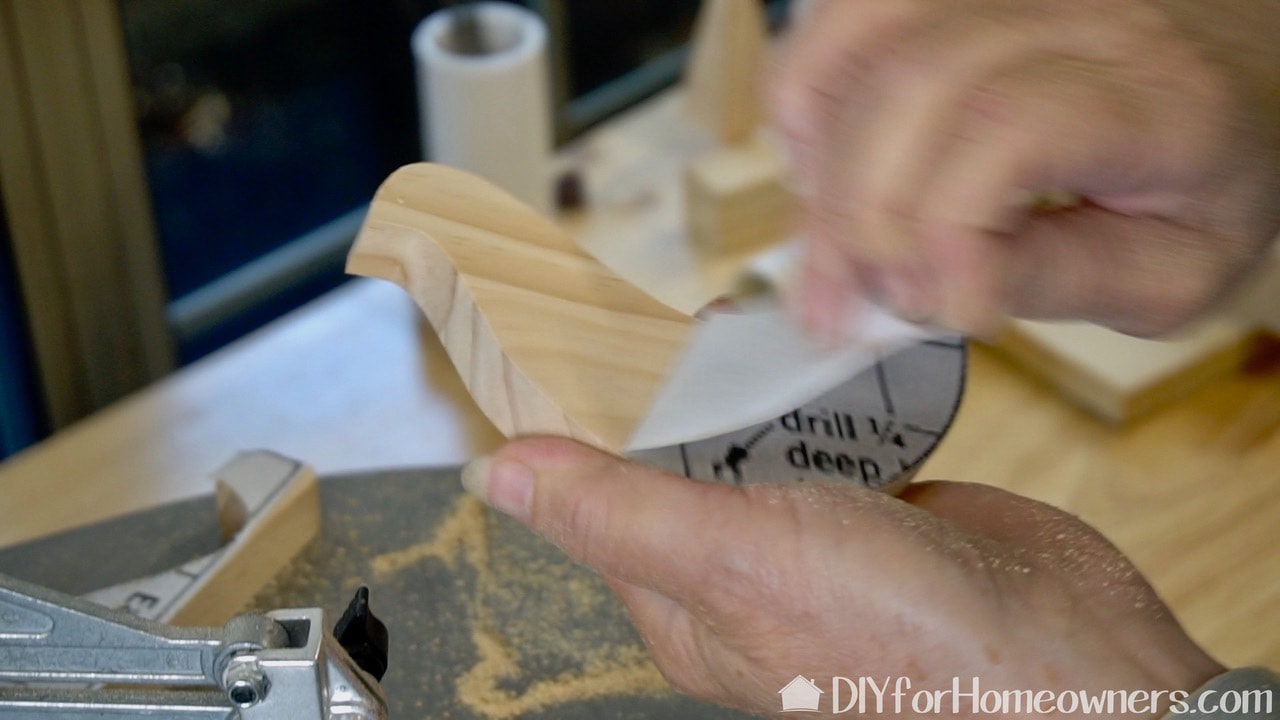
Once the bird is finished, just peel away the--no residue!
Now this is pretty cool! We've had this Dremel shaper/router table for a while but I've never used it. I needed to be able to sand the curves of the bird edges and realized this table with a Dremel rotary tool fitted with a sanding drum would be perfect! I'm using the new Dremel Lite 4V Rotary tool. I wasn't sure this would work, but sure enough, the nose comes off to fit into the table. Being cordless made it even easier to use!
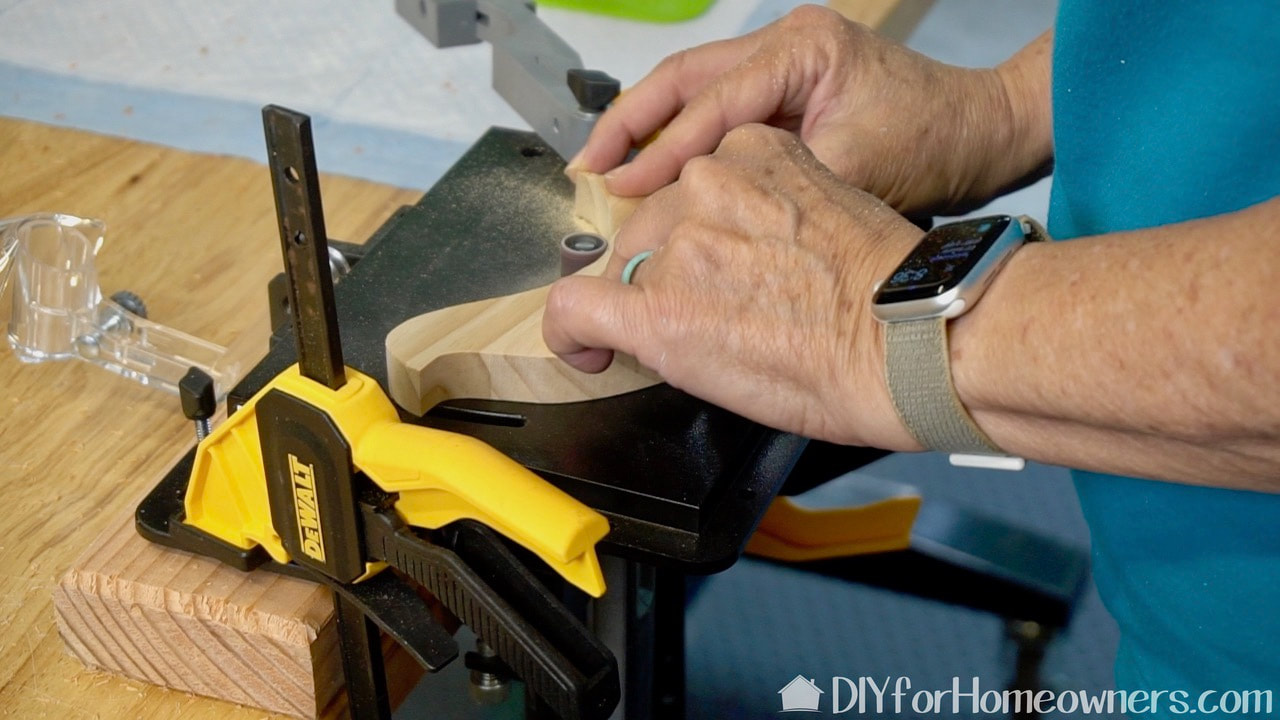
The table is adjustable so I was able to bring down the sanding drum to almost level with the table top so I could sand the birds. This might be my new favorite thing! (This has nothing to do with this post, but while I was learning to use this shaper router table, I dropped one of the screws to the fence and then accidentally sucked it up with the vac! I didn't relish the idea of digging around the inside of the vac so I found a long handled magnet and used that to poke around in the dust and found the parts without having to get my hands dirty!)
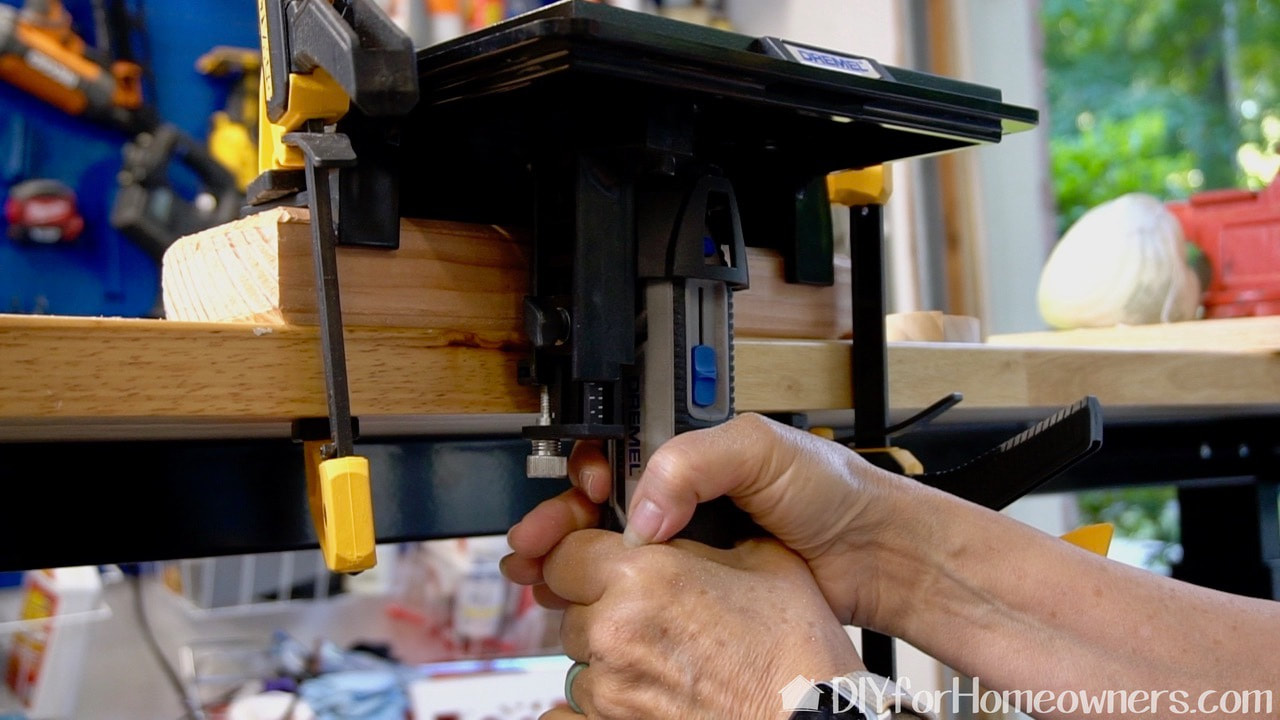
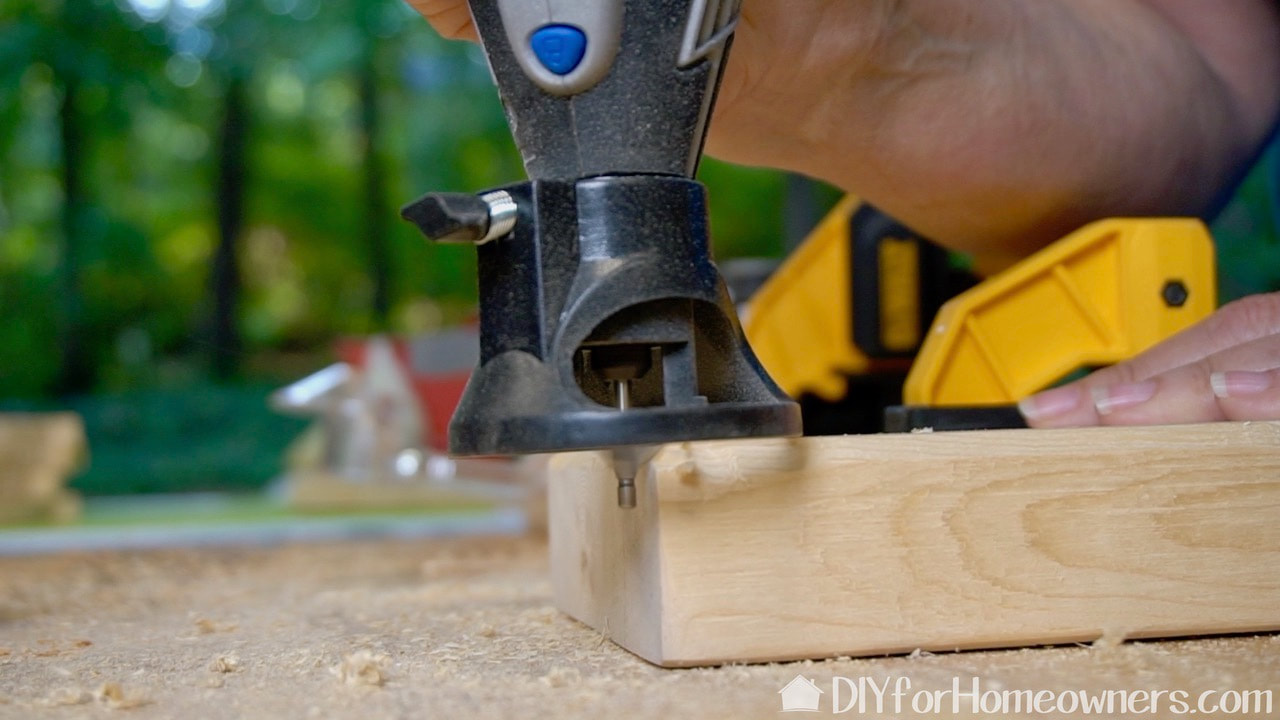
Here I'm clamping all the birds together so I can make the placement of the holes for the dowels. The holes in the bird base are made to accommodate a 1/4" diameter wood dowel. Drill these to 1/4" deep.
Next, it was time to tackle the base. I'm using a piece of 2X6 which is actually 1-1/2in by 5-1/2in. Here's the information gleaned from the magazine graphic: use a 5-5/8in square which is 1-1/4in high. The measurement between bevels is 4-7/8in. Drill five holes 1/2in deep, start 1/2in in from edge. One in each corner with one in middle. Easy enough, right? I almost decided against doing the routing with the chamfer bit as this is not something I'd ever done before, but Steph encourage me to try. I'm using another Dremel battery powered rotary tool with a chamfer bit and cutting guide. My attempt was not perfect, but with a little sanding it is presentable!
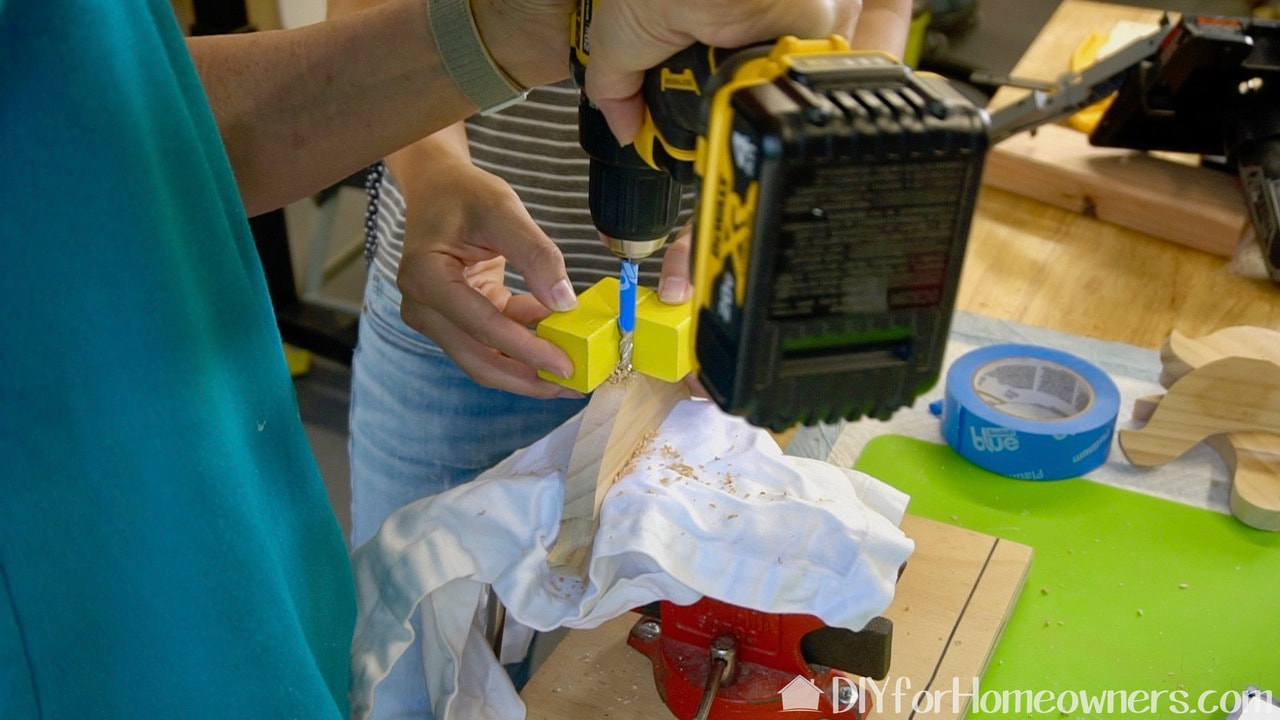
This is a cool little trick we discovered to help keep the drill perpendicular. It's just two pieces of wood glued together. The tape on the bit helps to consistently drill all the holes to the correct depth.
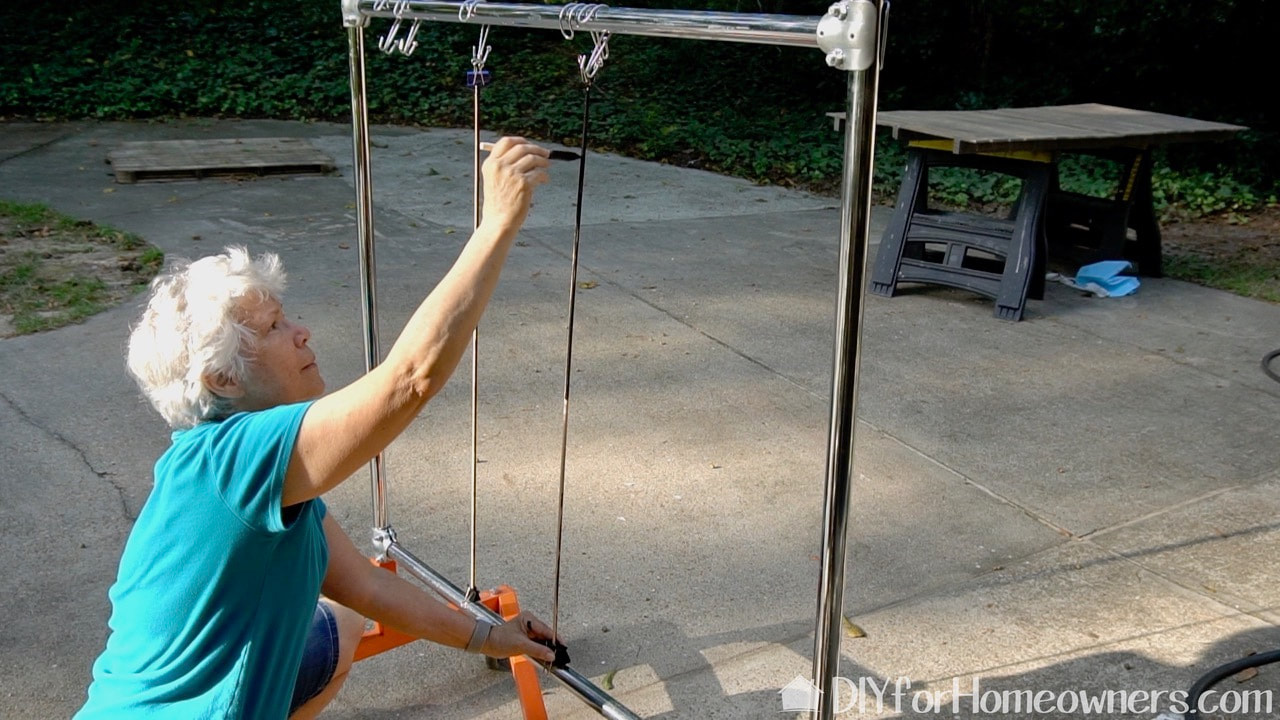
Another great trick. This is a clothing rack on which I hung shower curtain rings. I added binder clips to each end of the wood dowels and hung them on the hooks and balanced the other end on the lower rung. Easy to see and paint all around the dowel.

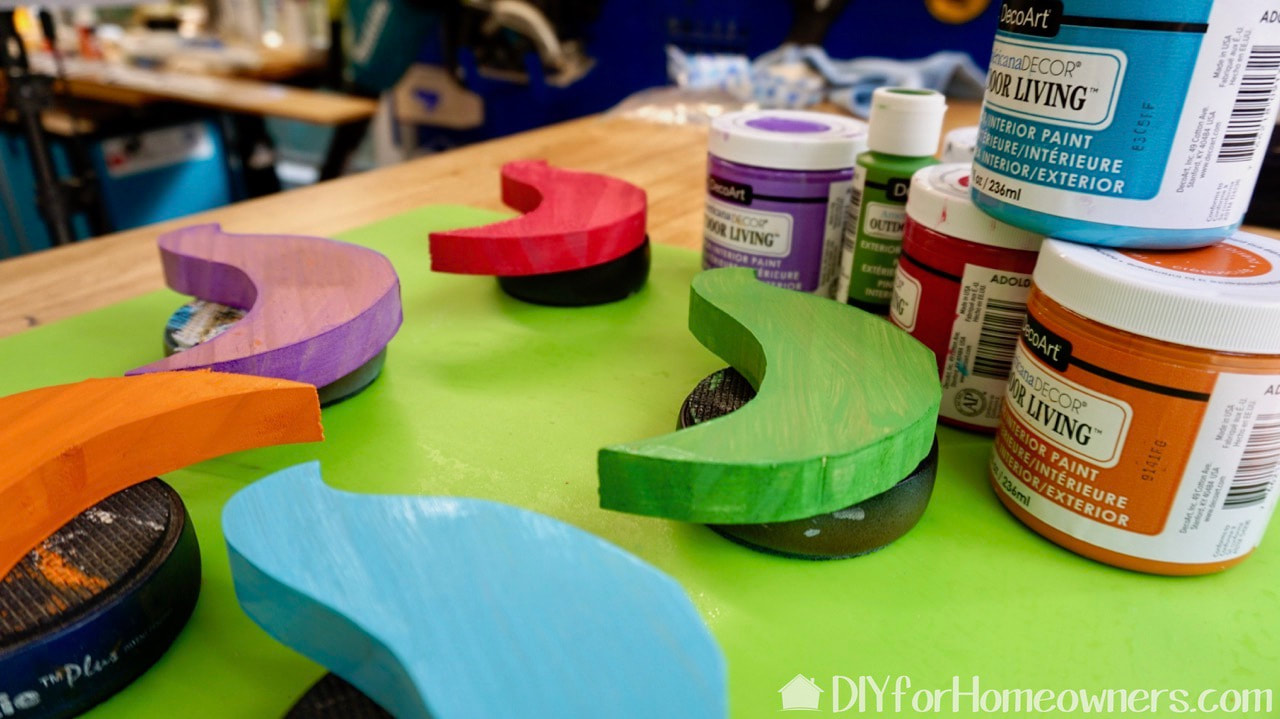
I'm using DecoArt Outdoor Living paint in mid-century colors. I think they are pretty close to the original in the magazine picture.
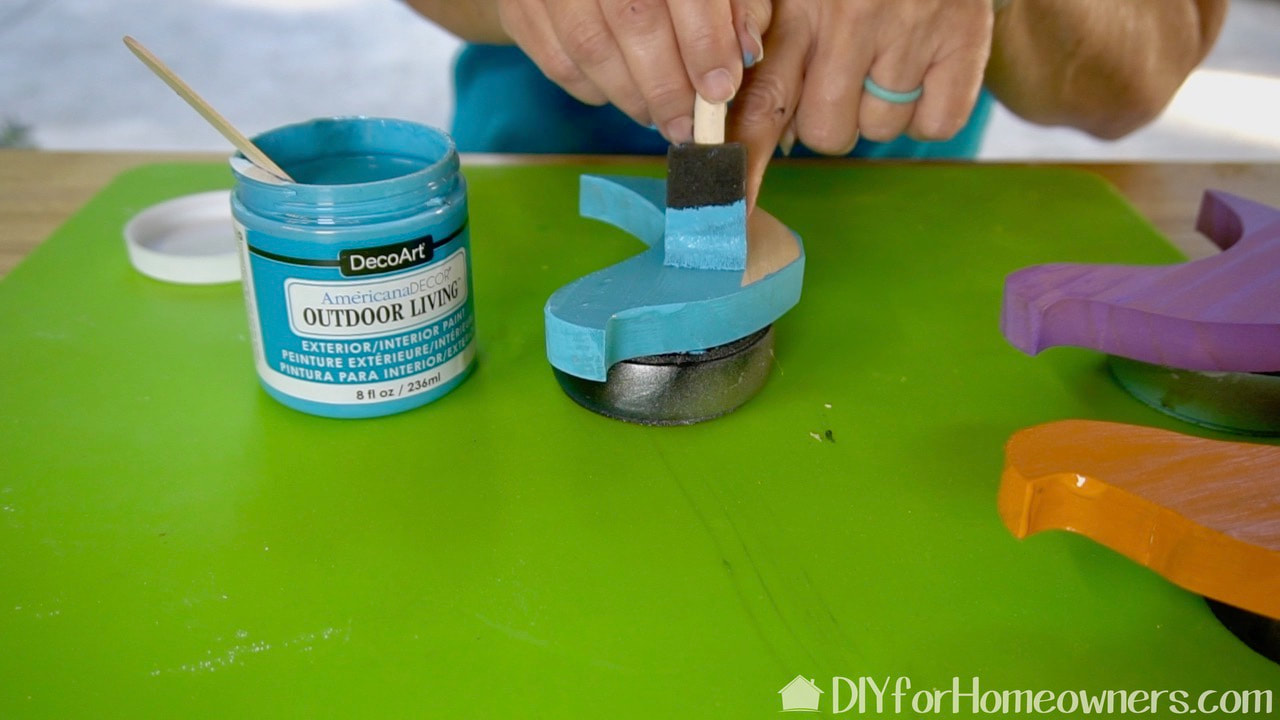
Each bird and the base got a couple of coats of paint. Thanks to DecoArt for providing the painted used in this project! We are part of their blogger outreach program.
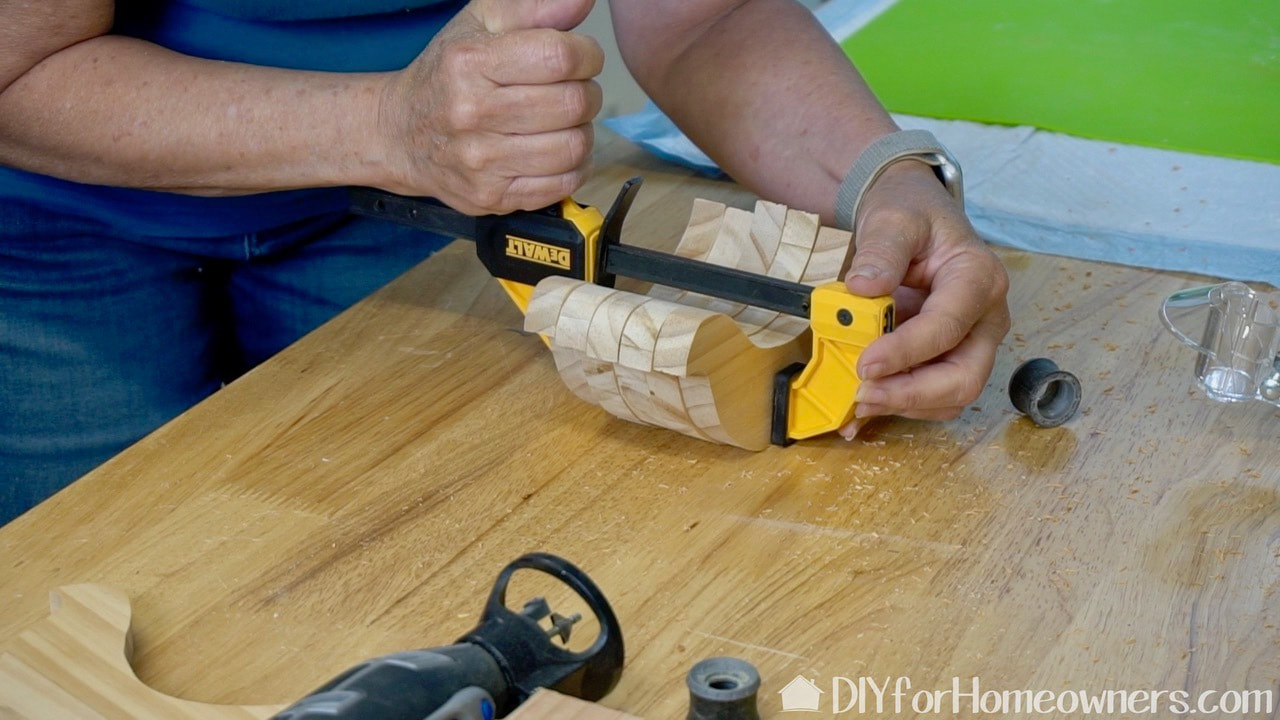
The birds are almost ready. While drying, I cut the dowels to size with another Dremel--this time the Dremel multi-tool. I found cutting the wood dowels into kind of blunted point helped them to go into the drilled holes a little easier.
This project was one learning and problem solving opportunity after another! I really like to challenge myself to try and learn new things and this project checked all those boxes! The success of this project and learning all the new things has given me such an incredible sense of accomplishment!
Steph has been very supportive of my new found hobby and encouraged me to tackle even the hardest things (like that routing part!). It's been very empowering to take on this project by myself, including learning to use the miter saw. I can't say that I'm totally comfortable with it, but I'm getting there. Personally, I think a little fear around it makes me very mindful of using it correctly and safely! What are you learning these days that makes you smile? Let us know so we can share in your successes! We acknowledge that The Home Depot is partnering with us to participate in the ProSpective 2019 Campaign. As a part of the Program, we are receiving compensation in the form of products and services, for the purpose of promoting The Home Depot. All expressed opinions and experiences are our own words. Our post complies with the Word Of Mouth Marketing Association (WOMMA) Ethics Code and applicable Federal Trade Commission guidelines. FYI: We are not professionals, and we don’t claim to be. This is what we found worked for our project. Yours may need a little different approach. Safety first! FYI: Affiliate links are being used on this page. Purchasing via these links help support MDP! Related Projects
2 Comments
Vicki
9/27/2019 05:56:20 pm
Can you give me an idea of the “noise level” of the saw? I had one quite a while ago it it made a racket, I found it intimidating.
Vicki
9/27/2019 07:59:13 pm
Mine is a bit noisy as I have it on a table which causes the machine to vibrate. I do wear ear plugs for comfort as I’m very sound sensitive. We were at Rockler woodworking yesterday where they were running the same saw I have. It was so quiet! The difference is theirs was mounted on a heavy duty stand that allowed for no vibration. I think that is the secret. Leave a Reply. |

Mother Daughter Projects
|
|||||||