|
text by Vicki Sign up here to join our weekly email newsletter!
Since making improvements to my garage a few years ago, we've noticed a crack in the ceiling that has grown to stretch from the garage door to the back wall!
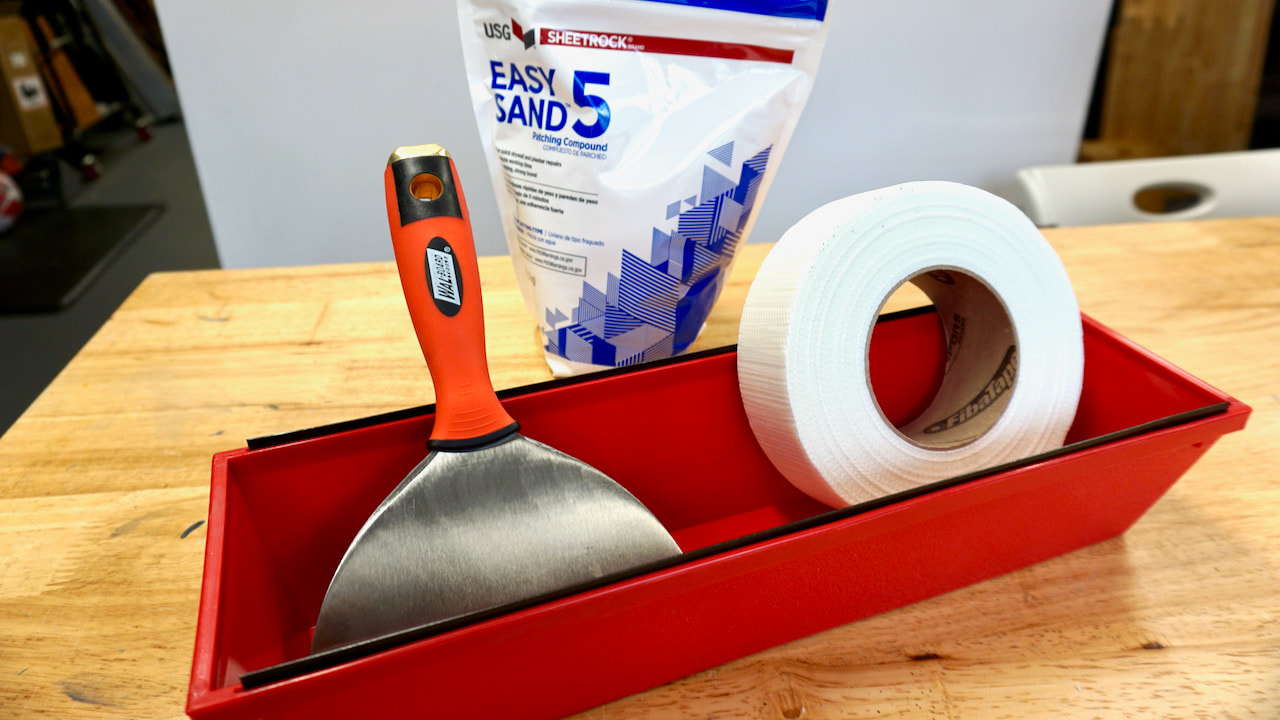
Steph decided it was time to investigate why it was happening. She contacted Gary, a good friend of hers that has professional drywall experience to help her troubleshoot the problem. With Gary's assistance, she was able to determine why the crack was getting worse, stabilized the problem, and then repaired the cracked drywall. Materials/Tools:
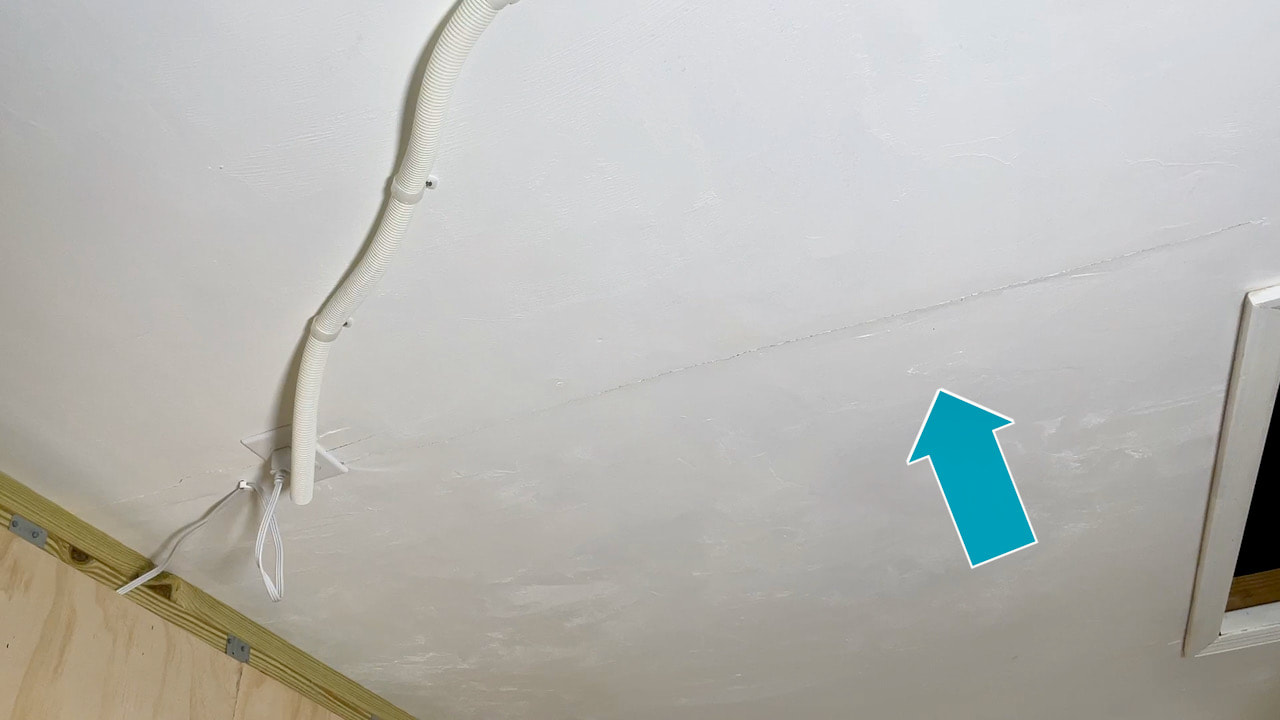
This is the ceiling crack. Most of the damage radiated out from that ceiling outlet. That was put in by electricians during the garage renovation a few years ago.
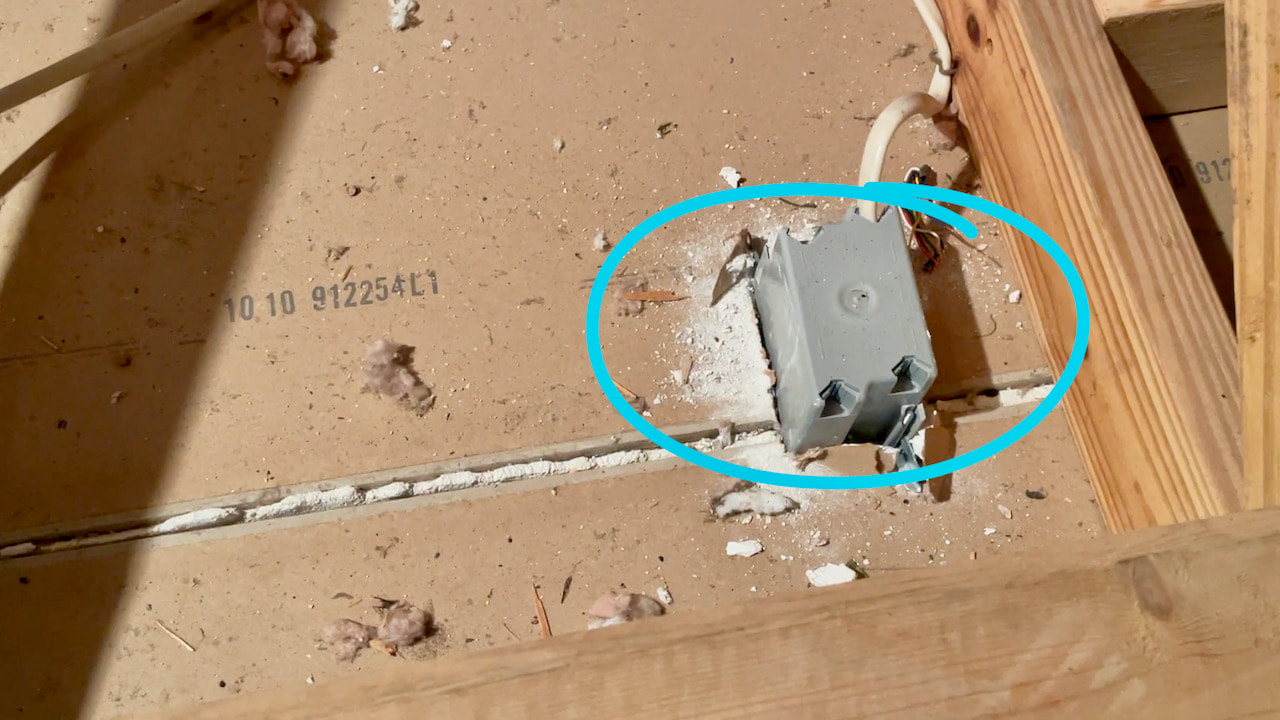
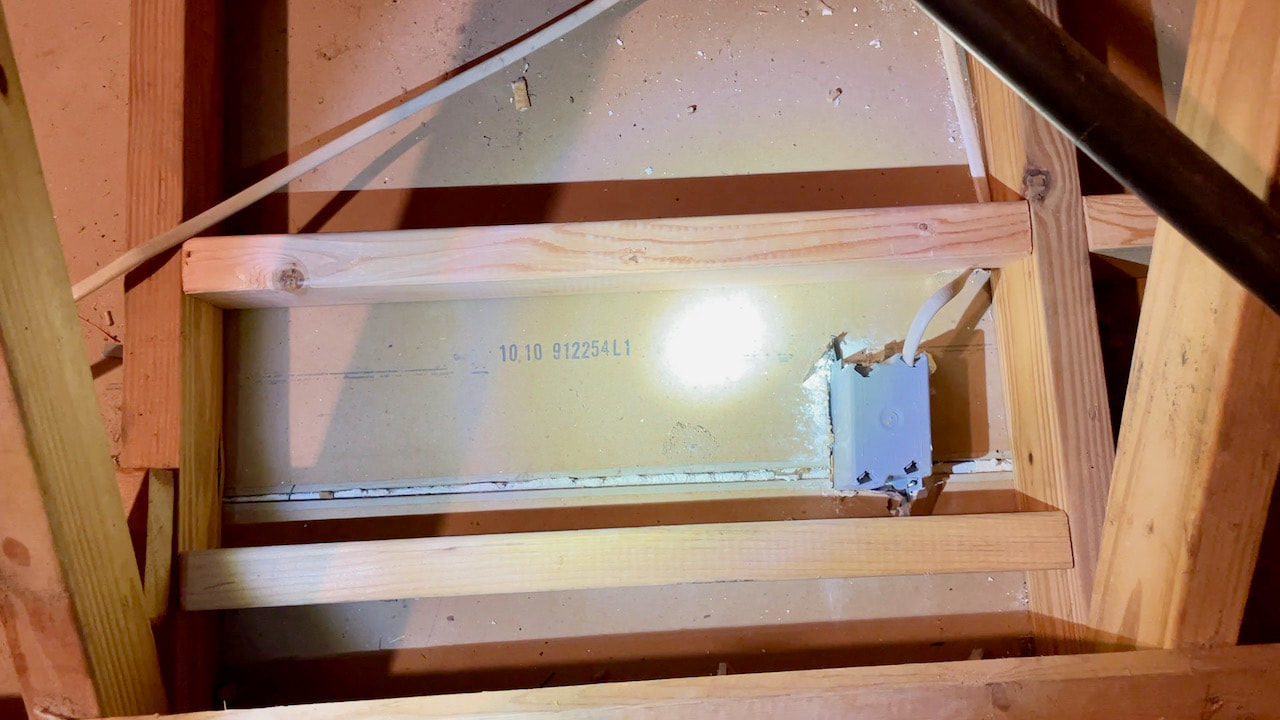
Steph headed into the attic where she found this. The electricians had simply placed the new outlet box into the seam of the drywall with no extra support. We certainly are no electrical experts, but it seems like securing the box to the nearby 2x4 would have helped to support it. If this is your area of expertise, tell us if this is how these ceiling boxes are usually installed.
Back in the attic, Steph added support 2x4s on either side of the crack. The drywall will then be secured to the new 2x4s thus giving that outlet box the support it needs.
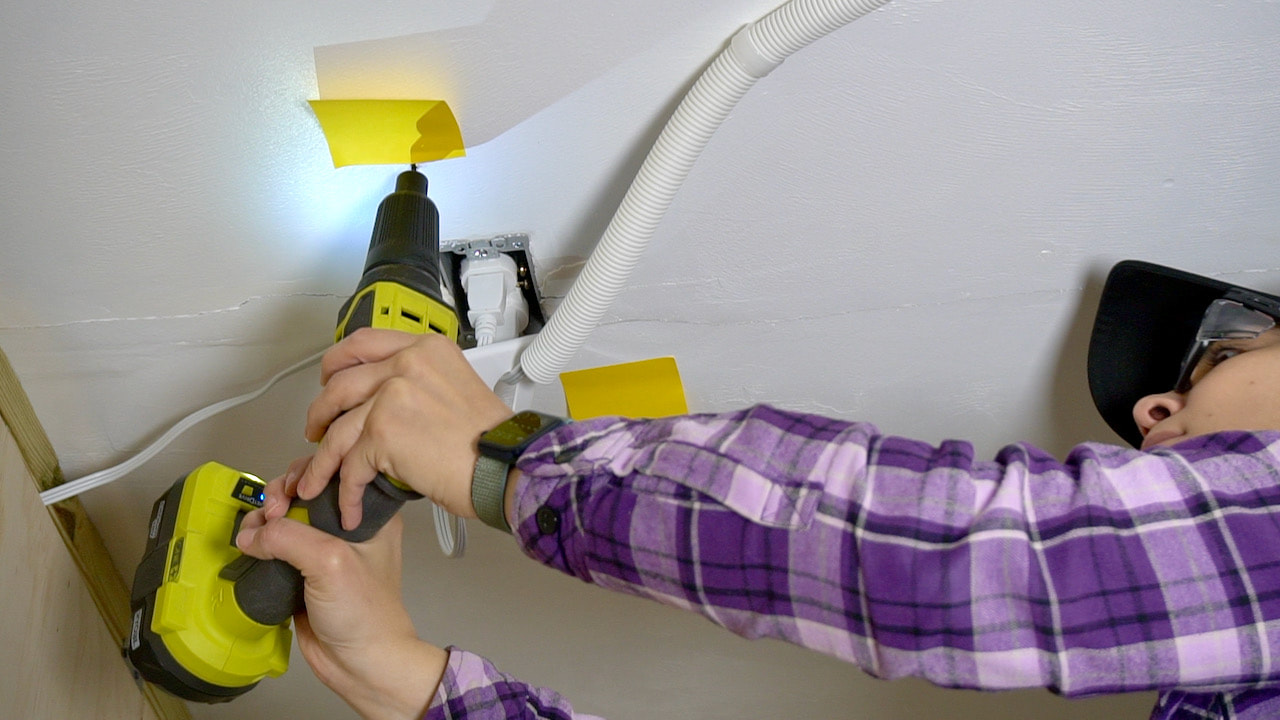
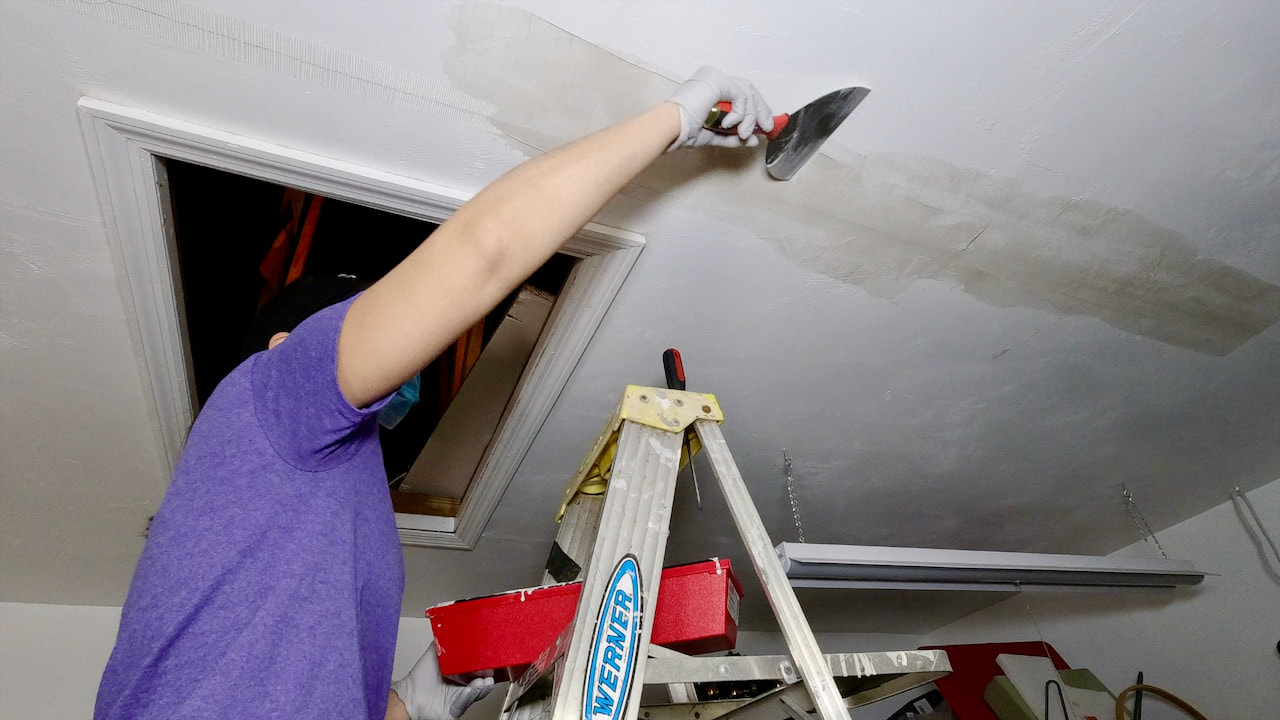
Here Steph is securing the drywall with drywall screws to those supports she added in the attic. She's using a Ryobi drywall screw gun. It's a pretty handy tool!
Time to repair the crack in the drywall!
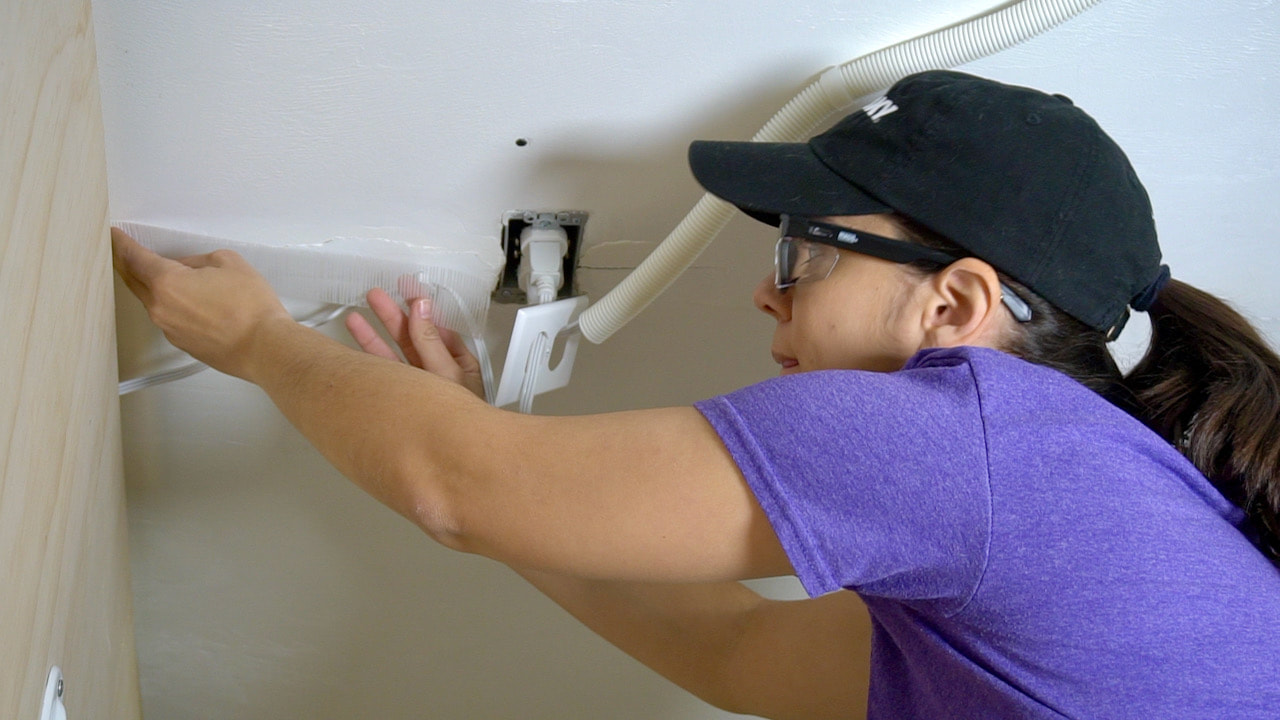
The first step was to cover the crack with the self-adhesive mesh tape.
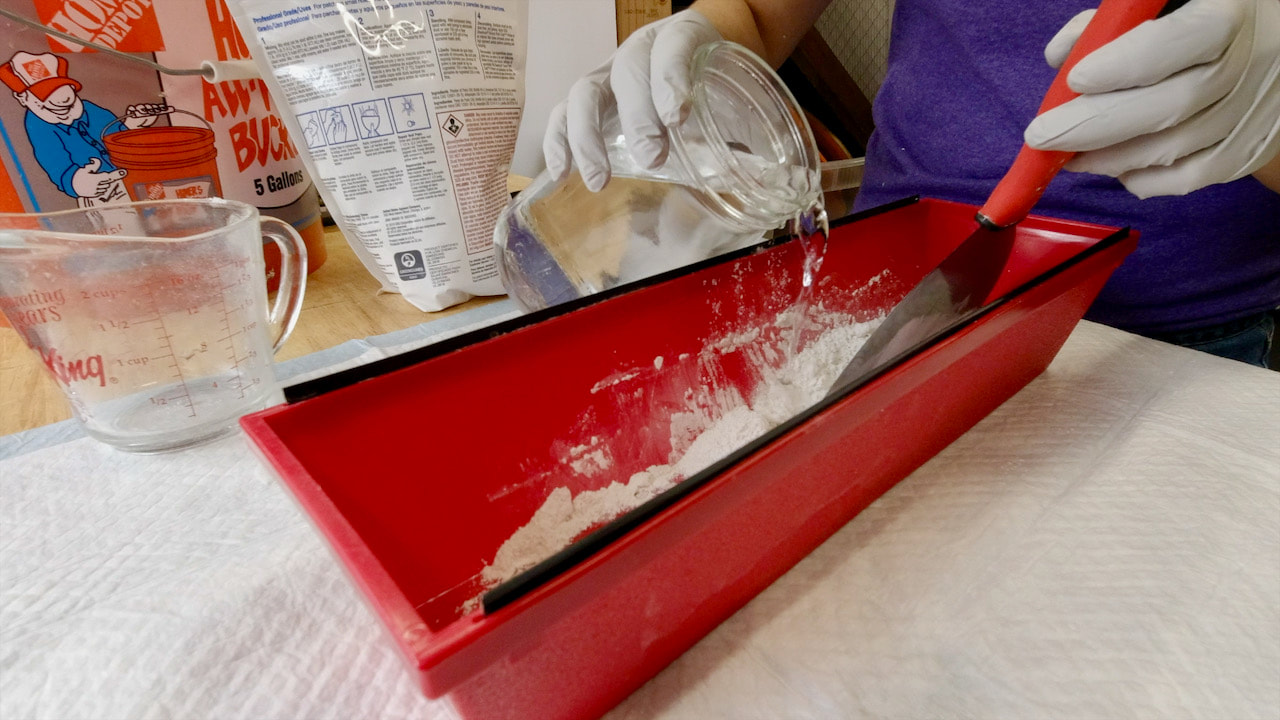
Mixing up the patching compound was a little like mixing pancakes! Tip: mix up small batches as this sets up literally in five minutes. Add a little water at a time to get the consistency you need.
Steph's first time to mud drywall. She did two coats, sanding between each.

Second coat of mud.
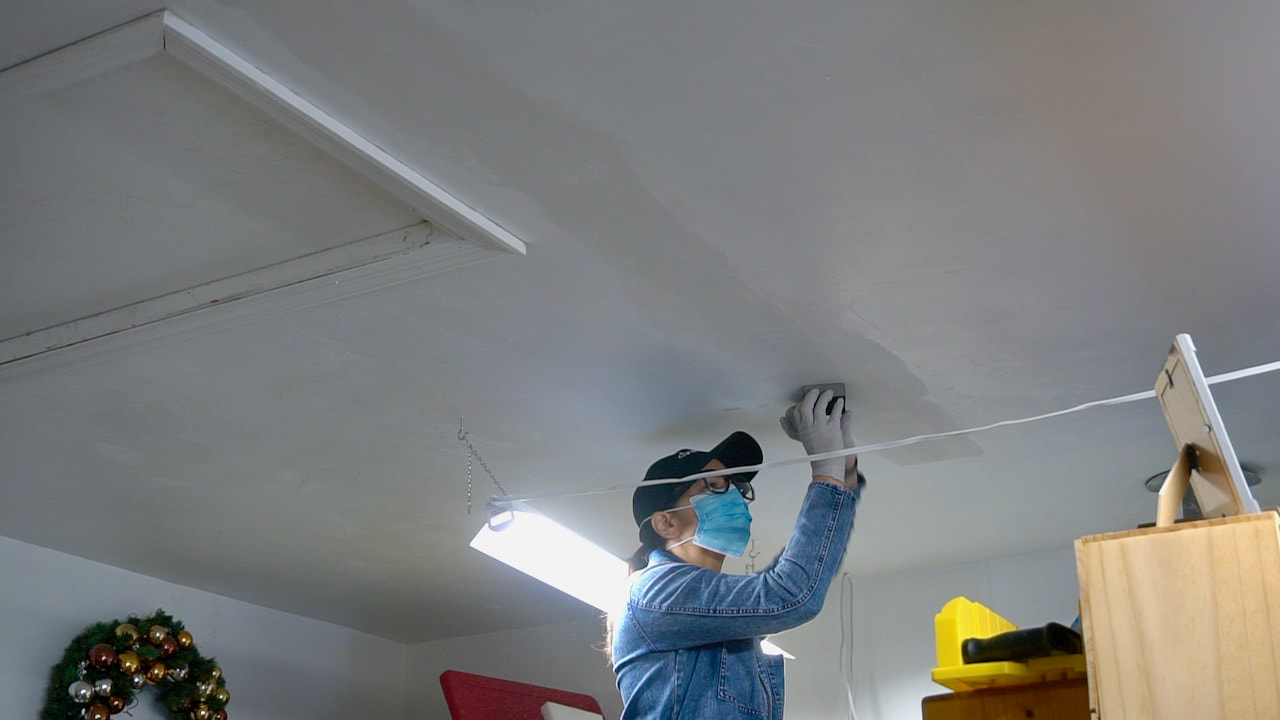
After sanding the second time, Steph painted the ceiling.
BEFORE
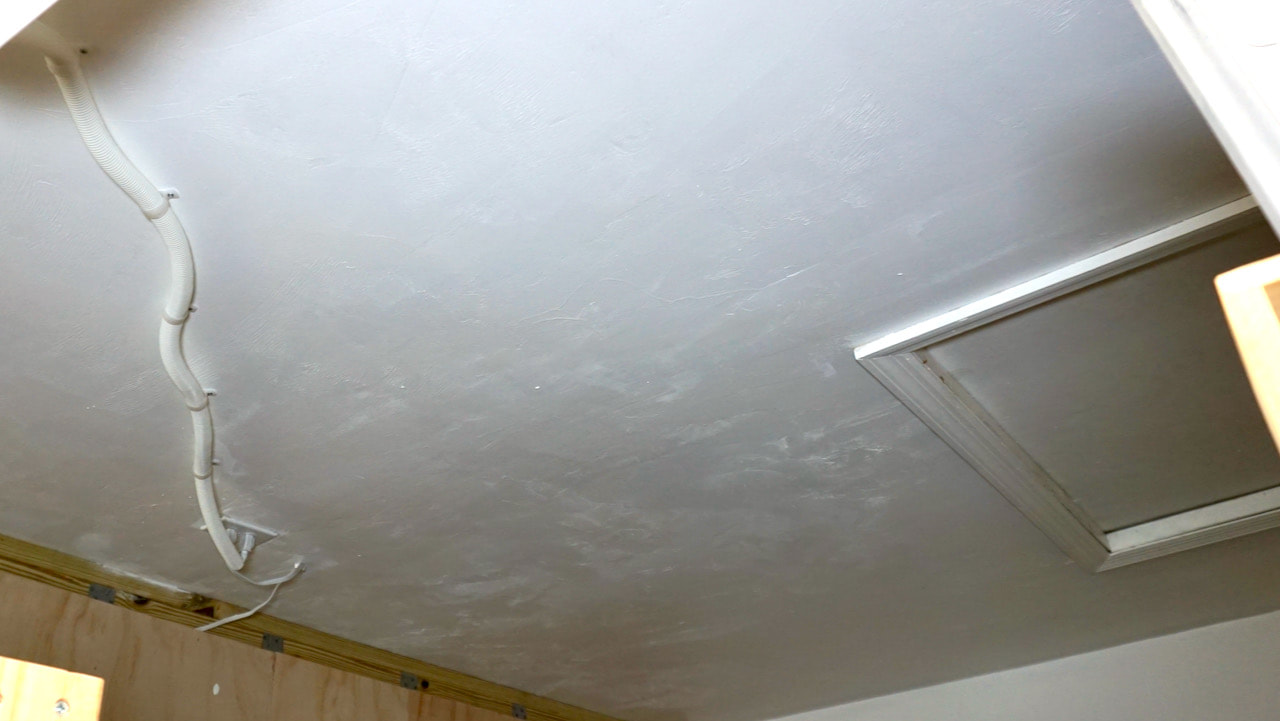
AFTER
Steph did a great job repairing the ceiling crack. She didn't hesitate to go up in the attic to identify the problem.
We are pretty sure the crack has gotten worse in the past six months due to workers installing a new A/C in the attic as well as the bug man treating for bugs up there. All that extra movement in the attic created just the right conditions for that crack to get worse. Although at the time of the repair, the crack was nearly cosmetic, over time, we knew we'd have an even bigger problem if we didn't take care of it sooner rather than later. Have you even put off a simple, easy repair only to have it turn into a major repair? Please note: This is not a sponsored post. FYI: We are not professionals, and we don't claim to be. This is what we found worked for our project. Yours may need a little different approach. Safety first! FYI: Affiliate links are being used on this page. Purchasing via these links help support MDP! Related Projects
0 Comments
Leave a Reply. |

Mother Daughter Projects
|