|
text by Vicki Sign up here to join our weekly email newsletter!
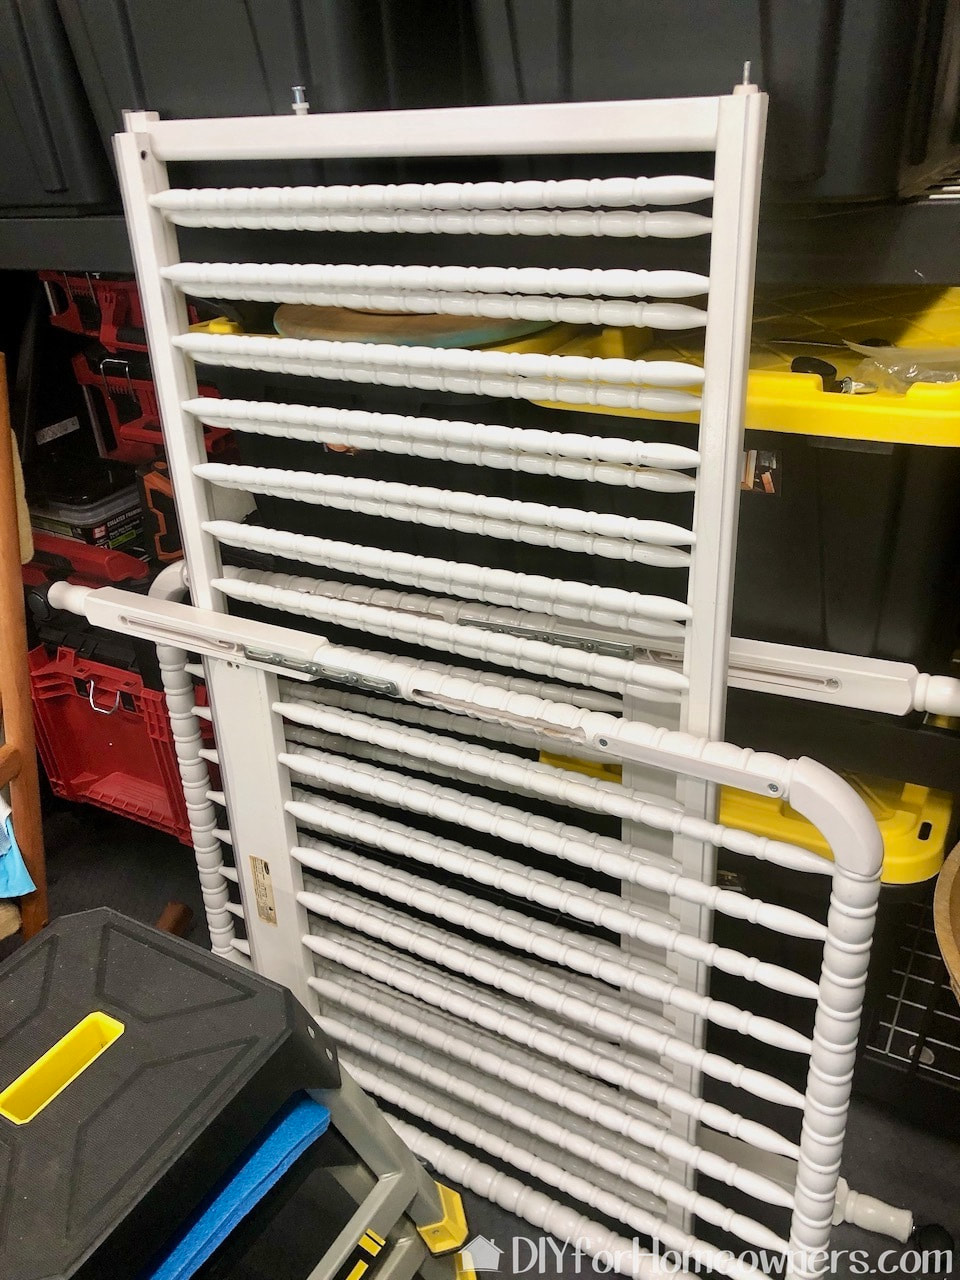
In our previous post, we upcycled the rails and mattress platform from an old baby crib. This crib could not be reused or donated as it didn't meet current US government safety standards. Rather than send it to the landfill, our friends offered it to us.
This project comes together using the spindles from the crib side. We're making a side table that doubles as storage for Steph's pet dog Mac's stuffed animals!
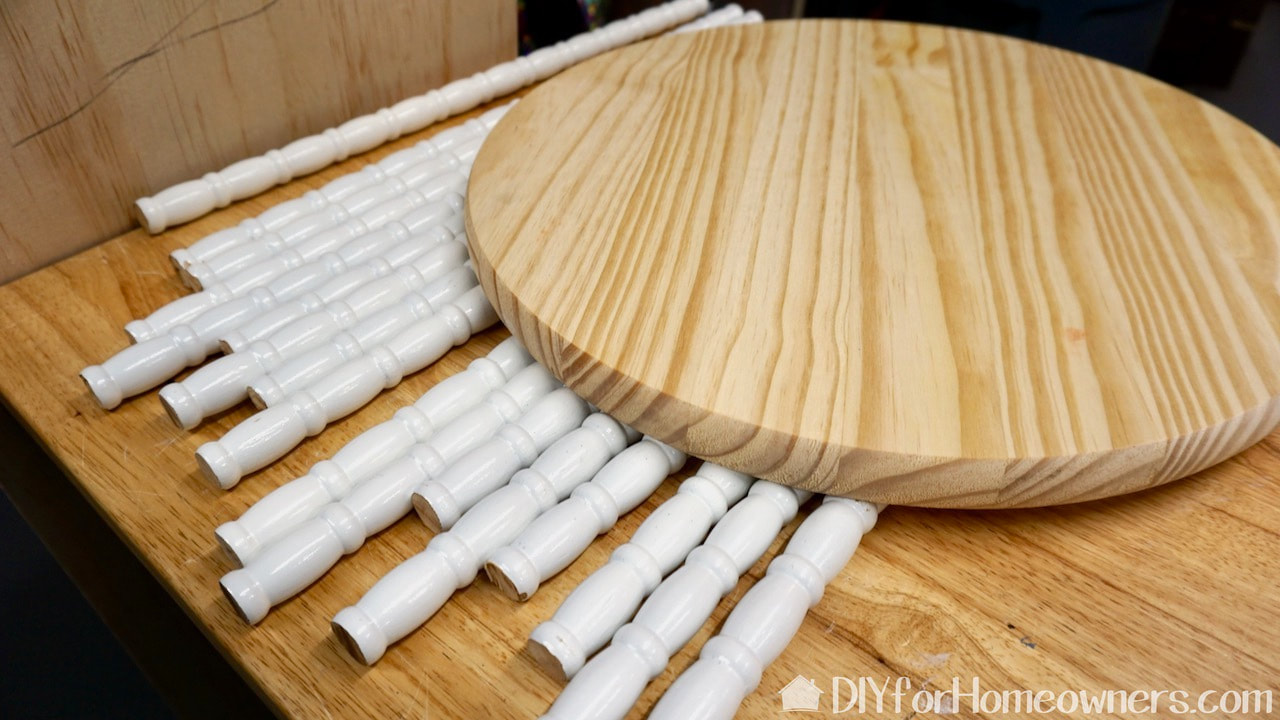
For this table we are using two small purchased rounds from the Home Depot and spindles from one side of the crib.
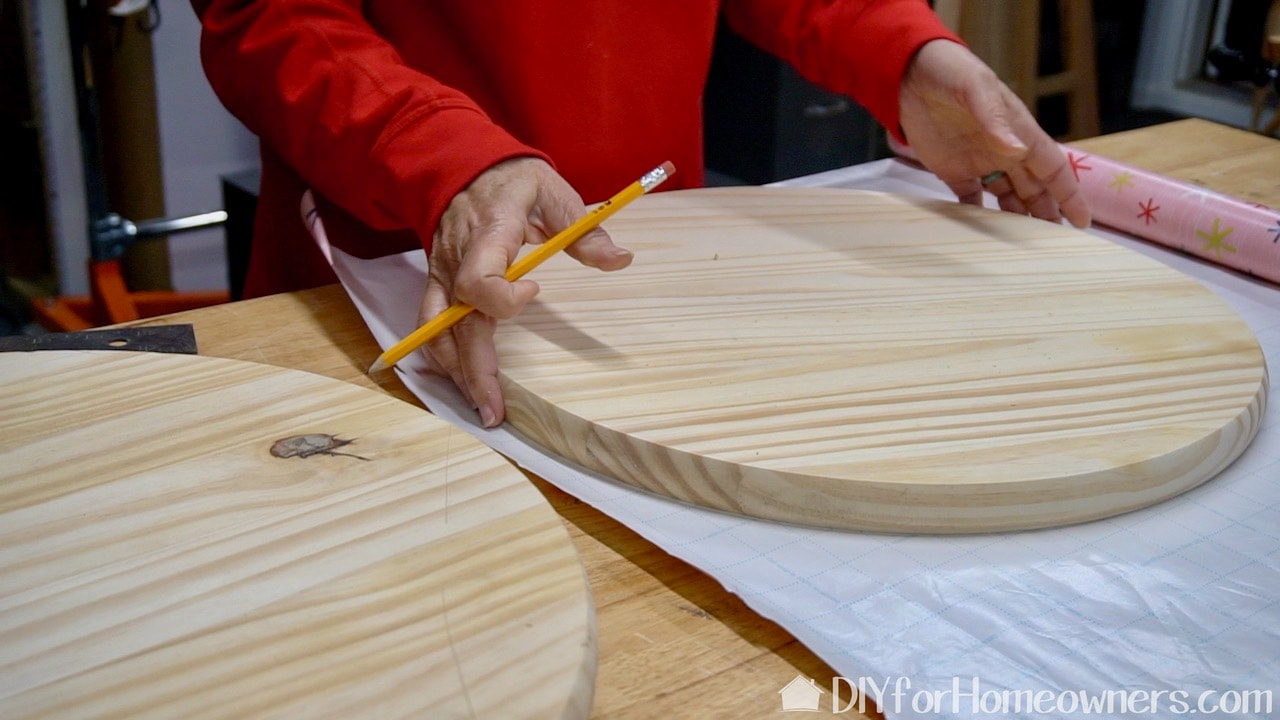
The hardest part of this project is finding the center of the wood rounds. There are many ways to do this. We decided to try making a pattern on wrapping paper that has a cutting grid on the backside. We centered the round on the grid and traced around the outside.
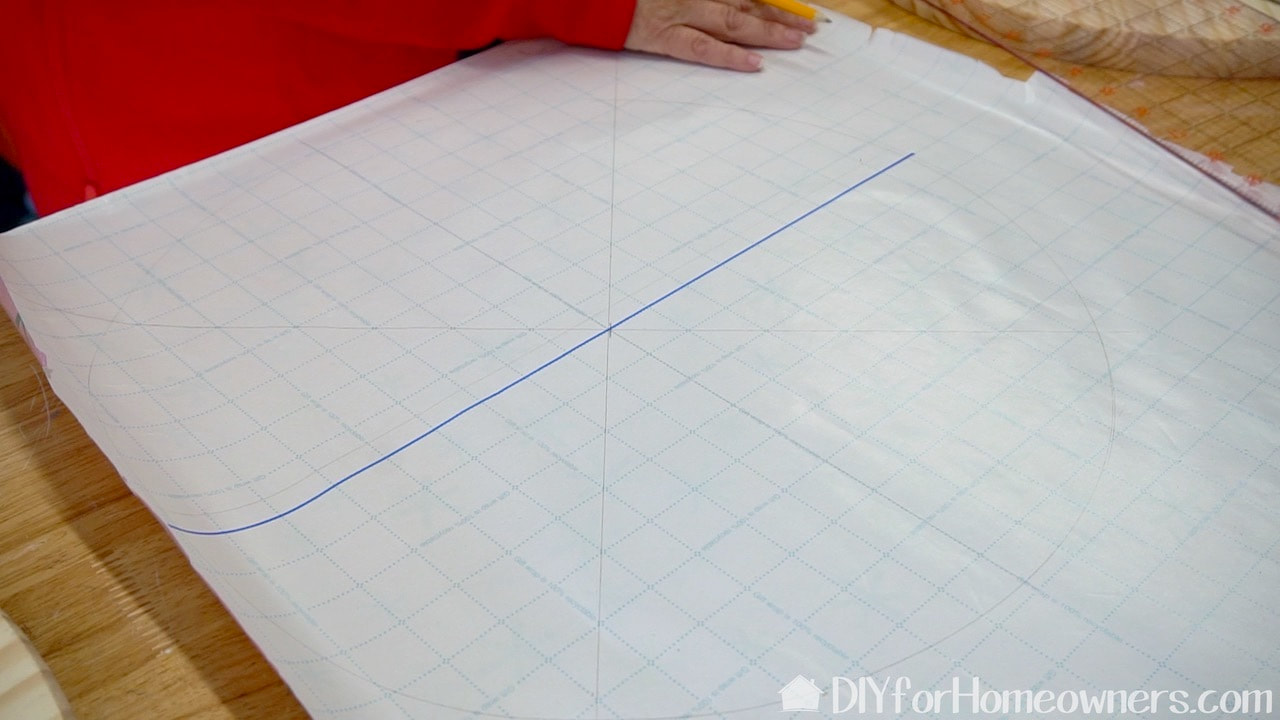
The grid made it easy to mark where we wanted the spindle holes to go.
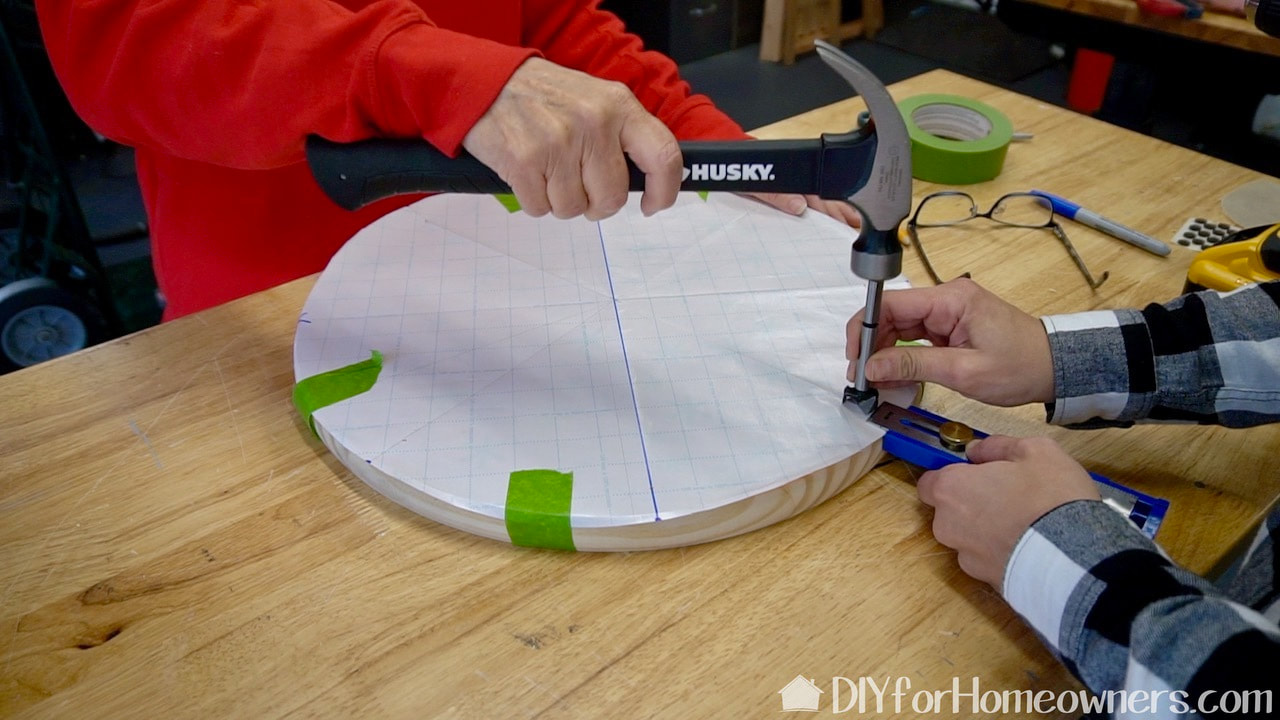
Once we finished the pattern, we cut it out and taped it to the wood round. We determined how far we wanted the holes to be from the edge. We're using a Kreg marking tool to keep this distance consistent. Steph is holding the Forstner bit we are using and I'm tapping it to mark the hole location.
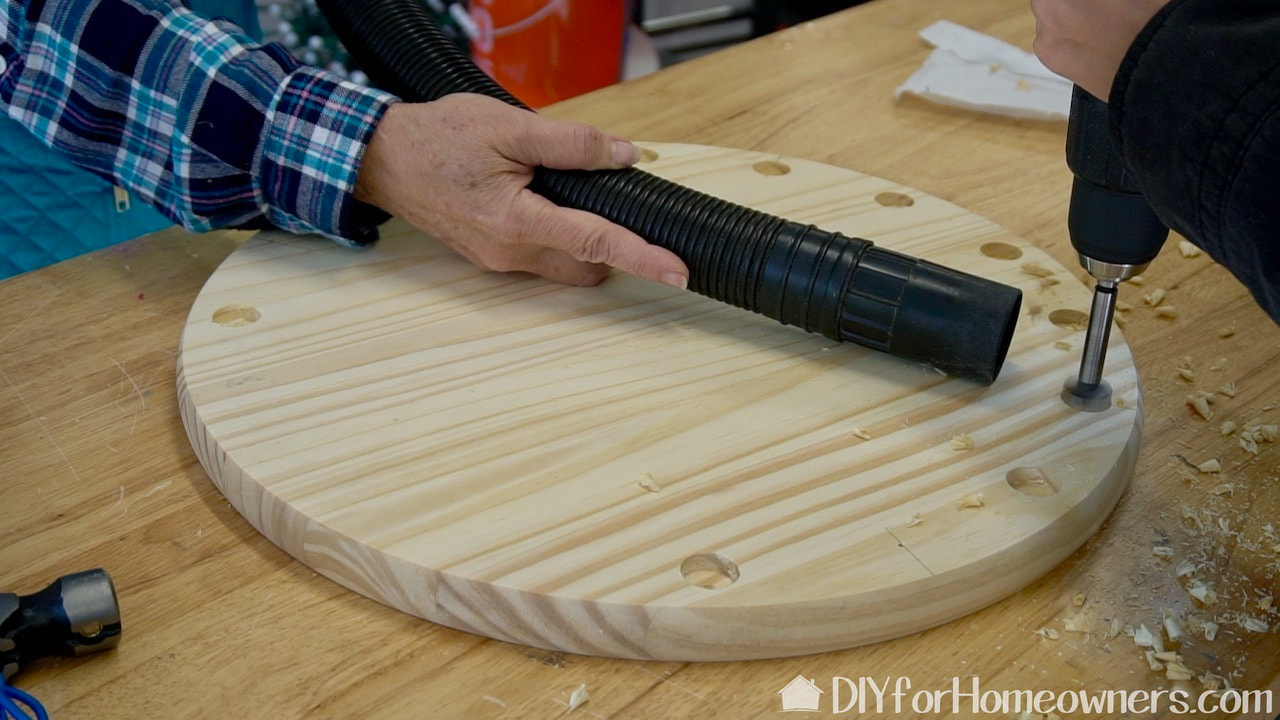
A drill press would be the preferred tool for this to get precise holes, but we don't have one of those! Steph drilled these and I helped keep the sawdust under control. Note: after our first test fit with the spindles, we realized we needed to add more spindles. We added additional holes between the ones we first made.
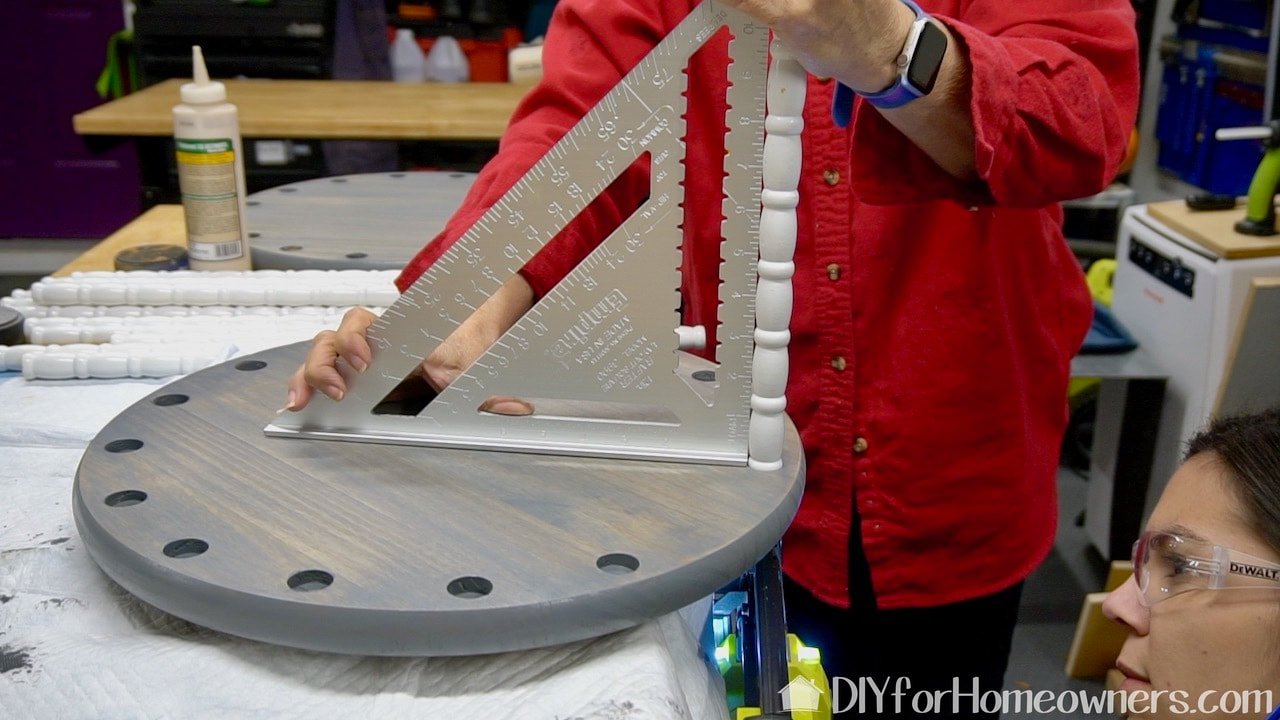
Prior to assembling, I sanded, preconditioned, and stained the wood. Once dry it was time to put this all together. Working as a team, we added wood glue to the holes, lined up the spindle with a framing square, and from the bottom, Steph added one brad nail to hold the spindle in place.
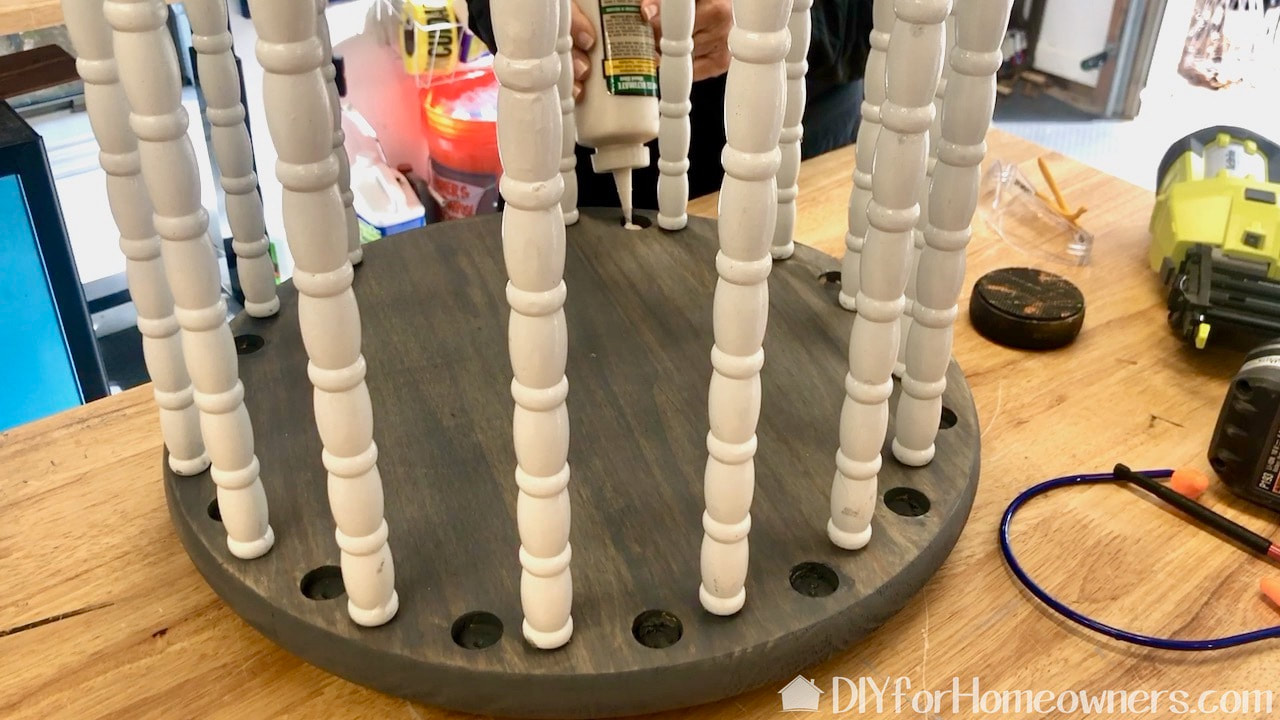
After leaving the piece to dry for 24 hours, we flipped it over and repeated the process with the second round.
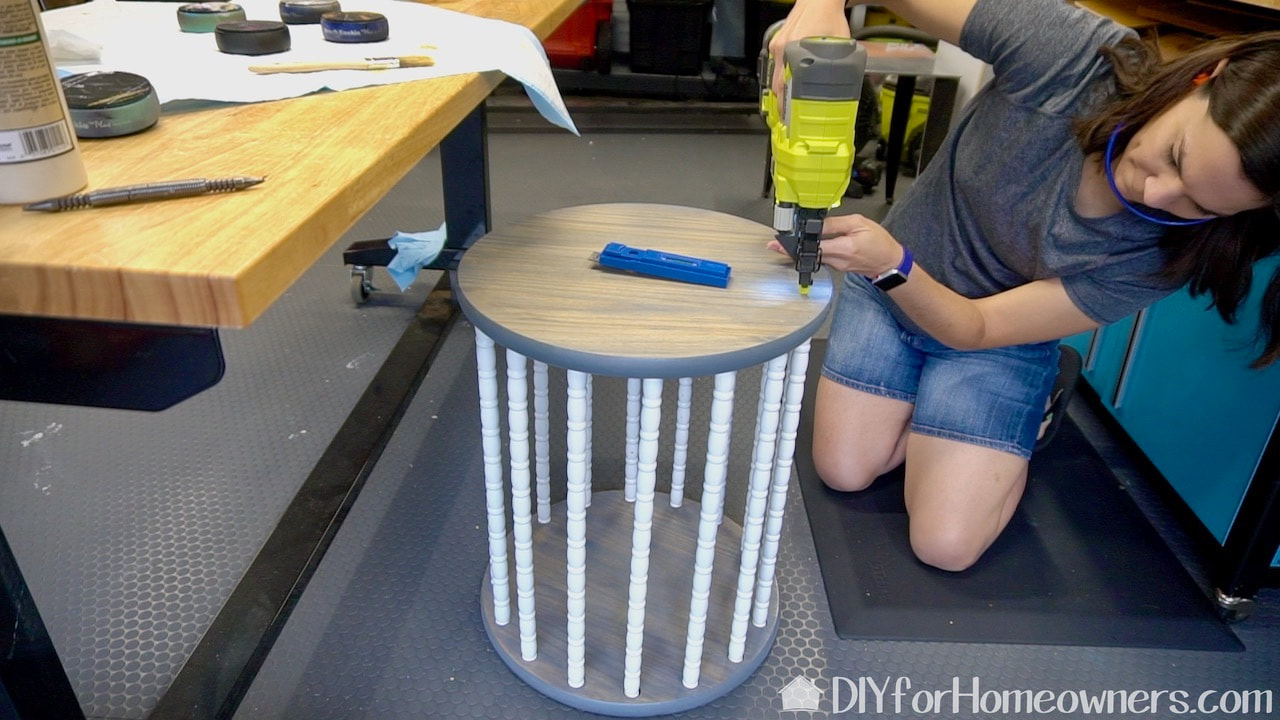
This side was much easier as Steph could brad nail from the top side!
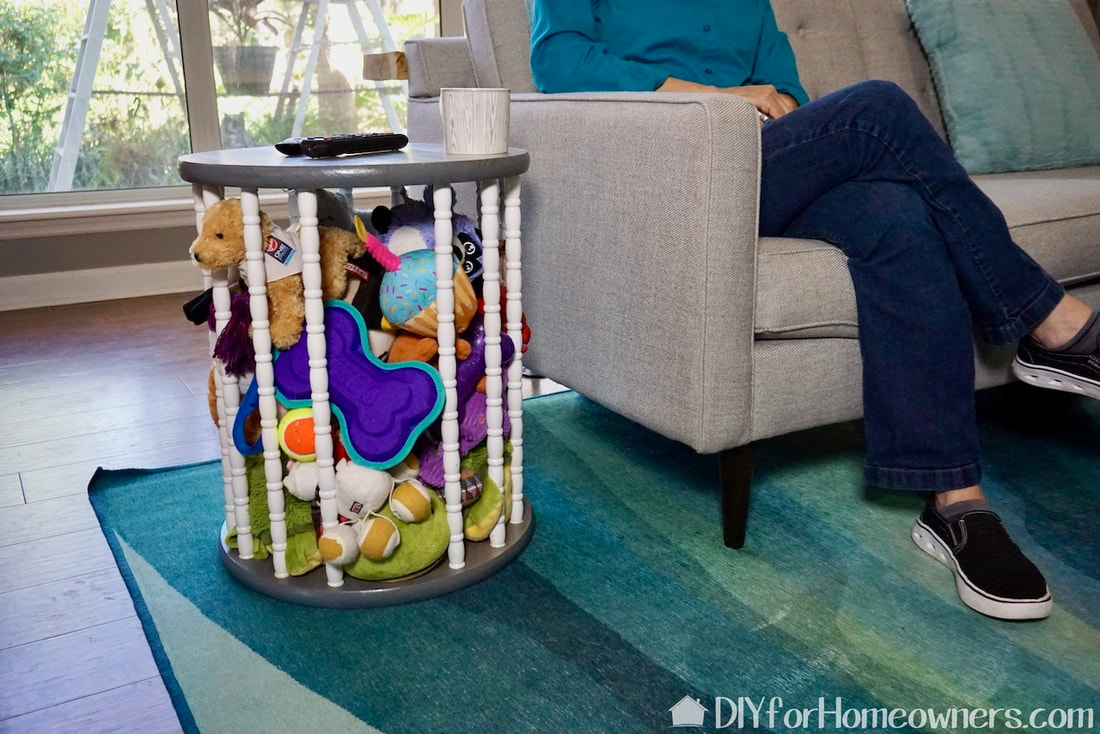
Here it is all filled up with Mac's toys. The table is the prefect height for beside the couch. The table keeps all Mac the greyhounds things nicely corralled.
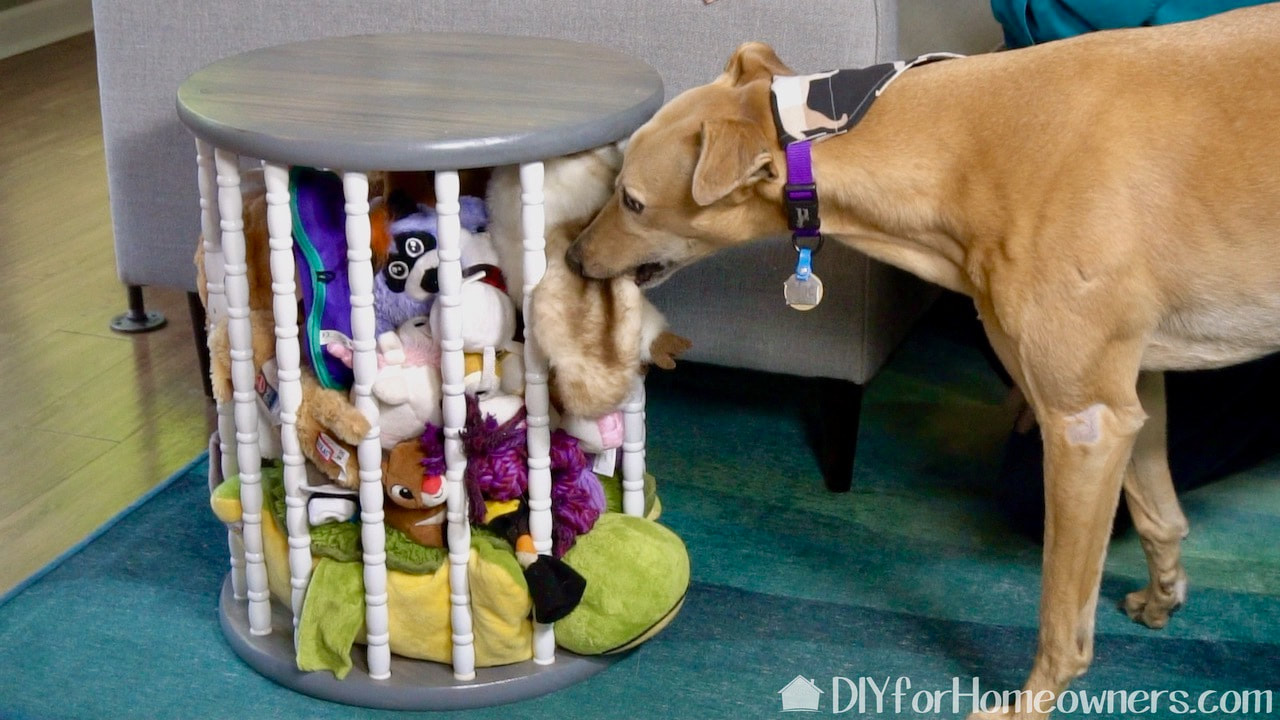
The opening is large enough for Mac to get out a toy, but not so large that everything falls out.
Although, Steph is using her new table for Mac's toys, it would be perfect for a child's room to keep all those stuffed animals contained. Caution: If using in a child's room, be sure to make the opening either too small for a child's head to go through or wide enough so a child can not get stuck.
Have you ever reused parts from an old crib? What did you make? Please note: This is not a sponsored post. FYI: We are not professionals, and we don't claim to be. This is what we found worked for our project. Yours may need a little different approach. Safety first! FYI: Affiliate links are being used on this page. Purchasing via these links help support MDP! Related Projects
2 Comments
Magdalena Avendano
1/23/2020 01:53:14 pm
Can I make these end table in a square form?
Steph
1/23/2020 04:35:00 pm
Sure! Leave a Reply. |

Mother Daughter Projects
|