|
text by Vicki Sign up here to join our weekly email newsletter!

It wasn't until we were filming the video for this post that we realized how long this project has been in the making! Back in May, 2019, we were offered an old baby crib. We had no idea how we could reuse the parts, but we decided to take it.
Actually, the one thing I knew we wouldn't be using it for was to make a bench. Those crib-to-bench transformation are everywhere so we needed to think outside the box.
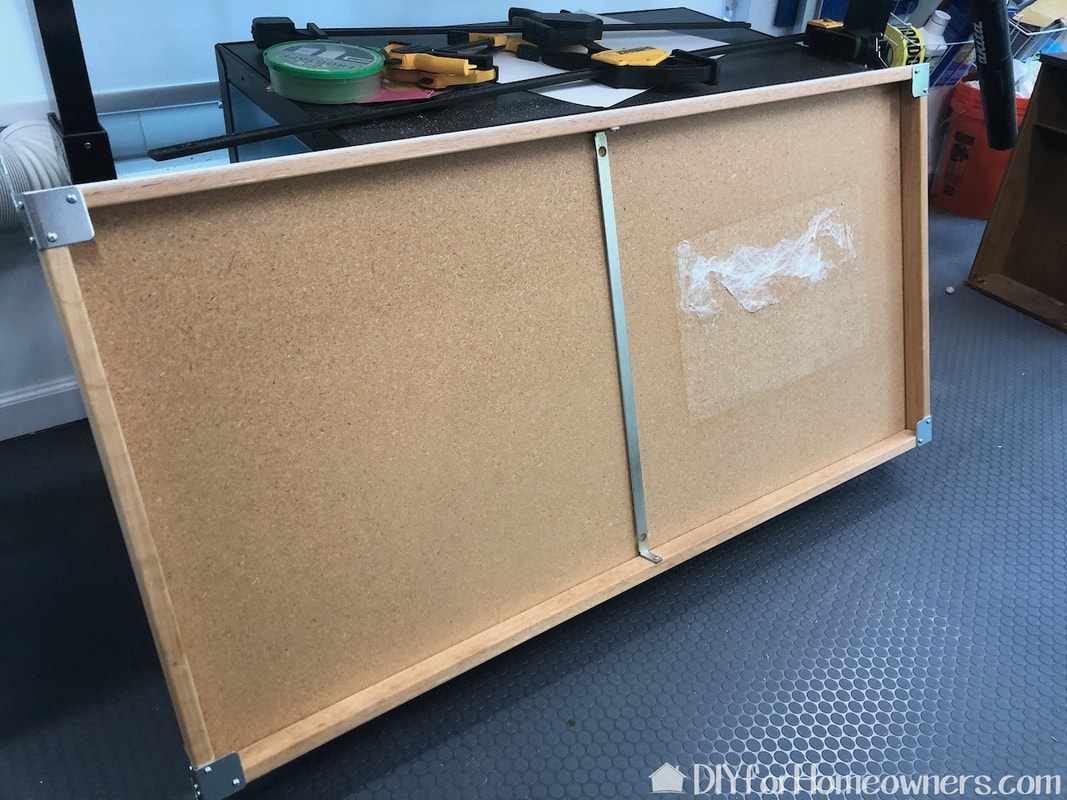
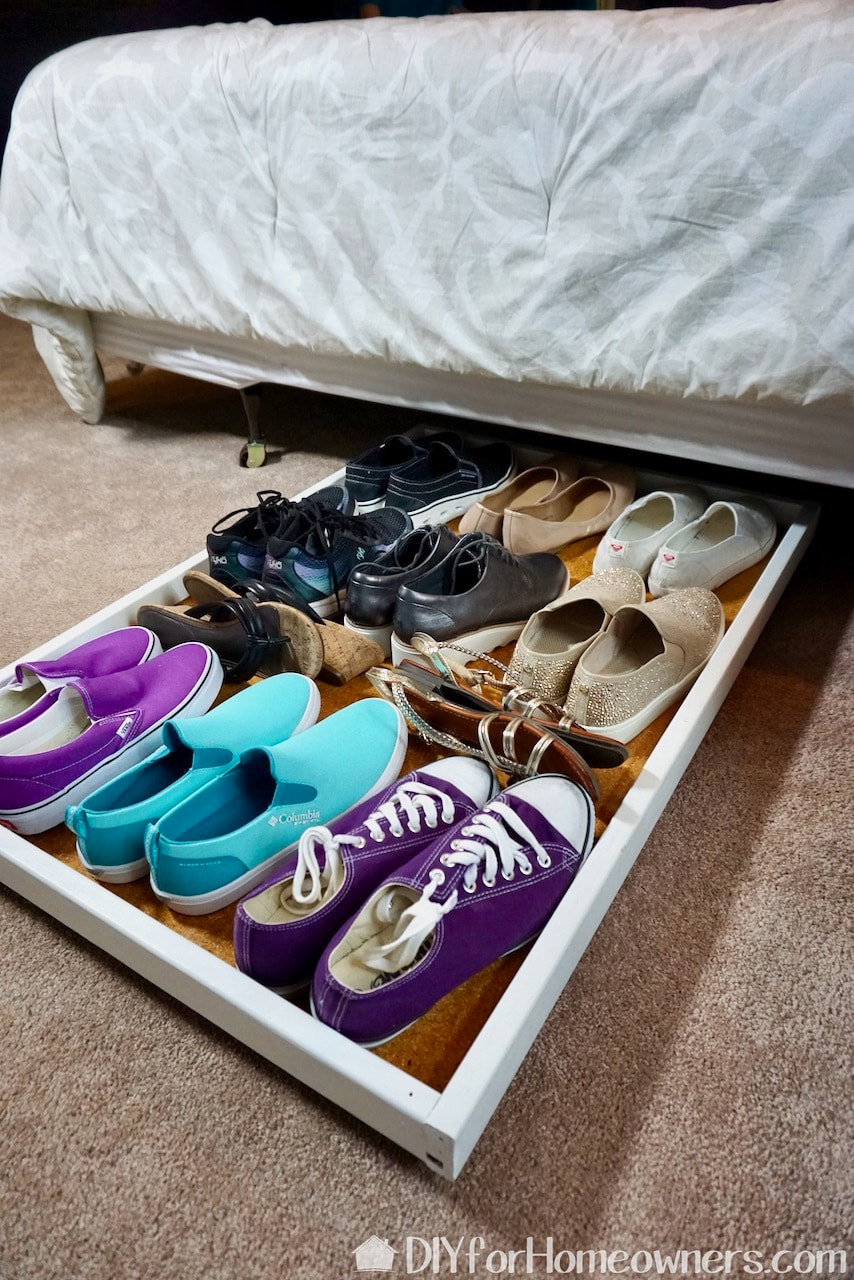
The first part we decided to reuse was the mattress support. We decided it would make a perfect place to store shoes under the bed or in the Lego room for Lego building! There was this awful sticker on the top side which resisted all efforts to remove. We decided to see if we could flip this over to hide the mess.
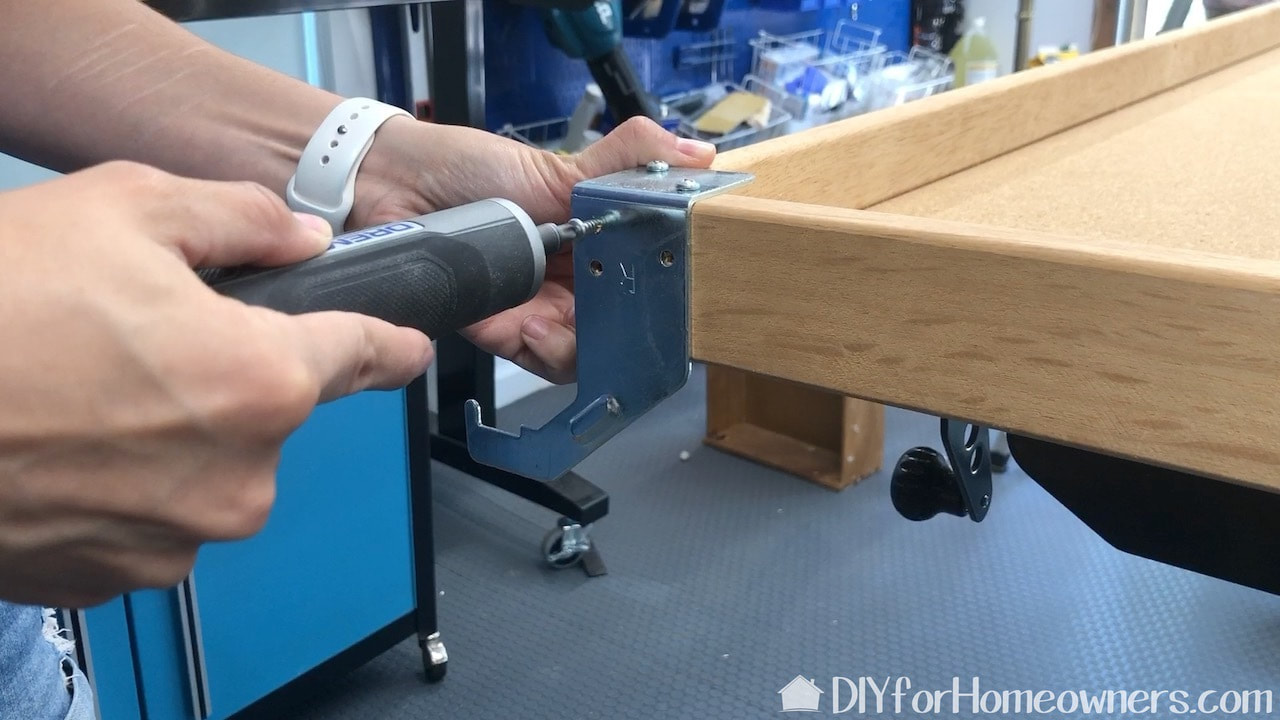
We removed all these metal supports. We're using our favorite power screwdriver, this Dremel Go. It charges via a USB cable. It's the perfect 'kitchen drawer' accessory!
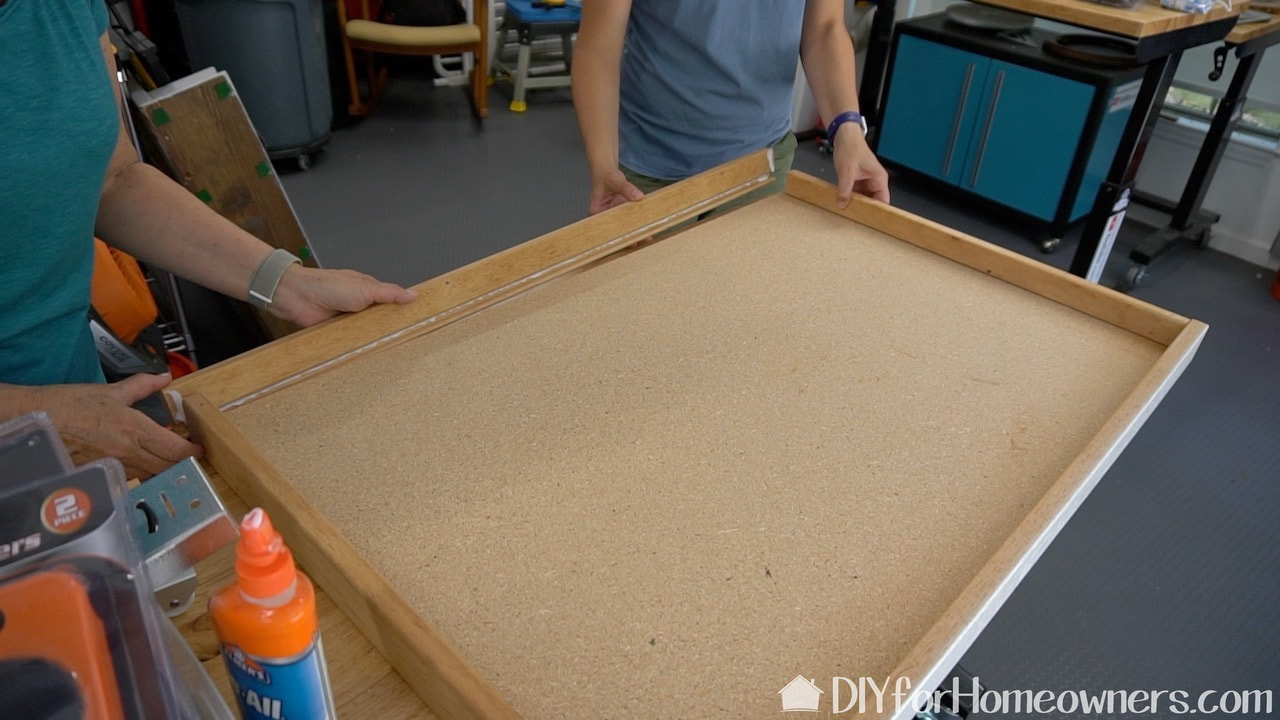
Surprise! The only thing holding this together were those metal supports! Actually, that made flipping the board over, to put it sticker side down, super easy. We flipped the board and then glued and brad nailed it all back together

To give the new storage unit mobility, we are hot gluing appliance casters to the underside. The appliance casters only have forward and backward movement which is perfect for sliding under the bed. Note: we are using Surebonder construction adhesive hot glue sticks here, not standard hot glue.
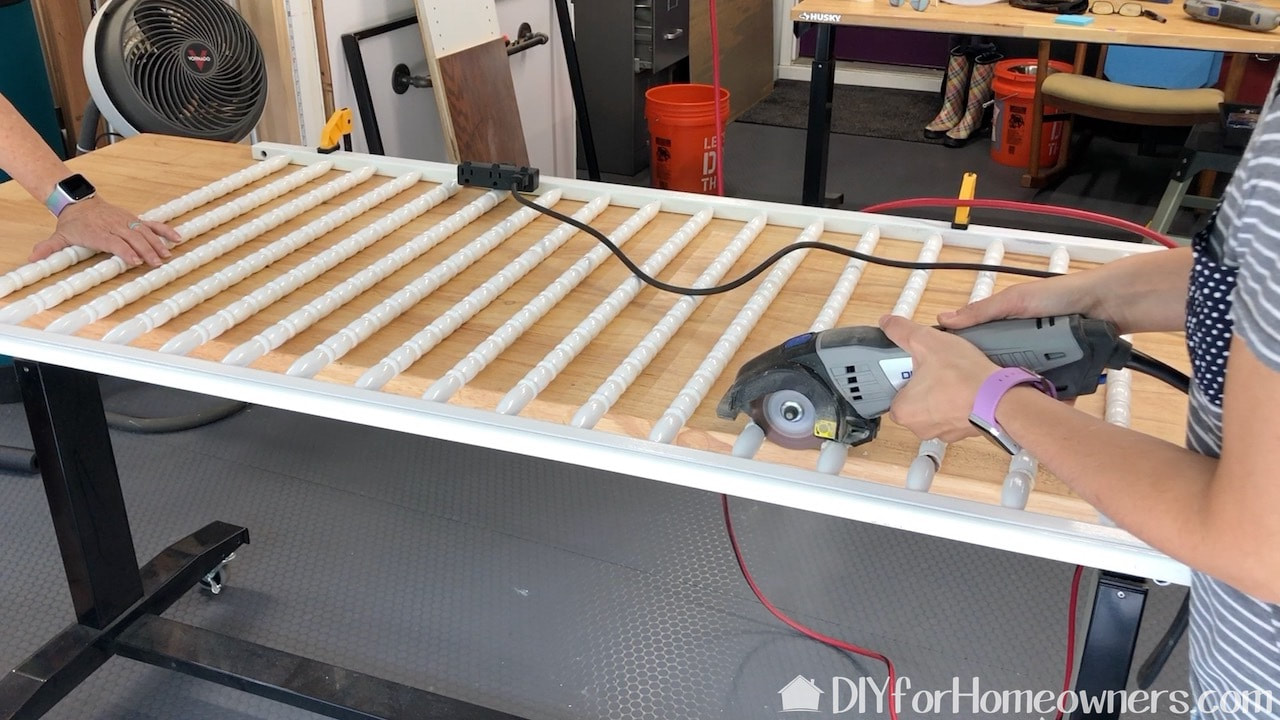
On to the next reuse project which ended up being another shoe storage solution! We cut the rails from one of the side pieces. We didn't need to measure or mark anything as we used the first decorative element on the spindles as our guide. We are using a Dremel Saw-Max which works like a mini circular saw! It was the perfect tool to get the precise cuts we needed.
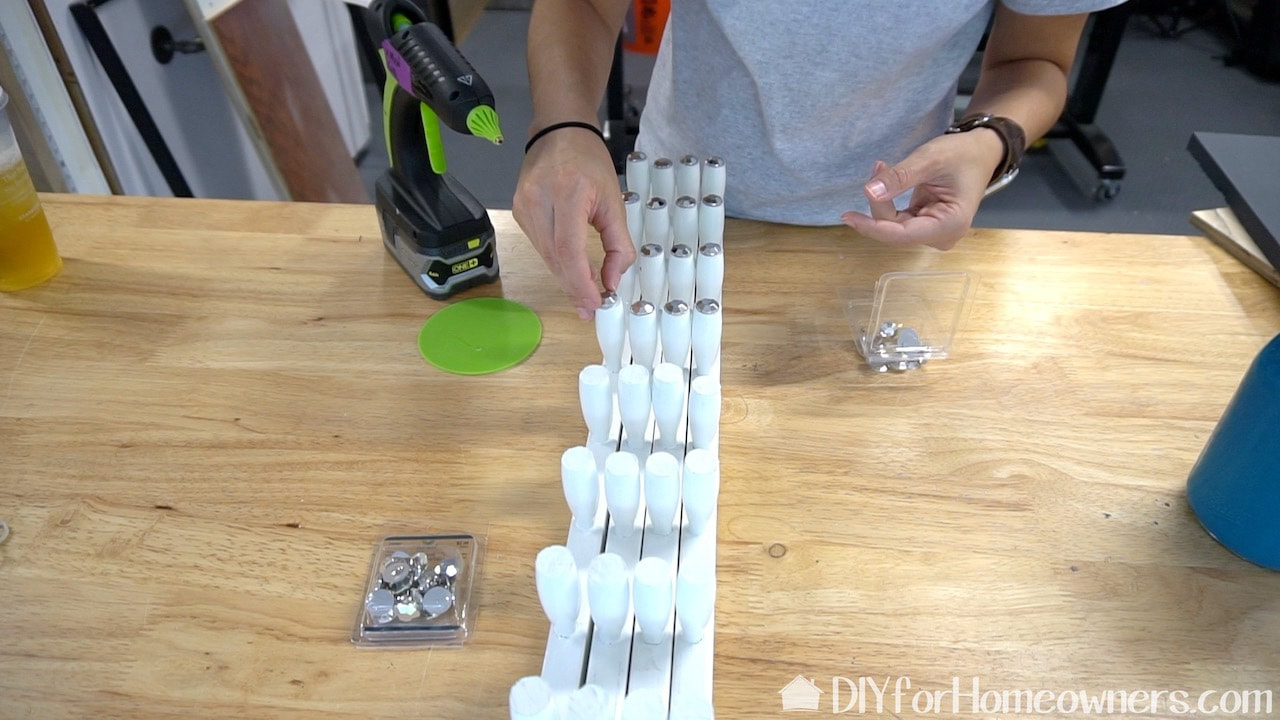
We determined how long we wanted the rails and cut them to length on a miter saw. To finish the pegs, we painted the tops and hot glued on some sparkly faux gemstones!
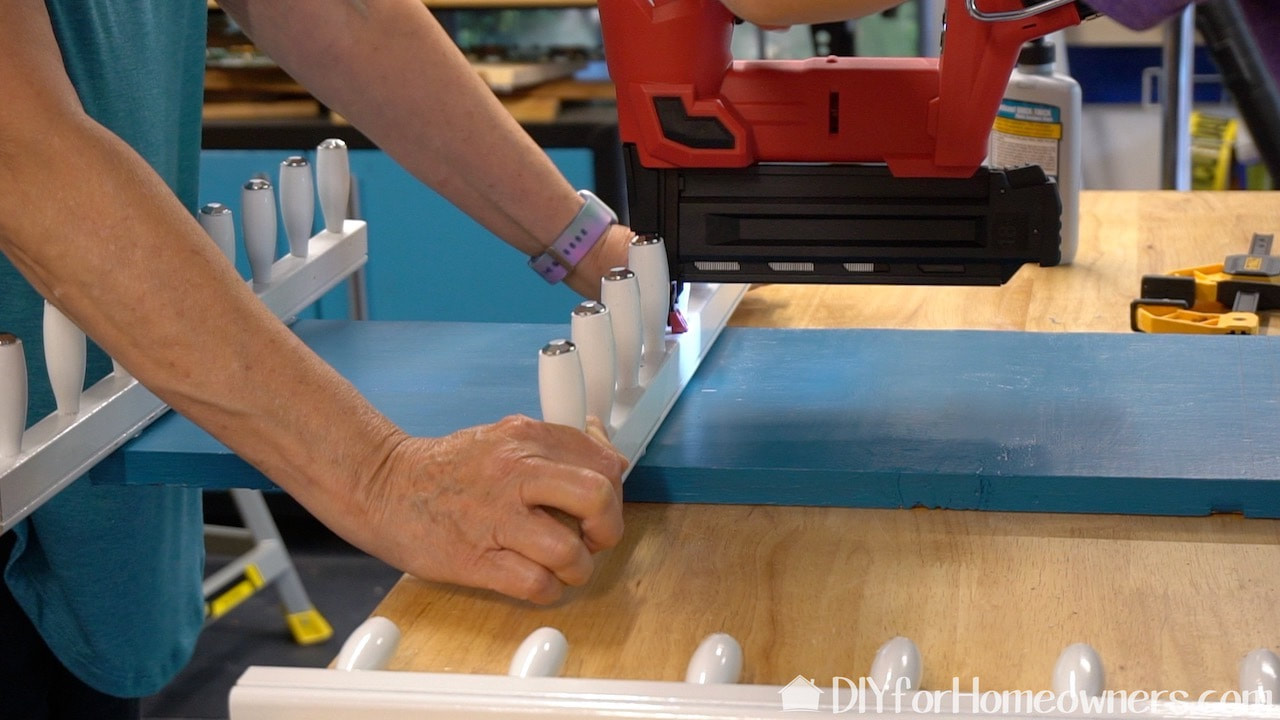
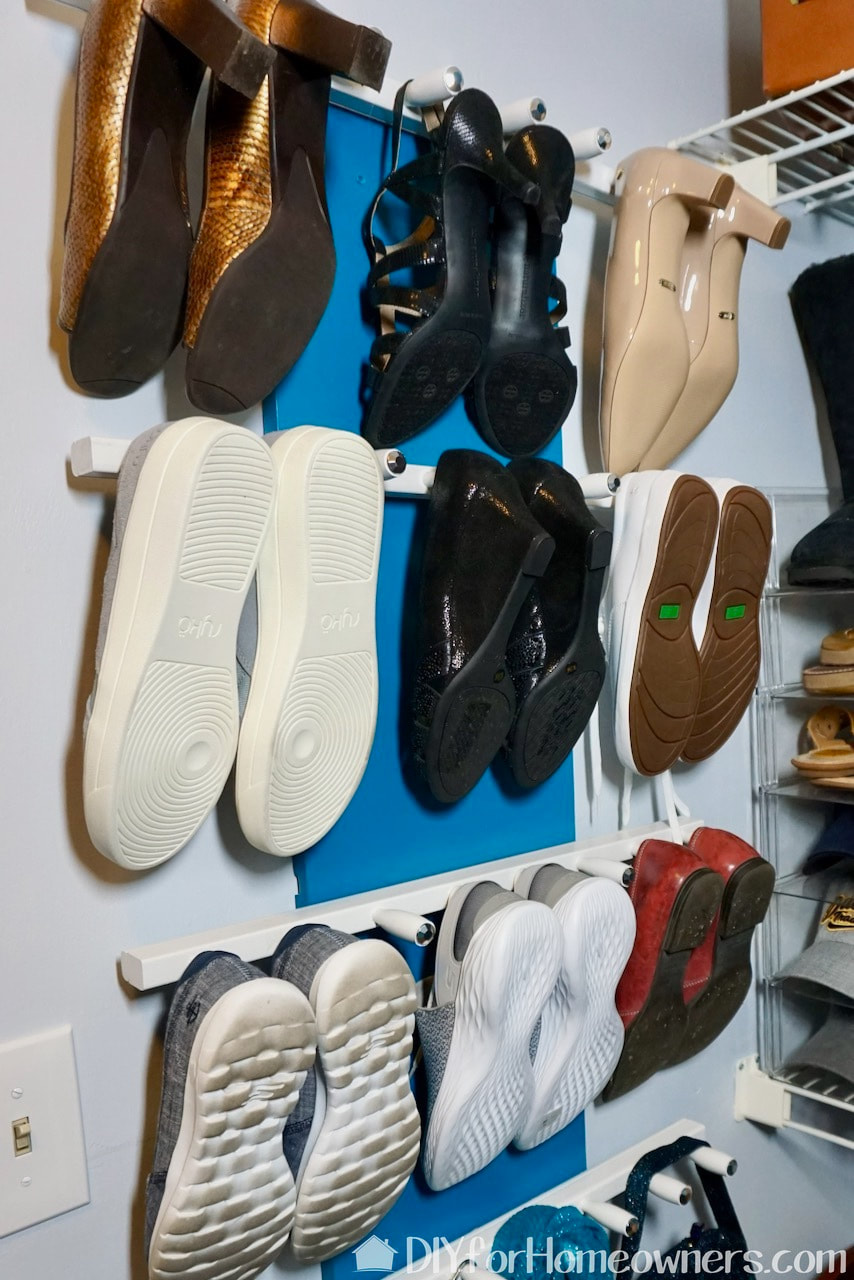
This shoe storage unit will go in my closet. As we didn't want to attach the individual rails to the closet wall, we decided to attach them to a board and then attach the board to the wall. We used a 1"x12" board cut to 37" long. The rails are 23" long placed 10" apart. We glued and brad nailed them to the board.
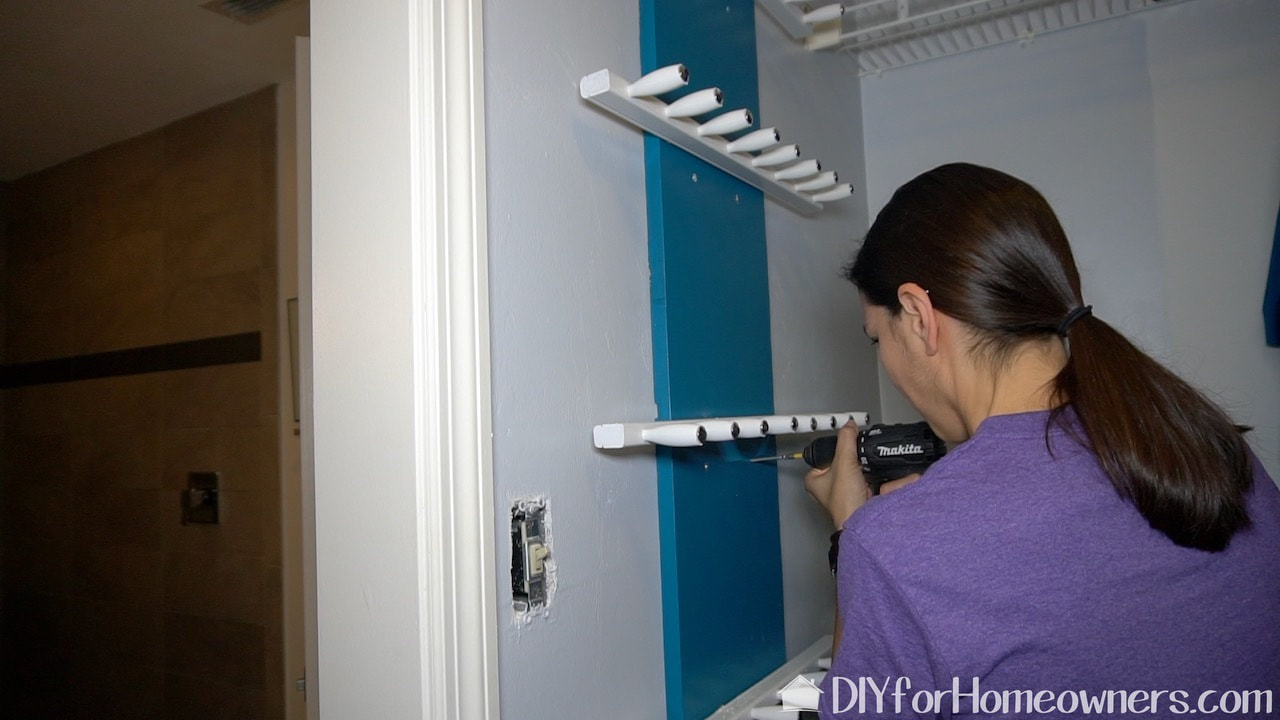
The board is screwed into a stud in the wall. Note: The light switch is missing its faceplate as the new shoe storage sparked a mini paint makeover of the master closet.
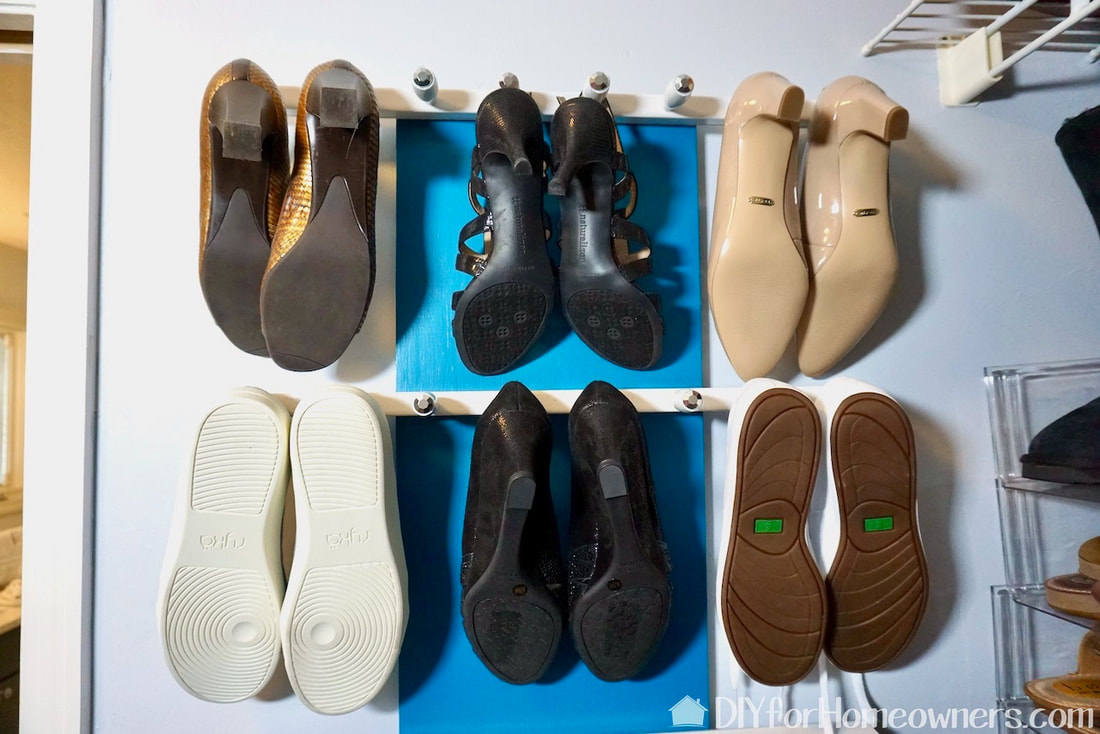
The wall hung shoe storage unit can hold up to 12 pairs of shoes. We found that leaving one peg between shoes makes it easier to remove and replace them.
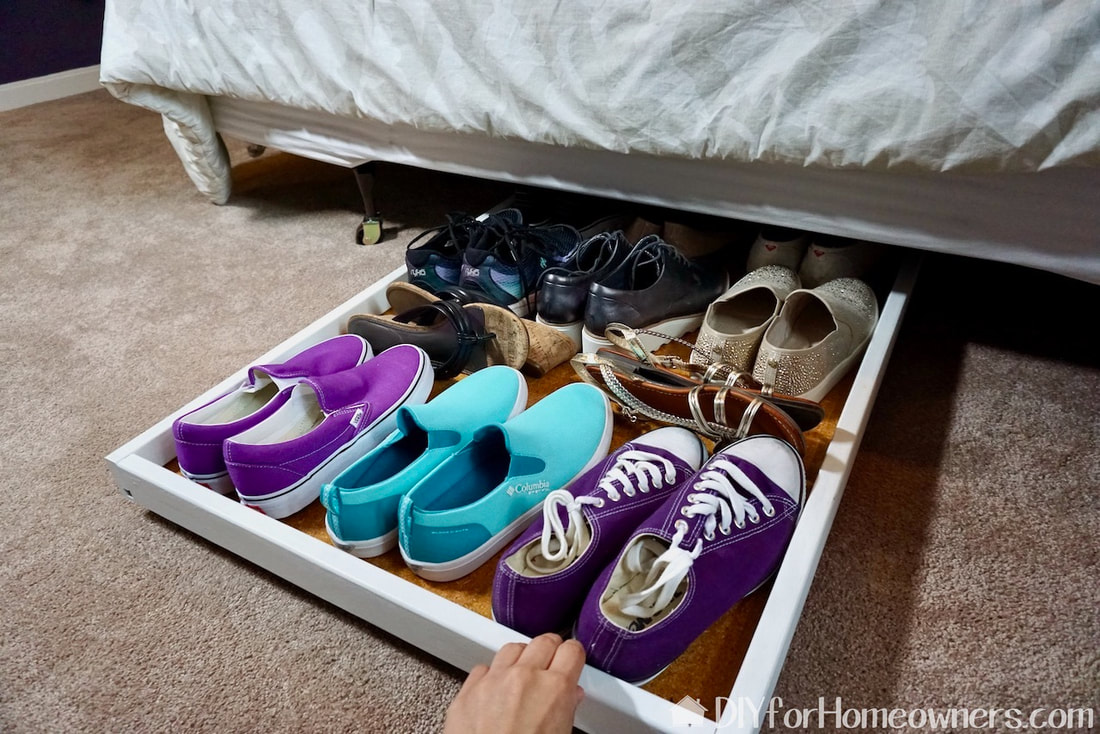
The under-the-bed roll out shoe storage here is holding almost a dozen pairs of shoes! It rolls easily in and out.
What I like best about these two shoe storage solutions is that neither looks like they were made from a crib! They both are so functional and solve shoe storage problem in both our homes!
But wait! What about all those spindles we cut off? We have another crib upcycle project that happens to double as storage too. We'll link that here once posted. How have you reused an old crib? Cribs are surprisingly easy to source if you don't have one of your own. Just recently, I found one in a neighbor's trash pile. It had just been put out so it was in great condition. Because many can not be donated, many people do put them out for trash collection. Let us know if you find one curbside and what you do with it! #trylearnshare Please note: This is not a sponsored post. FYI: We are not professionals, and we don't claim to be. This is what we found worked for our project. Yours may need a little different approach. Safety first! FYI: Affiliate links are being used on this page. Purchasing via these links help support MDP! Related Projects
4 Comments
3/1/2020 12:51:26 pm
Love the mutual respect for creative ideas that comes through in your video! My mom taught me the value of reusing things to save money, to not waste resources, and to be responsible for items that go into our landfills. Beautiful idea! Thank you. I wish I had my mom around yet to continue with our own home projects. Generational experiences and thought processes complement beautifully.
Steph
3/3/2020 08:35:50 am
Thanks for the kind words! We very much agree :)
Shirley Sloan
3/24/2020 04:24:24 pm
Love the do it yourself ideals
Steph
3/26/2020 08:53:32 am
Thanks Shirley! Leave a Reply. |

Mother Daughter Projects
|