|
text by Vicki Sign up to get Mother Daughter Projects updates in your email!
This post is sponsored by The Home Depot.
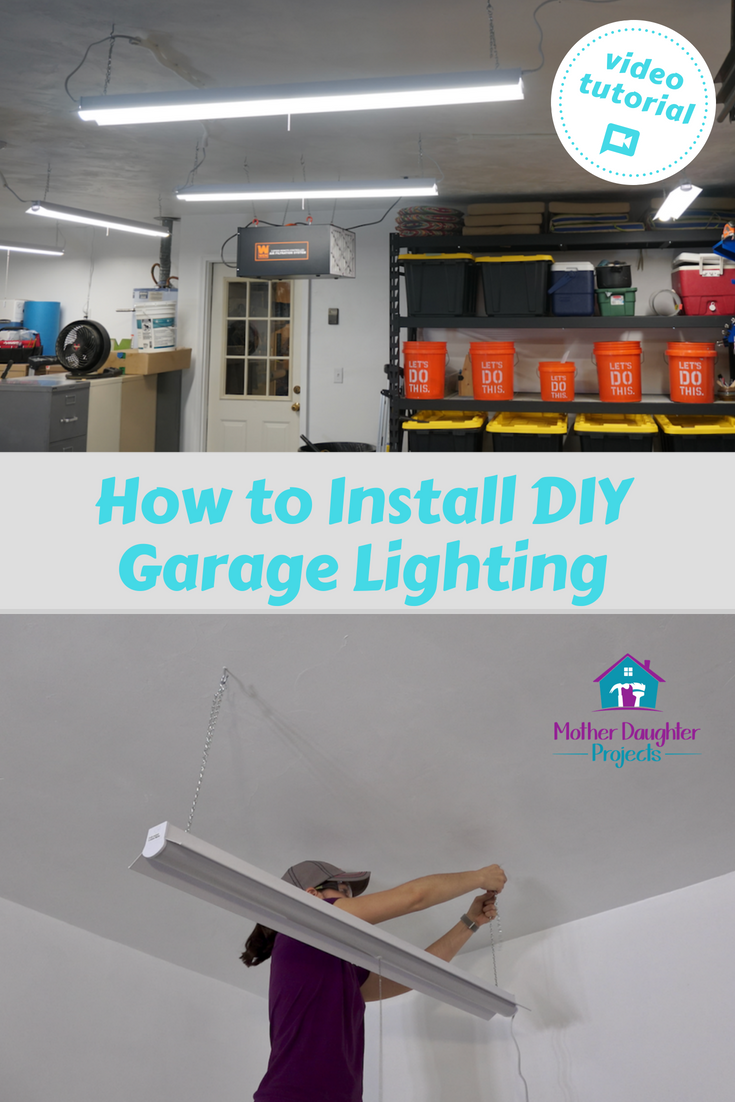
The most important thing I wanted in my garage makeover was good lighting! I've been in my house for 20 years now and the lighting in the garage has always been terrible. The two overhead lights didn't give complete light coverage so there were lots of dark corners. It was a chore to work in there.
Steph did a lot of research to determine what fixtures would be best to give wall to wall light coverage. She found these LED lights that only needed to be plugged in and not hard wired. Plus, up to 9 could be daisy chained together to work together.
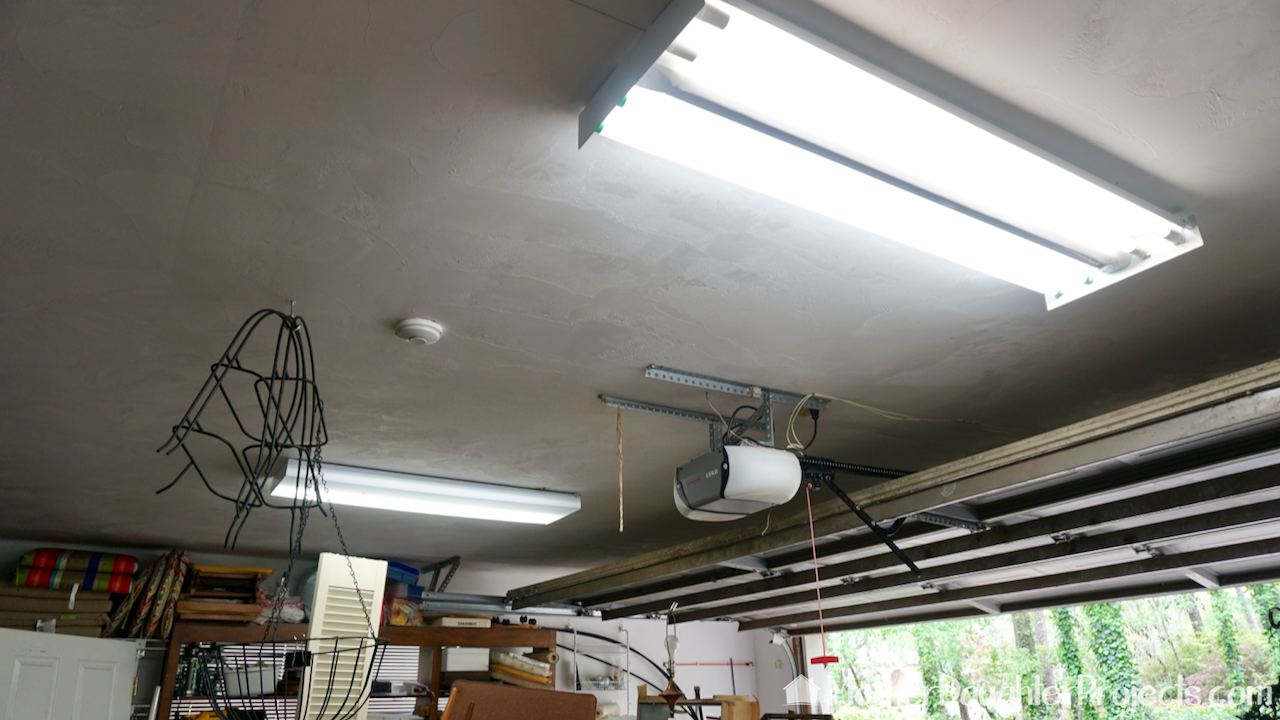
BEFORE: These florescent light fixtures provided the only light in the garage. Our plan was to take them down and replace the wiring with outlets.
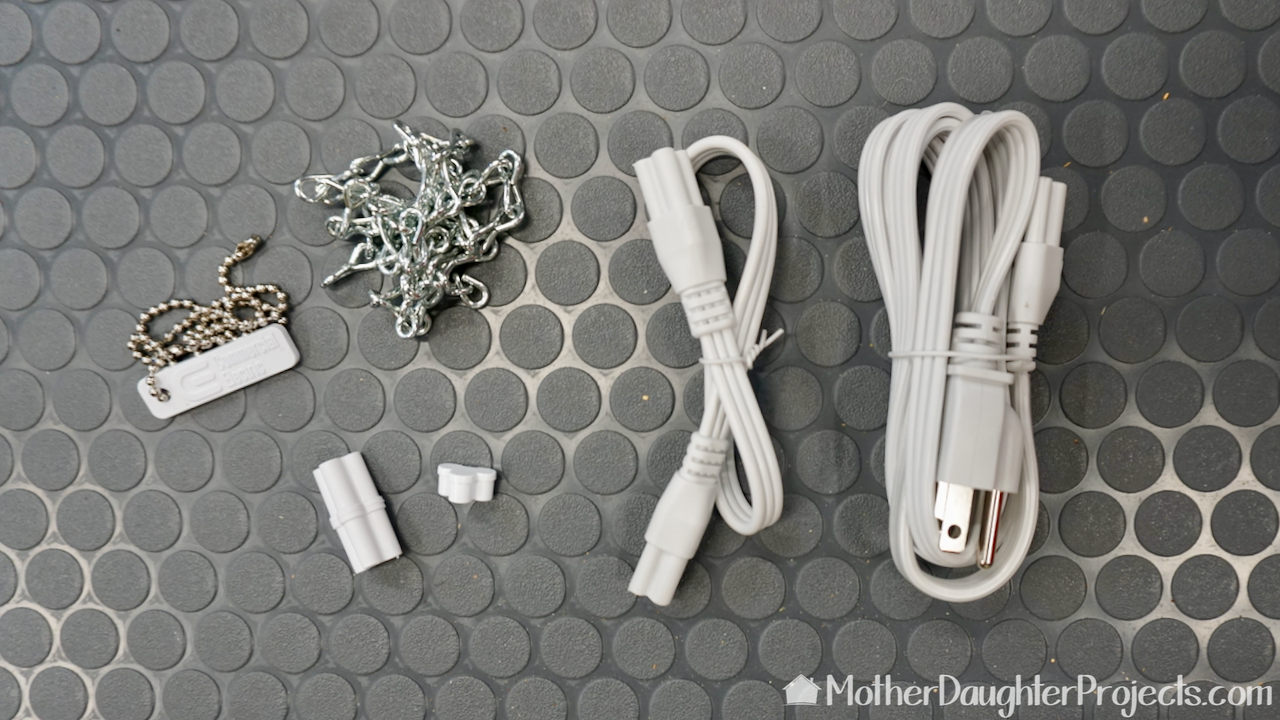
In the box with the new light fixtures was everything needed to make the lights work. We only needed to purchase hooks and anchors to hang them. The package included cables to connect the lights at different lengths apart, a pull chain, end caps, and a power cord. We needed to buy (3) additional 5' extension cables as our lights were located further apart.
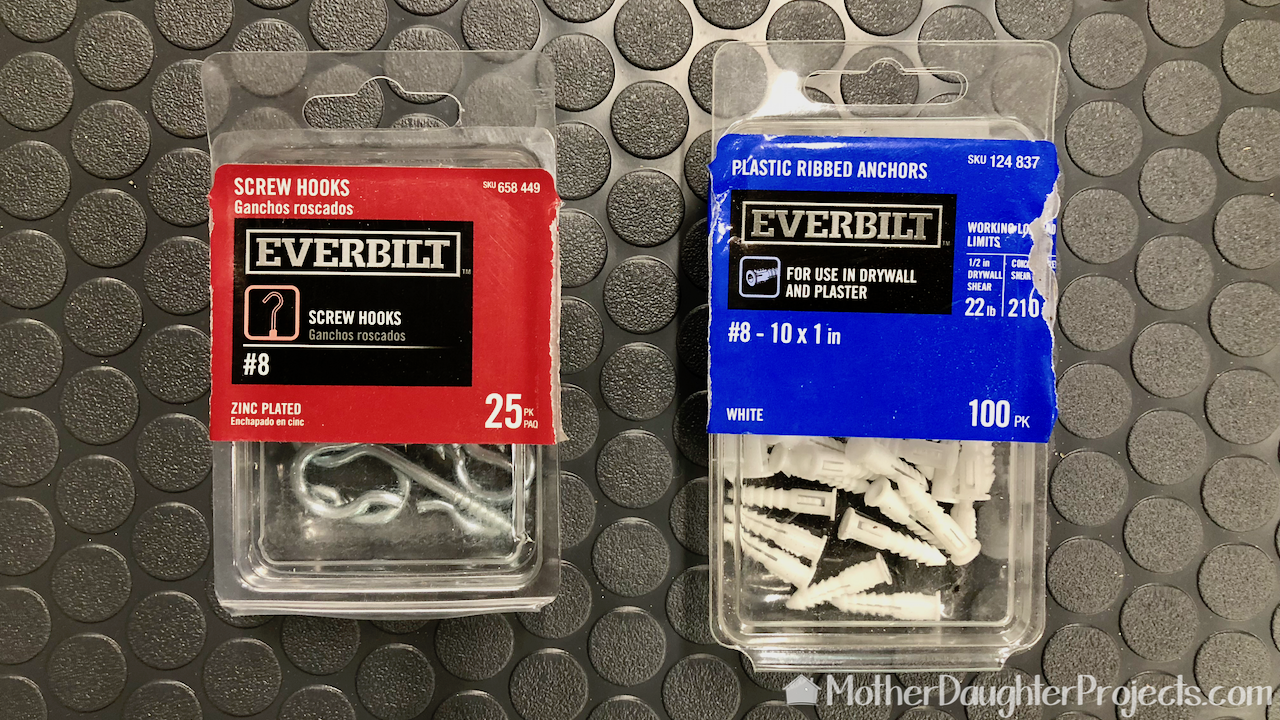
We used these screw hooks and these anchors. The anchors were used to install into the ceiling drywall.
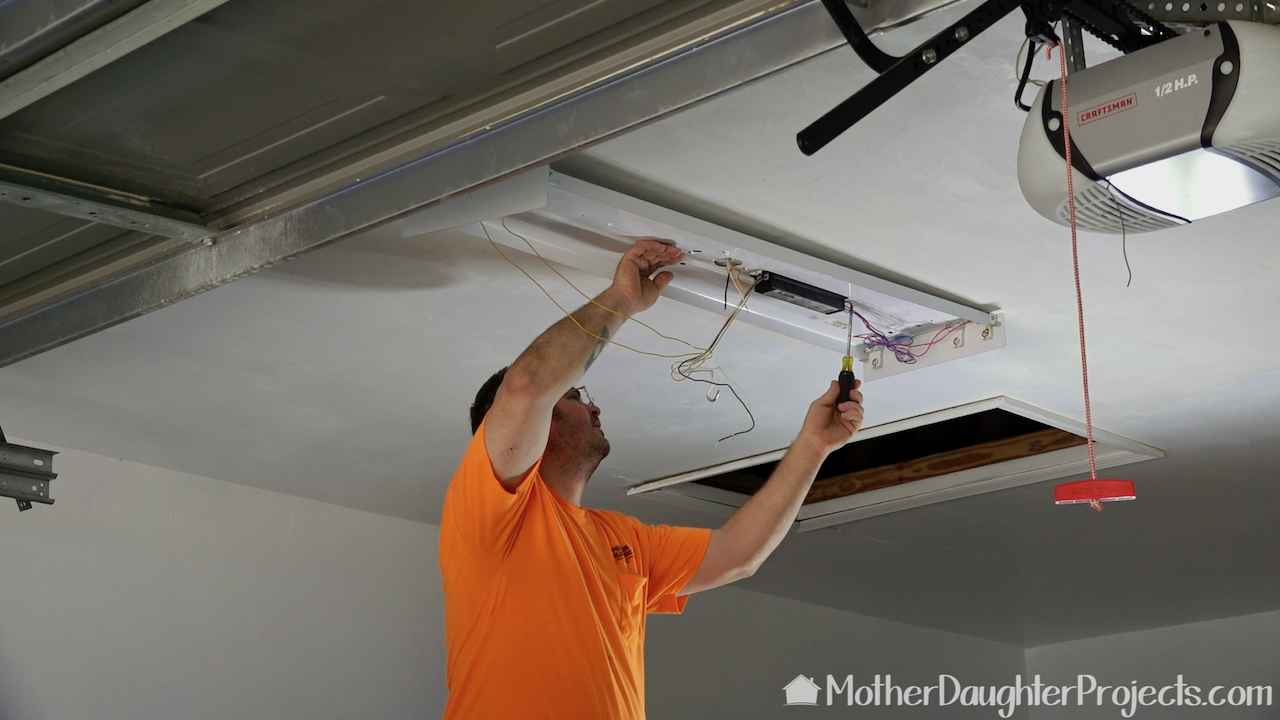
Before we could hang the lights we needed to do some electrical work. As we were evaluating our electrical needs we realized that we needed more projects done than we felt comfortable undertaking. We wisely called in a pro to handle the electrical needs. The two electricians were able to complete our list in about 2 hours including removing both of the light fixtures and wiring up the new outlets.
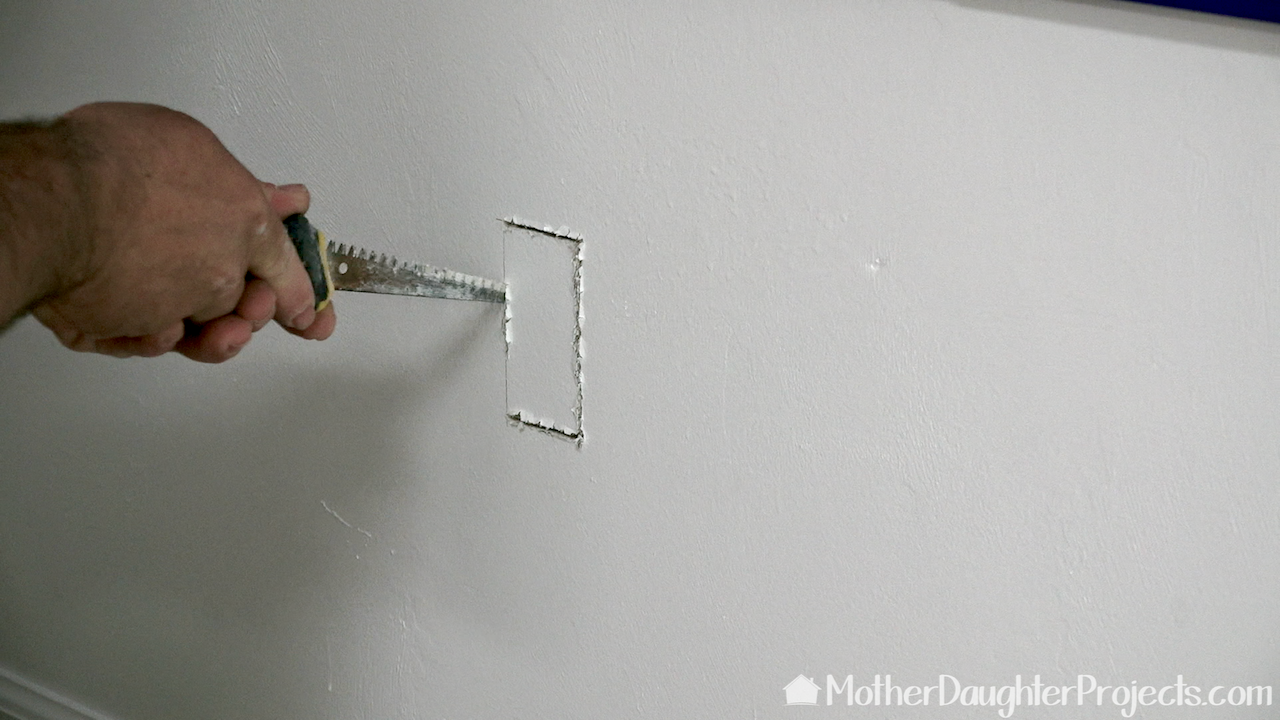
The electrician had amazing dry wall cutting skills! He was so precise. We had two holes cut to accommodate brand new lines and a third to move another outlet.
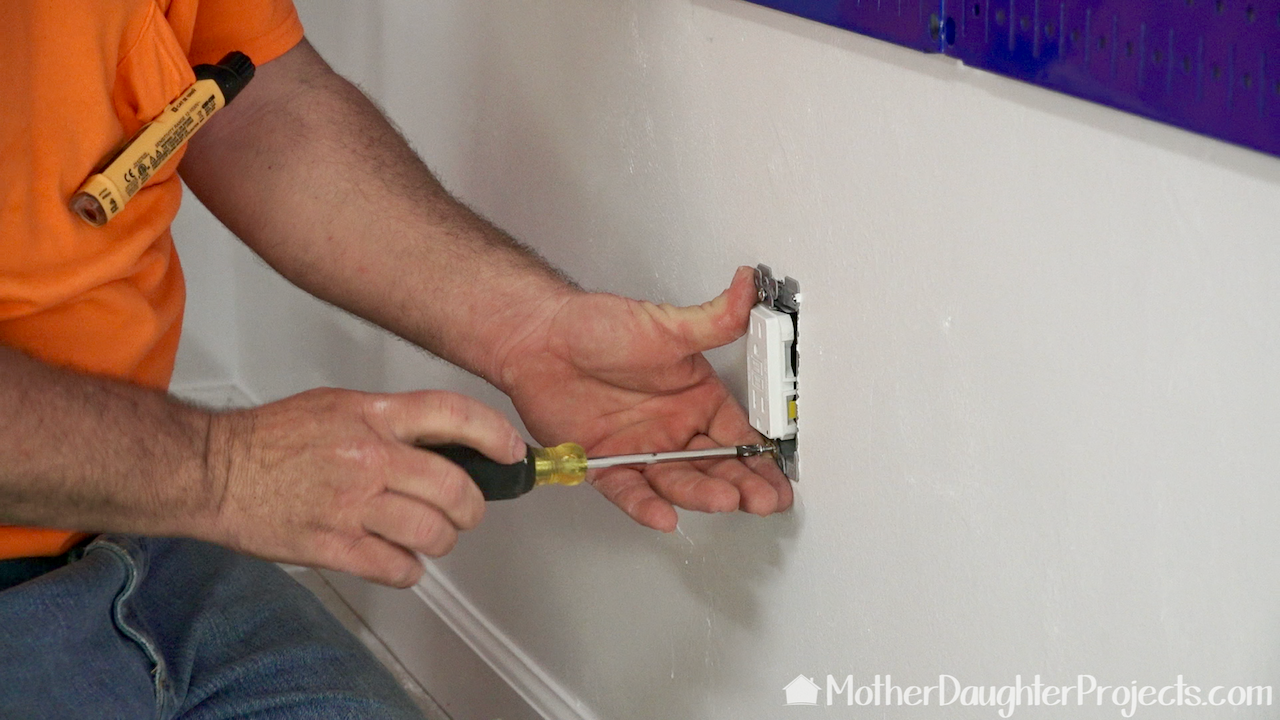
This is one of the brand new outlets. The electricians were not sure they were going to be able to drop a line here. They had trouble getting access to the top of the wall in the attic. I'm not sure what they did up there in the attic but they got it to work!
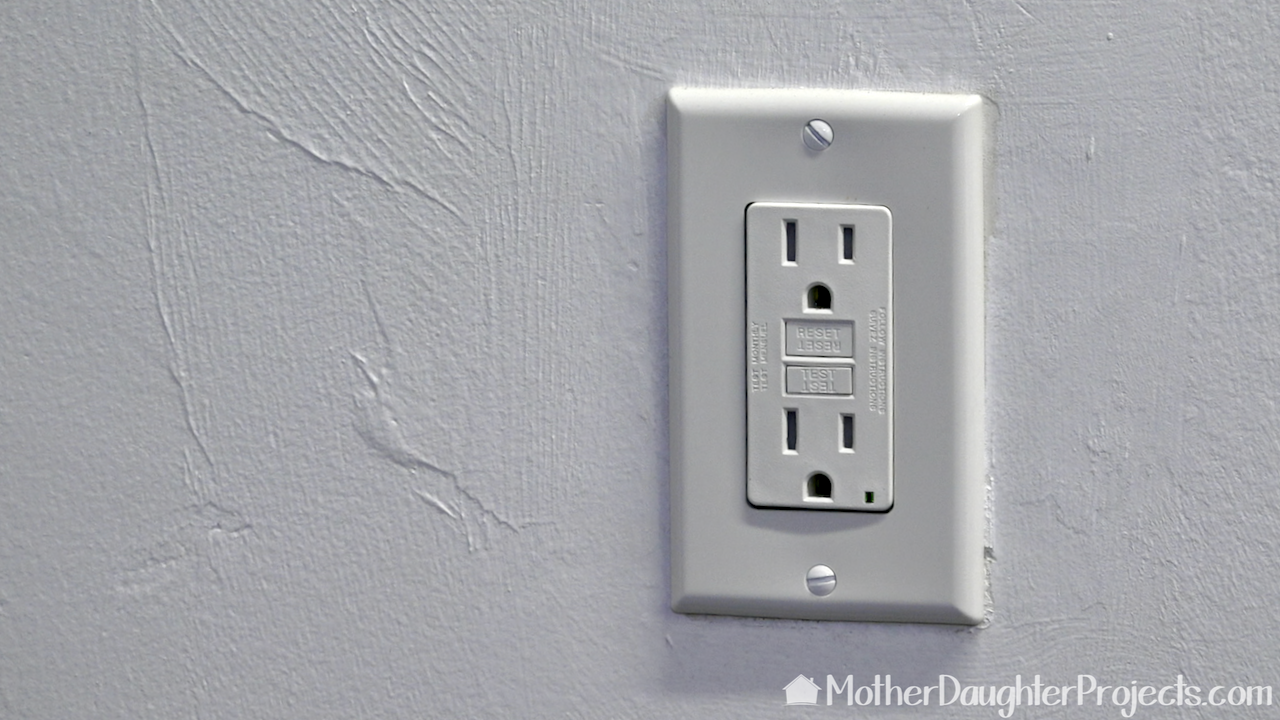
The electricians brought some of the older outlets up to code. This one was particularly troublesome as it was never wired correctly in the first place. They replaced it and fixed the bad wiring.
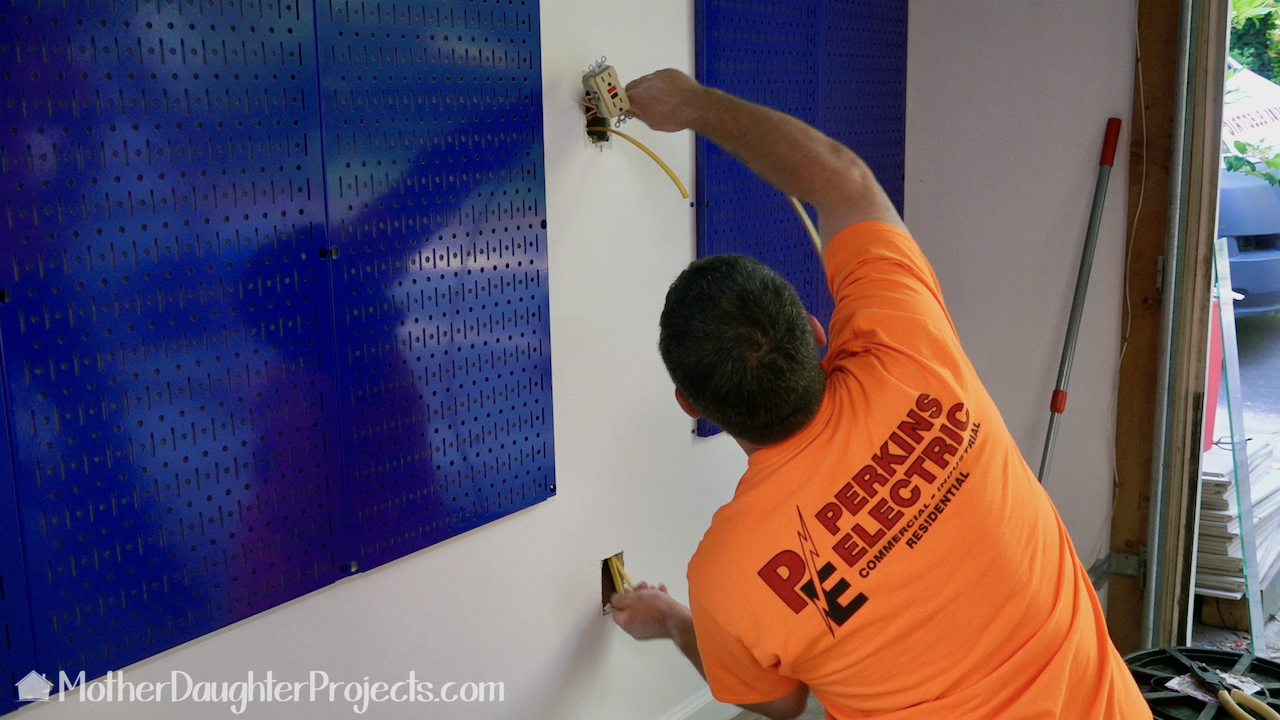
Looking at this makes me chuckle. When we were putting up the Wall Control pegboard, we realized that one of the panels was going to cover up the outlet. That is when we looked around and saw that there were only two usable outlets in the garage. We really needed an additional one on this wall. We started making a list of the electrical needs we had and that's when we called in the pros! Electrical work can be very dangerous if you don't know what you are doing. We knew our limitations and knew this was not a DIY project.

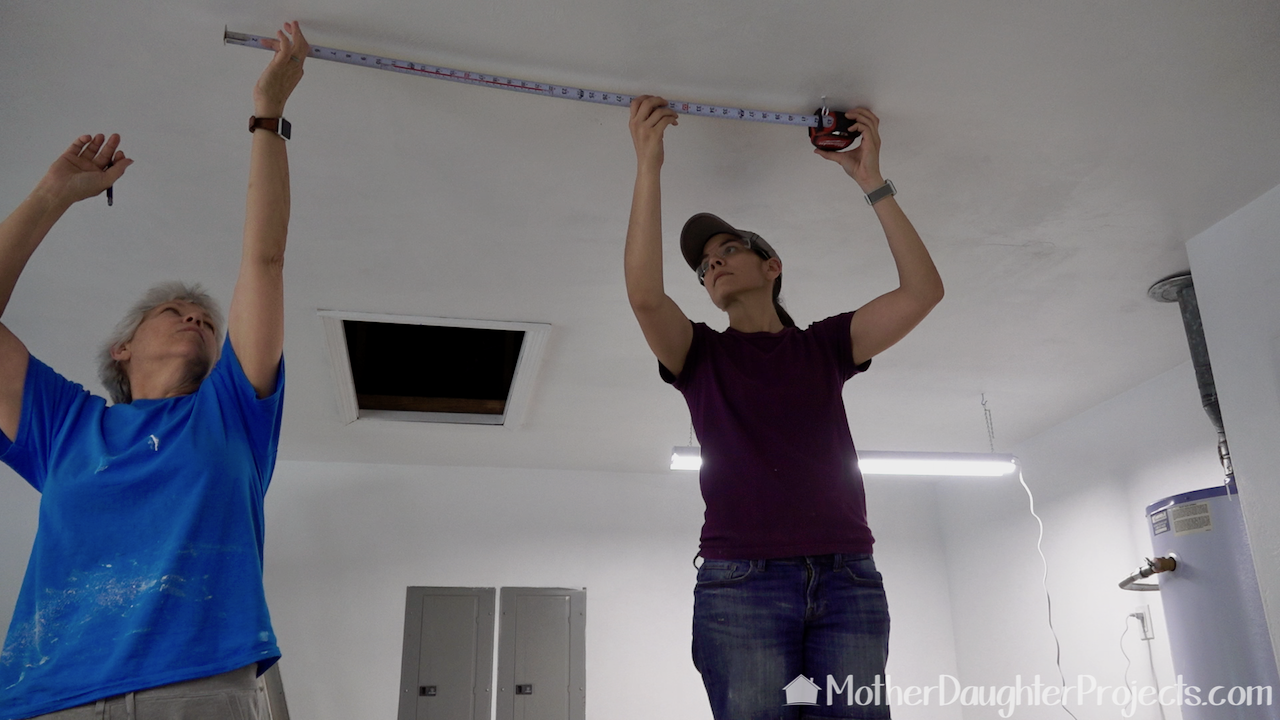
The electricians had all the work done in about two hours and were so kind to answer our questions and allow us to film them. It was money well spent to hire out this job! Now, onto the DIY part of our project. Steph laid painter's tape on the floor to determine the placement of the lights.
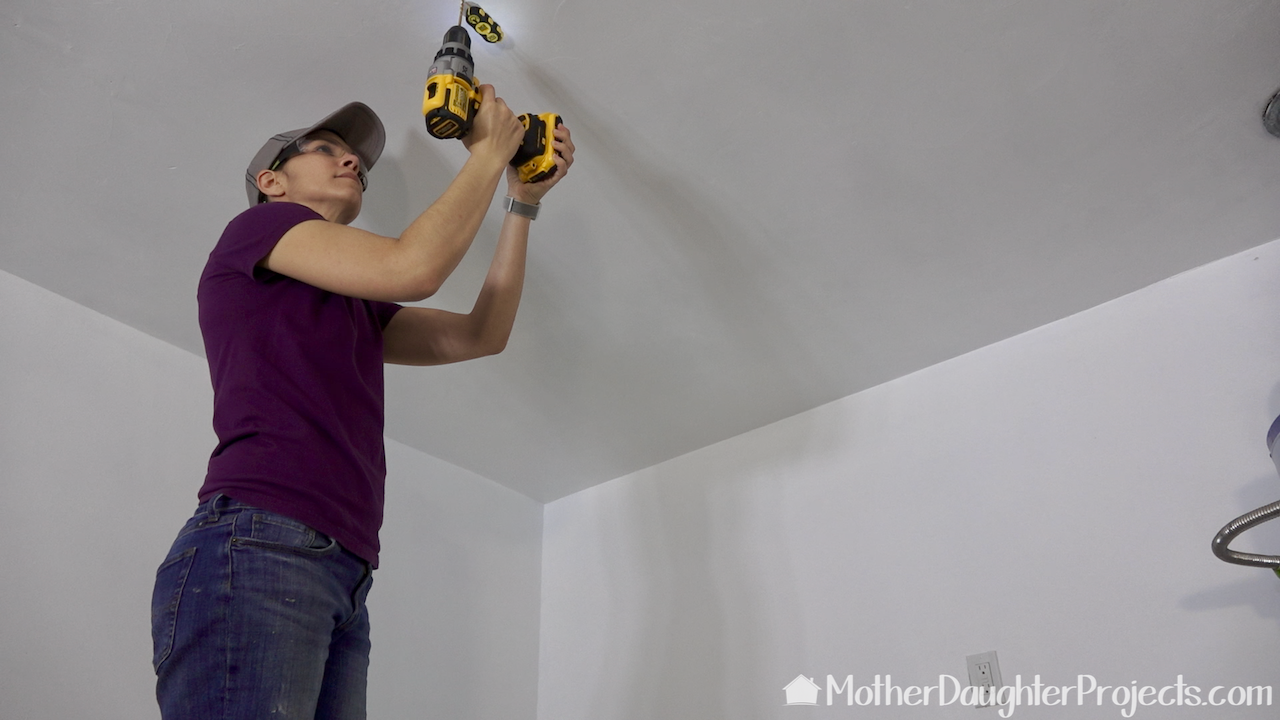
The lights were hung on screw hooks. Anchors were used if the hooks were not put into a stud. Steph drilled a hole, taped in an anchor and then screwed in the hook.
The screw hooks were placed about 42" apart.
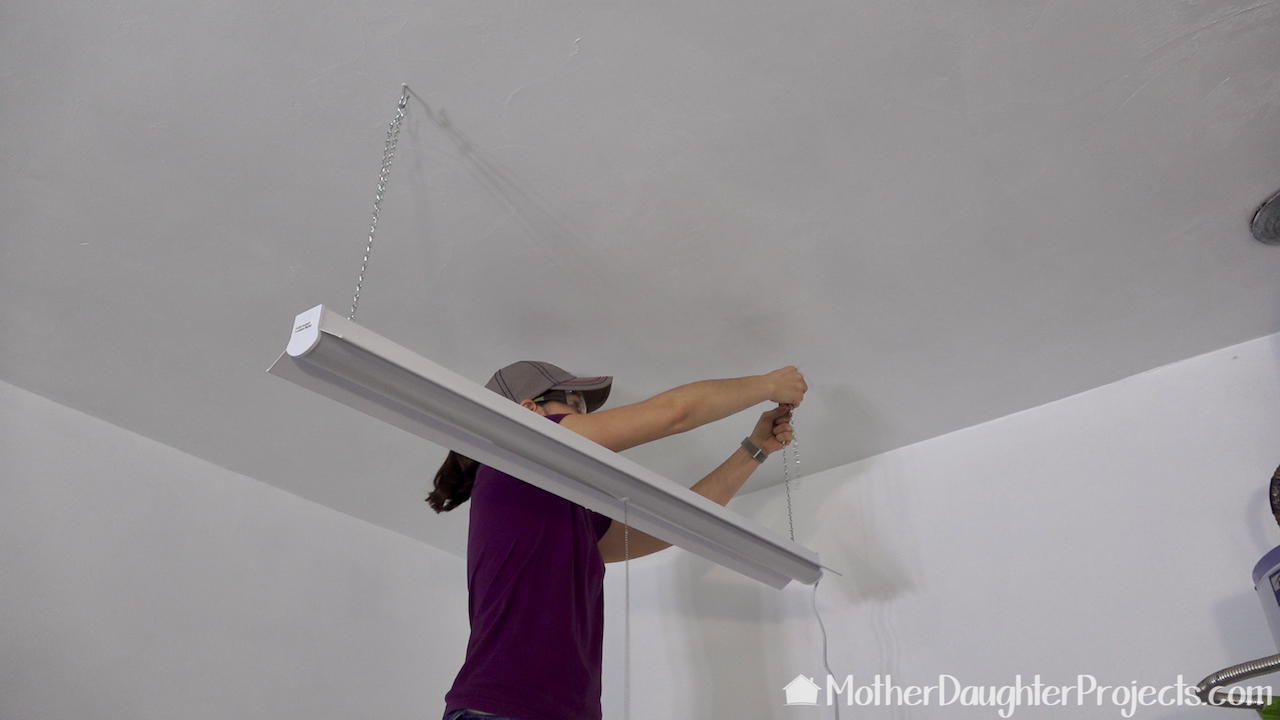
Once the screw hooks were in place, the lights were hung from "S" hooks and chain. It took a little finessing to get the height just right.
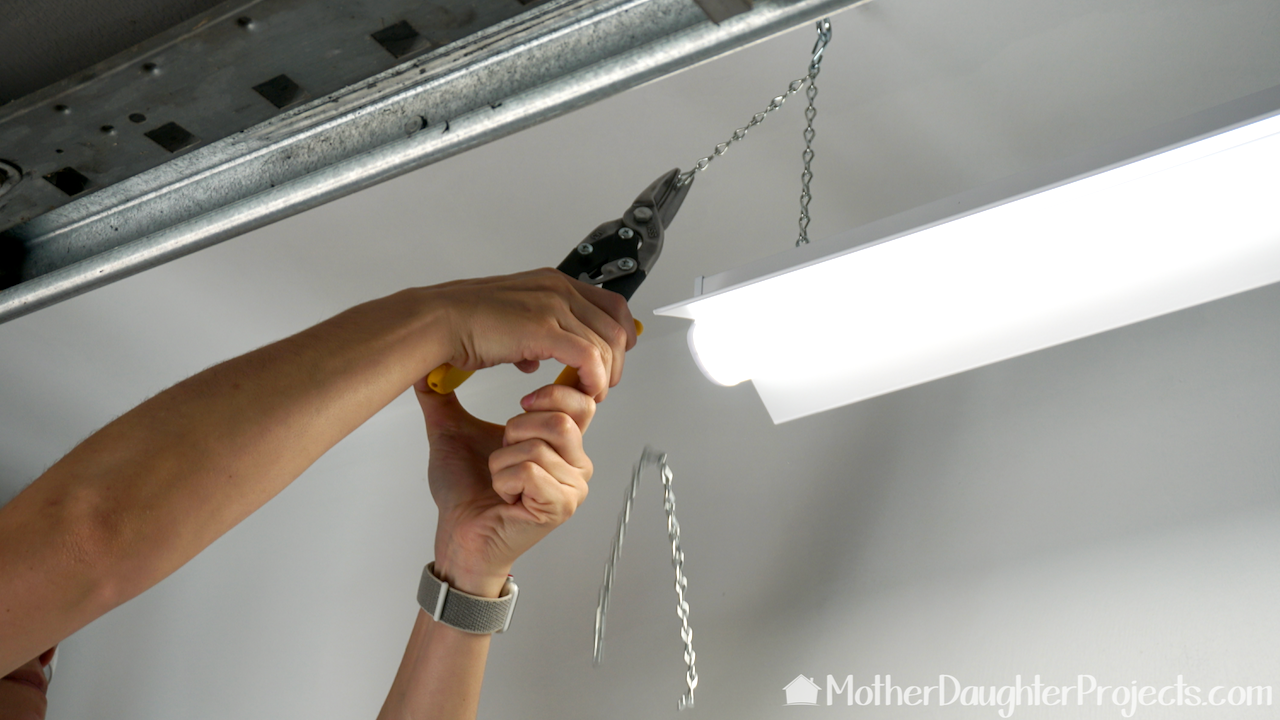
Once we got the lights hung at the proper height, Steph went around and cut off the excess chain. We used a pair of Wiss Straight-Cut Aviation snips. The comfort grip handles made of rubber make them easy to grip and use. We had a lot of chain to cut so we really put them to the test. I found them particularly helpful to cut through some tough plastic packaging!
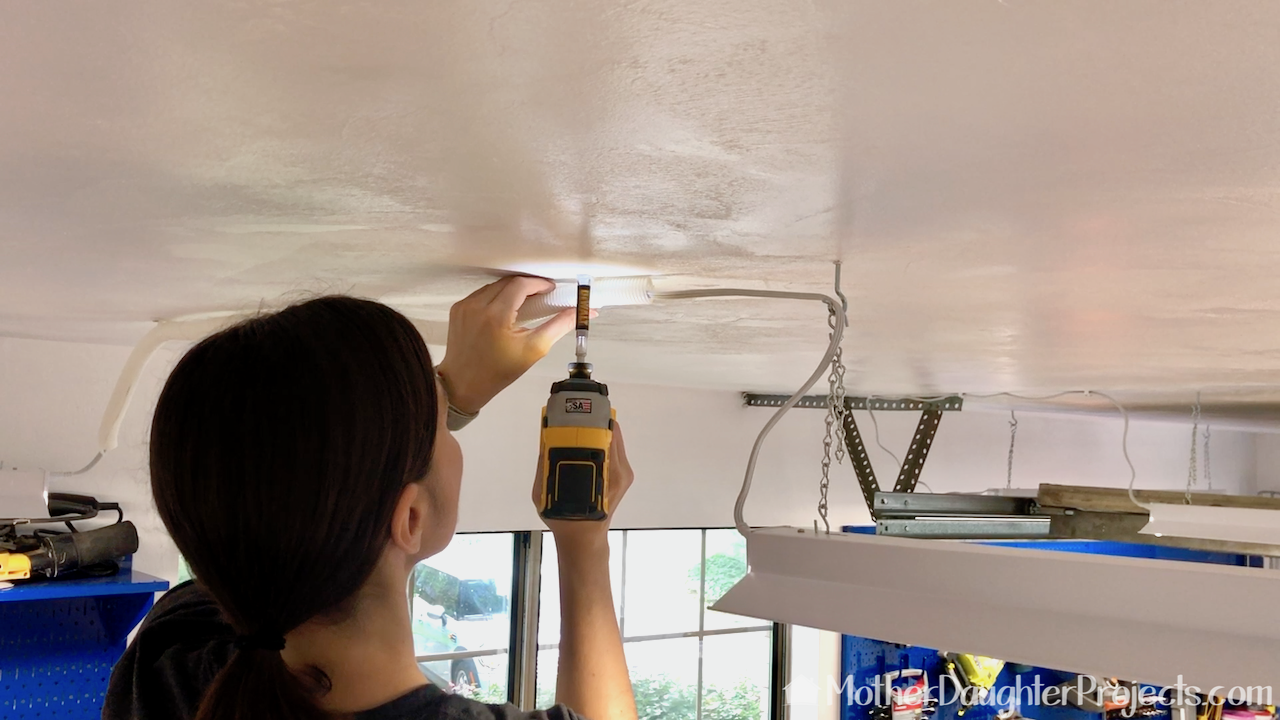
Lastly, Steph used plastic staples, cable clamps and some cord covering to neaten up the cords.
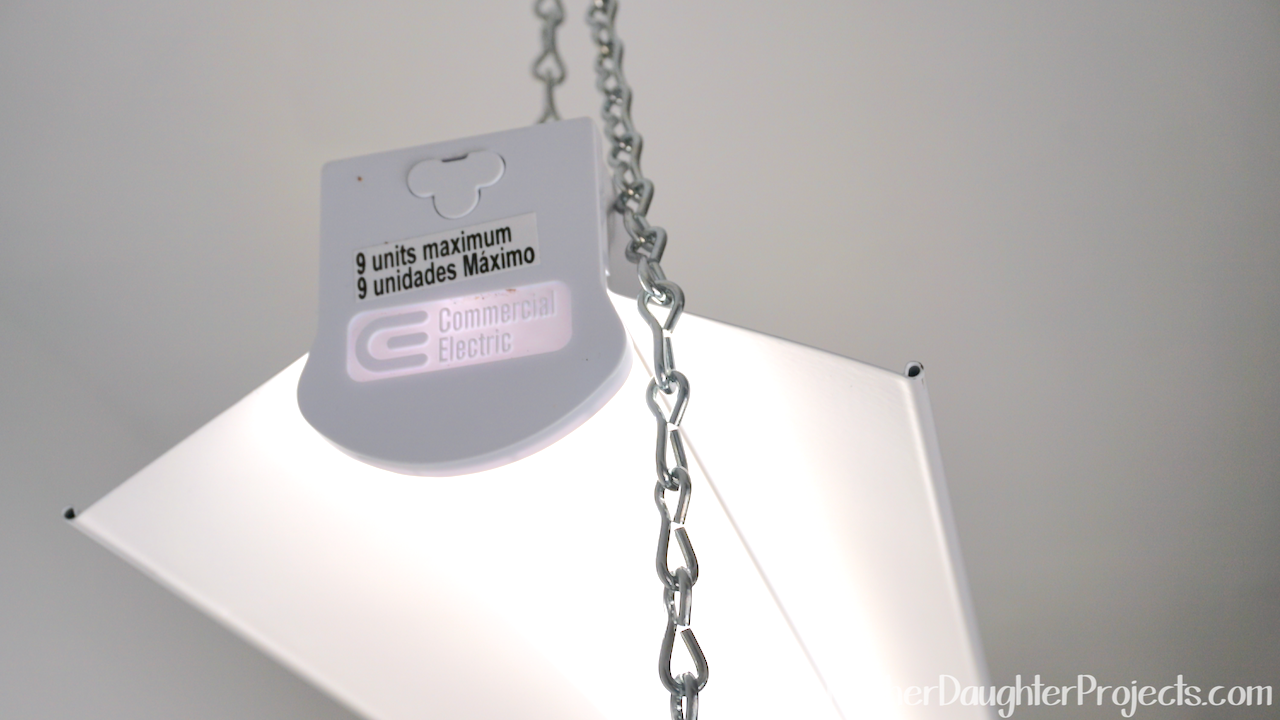
That little "hidden Mickey" looking thing is actually a plug cover. This is where the lights are connected to each other. There is a connection on each end of the light fixture.
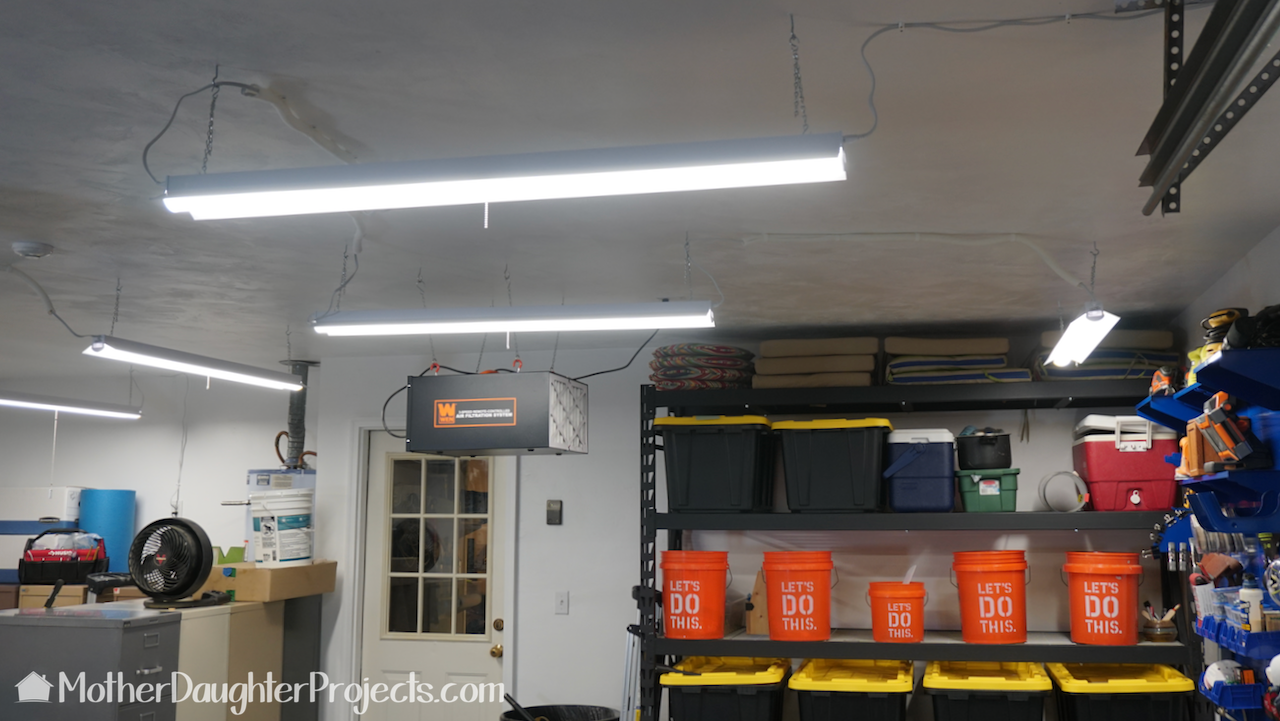
The light in here is amazing now! There is now wall to wall light coverage, just like I wanted--no more dark corners! Best of all, the lights are still controllable by the original switch. By the way, it didn't need it, but the electricians also changed out the original switch for a nice clean white one to match all the others. It's the little things!
We acknowledge that The Home Depot is partnering with us to participate in the ProSpective 2018 Campaign. As a part of the Program, we are receiving compensation in the form of products and services, for the purpose of promoting The Home Depot. All expressed opinions and experiences are our own words. Our post complies with the Word Of Mouth Marketing Association (WOMMA) Ethics Code and applicable Federal Trade Commission guidelines.
FYI: We are not professionals, and we don’t claim to be. This is what we found worked for our project. Yours may need a little different approach. Safety first! FYI: Affiliate links are being used on this page. Purchasing via these links help support MDP! Related Projects
0 Comments
Leave a Reply. |

Mother Daughter Projects
|