|
text by Vicki Sign up here to join our weekly email newsletter!

Rarely do I see a pin on Pinterest that makes me go, "wait, I want that!"
The pin below stopped me mid-scroll! I saved the pin and pondered how I could do a similar design in my small primary walk-in closet. Well, one thing led to another and I figured out how I could make it work using primarily what I already had on hand. 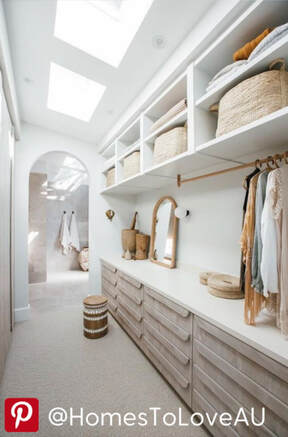
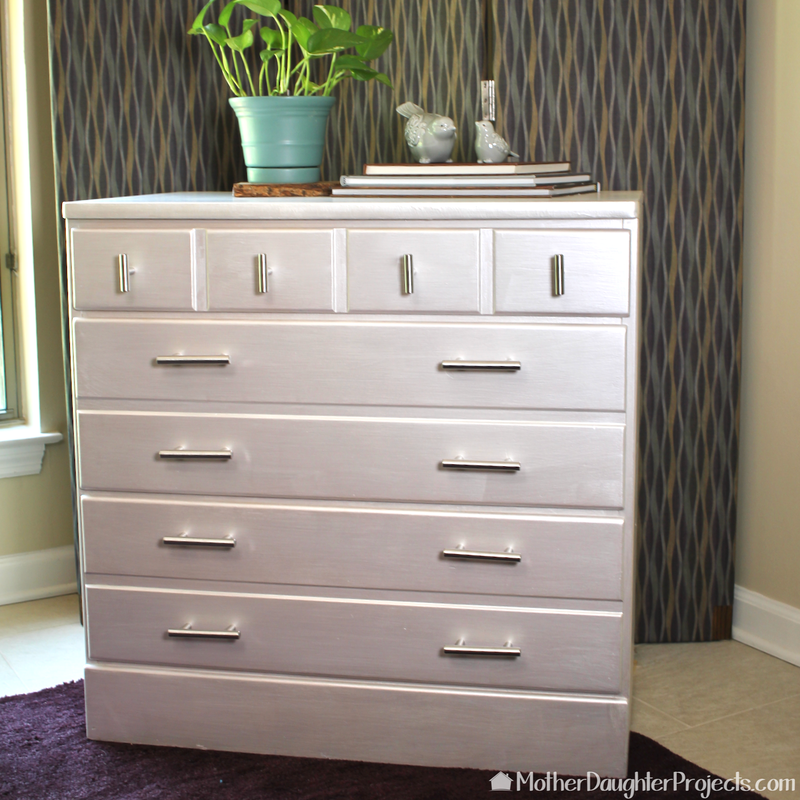
When I realized the three old Ethan Allen seventies cabinets I already had would work as the base for the countertop, the design came together quickly.
I had several goals in mind as this closet was gutted and put back together:
Materials/Tools:
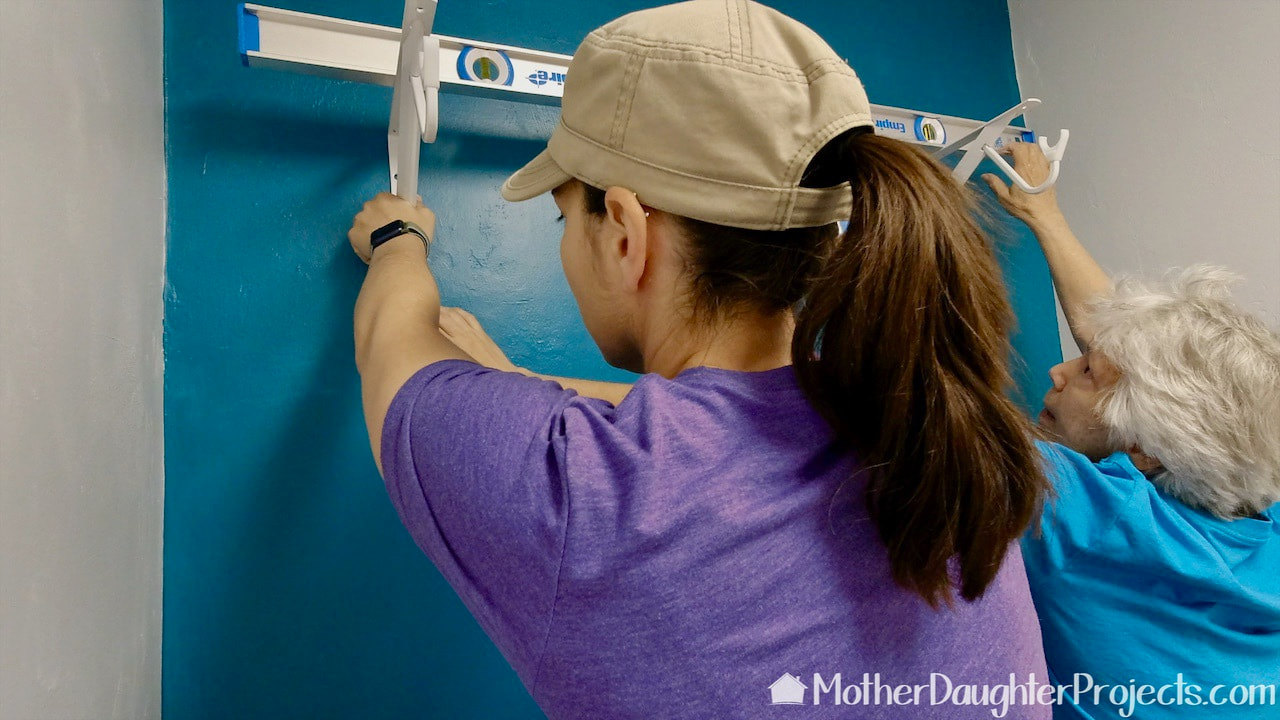
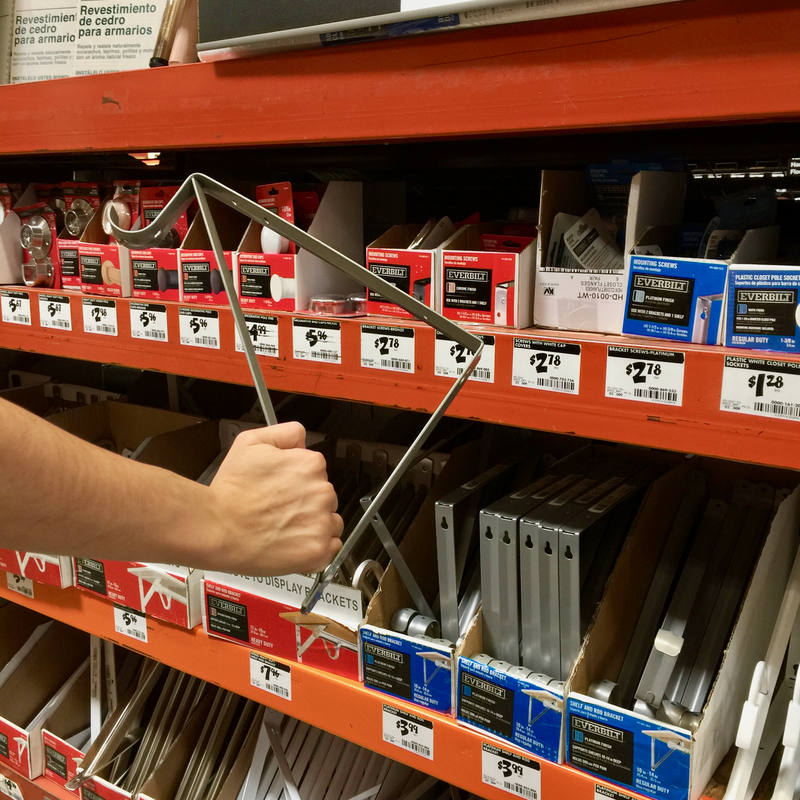
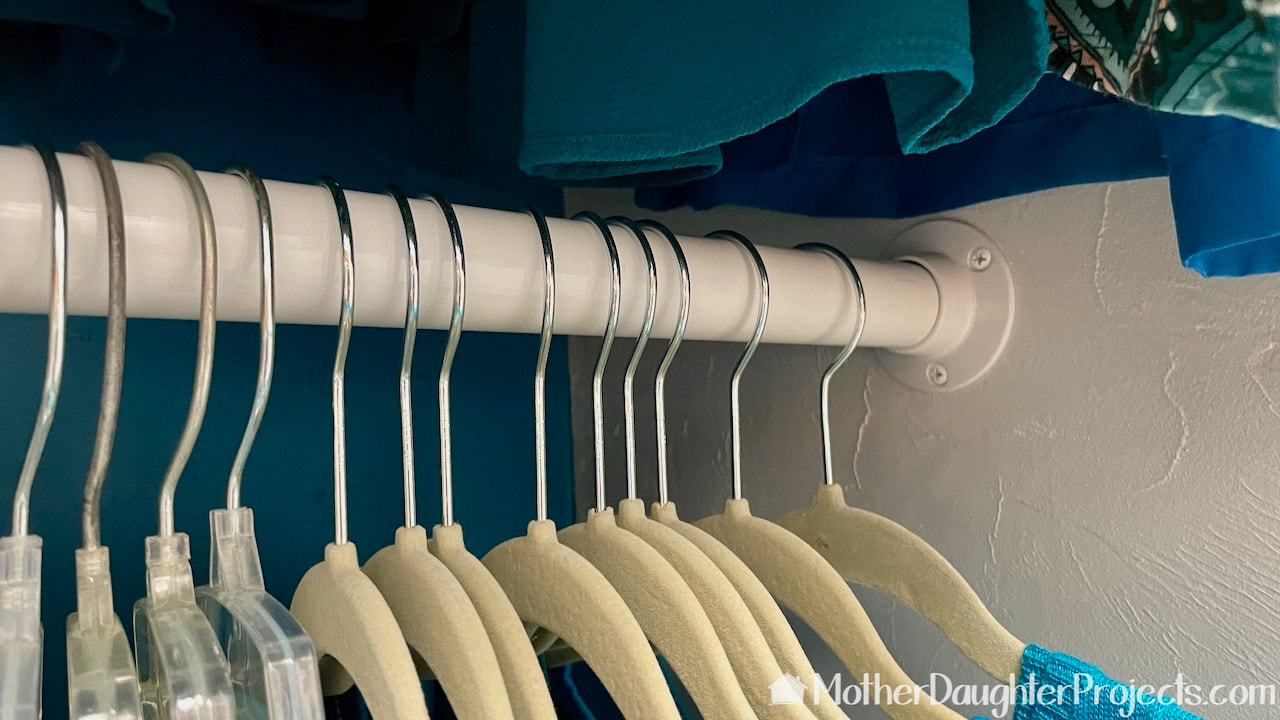
Once everything was removed from the closet and all the wire shelving was out and the wall spackled and painted, it was time to install the new hanging clothing rods. We installed two closet rod brackets for the rod which will also hold a shelf. The new clothing hanging space is installed in one end of the closet. The opposite end will be wall hung shoe storage.

Initially, we had two full length rods here, but after using the space for a while, I decided I wanted to bring my longer clothes back into the closet. We cut the the lower rod and added a bracket to create space for longer clothes. Bonus, the one suitcase I keep in here, fits under those longer clothes quite nicely.
This is the other end of the lower bracket. We used one part of a closet pole bracket to secure it to the wall.
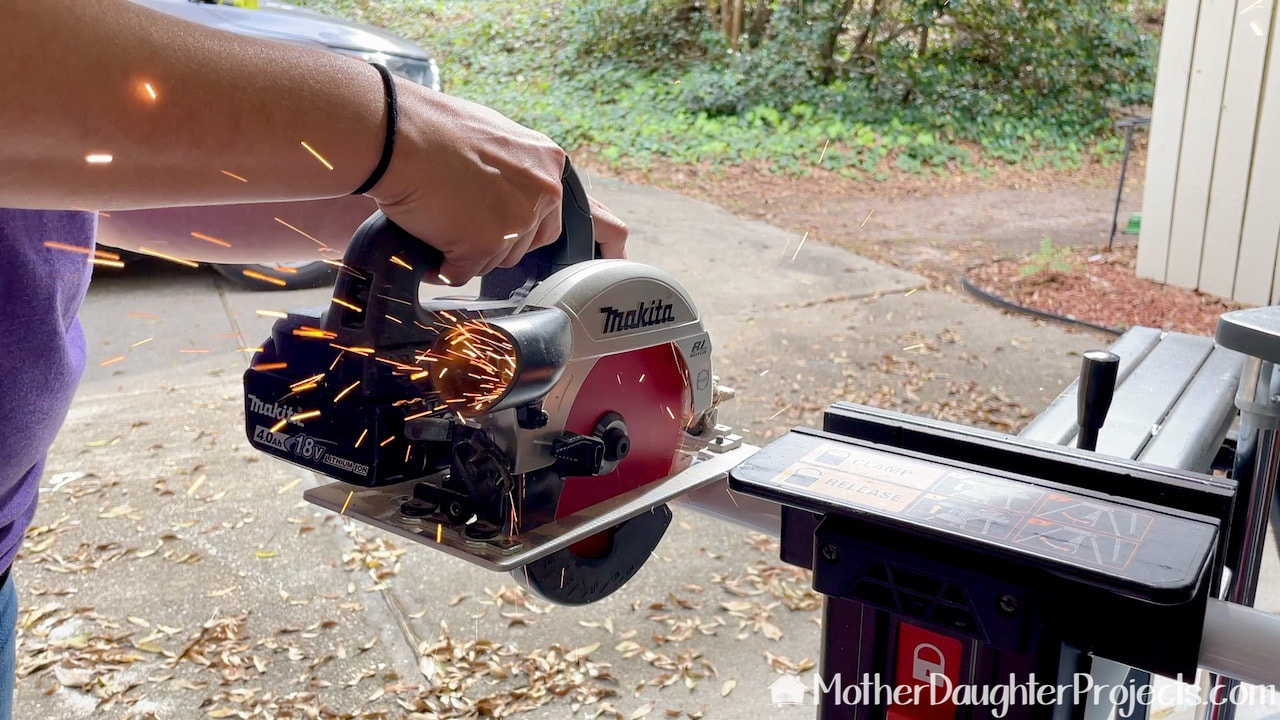
Both of the closet rods needed a bit of trimming to fit the space. They cut easily with a circular saw fitted with a metal cutting blade.
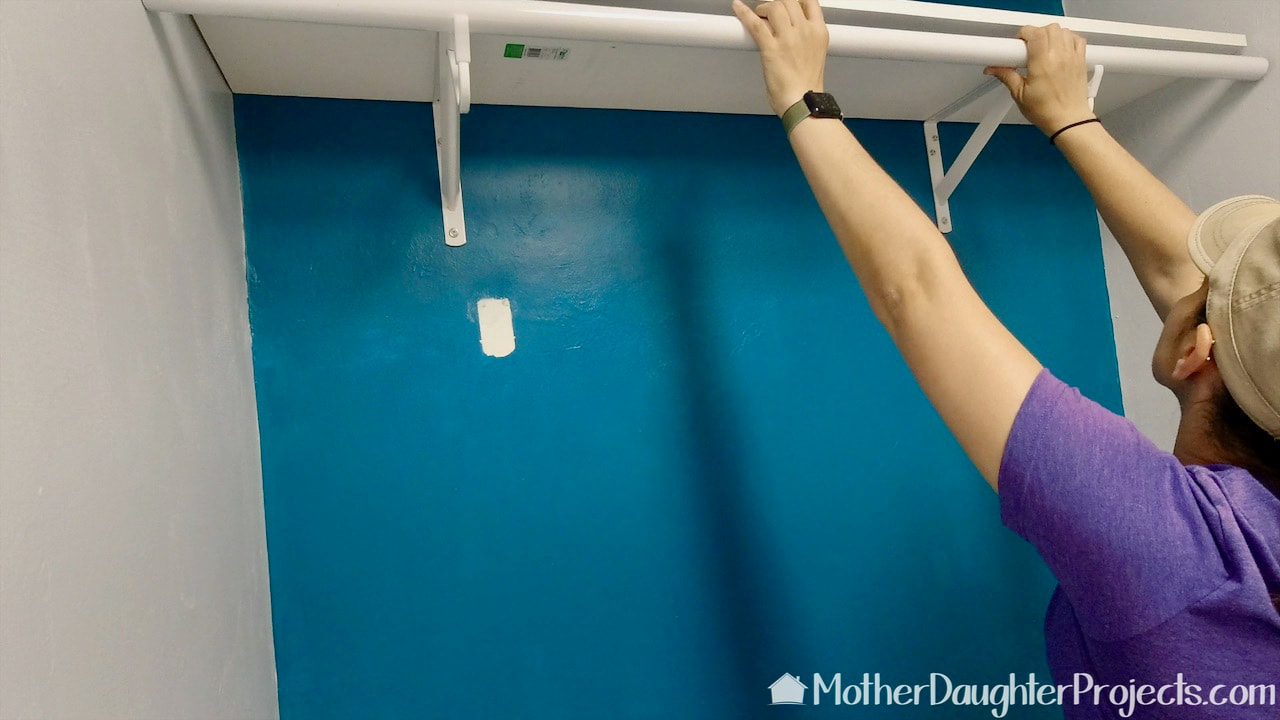
Once the rod was cut, it proved to be a perfect fit! Note, there are caps you can buy to finish the cut ends. We added a simple shelf on top. The wall was the original color, but did get touched up. It's Behr Paint in "The Real Teal" color. I've used it in several project as I really like it. Many years ago, I saw a picture of a credenza painted in this color on the front cover of HGTV magazine. I immediately went to Home Depot, picked up a gallon, and painted my dining room credenza in "real teal!"
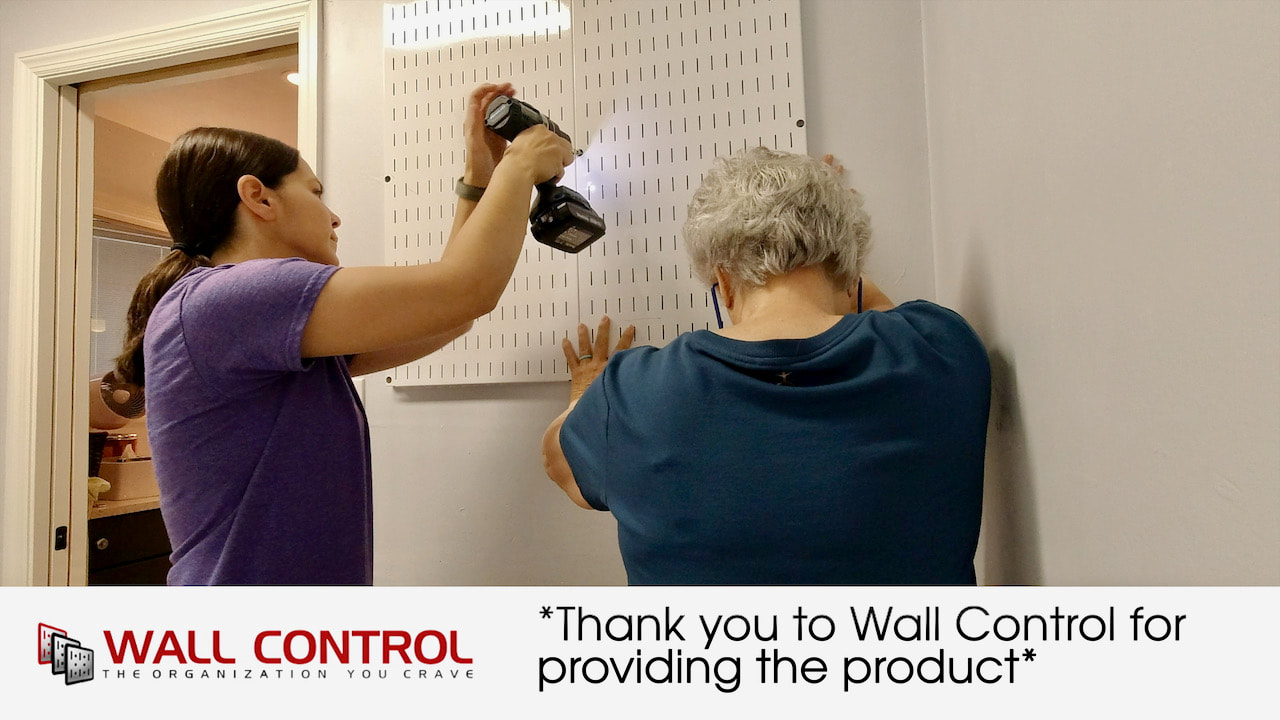
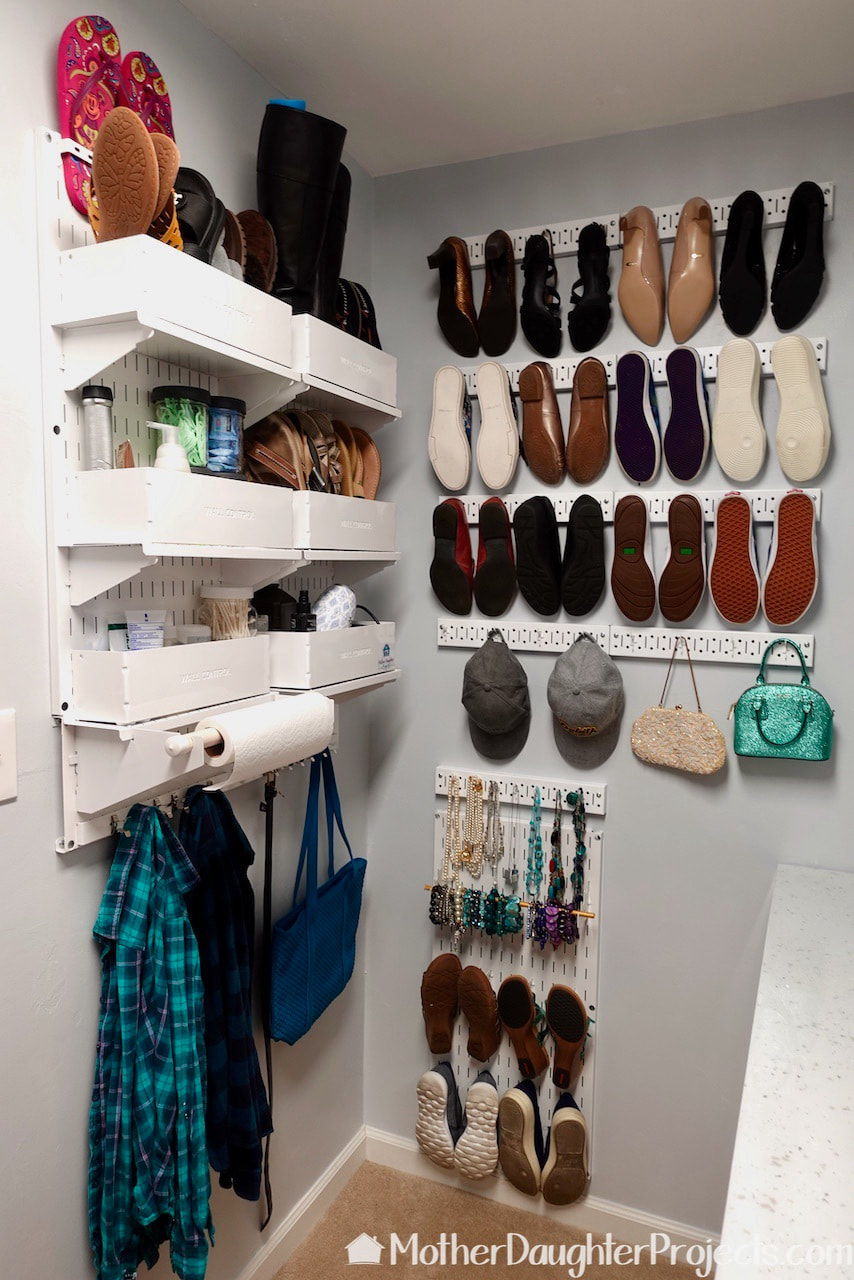
Using Wall Control panels and accessories gave me the storage space I wanted. Because it is wall hung, there's a lot of usable storage without taking up valuable floor space.
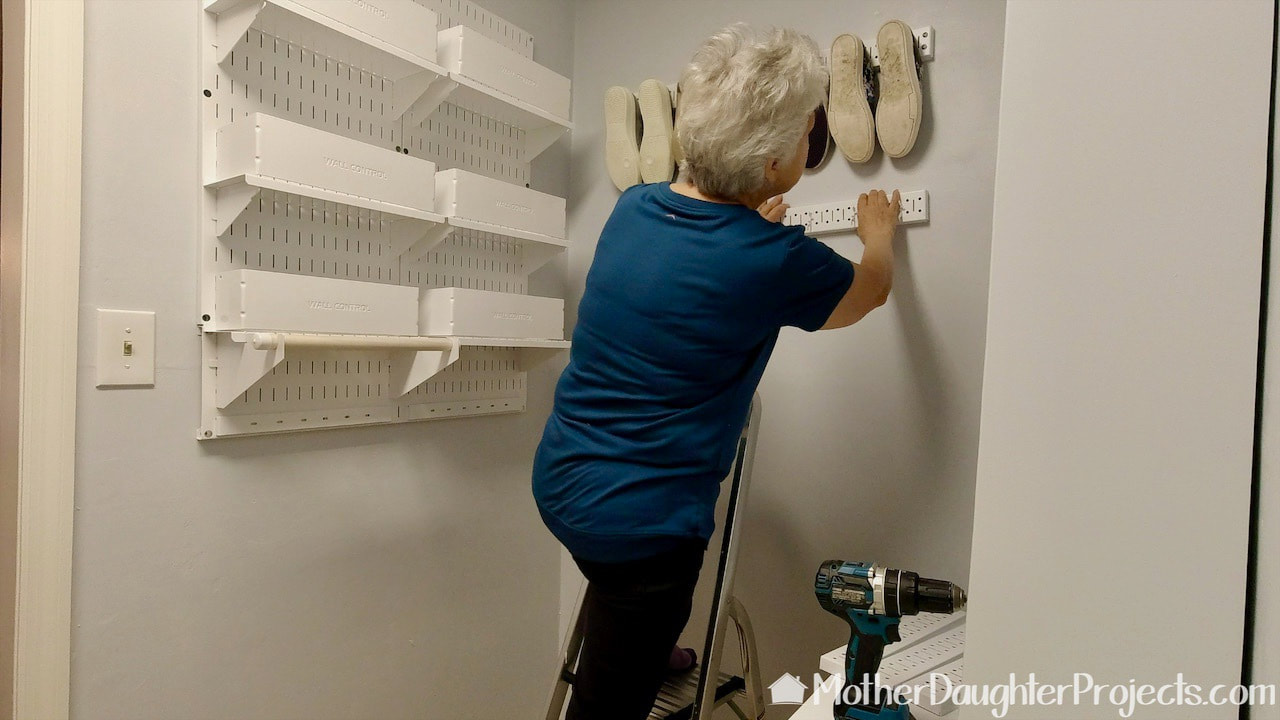
Using nine of these Wall Control strips gives me space for 18 pairs of shoes in a little space. The strips come in glalvanized grey, but I wanted white, so I simply painted them! Since these are not going to get a lot of rough use, chipping of the paint should not be a problem.
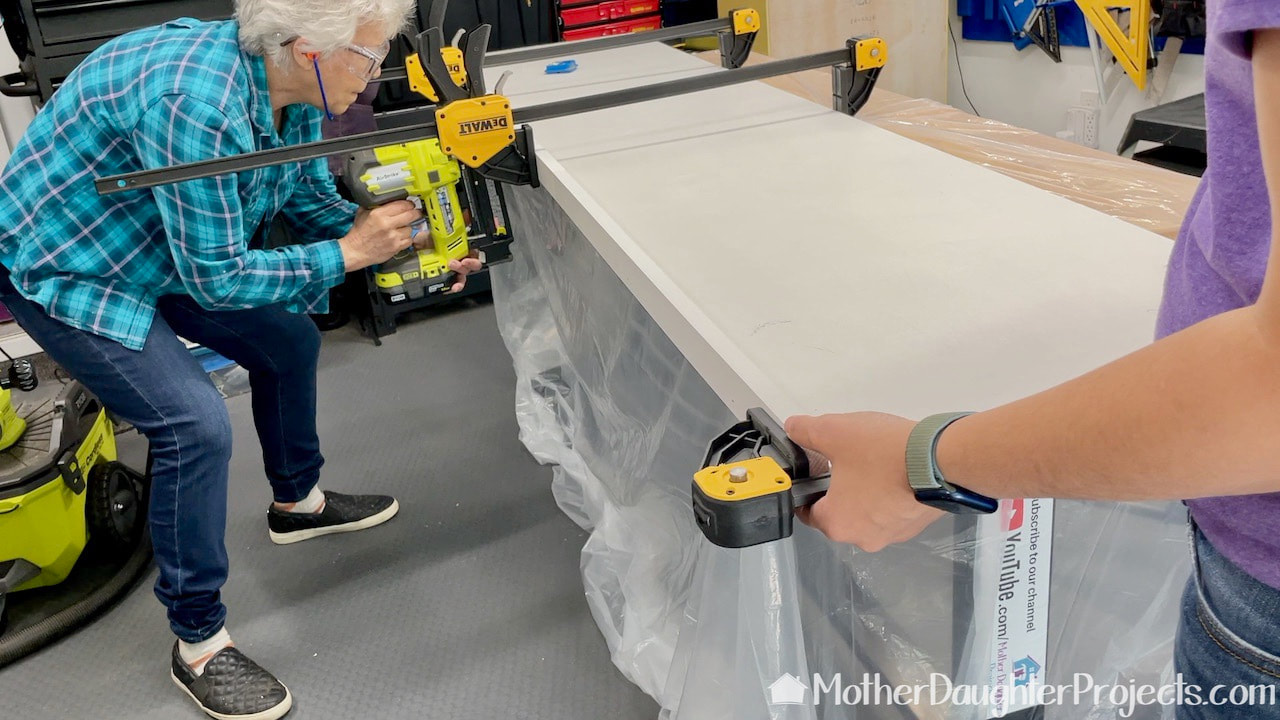
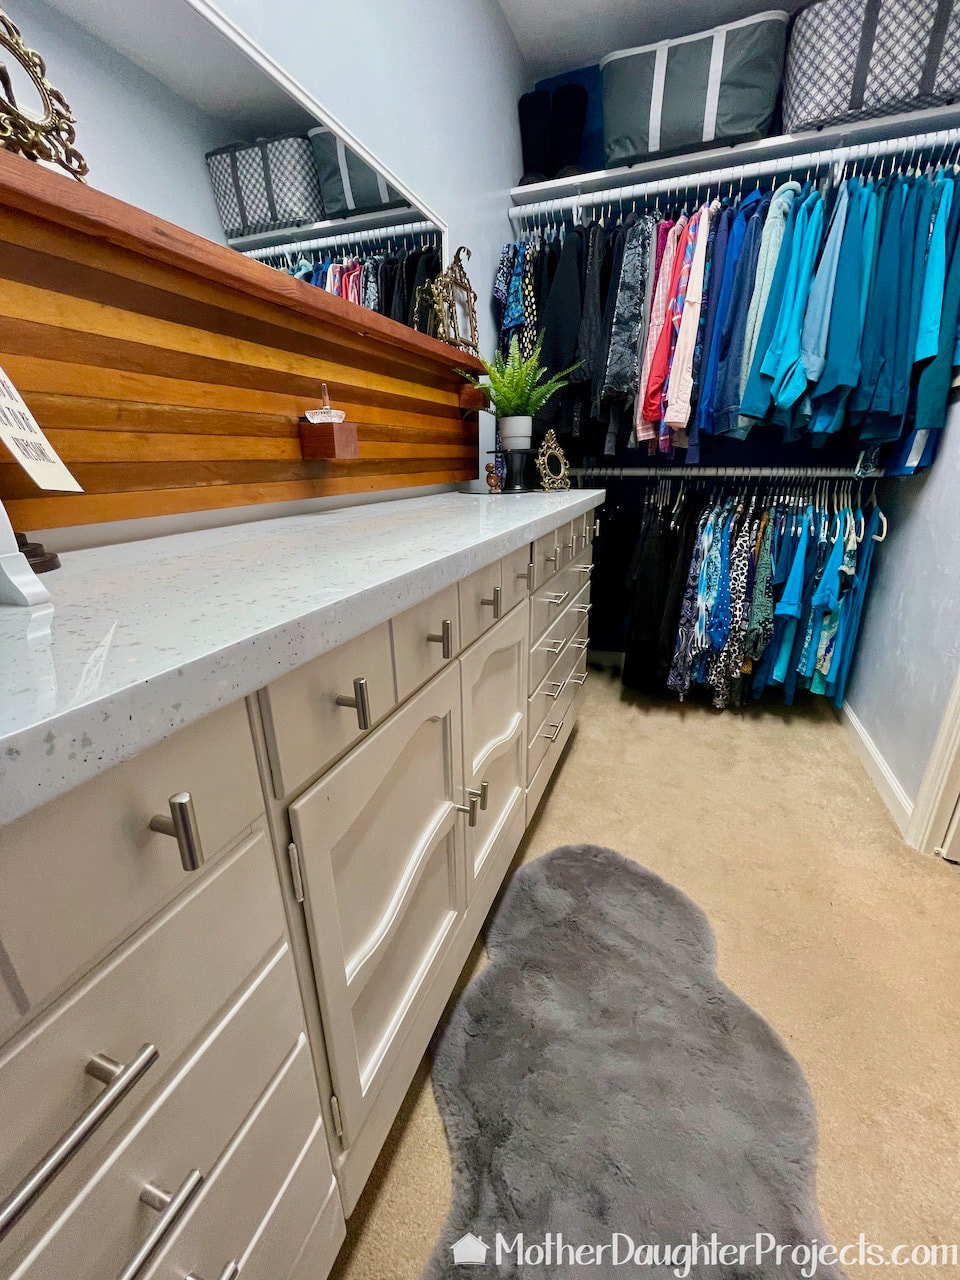
With the three cabinets in place in the closet, it was time to make the countertop. We cut 3/4 inch plywood to size and added a 1 1/2" board to create an overhang on the front. The top was primed and then painted with the closet wall color.
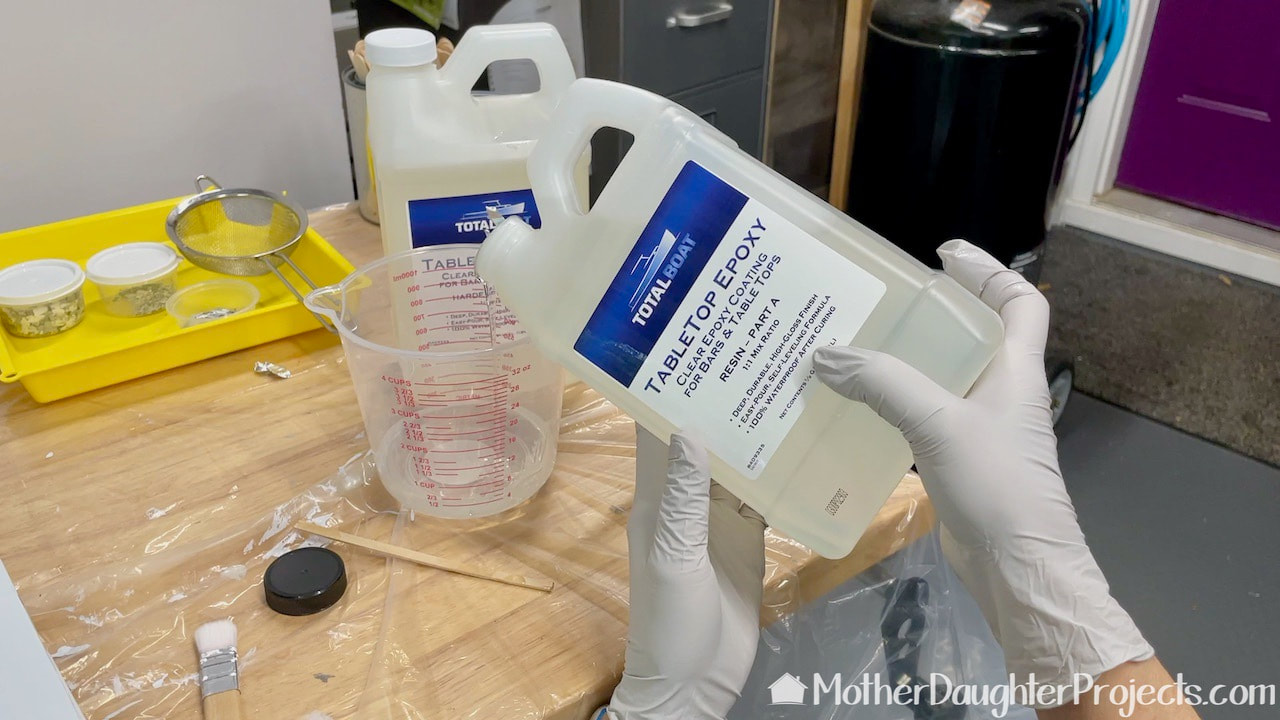
Our regular supply of epoxy had run out so we decided to buy and try Total Boat Tabletop Epoxy. It has a one to one mixing ratio making it super easy to measure and mix.
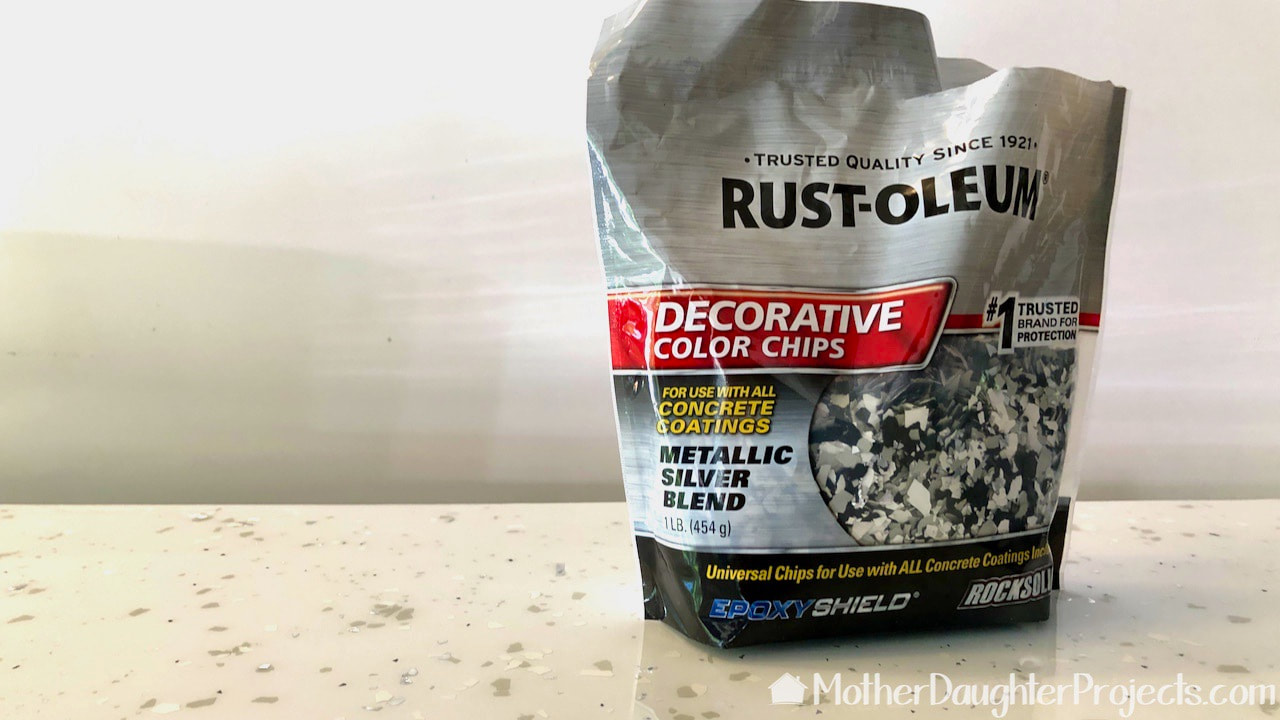
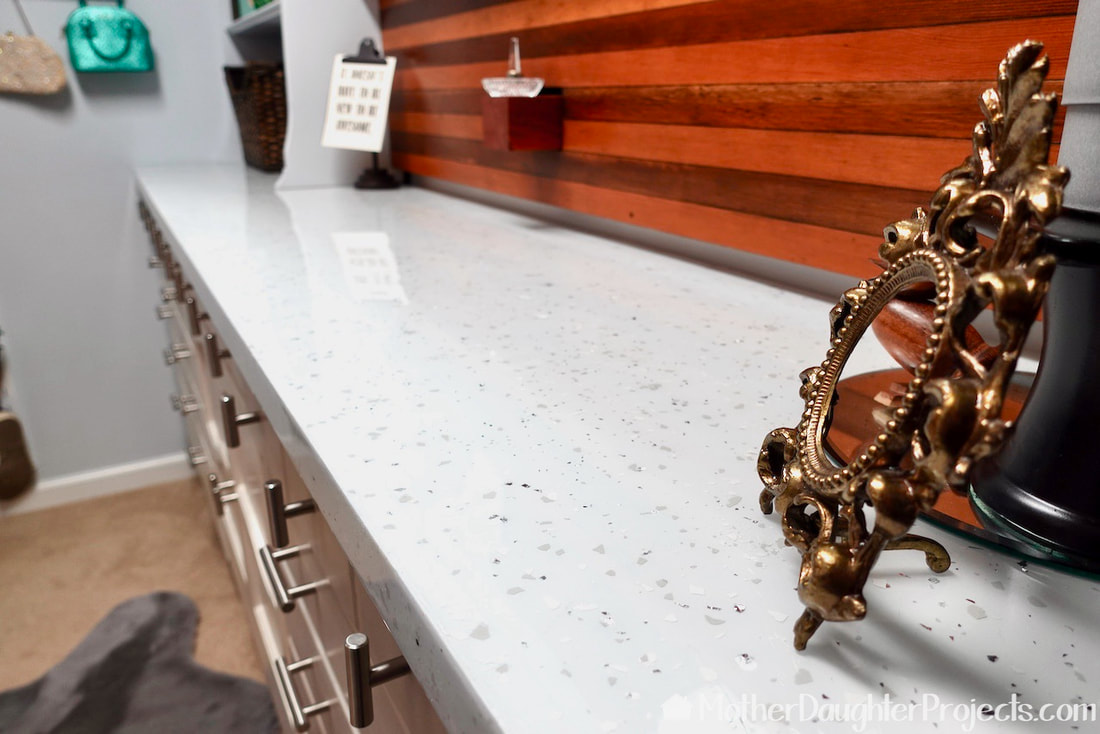
I wanted the closet countertop which can be seen from the bathroom to mimic the look of the Cambria quartz bathroom countertop. I thought these color chips from Rust-Oleum would give me the look I wanted. But, first, I sorted out all the black chips as I only wanted the mix of grey, white, and metal silver. I was unable or unwilling to remove the tiniest specks of black so you'll see those in the countertop. I like them as it give a little more depth to the look.
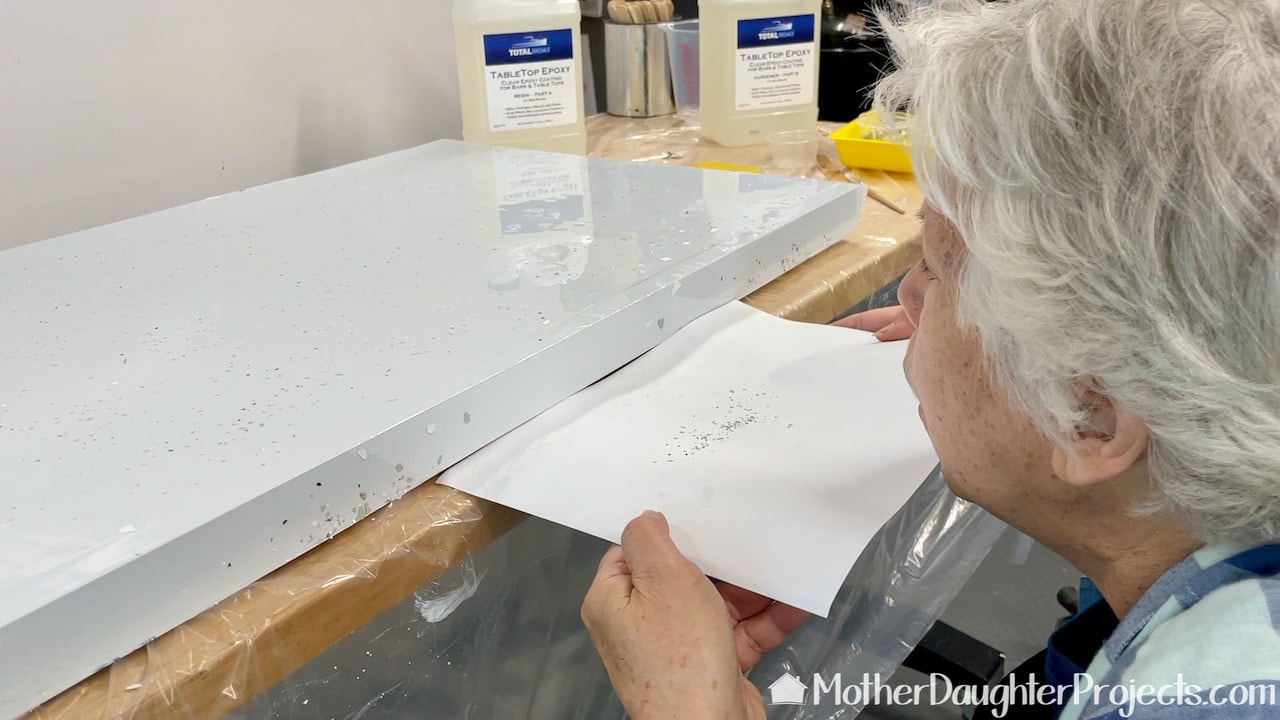
It was difficult to get the flecks on the edge so I simply blew them onto the wet epoxy!
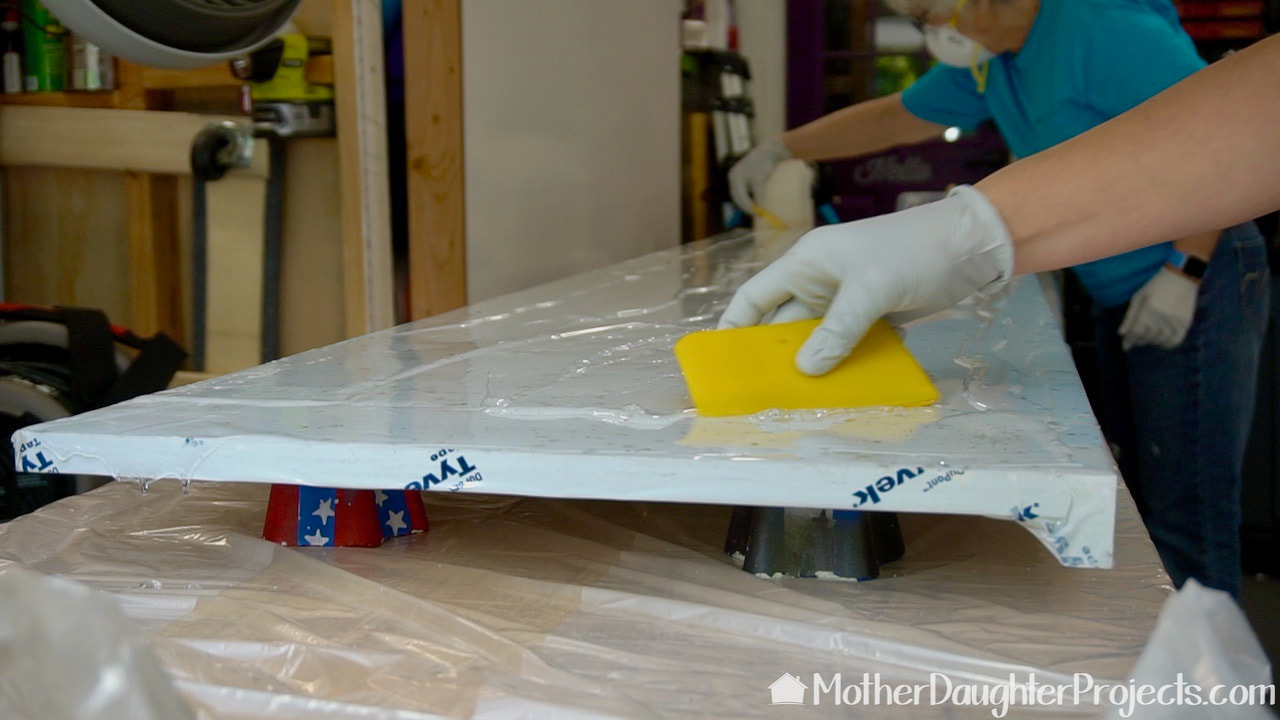
We did several coats of epoxy and used these inexpensive plastic spreaders to help move it around. We got them at Harbor Freight.
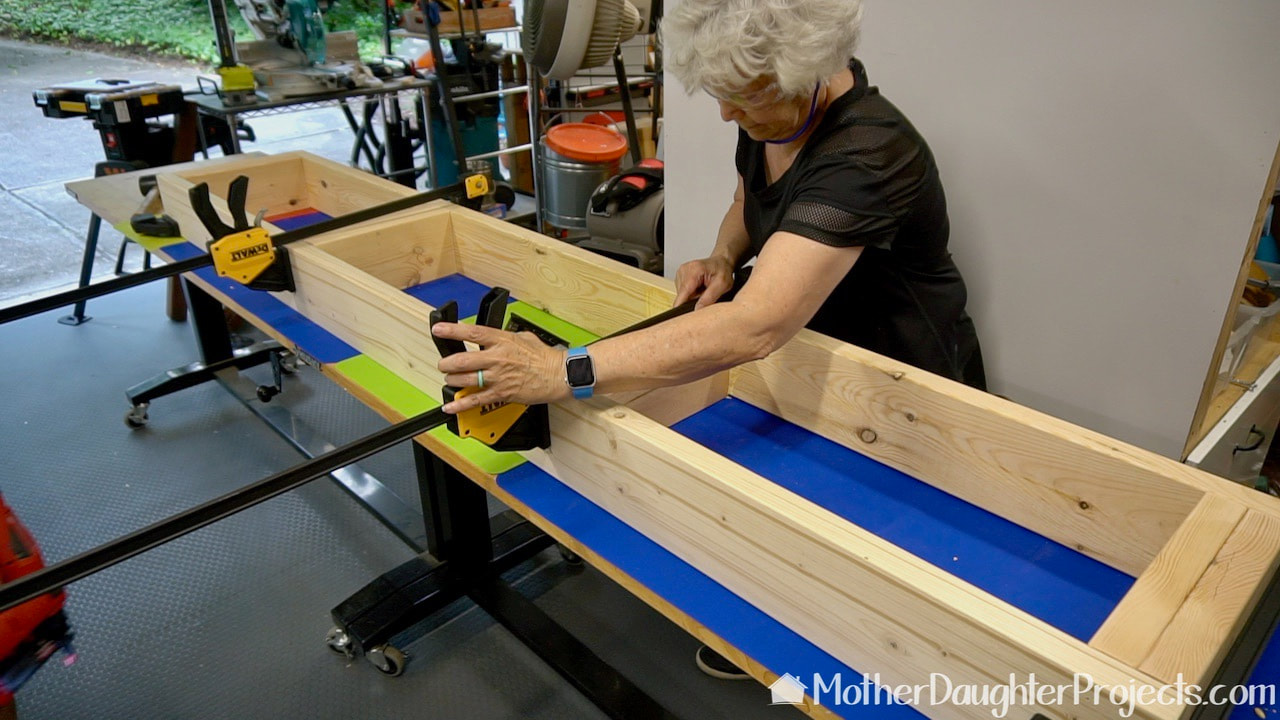
The closet was basically finished and I had been using it for weeks when I decided I wanted to raise the cabinets to counter height! Counter height is much more comfortable for folding clothes. Plus, the drawers are six inches higher making it easier to put things away. We built a very simple riser out of a couple of 2x6 boards. The finished base was painted in the closet wall color. Pro tip: those long clamps were a hazard while they were in place. We put a pool noodle on each end so if (when) we ran into them, we wouldn't impale ourselves!
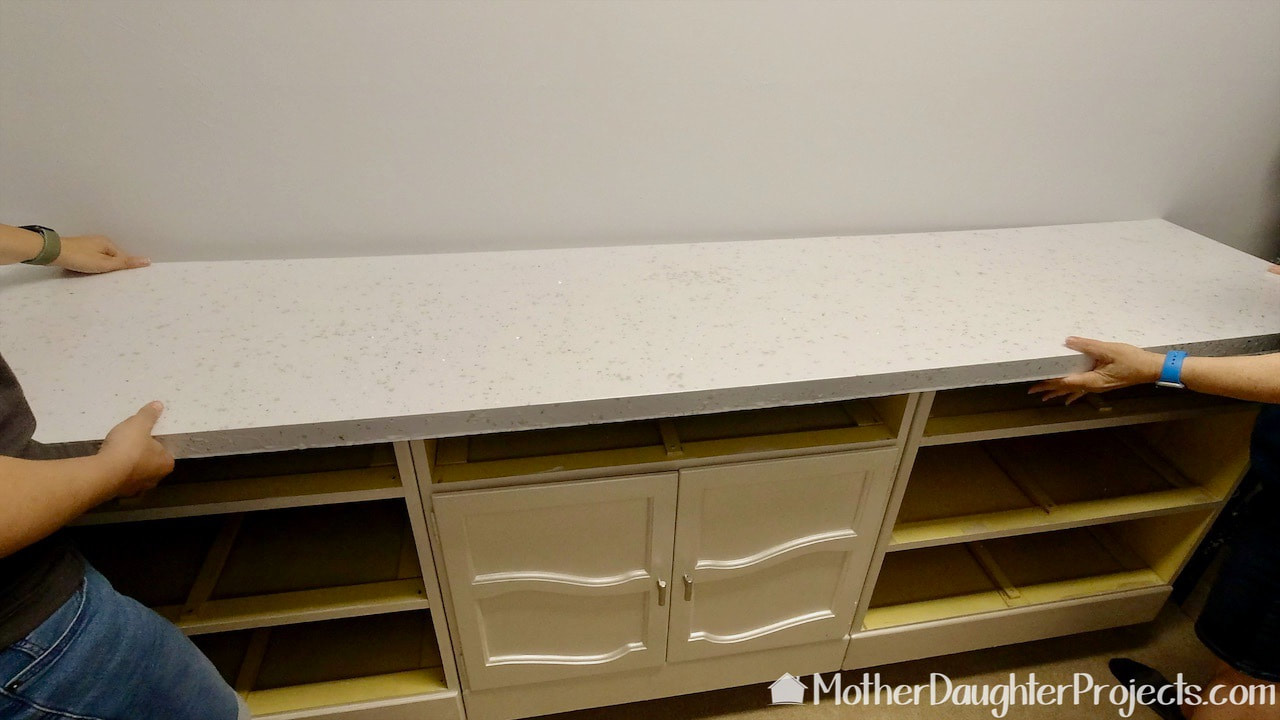
So, this is the second time we moved the cabinets and added the countertop. At this point I thought we were finished but, later on I decided to completely redo the front edge of the countertop! Here you can see the original color of the cabinets. Also, do you see something else that may be wrong here? I'll let you know at the end.
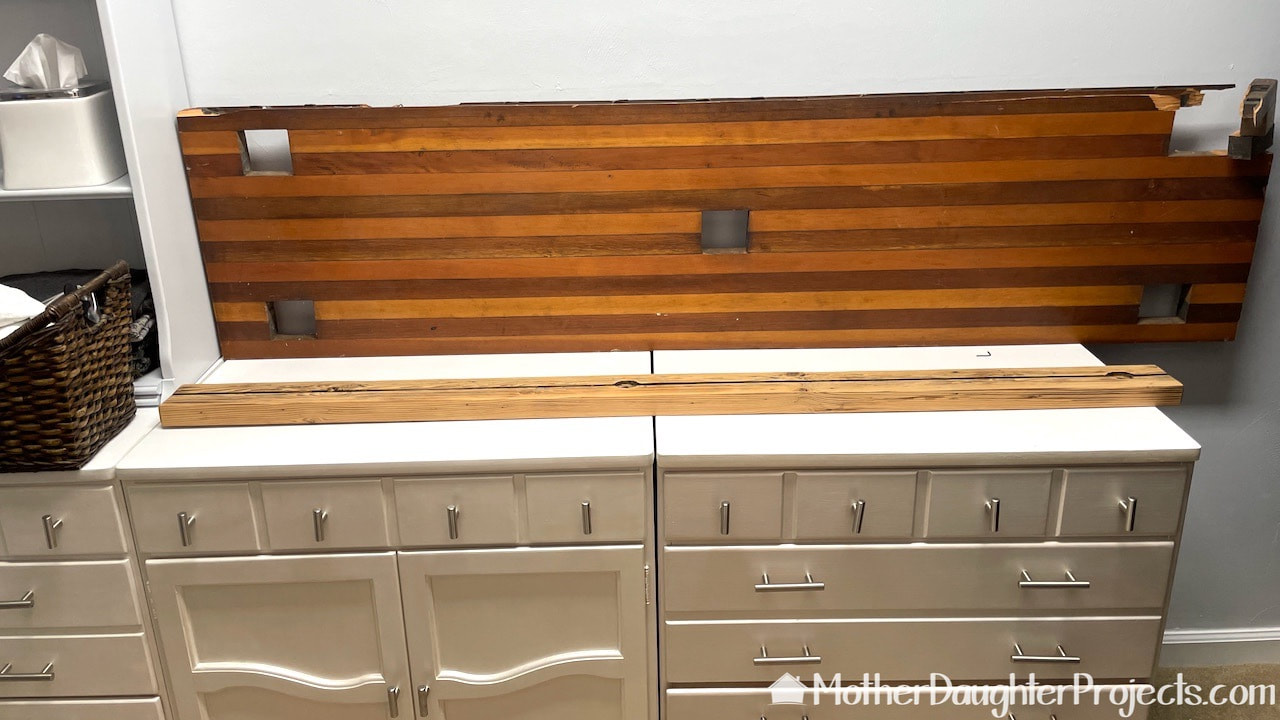
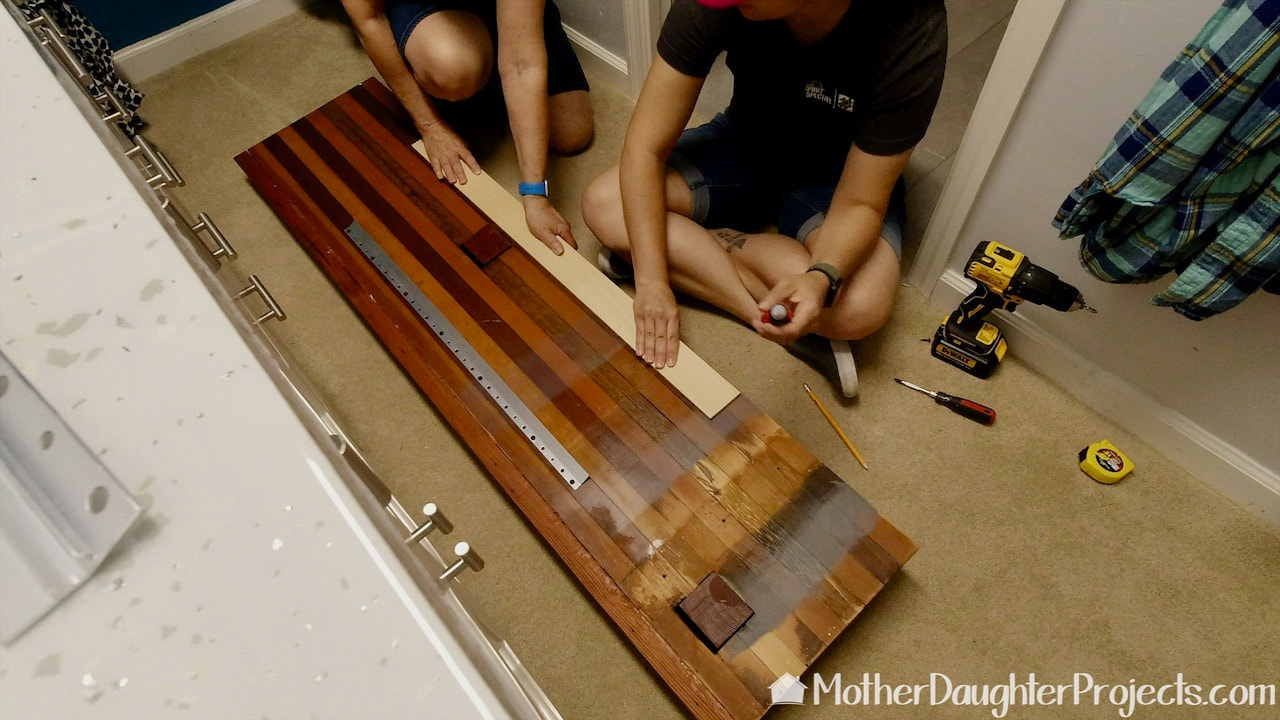
We decided to add a natural, warm element to the space by reusing this old mid-century shelf. Here we are trying it out for size. That piece in the front, also from the same old shelving unit is going to sit on the top like a ledge. In the original design, a round mirror was going to sit in that groove on the top of it. Be sure to watch the blooper at the end of the video to see how that did NOT work out!
The old piece was cleaned and the top ledge was glued and screwed into place. We put a French cleat on the back to hang it on the wall.
We added a piece of wood to the back so that the backsplash would sit flat against the wall.
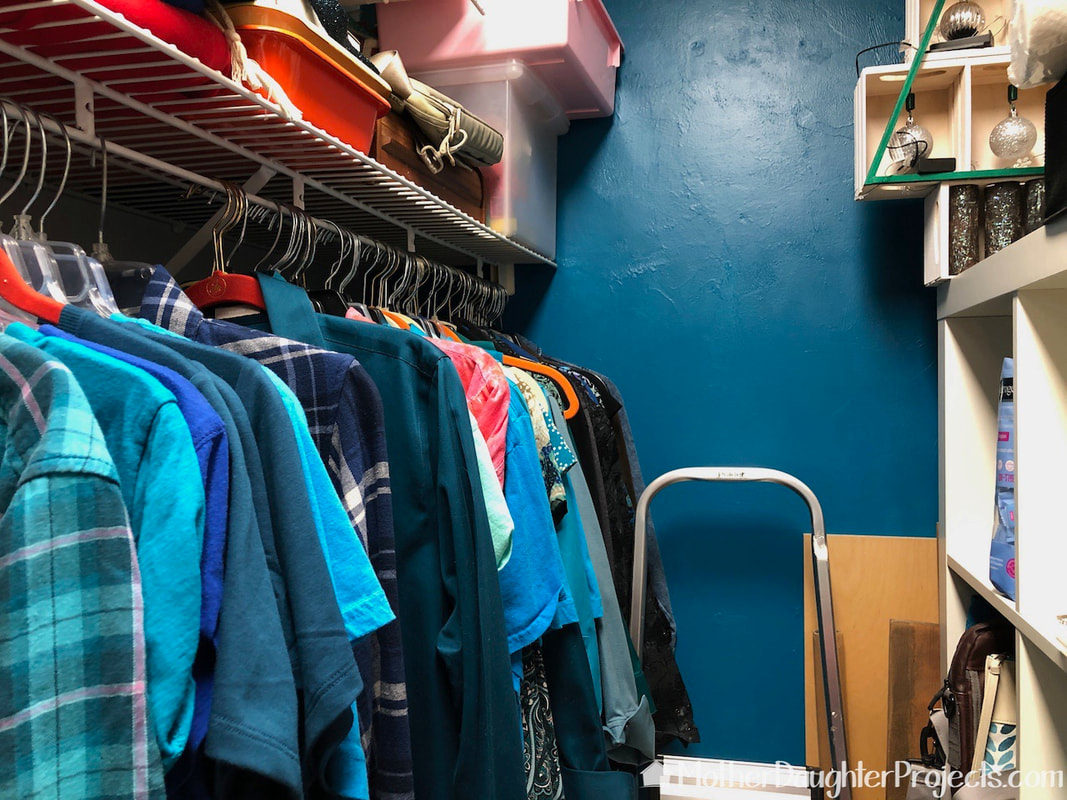
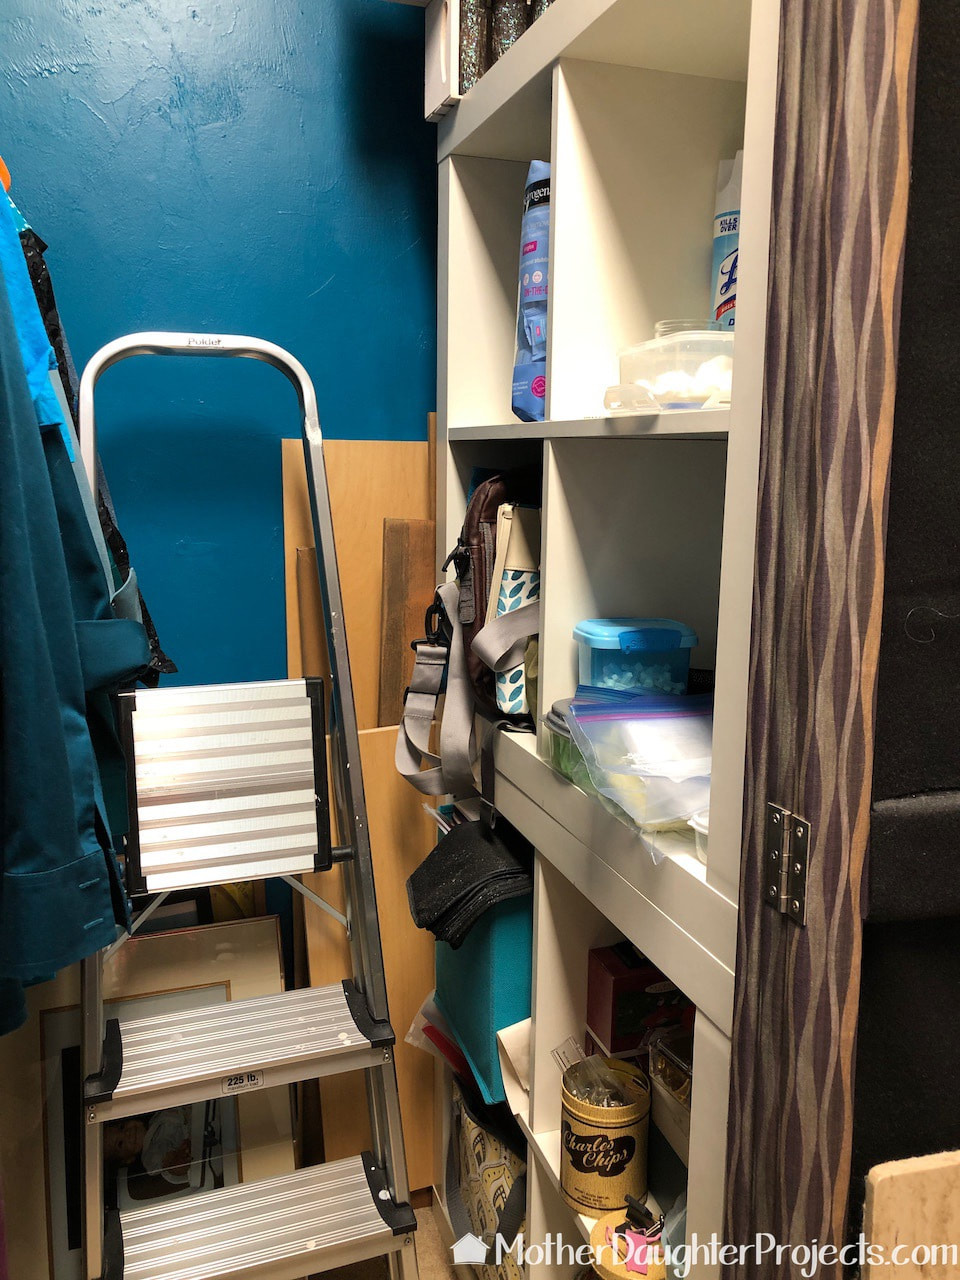
Time to clear out all the clutter and get rid of all that wiring shelving!
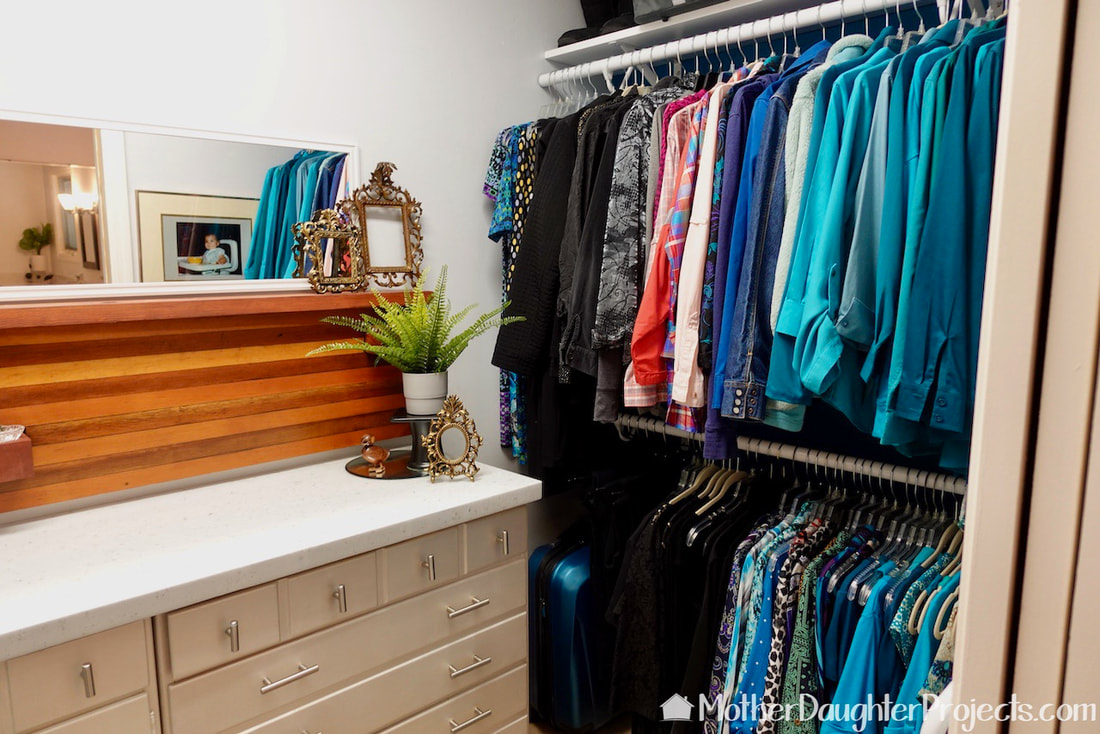
The layout of the closet was change so that all the clothes would hang on this end. Surprisingly, after all the purging of stuff and folding my t-shirts and storing them in a drawer, everything fit with room to spare.
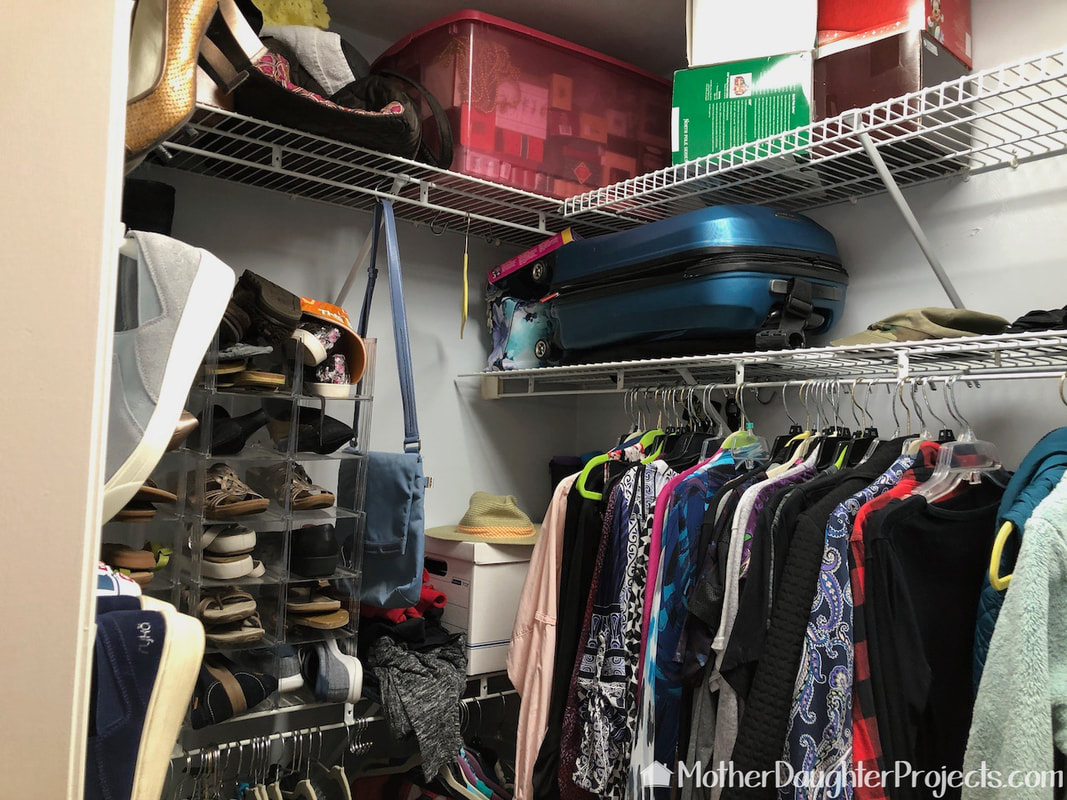
This is so bad! That suitcase is about the only non-clothing/personal item that is still stored in the closet!
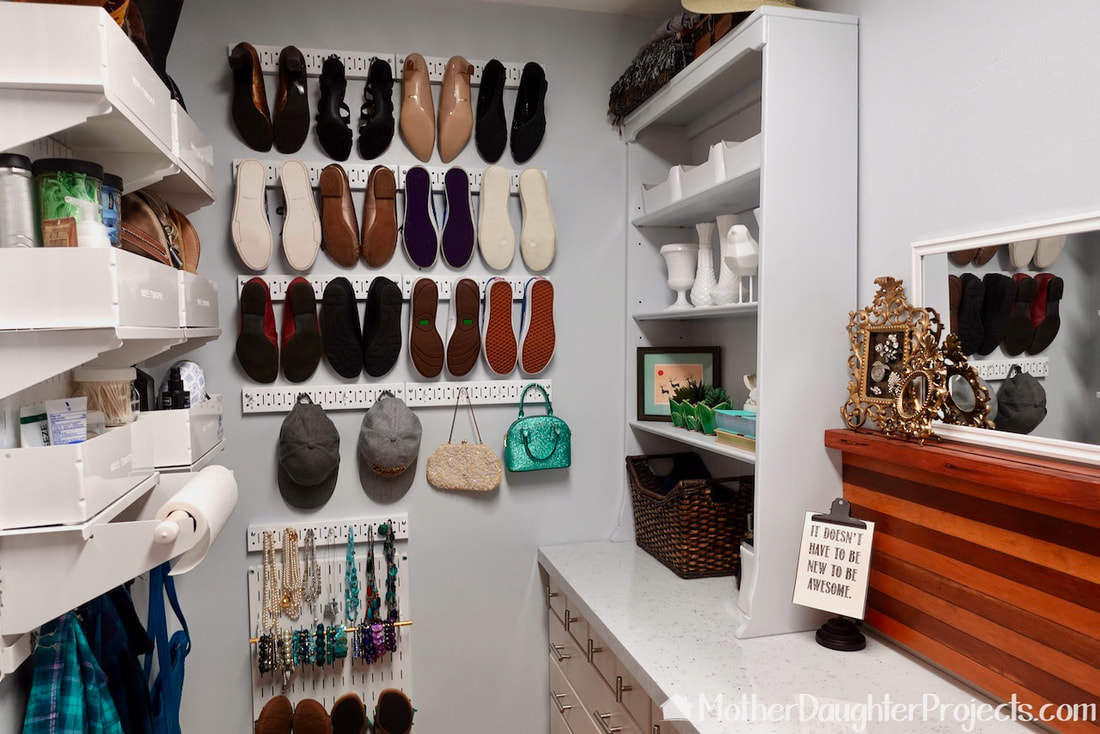
Everything now has a place making it easy to access things and to put them away. I especially like my wall hung Wall Control "medicine" cabinet. I like having the essentials at eye level and easy to reach. I have always had paper towels in the bathroom, but I dislike the clutter of them on my countertop. This Wall Control accessory holds the paper towels right inside the closet door so I can easily grab one when I'm cleaning.
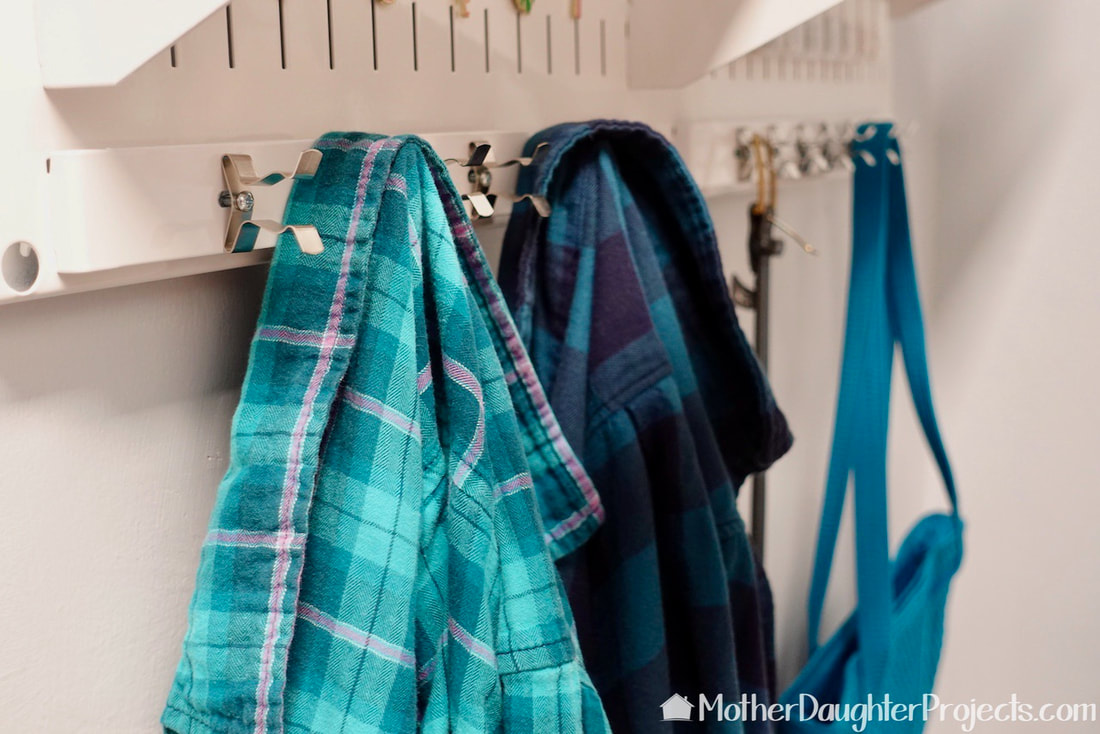
These are Wall Control spring clips that are actually used for tool storage. I found they make great hooks for hanging things like belts, bags, and especially my year-round flannel shirts.
I've purposely kept the countertop clear in order to have space for folding towels and clothes. And, in keeping with the "it doesn't have to be new to be awesome" theme, I've decorated with some vintage ornate over-the-top frames that I've collected over the years. On the sheIves I've added some of my favorite milk glass vases and my mom's vintage wedding gloves from 1951.
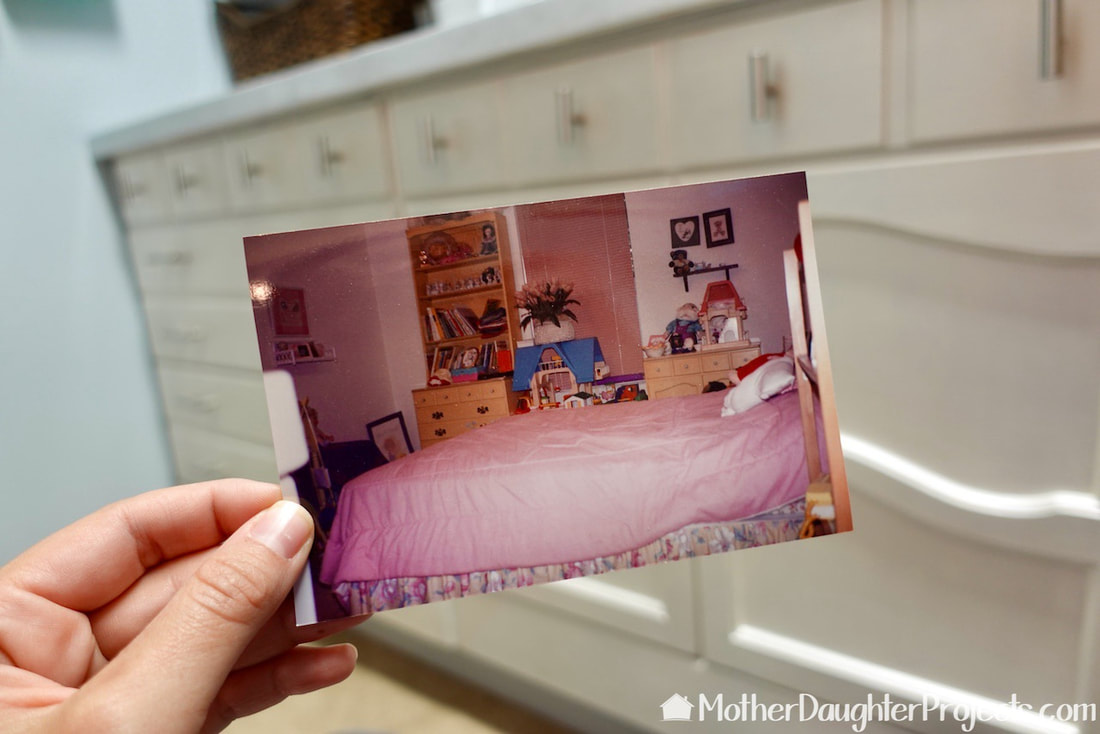
Steph's childhood bedroom, circa 1992, showing the vintage dressers still in their original yellow! Years later, I found another matching dresser. The hutch in the picture is now painted and in the newly renovated closet.
At the beginning of the year, I didn't know I needed this closet makeover, but, I'm so glad I found that original pin which inspired me to tackle this mess of a closet.
What is not shown in this project is the project that had to happen before this one could start. I had painted one of the closet dressers many years ago and had been using it as a nightstand. The other two were buried in my laundry room closet. To get them out, I had to remove everything from that space. Once that space was cleared out, that closet got a makeover as well. All the wiring shelving was removed as well, it got fresh paint, the floor was cleaned and a new portable shelving unit was purchased and assembled to use in that space. It is a much more clean and functional space thanks to needing to get the dressers out! Anyone else have projects snowball like this one? Do tell... *Did you spot what was wrong? I didn't until, I got ready to add new a magnetic closure to the doors in the middle piece as they wouldn't stay closed. After installing one of the latches, it was then I discovered that after painting the doors, I had installed them back onto the piece upside down! As my eyes traveled down to the bottom of what was actually the top, I saw the latches! It was a DUH moment for sure! Please note: This is not a sponsored post. FYI: We are not professionals, and we don't claim to be. This is what we found worked for our project. Yours may need a little different approach. Safety first! FYI: Affiliate links are being used on this page. Purchasing via these links help support MDP! Related Projects
4 Comments
Karen Peaco
6/17/2021 10:04:50 pm
You ladies hit a home run on the closet make-over!
Vicki
6/18/2021 12:08:48 pm
Karen, thank you so much. Yes, that wiring shelving is the worst, I'm very happy to be rid of it! ~Vicki
Jan Houston
8/22/2021 09:18:44 am
Could you tell me what the dimensions are of your closet?
Vicki Kubiak
8/24/2021 10:09:55 am
The closet is 57" wide (4.75 feet) and is 121" long (10.08 feet). Leave a Reply. |

Mother Daughter Projects
|