|
text by Vicki Sign up here to join our weekly email newsletter!
Last year, I participated in the Builders Challenge furniture flip challenge. I enjoyed it so much that I wanted to participate again this year.
Prior to the start of the challenge, I happened to see a picture online of a furniture piece by my favorite mid-century designer, Adrian Pearsall of Craft Associates. The Brutalist Hanging Disc Bar was nothing I’d ever seen before—I decided I'd try to recreate it for my challenge entry. 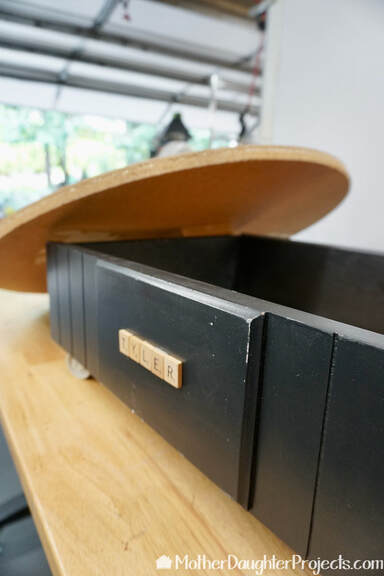
This project started with an old seventies formica tabletop and a dresser drawer. Many years ago, before MDP, I had made the drawer into a rolling toy box for my grandsons. The size of the drawer was perfect for this build.
Materials/Tools:
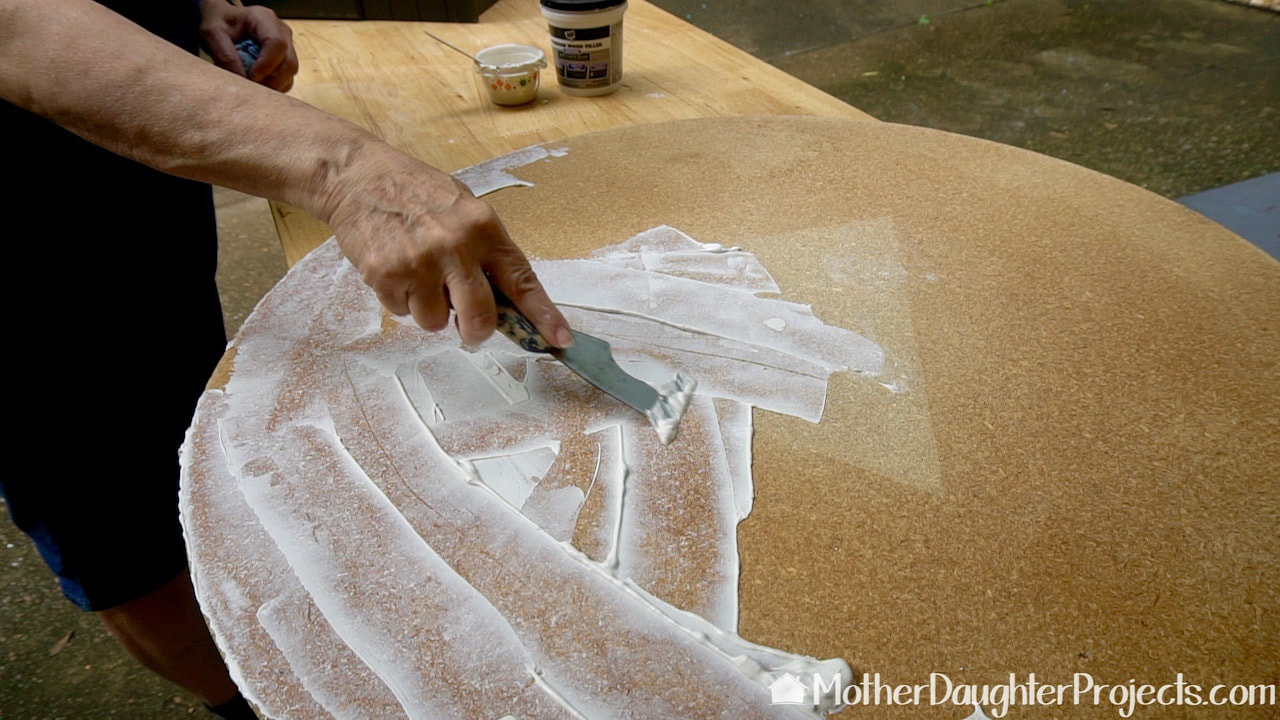
The tabletop was particle board topped with formica plastic laminate. To create a smooth surface on the particle board side, I covered it with wood fill which I let dry and sanded smooth. The wood fill also helped to improve the broken edges.
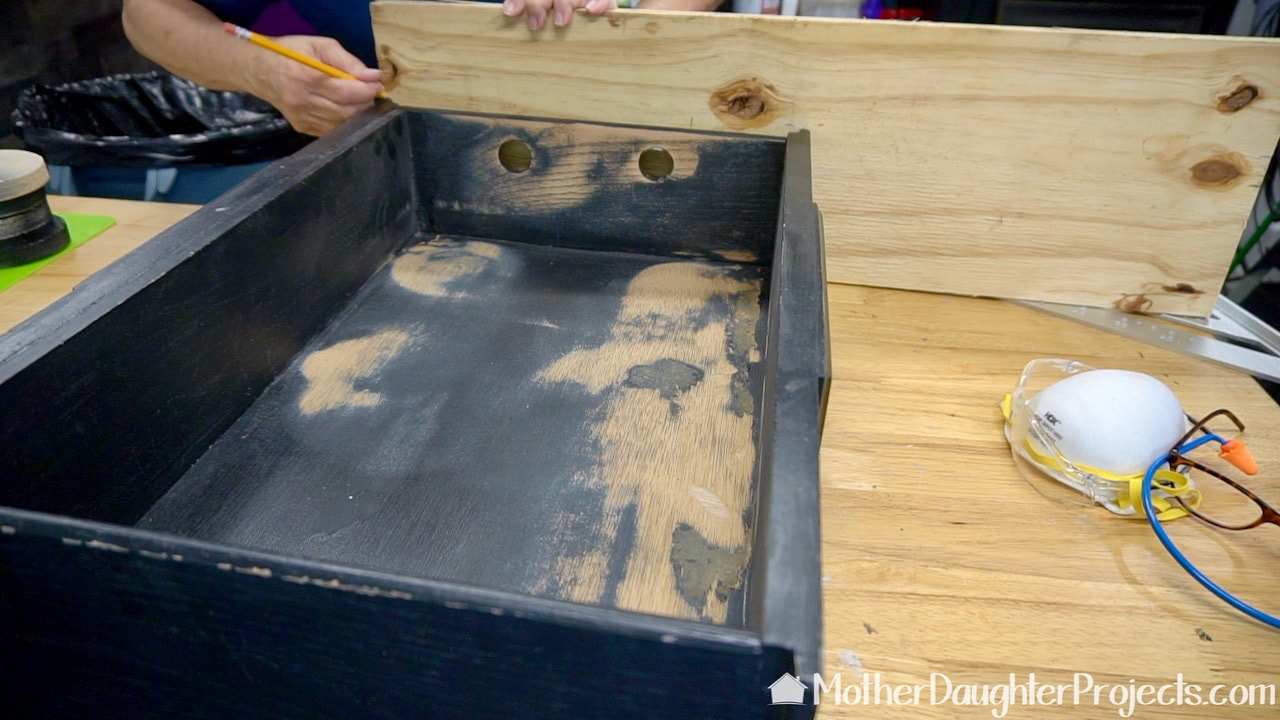
To add extra support to the drawer sides I added plywood to fit.
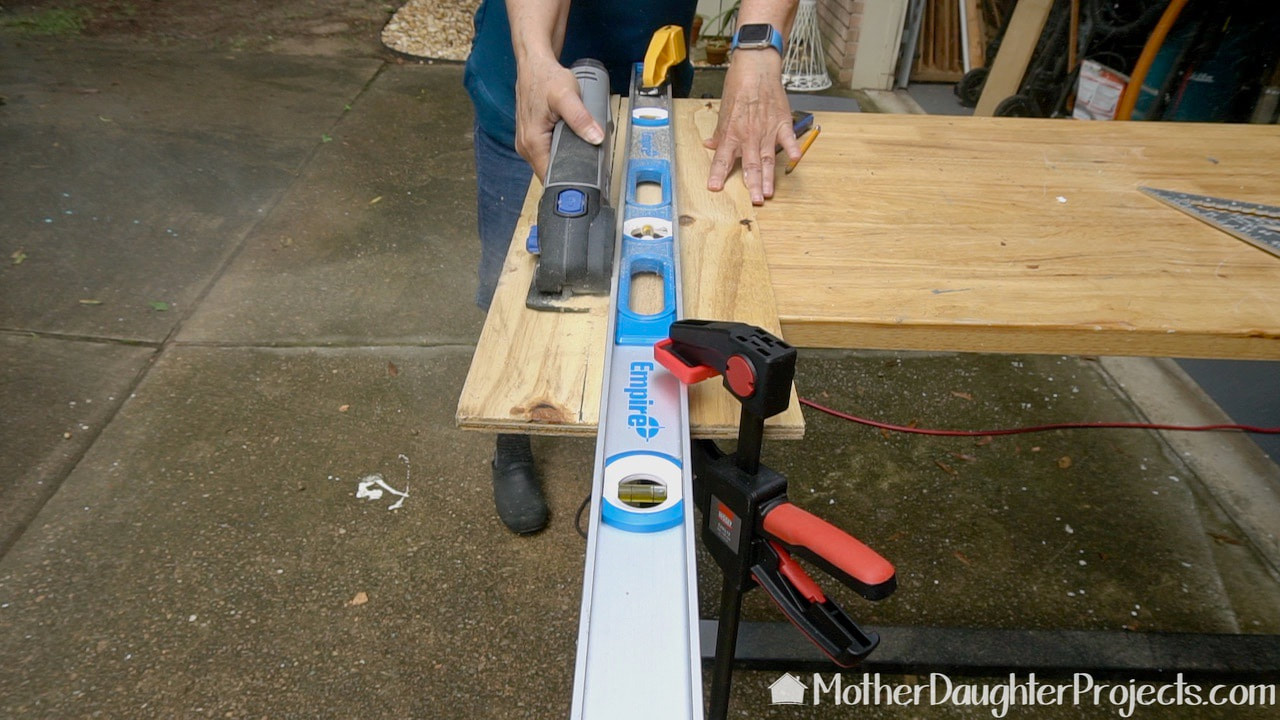
For smaller cuts, a Dremel Saw-Max is a great alternative to a table saw or circular saw.
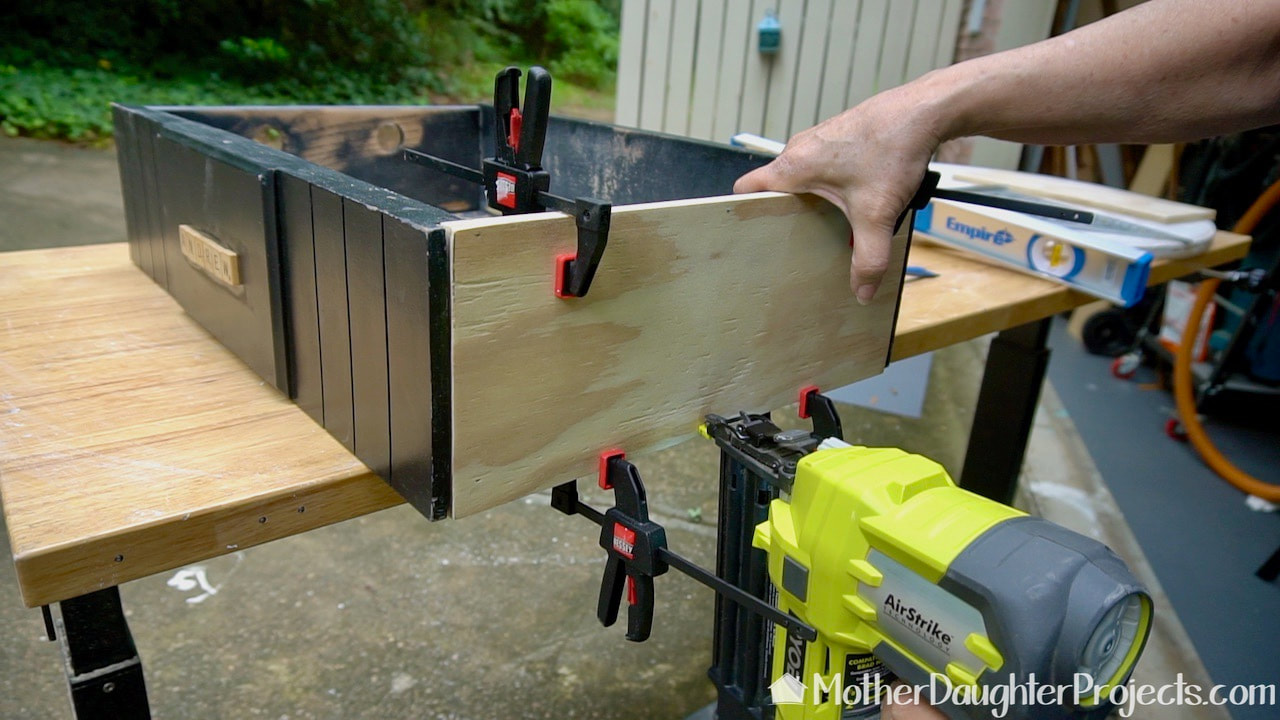
The plywood was glued, clamped, and brad nailed into place. I'm using a Ryobi 18 gauge brad nailer.

One of the requirements of the challenge was to use color. I decided to use color in the drawer and underside of the front. I used these colors to paint pour the bottom of the drawer.
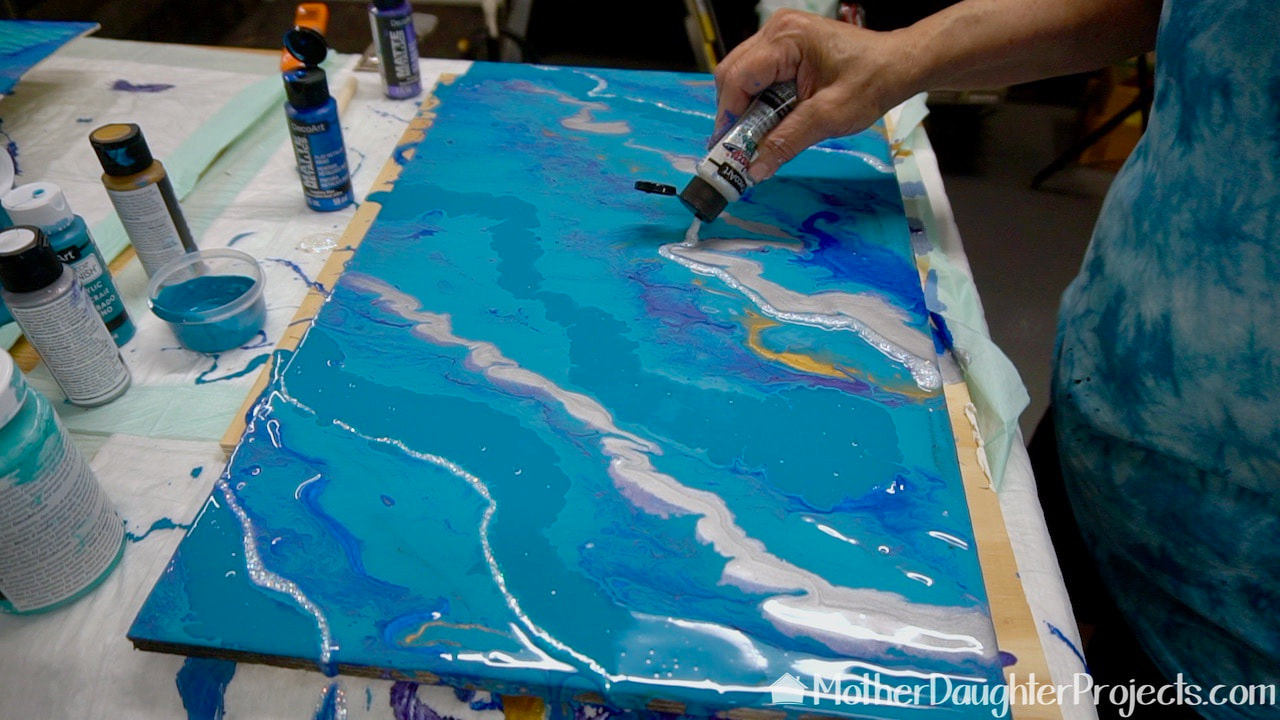
Creating the paint pouring for the drawer. I added a little glitter with the DecoArt Galaxy Glitter paint.

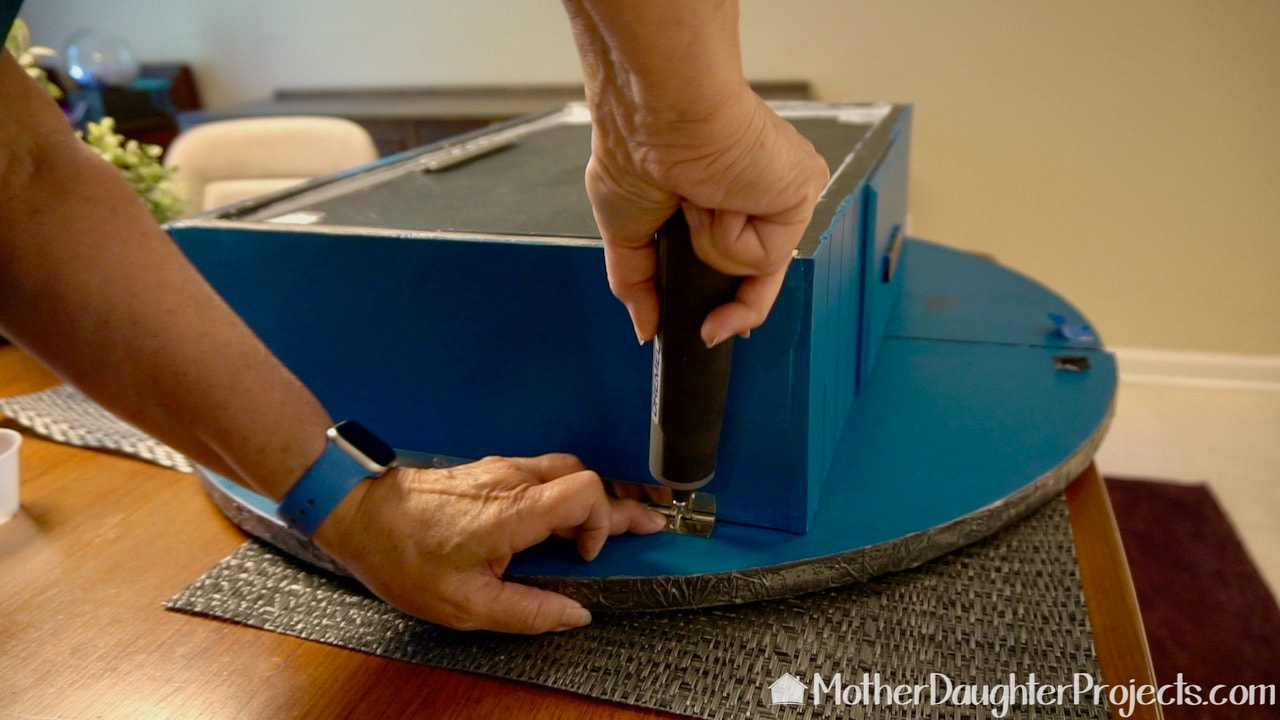
The entire project hinged on getting this circle cut exactly in half which we successfully did with the Makita track saw!
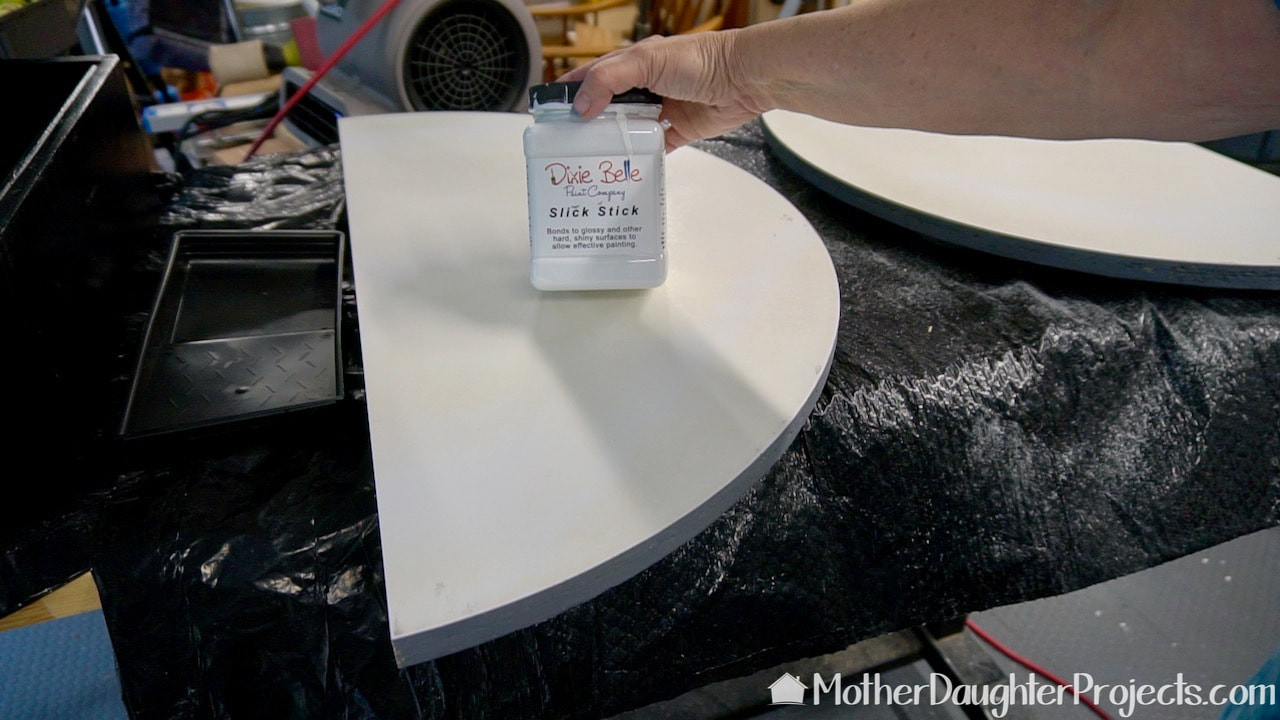
This product by Dixie Belle is designed for slick surfaces like plastic laminate. The formica part of the tabletop will now be the backside of what will become doors on the piece.
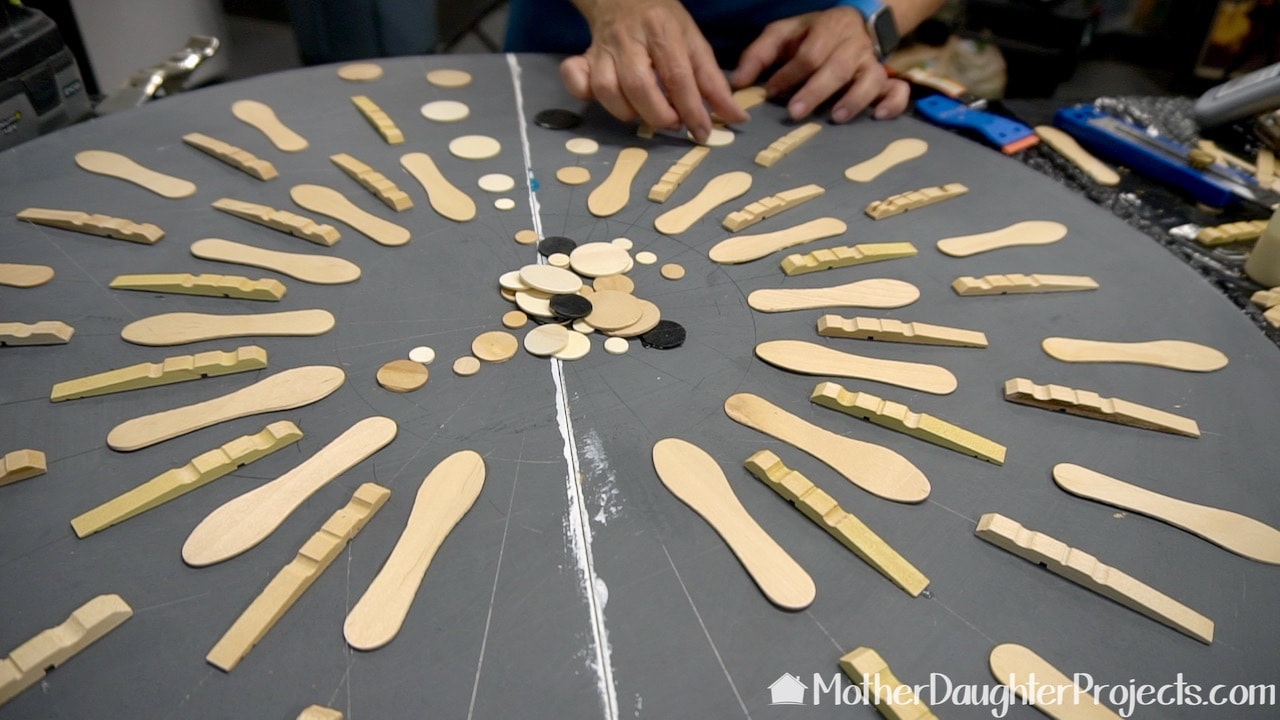
The design on the front was created with wood ice cream spoons, deconstructed clothes pins, and various sizes of wood circles.
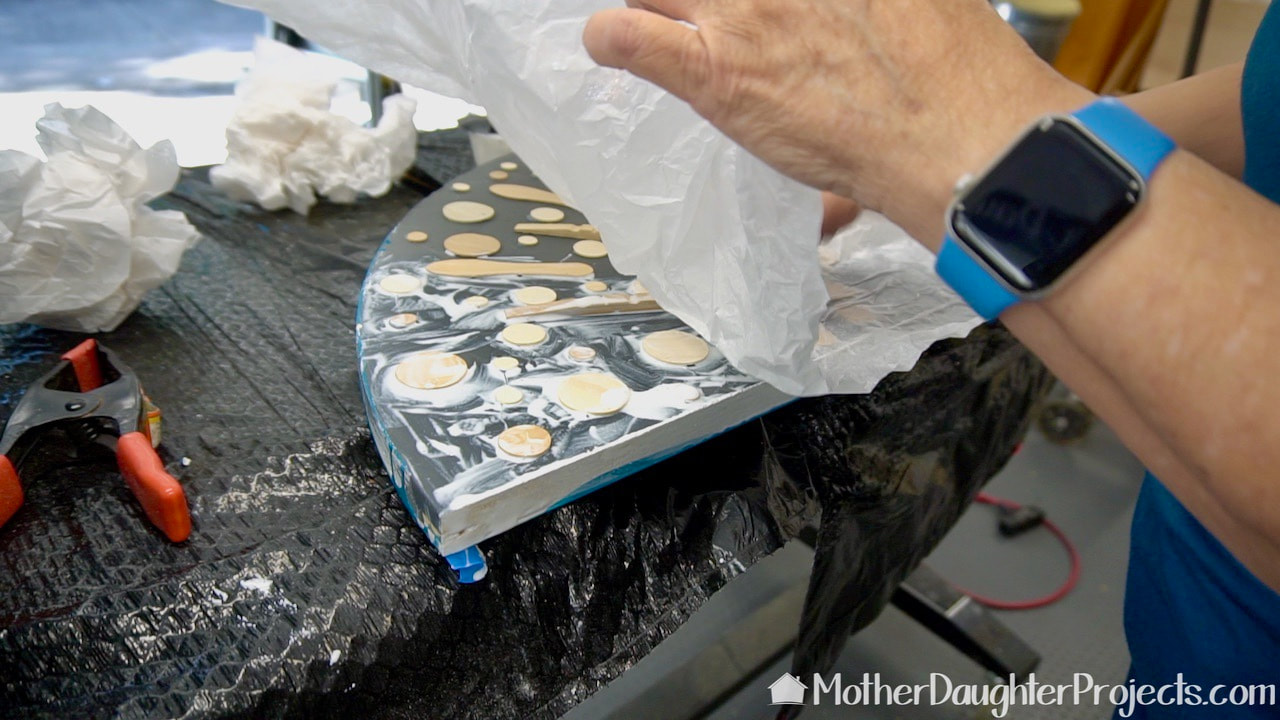
Once all the wood pieces were in place, I covered the surface with Mod Podge and tissue paper.
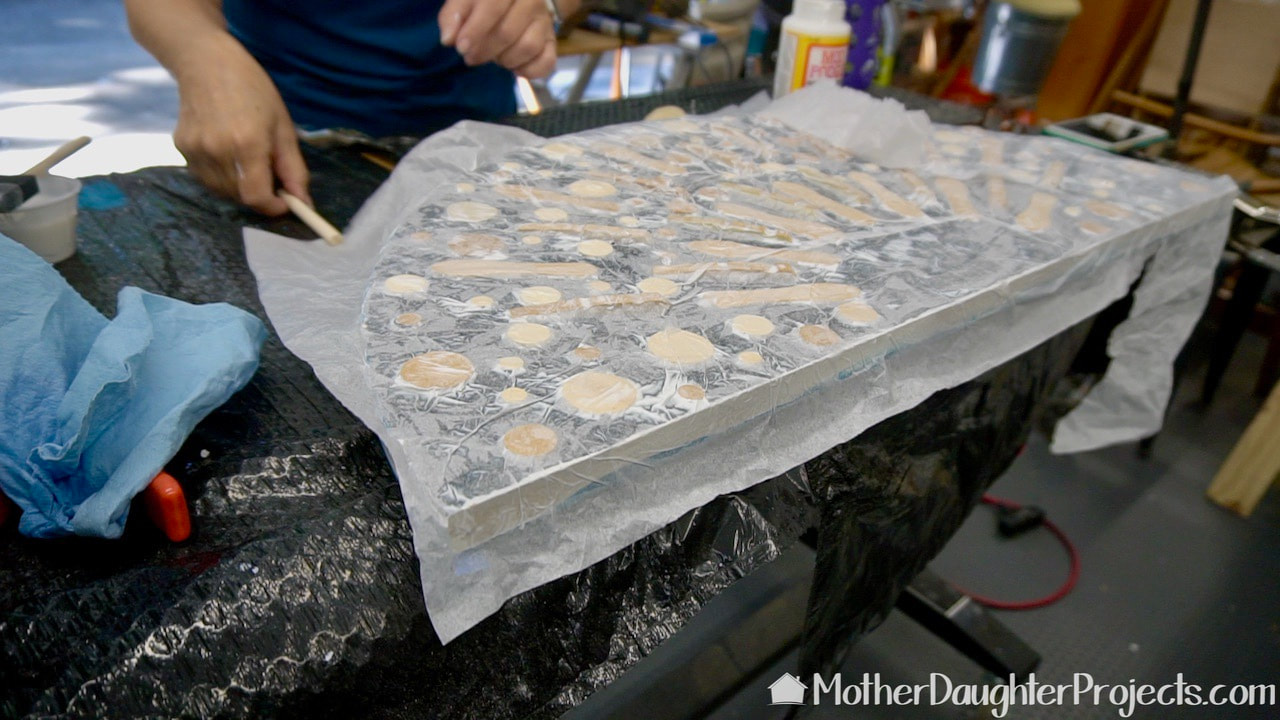
After the Mod Podge dried, the edges were cleaned up and then another layer of Mod Podge was applied and allowed to dry.
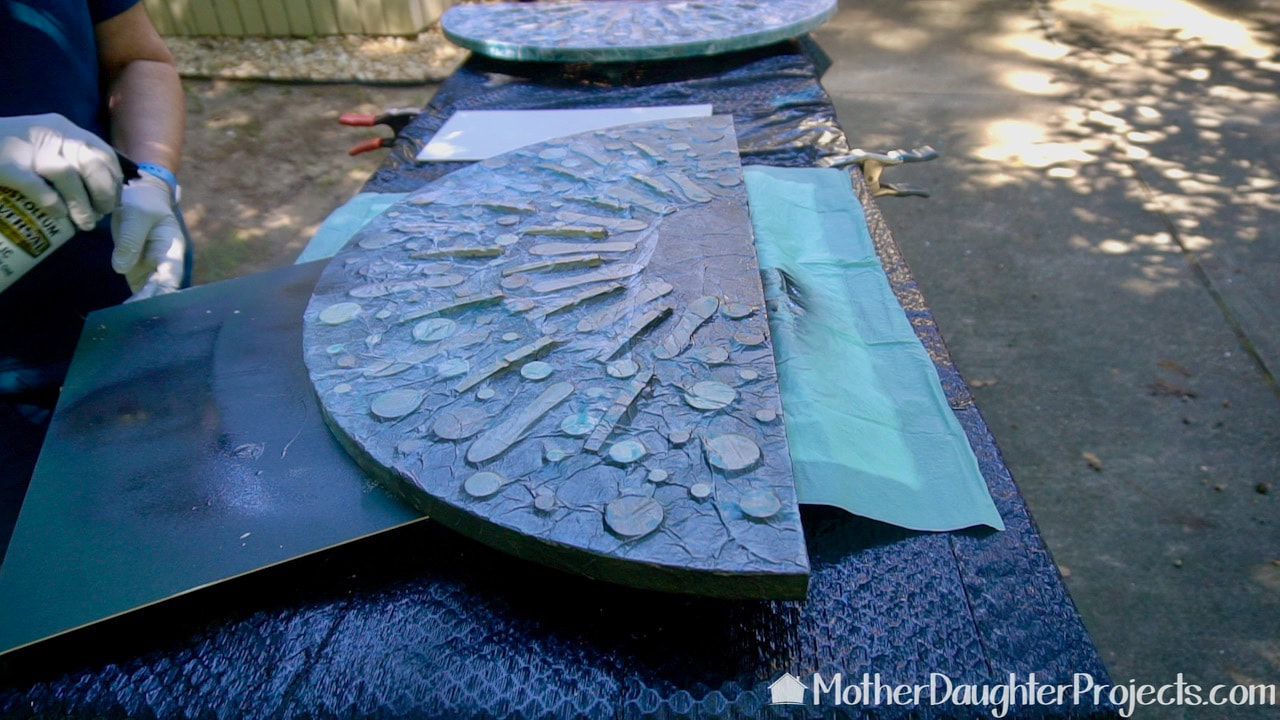
Once the Mod Podge was dry, the entire front and edges was given a coat of spray paint.
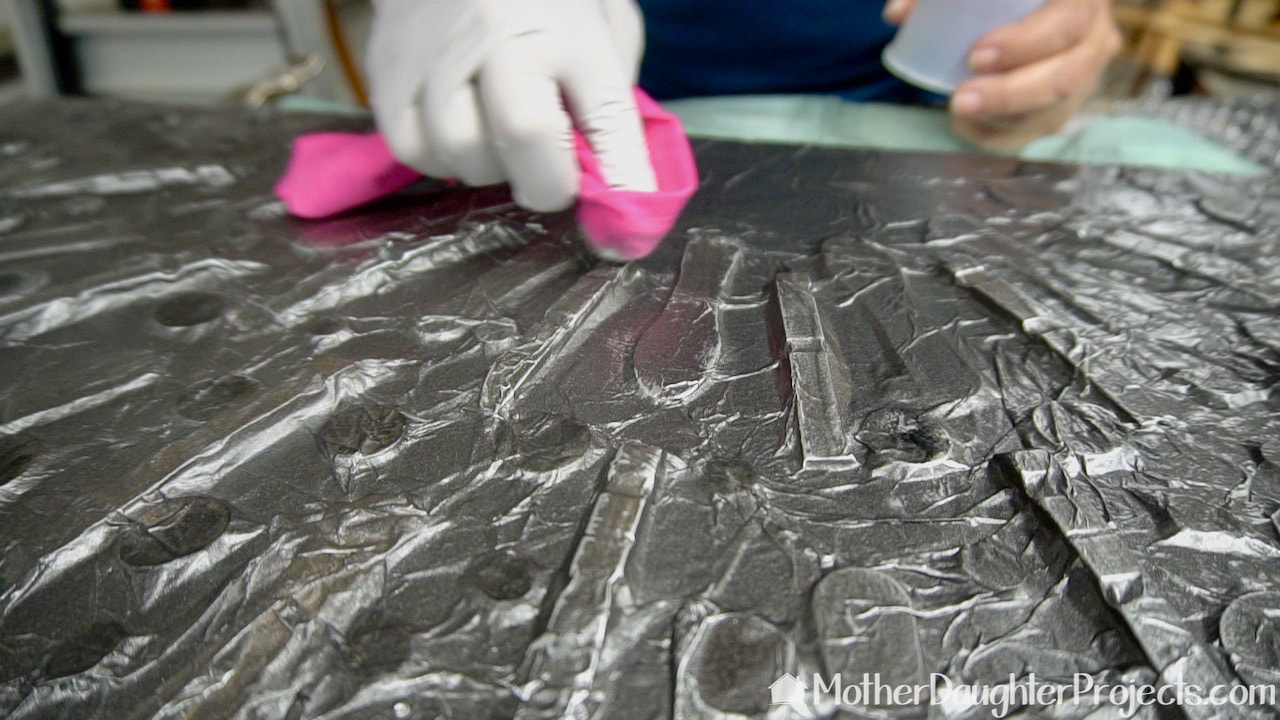
I used Rub n Buff in black and silver to highlight the design.
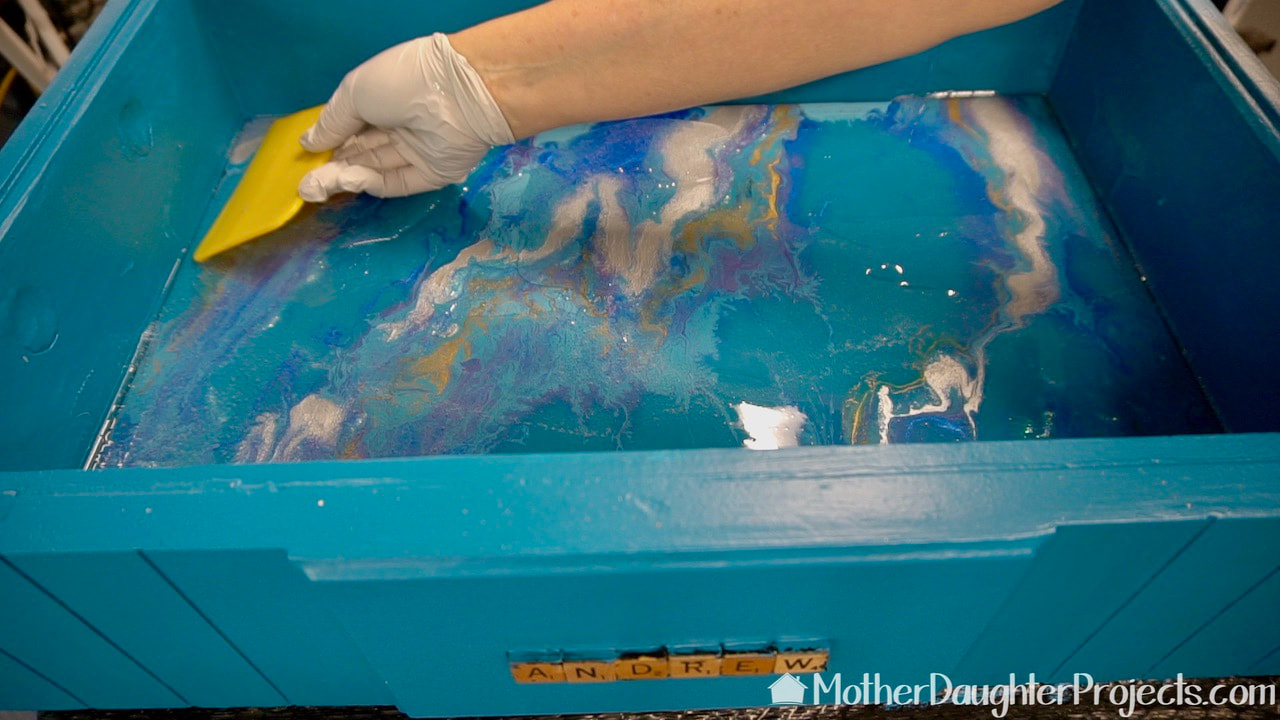
While the front was drying, I added a layer of epoxy resin over the now dry paint in the drawer. If you look at the bottom of the picture you can see I left an homage to the previous use of the drawer. To keep those scrabble tile names clean during painting, I covered them them Vaseline and once dry, I just wiped away the paint.
The tabletop, now turned into doors, were attached to the drawer, now cabinet, with a piano hinge on each side. The bar is hung on the wall with a French cleat.
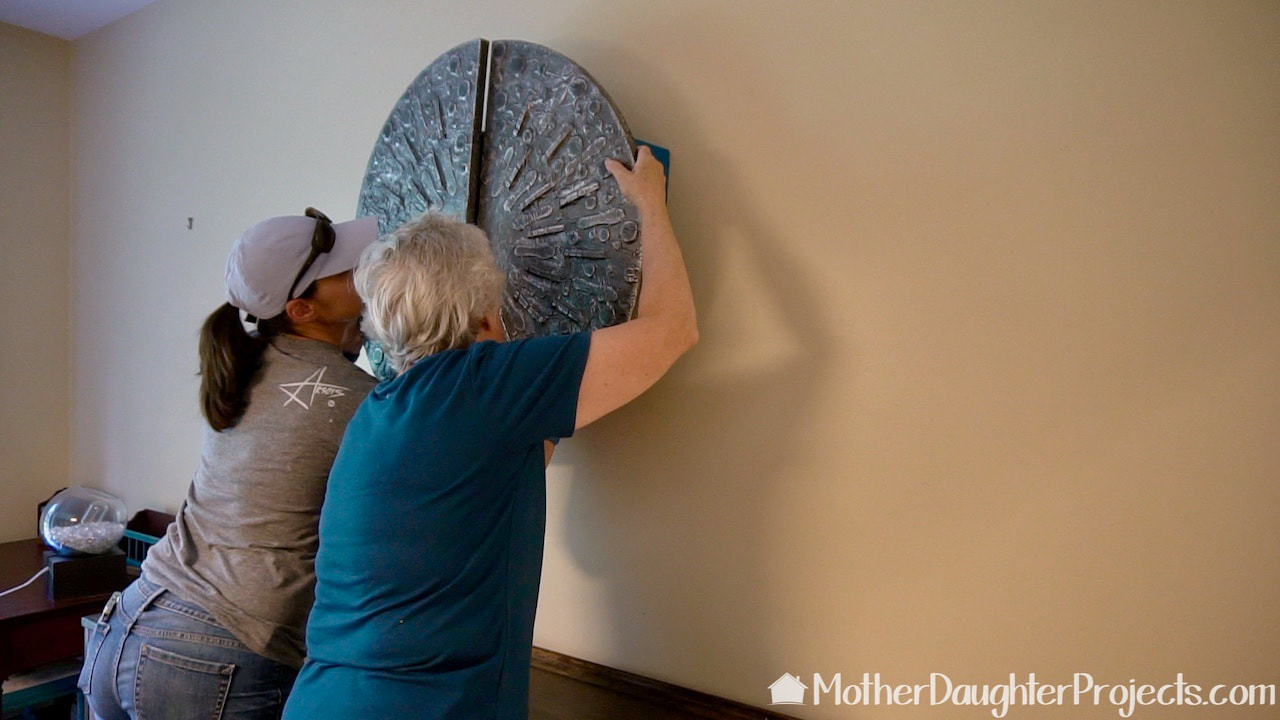
Hanging the bar was definitely a team effort!
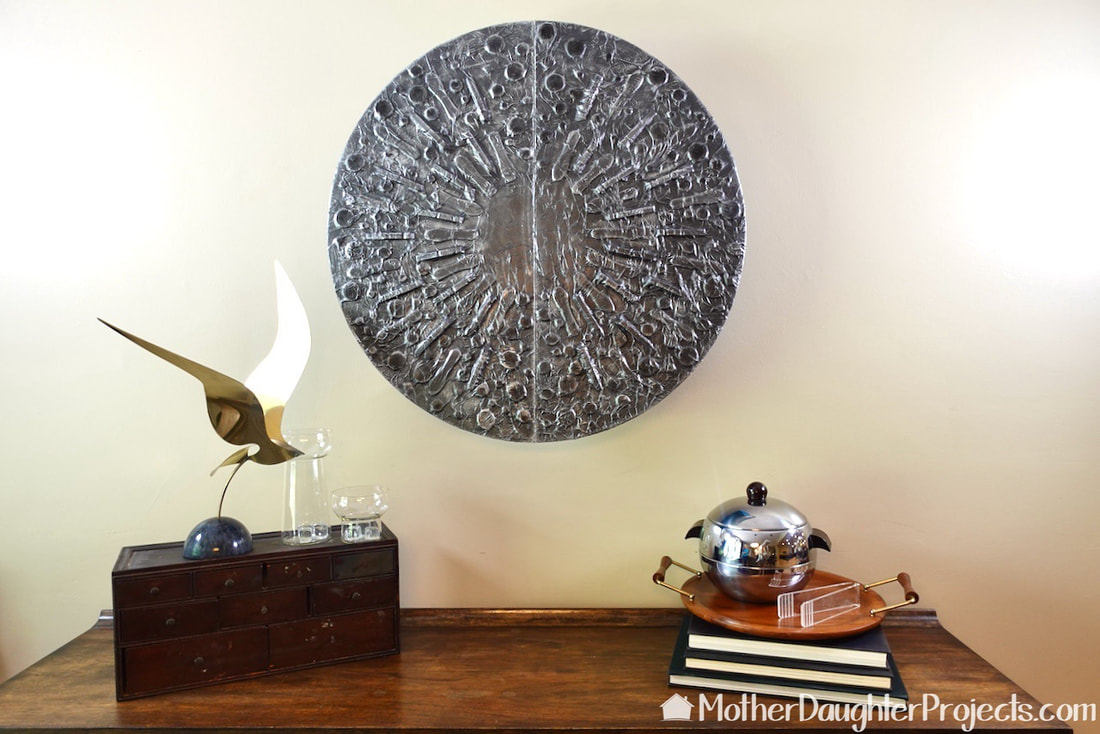
The new hanging bar is right at home with my mid-century decor!
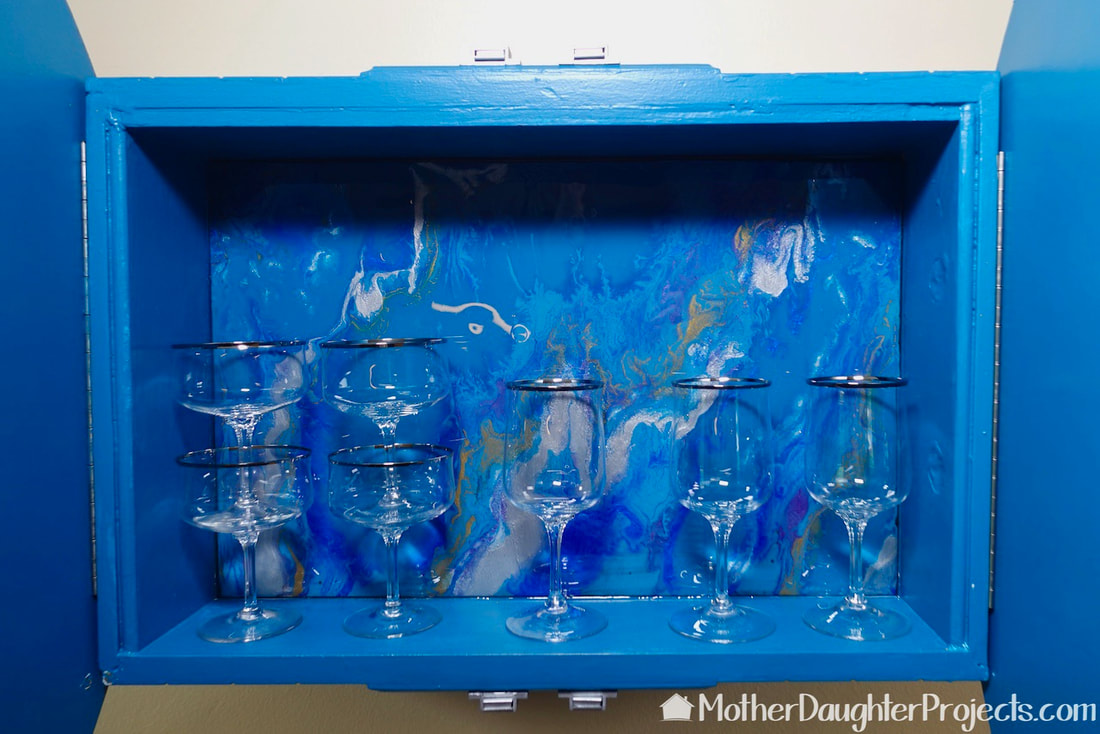
The colorful interior!
I enjoyed working on this project and seeing it come together as I envisioned.
But, like many of the projects we do, there was a learning curve to this one. It seemed this build was a series of problems needing solutions which pretty much sums up the DIY life! I learned to take those problems one at a time and think about the solution. For example, I spent a lot of time overthinking the cutting of the circle but ultimately a simple conversation with Steph provided the solution. She suggested using the track saw which was the easiest and most accurate solution. That's a good lesson. When you get stuck, consult with someone who is not close to your project! I like to take part in challenges which force me to get creative based on a set of rules and a time limit. Anyone can enter the Builders challenge*. They have challenges that start at various times during the year. *the Builders Challenge is now called Makers Challenge Central Please note: This is not a sponsored post. FYI: We are not professionals, and we don't claim to be. This is what we found worked for our project. Yours may need a little different approach. Safety first! FYI: Affiliate links are being used on this page. Purchasing via these links help support MDP Related Projects
4 Comments
Leslie
10/14/2021 11:41:34 am
Lovely!!
vicki
10/15/2021 03:47:26 pm
Thank you. I had a lot of fun making it. Vicki
Cindy
10/14/2021 03:14:39 pm
What a great piece. Your video gave really good instruction,clear, concise and pleasant to listen to. You are impressive with your ability. Thanks for the video
Vicki
10/15/2021 03:48:00 pm
Thank you for the kind words about the project and video. Vicki Leave a Reply. |

Mother Daughter Projects
|