|
text by Vicki Sign up here to join our weekly email newsletter!
This post is sponsored by The Home Depot.
Despite all the work our first PVC project entailed, we were determined to repeat the process on an indoor piece. We incorporated many of the suggestions given through the comments from our viewers. Spoiler: this process was so much easier!
As always, watching the video will give you a complete look at the entire process. It's less than 10 minutes to view. 
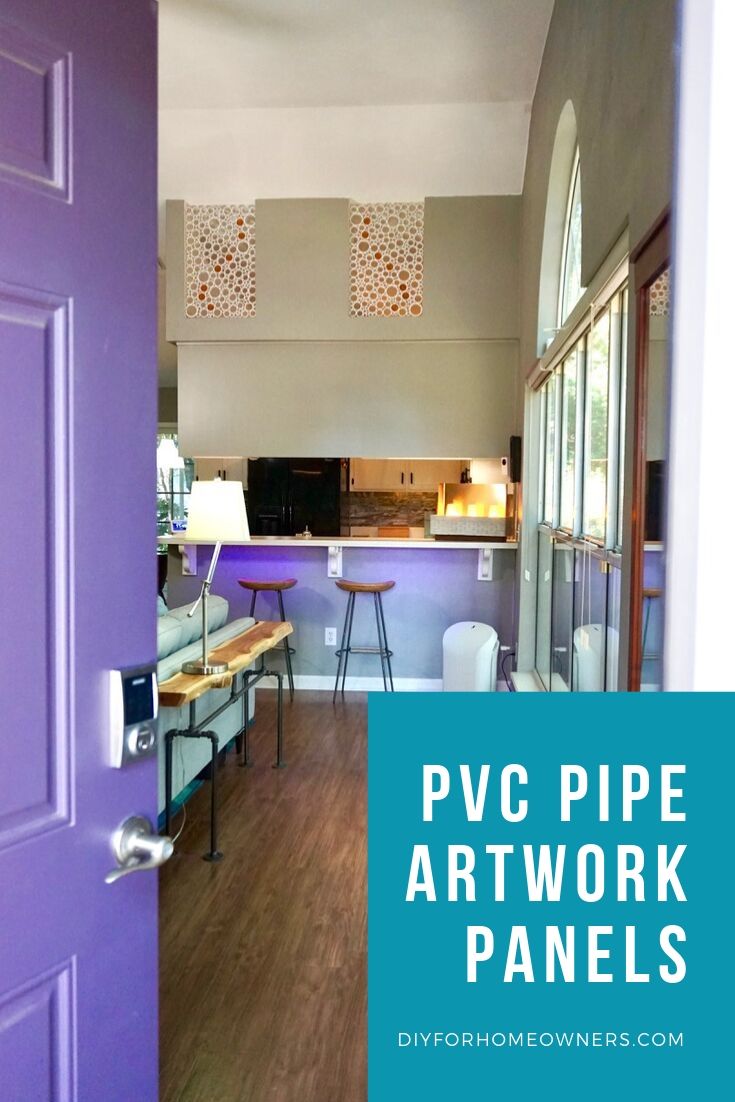
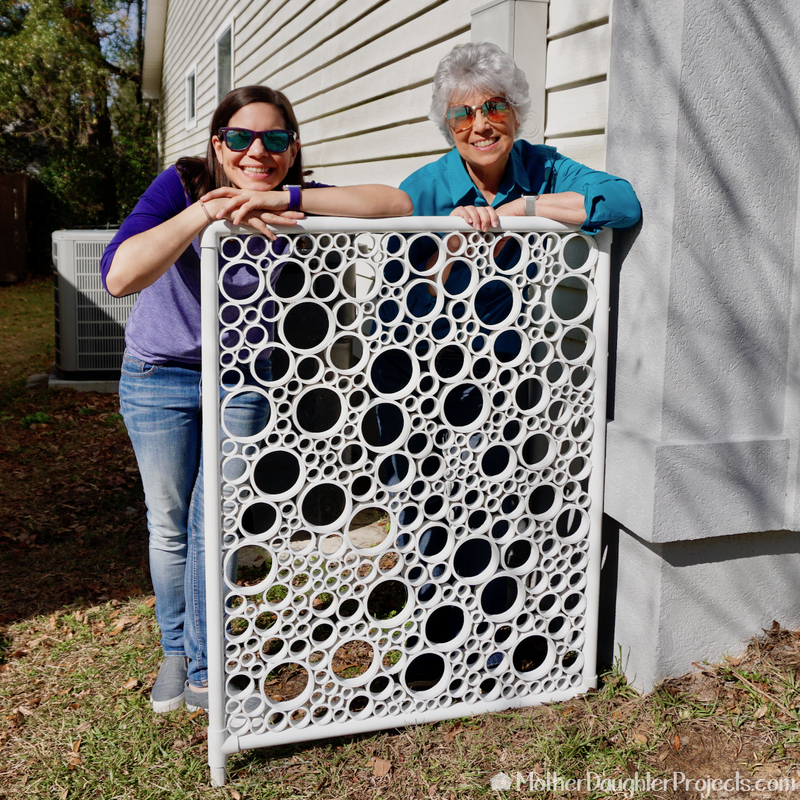
This new PVC art piece will go into those weird openings at Steph's house. They always looked a little incomplete so we thought that would be the perfect location.
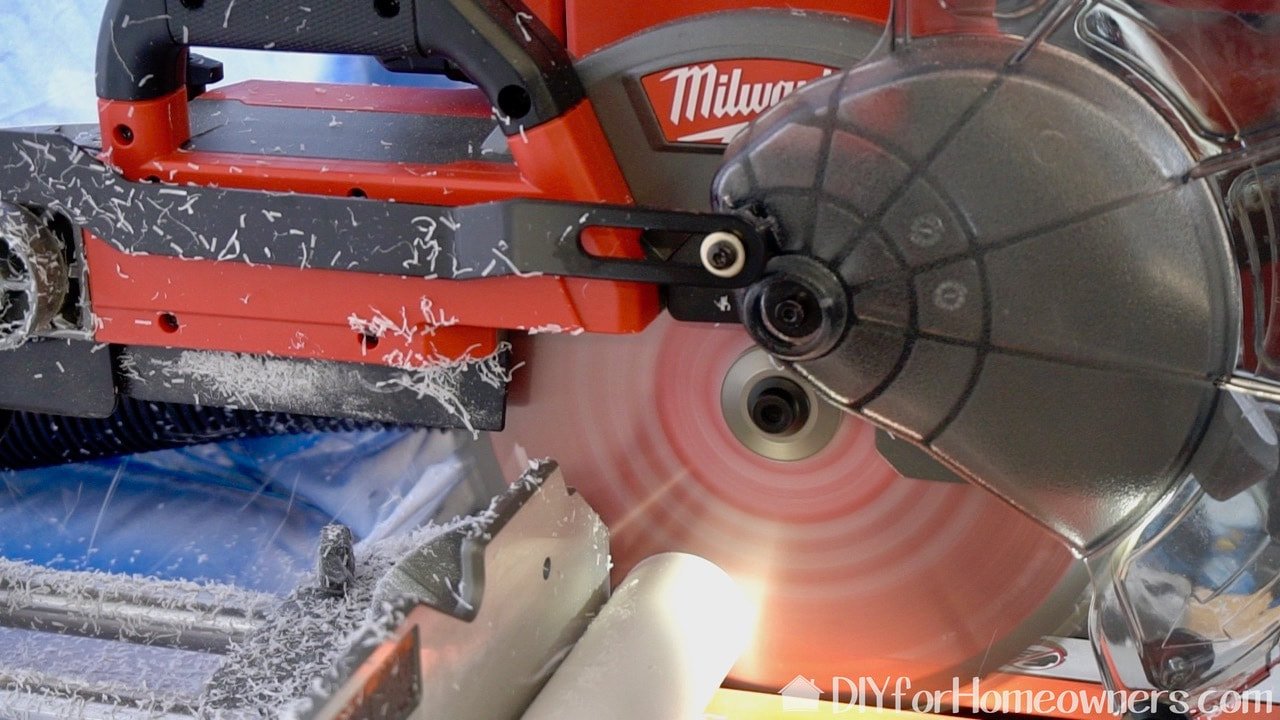
Most of our cuts were made on this Milwaukee Cordless 10 in. Miter Saw. We've used an earlier vesion of this saw for two years and have nothing but good things to say about it. We like the compact design and ease of use. It delivers up to 400 cuts per charge!
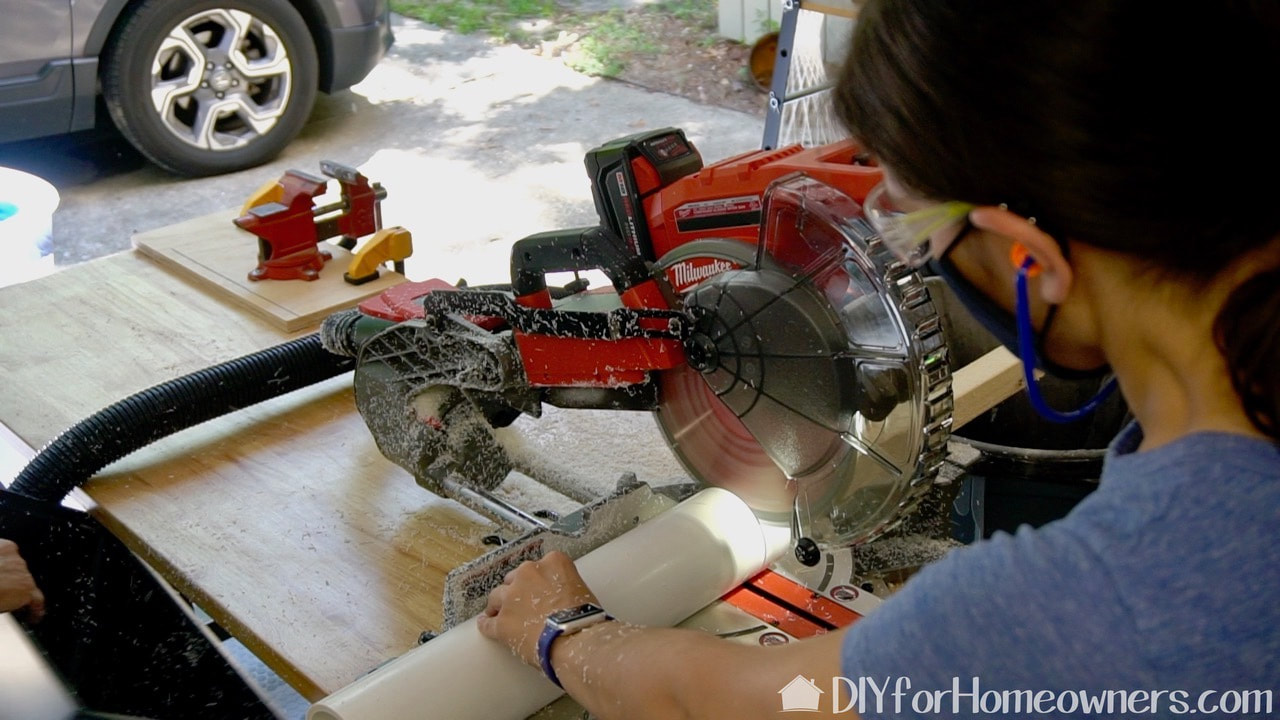
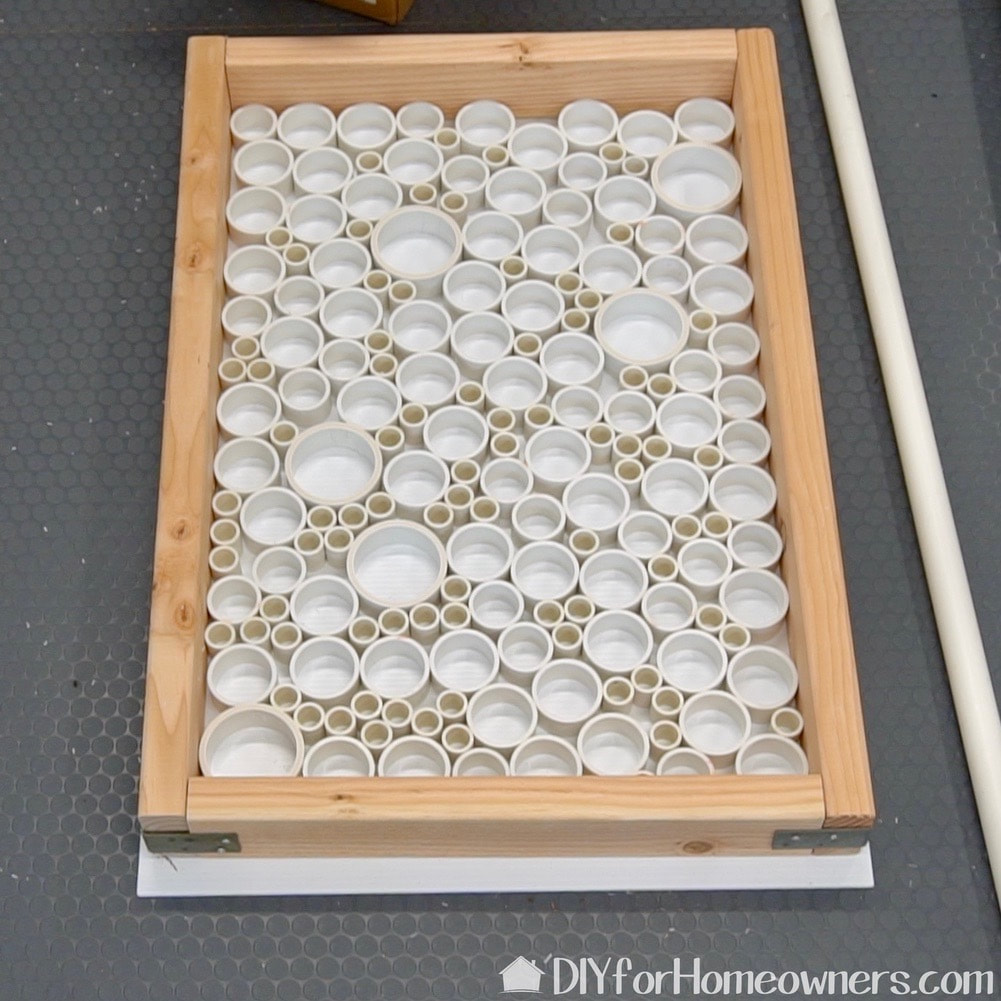
Ug, cutting PVC makes such a mess! We did use dust collection and stopped periodically to clean up. Steph set up a stop block (there on the right) so that all the cuts would be the same length.
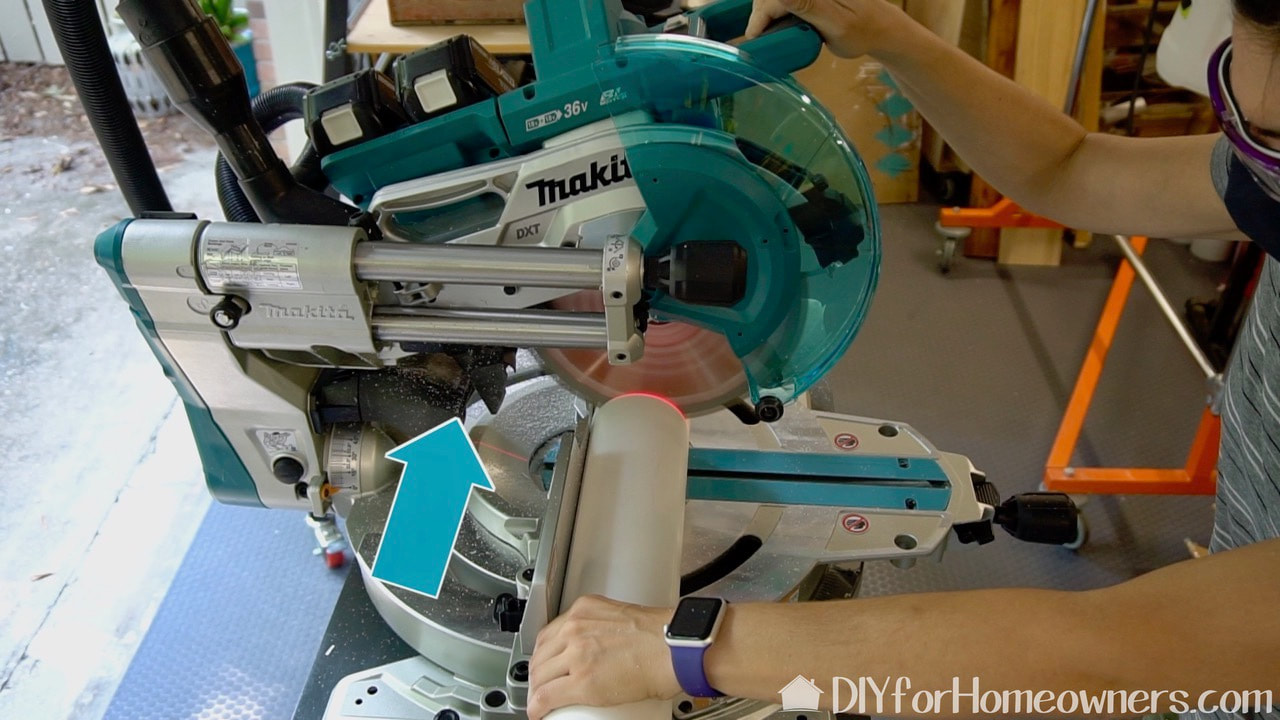
We also tried out this brand new Makita miter saw. It's brushless and uses two LXT batteries; X2 LXT technology delivers more power, speed and run time without the hassles of a cord. There is so much more flexibility when you don't have to deal with plugging in a tool! Also, a nice feature of this saw is the dust collection is nearer to the blade which meant, for us in this project, it collected more of the PVC dust so less clean up for us! We swapped out the Makita blade that came with the saw for one with a higher tooth count to cut the PVC. (60 as opposed to 40). The higher tooth count makes smooth cuts.
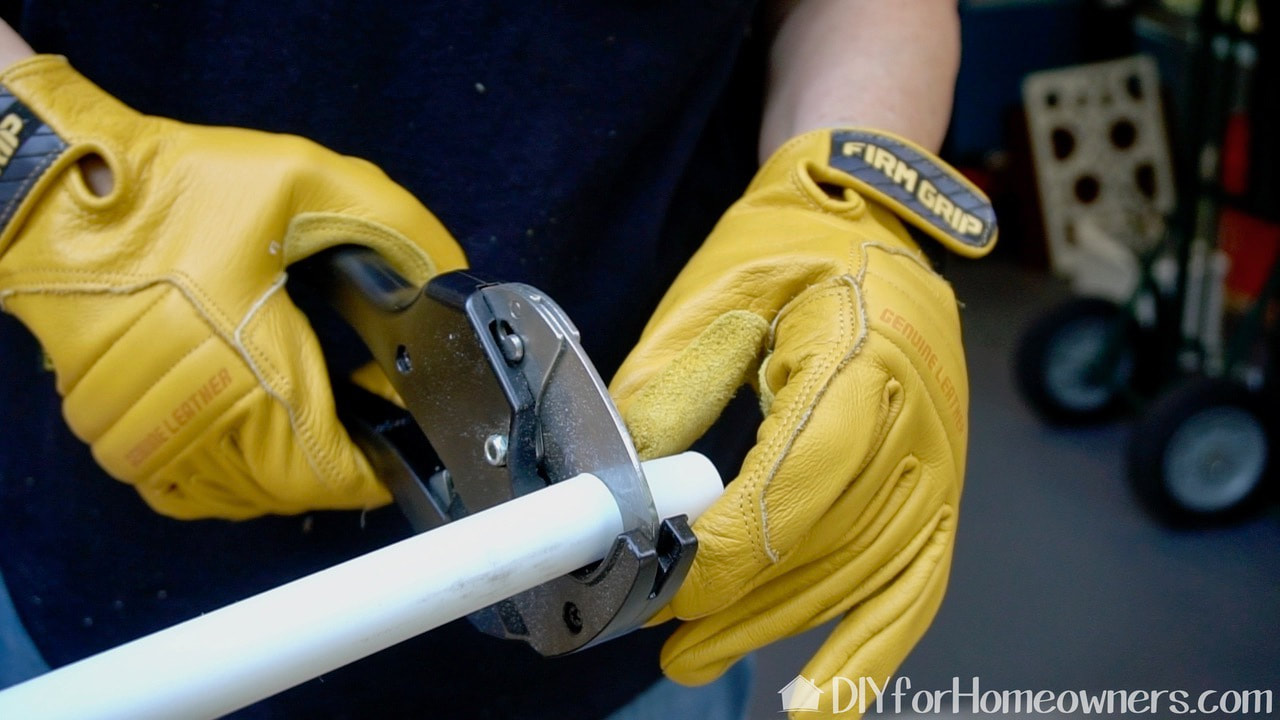
We learned from our first PVC project that when cutting the smaller diameter pipes, that they ricochet everywhere! We knew this, but we tried again anyway! We decided that wasn't a good idea when one beaned me in the forehead. (I didn't get hurt--I had on my safety gear but we were done!) We decided to cut the smaller pipes with this Husky ratcheting PVC cutter. It took a little effort, but it worked. I was doing this bare handed, but then realized I had this pair of Firm Grip padded leather gloves that would totally aid me in this task! It's interesting, I love leather gloves but Steph really doesn't. What are your go-to gloves for working in the garage or yard?
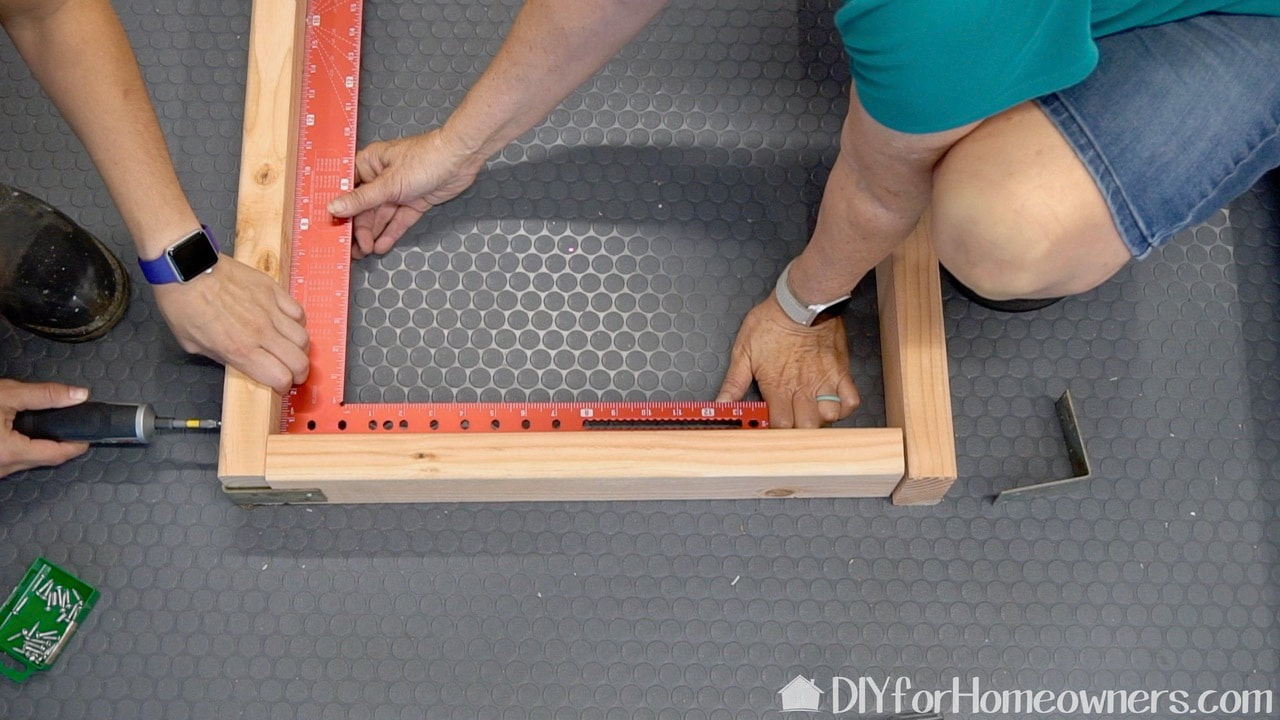
Steph built a frame in which to hold the PVC pieces while we put them into place. The frame is held in place with those metal corner pieces. That powered screwdriver Steph is using is the best! It's the Dremel 4V GO. It's battery powered and you simply push and it automatically works. We are using a Milwaukee framing square to help square up everything. One of my oldest tools is a framing square like this, but this one is such an improvement over that one. The main thing is the weight! This is aluminum making it so much lighter and easier to use. I bought my first one to actually aid in drawing patterns for sewing, soooooo, I'm thinking this is going to disappear into my sewing room. (Don't tell Steph!)
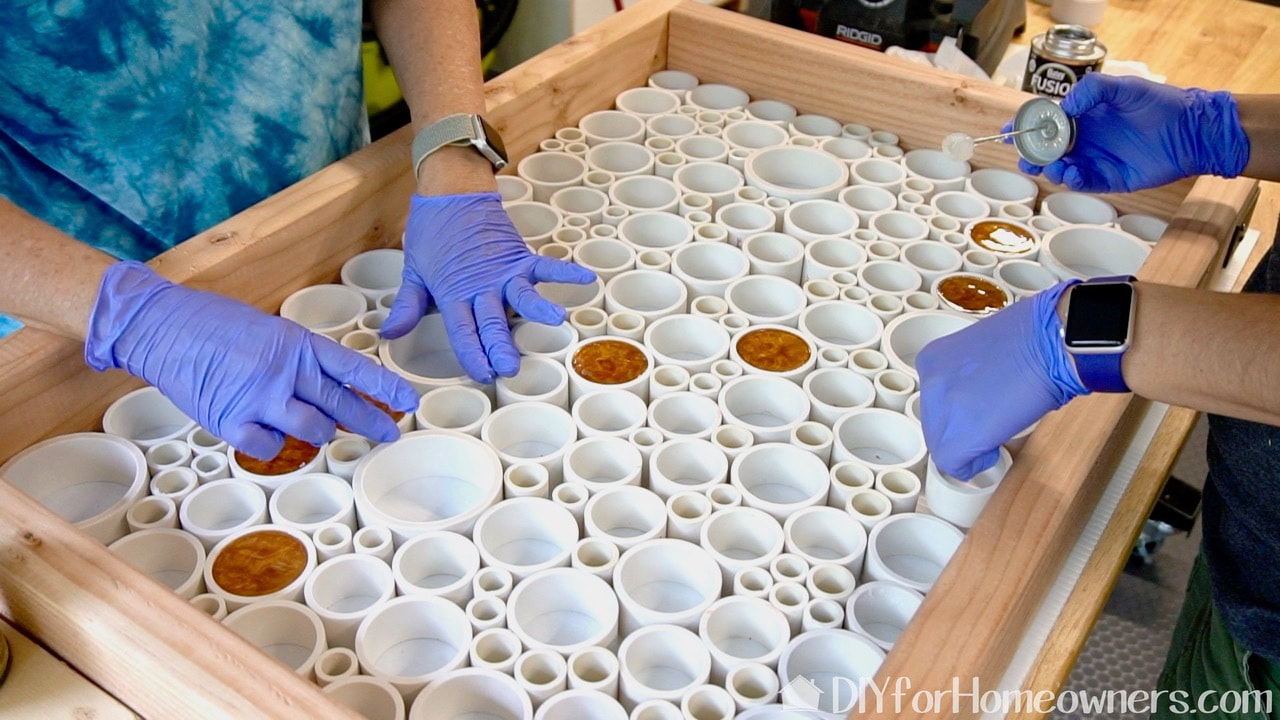
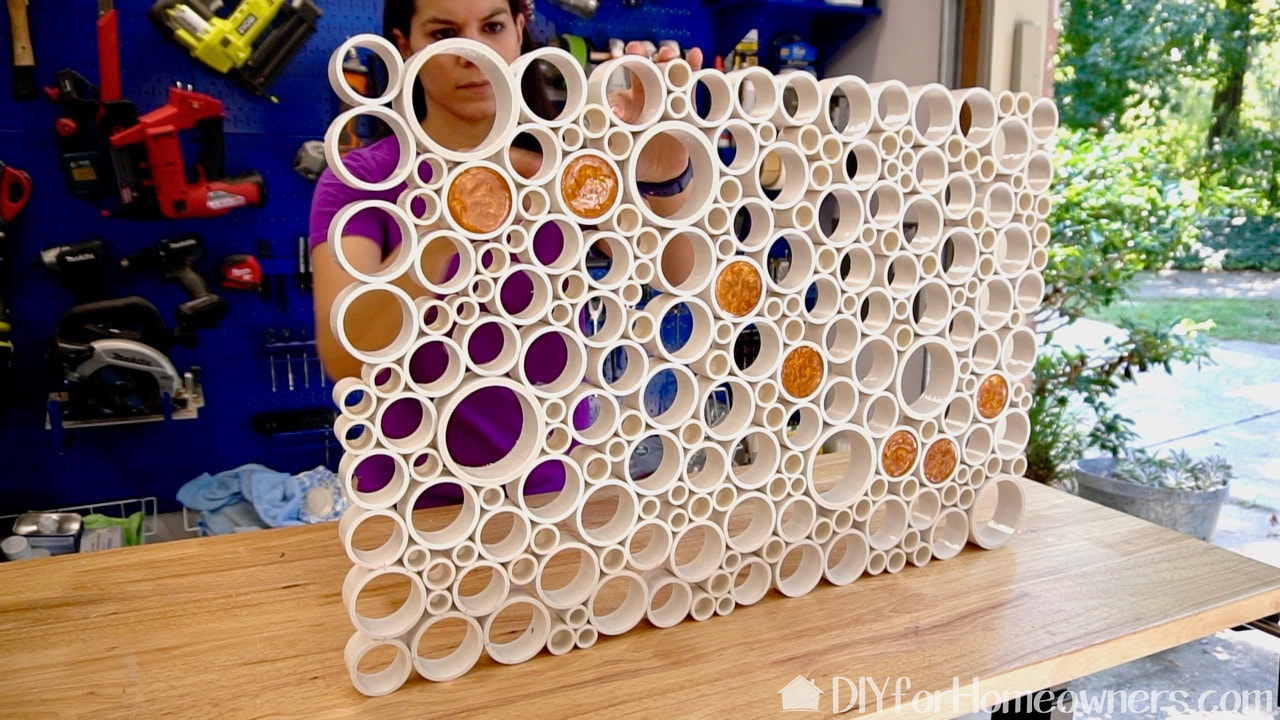
One of the talking points of our first PVC project was that we used construction adhesive instead of PVC glue. This time we took your suggestion to use PVC glue. We did experience some issues with it. We share those in the video, "What We Learned" section.
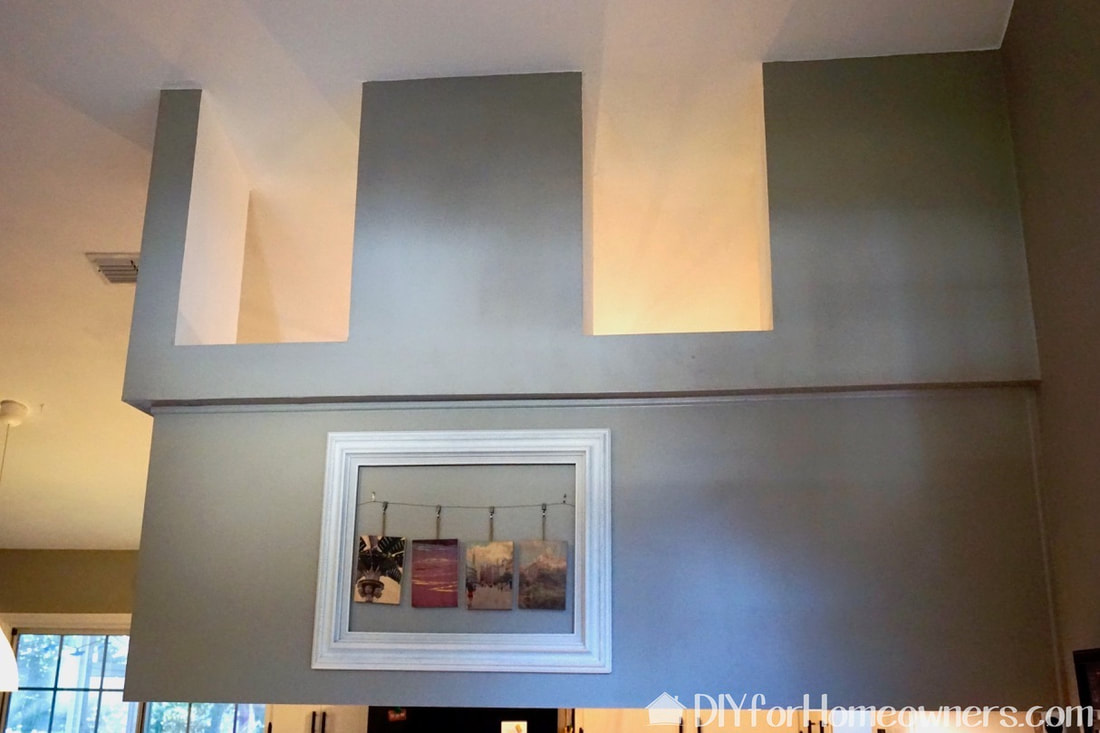
Here's the before...
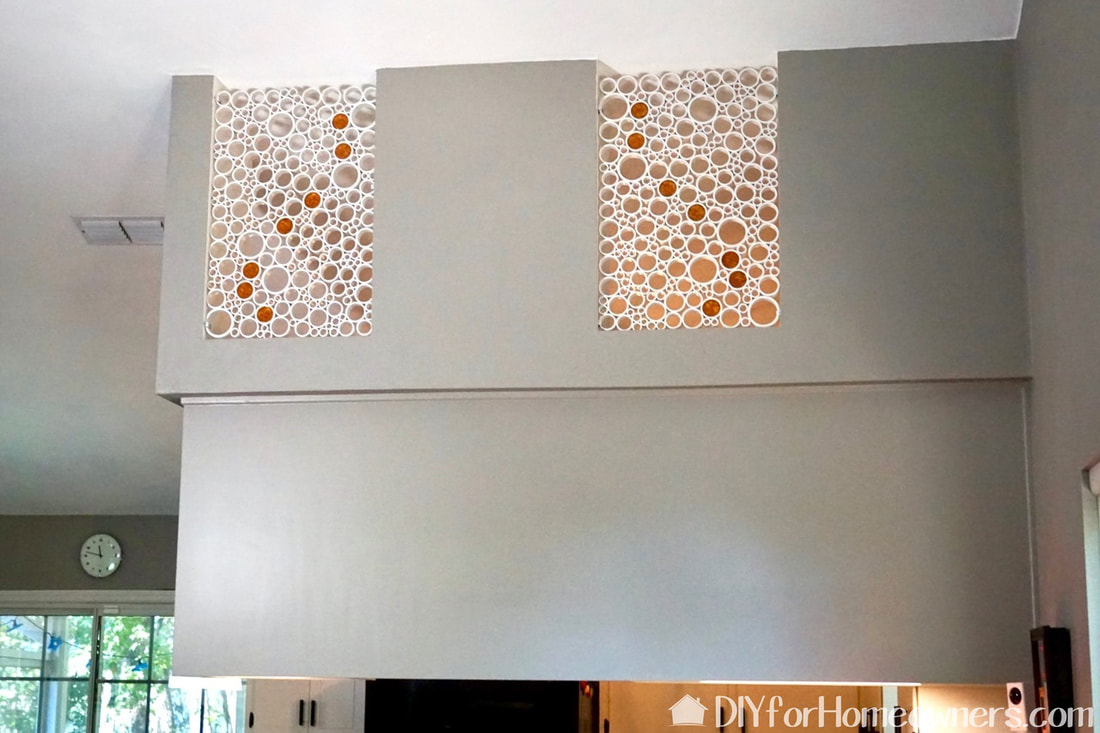
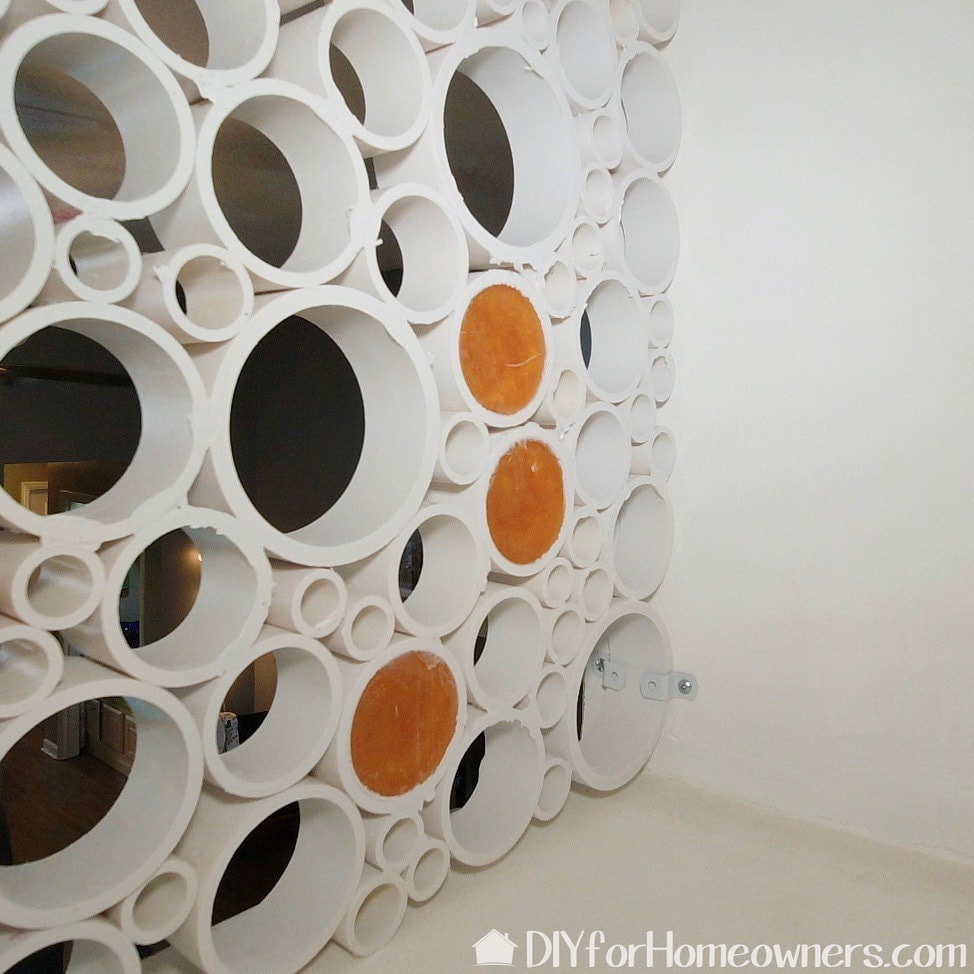
...and the after! It looks like they have always been there!
We love these panels!!!
Thanks to everyone who made suggestions on the PVC privacy screen. The best suggestion was closing up the fence on our miter saw. We did that this time and we had no issue with flying cut PVC pieces (with the exception of the small ones!) The epoxy was another idea, which is subtle in this project but effective. Thanks to all those that made that suggestion! We acknowledge that The Home Depot is partnering with us to participate in the ProSpective 2019 Campaign. As a part of the Program, we are receiving compensation in the form of products and services, for the purpose of promoting The Home Depot. All expressed opinions and experiences are our own words. Our post complies with the Word Of Mouth Marketing Association (WOMMA) Ethics Code and applicable Federal Trade Commission guidelines. FYI: We are not professionals, and we don’t claim to be. This is what we found worked for our project. Yours may need a little different approach. Safety first! FYI: Affiliate links are being used on this page. Purchasing via these links help support MDP! Related Projects
10 Comments
Cookie zimmer
9/18/2019 08:42:50 pm
Love the look! I'm impressed with your precision!
Steph
9/20/2019 10:09:08 am
Thanks Cookie :)
Erin
10/3/2019 10:44:15 pm
I looked for cost... but seemed to have missed it. Also, did think of using something other than resin for those specific pieces? I really like them.
Steph
10/4/2019 02:04:59 pm
The cost for us was around $90 for materials. We used an epoxy we found on amazon and a powder to make the gold look. Not sure what else would give this same effect.
Roxanne Robertson
10/25/2019 10:58:47 am
I really really liked this, might be pricy, but I'm sure I can find sales. This is soooooooo pretty
Steph
10/27/2019 11:02:33 am
Thanks Roxanne!
Valerie
1/4/2020 10:00:40 am
I love this so much.
Steph
1/6/2020 08:40:41 am
Thanks Valerie!
Susan
6/1/2021 01:29:20 pm
I love this project! Here's my question: could you do the epoxy or resin pour and then do the cutting? Instead of trying to seal all those individual pieces of pvc, you would seal one end (maybe use silicon caulking around the base to prevent leakage), then cut it into smaller slices once the resin has set. Any idea if that's possible? Or would the saw blade dull the shine of the epoxy/resin?
Steph
6/1/2021 07:55:08 pm
Interesting. I'm not sure if it would work, but it would be worth trying! I do think the shine would not be on the epoxy, but you could buff it probably. Leave a Reply. |

Mother Daughter Projects
|