|
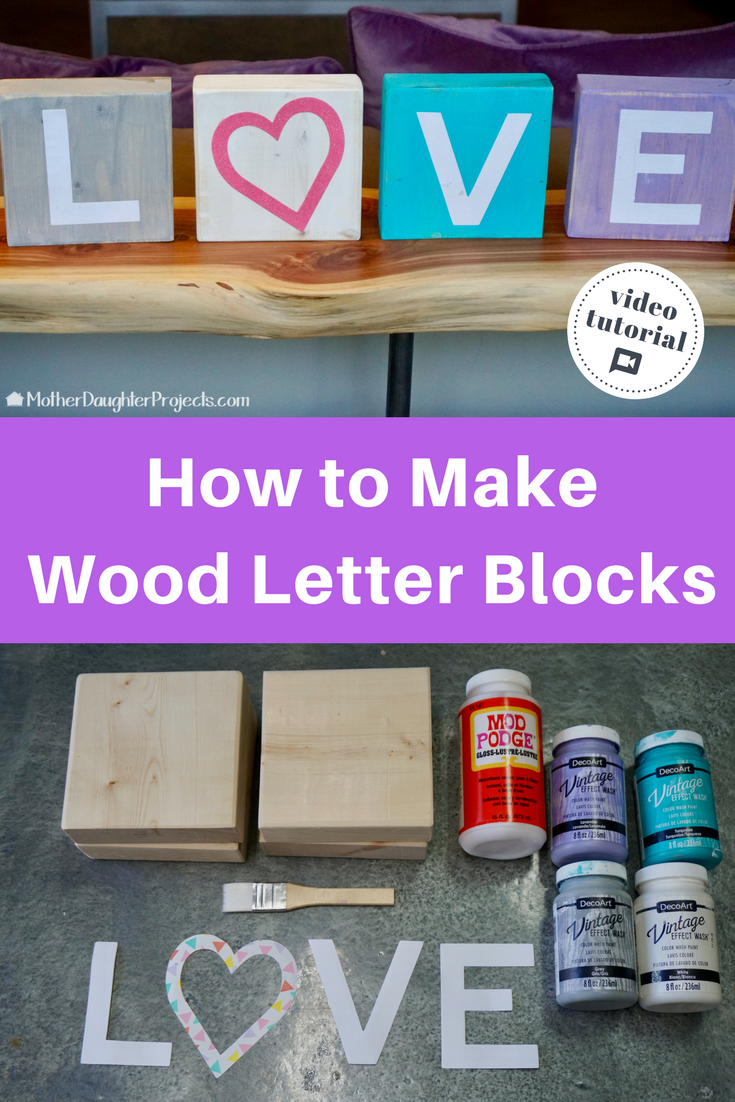
text by Vicki Sign up to get Mother Daughter Projects updates in your email! Recently, with Steph’s help and the help of a few volunteers, we planned and hosted a craft night for women at my church. A search of Pinterest and a picture on Facebook provided the inspiration for our Valentine’s Day craft. I’ll provide some tips at the end of the post for planning a craft night for a group. 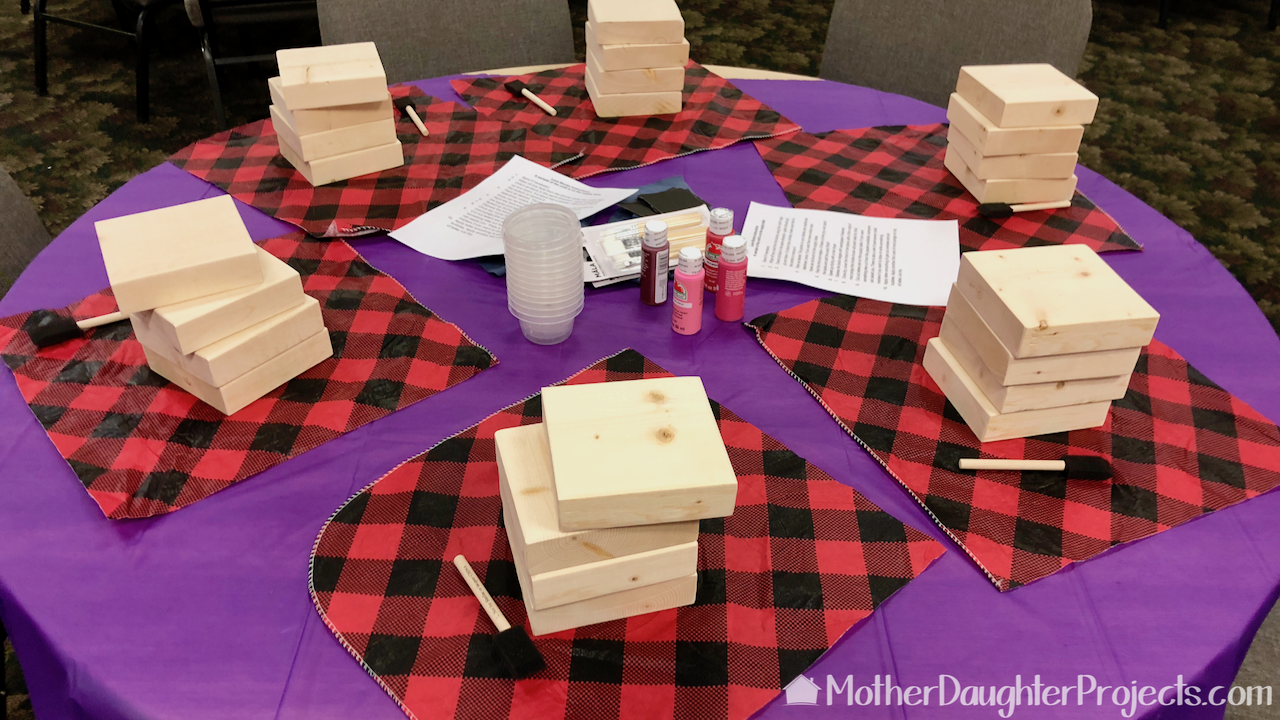 We set four tables with six at each table. A plastic tablecloth went on first and then each "place setting" got a set of blocks and a foam brush all set on a piece of cut flannel backed tablecloth. Each table was set with four bottles of paint, sandpaper, a handful of t-shirt rags, plastic cups for paint or water for brush cleaning, some Ikea craft brushes and two sets of instructions. 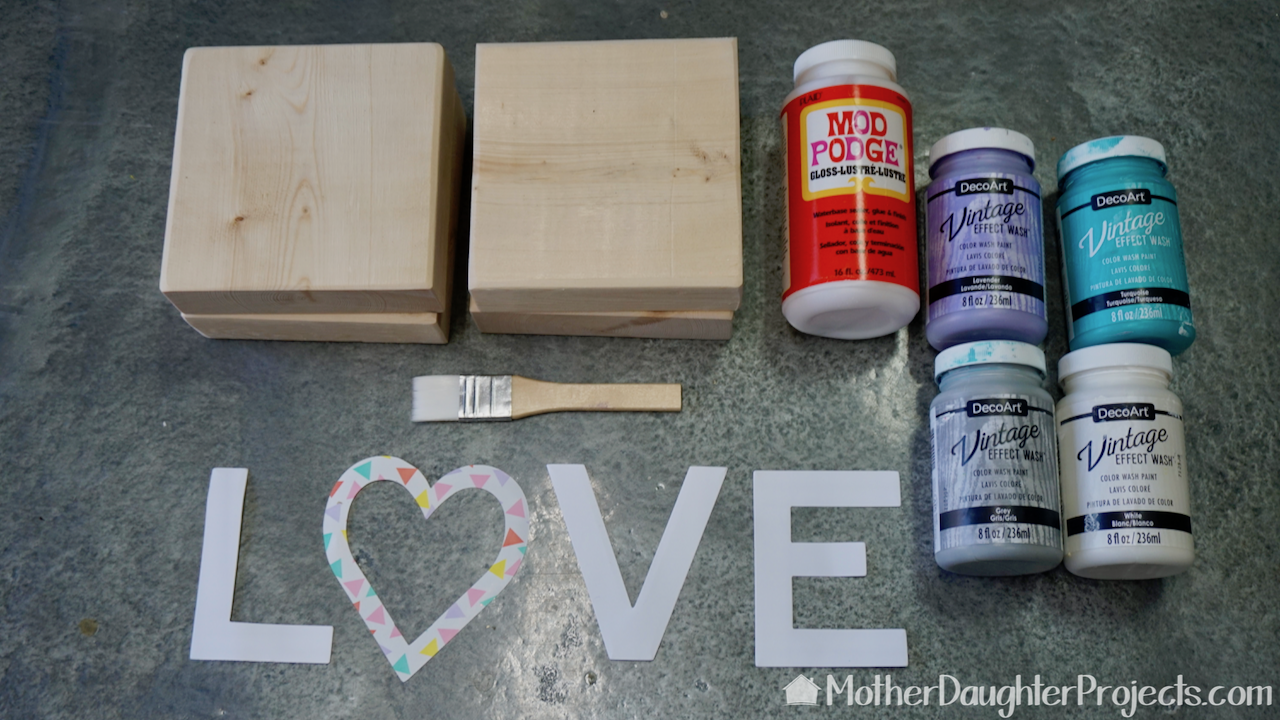 For each guest, you'll need 2x6 cut into squares, Mod Podge, paint, brush and die cut letters.
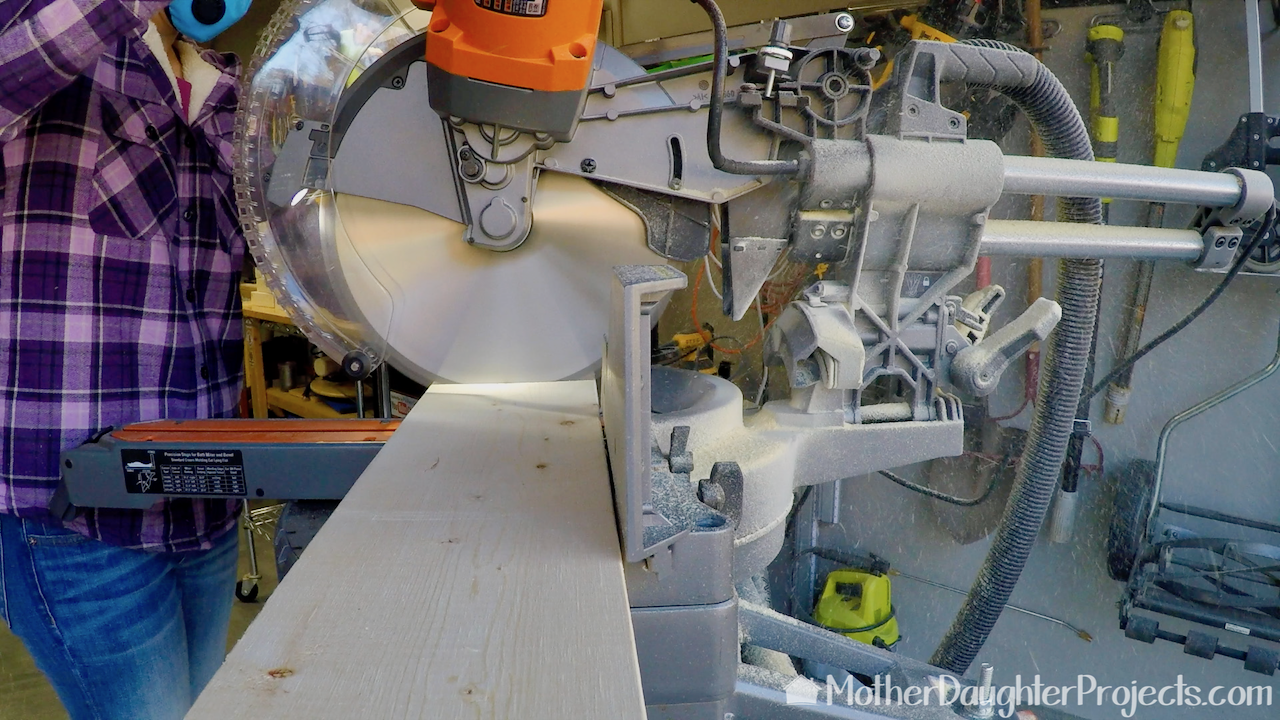 Prior to the event, Steph and I cut 25 sets of (4) blocks from (3) 2"x6"x16' boards. Once cut they were sanded with 150 grit sandpaper to remove the most obvious roughness and to round the edges to give them a softer look. They could have used more sanding, but sanding 100 blocks takes a whole lot of time and energy! 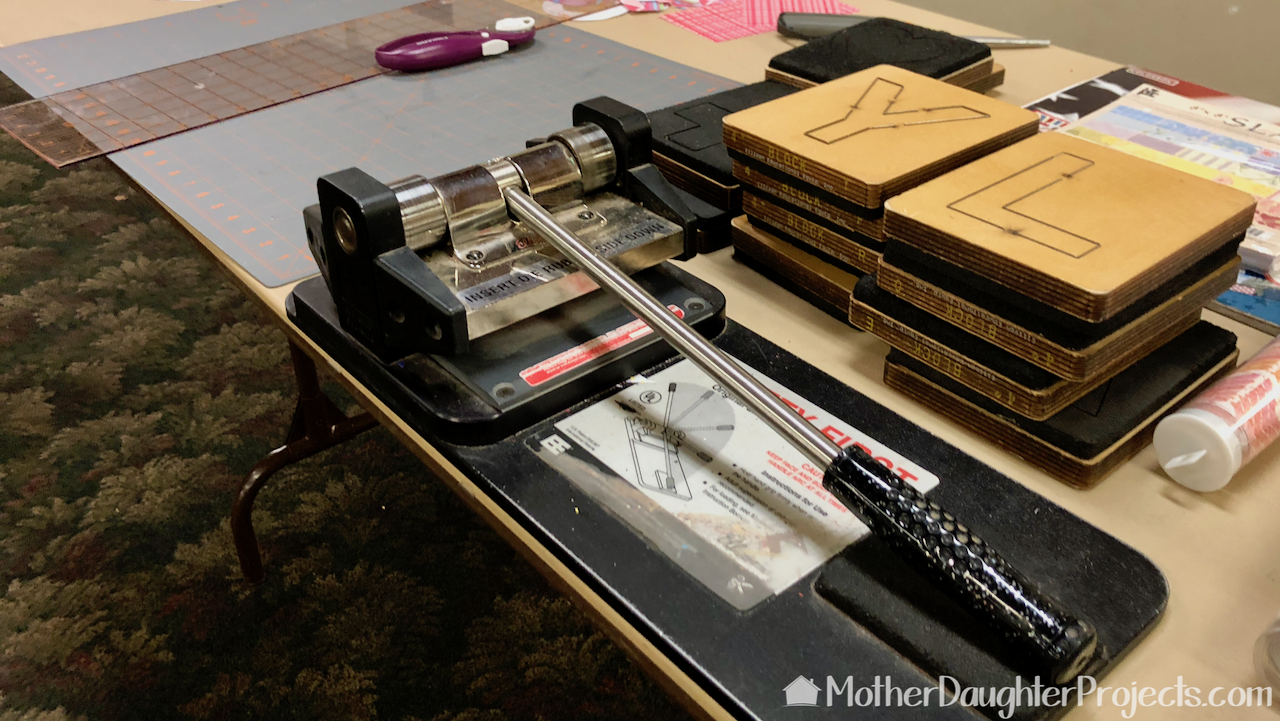 Prior to the event, I die-cut the letters L-O-V-E and some hearts using an Ellison die cut machine owned by the church preschool. Letters could also be purchased or cut with a vinyl cutting machine. 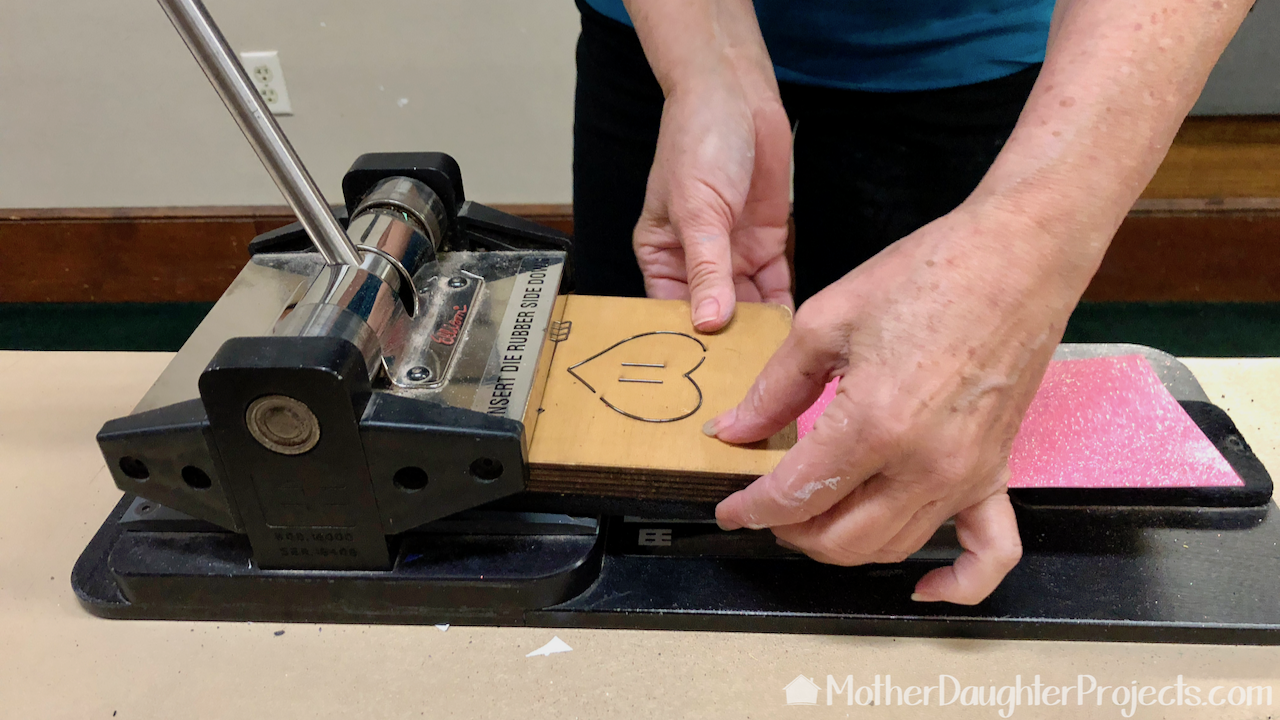 At the last minute, I decided to bring the die cut machine and alphabet letters into the crafting space just in case anyone wanted something other than white letters or wanted to use a different word. We had a little bit of scrapbook paper on hand to choose from. Surprisingly, most attendees wanted something different. Besides using LOVE; HOME, HOPE, EMMA, PRAY were all used! 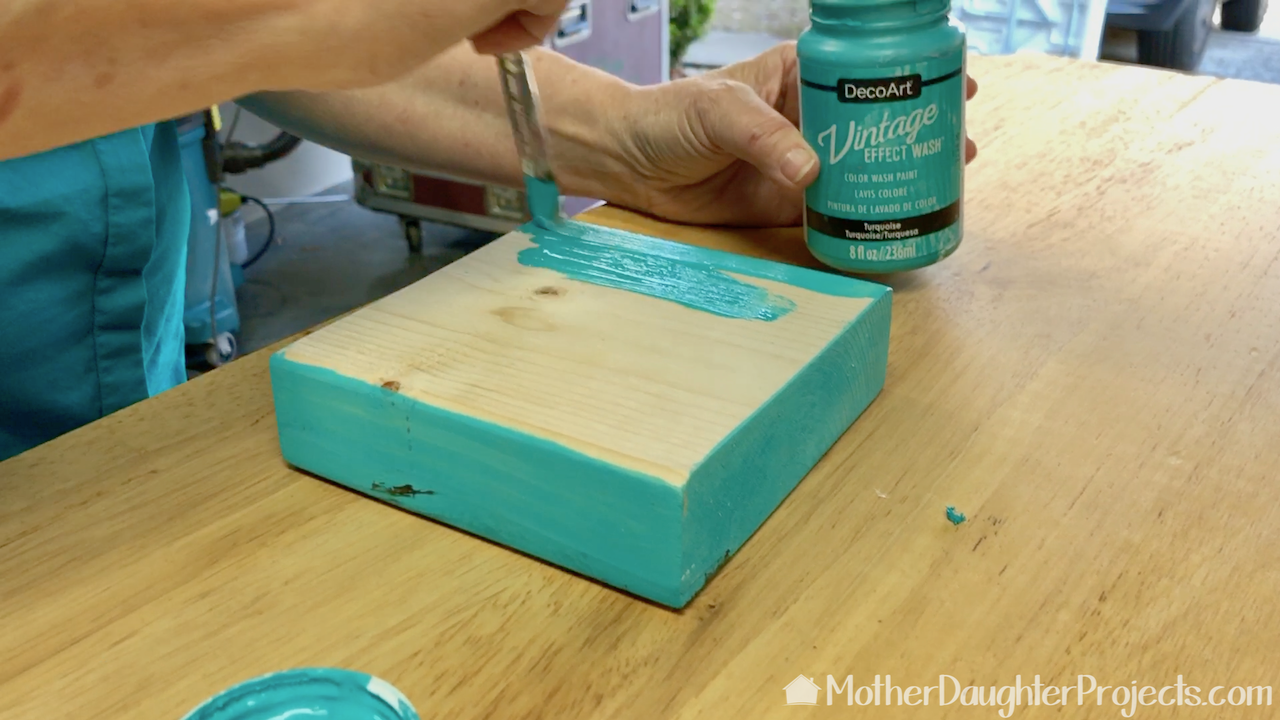 Before painting, be sure all block are oriented in the same direction. The grain of the wood should be vertical. If a block has a sticker that should be placed on the bottom. Paint the blocks including both sides and edges. The drying process can be speeded up with a hair dryer. I like this Vintage Effect Wash paint by DecoArt because it looks more like a stain than a paint. 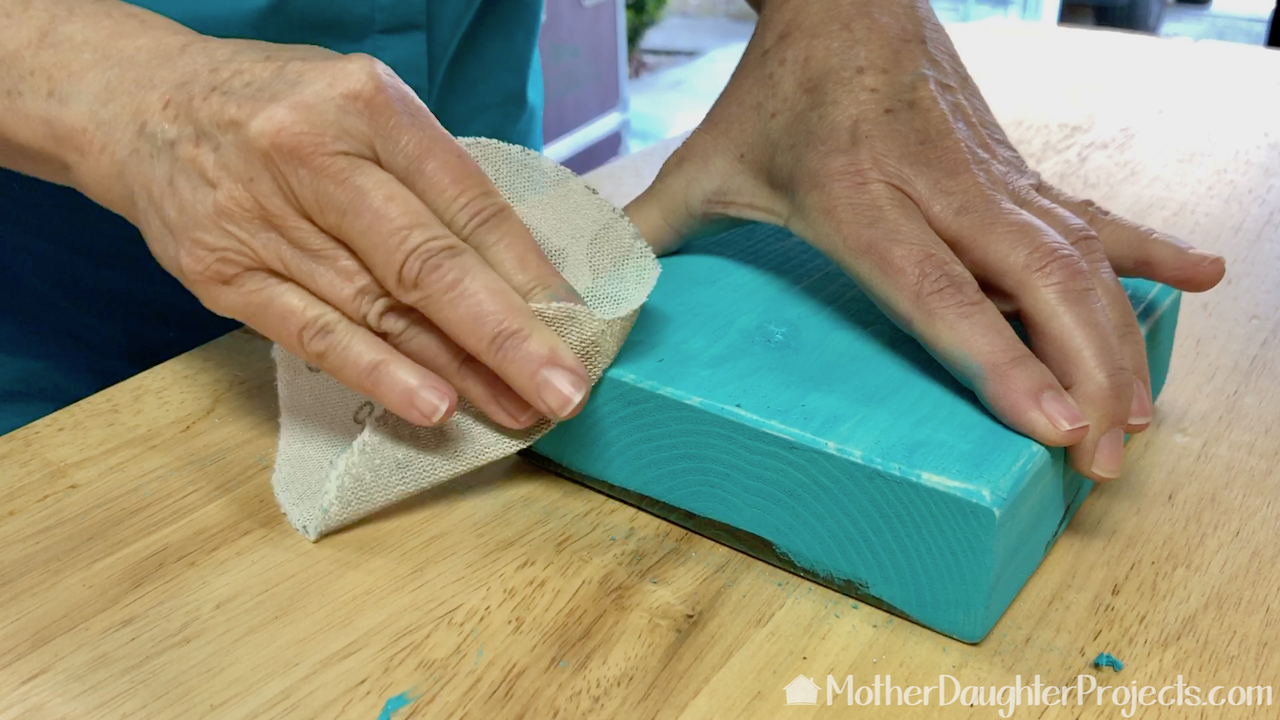 Edges can be left alone or sanded for a slightly distressed look. 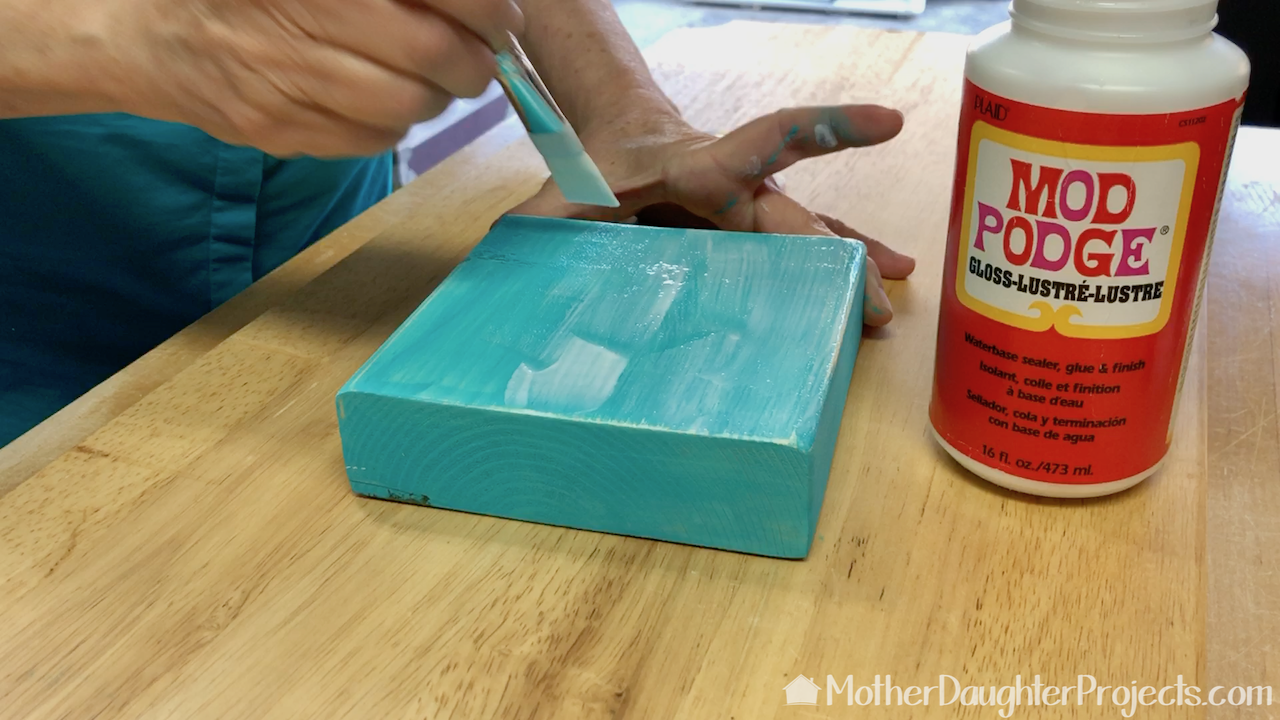 Apply a very thin layer of Mod Podge to the front of the block. I like to use a bristle brush for this as opposed to a foam brush. Mod Podge comes in many finishes include a matte look. 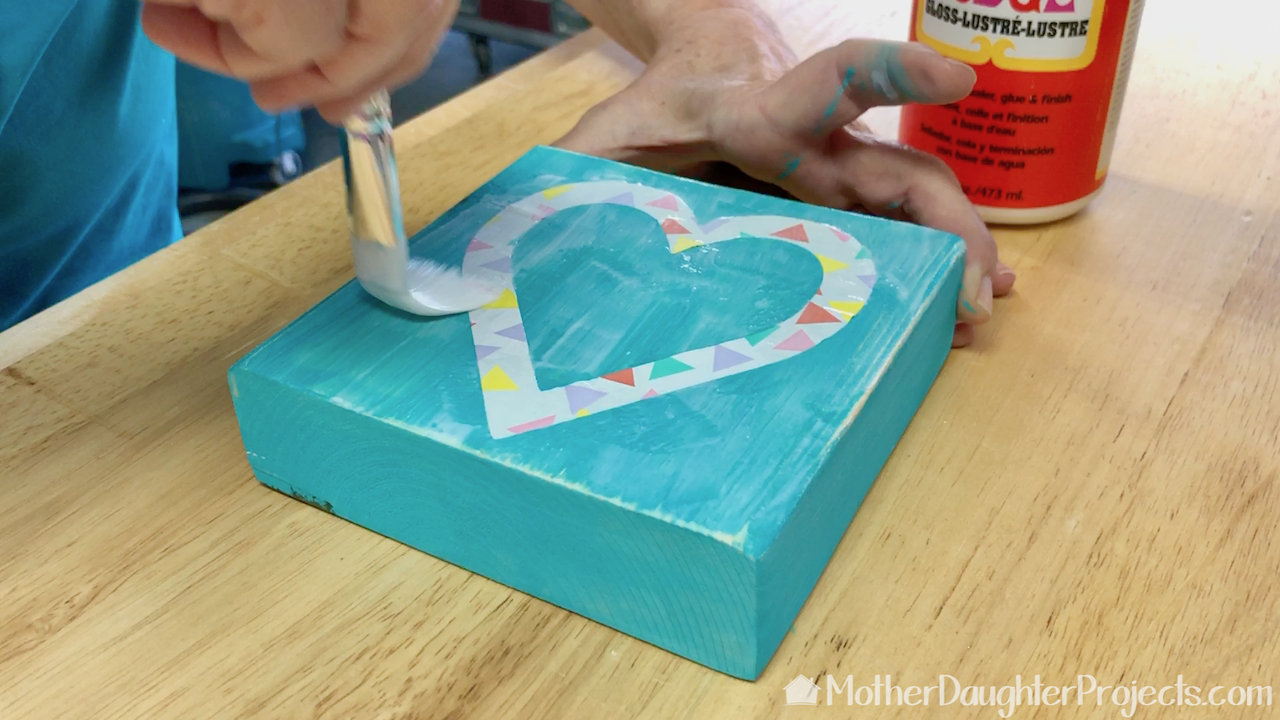 Lay the shape or letter in place, apply another thin layer of Mod Podge taking care to smooth out any wrinkles or bubbles. Let dry.
This was a fun and quick craft which can be adapted for other seasons and holidays. It's sometimes difficult to find a craft for a group, but this one was perfect. The really surprising thing about using this for a group, was how different and creative everyone's set of finished blocks looked. That's the great thing about DIY--you can see an idea and customize it for your own home or needs. Here are some tips for adapting this craft for a group: Be sure you have a way of registering attendees prior to the event. This is not an activity that lends itself to drop ins. Have a list of attendees printed for check in. It's helpful to have someone checking people in and collecting fees. We charged $10. Purchase supplies based on the number of guests. This is what I bought or gathered. We set up four tables.
We were able to manage this group with four volunteers. The tables were all set up prior to the event. The supply table was set with extra paint and supplies, the die cut machine, and a sample of the craft. With the tables pre-set and instructions available on each table, the attendees were able to self-start as soon as they arrived. The volunteers checked in attendees, did the die cutting, washed brushes and helped where needed. It was such a fun evening! Please note: We are not sponsored by any of the companies/products that we used. These products were picked and bought by us. FYI: We are not professionals, and we don’t claim to be. This is what we found worked for our project. Yours may need a little different approach. Safety first! FYI: Affiliate links are being used on this page. Purchasing via these links help support MDP! Related Projects
0 Comments
Leave a Reply. |

Mother Daughter Projects
|