|
text by Vicki Sign up to get Mother Daughter Projects updates in your email!
This post sponsored by Diablo Tools.
In April 2017, we were introduced to a new product that just blew us away! Of all the tools and accessories that we saw at the event, this was the one that had us wanting to try it ourselves. That product was sandpaper from Diablo called SandNet.
I guess what surprised us the most was Diablo took a very low tech product--sandpaper--tweaked it and vastly improved the life and function of it. Who knew sandpaper could be improved?! We were thrilled when Diablo asked us to partner with them to demonstrate SandNet. It was easy to say yes as SandNet has truly become our 'go to' sandpaper of choice. We needed the perfect project that would showcase it's ability to be more efficient and last longer than what most of us are used to using. A recent yard sale find of a piece of live edge cedar proved to be the perfect piece of wood. We decided to make a sofa table for Steph's house with it. Read on to see how we put the table together! 
This is the space where Steph wanted the table. It's a narrow space thus we needed a narrow and long table to fit behind the sofa. That's the cedar over on the left. We let it acclimate in the space for a few weeks before working on this project.
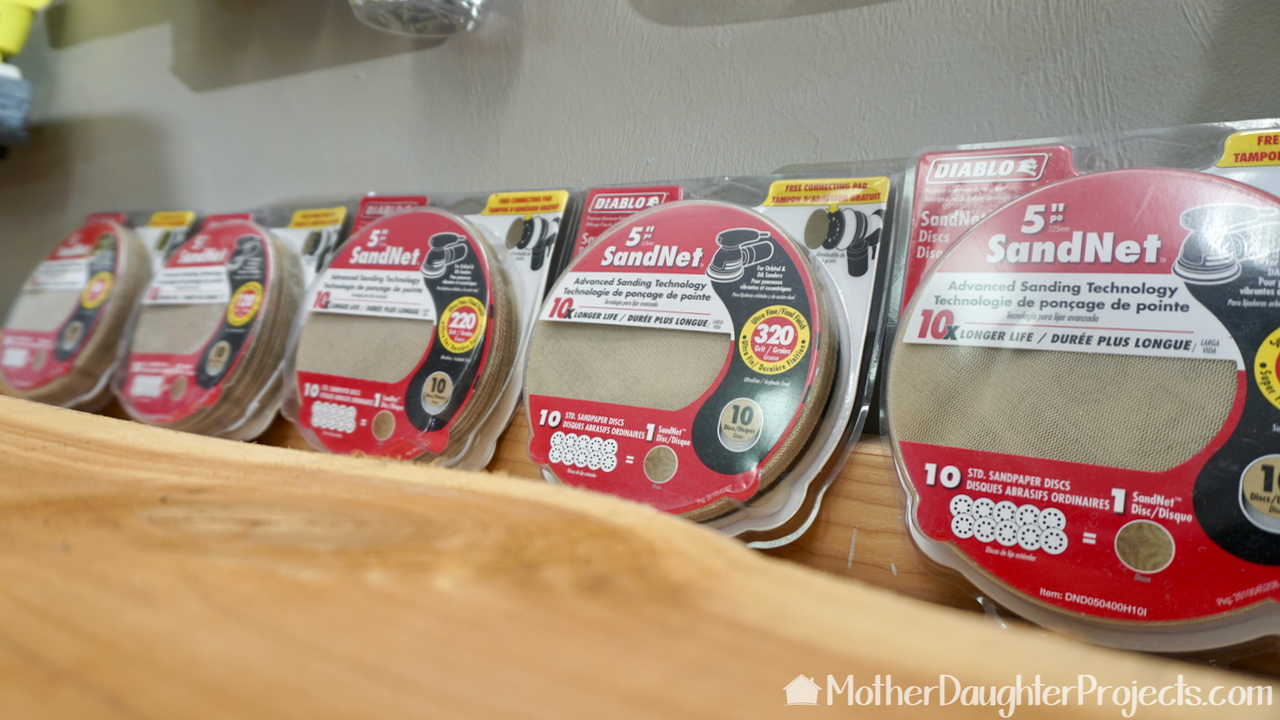
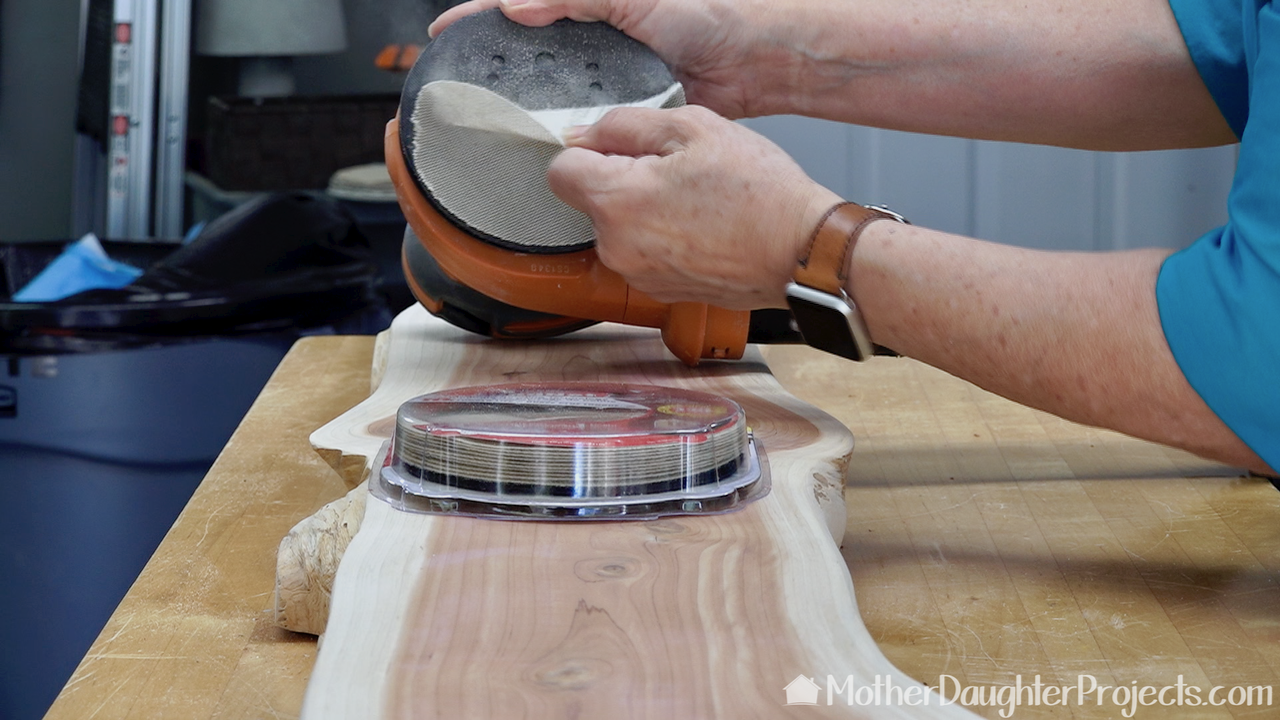
In each package, you'll get 10 sheet of sandpaper and a SandNet adapter for your orbital sander. It's all hook and loop so it's easy on, easy off!
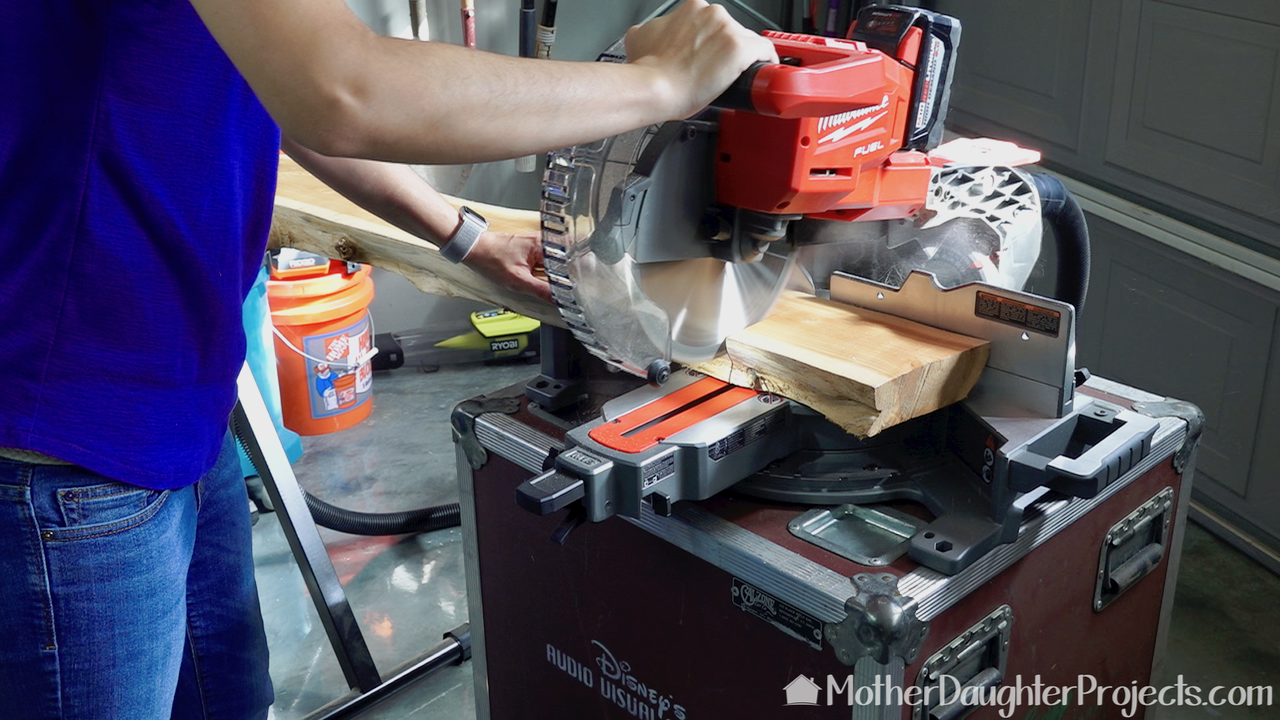
We started our table by cutting the live edge cedar to the length we needed. That first cut exposed the beautiful end grain and cedar fragrance!
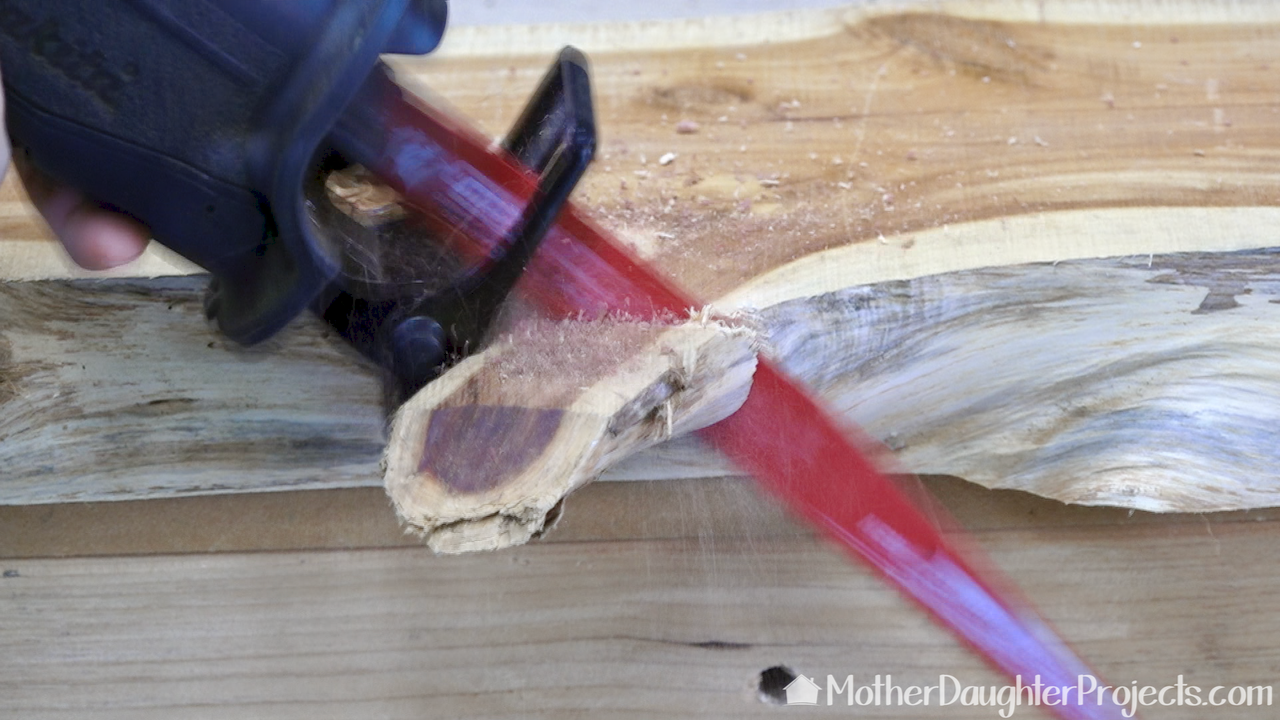
We used the Diablo pruning blade with a reciprocating saw to cut off the knobby parts of the plank.
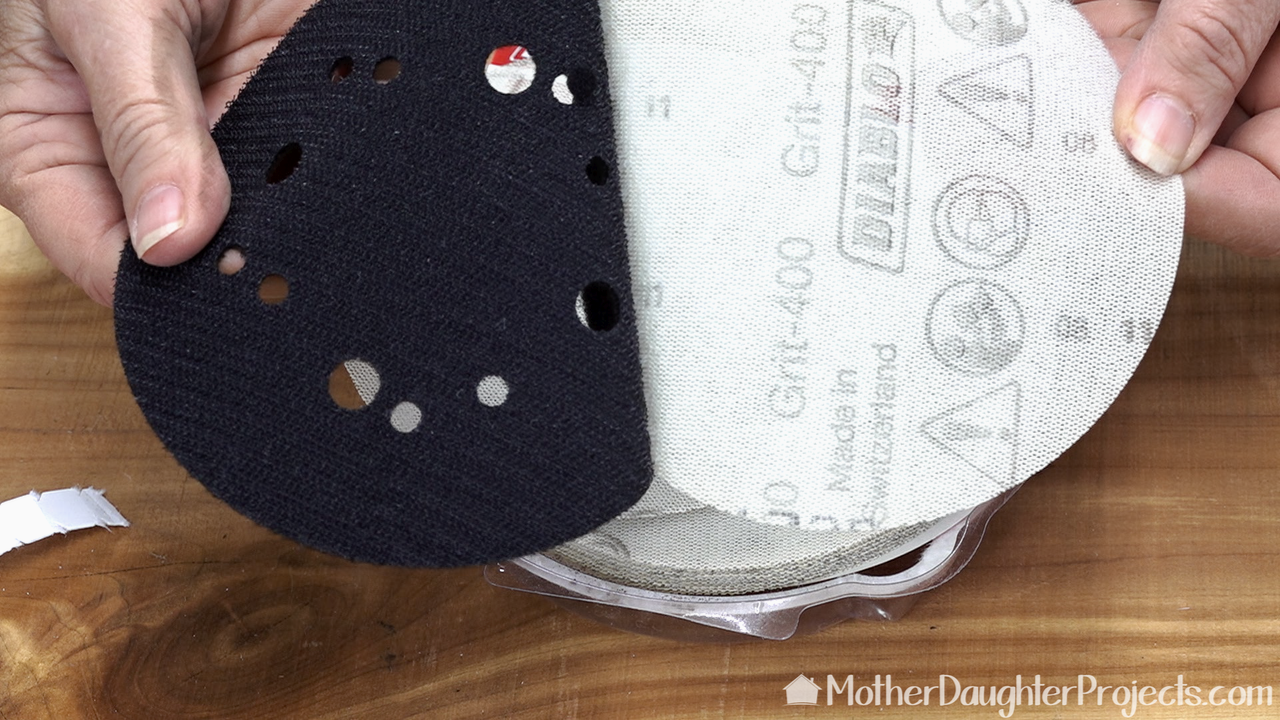
This is the adapter that is included with SandNet. See all those holes? That helps when you use a dust collection vac. When the disc does get full of sawdust, simply remove it from the adapter and shake it over a trash can. The sawdust will fall out easily and the disc can be put back into service.
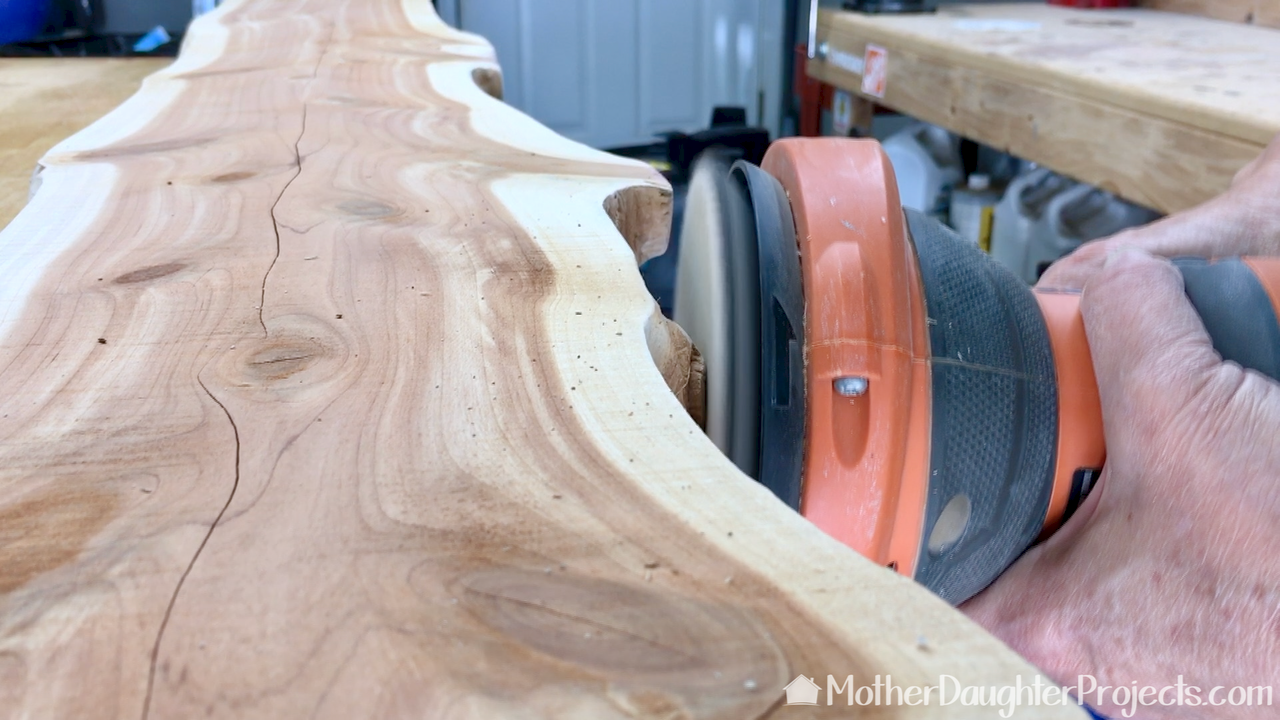
On the first pass on the plank, I sanded with 80 grit. I used a single disc on the top and bottom as well as on the knobby points. If I'd been using ordinary sandpaper, I would have had to reload with a fresh disc many times over!
I continued sanding moving through the grits (80, 120, 220, 320) to create the smoothest finish possible.
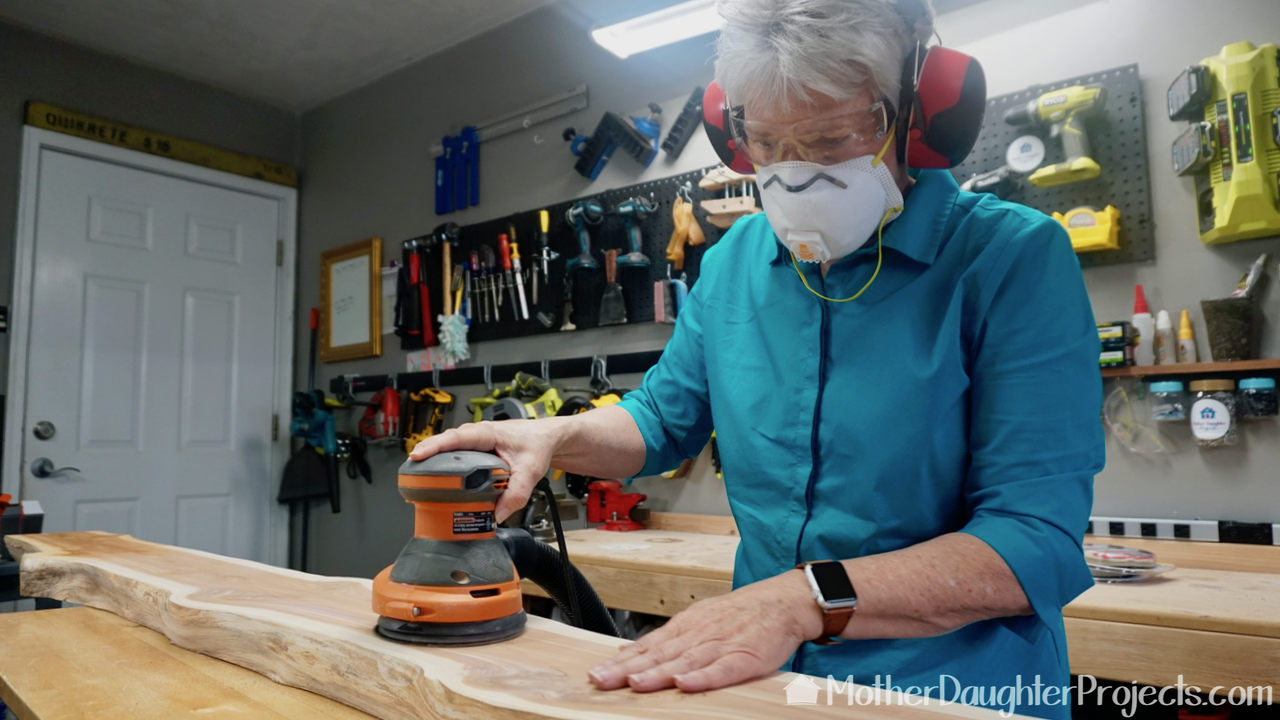
I sanded barehanded so I could monitor the state of the finish.
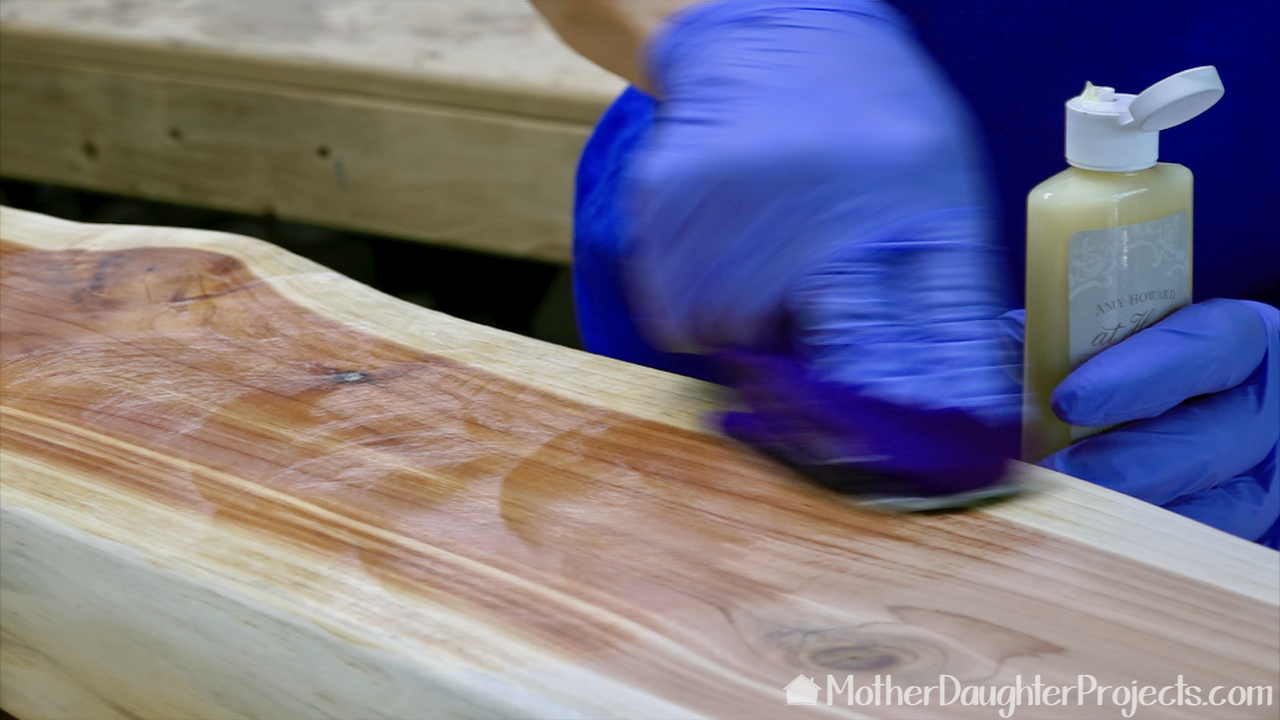
We debated between two different finishes--Danish oil and beeswax. The Danish oil covered the cedar smell so we used the beeswax. We wiped it on, allowed it to dry and then buffed with an electric buffer. Unfortunately, the buffer left swirl marks so I waxed again, wiped off the excess, let it dry, then buffed with 0000 fine steel wool. This proved to be the perfect technique.
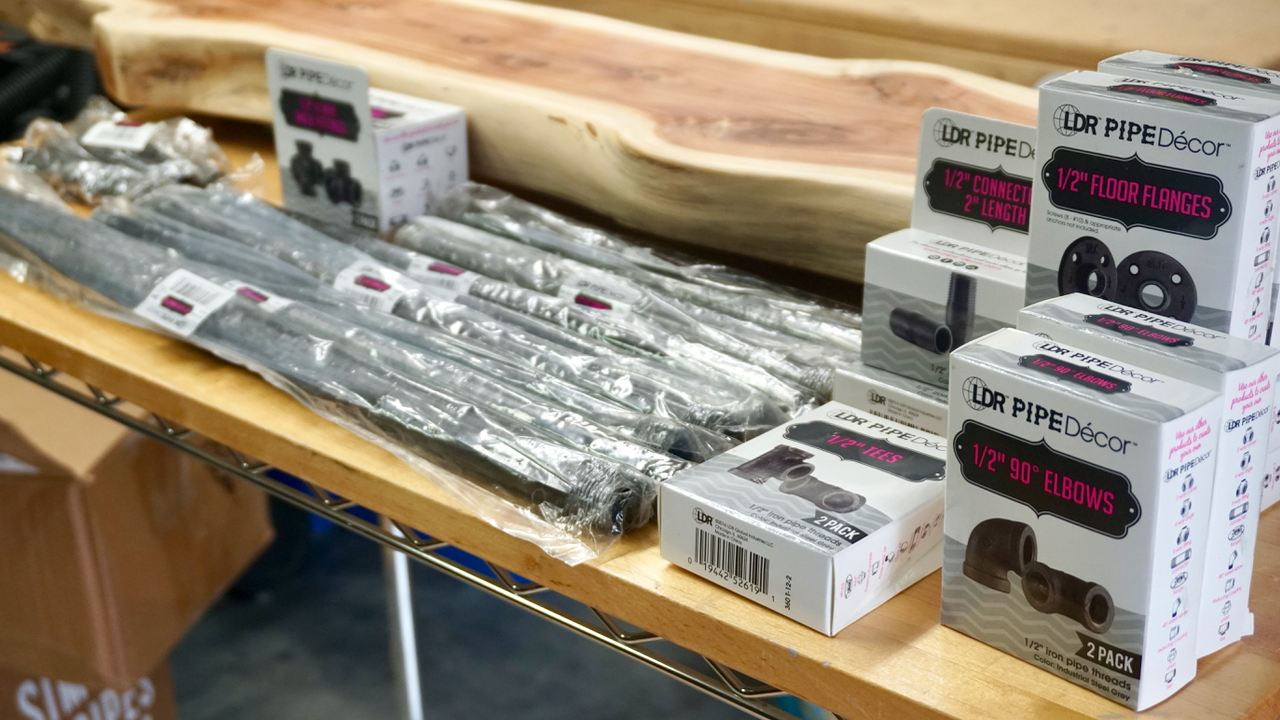
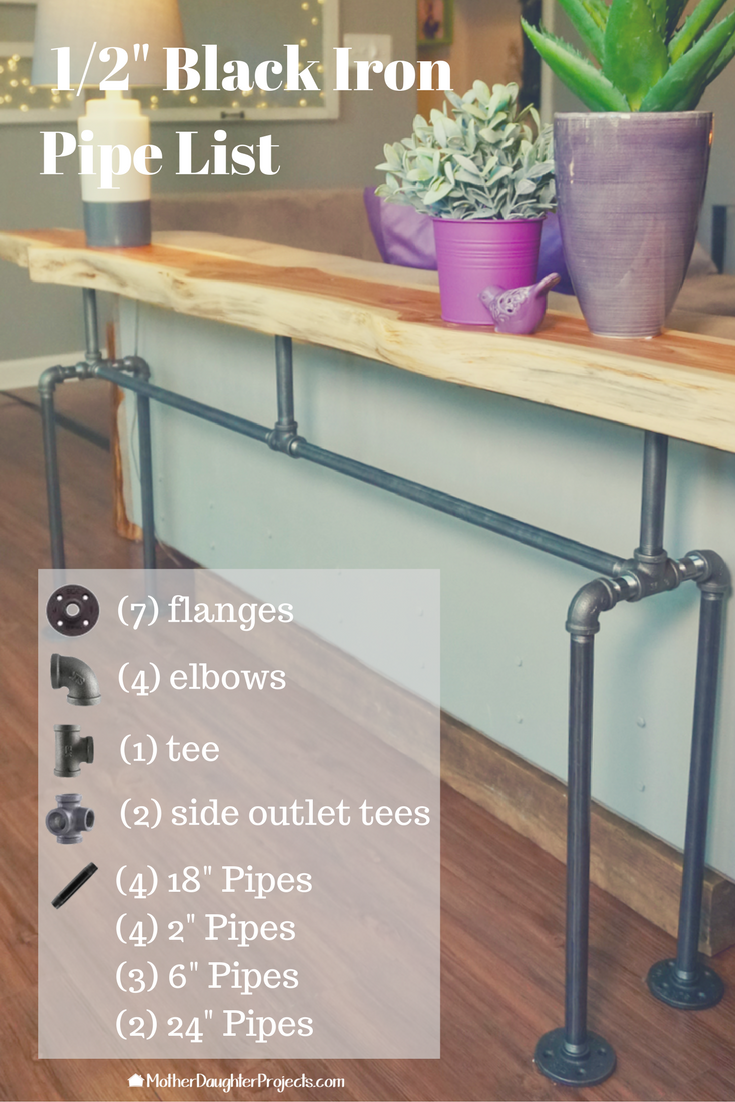
We used a variety of metal pipe parts to build a base for the table top. Before putting the parts together everything was cleaned and waxed, to prevent rust.
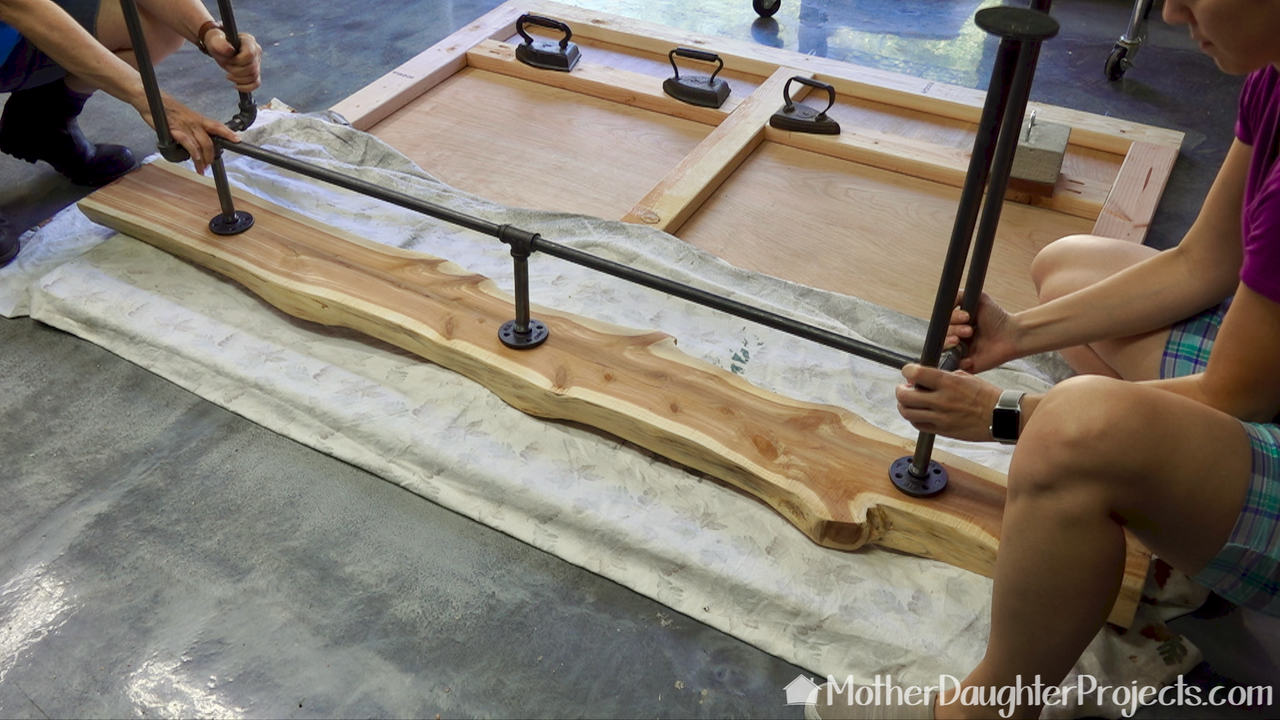
Once the base was assembled it was screwed into the bottom of the table top. Felt was added to the bottom of the flanges to prevent floor scratching.
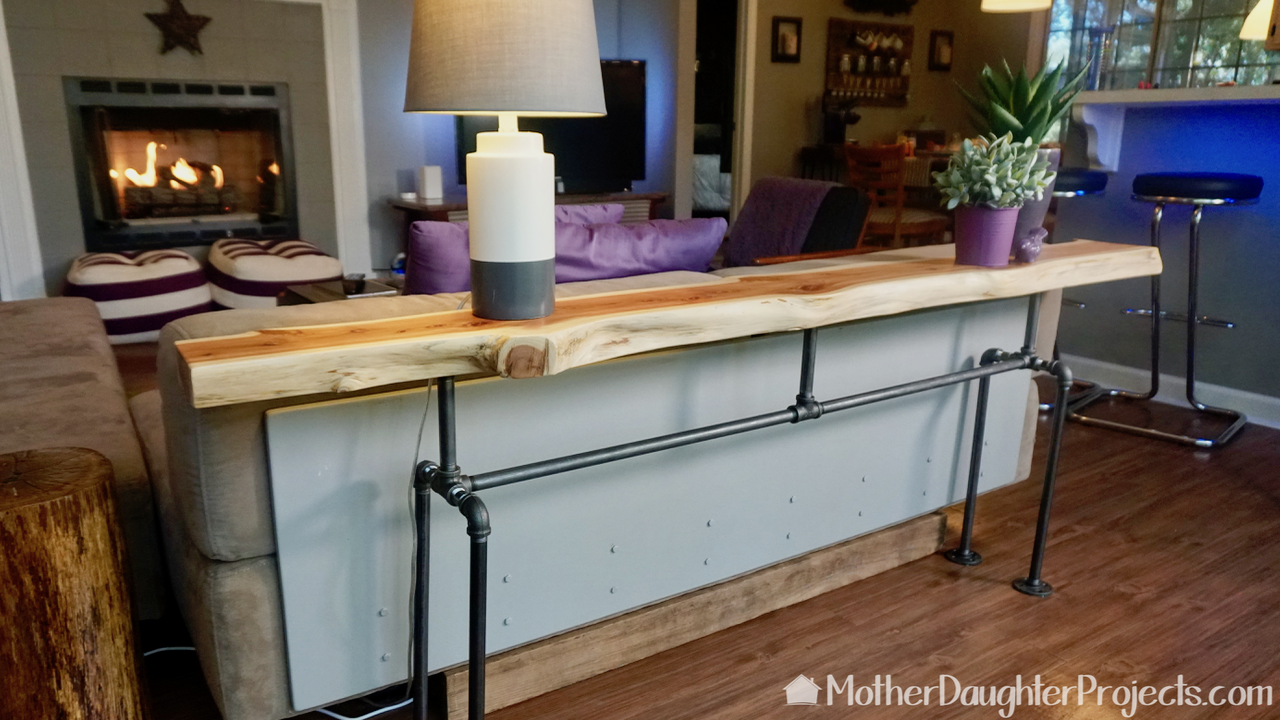
The sofa table is the perfect size for the space. The finish of the tabletop is super smooth.
The use of SandNet really brought out the natural beauty of our piece of live edge cedar. SandNet has truly become our 'go to' sandpaper for almost all our sanding projects.
This new sofa table fits perfectly into Steph's house, which has a rustic/natural theme. She wasn't sure about the pipe legs at first, but we found they compliment the cedar perfectly! Please note: This post is sponsored by Diablo Tools. We received product and compensation for this project. All thoughts and opinions are our own. FYI: We are not professionals, and we don’t claim to be. This is what we found worked for our project. Yours may need a little different approach. Safety first! FYI: Affiliate links are being used on this page. Purchasing via these links help support MDP! Related Projects
6 Comments
Jess
11/25/2017 09:36:20 pm
You ladies can do anything! I loved your live edge sofa table instructions and video! I was lucky enough to get some beautiful live edge pieces from an auction and want to make some sofa tables too! I'm wondering if you have a list of iron pipe parts amd measurements that you used? Thanks in advance!
Steph
11/26/2017 12:06:53 pm
Awesome score at the auction! I just added a graphic above of the pipes we used. Hope this helps! Good luck with your projects :) 11/27/2017 02:14:19 pm
This really turned out nice. I'm normally not a fan of the pipe legs on projects, but I think the sheer opposition of the two materials made them work for me. Love your living room, BTW. Such a beautiful and welcoming space!
Steph
11/27/2017 05:08:17 pm
Hi Andrew! Thanks so much! Yeah, I wasn't sure I would like the pipe legs but I love it now- just fits perfectly!
Zebbra
2/5/2018 11:01:55 am
I loved the creatively beautiful! My husband starts to add up cost, that is how his mind goes, I love him! But hate his reality. Thank you for your gifts of imagination!
Steph
2/7/2018 08:55:36 am
Hi Zebbra, yep metal pipes are surprisingly expensive. You could also use PVC pipe and paint it black, or make a simple wood base out of 2x4. The cedar top was actually $10 at a yard sale. We find a lot of great deals on wood at yard sales! Leave a Reply. |

Mother Daughter Projects
|