|
text by Vicki Sign up here to join our weekly email newsletter!
Summer time activities with my grandkids included teaching the two younger ones to sew. Although, I have a Janome sewing machine that I use on a regular basis, I have a few vintage ones as well that I like to use.
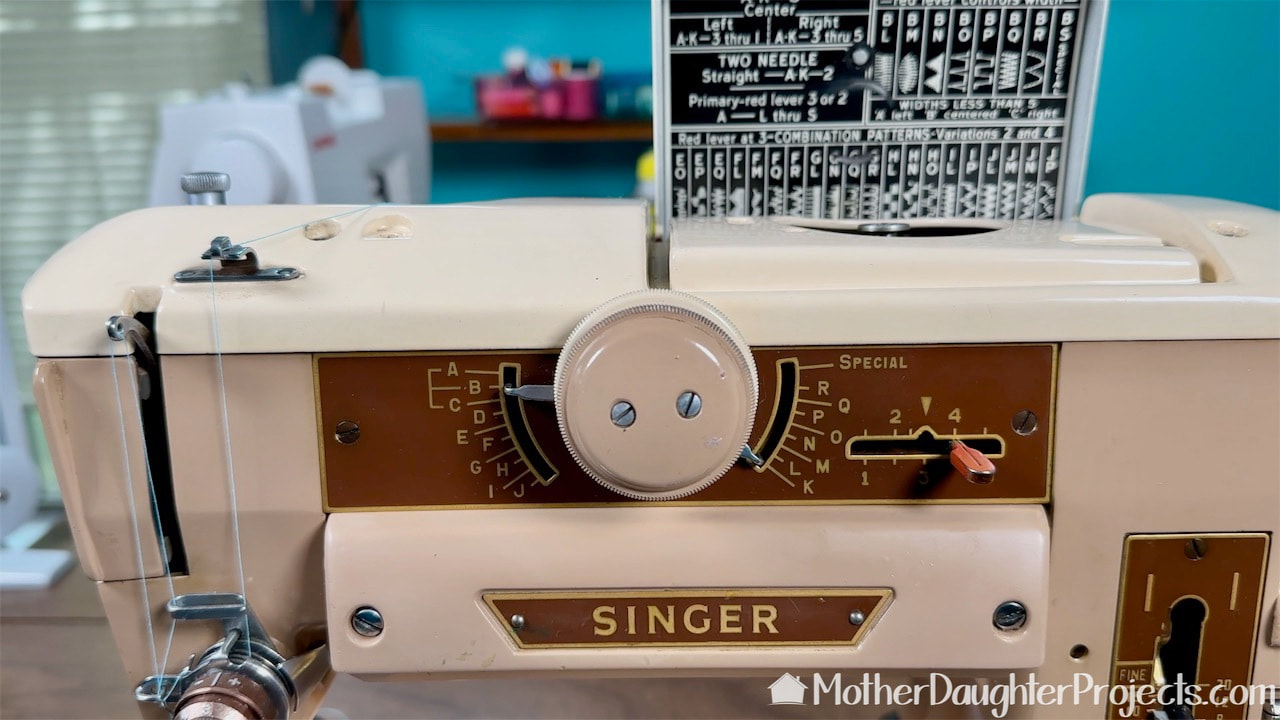
Many years ago, my mom passed along her vintage Singer 401A to me. She purchased the machine in 1960 for the sum of $298.70. (That also included the wood cabinet). In today's dollars that would be equivalent to $3,078.92! This is the machine that my sisters and I learned to sew on as 4-H members. While teaching the grandkids, I decided to get the 401A out and let them use it to practice on. It was actually quite an emotional moment seeing them use this machine that I had learned on almost 60 years ago! We were humming along quite nicely with it when I decided it was time to learn to use the zig zag stitch. Well, I turned stitch selector knobs or at least tried and nothing happened! After, they left for the summer, I did a little research to see if I could fix what was wrong. Spoiler, yes, I did get it working once again over the course of three days. But it was not a quick fix! 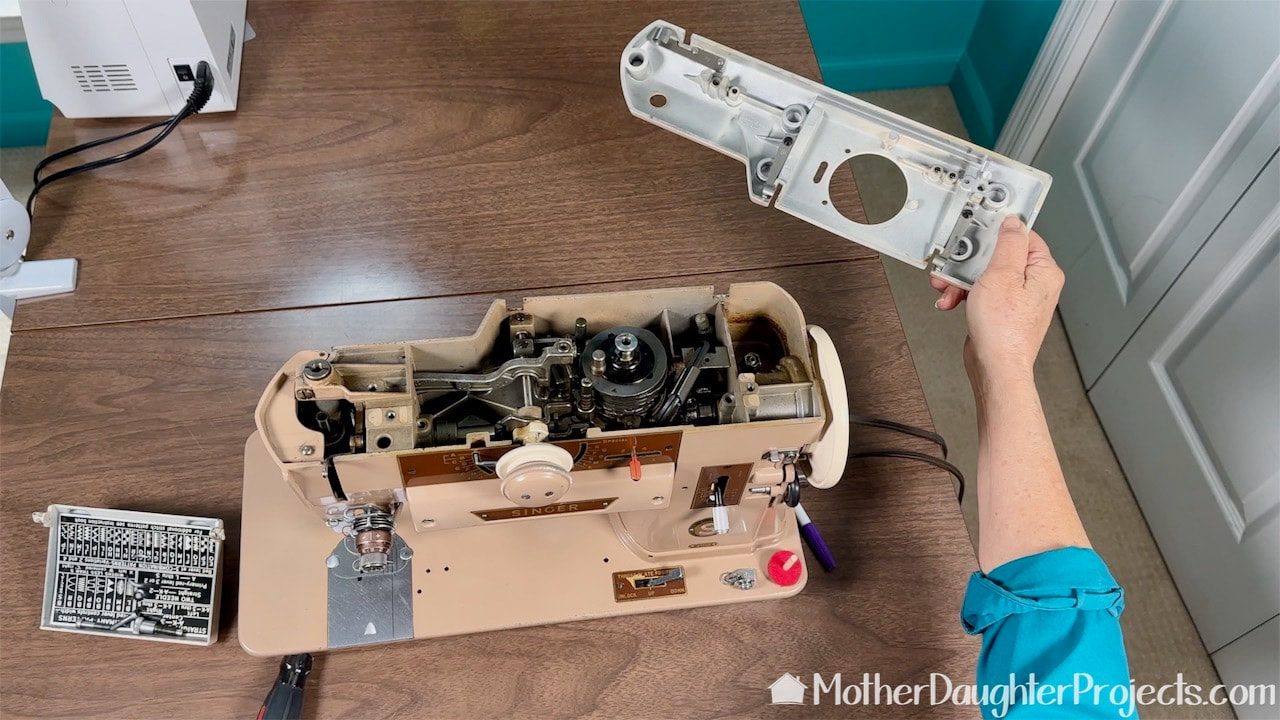
The Singer 401A is the perfect machine to work on. Evidently, all the electrical parts can be removed and the entire thing given a bath! I did not do that. I started this fix by removing the top of the machine. It's held in place with two screws and a thumb screw. Easy! That lid thing over on the left was easy to remove but a challenge to get back into place.
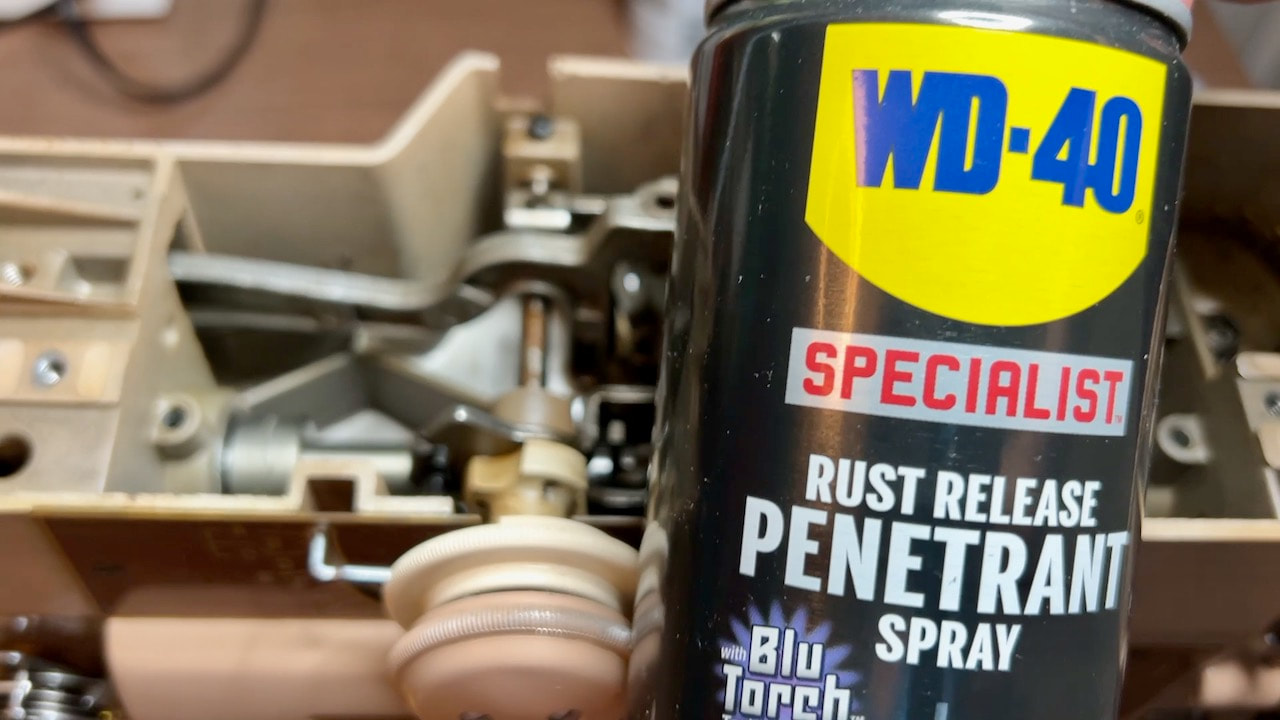
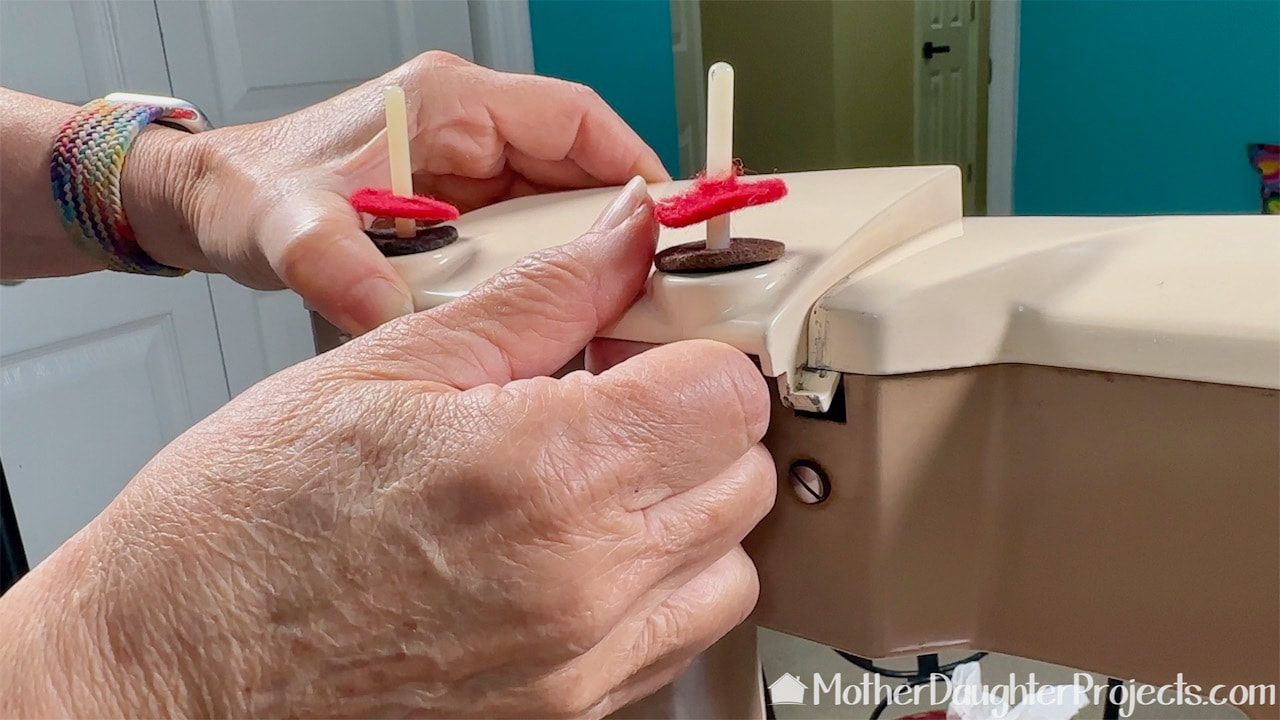
I started trying to loosen the parts with sewing machine oil, but when that didn't work within 24 hours, I used this WD-40 specialist spray.
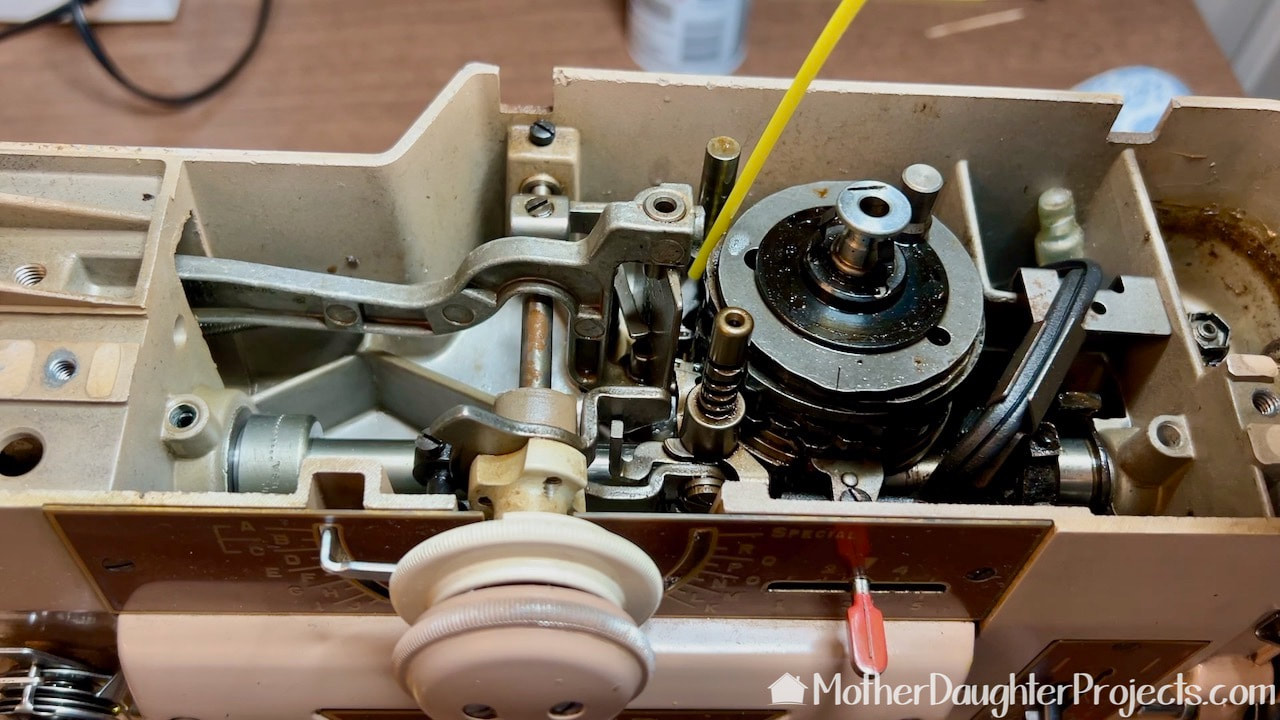
In this picture the areas that were sprayed was the rod from the two selector knobs to the back as well as those two rod on either side of the yellow spray straw. Each of those control one of the two stitch selector knobs.
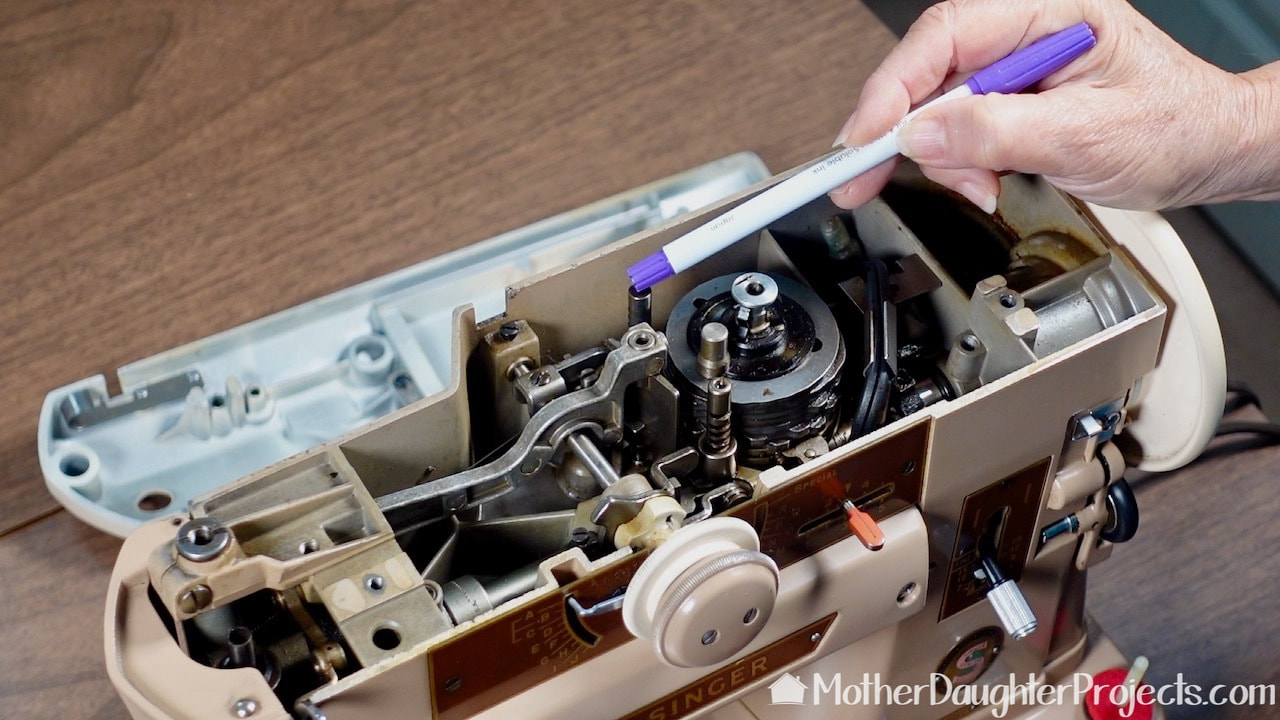
I'm pointing to one of the stitch selector rods. This one took three days to get unstuck. Basically, to unstick them, you oil them and continue to work the stitch selector knobs until you feel them come free. The first one came unstuck about a day and a half into the process. The rod that attaches to the knobs and goes through to the back of the machine freed up rather quickly! I am assuming if these parts had not come unstuck using this method, I probably would have had to take all the parts out! I'm very happy I didn't have to do that!
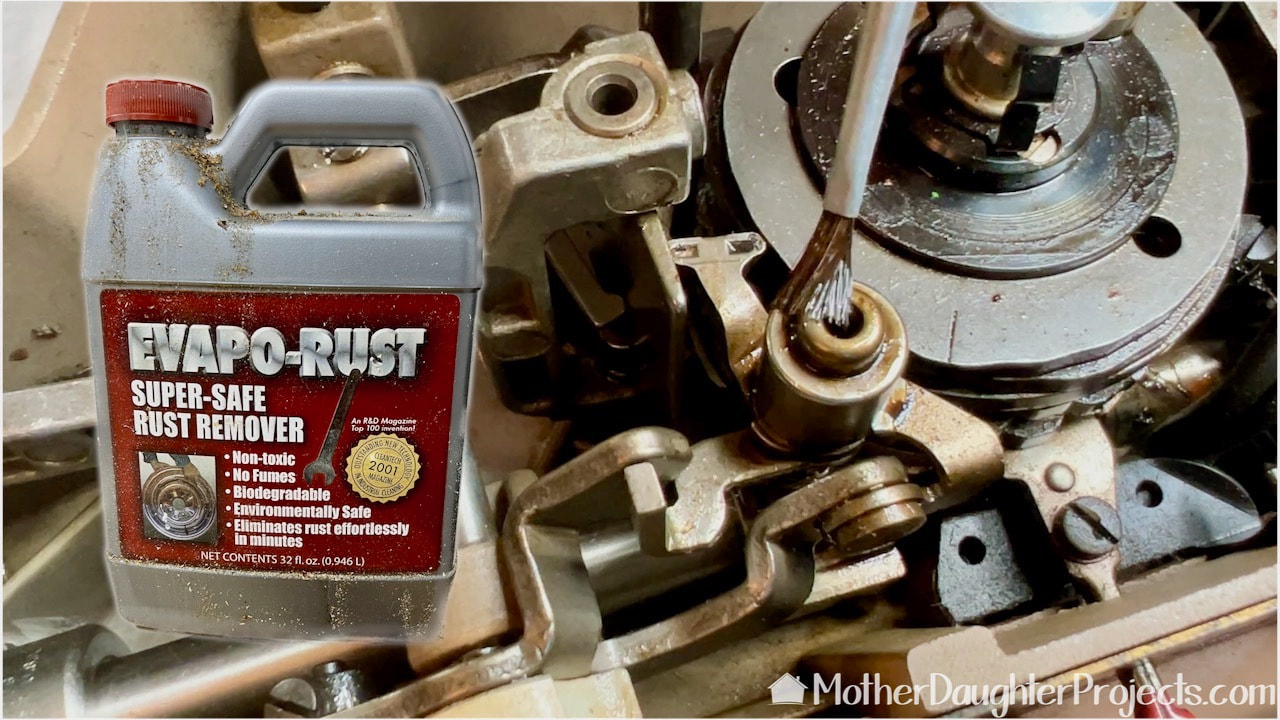
While I had the cover off the machine, I decided to do a bit more cleaning. This machine is 63 years old and despite its age, it was in pretty good condition. There were a a few areas of rust which I took care of with some carefully brushed on Evapo-rust.
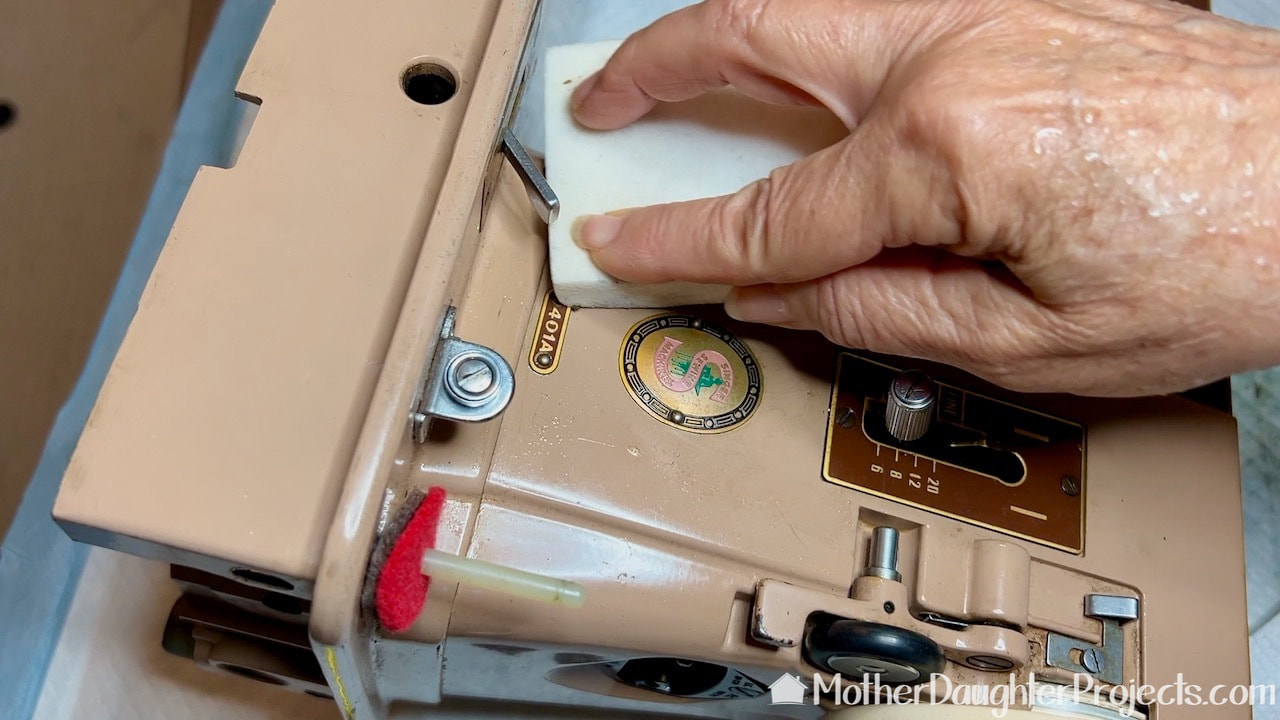
I gently cleaned the outside of the machine with a magic eraser and water.
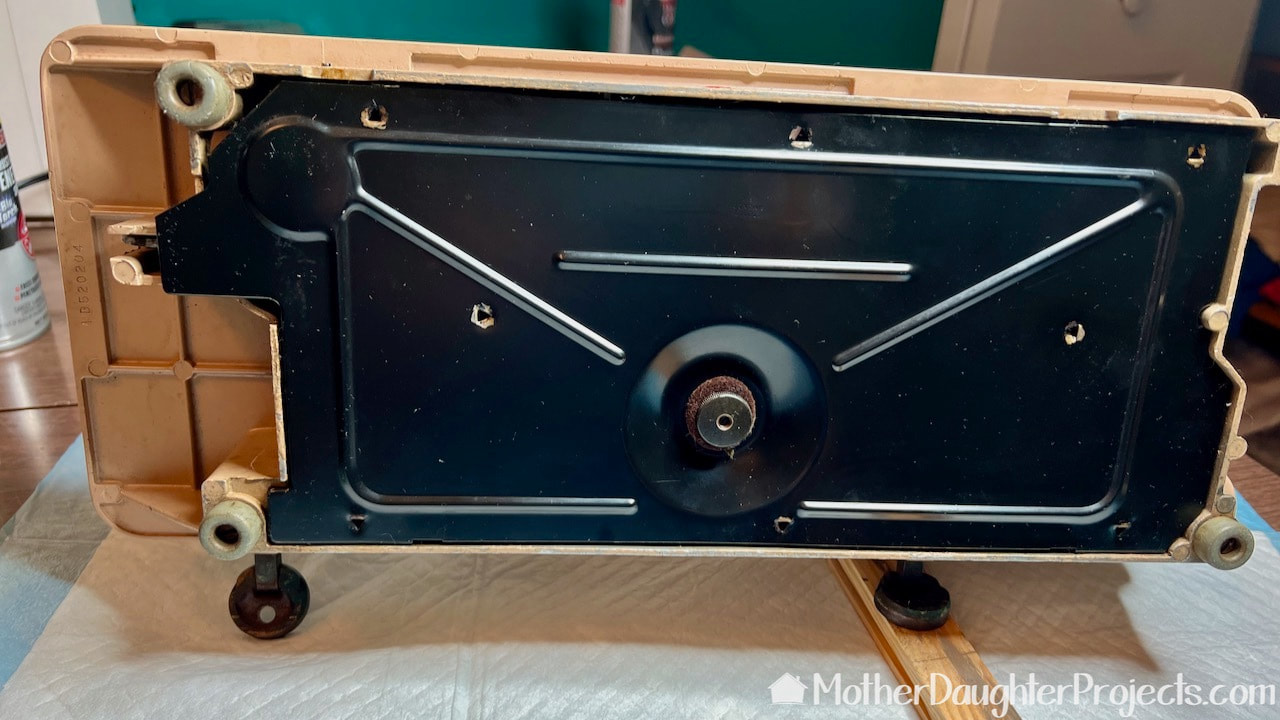
One of the reasons I tipped this machine over was to allow the excess oil and spray I used to run out of the machine. When oiling or cleaning your machine you don't want to leave puddles of oil in the top of the machine. While the machine was on its side, I took the bottom off. It's held in place with that center thumb screw.
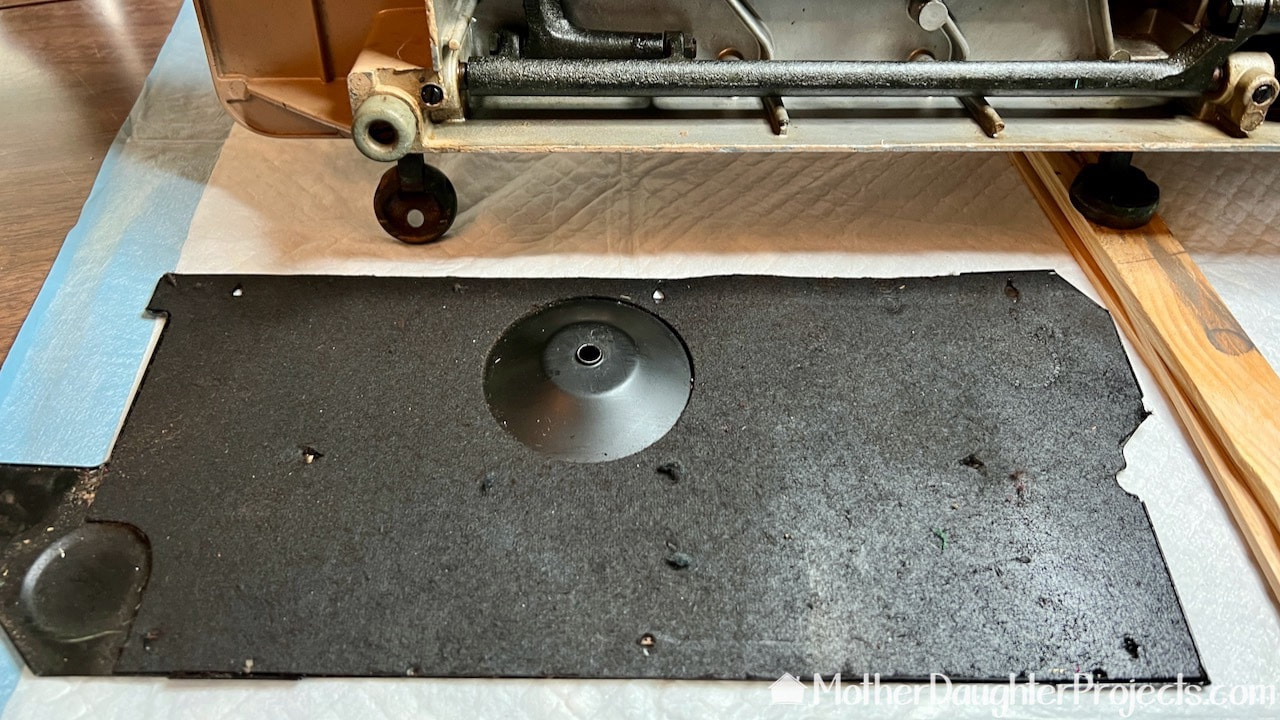
What is inside is this felt-like material that absorbs excess oil and grease from the machine. Over time, this build up of oil will cause the machine to smell. You can't really tell, but this is really, really dirty!
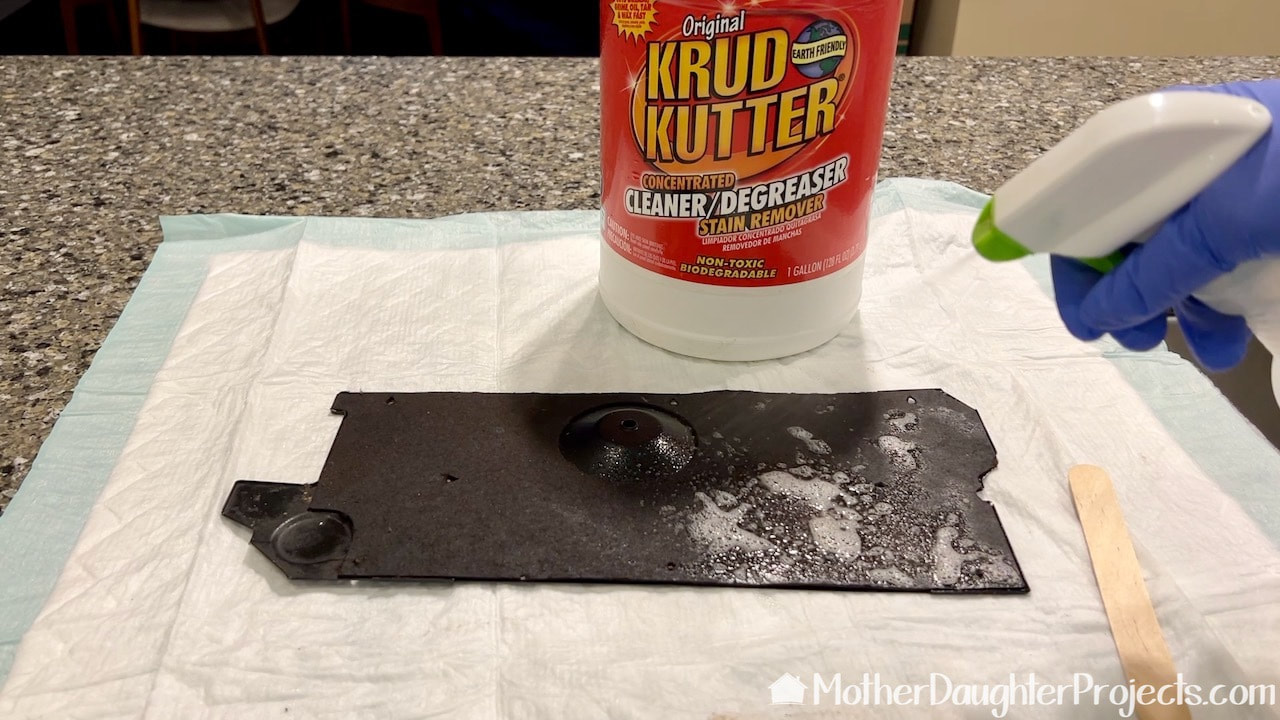
I used a 50/50 solution of Krud Kutter and water to clean the felt pad. After letting it soak, I washed it and then laid it out in the sun to dry.
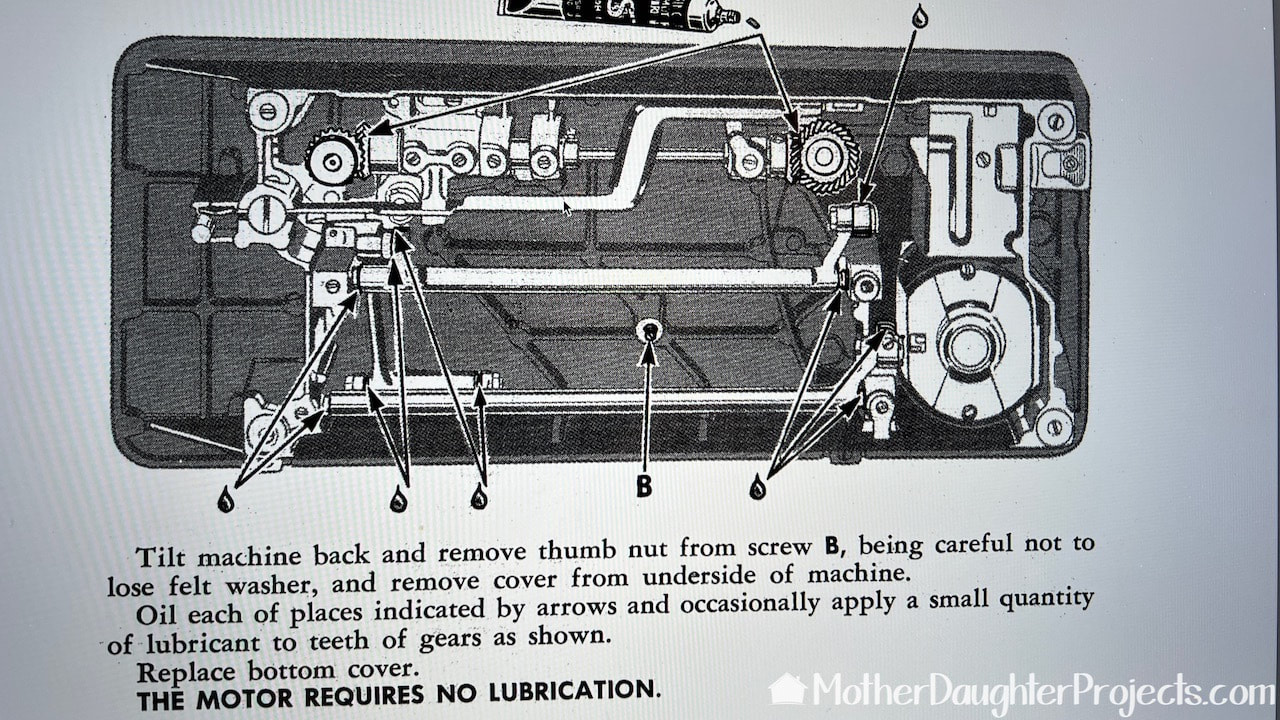
The manual for this machine shows exactly where to oil the machine on the bottom. The gears get lubricant not oil by the way. You can find old sewing machine manuals on Singer's website.
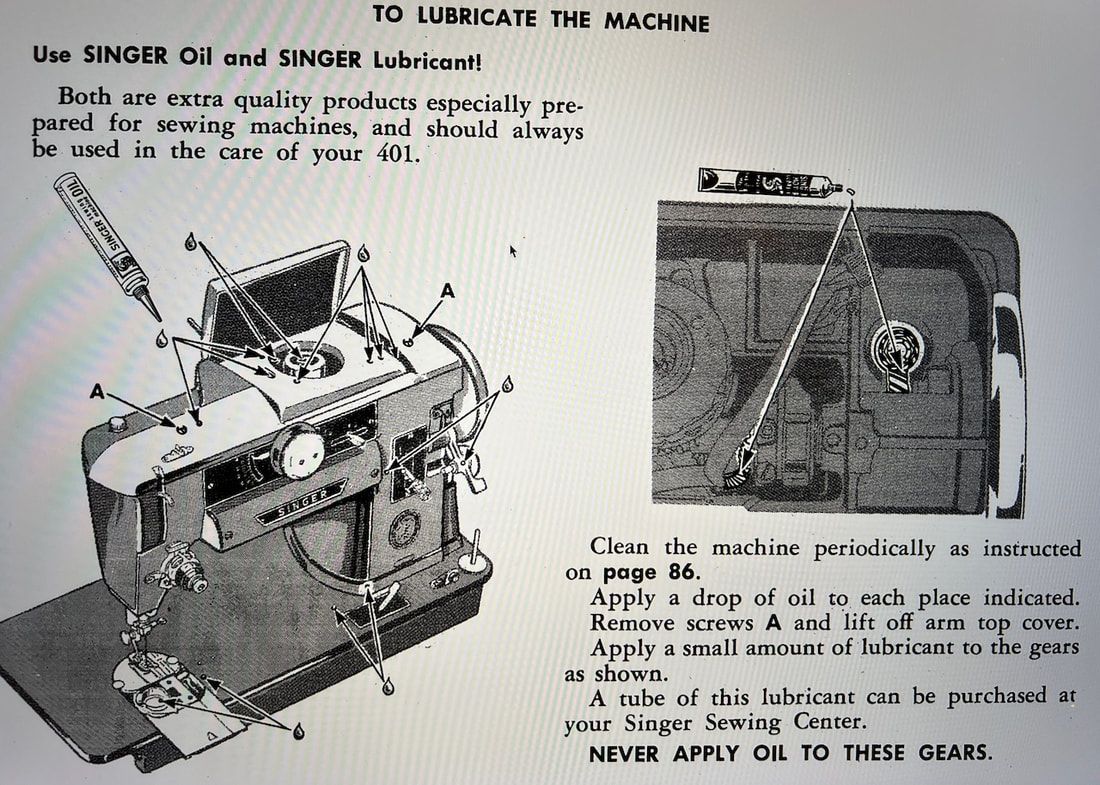
And here are the others spots that are to be oiled and lubricated. Don't forget the bobbin area as well.
It addition to taking the top off and washing it in the sink, I also took that light cover off (the cover is where it says Singer) as well as a couple of the thread guides. I took a few of the cover plates off including the stitch length selector one on the far lower right. It was easier to clean around it by taking it off.
This little lid is a bit tricky to get back on. Actually, I found how to get it back in place in the manual for this machine. Even with this information it was tricky. Basically, you set it in place and push it forward.
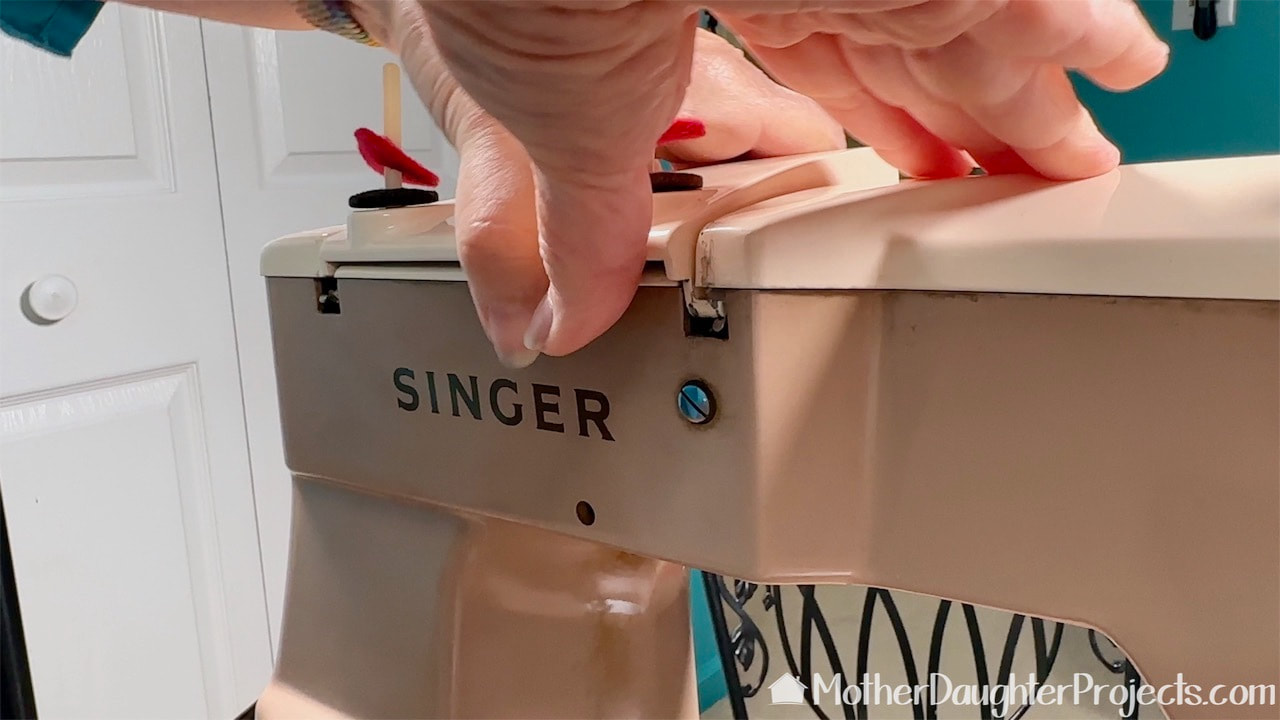
If you looks closely at the back where the lid goes, you'll see a metal prong on each side. The two sticky-outty things on the lid have to go above these before the lid is pushed forward. Before you attempt to take this lid off, look at the back so you can get a better idea of how the parts fit together. Once you know the secret, it's pretty easy to do!
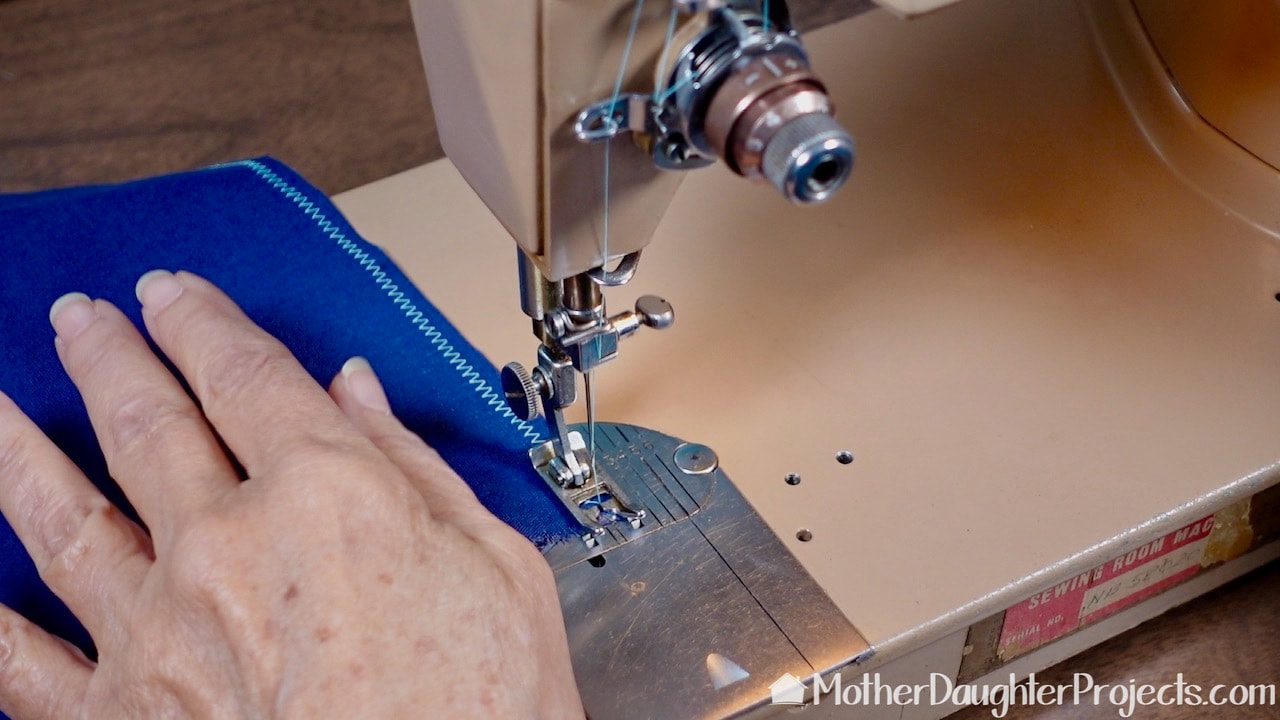
And look! It will now zig zag like it did when it was first new!
Repair projects are some of my most favorite projects ever. There's something very empowering about taking something broken and making it work again.
This particular project didn't take a lot of skill, tools or supplies, but it did take time and patience. Getting these parts unstuck could not be rushed. Trying to force the parts to move would have cause damage that probably could not be repaired. Three days after beginning the repair, then machine works just like it should. I'd say that was time well spent. The machine is now ready for a third generation to sew on. Please note: This is not a sponsored post. We are not professionals, and we don't claim to be. This is what we found worked for our project. Yours may need a little different approach. Safety first! Affiliate links are being used on this page. Purchasing via these links help support MDP. Related Projects
0 Comments
Leave a Reply. |

Mother Daughter Projects
|