Mother Daughter Projects

  • About
    • Contact
    • Privacy Policy
  • Maintenance
  • Improvement
  • Decor
  • Tech
  • Tools
  • About
    • Contact
    • Privacy Policy
  • Maintenance
  • Improvement
  • Decor
  • Tech
  • Tools

DIY for Homeowners

Installing Plywood Deck on Harbor Freight Utility Trailer

6/9/2021

2 Comments

 
text by Vicki     Sign up here to join our weekly email newsletter!
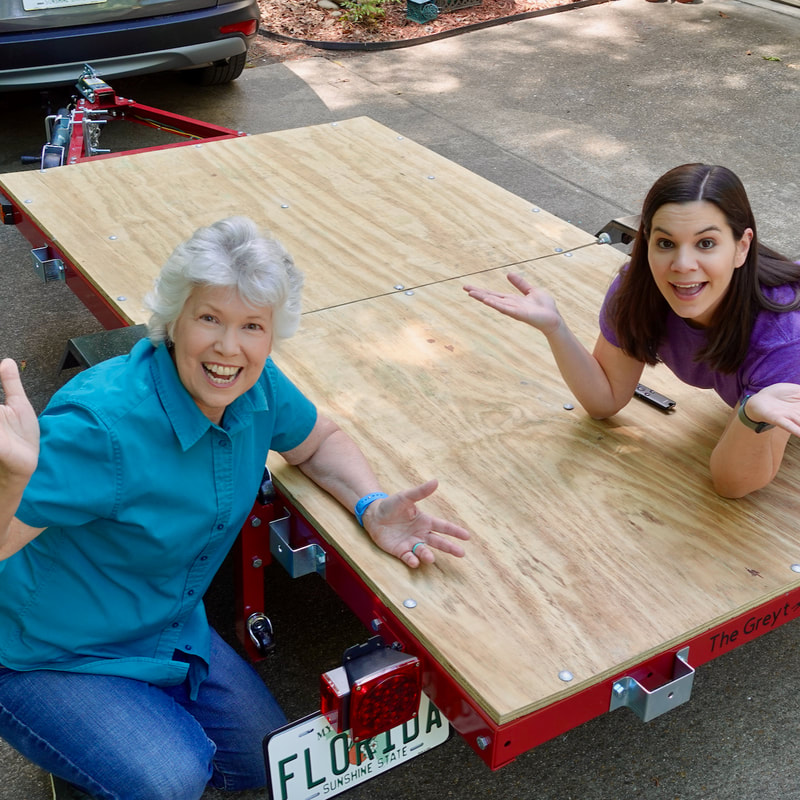
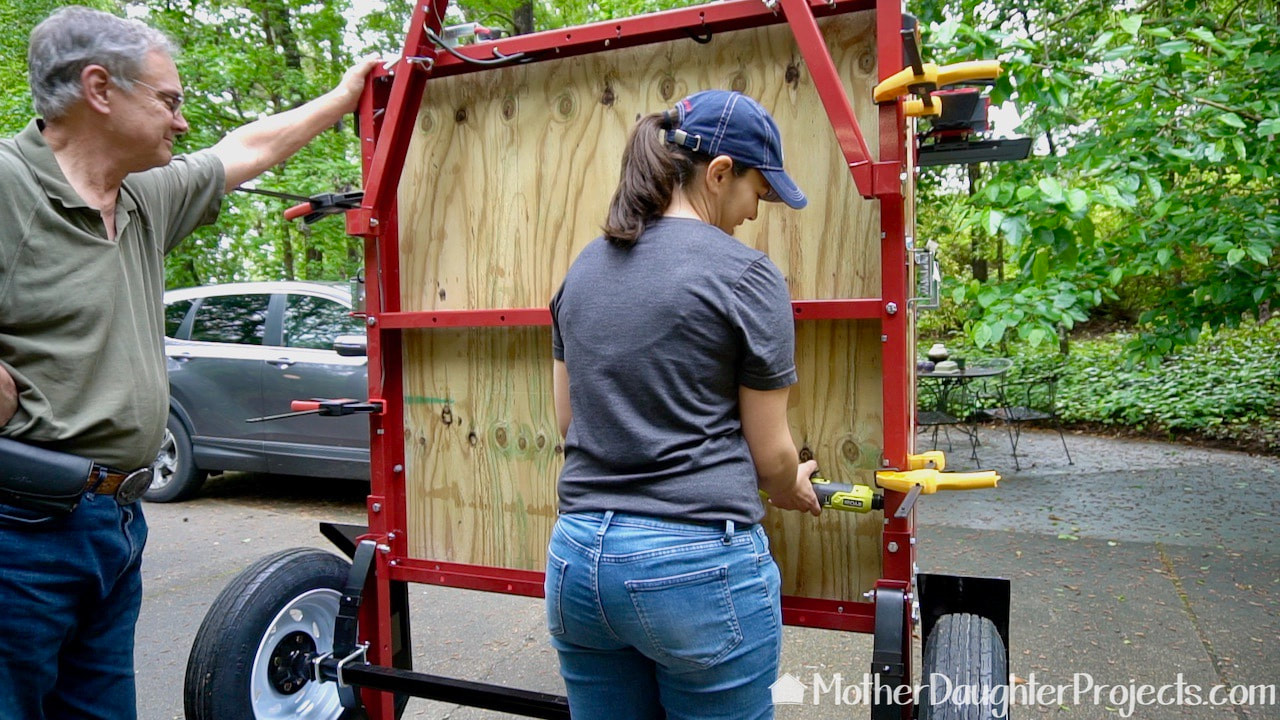
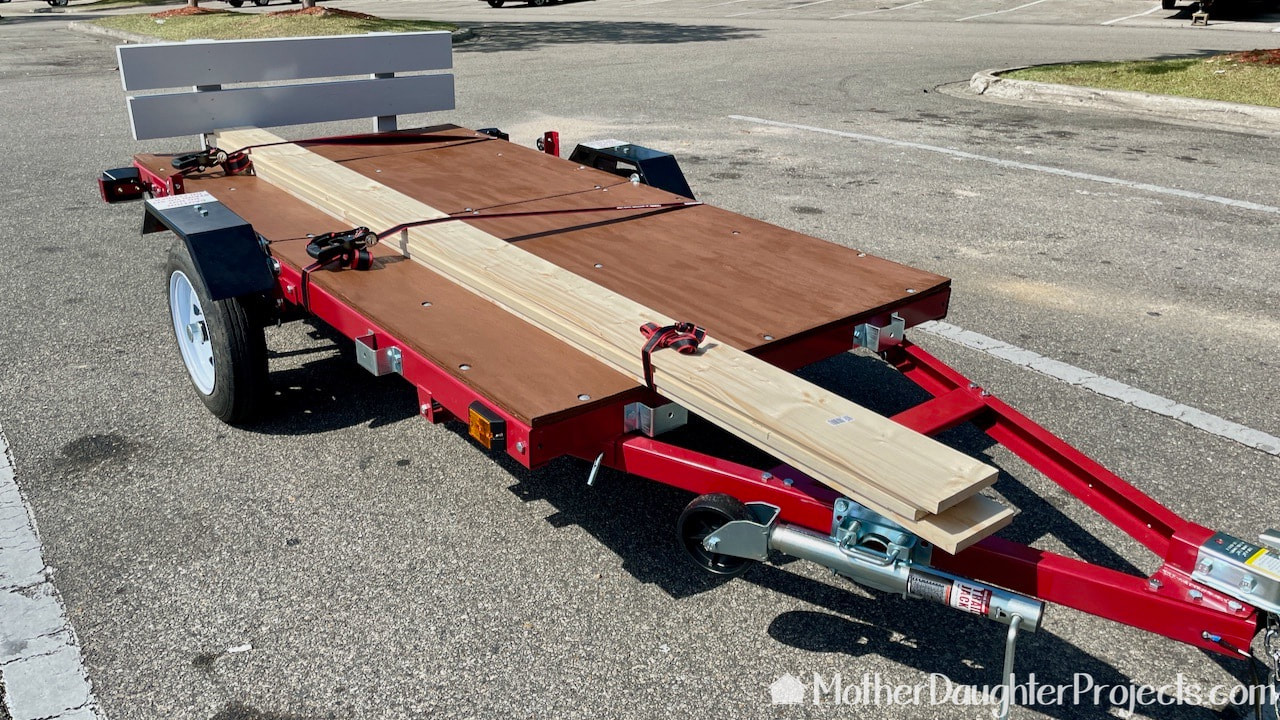
We are continuing the series about assembly of a Harbor Freight DIY Utility Trailer. With the framing and wiring completed, it's time to add the plywood decking.

The addition of the plywood decking signaled that the work on the trailer was almost complete. But, there were still a few more things to do and ultimately we decided we needed a couple of tweaks to some of the previous work.

Along the way, we discovered and purchased a couple of really useful tools!

Trailer Essentials:


  • HAUL-MASTER 1195 Lb. Capacity 48 In. X 96 In. Heavy Duty Folding Trailer (Harbor Freight)

  • PITTSBURGH AUTOMOTIVE Foldable Metal Wheel Chocks, 2 Pc. (Harbor Freight)

  • HAUL-MASTER 1000 Lb. Swing-Back Bolt-On Trailer Jack (Harbor Freight)

  • HAUL-MASTER Trailer Jack Wheel Dock (Harbor Freight)

  • HAUL-MASTER 600 Lb. Trailer Dolly (Harbor Freight)

  • HAUL-MASTER Four-Way Trailer Light Tester (Harbor Freight)

  • HAUL-MASTER 1200 Lb. Capacity 30-1/4 In. X 72 In. Convertible Aluminum Loading Ramp (Harbor Freight)

  • STOREHOUSE Self-Drilling Screw Assortment, 200 Pc. (Harbor Freight)

  • CHICAGO ELECTRIC 1/4 In. X 14 Ft. Protective Wire Wrap (Harbor Freight)

  • STOREHOUSE Terminal And Connector Set, 150 Pc. (Harbor Freight)

  • Sopoby Solder Seal Heat (Amazon)

  • CE Smith Trailer 16867A Trailer Frame Wire Clips (Amazon)

  • Klein Tools 11063W Wire Cutter / Wire Stripper, Heavy Duty Wire Stripper Tool for 8-20 AWG Solid and 10-22 AWG Stranded Electrical Wire (Amazon)

  • Weller Helping Hands with Magnifier (Amazon)

  • Cable Zip Tie Mounts (Amazon)

  • 40 In. 300 Lb. Capacity Low-Profile Creeper, Blue (Harbor Freight)

  • Steel License Plate Durable Car Tag Holder Backing (Harbor Freight)

Materials/Tools:


  • 4x8ft. pressure treated Plywood (Home Depot)

  • 7/8in Forstner bit (Home Depot)

  • DeWalt 20-Volt MAX Cordless Brushless Oscillating Multi-Tool (Home Depot)

  • (25) 3/8in 1-1/2in carriage bolts (Home Depot)

  • (25) 3/8in lock washers (Home Depot)

  • (25) 3/8in hex nuts (Home Depot)

  • 18-Volt ONE+ Cordless 3/8 in. 4-Position Ratchet (Home Depot)

  • Dremel 36 in. Flex-Shaft Attachment for Rotary Tools + 8220 Series 12-V MAX Lithium-Ion Variable Speed Cordless Rotary Tool (Home Depot)

  • Dremel 3/8 in. Rotary Tool Aluminum Oxide Cylinder Shaped General Purpose Grinding Stone (Home Depot)

  • 1in Forstner bit (Home Depot)

  • Olympic Elite 1 gal. Chestnut Brown Solid Advanced Exterior Stain and Sealant in One (Home Depot)

  • Olympic Elite 1 gal. Chestnut Brown Solid Advanced Exterior Stain and Sealant in One (Home Depot)

  • 2x6 8ft (Home Depot)

  • 2x4 (Home Depot)

The corner bolt head stick up above the frame creating the need to recess them into the backside of the plywood decking.
The decking consists of one sheet of plywood cut in half. The first issue we had to deal with were these bolt heads on each corner of the frame. Since they stuck up above the frame, we needed to drill into the backside of the plywood to create a recessed area for these bolt heads to fit into in order for the plywood to lay flat.
The area near the hinges needed to be cut away so the plywood. would fit as it needed to.
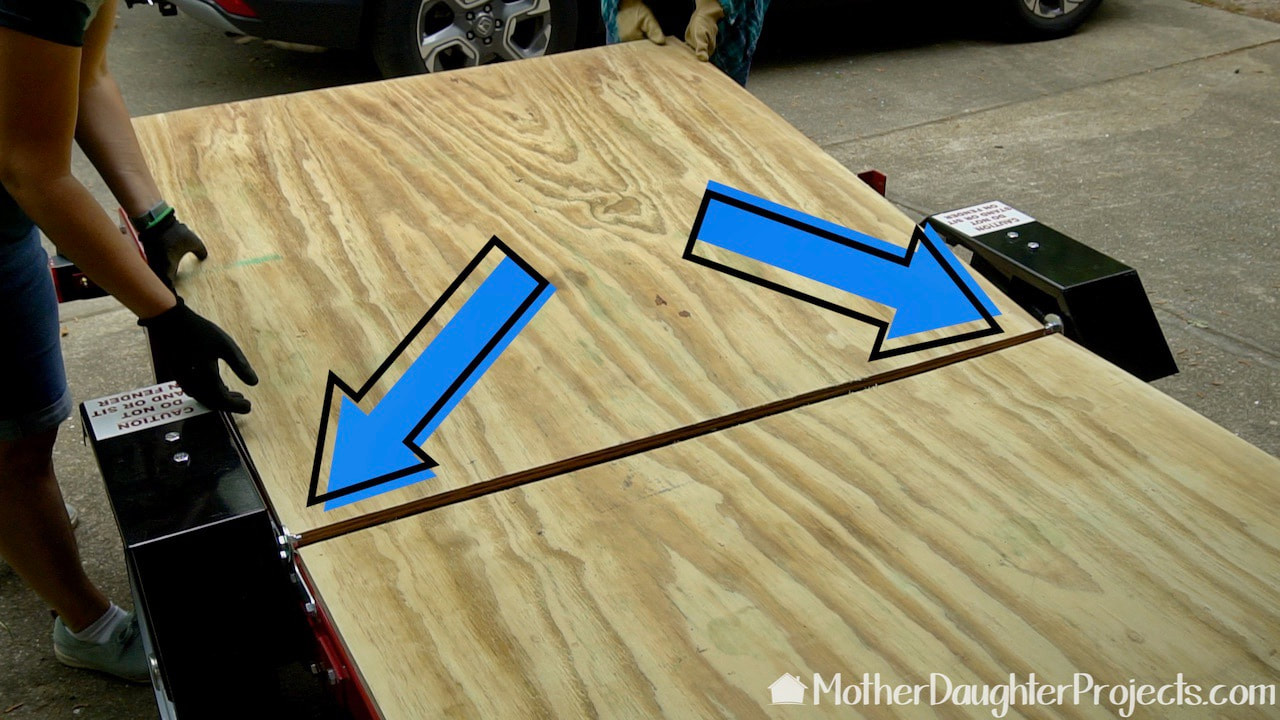
The second issue involved the hinges. Due to the placement of the hinges, the plywood would not slide underneath. To solve this, we cut a small notch for the plywood to fit.
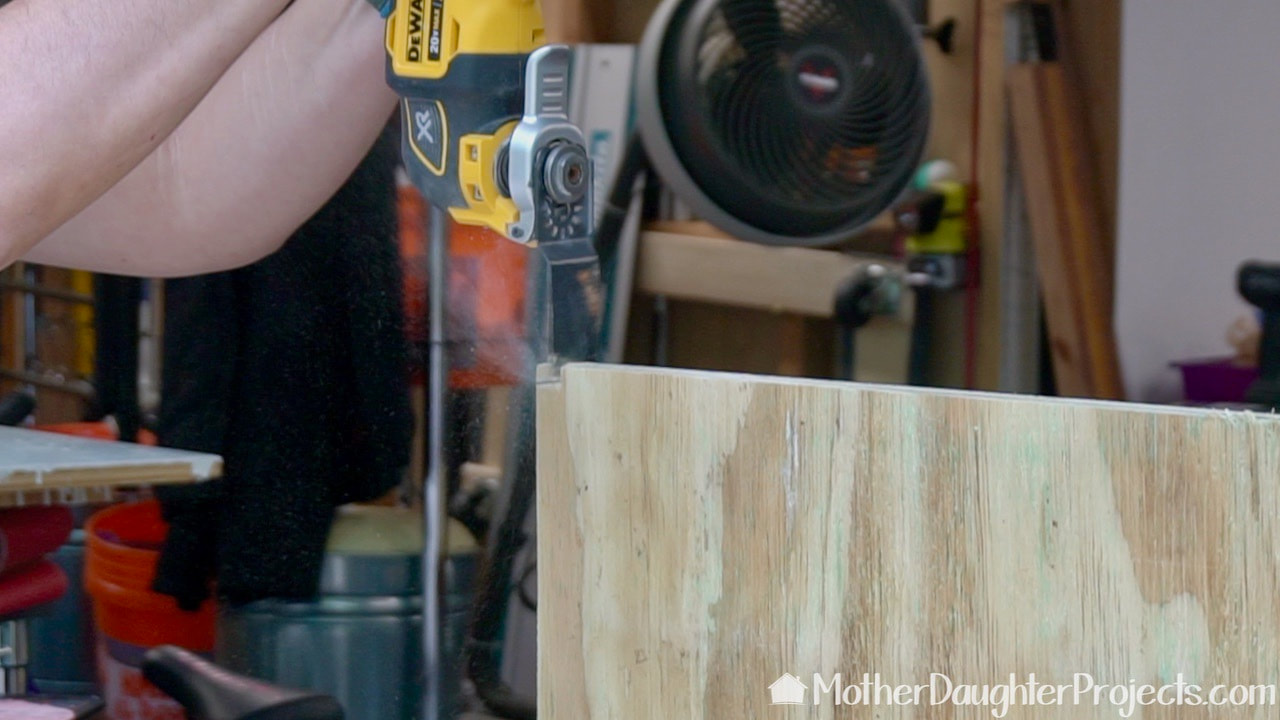
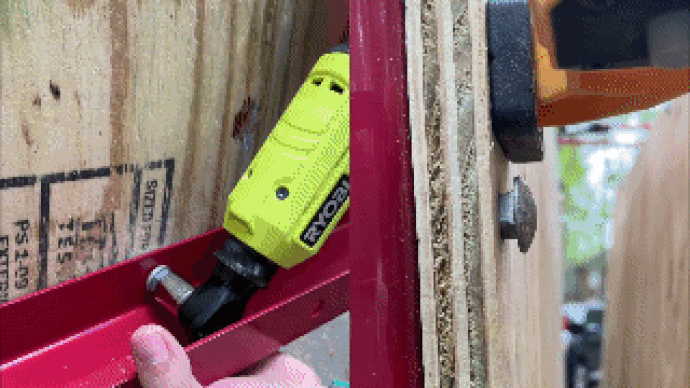
The notch was cut with a battery powered DeWalt multitool.
While under the trailer, Steph marked the bolt holes with a pencil.
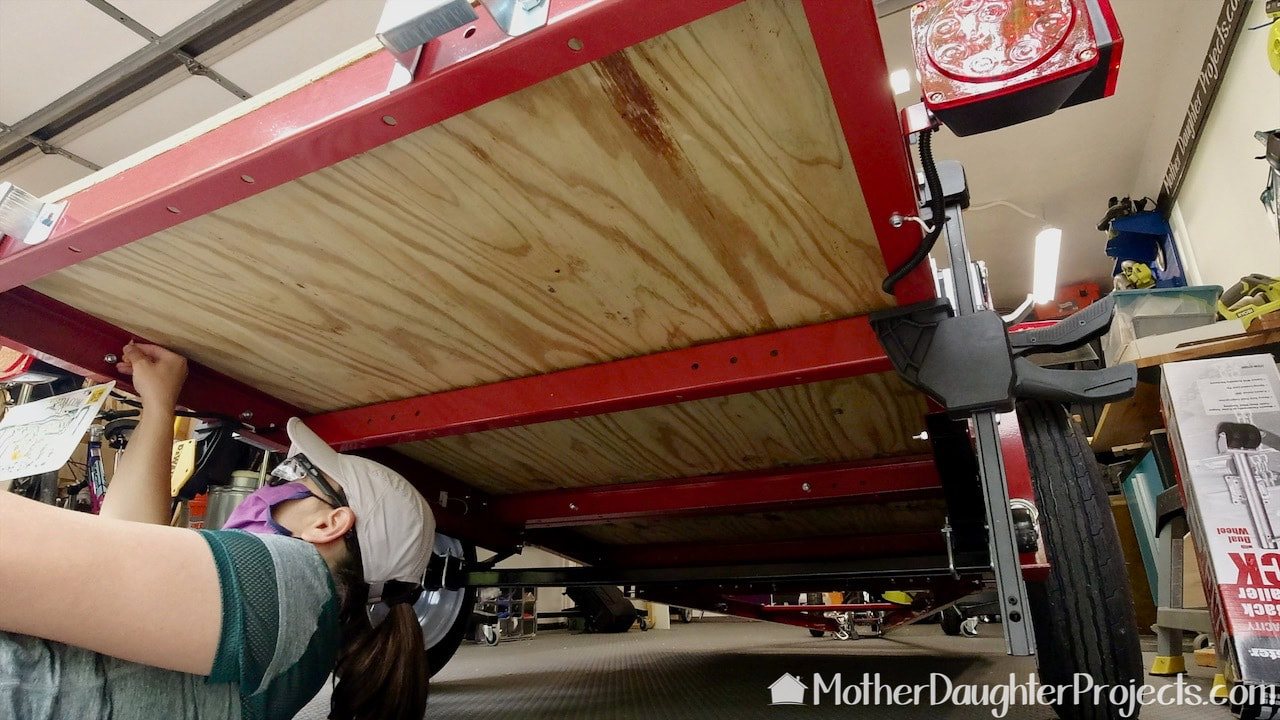
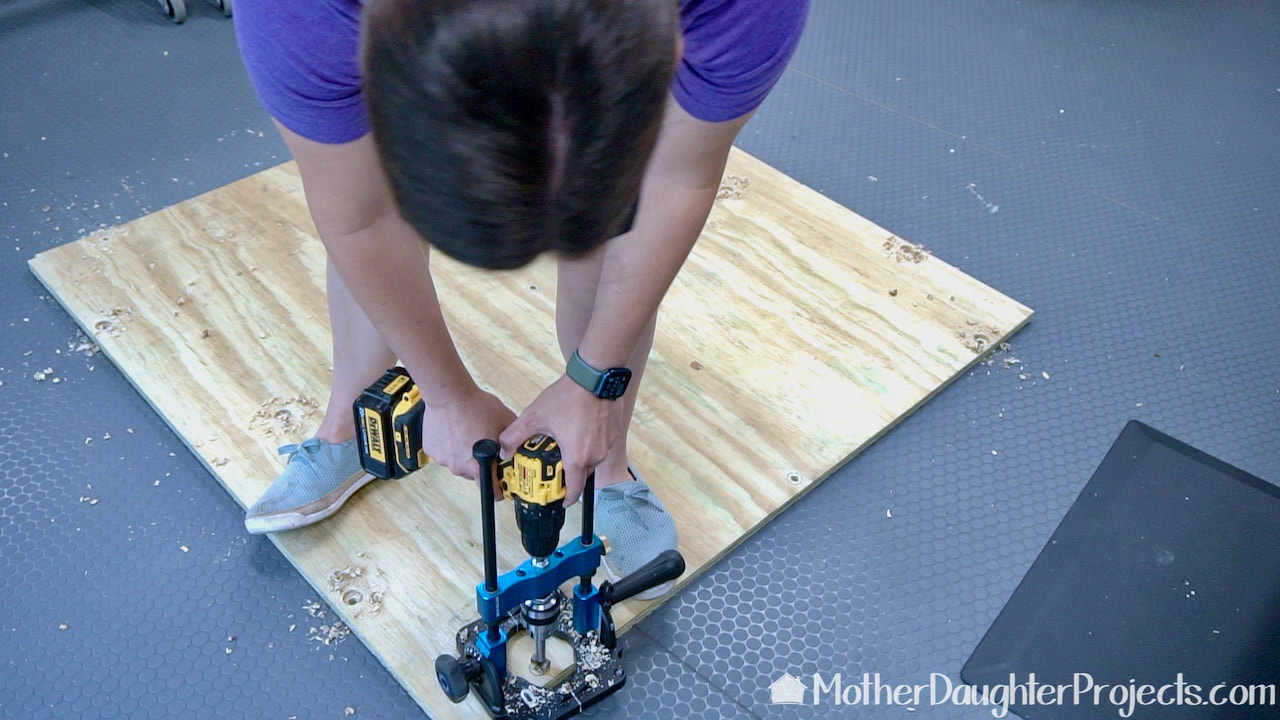
Steph's first trip under the trailer was to mark the placement of the bolts.
Steph used a battery powered DeWalt drill to make the holes for the bolts in the plywood.
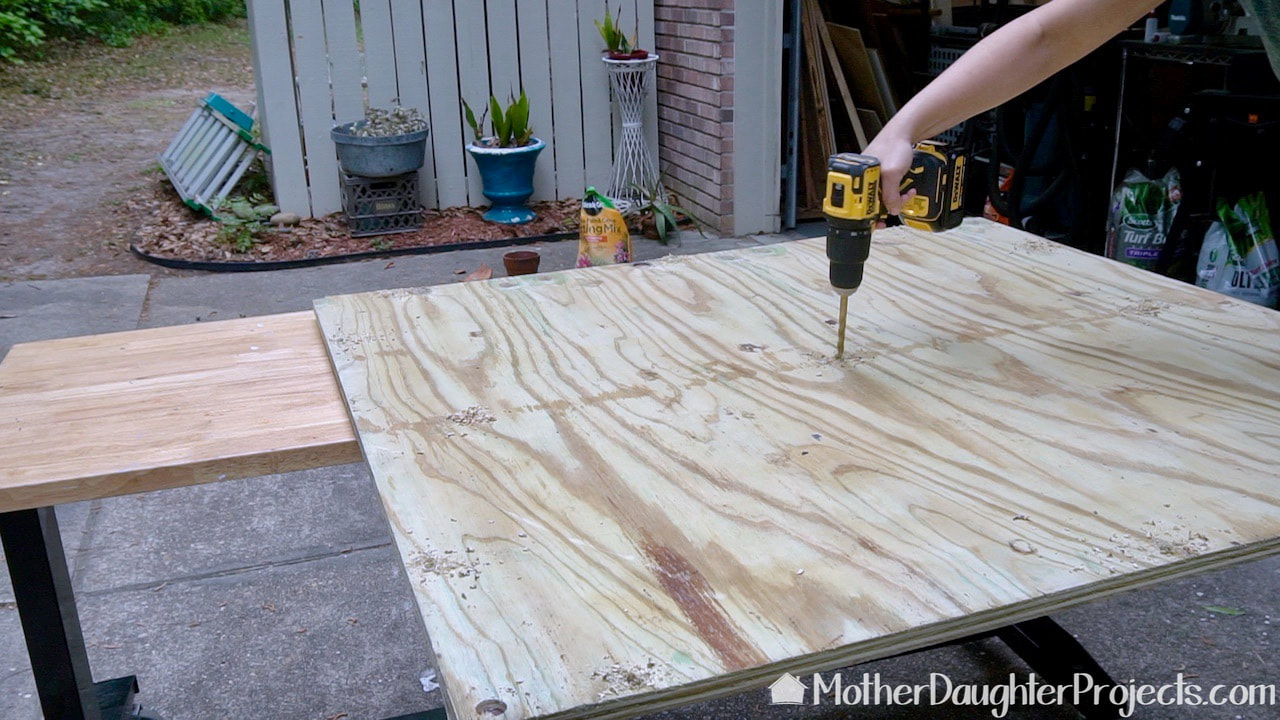
Using a 3/8in drill bit, Steph drilled all the holes for the bolts.
Cleaning the holes with a Dremel rotary tool and accessory.
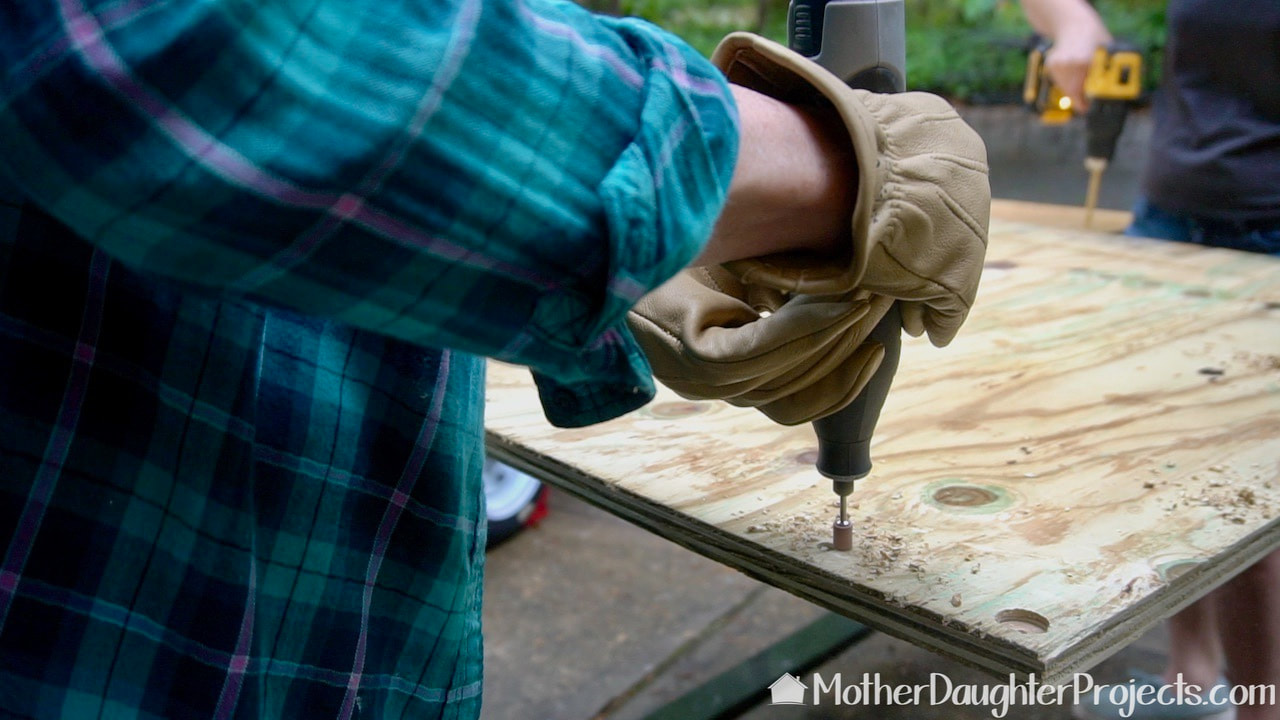
Here I'm cleaning up the holes with a Dremel rotary tool and cylinder shaped grinding accessory. On the first decking side, I only sanded and didn't clean out the holes. Using the rotary tool really was a better choice.
We used everbilt galvanized carriage bolts to secure the plywood to the trailer frame.
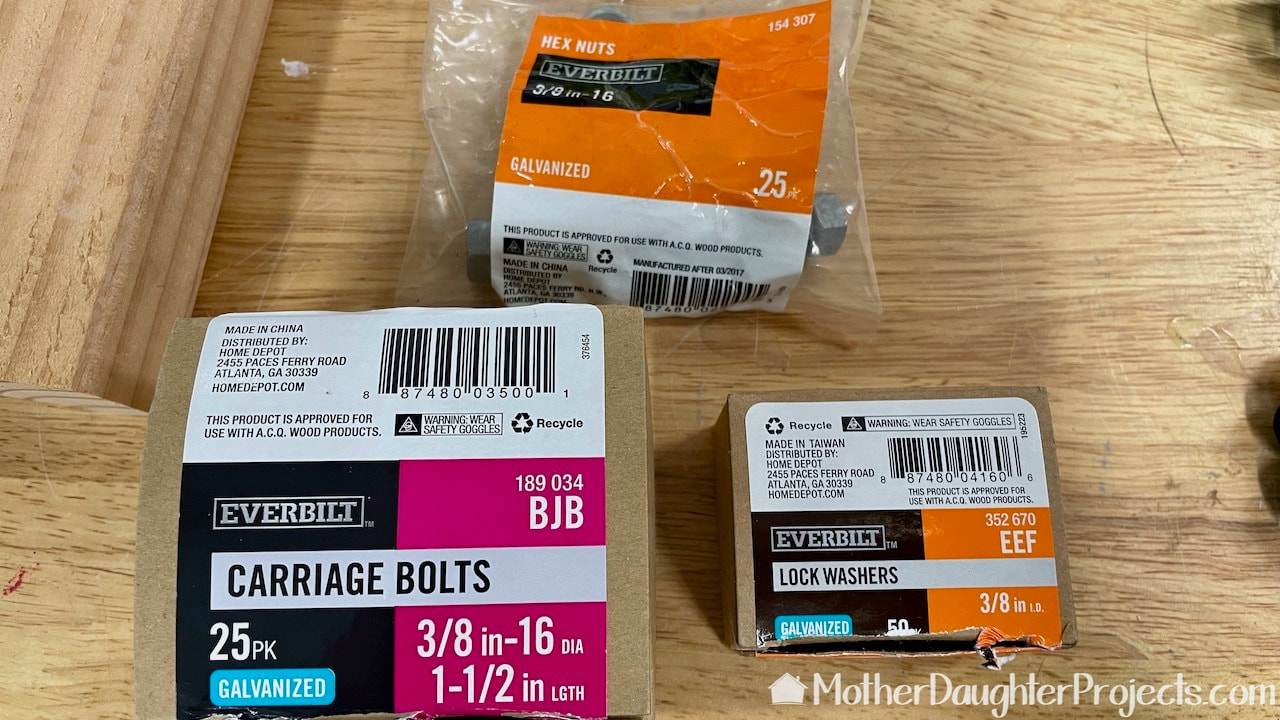
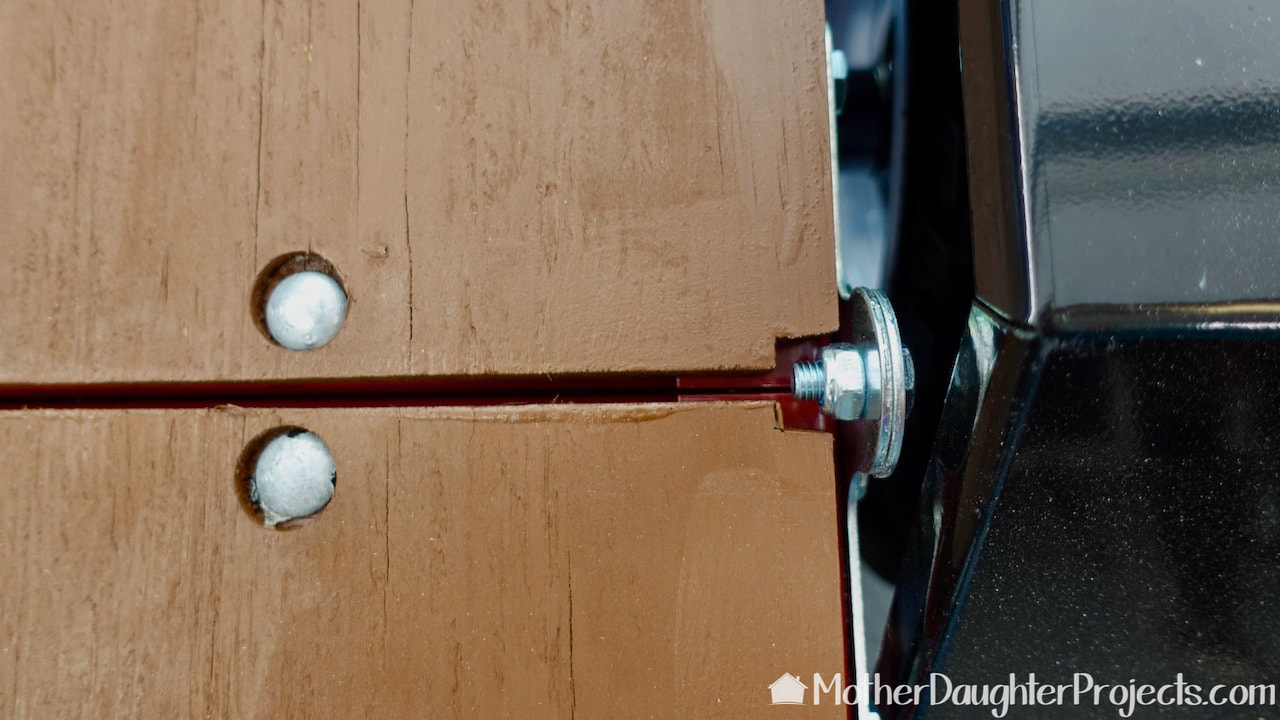
This is the galvanized hardware we used to secure the plywood to the trailer frame.
We used 3/8
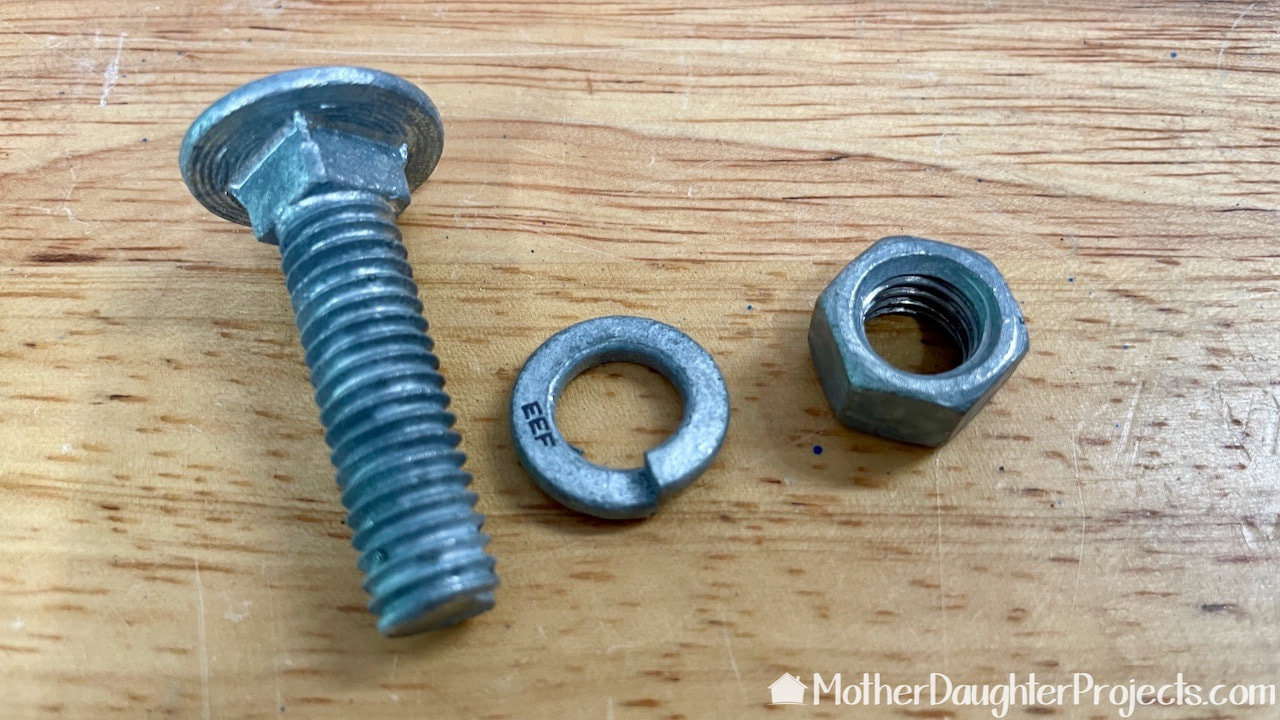
We used 3/8" carriage bolts, lock washers, and hex nuts.
This Rockler drill press accessory insured they were all the same depth and perfectly straight.
This was one of the tweaks we ultimately made to the decking. After living with the decking for a few weeks, Steph decided the bolt heads on the topside needed to be recessed. So she took the decking off and used a Forstner bit to drill holes to recess the bolt heads. This Rockler drill press accessory insured they were all the same depth and perfectly straight.
Using Olympic Elite stain on the Harbor Freight trailer decking.
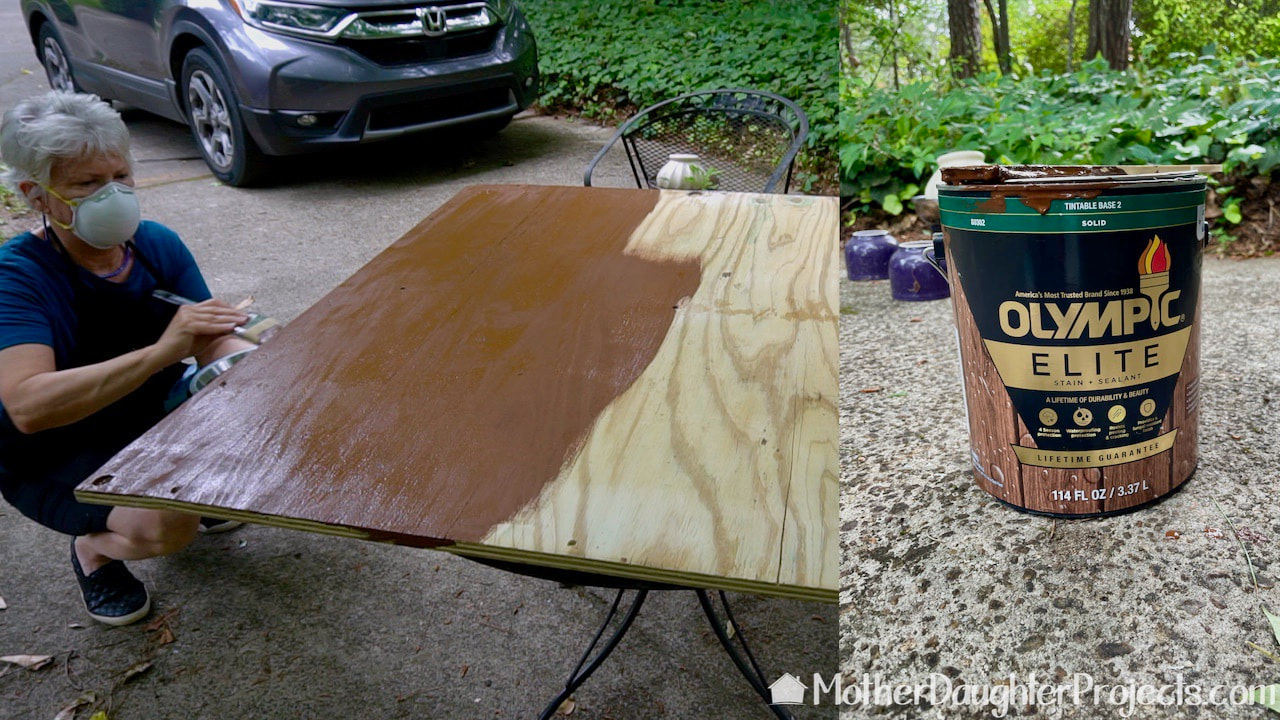
The next tweak was to stain both sides with this leftover Olympic Elite stain. We used this stain on Steph's outdoor furniture and been very pleased with it so we thought it would be a good choice to help protect the wood decking.
The Ryobi battery powered ratching wrench is a game changer!
This Ryobi battery powered ratching wrench was a game changer! Steph saw it advertised and the next day we went to Home Depot and bought it. She was able to secure the second half of the deck in less than half the time of the first.
This tool made quick work of fastening all those carriage bolts!
We bought a creeper from Harbor Freight to get under the trailer.
Oh, and we also went back to Harbor Freight and picked up this blue creeper. It made it so much easier for Steph to get under and work on the trailer plus there are recessed area to put hardware as it is taken off so you don't lose any!
We decided to add a rail to the back of the trailer which we are doing here.
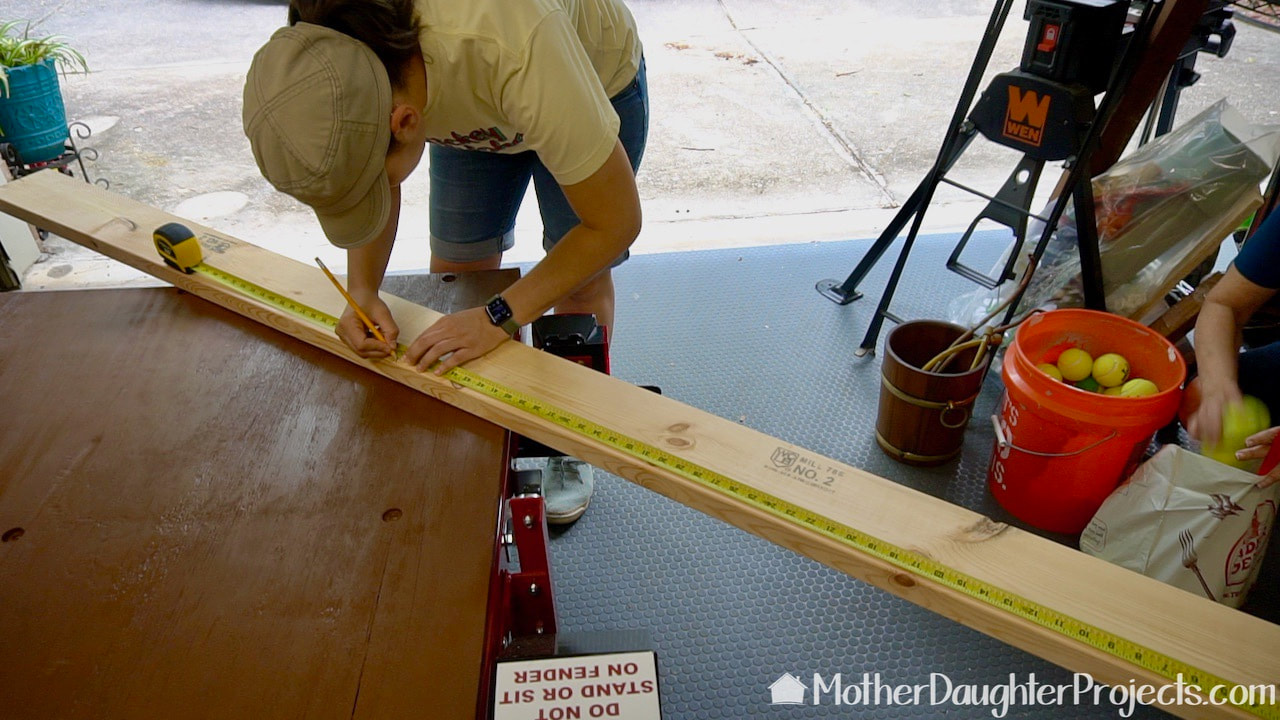
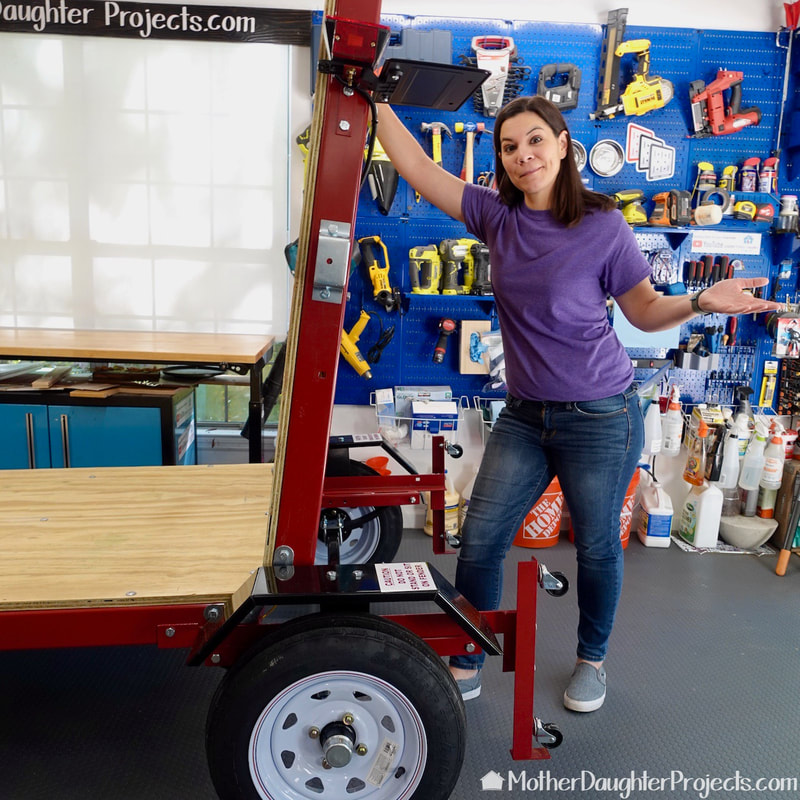
We decided to add a rail to the back of the trailer which we are doing here. Well, Steph is working on the trailer, I'm bagging up a bunch of old tennis balls for Alice, the next door neighbors' Doberman.
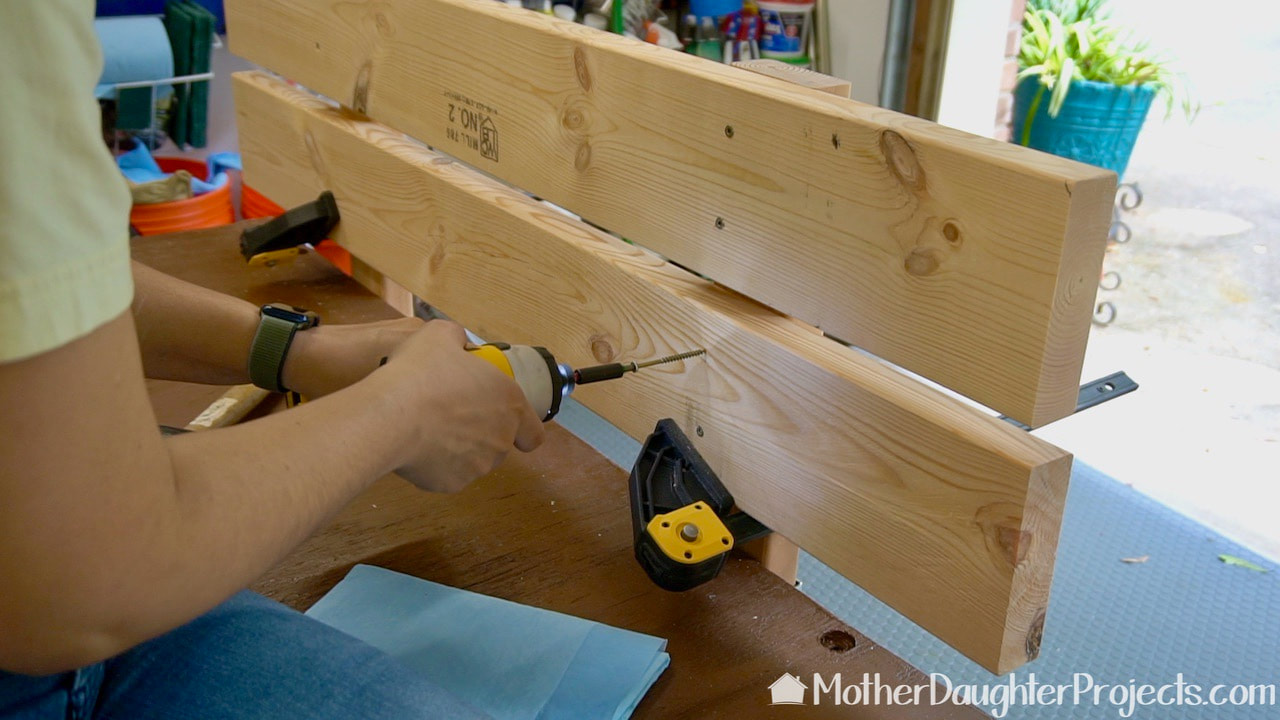
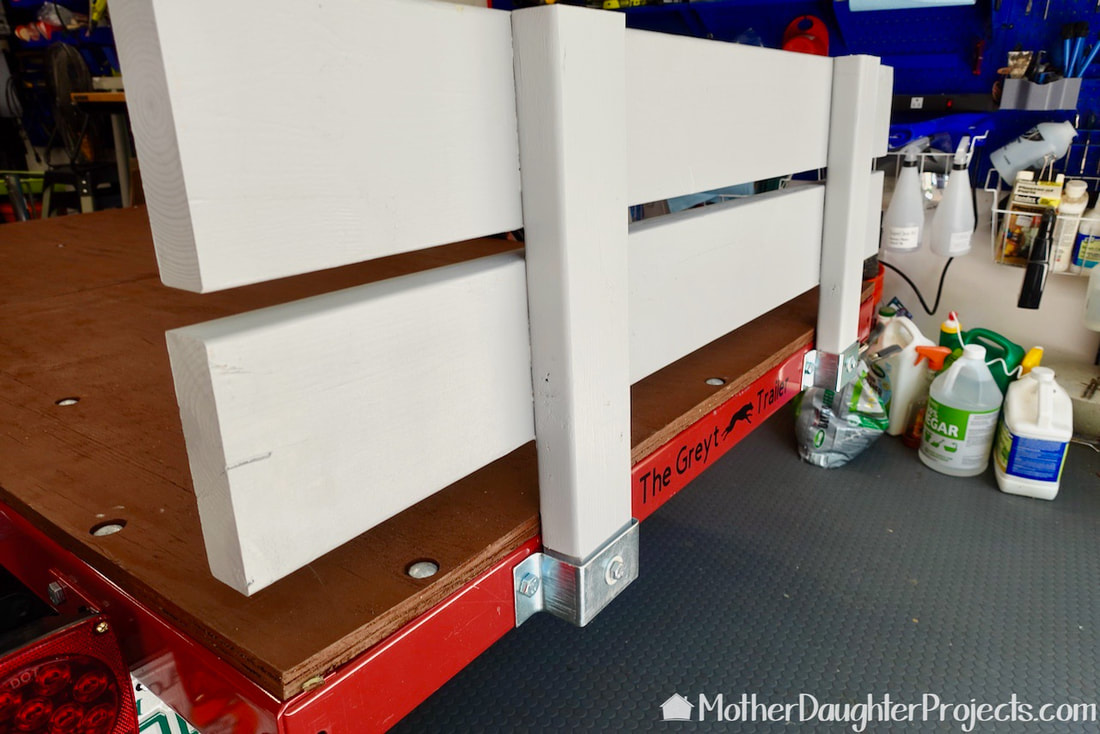
The back rail is a simple design, two 4' 2x6 boards are attached to two 2x4s which then fit into brackets on the back of the frame.
The rail is secured into place with two bolts.
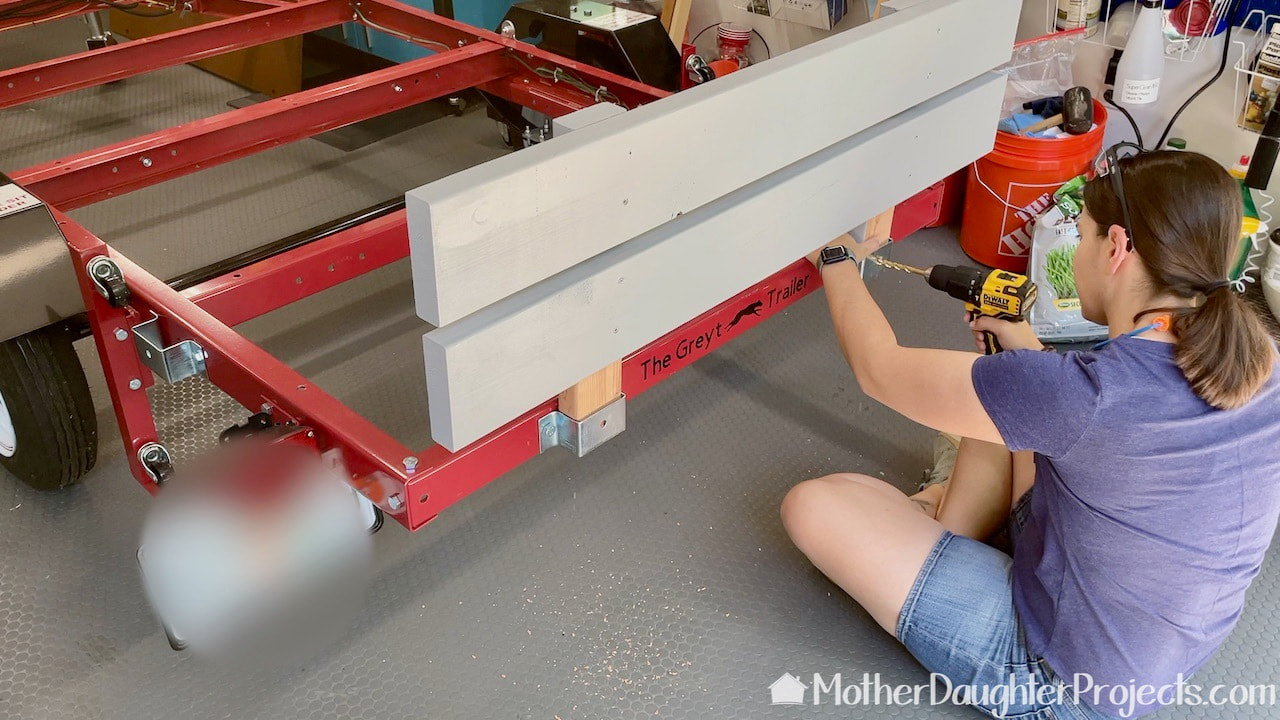
The rail is secured into place with two bolts. The rail is painted in leftover outdoor house paint.
Here's a birdseye view of the topside recessed bolts and how the plywood now fits around the hinge.
And, of course, we had to give the trailer a cute name which is an homage to the greyhounds!
In the Home Depot parking lot picking up our first load of lumber!
There are two more videos in this Harbor Freight Utility trailer build series. In the next two, we'll show how the trailer folds for storage, as well as how to hook up the trailer to the car for towing. 

​What do you think, should we add additional rails to the other three sides? 


Please note: This is not a sponsored post. 

FYI: We are not professionals, and we don't claim to be. This is what we found worked for our project. Yours may need a little different approach. Safety first!

FYI: Affiliate links are being used on this page. Purchasing via these links help support MDP!

Related Projects

Picture
7 Trailer Tips
Picture
Assembling a Folding Trailer
Picture
Trailer Wiring
2 Comments
Tom Hogan
8/18/2021 07:34:03 am

Two things that I learned putting the deck on my Harbor Freight trailer:

1. If you put the hinge bolt with the head to the inside, you can put down a 4x8 sheet of plywood without notching it.
2. If you use a planer to shave 1/4" off a strip the length of the plywood on both sides, it will help with folding.

Reply
Bart Tizio
10/24/2023 11:10:31 pm

At minimum the recessed bolt heads should be covered over with a product like PC woody. If not holes will capture water and compromise the wood over time.

Reply


Leave a Reply.

    MotherDaughterProjects.com

    Mother Daughter Projects
    ​
    Steph & Vicki

    MotherDaughterProjects.com
Mother Daughter Projects, LLC ∙ est. 2015 ∙ Tallahassee, FL by Vicki & Steph ∙ Privacy Policy