|
text by Vicki Sign up to get Mother Daughter Projects updates in your email!
This post is sponsored by The Home Depot as a part of The Home Depot’s ProSpective Campaign. THD provided the Ridgid Compressor used in this post.
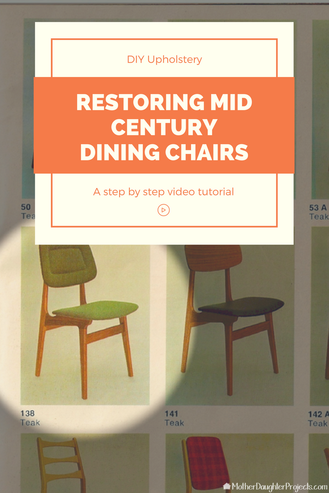
Almost any tutorial on dining room chair reupholstering has you finished in an afternoon--"it's simple, try it," the tutorial assures! Well, I found, reupholstering mid century dining room chairs with a seat and a back is no simple, afternoon project!
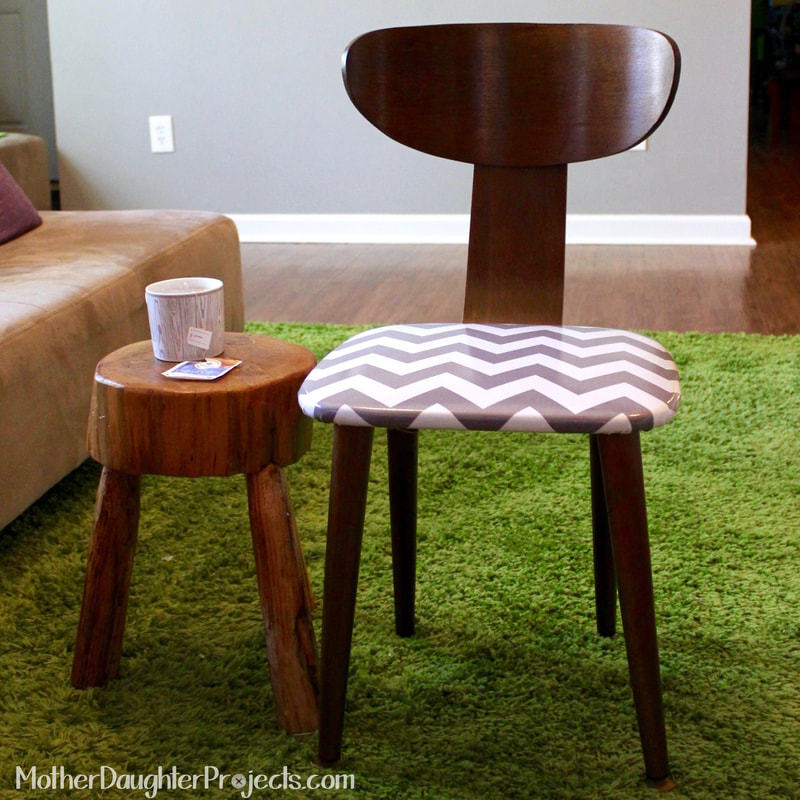
A little background. I've been searching for a mid century dining room chairs and table for some time now. I had a "farmhouse" style table by Ethan Allen that was serving me well, but it really wasn't my style. Less than a year ago, I found a local Craigslist post for a mid century table and chairs--no picture was included. I was intrigued and messaged the seller for a pic. The seller responded promptly and sent me a picture of the table and chairs of my dreams! I quickly called and set up an appointment to go see them. I went with cash in hand and the largest vehicle we own in the hopes that it would also be perfect in person and I could take it home!
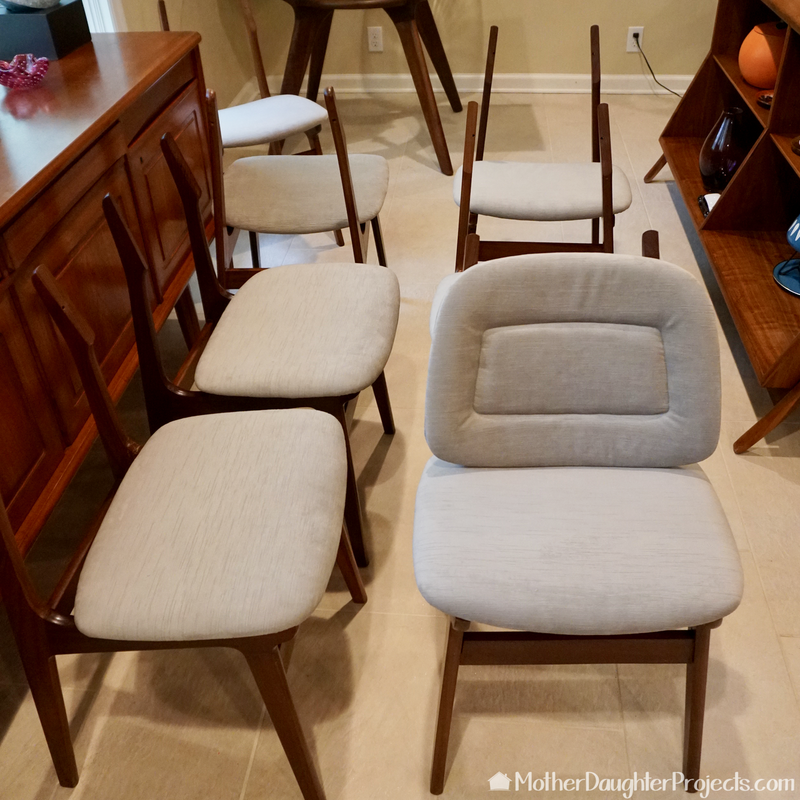
Not only did I get the table and 8 chairs, for another $100 I got a set of three nesting teak side tables, and the biggest buffet I've ever seen. All the pieces are from Norway where the original owner who was stationed through the military purchased them. I have the original product brochures as well as the original receipt from 1967.
It's interesting that when I looked at the pieces, I did not detect any discernible odor to the upholstery, but once home I started to notice a funky smell. I determined it indeed was from the chairs and started to figure out whether to sent them out to be reupholstered or do it myself.
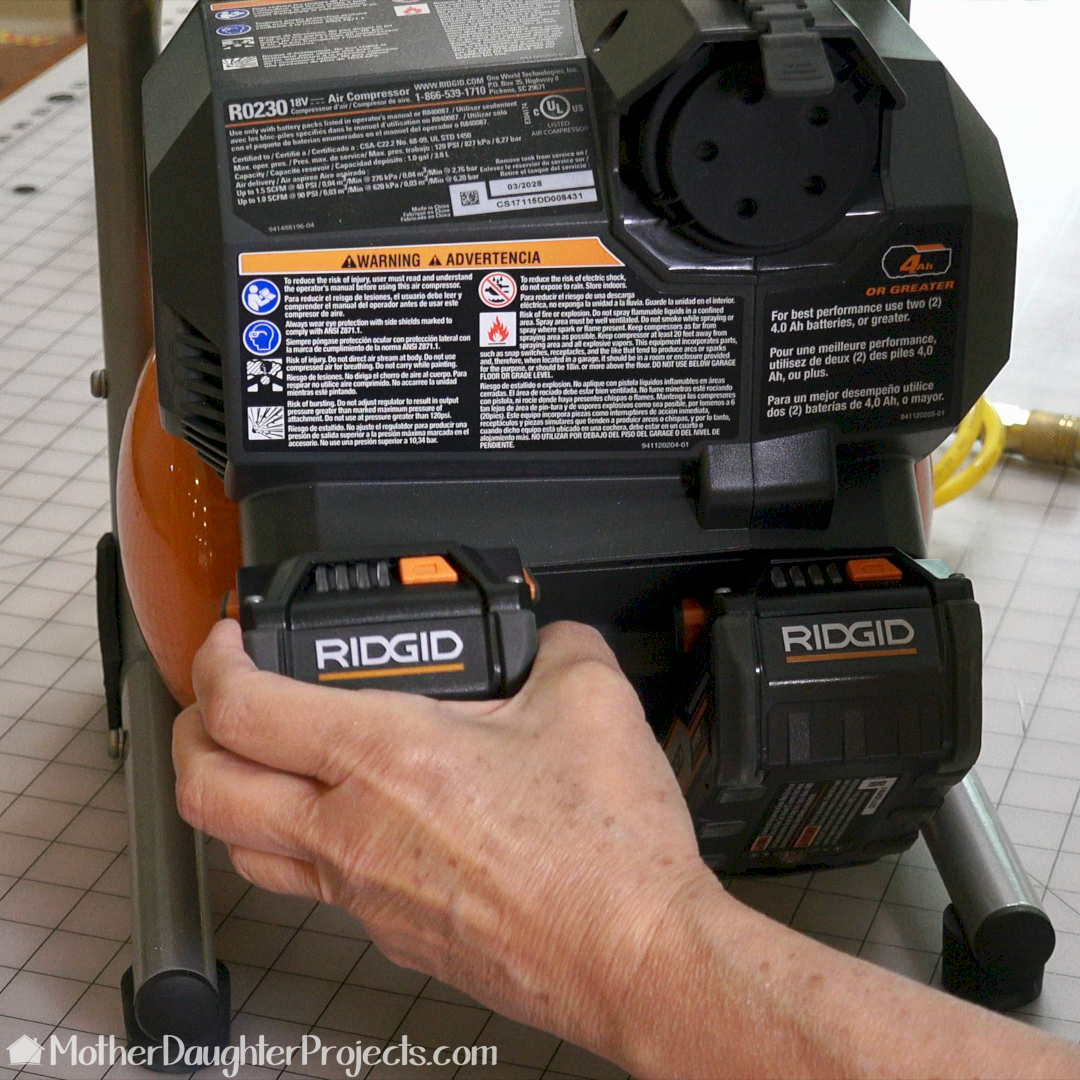
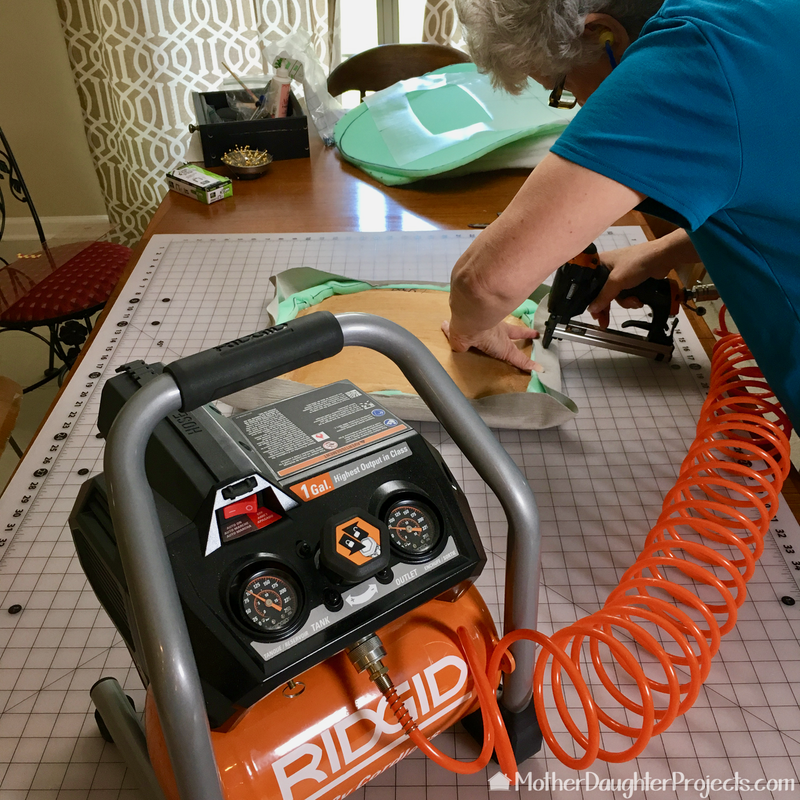
Once we got the Ridgid compressor from The Home Depot as well as an upholstery staple gun, I decided I would tackle the project myself.
There was a lot of trial and error in this project. The most difficult aspect was figuring out how to recreate the stitched design on the chair back. It was only when I deconstructed the chairs that I saw how it was done, but it was no easy feat to recreate. I tried several different options to try to recreate it and finally settled on the technique I show below. I really wanted to sew through the pieces with the foam in between the top and muslin fabrics, but my home sewing machine just wouldn't cooperate. I even purchased a "walking" foot in the hopes that would help the fabric pull through the machine--nope, no go! 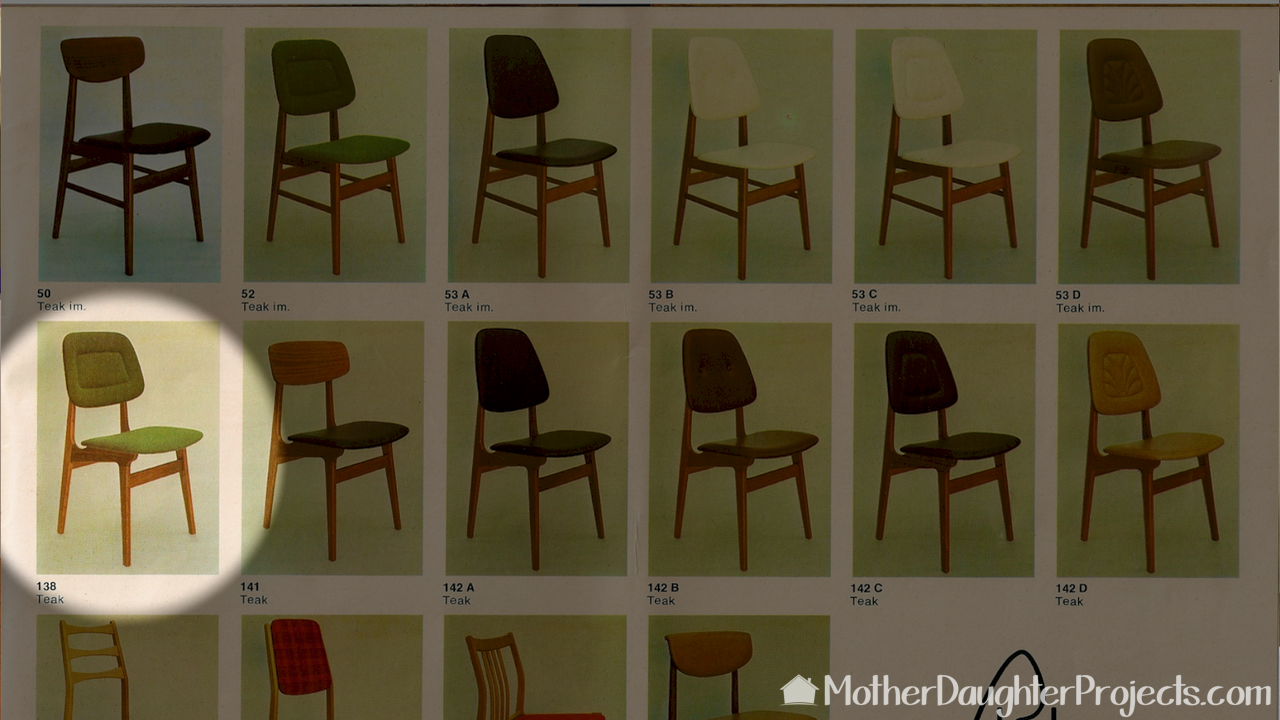
I couldn't believe the owner still had the original brochure. I scanned it all and now have it in both PDF and iBook formats. The furniture brand is Bahus of Norway manufactured in 1967 of teak.

The original chair. Once I started inspecting the chairs, I found a lot of them had some really poorly done repairs over the years. I couldn't do much about it but cleaned them up and reinforced with glue where appropriate.
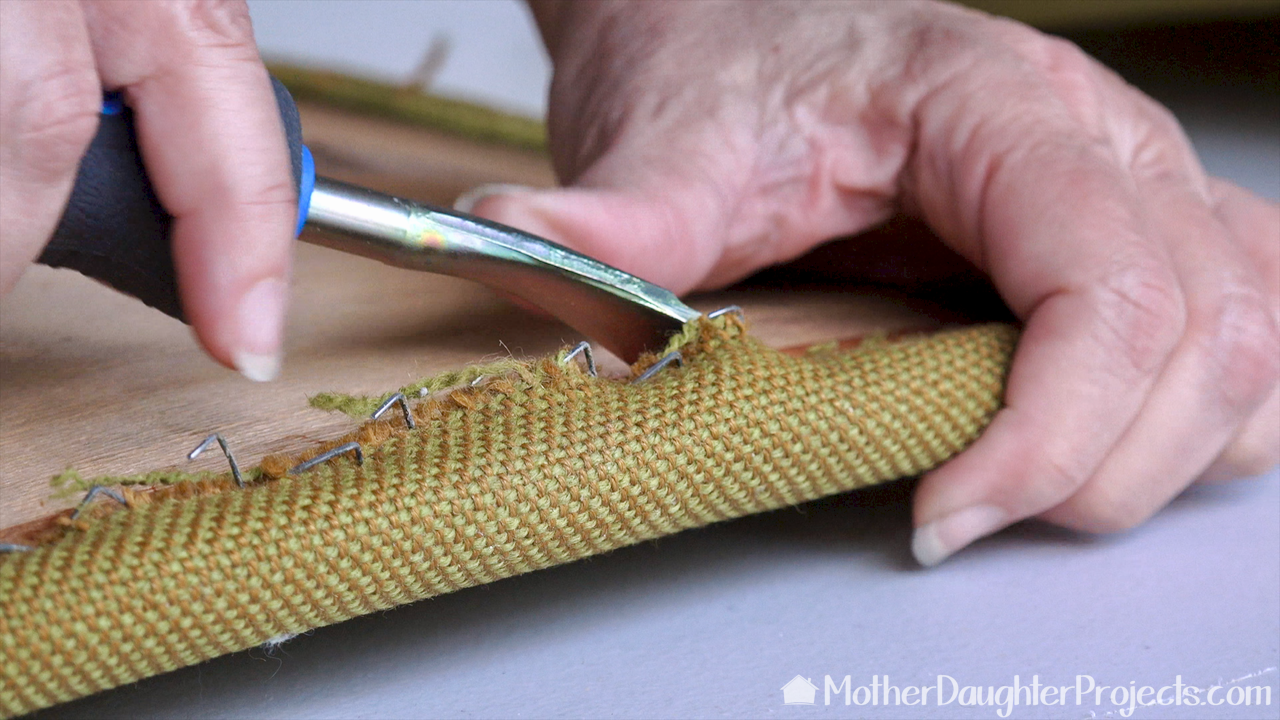
There were So. Many. Staples. to remove!
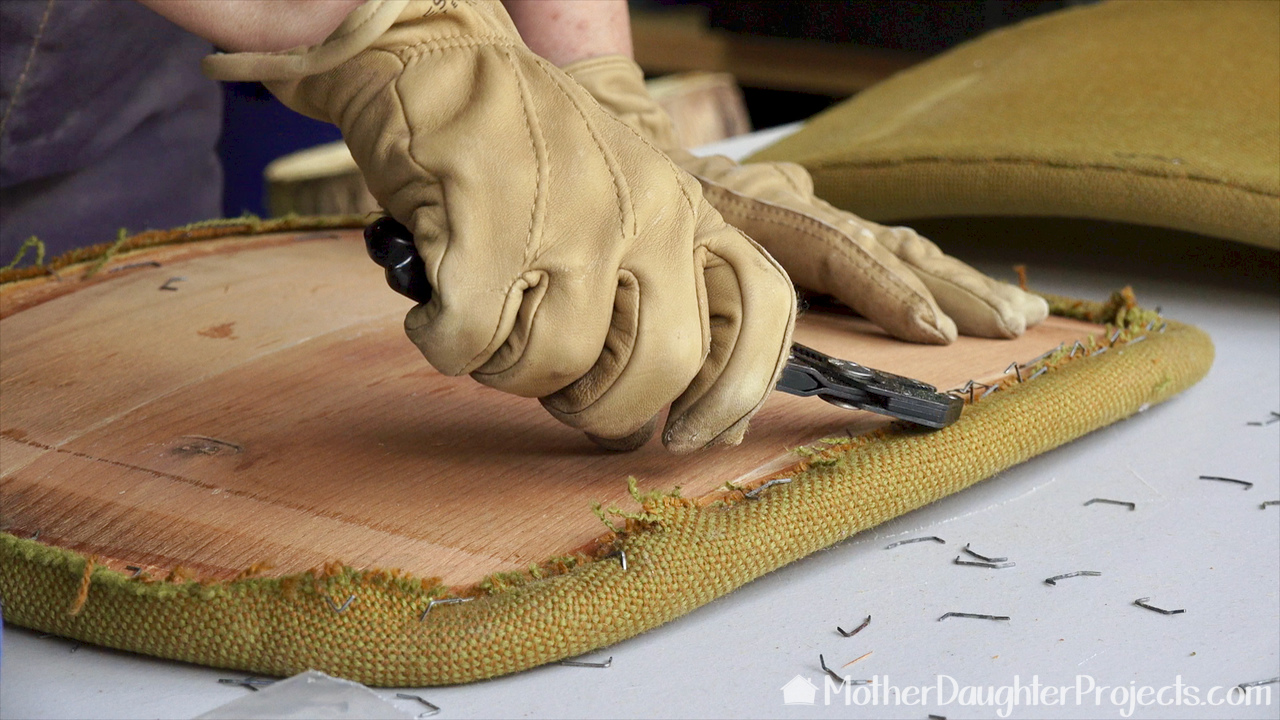
I used a pair of pliers to fully remove the staples. A good pair of gloves is a must to protect your hands.
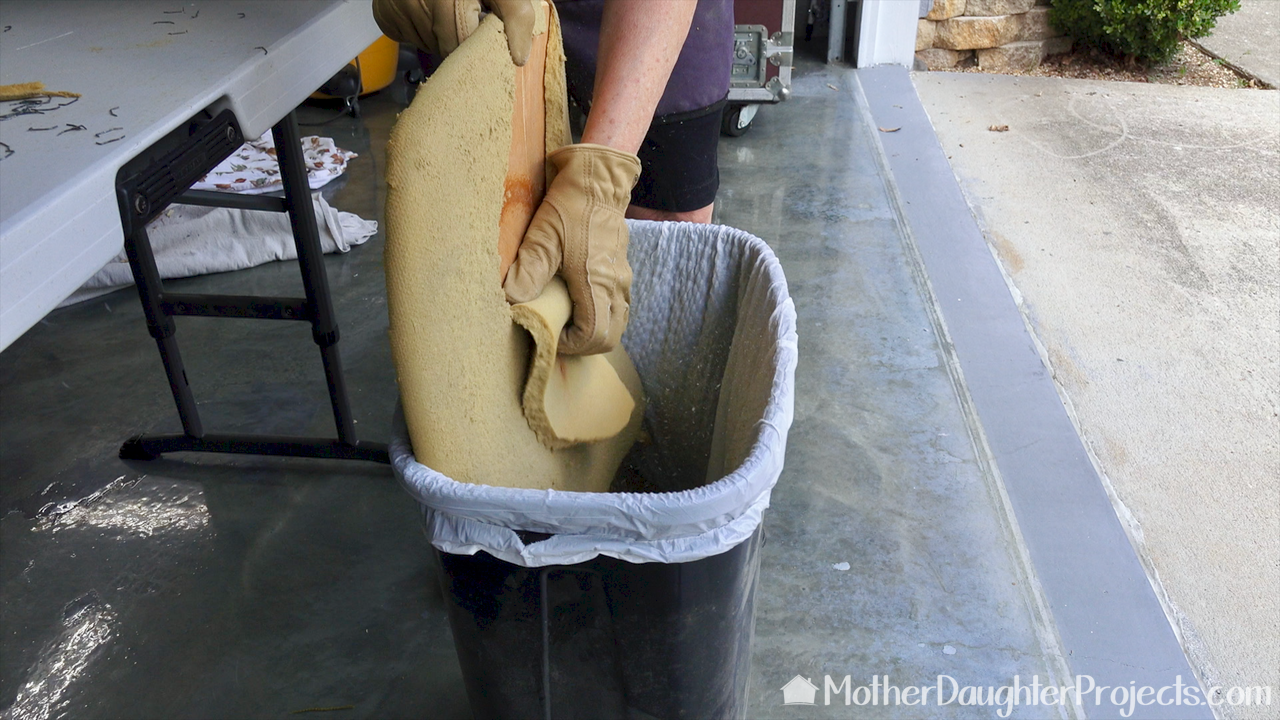
You can't see it in the picture, but I am wearing a respiratory type mask to protect against dust from the old foam. The foam had started to break down and become powdery. It is important when working with old material to protect your lungs as well as your eyes.
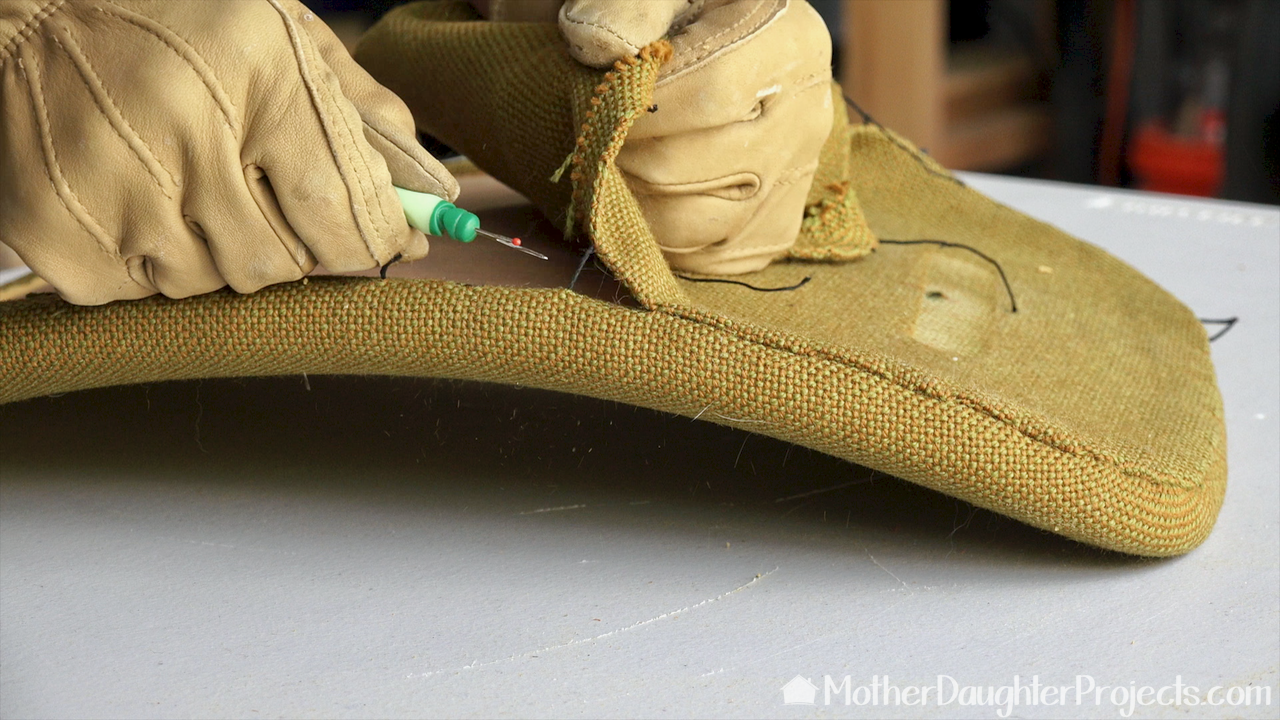
I used a seam ripper to removed the back piece. In the video you can see visible dust emitting from this piece--yuck!
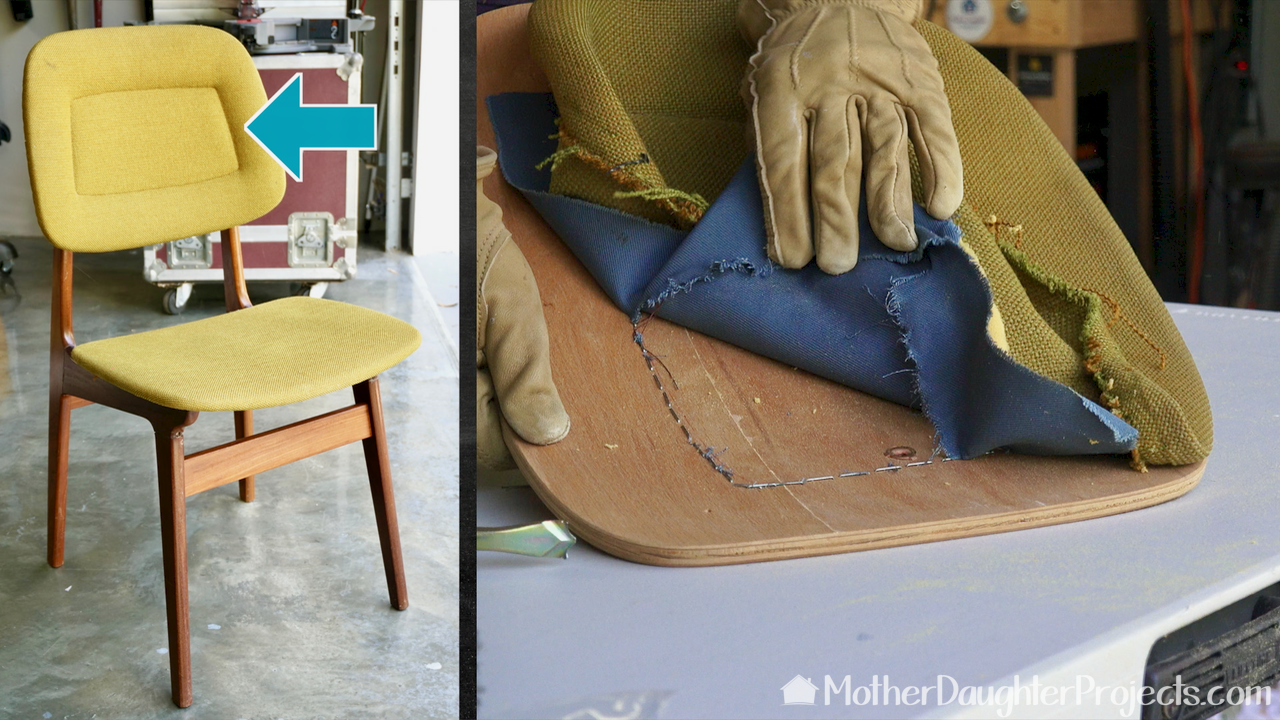
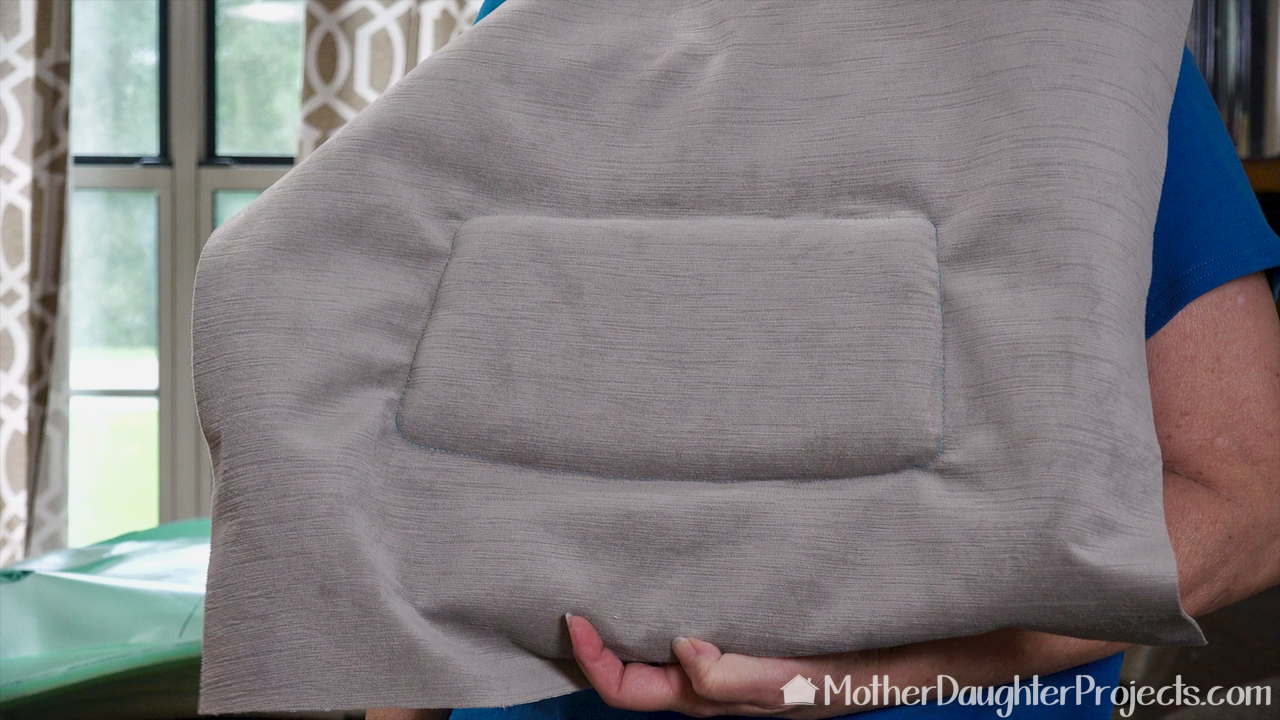
This is what the underside of that pretty stitching looks like. That extra blue piece was stitched onto the back and then it was stapled into place first creating the indention you see in the pic on the left. More staples to remove!
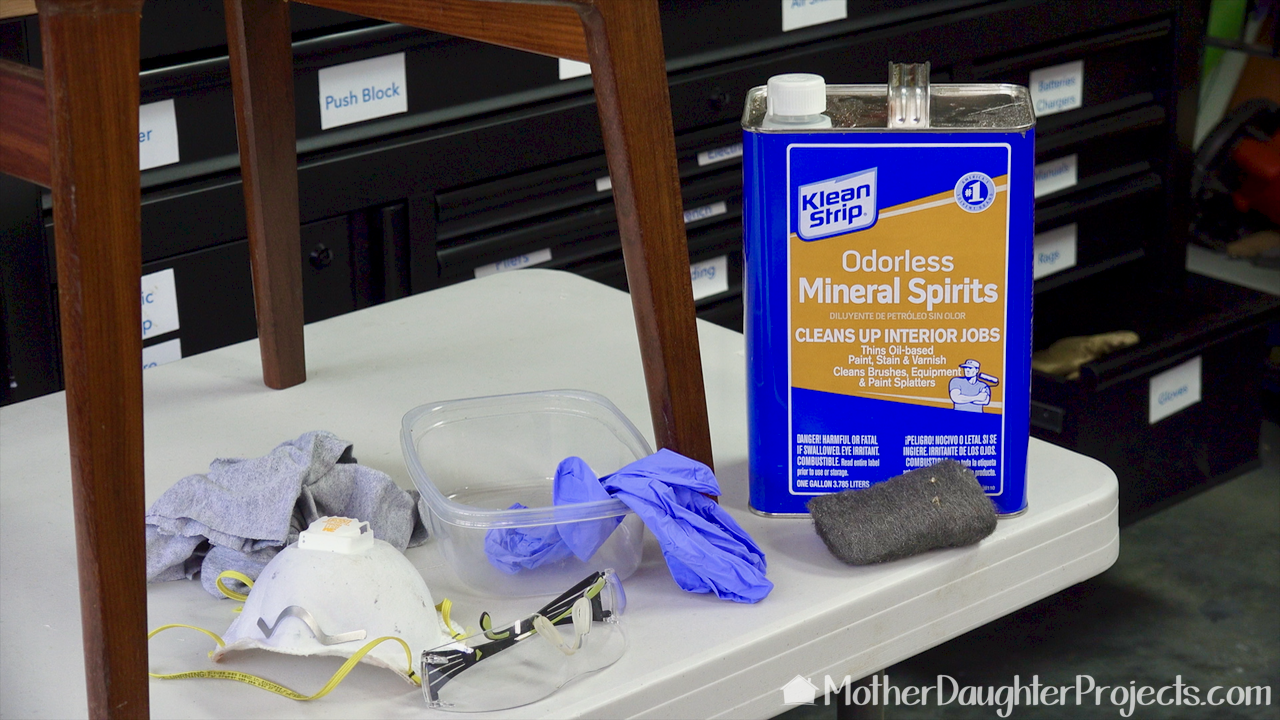
I used mineral sprits to clean up the chairs before applying Danish oil to freshen the frames.
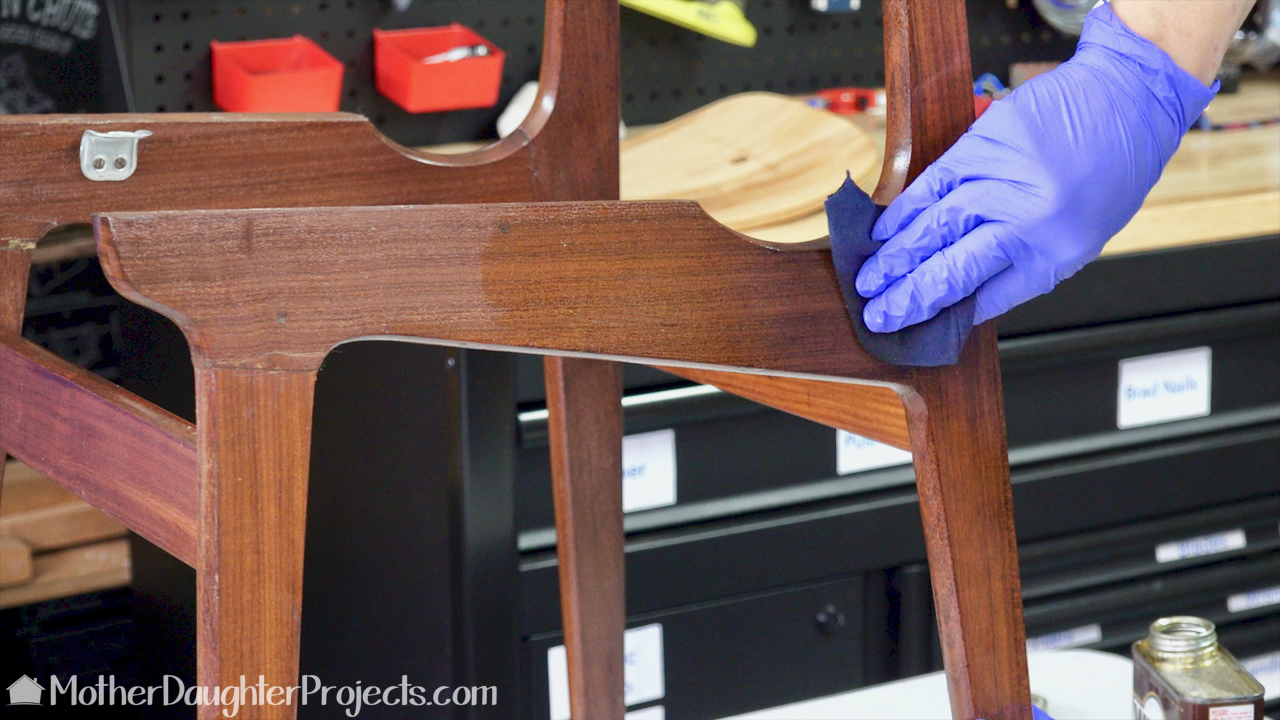
Danish oil is magic! Not really, but it does make the wood look fresh again. Wipe on, wipe off.
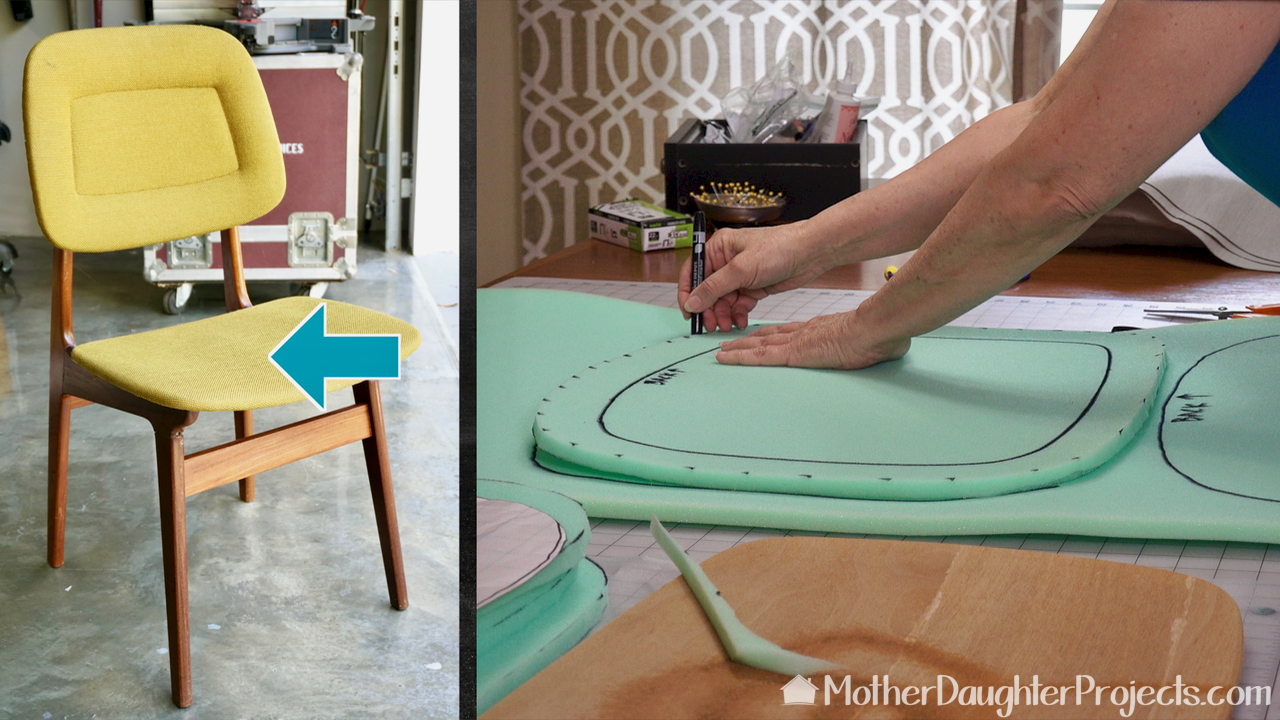
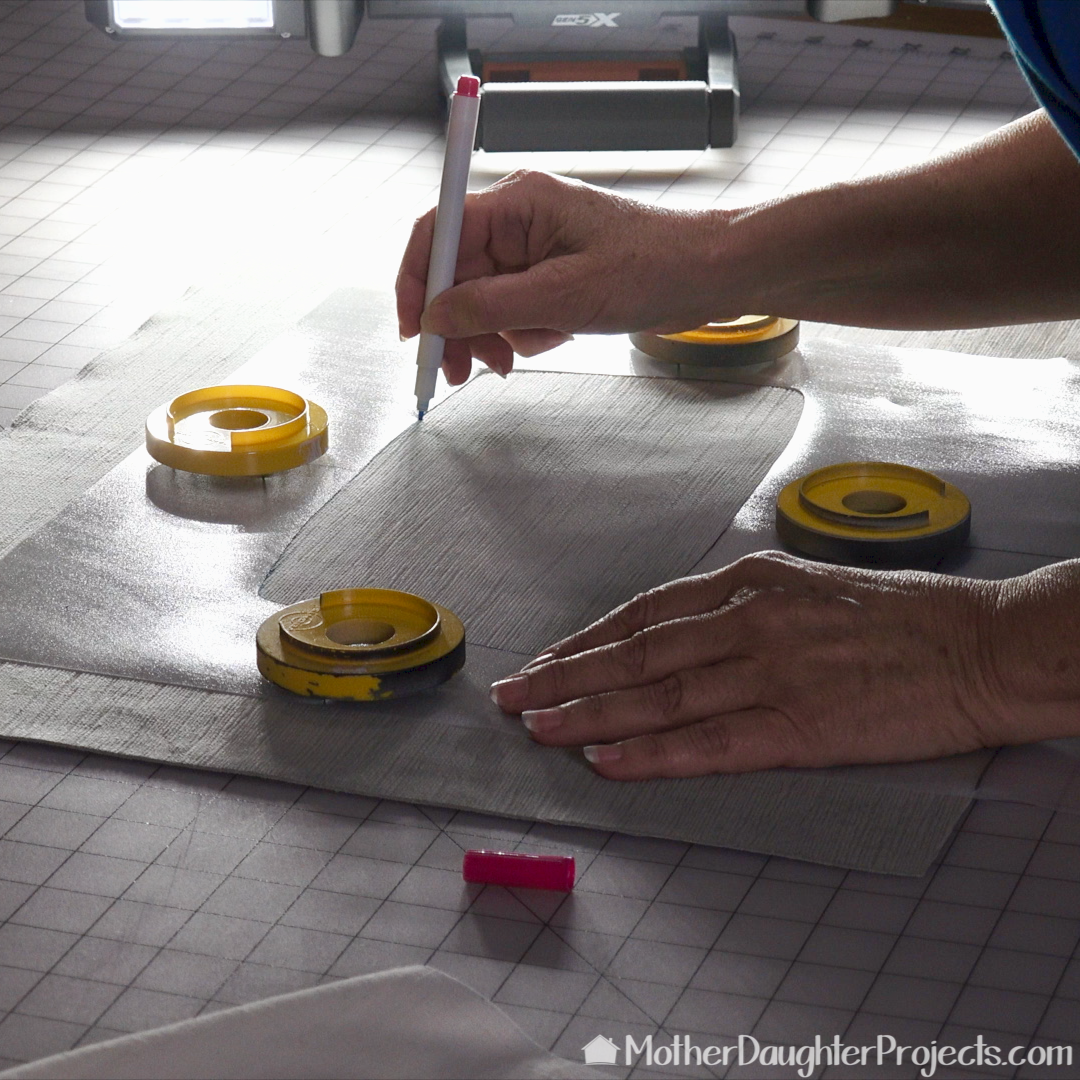
Because there were eight chairs, I took time to make templates or patterns for the various things I had to cut out or mark. I marked one piece of foam for the seat, cut it out and used it to mark and cut the remaining seven. Notice the writing on the foam. I marked every piece so I'd know what was the right side. This is marked Back with an arrow which tells me this is the side that fits at the back side of the seat.
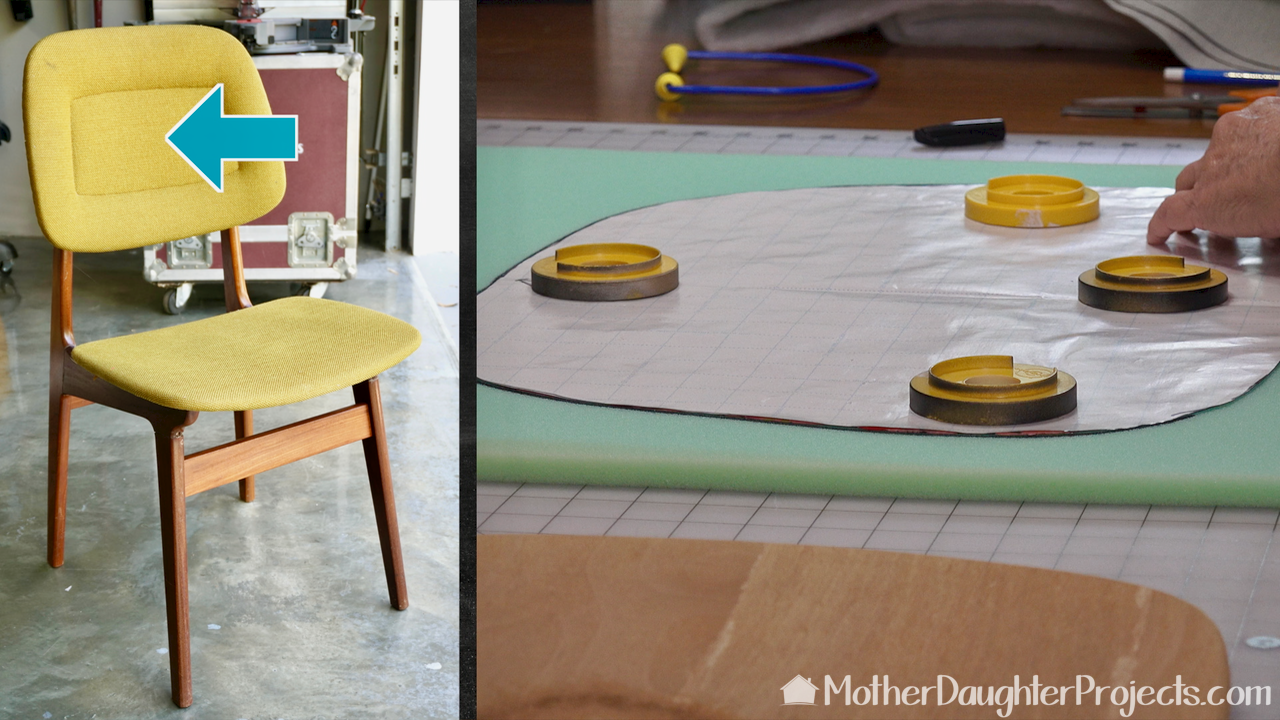
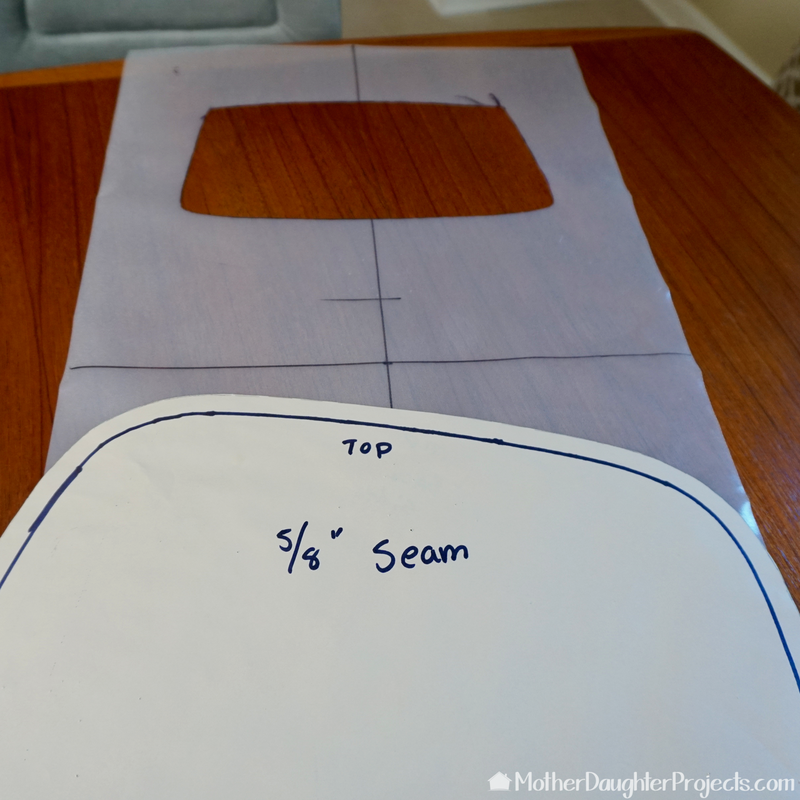
This is the pattern for the back foam. Those are pattern weights. They are discolored because I used them for spray painting. FYI, not a good idea in hindsight!
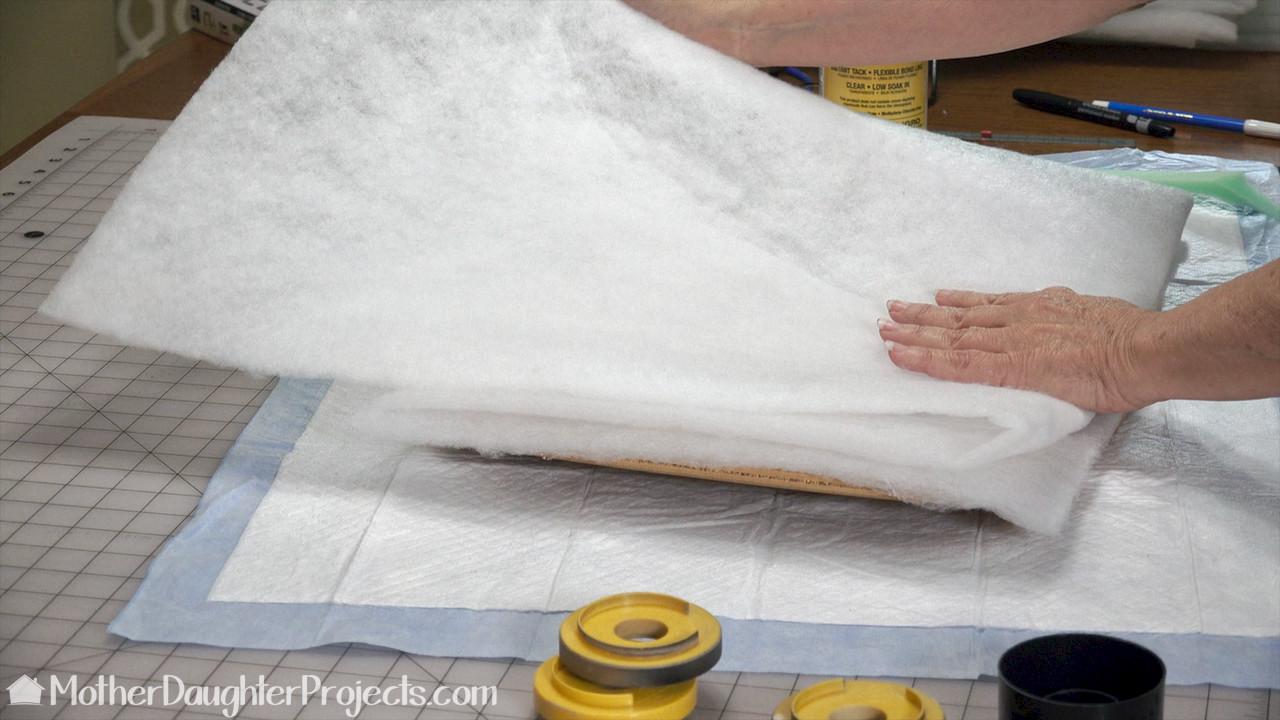
It was difficult to determine the exact thickness of the foam that was originally on the chairs. I decided to use 1/2" but felt like this was not enough thickness for the seat bottoms. I added three layers of 1/2 batting for more cushioning.
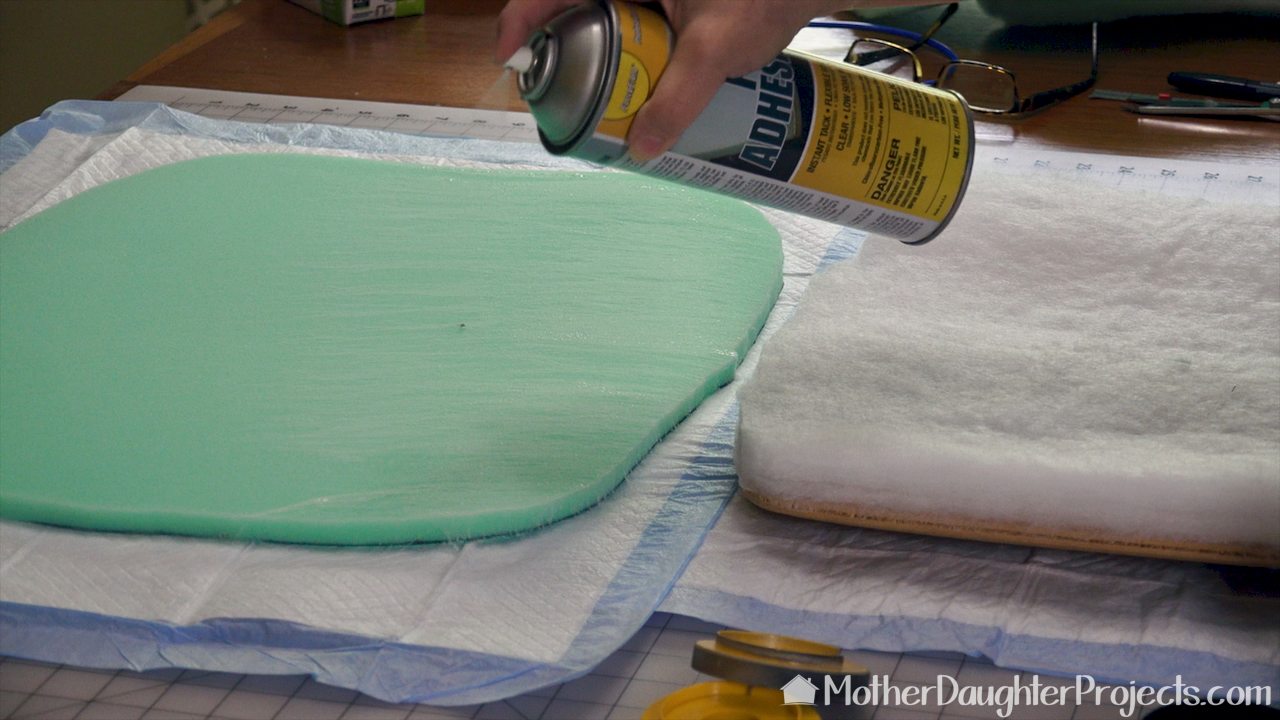
I bought a spray glue that was designed for foam. It is best to use this OUTSIDE. Both sides were sprayed and left to dry slightly so each was tacky. This created a really secure bond between the materials. I added the batting first and then the foam over that.
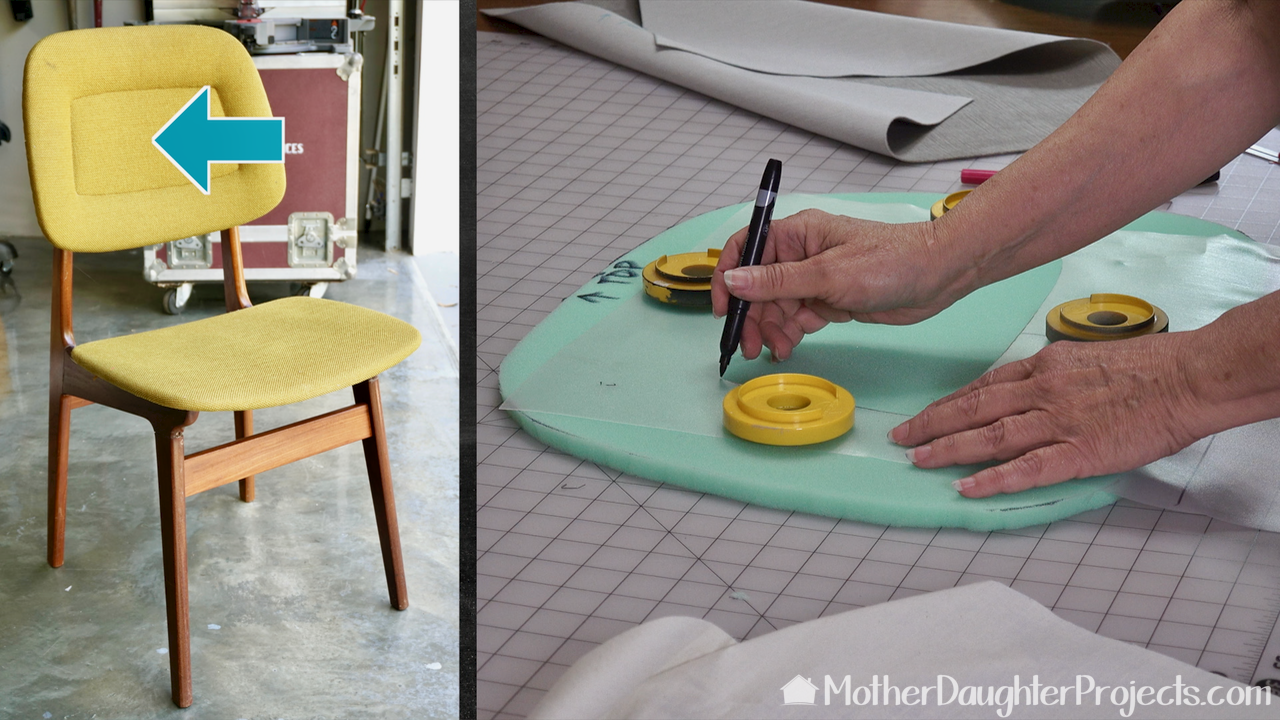
When all my sewing options for making the stitched back didn't work out, I decided to work with the back foam in two pieces. I marked all the foam centers and cut them out.
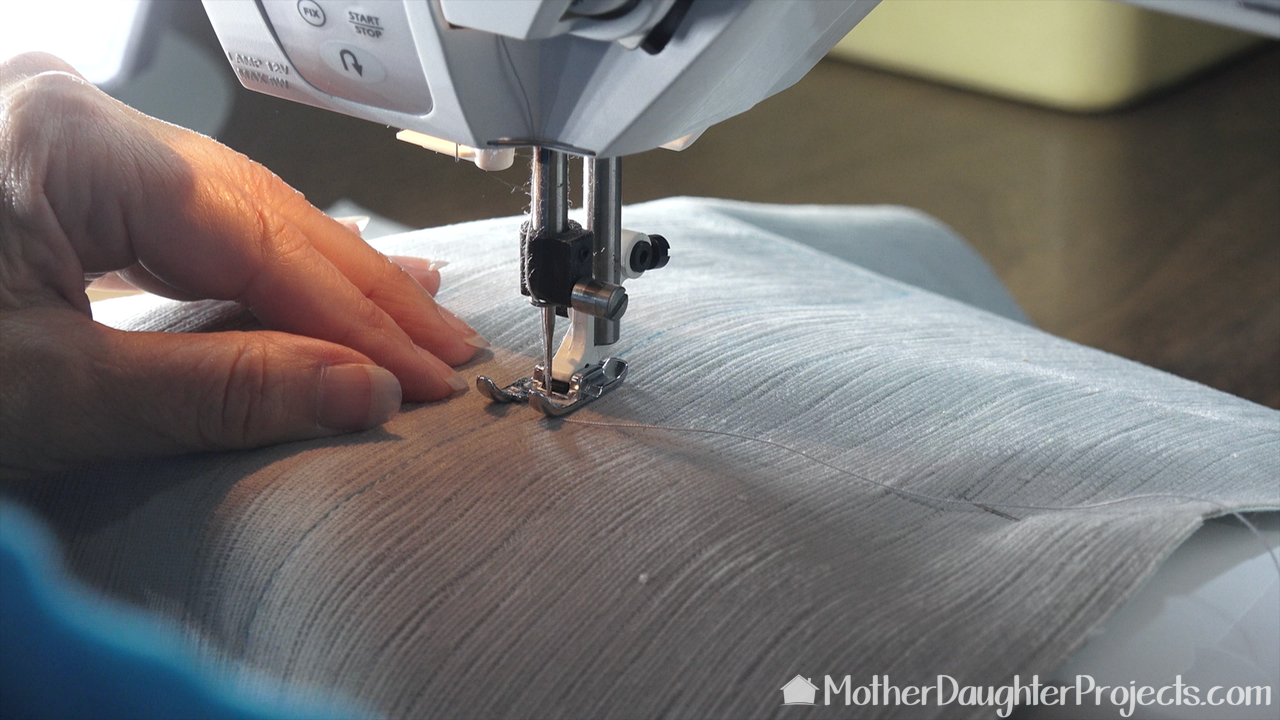
I used upholstery thread to stitch the line. I used a 3.5 stitch length. I had to adjust the tension higher than normal because of the type of thread I used. Refer to your sewing machine manual for information about tension and thread thickness. Note, I did not backstitch when I came to the end of the stitching line, but left the ends long and pulled them to the underside (use a hand needle for this) and tied them off. By doing this, there is no discernible starting and ending point that shows on the front.
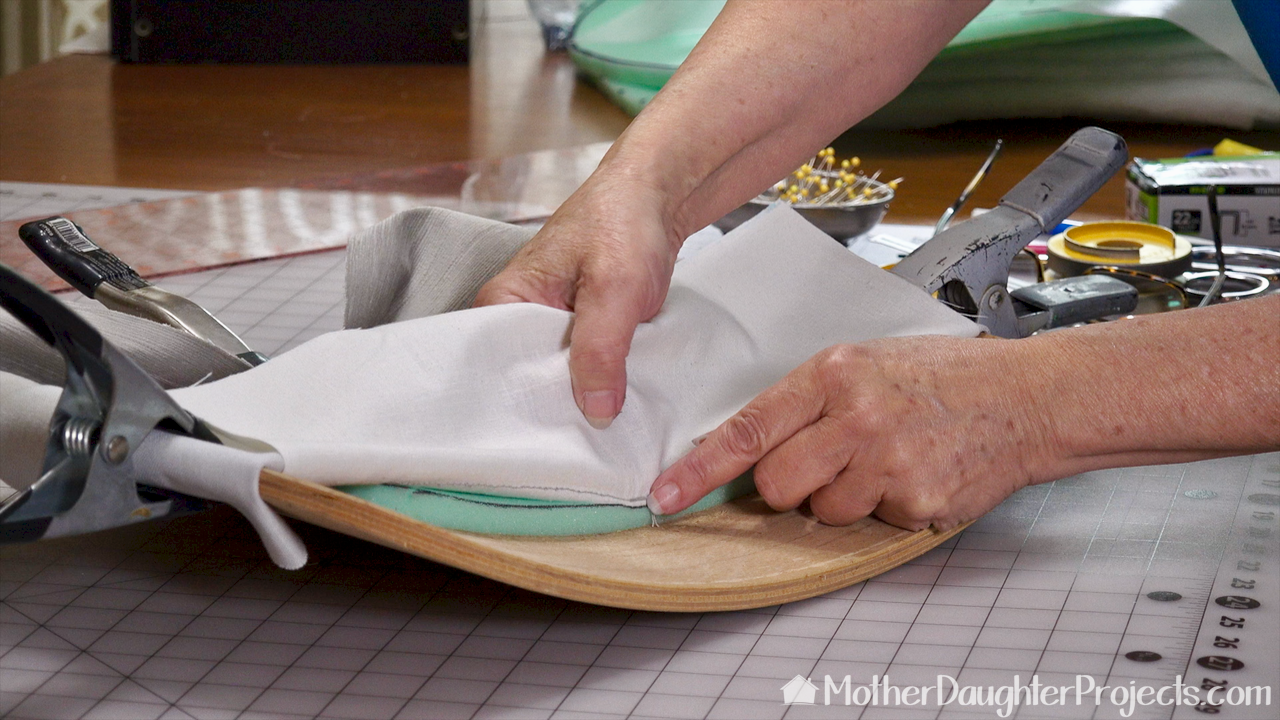
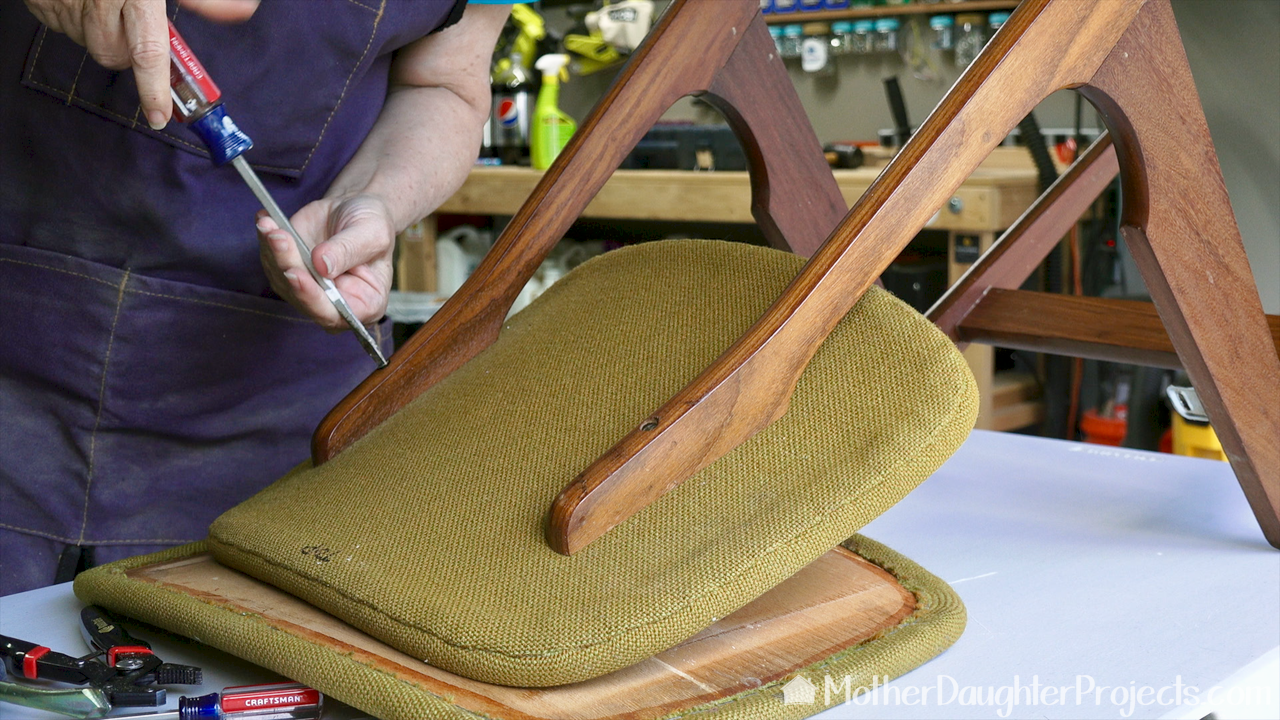
To attach the front to the seat back, I first glued the center part of the foam into place on the wood back. I lined up the stitching with the edge of the foam, laid the muslin piece down, keeping the upholstery fabric clear of the staples and stapled close to the stitching line.
The clamps helped to keep the upholstery fabric out of the way. This probably was the most difficult part of the process. Tedious and not all together perfect. I had to be okay with "not perfect!"
Done with this part, now onto the rest!
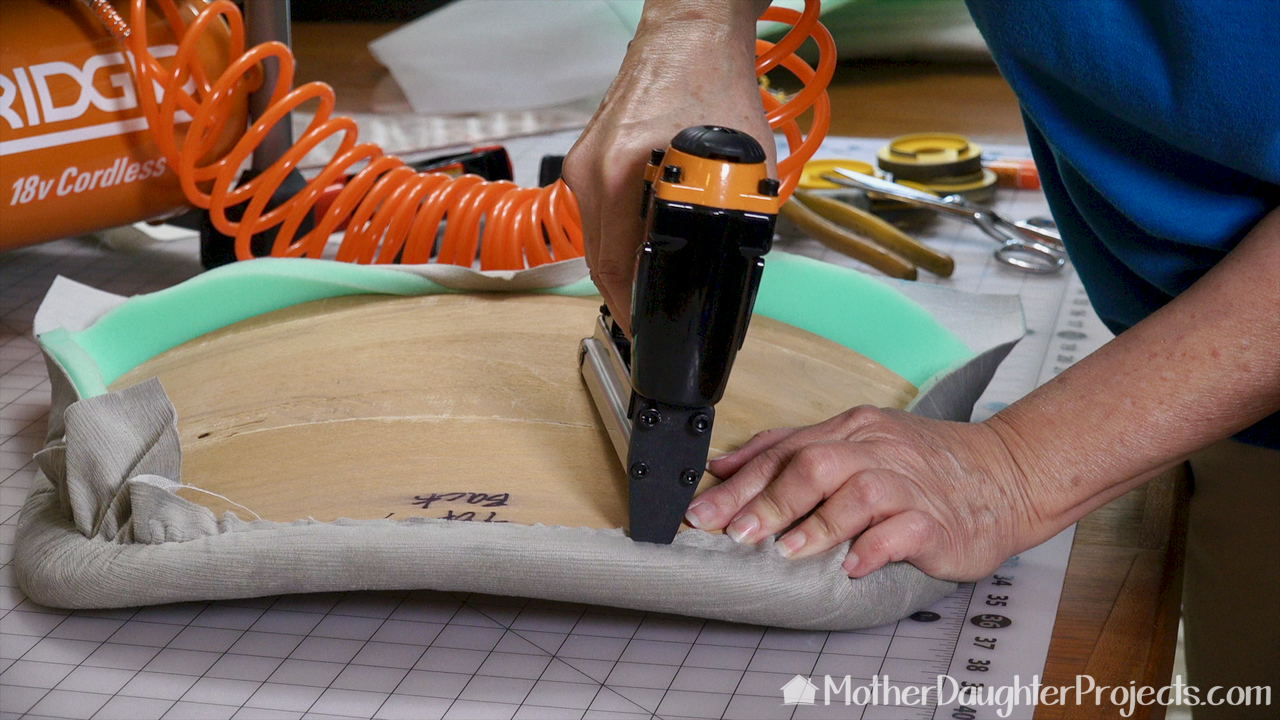
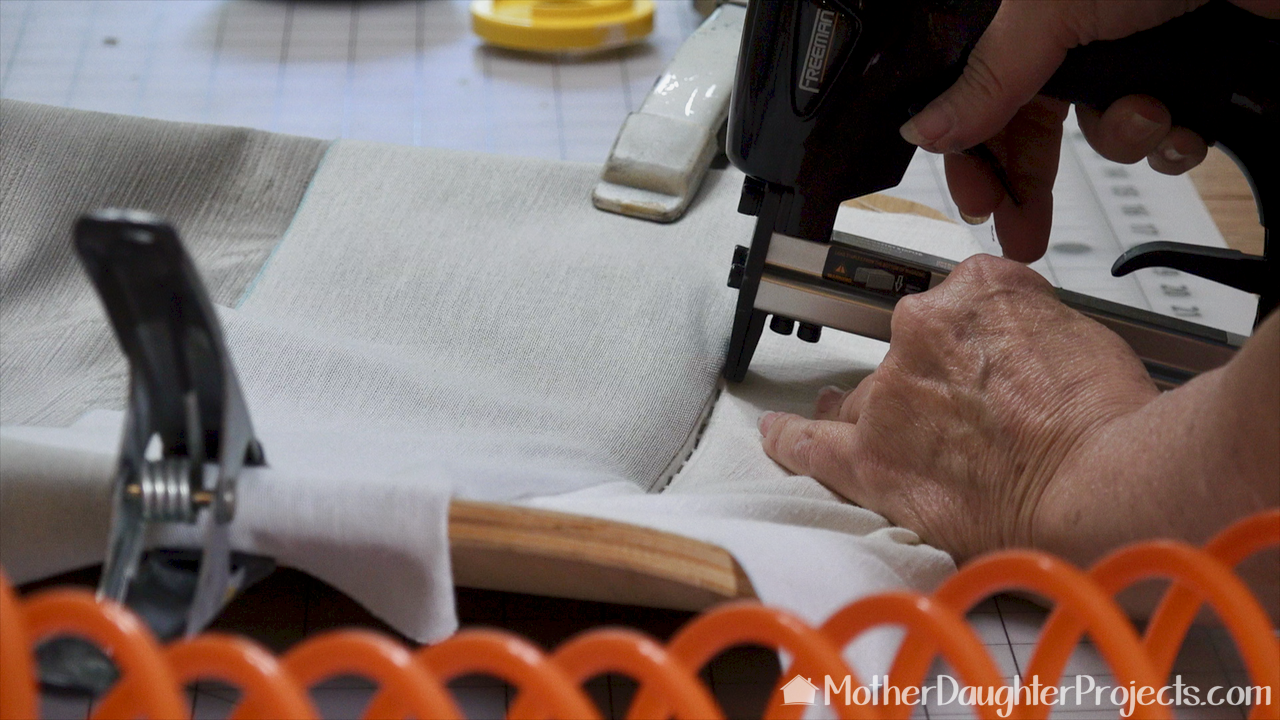
The remainder of the foam was put into place between the now stapled into place muslin and the back of the upholstery fabric. More pulling and stapling into place.
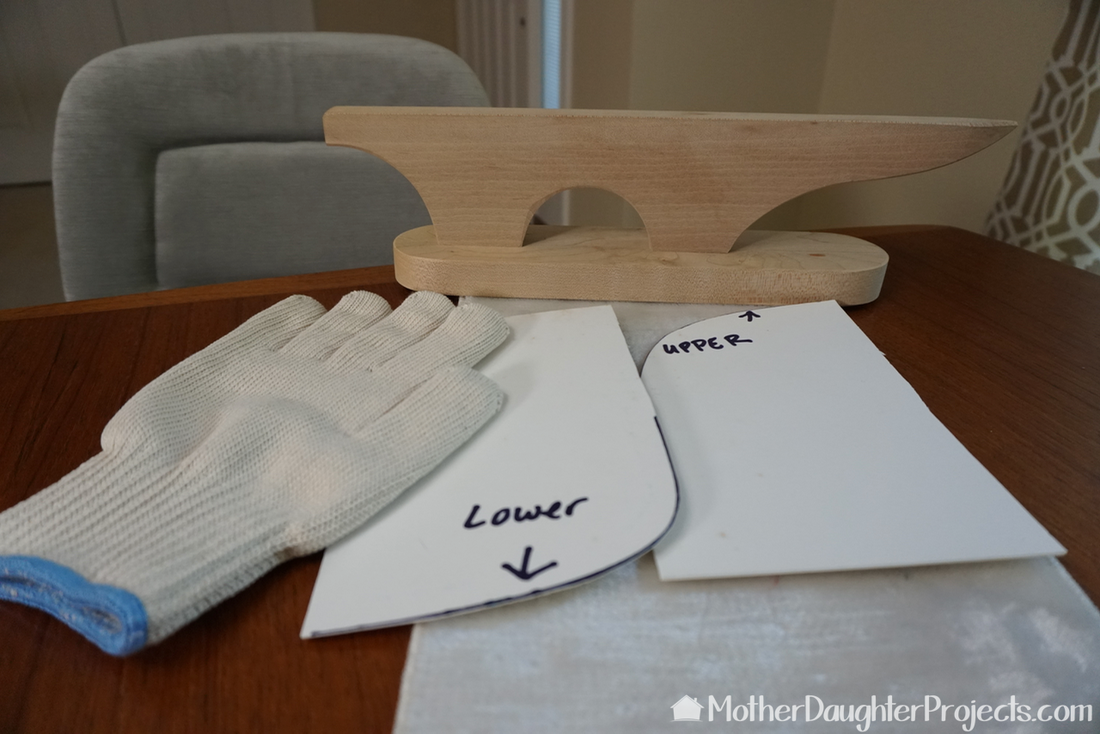
The piece that went on the back of the chair needed to have the raw edges turned under. I used a couple of templates to help create the curves. I wore the heat resistant glove on my left hand to hold the seams into place while I used my steam iron to press them. The wood point presser was used to hold the seam flat. The block holds the seam in place and as the fabric cools, it helps to lock in the crease. The white thing under the pattern is a pressing cloth for fabrics with nap (think velvets). I used it to press on the right side of the fabric so I wouldn't damage the fabric since it has nap.
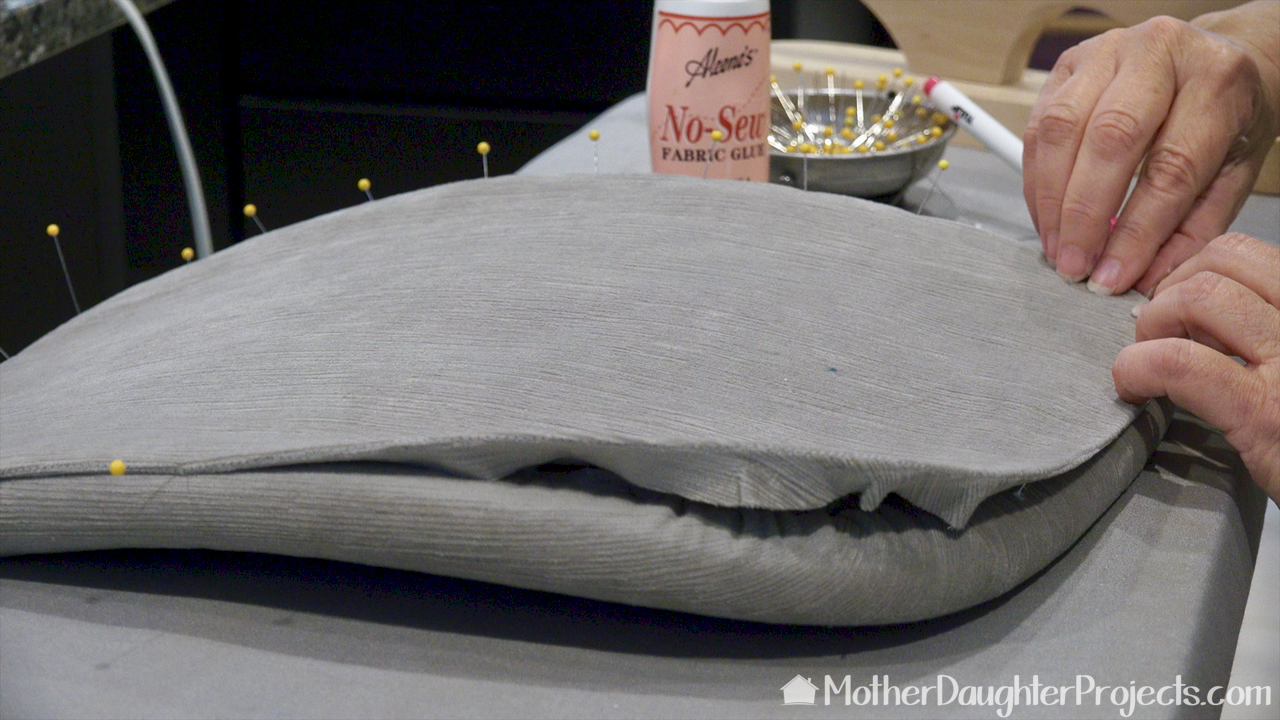
I really wanted to be true to the original design and stitch the back into place, but that proved to be very difficult. I settled on fabric glue and pins to attach the back. It worked!
Are you interested in what is in that picture on the left? Next to the chairs on the left is the buffet that came with the dining room table and chairs, the table in the back is an Adrian Pearsall, Craft Associates table with walnut sculptured base, and on the right is a Drexel bookcase, 1959.
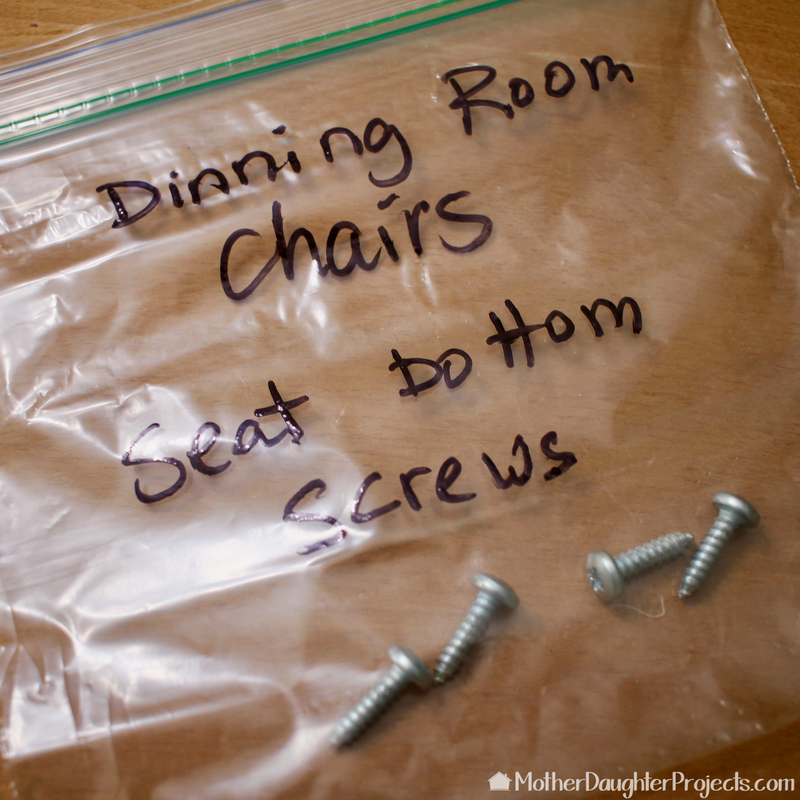
When I bought the fabric for the 8 chairs, the store clerk was surprised I was going to recover the chairs myself. Actually, it never occurred to me not to do them myself. Although, after working on them and the endless amount of work they were, in hindsight I might have considered hired them out! I now know why upholstery work is so expensive! Actually, if I had not had the compressor and staple gun there would have been no way for this to be a DIY project. I no longer have the strength in my hands for a manual or even electric staple gun. The compressor takes all the effort out of using a staple gun so even someone like me with strength issues can use this.
In any project, there are always things you wished you had done differently. This DIY was no exception.
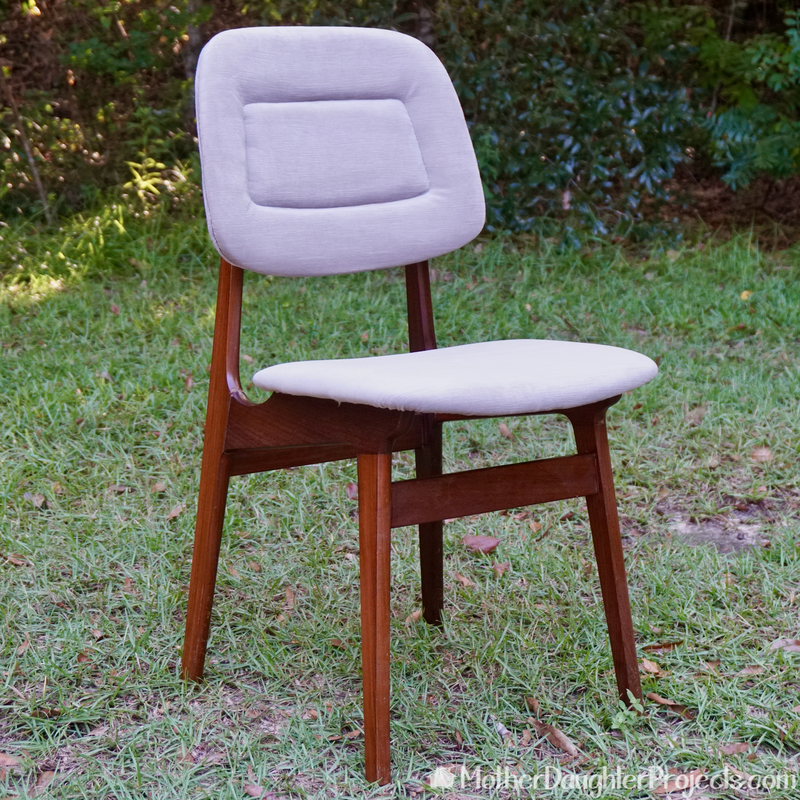
In the end, I am very please with the chairs and the fact that there are no more funky smells! I wouldn't recommend this project for everyone, but know that if you're doing just seat bottoms, it's very doable and very quick. The seat bottoms took almost no time. Do you have any upholstery projects waiting to be started or finished? How's it going? What tips do you have?
We acknowledge that The Home Depot is partnering with us to participate in the The Home Depot ProSpective Campaign. As a part of the Program, we are receiving compensation in the form of products and services, for the purpose of promoting The Home Depot. All expressed opinions and experiences are our own words. Our post complies with the Word Of Mouth Marketing Association (WOMMA) Ethics Code and applicable Federal Trade Commission guidelines.
FYI: We are not professionals, and we don’t claim to be. This is what we found worked for our project. Yours may need a little different approach. Safety first! FYI: Affiliate links are being used on this page. Purchasing via these links help support MDP! Related Projects
1 Comment
Eric Linderman
6/1/2022 02:04:05 pm
I recently grabbed a very similar set of dining chairs. I love them. I read that you scanned the catalog. I would love to look up my chairs, if possible. Do you share or sell access to the catalog pictures you took? Leave a Reply. |

Mother Daughter Projects
|