Mother Daughter Projects

  • Blog
  • About
    • Contact
    • Privacy Policy
  • Tools
    • Tool Tuesday
  • Maintenance
  • Improvement
  • Decor
  • Tech
  • Blog
  • About
    • Contact
    • Privacy Policy
  • Tools
    • Tool Tuesday
  • Maintenance
  • Improvement
  • Decor
  • Tech

DIY for Homeowners

TV Stand with Sliding Door and a Secret!

3/7/2021

0 Comments

 
text by Vicki     Sign up here to join our weekly email newsletter!
This custom TV stand was planned with two goals in mind:

1. Hide all the tech including cables and cords
2. Provide storage for all the things previously stored in the coffee table

This build does both, plus it reduces the light from the tech "on" lights! That's a bonus for anyone who has ever spent the night in someone's home office!

Materials:


  • (2) 3/4” Plywood (Home Depot)

  • 2x4 (Home Depot)

  • 1x2-8ft Prime Board (Home Depot)

  • (3) 1x3-8ft Prime Board (Home Depot)

  • 1x4-8ft Prime Board (Home Depot)

  • 16in x 32in Horizontal White Metal Pegboard Tool Board Panel (Wall Control)

  • 12in x 16in White Metal Pegboard Tile Fun Size Tool Board Panel (Wall Control)

  • Everbilt 3 in. Steel Swivel Caster (Home Depot)

  • KUGGIS Box with lid, white (IKEA)

  • EaseLife 4 FT Cabinet Mini Top Mount Sliding Barn Door Hardware Kit (Amazon)

  • 120 Packs Shelf Pins, 5mm Shelf Support Pegs (Amazon)

  • 50-Pcs Self Adhesive Cable Management Clips (Amazon)

  • Cable Labels by Wrap-It Storage (Amazon)

  • Opentron OT4126 Heavy Duty Metal Surge Protector Power Strip with Mounting Parts - 4 Feet 12-Outlet 6 Feet Power Cord (Amazon)

Tools:


  • SawStop Jobsite Saw Pro (SawStop)

  • Makita 18-Volt 5.0Ah X2 LXT Lithium-Ion (36V) Brushless Cordless 10 in. Dual-Bevel Sliding Compound Miter Saw with Laser Kit (Home Depot)

  • Ryobi 18-Volt ONE+ Cordless AirStrike 18-Gauge Brad Nailer Kit (Home Depot)

  • Kreg 5 mm Shelf Pin Jig (Home Depot)

  • Ryobi 18-Volt ONE+ Cordless Rotary Tool with 1.5 Ah Compact Lithium-Ion Battery (Home Depot)

  • Rockler Pock-it Hole Clamp® with Quick Release (Rockler)

  • Behr 1 gal. Ultra Pure White Semi-Gloss Enamel Low Odor Interior Paint and Primer in One (Home Depot)

  • Rust-Oleum Ultimate Polyurethane Matte Interior

You can see the entire cut list in this downloadable PDF.
Using Wall Control and Ikea storage bins for storage in the TV stand.
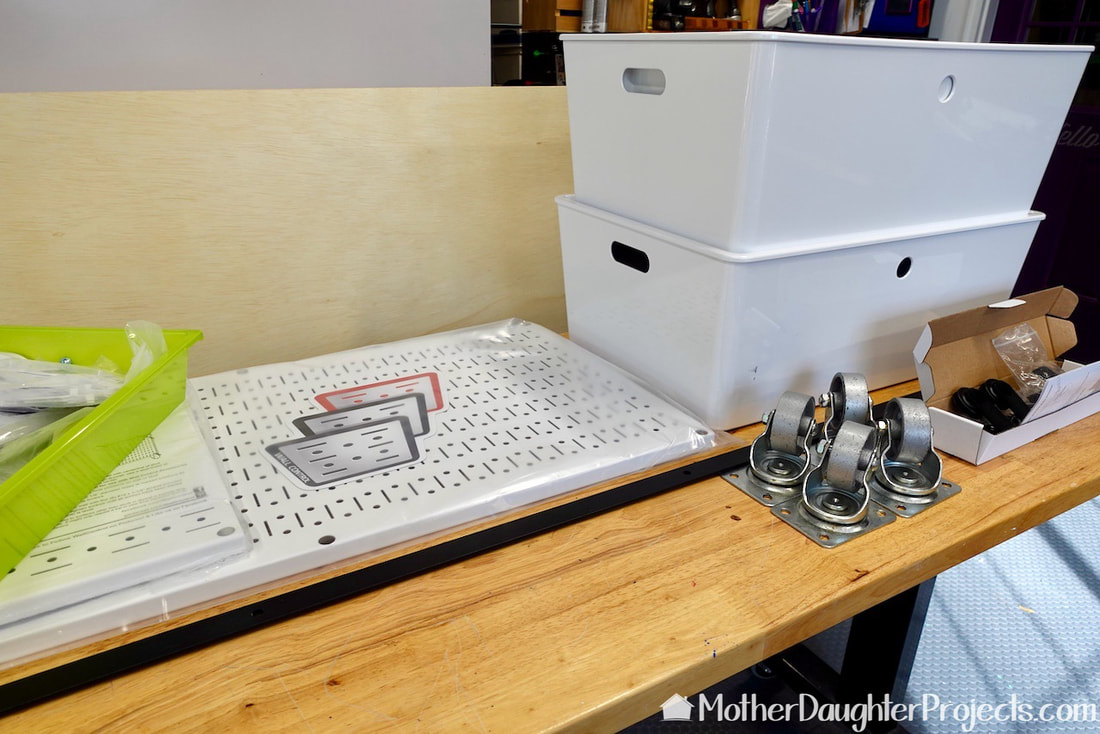
The build plan was based on three things: (2) Wall Control panels, (2) Ikea storage bins, and sliding door hardware. All the measurements are based on accommodating these three things.
Miniature TV stand with mini Wall Control.
Steph created a miniature of the build to see how it would all go together.
The back side showing the mini Wall Control metal pegboard.
The back side with mini Wall Control. It was easy to imagine where everything would fit.
Using the Kreg pocket hole jig.
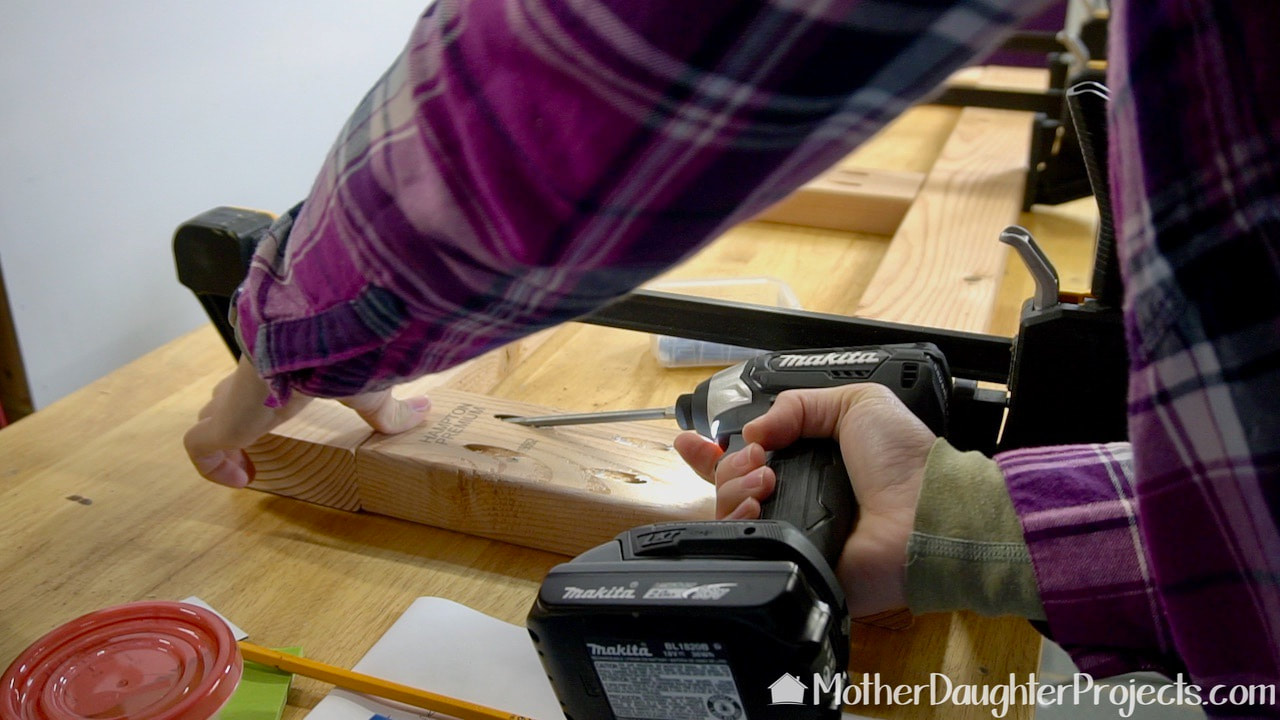
The base of the TV stand was built from 2x4s and assembled using pocket holes and screws.
All the plywood cuts were made on the SawStop table saw.
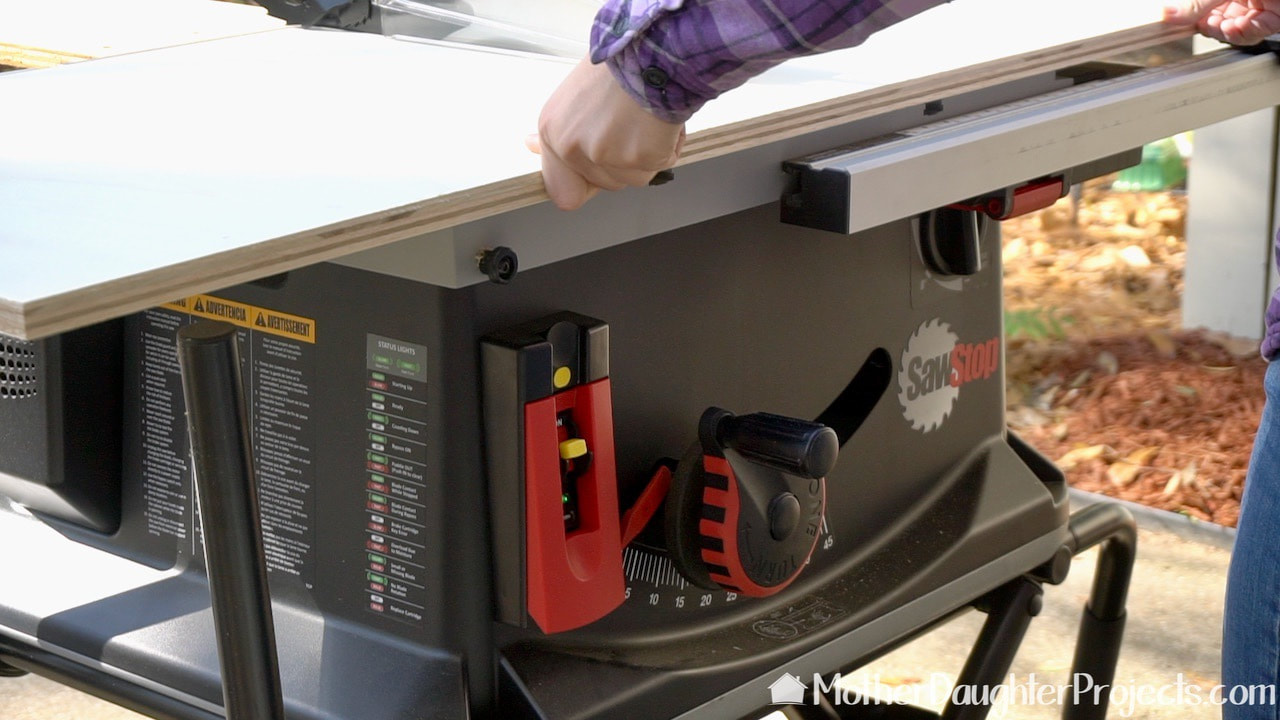
All the plywood cuts were made on the SawStop table saw. This is a job site model. In the video, Steph shows how it moves and how to set it up.
This Kreg shelf pin jig makes it easy to accurately make the holes.
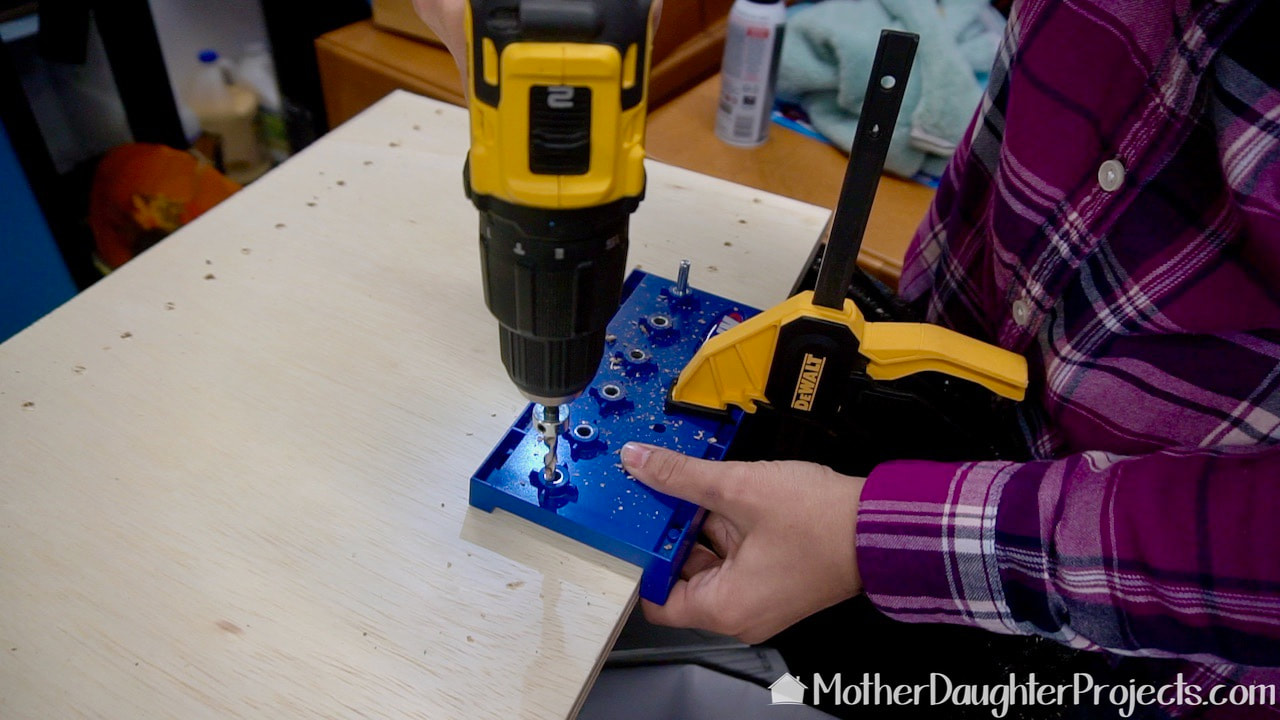
The TV stand will have two adjustable shelves. This Kreg shelf pin jig makes it easy to accurately make the holes. There's a great demonstration in the video on how to use this.
 I'm using a Ryobi rotary tool with sanding disk to clean up the inside and edges of the hole.
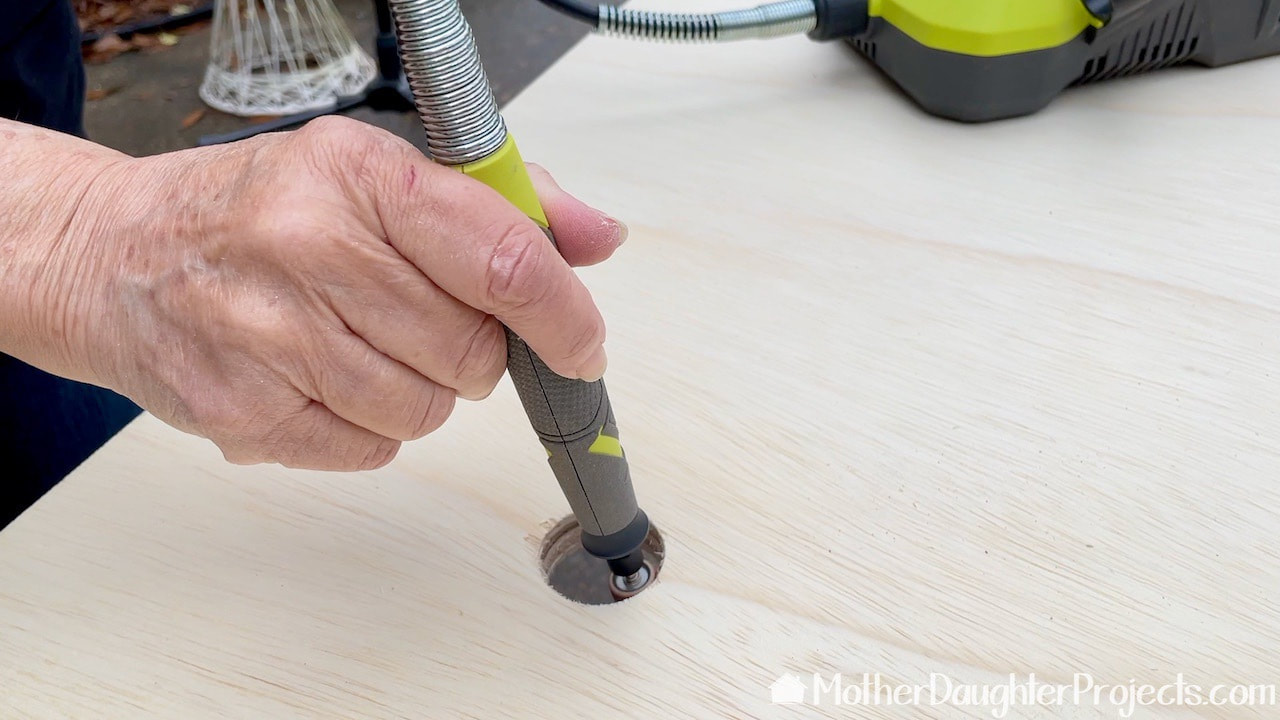
We drilled a hole in the back of the stand where cables will come through from the front. I'm using a Ryobi rotary tool with sanding drum to clean up the inside and edges of the hole.
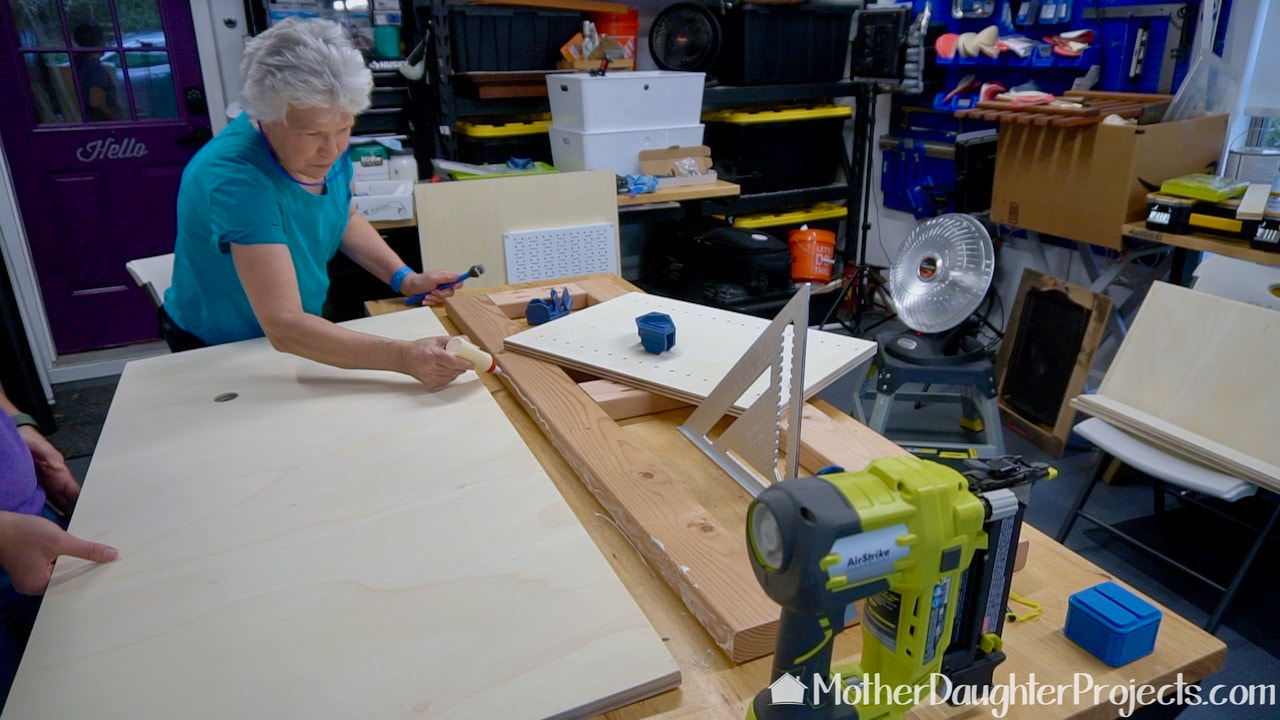
The unit is put together with wood glue and brad nails.
Using a Ryobi brad nailer to secure the body of the TV stand.
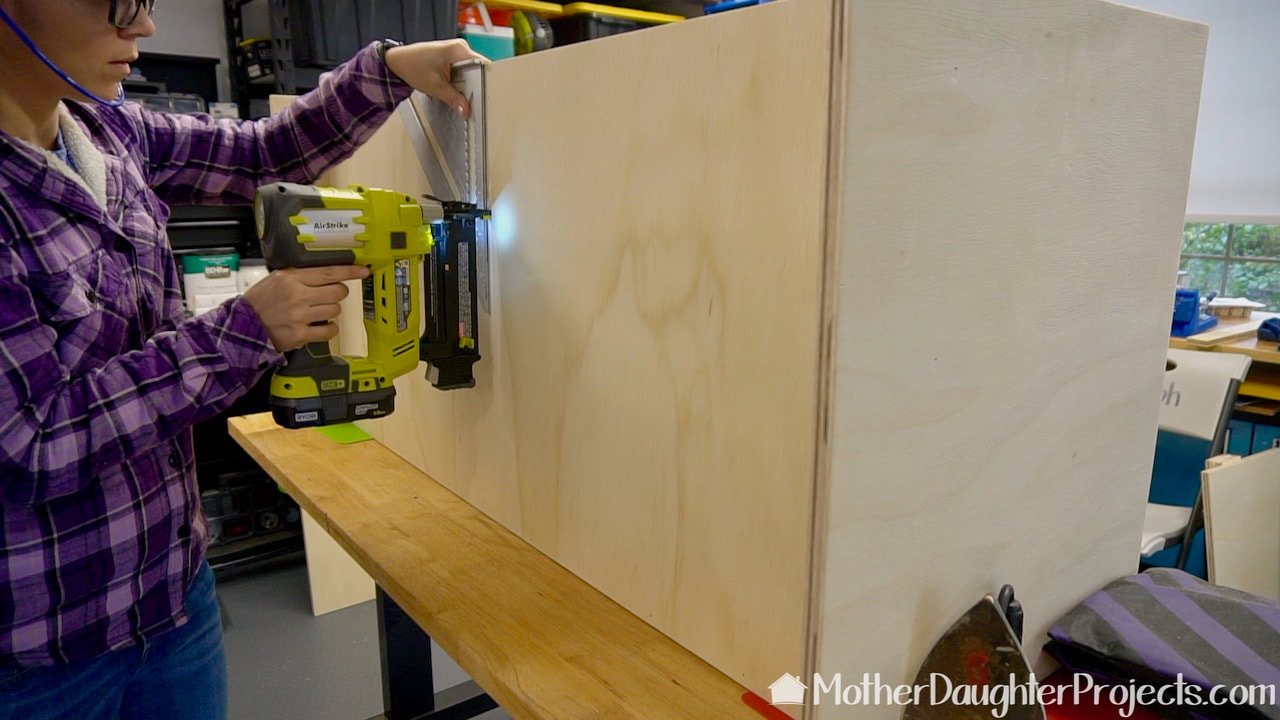
Here Steph is putting brad nails through the back into the center vertical support on the other side. The framing square helps to insure the nails goes into the right place.
Those are Rockler pocket hole clamps that are so helpful when using pocket holes. Kreg also makes them.
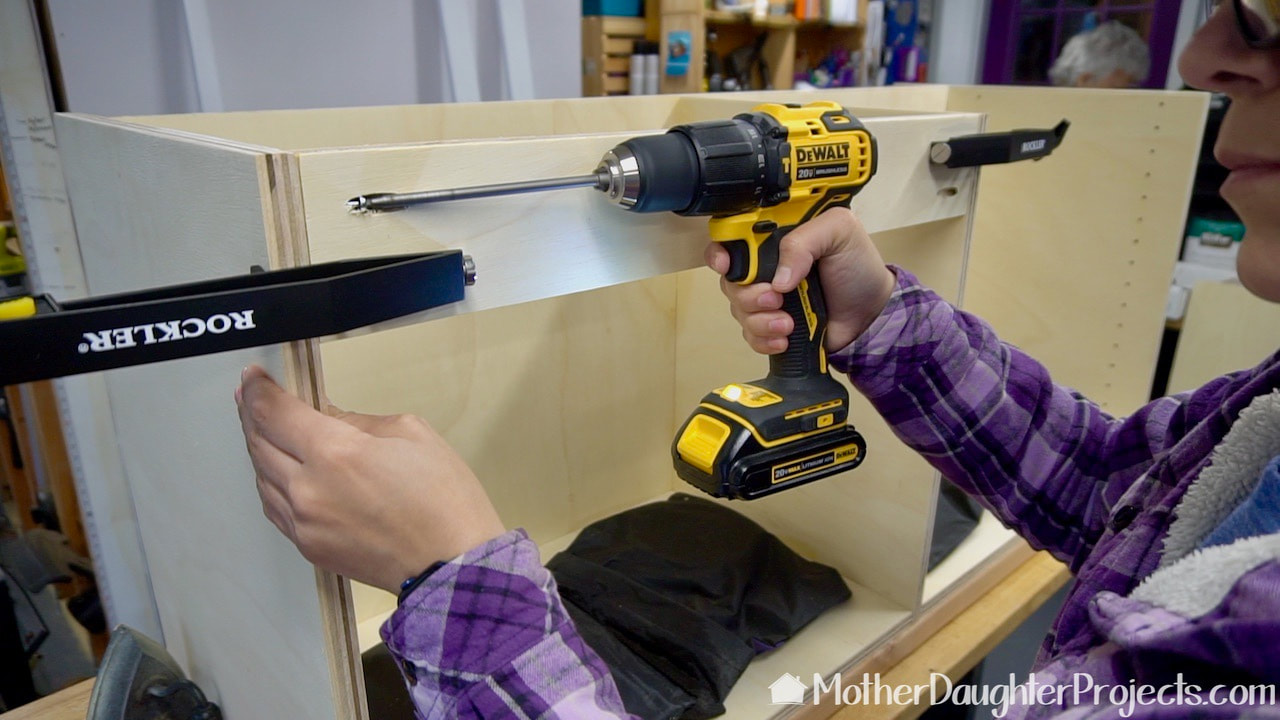
We added these extra supports on the front to fully support the sliding door hardware. We're using pocket holes since this will not show in the final product. Those are Rockler pocket hole clamps that are so helpful when using pocket holes. Kreg also makes them.
Adding Wall Control panels, one full size and one fun size, to the back of the TV stand.
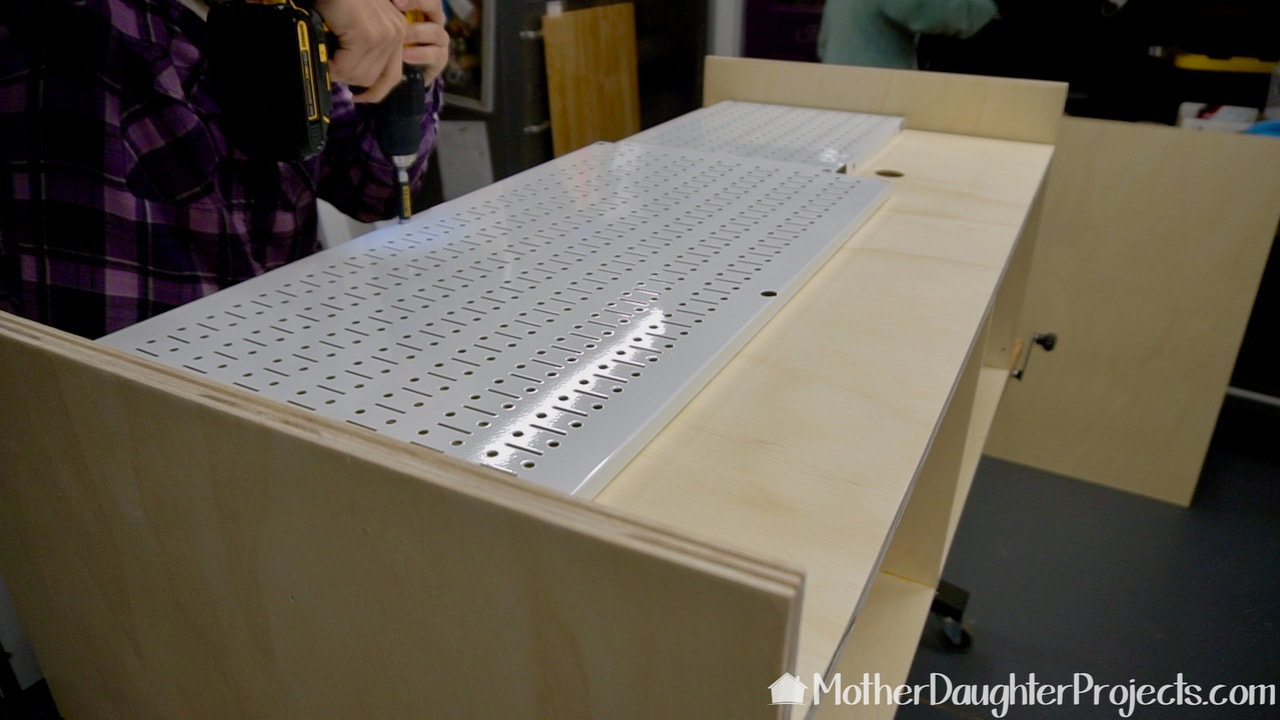
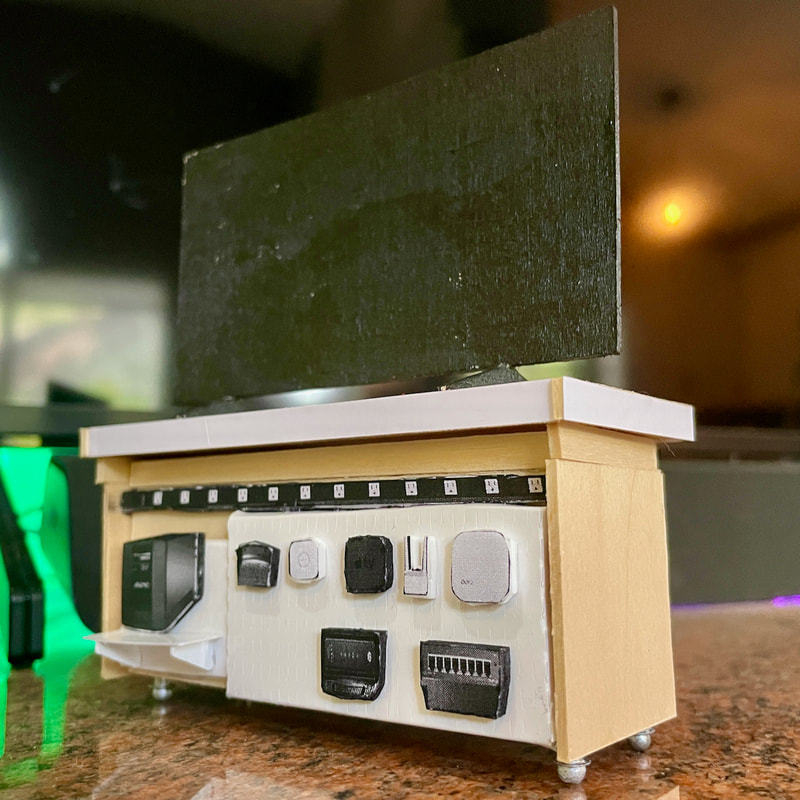
Screwing the two Wall Control panels in place. The screws that come with the panel are too long so we found some that were 3/4" which were perfect.
Assembling the face frame with pocket holes.
Here we are fitting and glueing the TV stand face frame into place.
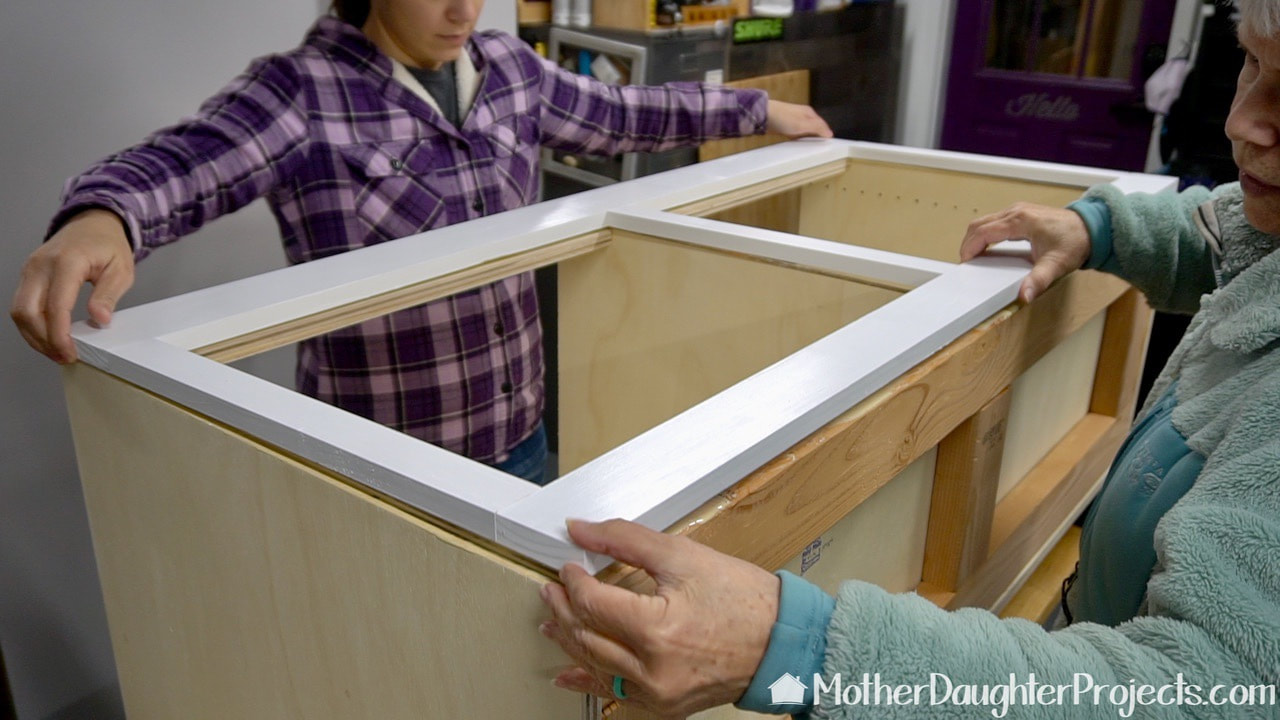
Gluing the face frame into place.
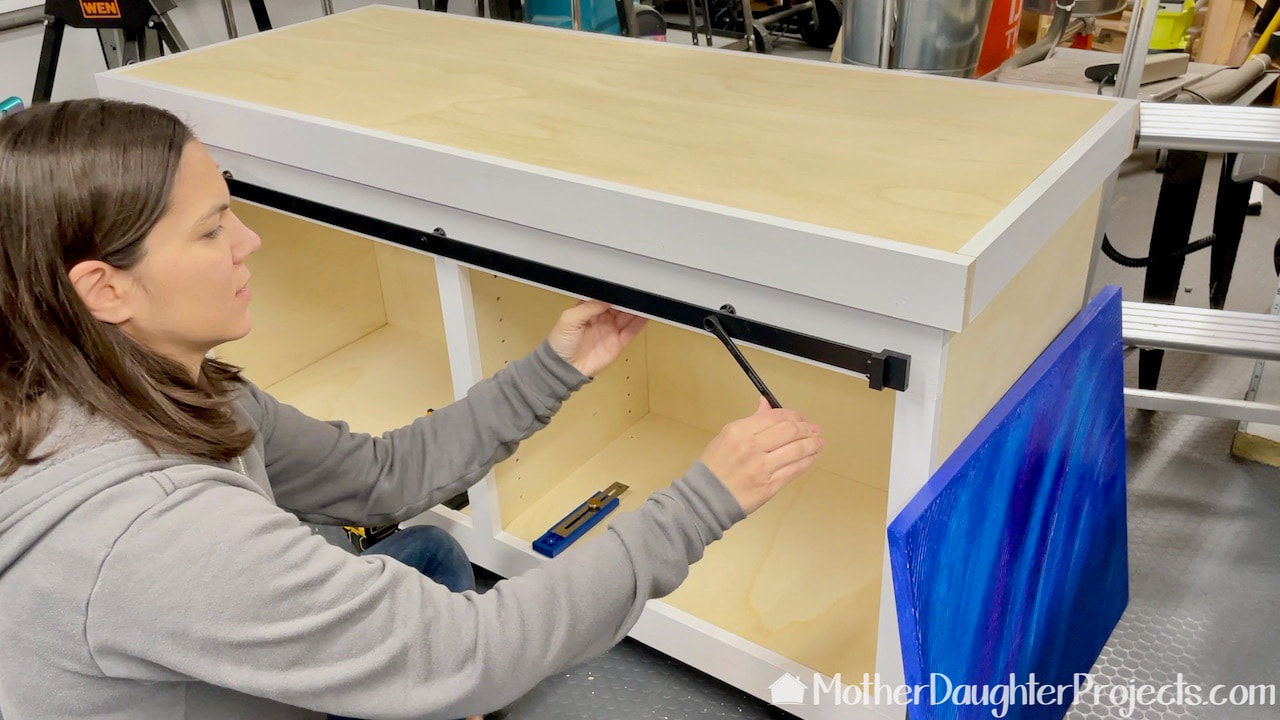
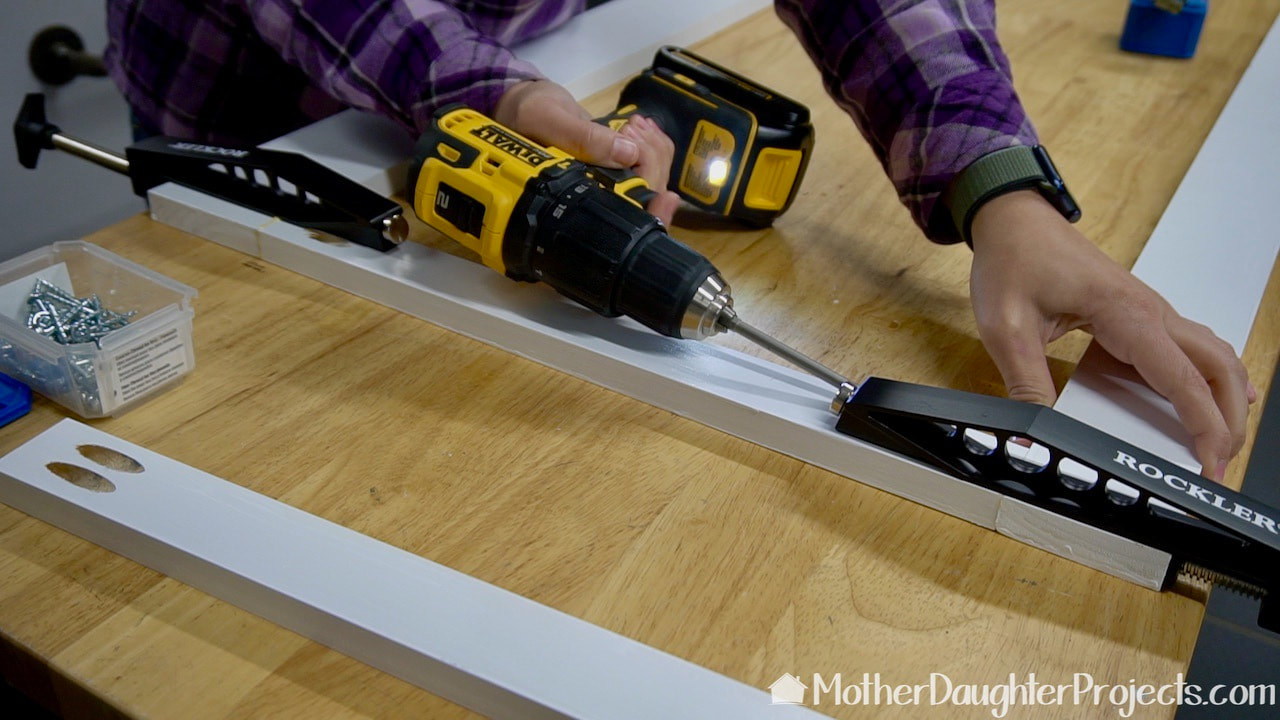
Attaching the sliding door hardware to the face frame.
The TV stand in place with colorful sliding door.
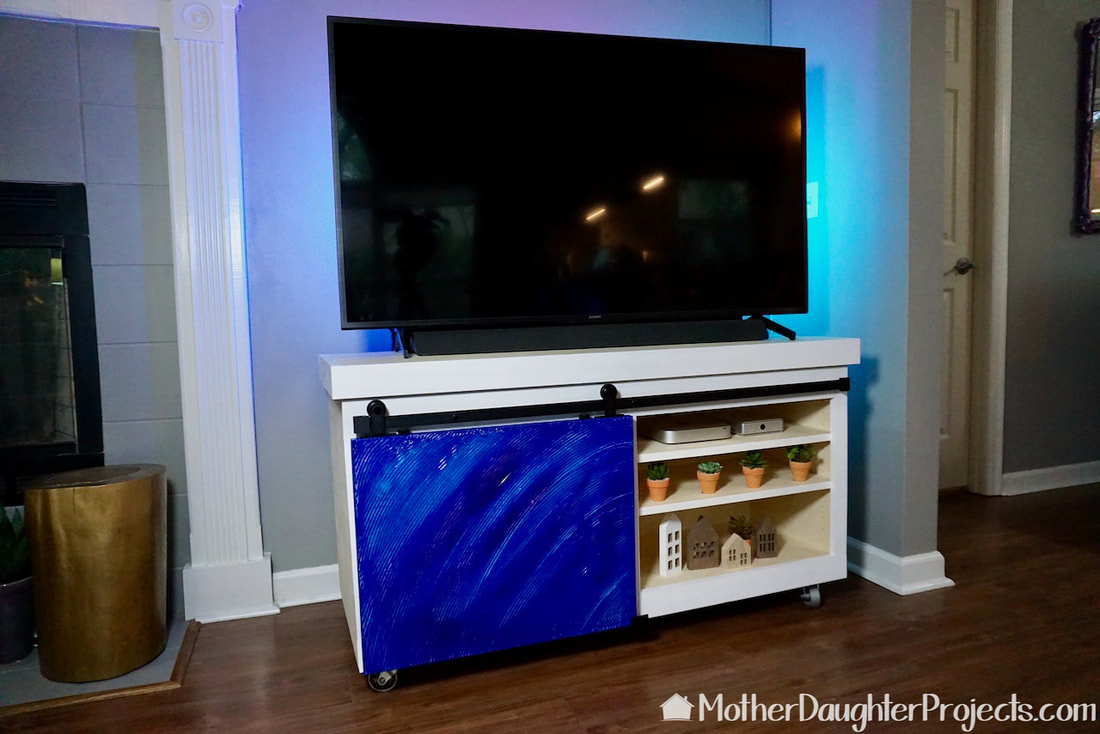
Here it is in place with all the cables and cords and tech hubs hidden out of sight. (That's the secret!)
The miniature TV stand looks like it belongs in a doll house.
Miniature...
The TV stand compared to it's mini version.
Full size!
No glowing lights, tech or cables or wires in sight!
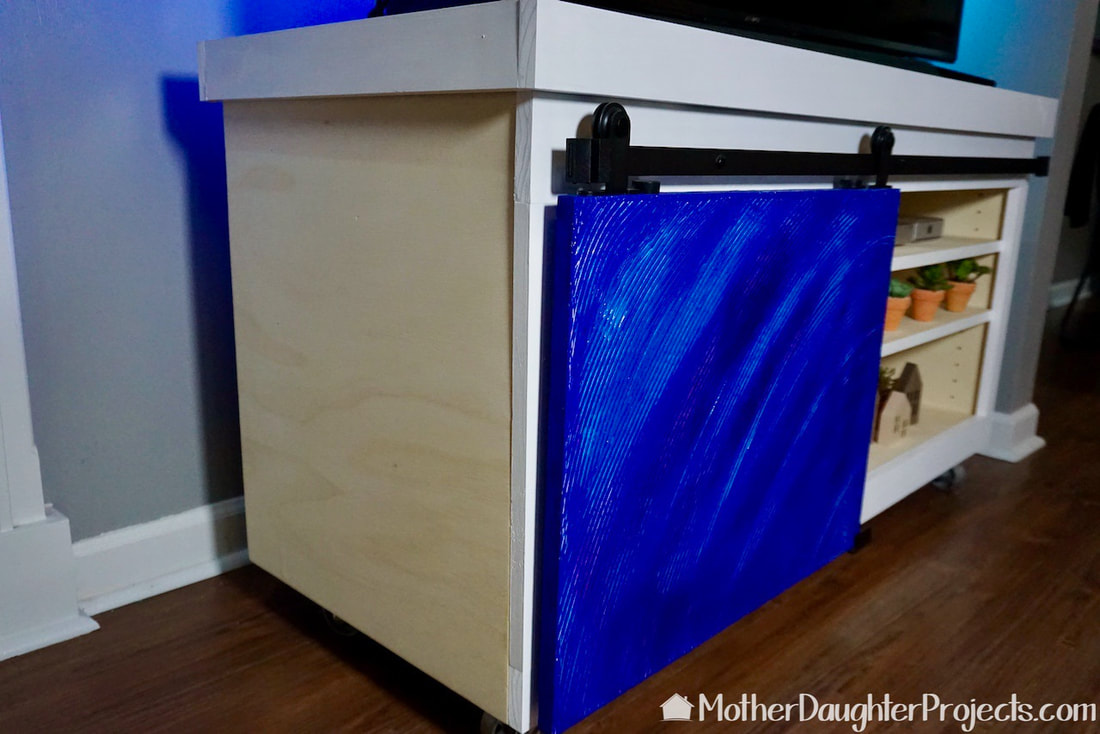
Cable management at its best! That's a battery backup on the shelf and a multi-outlet power strip at the top. The Wall Control bars help keep the cables in place.
Picture
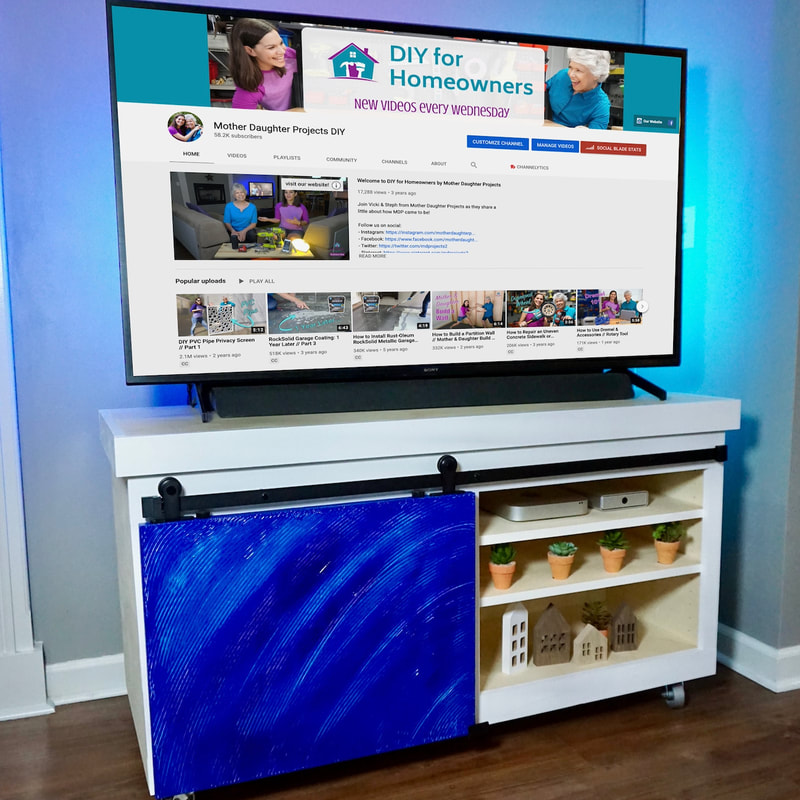
This build ticked all the boxes for Steph, plus she put it on wheels so it is really easy to access the back now. 

It came together exactly as she planned. I'm most impressed by all the cable and cord management! She spent a lot of time working to get all of that just right. It's all labeled as well making it easy to find what she needs. 


Please note: This is not a sponsored post. 

FYI: We are not professionals, and we don't claim to be. This is what we found worked for our project. Yours may need a little different approach. Safety first!

FYI: Affiliate links are being used on this page. Purchasing via these links help support MDP!

Related Projects

Picture
Modern Mailbox
Picture
Pipe Ottoman
Picture
Smart Blind Review
0 Comments


Leave a Reply.

    MotherDaughterProjects.com

    Mother Daughter Projects
    ​
    Steph & Vicki

    We're homeowners sharing our DIY adventures as we learn to maintain, improve, decorate, and ​use tech in our homes.
    Share your projects with us here:  
    ​#trylearnshare
    MotherDaughterProjects.com
Mother Daughter Projects, LLC ∙ est. 2015 ∙ Tallahassee, FL by Vicki & Steph ∙ Privacy Policy