text by Vicki Sign up here to join our weekly email newsletter!
This project was inspired by a pin I saw on Pinterest. It was a sun catcher made from glass. I wanted to recreate it, but not in glass. We decided we could use the Cricut Maker to cut shapes and use epoxy as a faux stained glass!
Materials/ Tools:
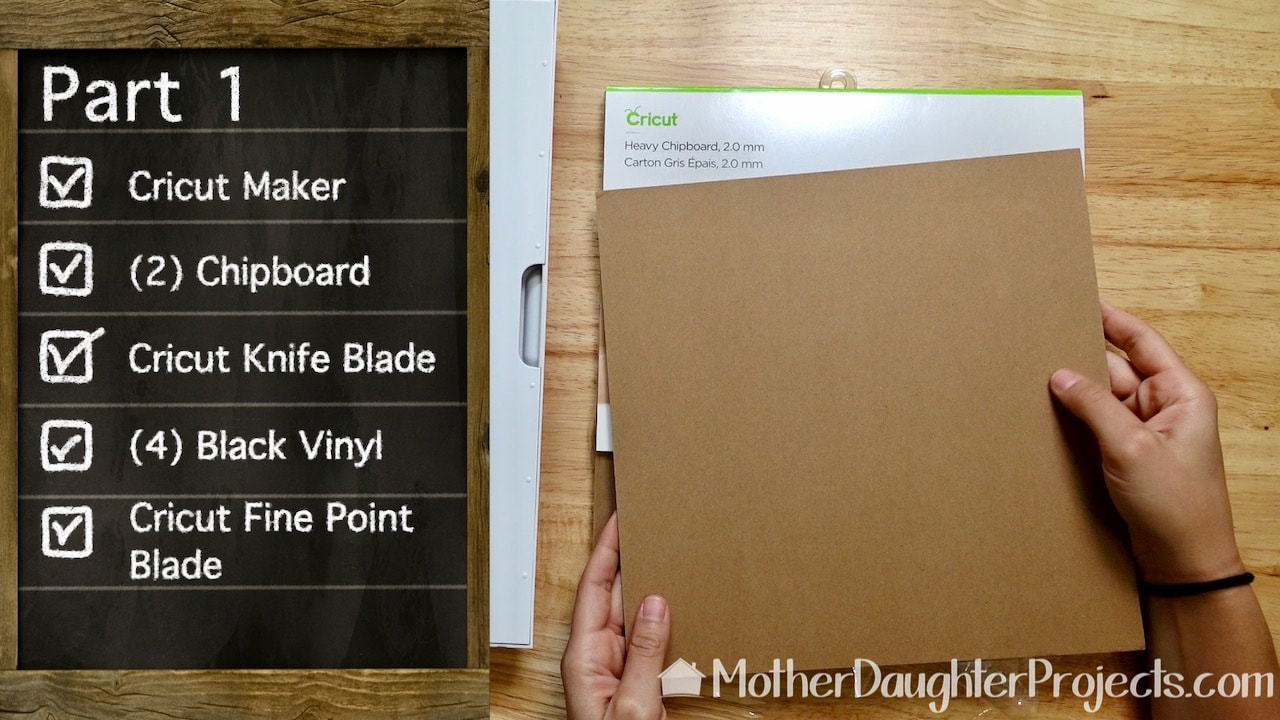
The Cricut Maker will cut all sorts of things including this heavy chipboard. We thought this would be the perfect material for our shapes.
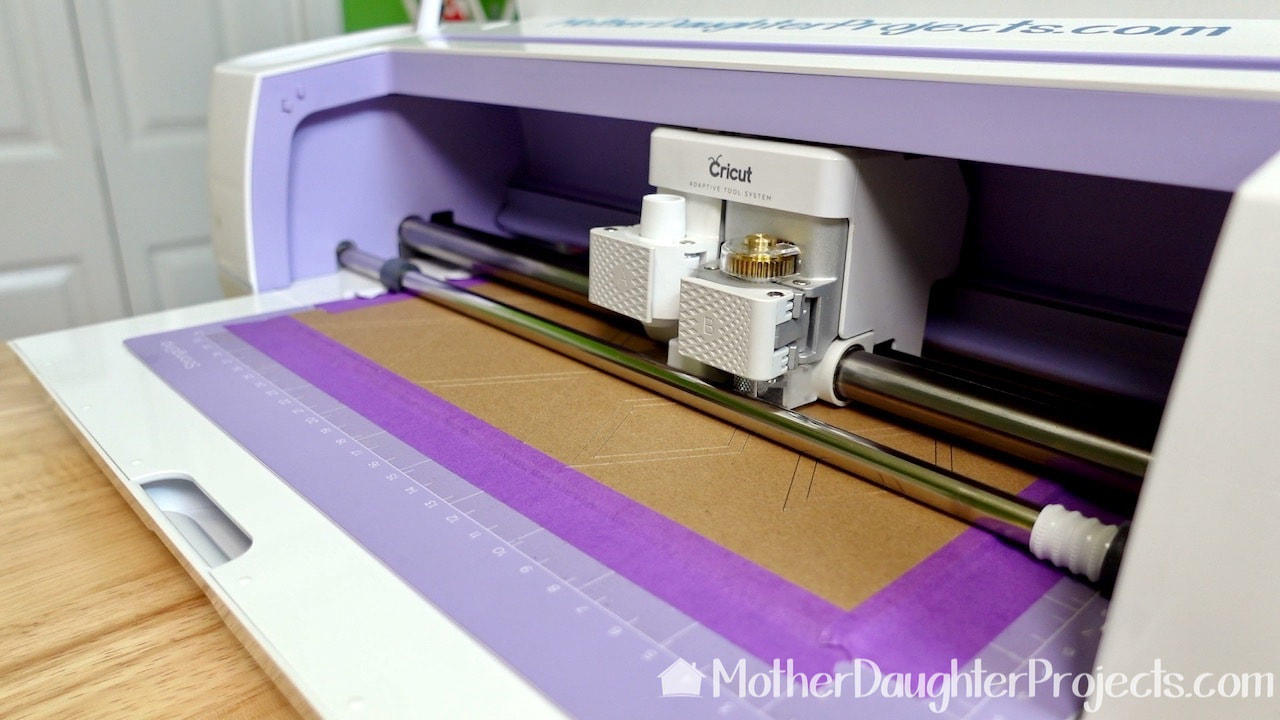
After setting up the design in Cricut Design space, Steph completed all the necessary steps and started the machine to cut. The tape around the chipboard helps in to remain in place.
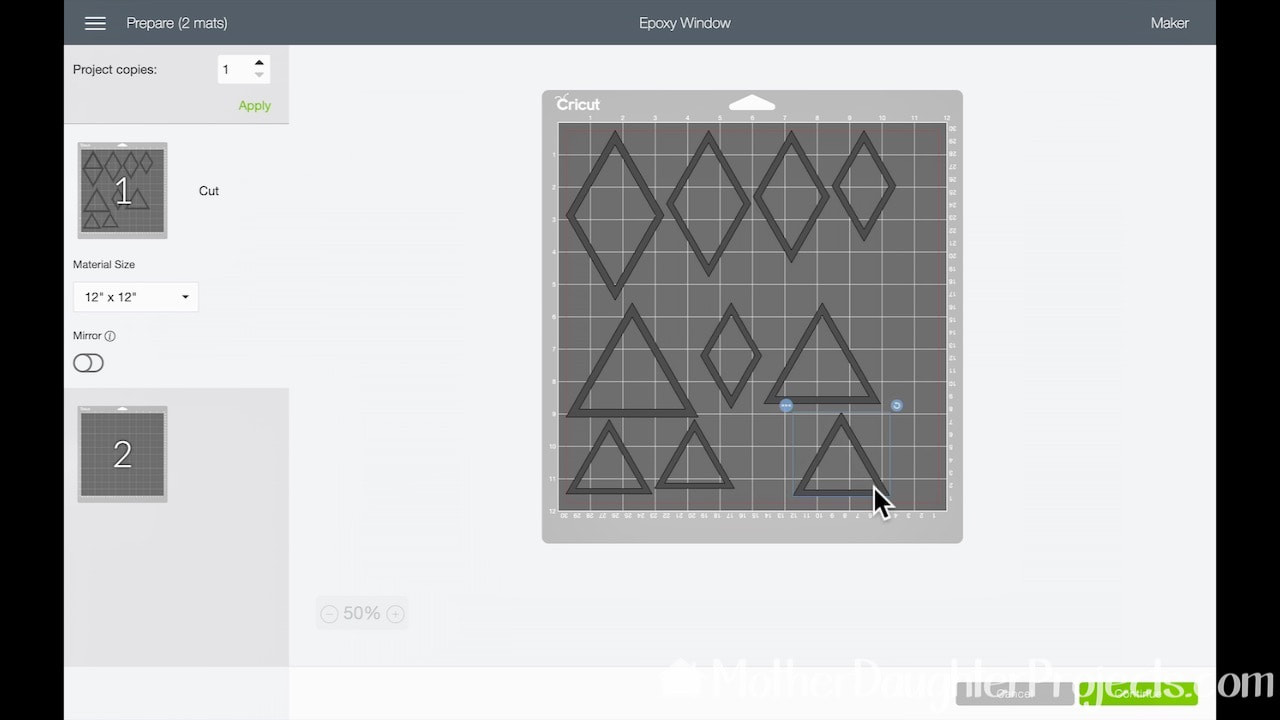
This is design space. Steph created these shapes and fit them onto a single page for cutting.
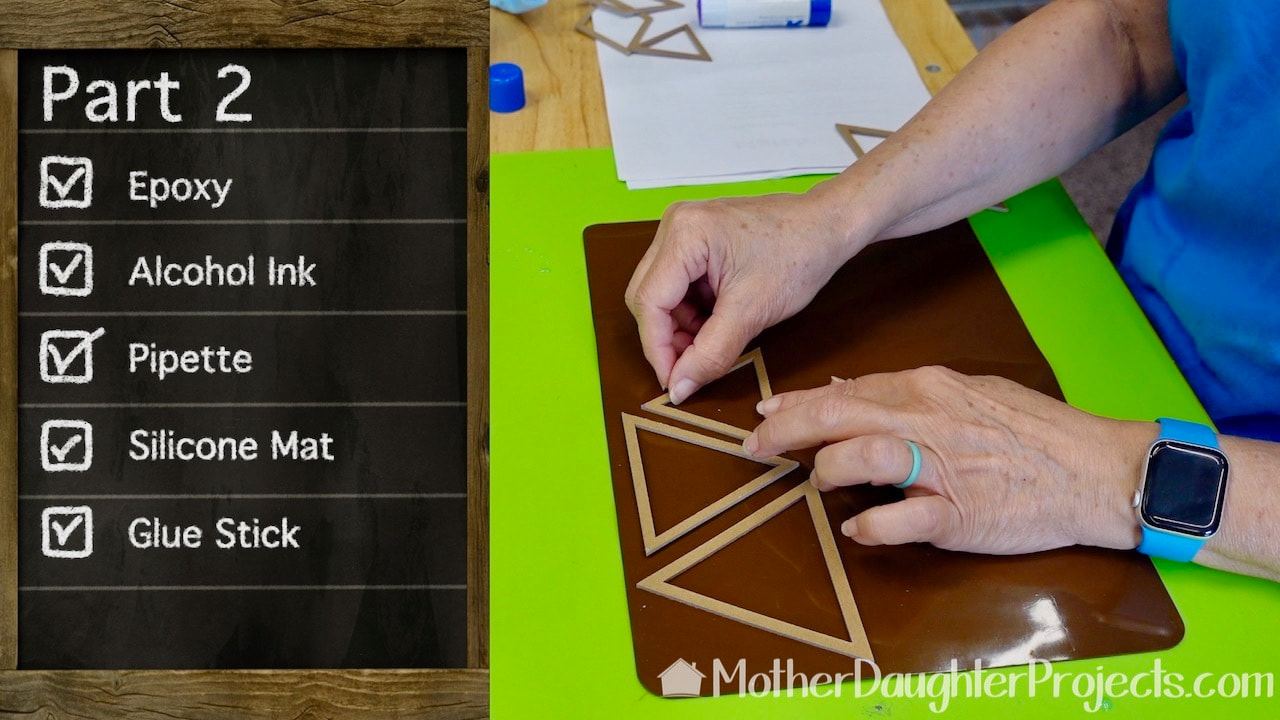
Once all the shapes were cut it was time to prepare them for the epoxy pour. The shapes were glued onto the silicone pad with a glue stick. I made sure to remove any excess glue from the inside of the shapes.
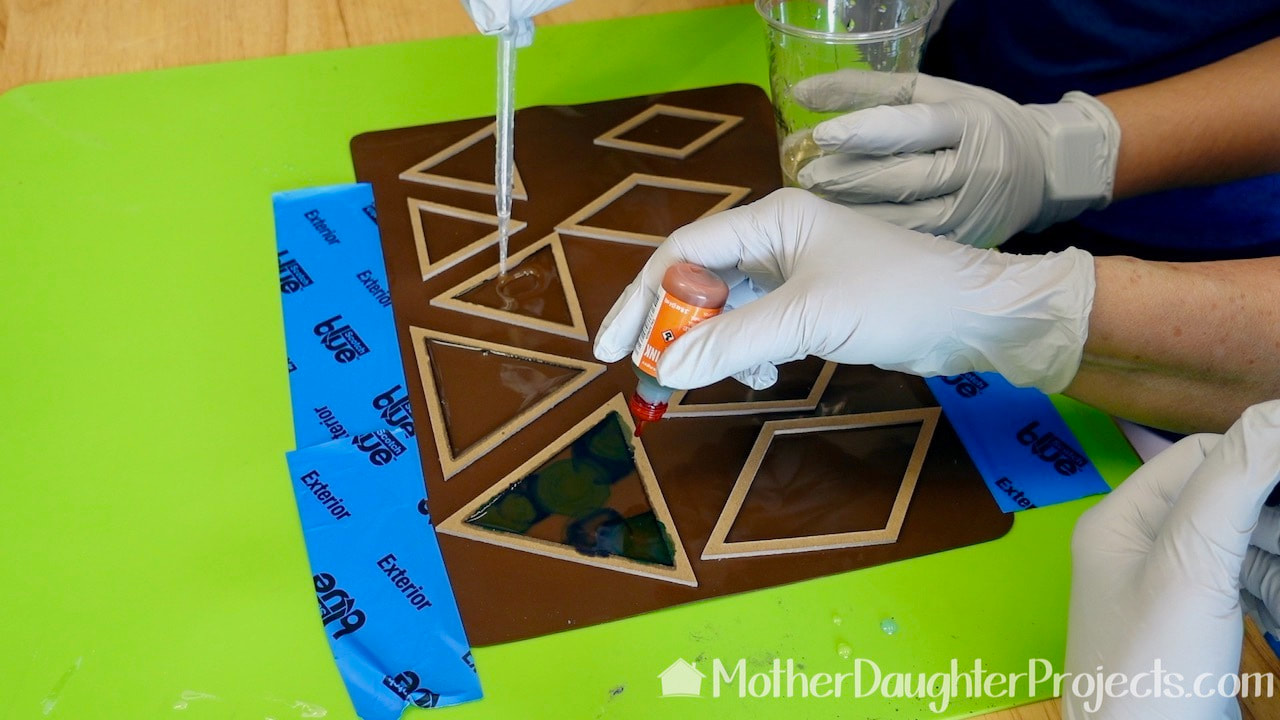
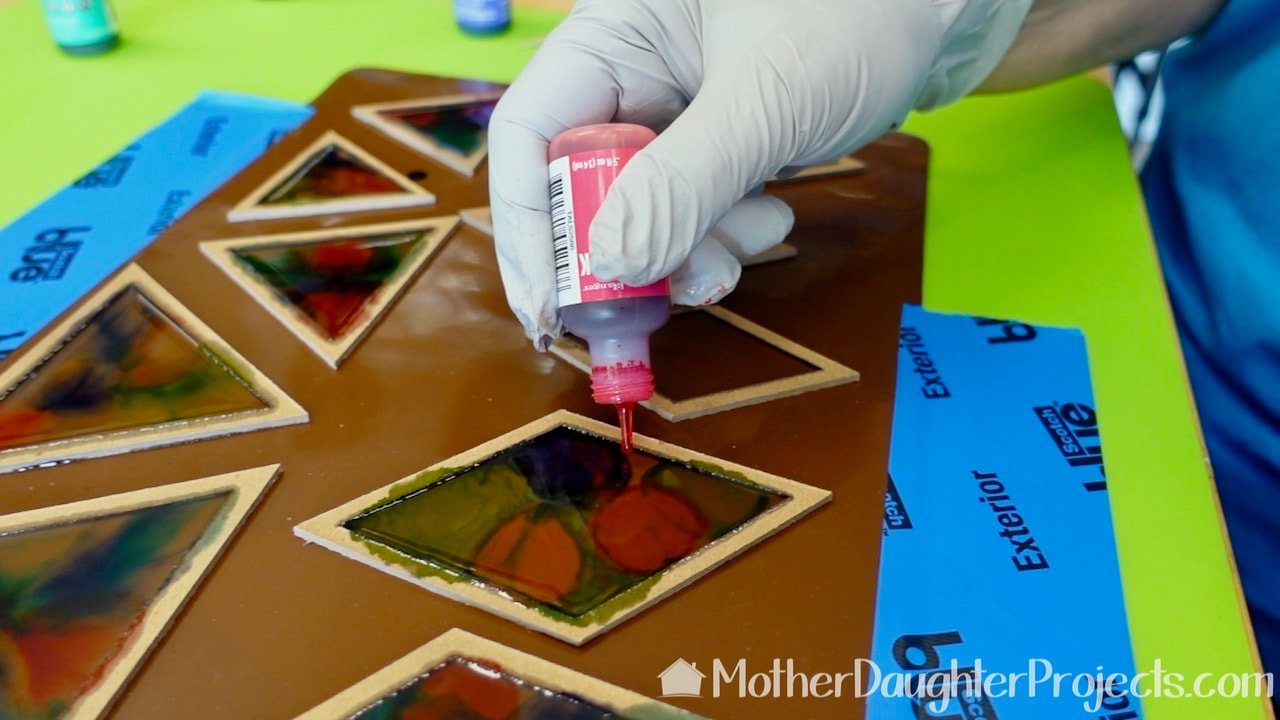
Every epoxy is different so it is VERY important to mix it according to the instructions on the label. After mixing, we used a pipette to add the epoxy to the shapes. This helped insure there wasn't any overspill. It actually worked quite well.
We used alcohol inks in various color combinations to add to the epoxy. Purple was used in all the shapes so they would all coordinate.
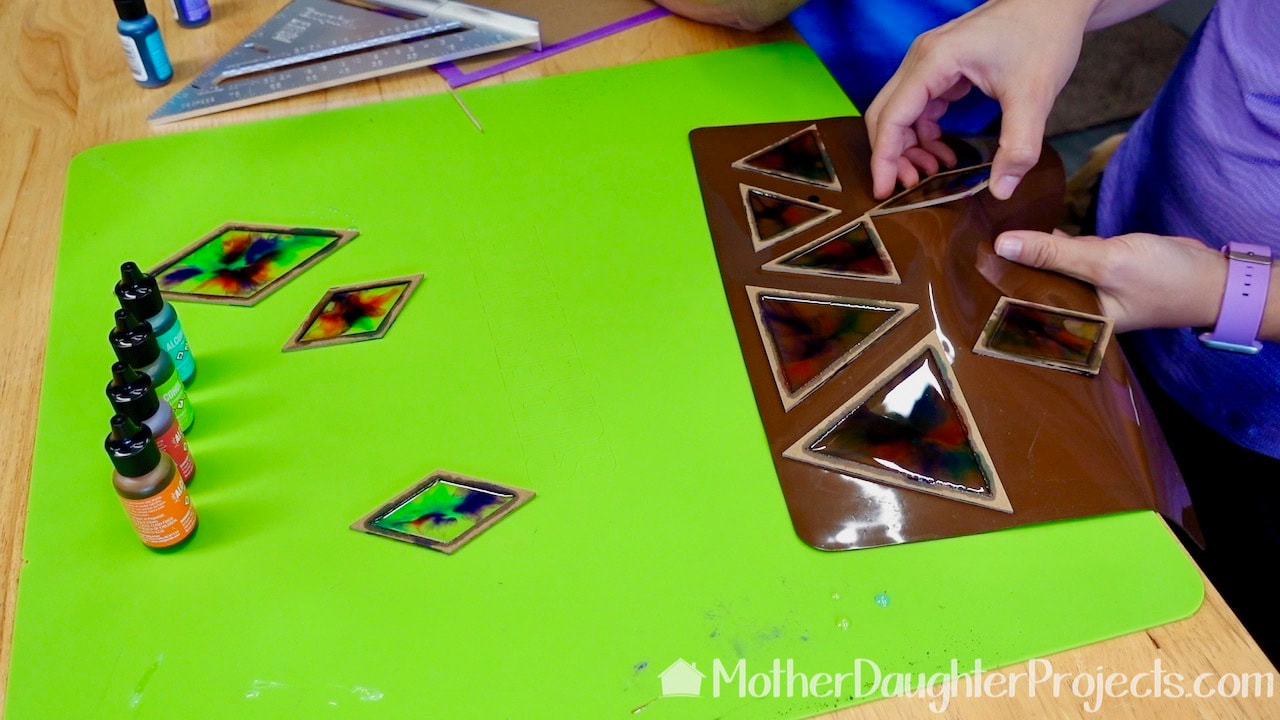
The cured epoxy shapes removed easily from the silicone pad.
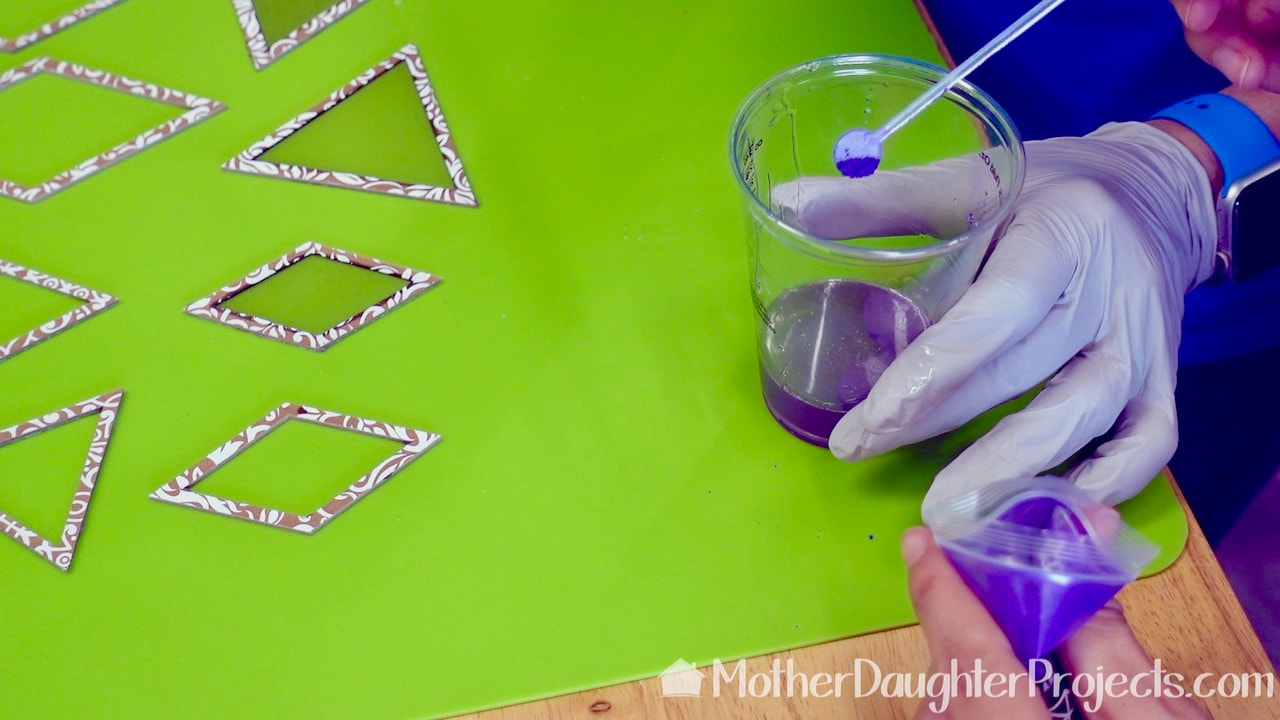
This was actually our first attempt at filling the epoxy shapes. We used this patterned chipboard which we do no recommend. Instead of alcohol ink, we used mica pigment powder.
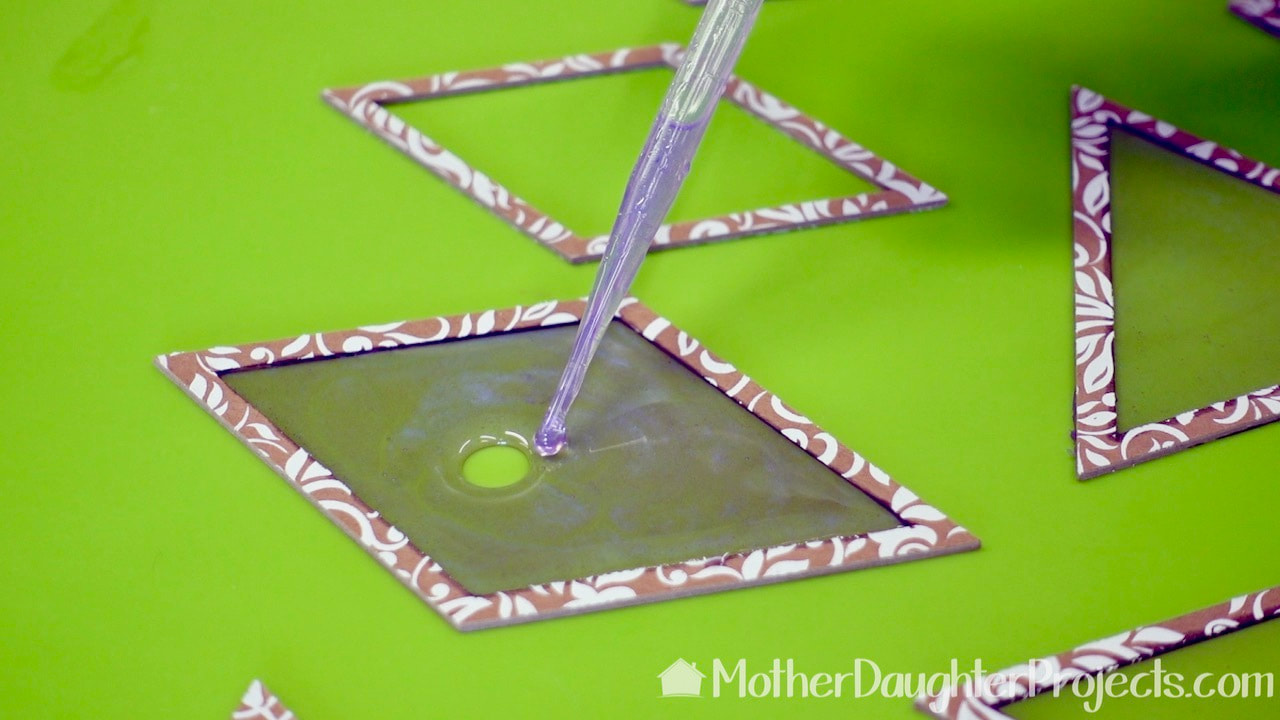
This is a close up of using the pipette to fill the shapes. It was slow but accurate.
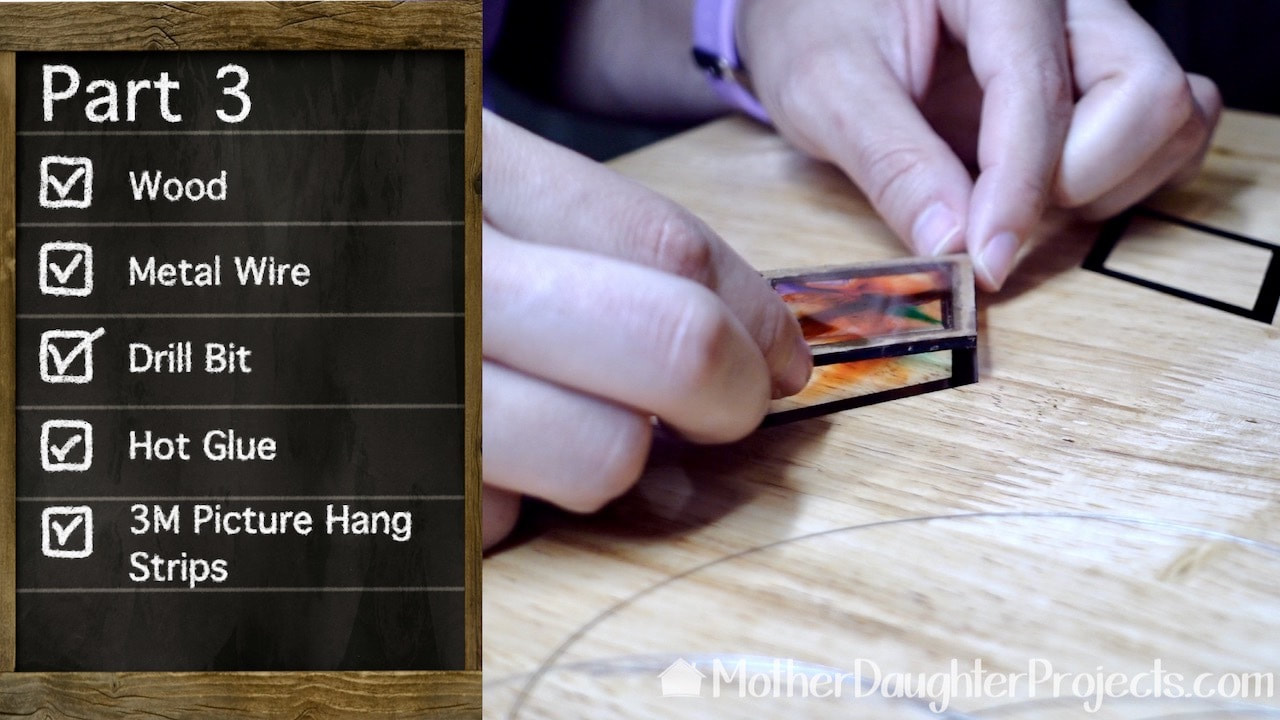
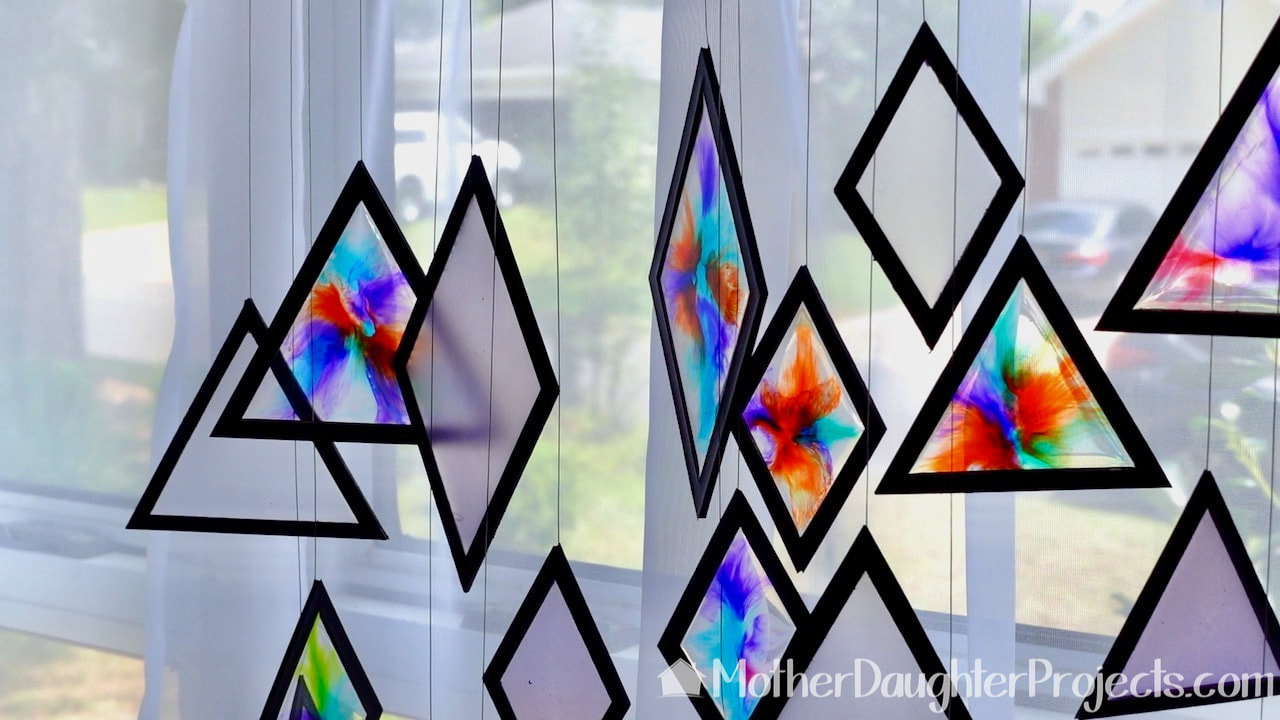
The edges of the shapes were colored with black sharpie and then the front and back were covered with black vinyl to mimic the lead in stained glass.

We laid out the placement of the shapes and added hanging wires. To hang the shapes, we used a long narrow board. We drilled small holes where we had marked the placement for each wire. The wires were put into place and then hot glued to secure. The excess wire was cut off.
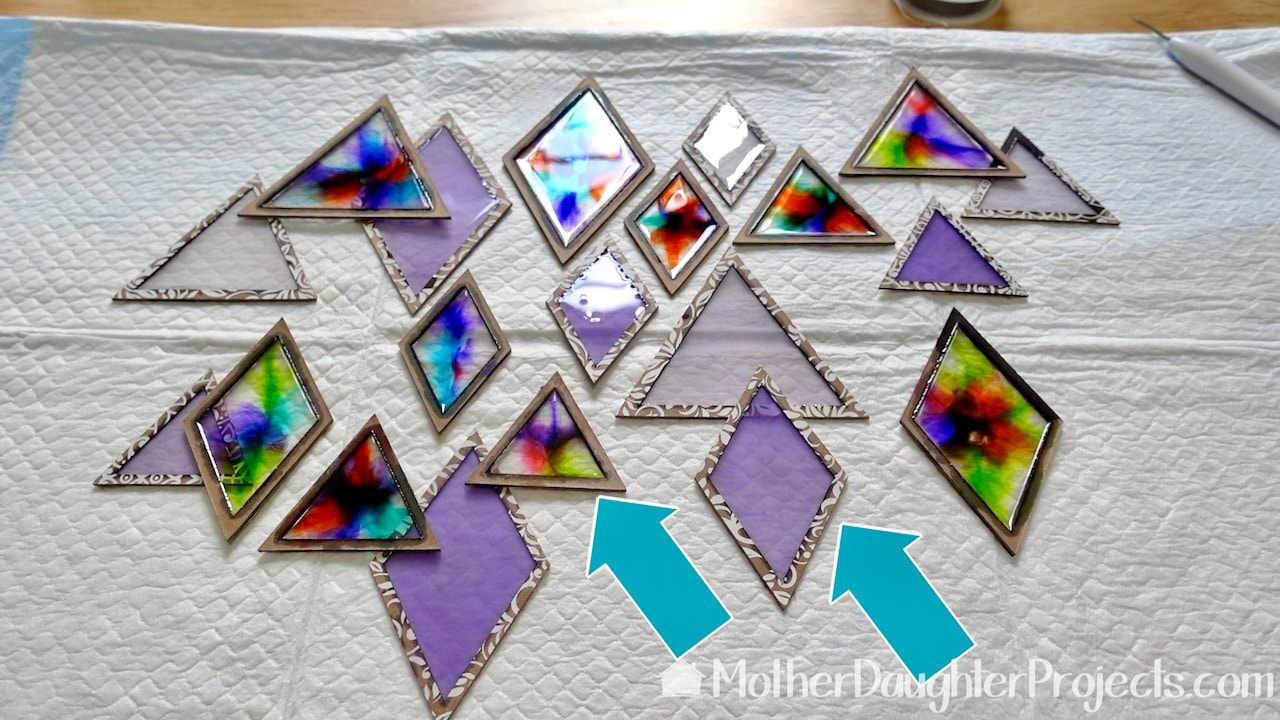
We laid all the shapes out to find the design we wanted. Here you can see the two types of chipboard we used. The solid is a much better option.
Here it is all ready to hang up in Steph's kitchen window.
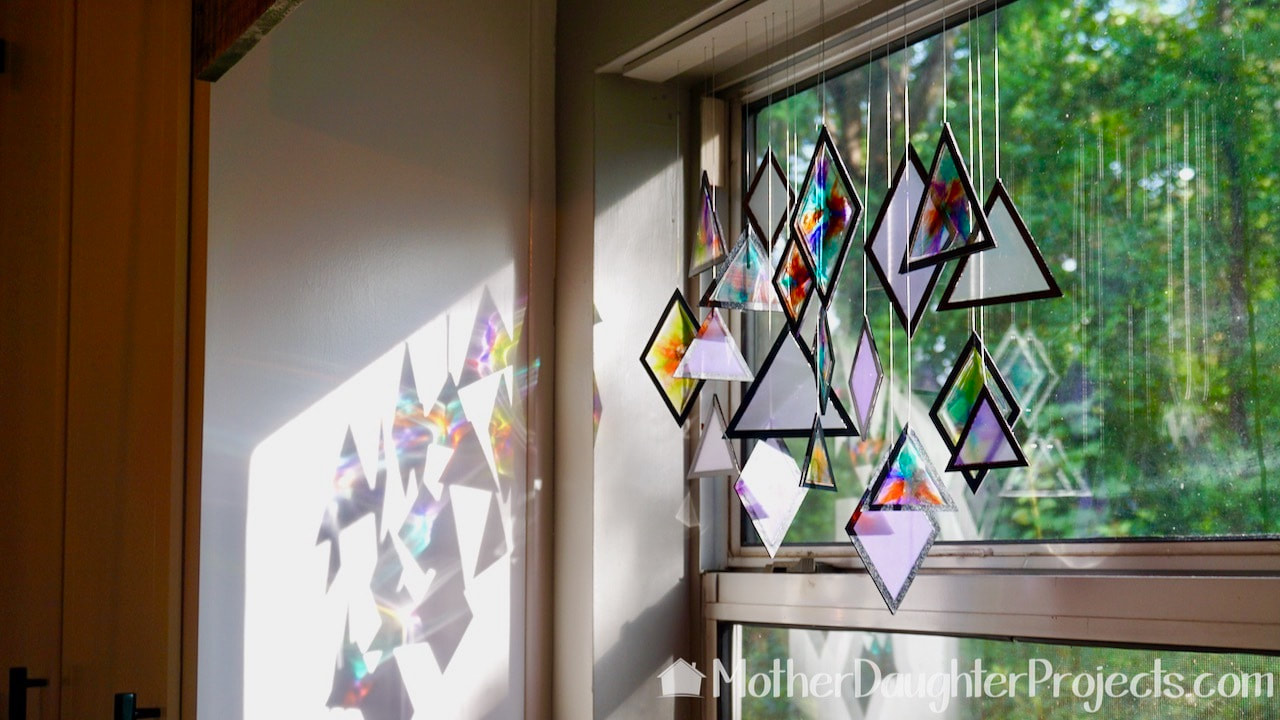
Just like glass, this catches and reflects the sun light beautifully!
Please note: This is not a sponsored post.
FYI: We are not professionals, and we don't claim to be. This is what we found worked for our project. Yours may need a little different approach. Safety first! FYI: Affiliate links are being used on this page. Purchasing via these links help support MDP! Related Projects
0 Comments
Leave a Reply. |

Mother Daughter Projects
|