Mother Daughter Projects

  • About
    • Contact
    • Privacy Policy
  • Maintenance
  • Improvement
  • Decor
  • Tech
  • Tools
  • About
    • Contact
    • Privacy Policy
  • Maintenance
  • Improvement
  • Decor
  • Tech
  • Tools

DIY for Homeowners

DIY Floor Lamp using Metal Pipe

6/3/2020

0 Comments

 
text by Vicki     Sign up here to join our weekly email newsletter! ​
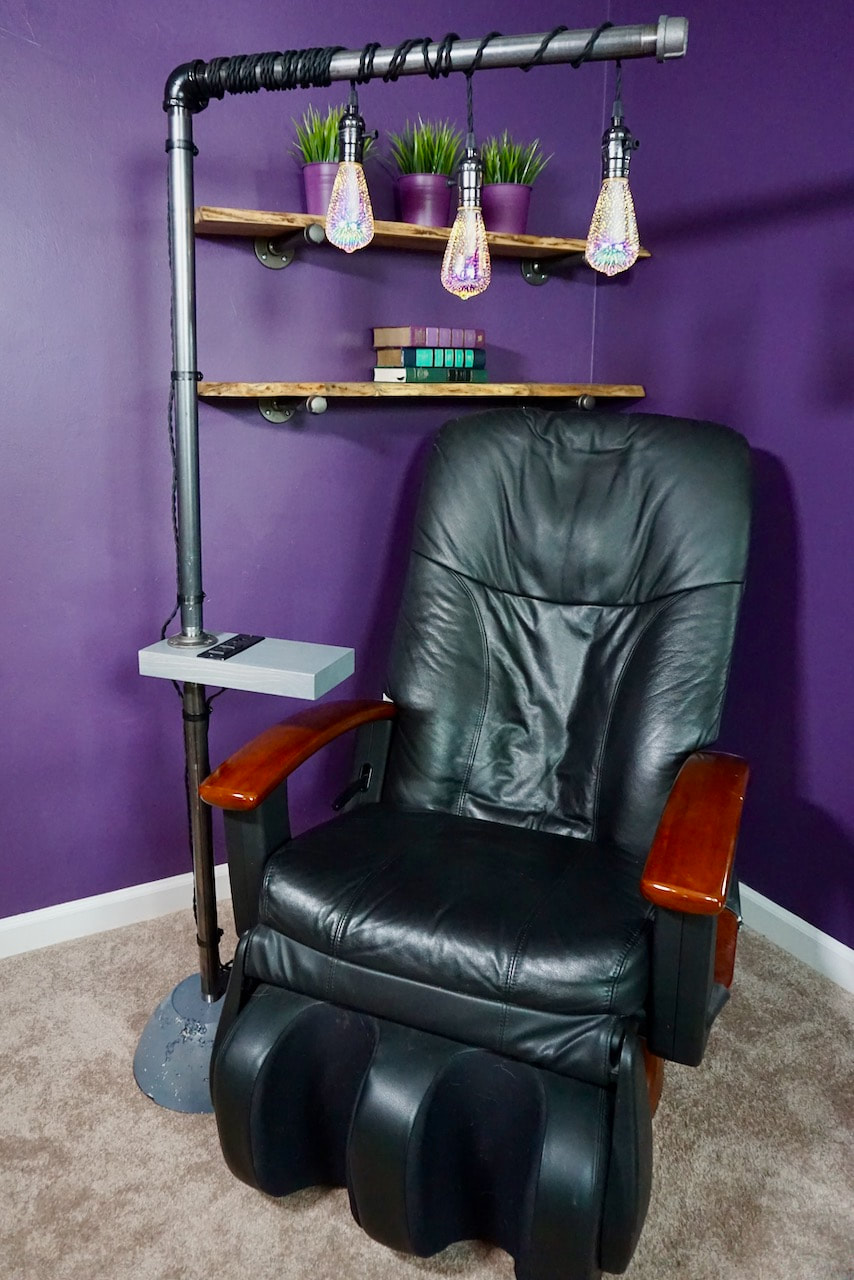
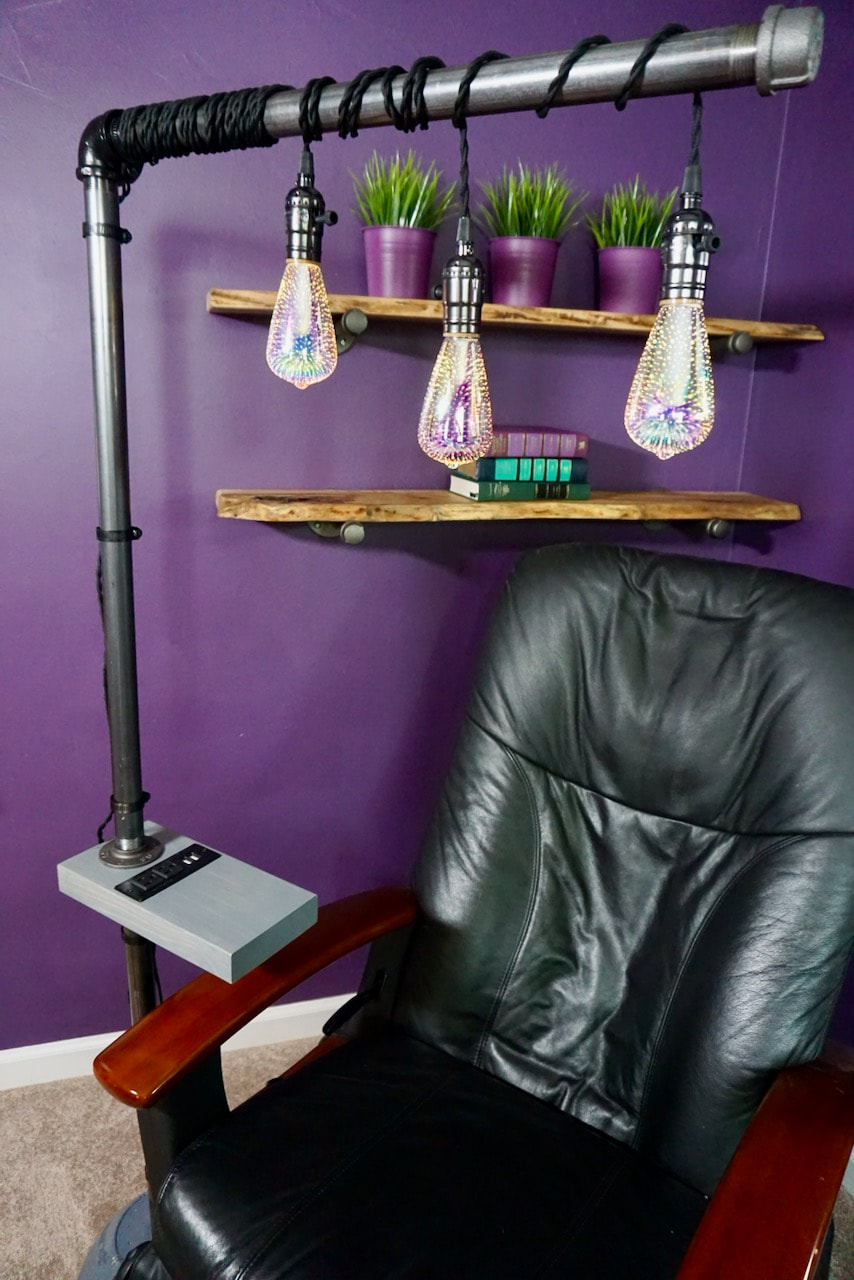
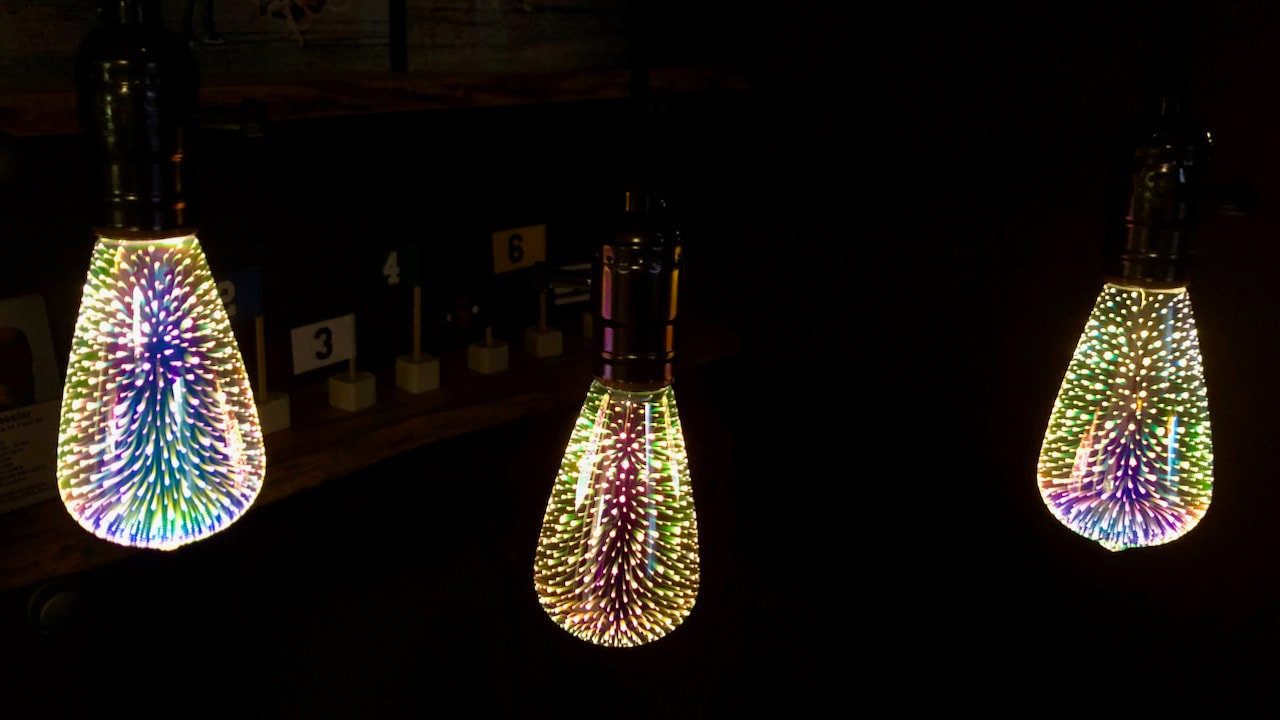
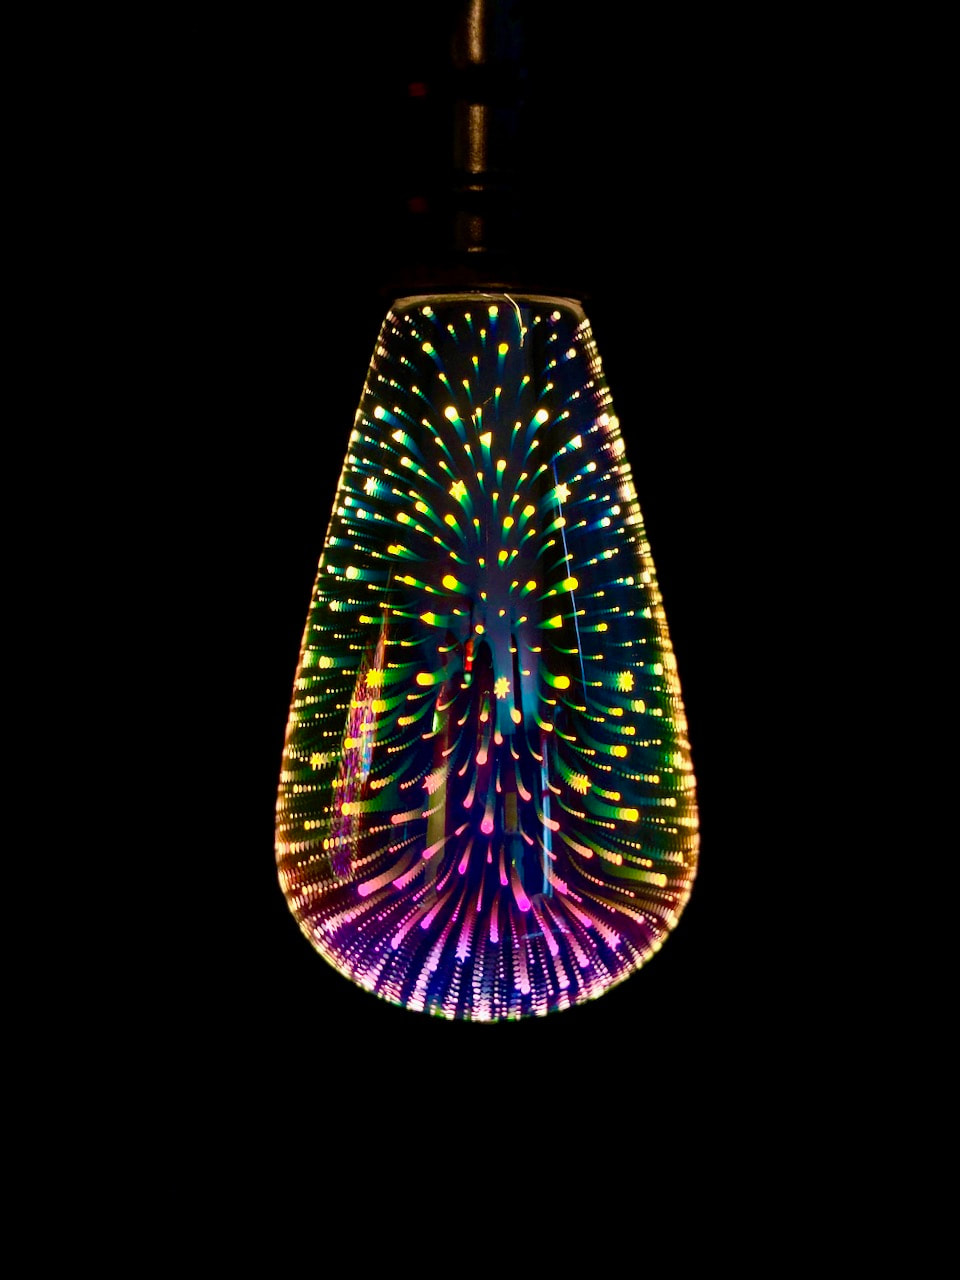
This project was inspired by a light bulb--the Feit 3D Infinity Fireworks bulb. We saw it online and ordered one, then we ordered a second, and then a third! Take a look at the statement standing lamp Steph made with the three bulbs. 
The three socket cord set and Feit fireworks bulb.
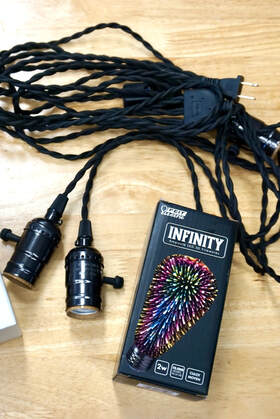
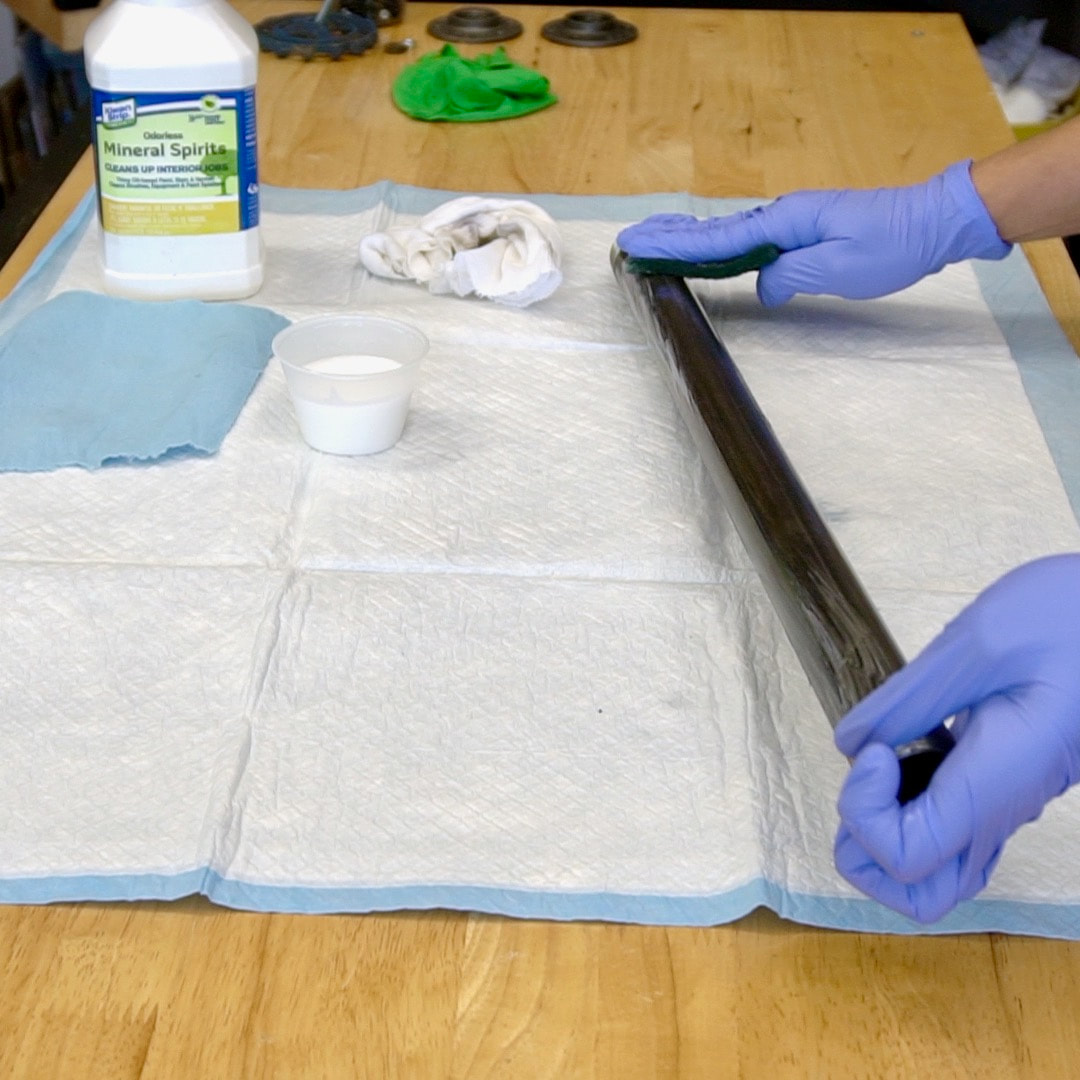
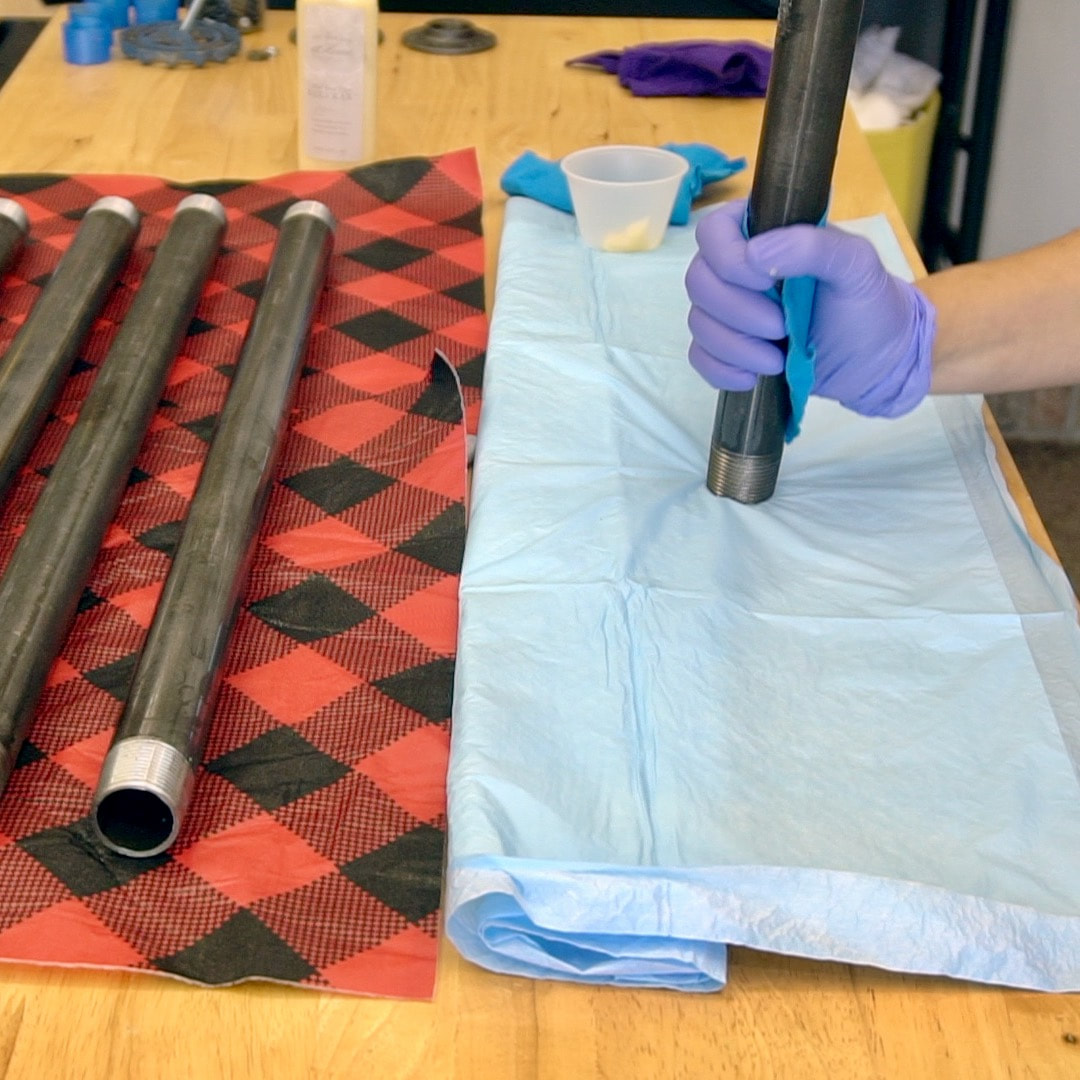
A bonus to this project, is there is no actual wiring of sockets. Steph found a really cool vintage looking three socket set that complements the metal pipe she used in the build.

Tools/ Materials:


  • FEIT Electric LED Infinity 3D Fireworks Effect Light Bulb (Amazon)

  • Vintage Pendant Light Kit Cord with Dimming Switch Hanging Light Fixture (Amazon)

  • Recessed Power Strip Socket With 2-Outlet & 2 USB Ports (Amazon)

  • Pipe 1 in x 24 in (Amazon)

  • Pipe 1 in x 30 in (Home Depot)

  • Pipe 1" 90 Degree Elbow (Amazon)

  • Pipe 1" Cap (Amazon)

  • Pipe 1" Flange (Amazon)

  • SAE 16 Piece Hose Clamp Box (Amazon)

  • Concrete Base (Post to Make Here)

  • Ryobi 18-Volt ONE+ Cordless Brushless Jig Saw (Home Depot)

  • Weather grey stain

  • Pre-stain conditioner

  • Minerial spirits

  • Wax

Using a Scotch brite pad to clean the metal pipes.
The first step, always, when using metal pipe, is to clean it. Steph is using mineral spirits and Scotch Brite pad to clean all the pieces.
Applying Amy Howard wax to finish the metal pipe.
We've used metal pipe in many projects and have found a coat of wax is the perfect finish after cleaning. Simply follow the directions for the wax you are using.
Using Varathan wood stain in weathered grey on the concrete base.
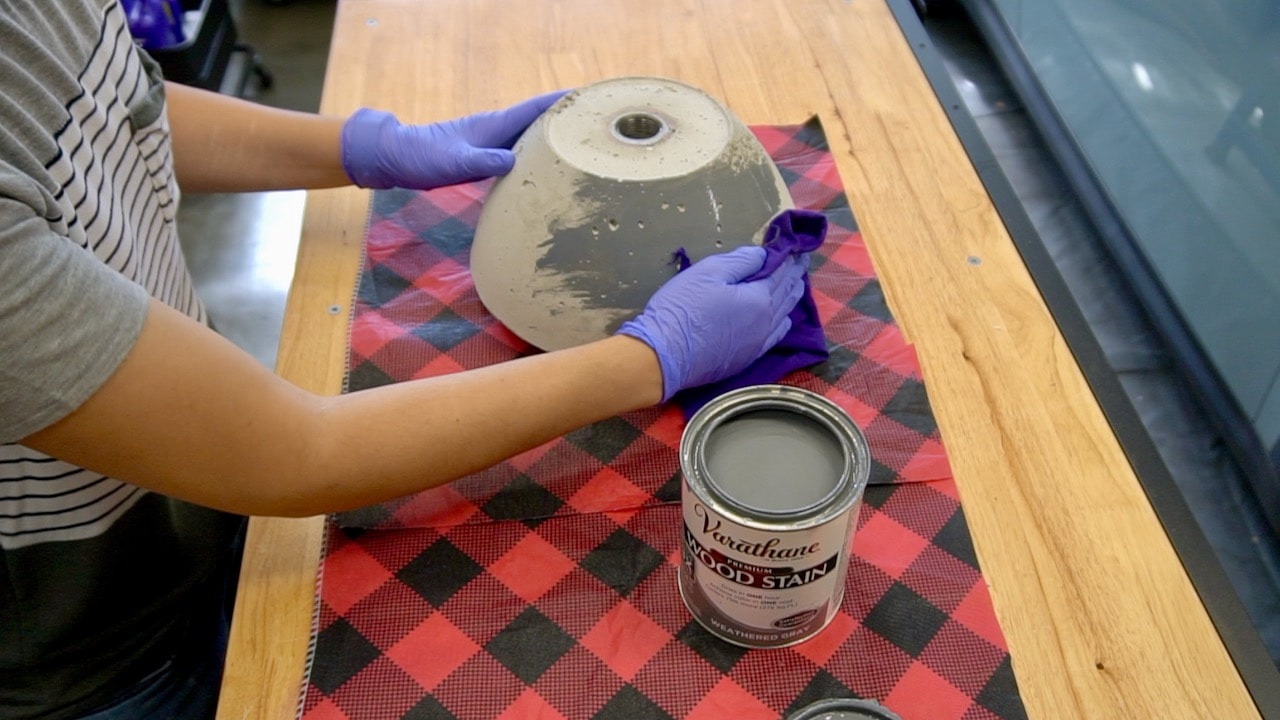
The lamp is going to be supported by a concrete base. The one inch cap was cast into the concrete when it was made. Find out how we made the base in the link above. Here we are staining the concrete with wood stain to match the tabletop we are adding to the lamp. We have used this staining method on concrete before and really like the results.
Cutting sticky back felt on a Cricut Maker.
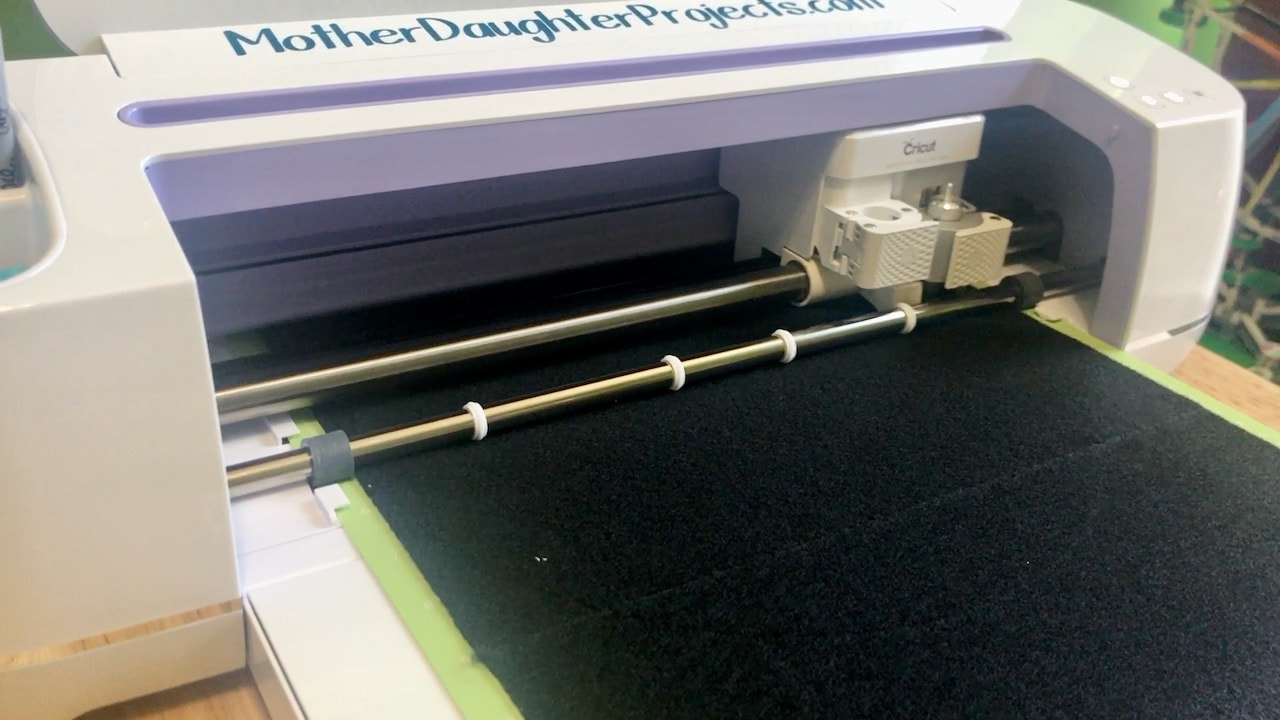
To protect the surface that concrete is resting on, we added a piece of sticky felt to the bottom of the concrete base. Steph could have used scissors to cut this out, but now that we have a Cricut Maker, she decided to cut the circle out on that!
Adding felt to the bottom of the concrete base.
The felt is a perfect fit!
Steph used the Cricut Maker to cut a vinyl template to make an exact cutting guide.
Now onto cutting the center out of the lamp side table. Again, Steph used the Cricut Maker to cut a vinyl template to make an exact cutting guide.
Tip: new jig saw blades give way better results!
Steph is using a jig saw to cut the interior out of the table top where the mini power strip will sit. Tip: new jig saw blades give way better results!
Using Varathane pre stain conditioner on wood for best results.
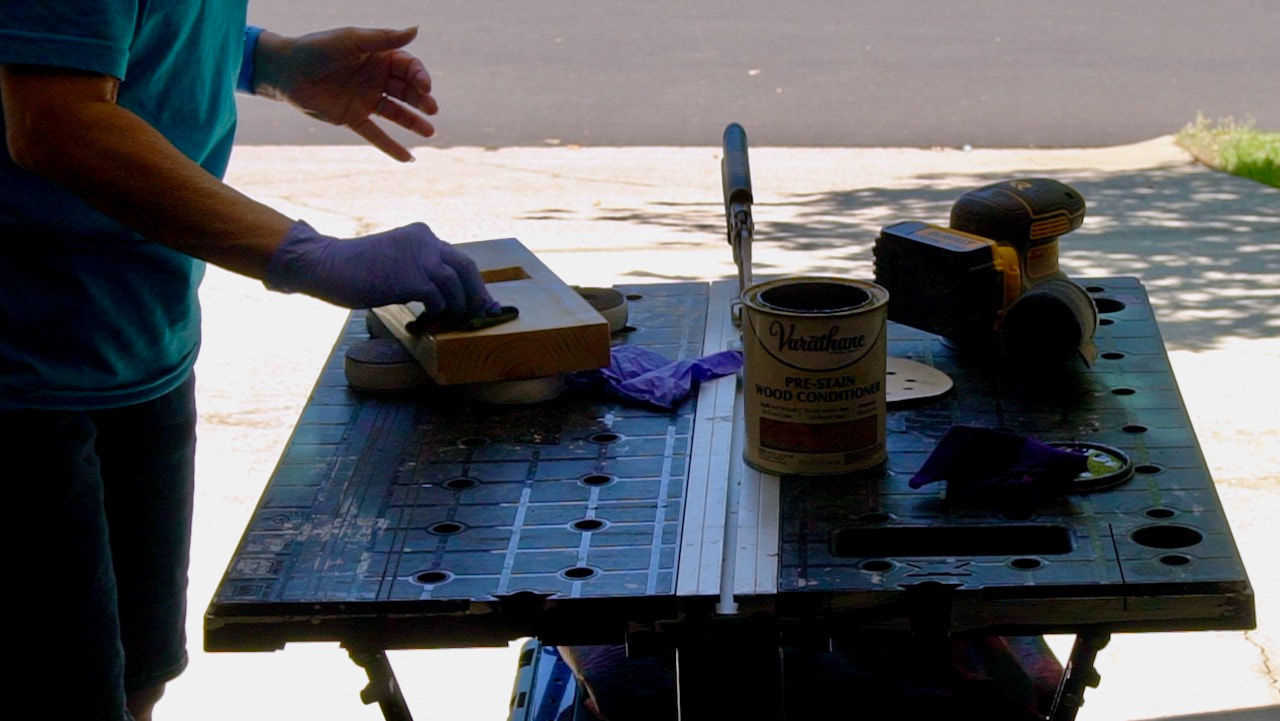
Hey, did you think I wasn't helping on this project? I did the sanding and staining and gave moral support! Tip: use a stain pre-conditioner on pine for better results.
Metal pipe flanges are used to construct the Feit lightbulb lamp.
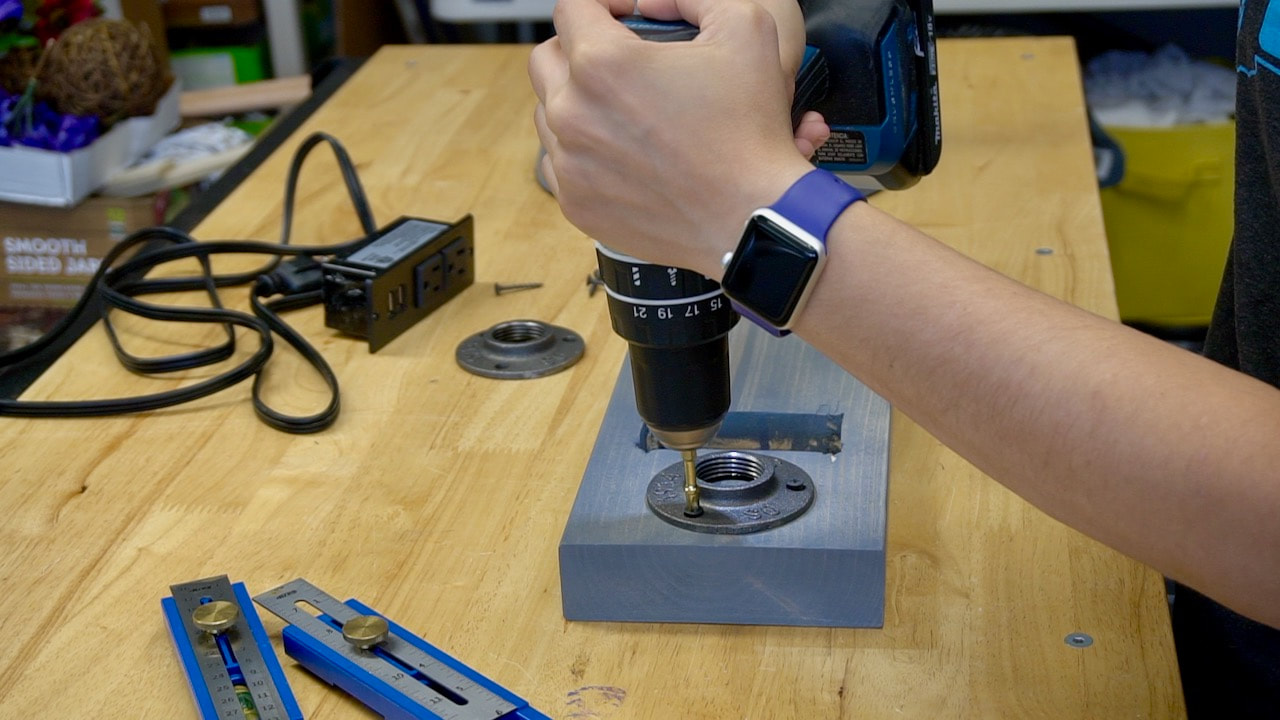
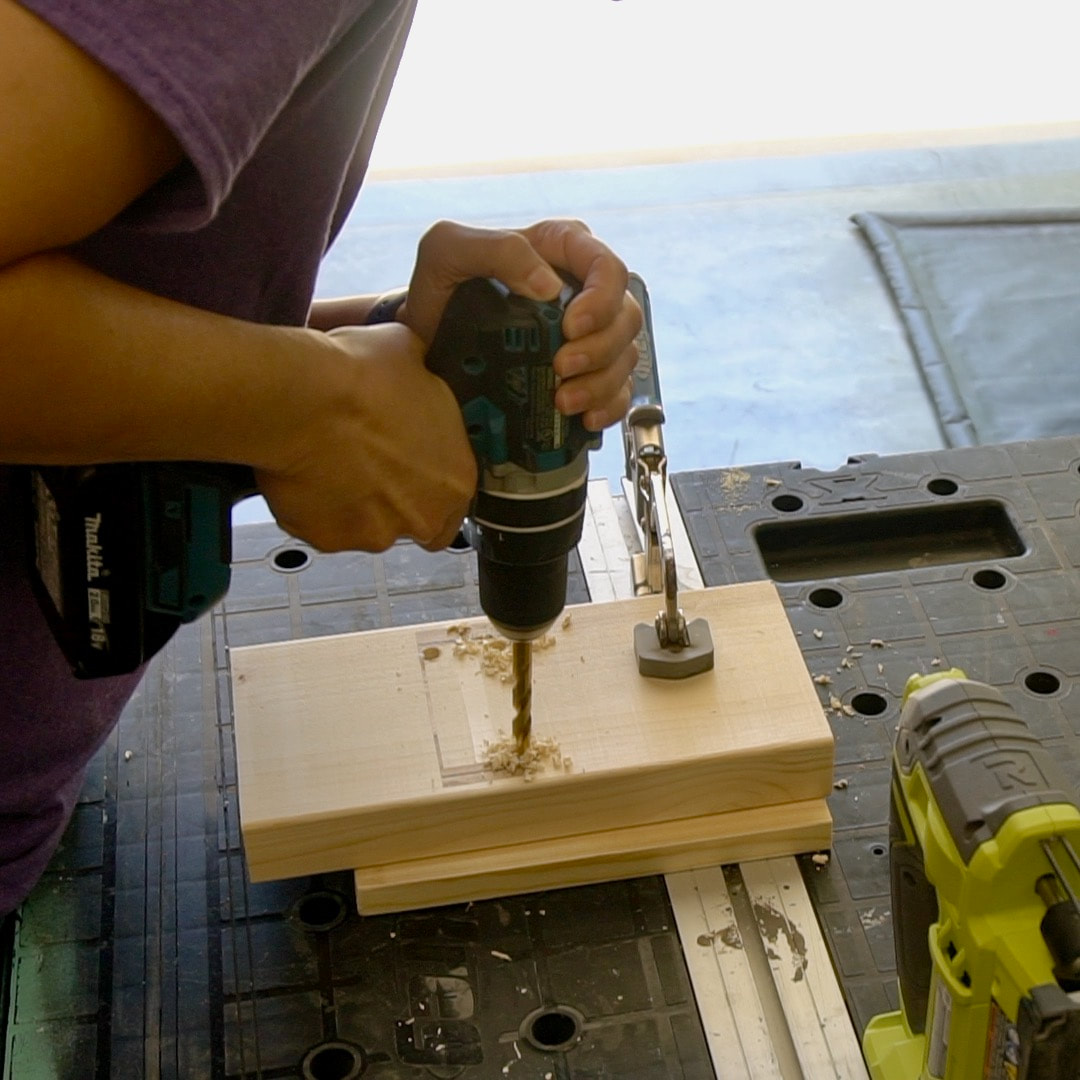
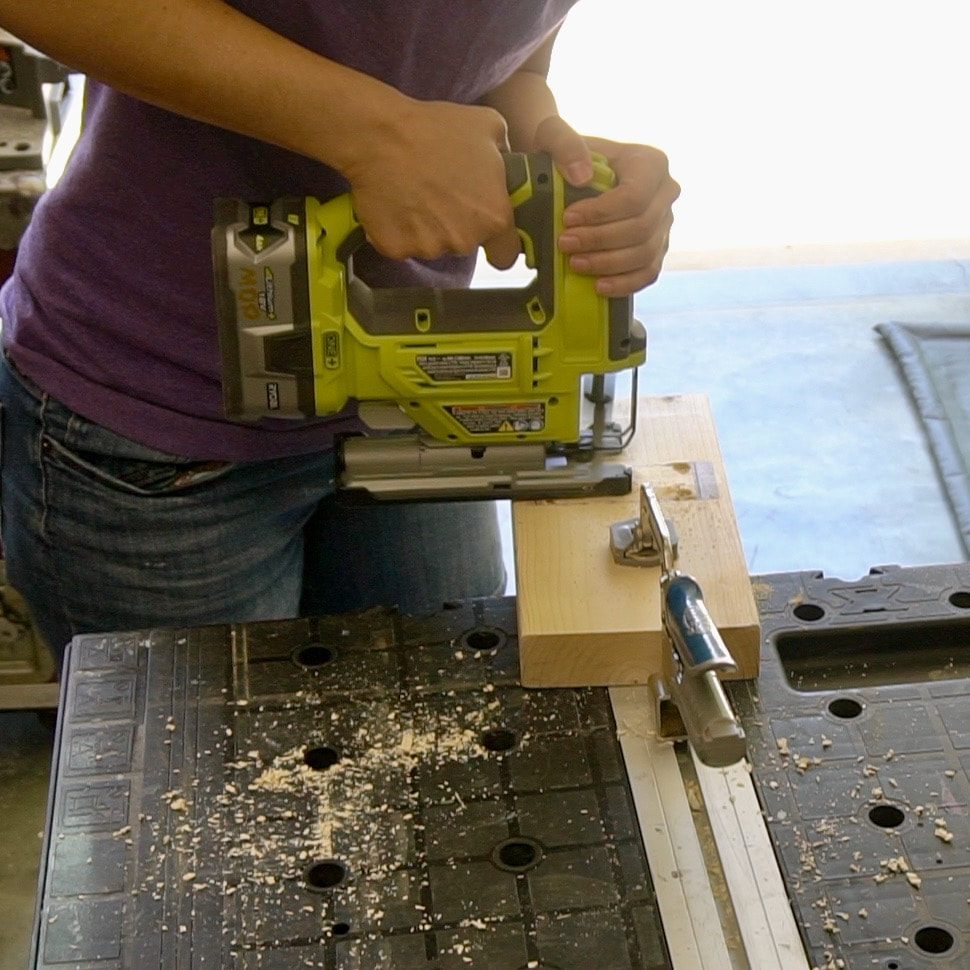
Flanges are screwed into place on both sides of the mini side table.
The lamp parts are screwed together.
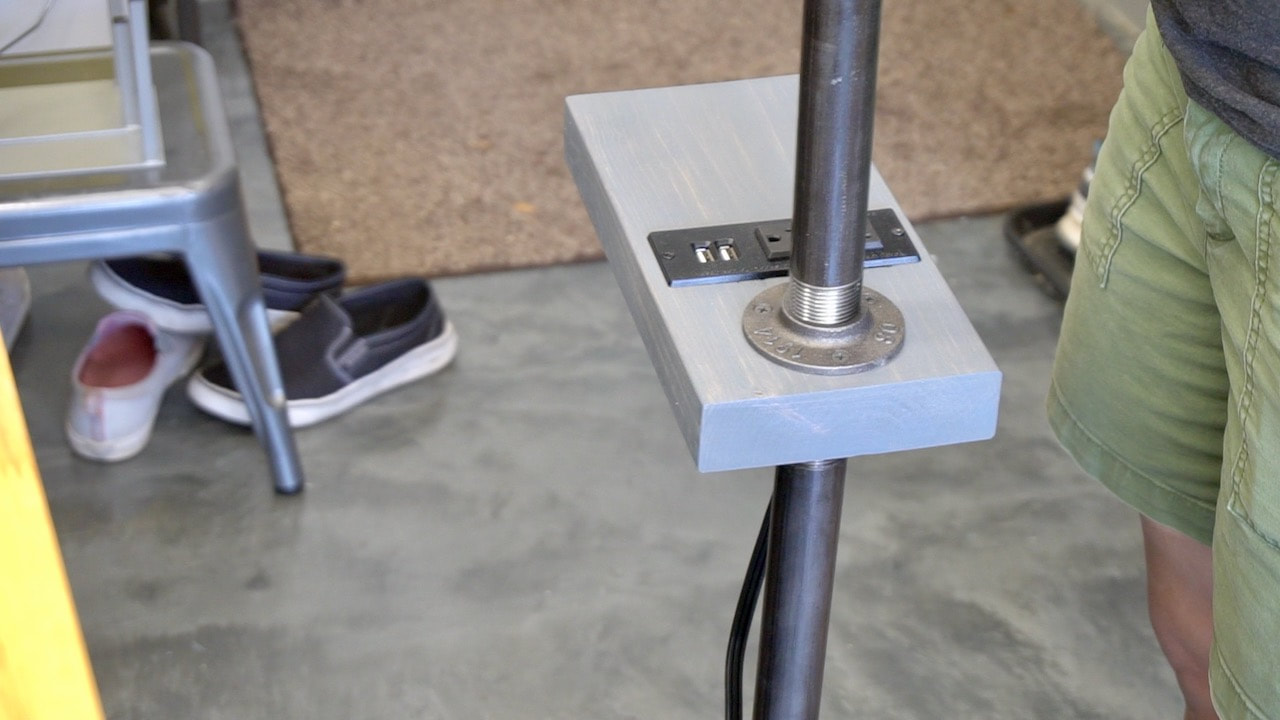
With the flanges in place, the pipes are simply screwed into place.
The socket set is simply wrapped around the pipes.
Hose clamps, sprayed painted black, are used to keep the cord in place.
A boom arm hold the iPhone for hands-free viewing.
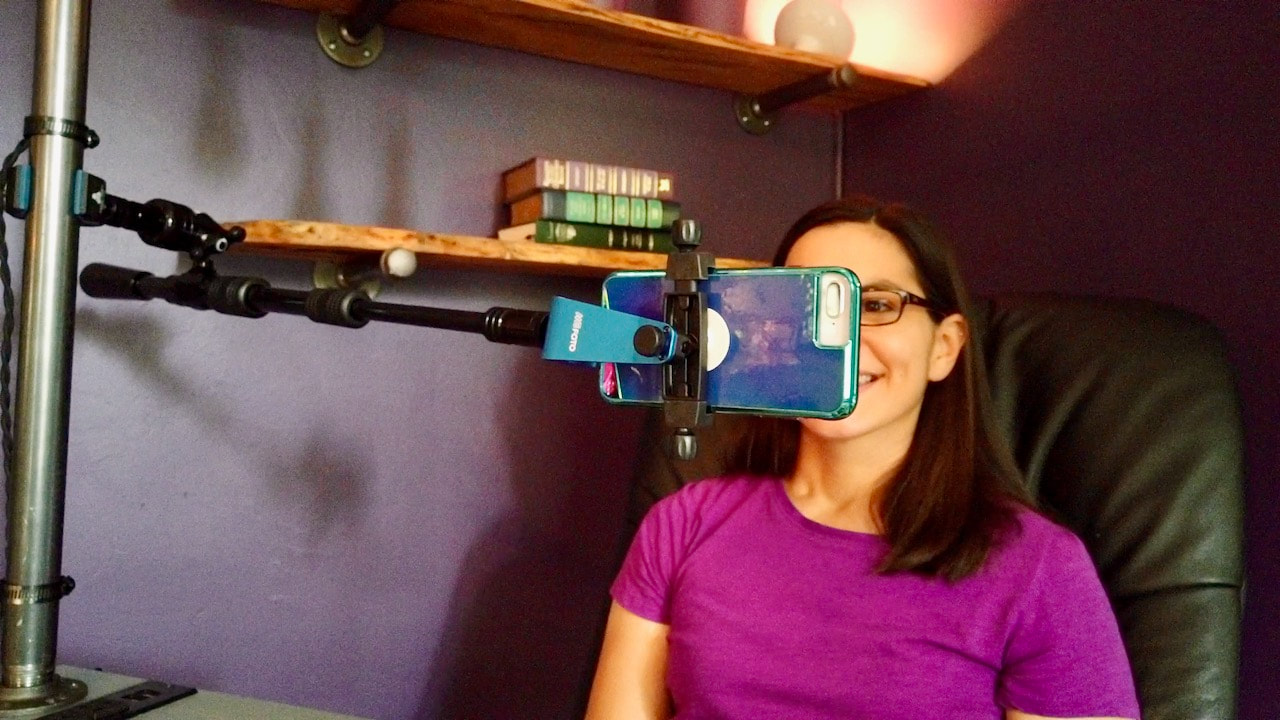
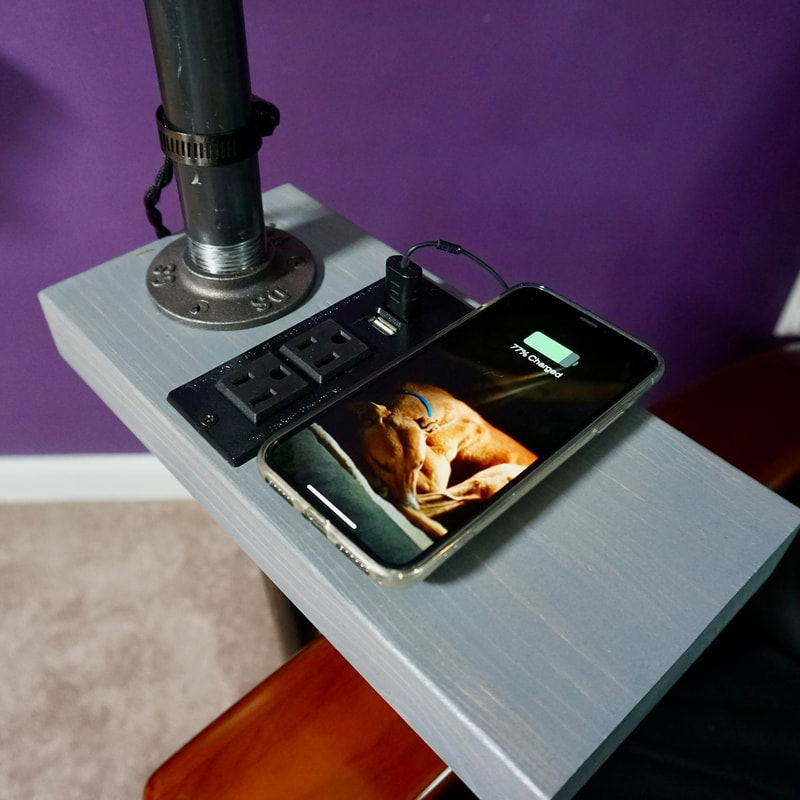
Steph loves her tech so she added this boom arm to hold a phone for a little hands-free viewing on her phone! (By the way, I didn't know it was called that until I heard Steph refer to it as a "boom arm!") You obviously could use something way less sophisticated than this.
Using a USB pinpoint light for reading.
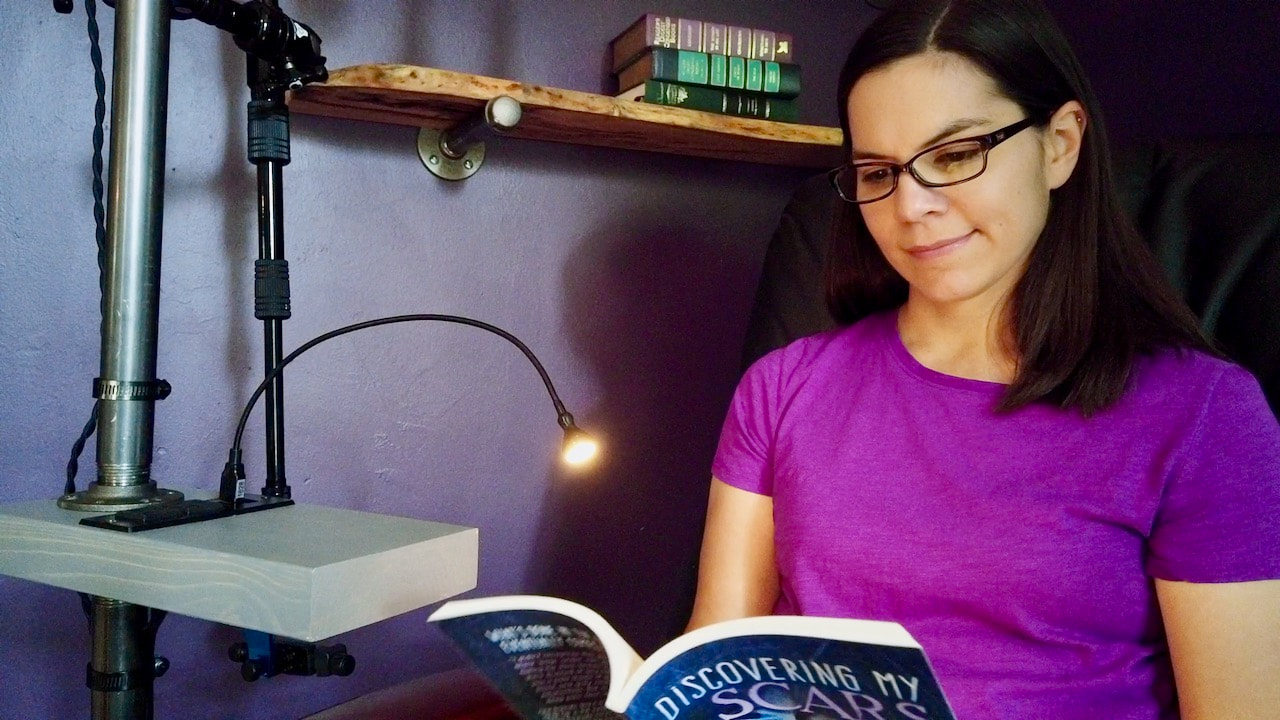
This was my contribution to the project! When it because apparent this was not going to be a reading lamp, but more of a statement piece, I suggested Steph use one of these USB powered computer lights as a reading light. It works perfectly for this purpose!
Steph can charge her phone via one of the two USB ports on this mini power strip.
The Feit fireworks light bulbs.
This lamp is so cool and functional! It was so smart to include the power strip.
Three of the Feit Electric LED Infinity 3D Fireworks Effect light bulbs.
Close up of the Feit Electric LED Infinity 3D Fireworks Effect light bulbs.
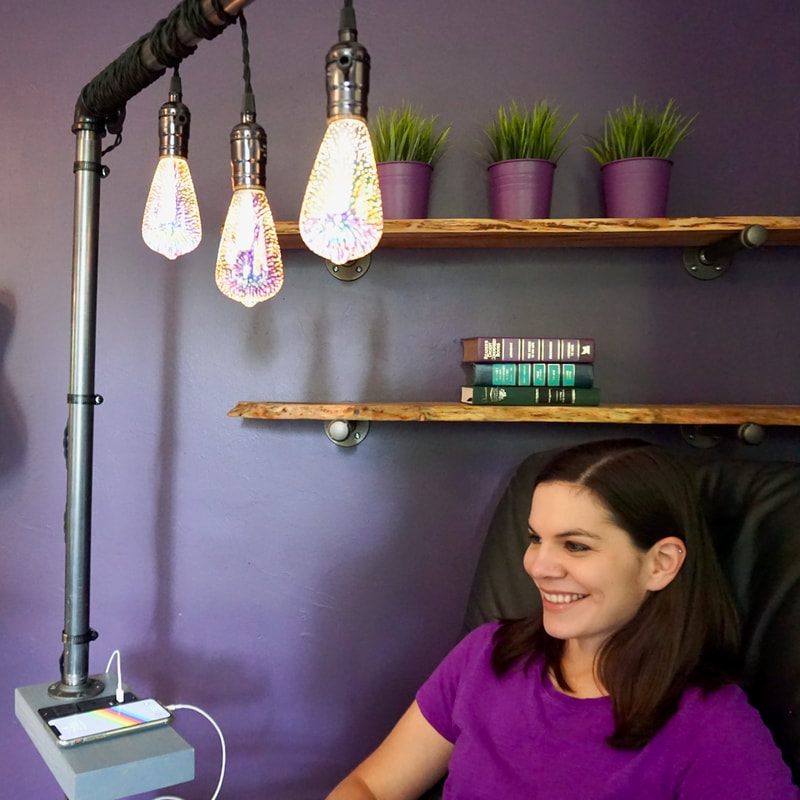
We've done a lot of  lighting projects, but this has got to be one of my favorites. The last favorite was also with Feit bulbs when we made our faux fireplace with their flame design bulbs. The Feit company is really doing some innovative things with LED lighting. 

Have you used any of the Feit LED bulbs in your projects? Please share in the comments below. 


Please note: This is not a sponsored post.

FYI: We are not professionals, and we don't claim to be. This is what we found worked for our project. Yours may need a little different approach. Safety first!

FYI: Affiliate links are being used on this page. Purchasing via these links help support MDP!

Related Projects

Picture
Pipe Bookshelf
Picture
Lamp Turned Coat Rack
Picture
PVC Pipe Gate
0 Comments


Leave a Reply.

    MotherDaughterProjects.com

    Mother Daughter Projects
    ​
    Steph & Vicki

    MotherDaughterProjects.com
Mother Daughter Projects, LLC ∙ est. 2015 ∙ Tallahassee, FL by Vicki & Steph ∙ Privacy Policy