|
text by Vicki Sign up here to join our weekly email newsletter!
Last spring, while I was experimenting with my new silicone charcuterie molds from TotalBoat, I tried a technique (that maybe I invented or discovered) that I had not seen before to see if it would work and it did!
I decided the technique would be perfect to create a fun, Halloween themed charcuterie board. So, now it's cool enough (relatively--it's still Florida after all in September!) in the garage to once again create some fun with epoxy. Here's how it went. Materials:
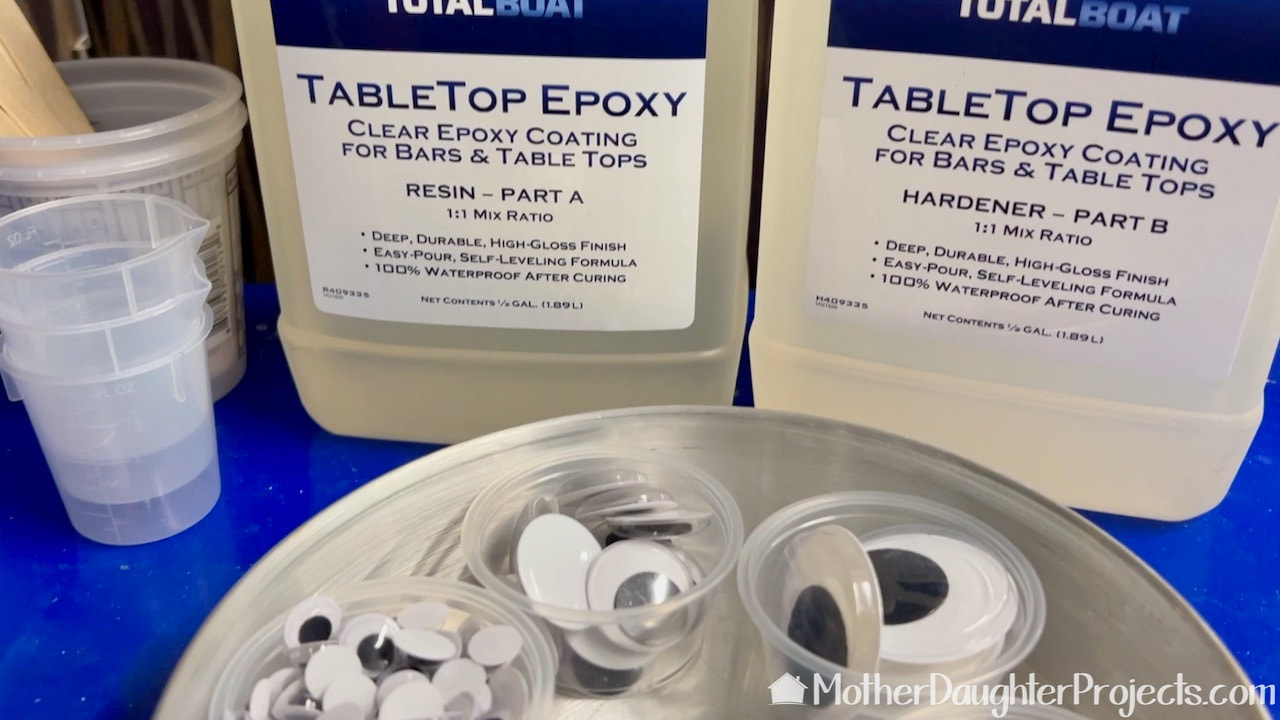
I'm going to be using both the rectangle and circle silicone charcuterie molds from TotalBoat. I'm using TotalBoat TableTop Epoxy as well as trying out Makerpoxy. For the first board I'll be using spray paint, Dawn Powerwash and an assortment of googly eyes. Fun!
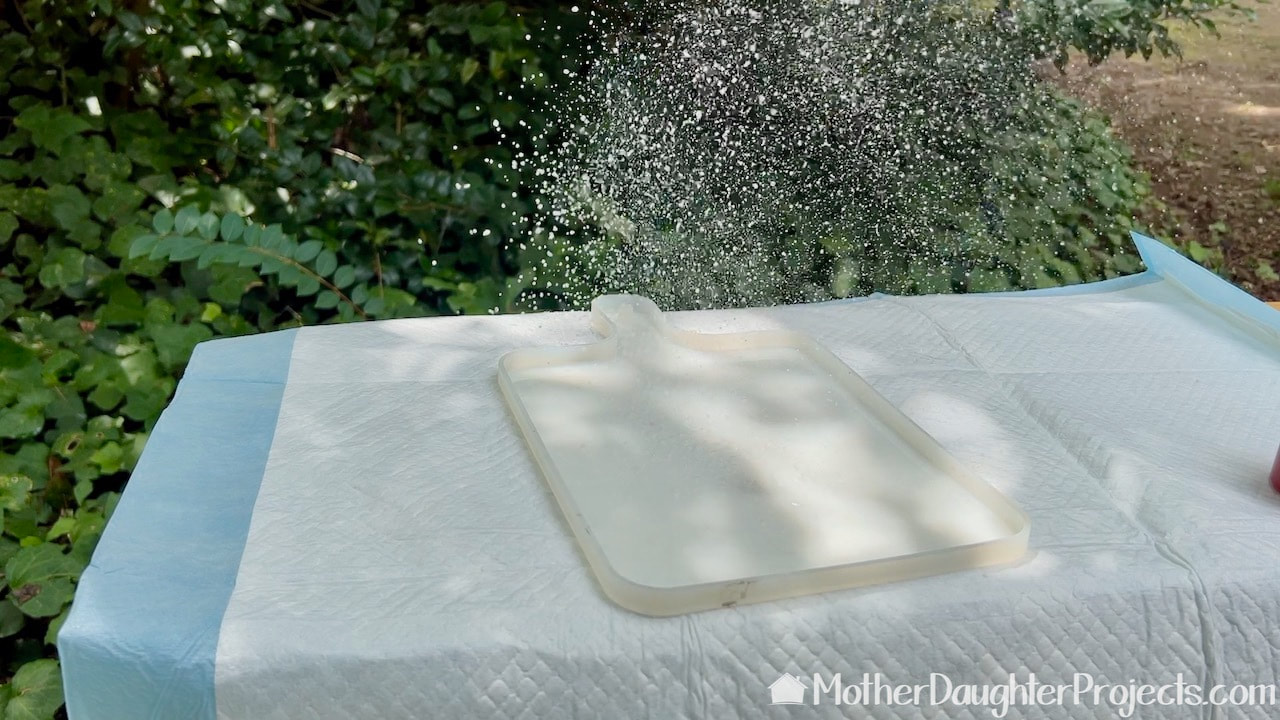
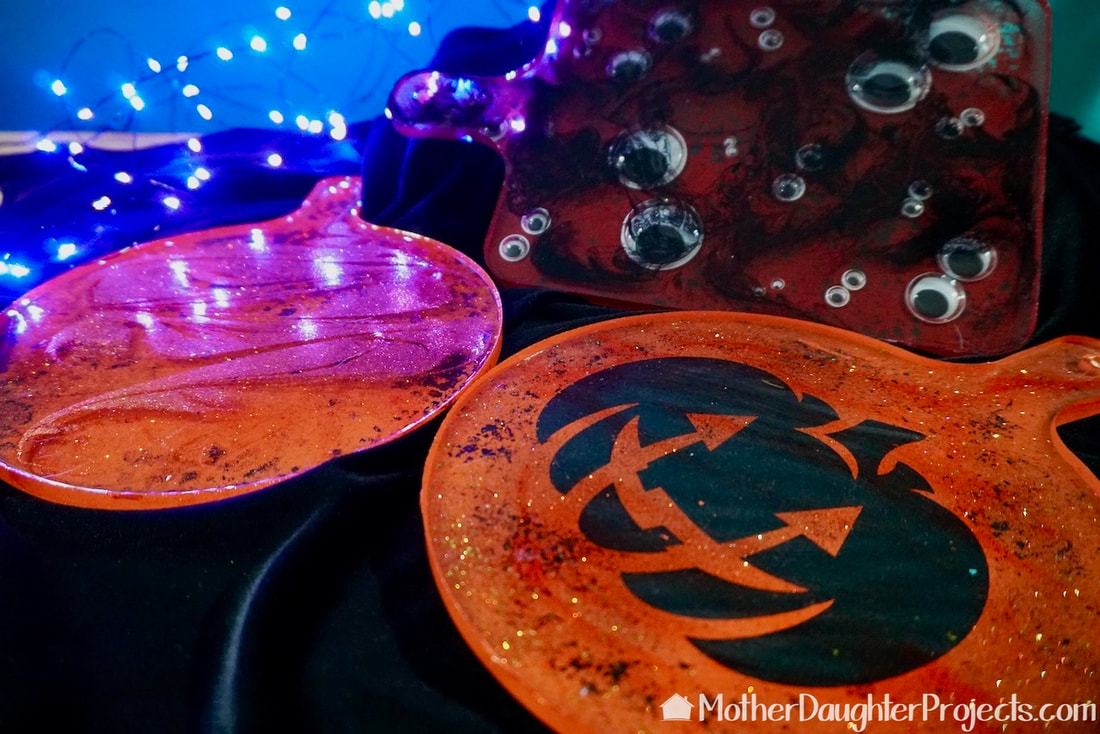
The secret ingredient for this technique is Dawn PowerWash spray which is sprayed lightly onto the mold.
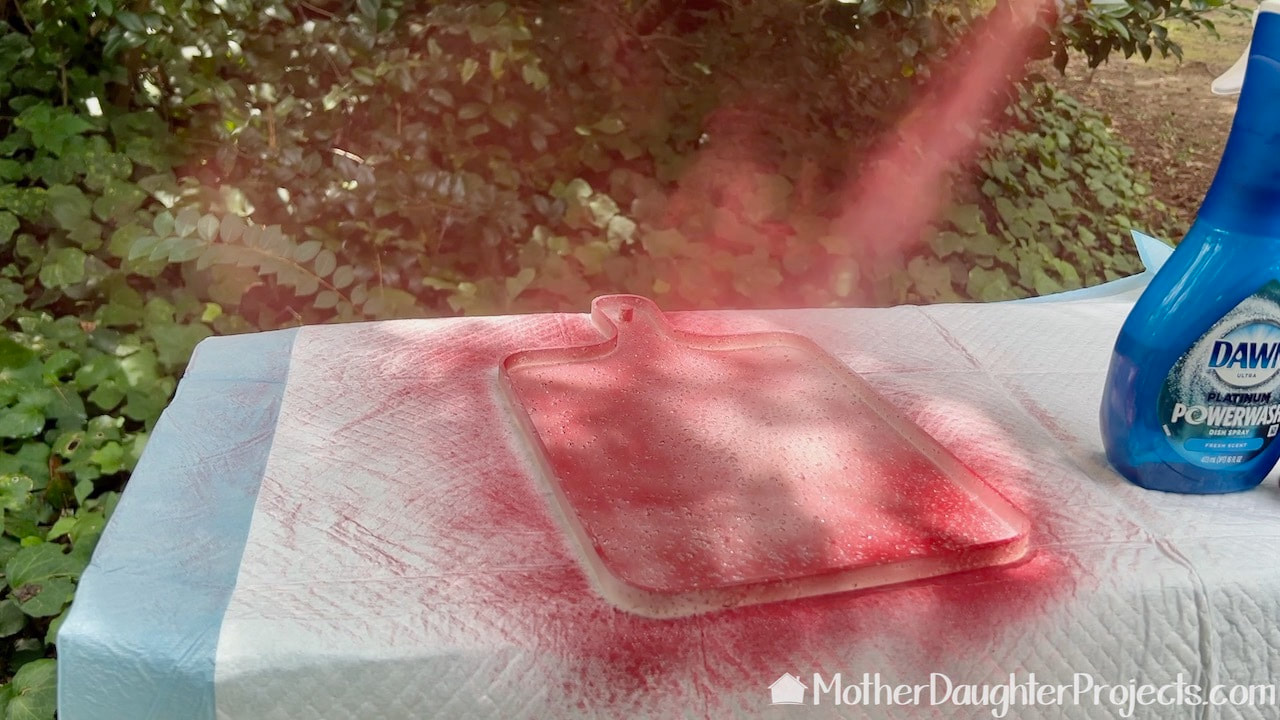
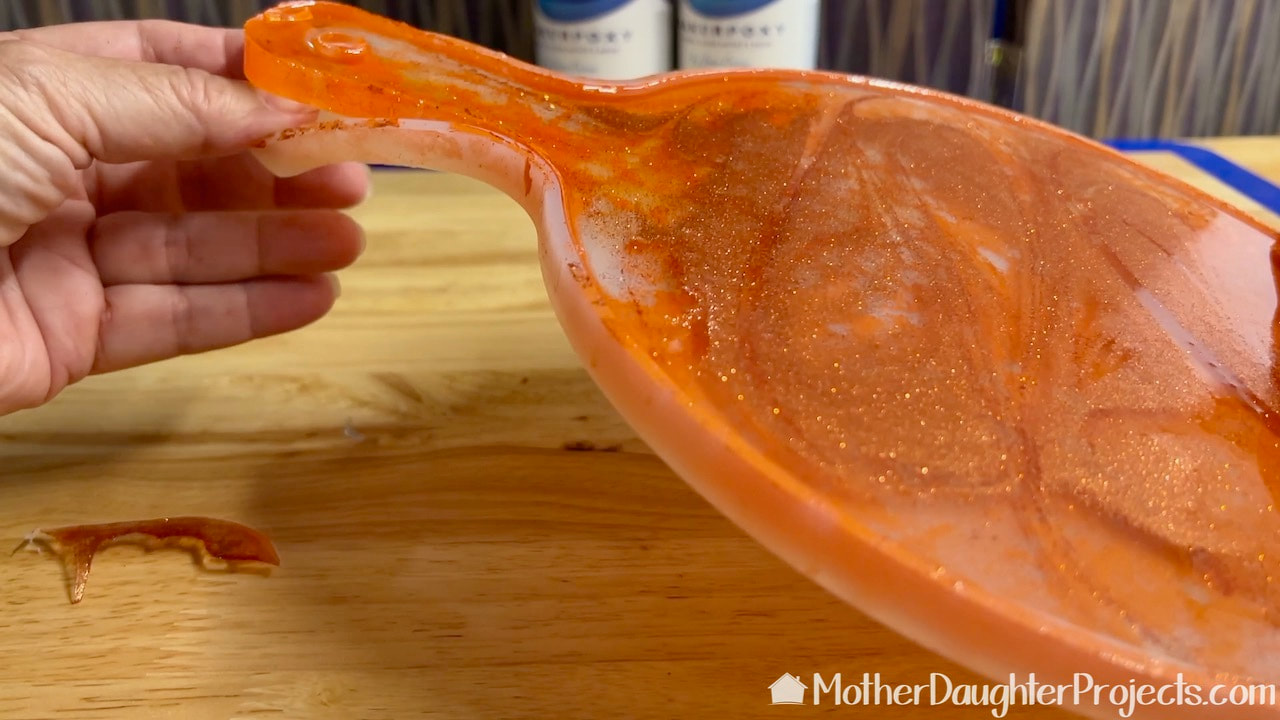
Next, I spray painted it in Rust-Oleum gloss in Colonial Red. I let this dry for 20 minutes and then rinsed the board to remove the soap. The board can be left to dry naturally or it can be gently blotted with a paper towel. What I discovered in my experimentation is the spray painted design bonds with the epoxy leaving the silicone mold totally clean with the exception of the edge. I clean up the mold edges with alcohol and then wash and dry the mold before storage.
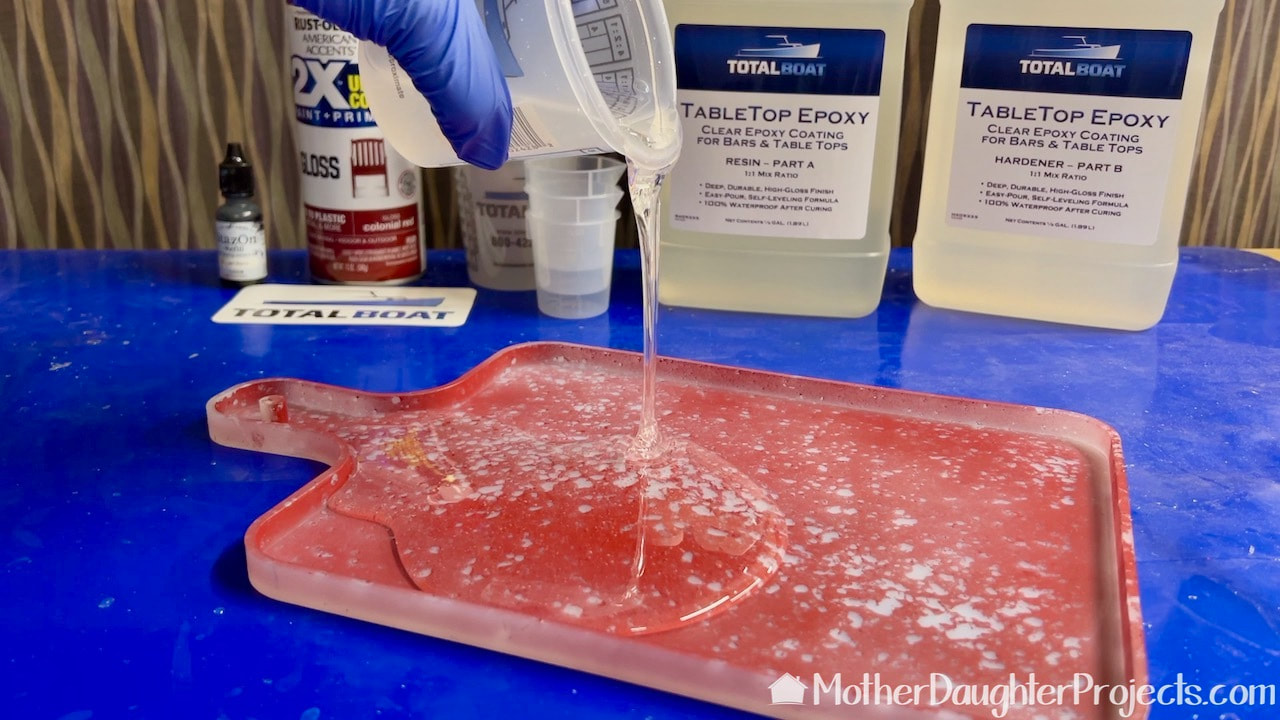
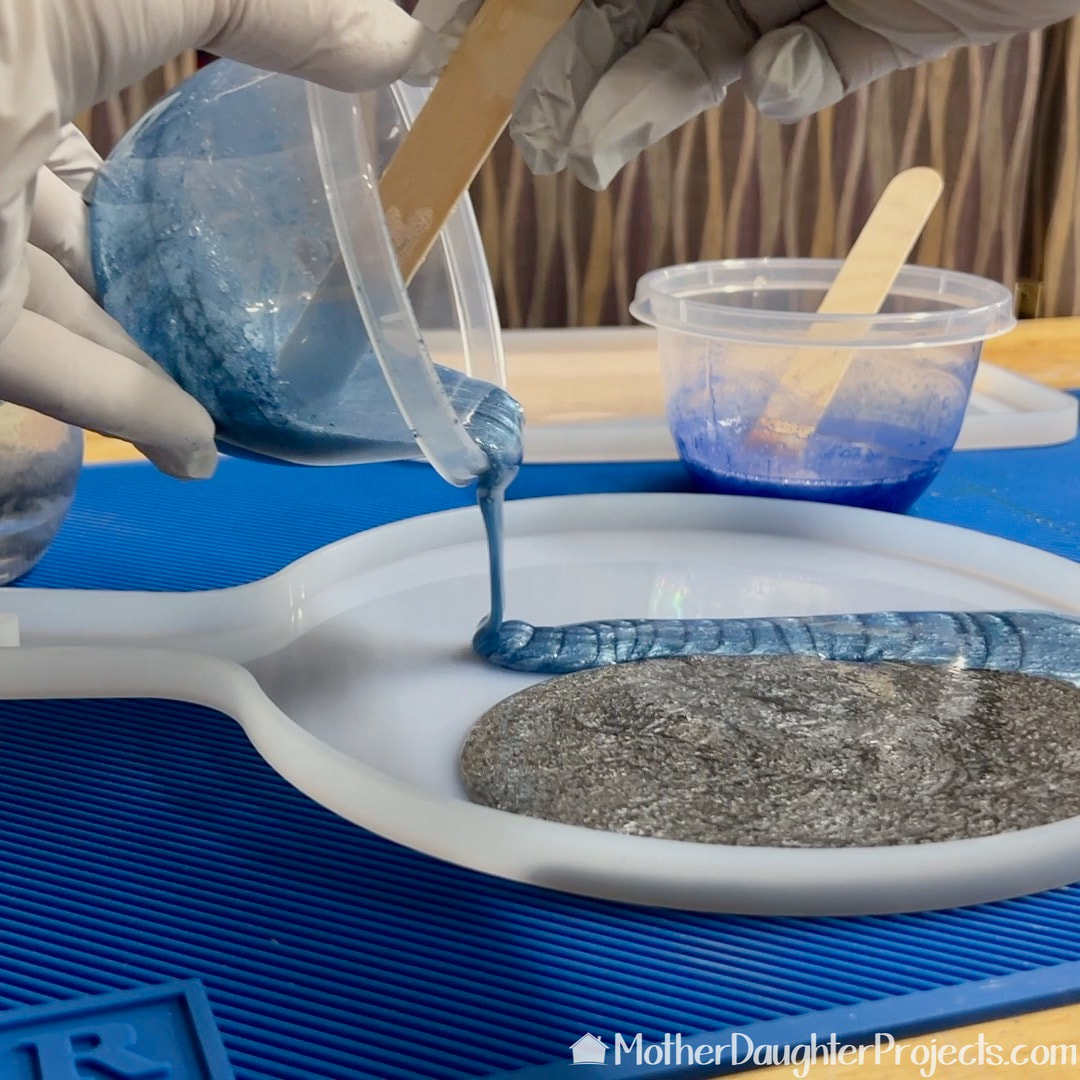
I mixed up about 8 ounces of TotalBoat TableTop epoxy and poured it into the mold. Once the epoxy had settled out, I used a heat gun to remove the bubbles.
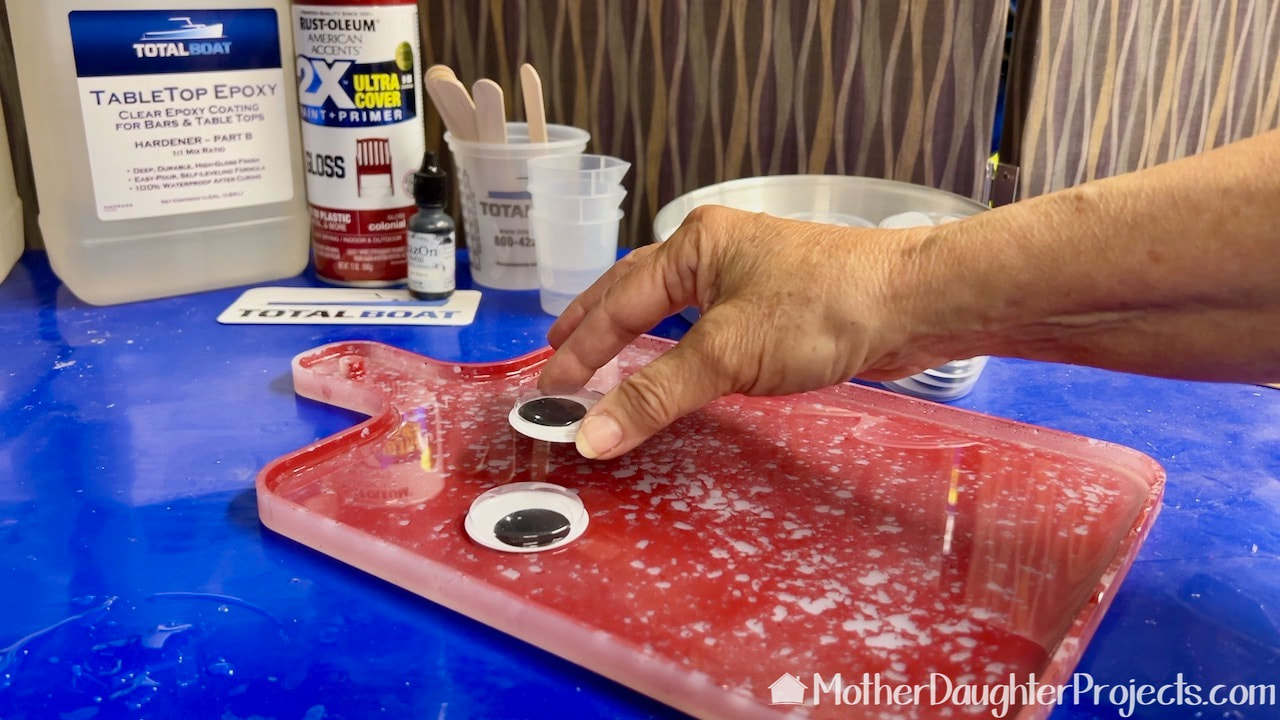
I started putting the googly eyes in place starting with the largest of the three sizes.
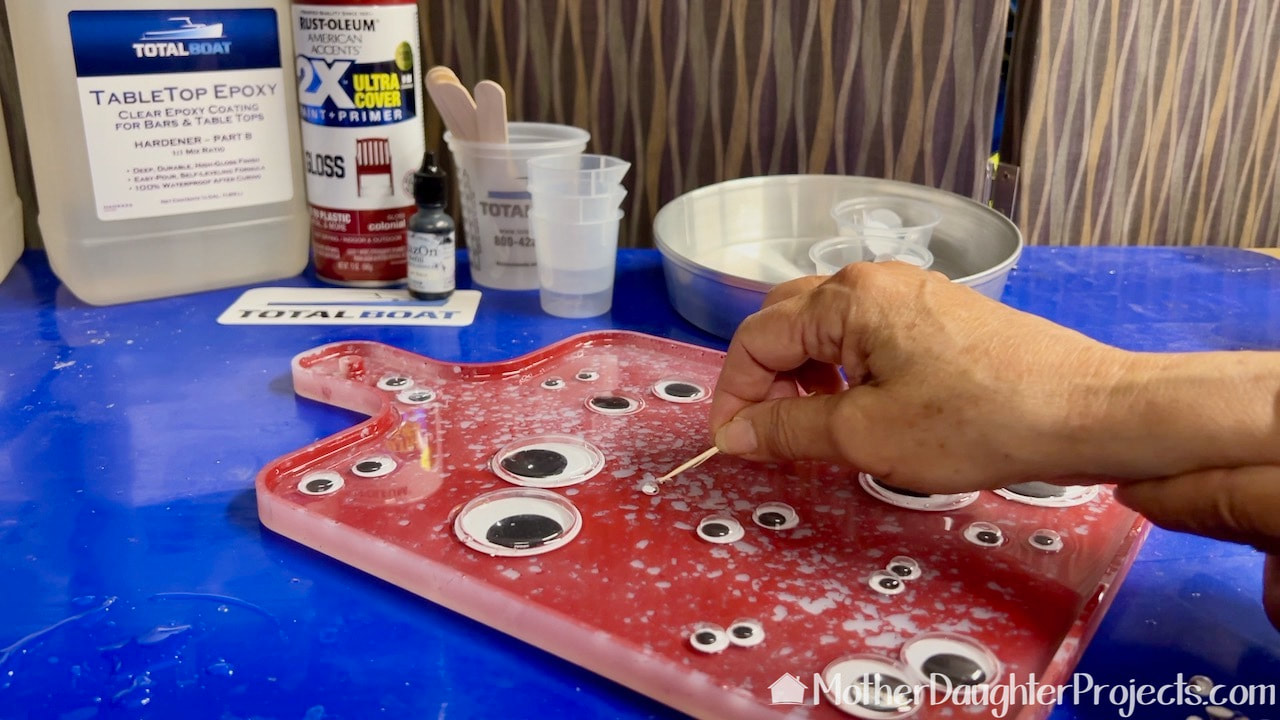
The eyes will continue to drift towards the surface until the epoxy has thickened. Gently press them back down into the epoxy with a toothpick. I checked back every 10 minutes to see if adjustments needed to be made or another pass of the heat gun was needed.

A final coat of epoxy is poured into the mold to finish filling it. The rectangular size, without any add-ins, holds approximately 14 ounces total.
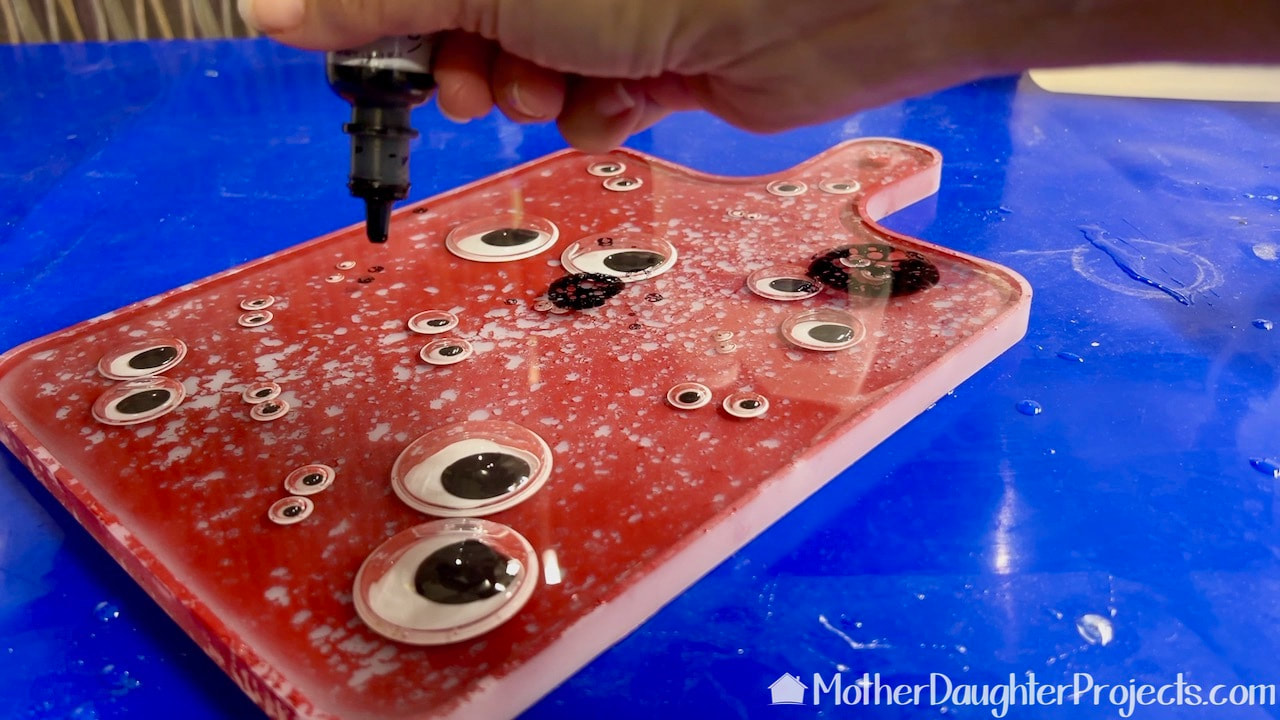
I'm using Stayz-On Stamping ink to create a spooky web-like finish in the top layer of epoxy.
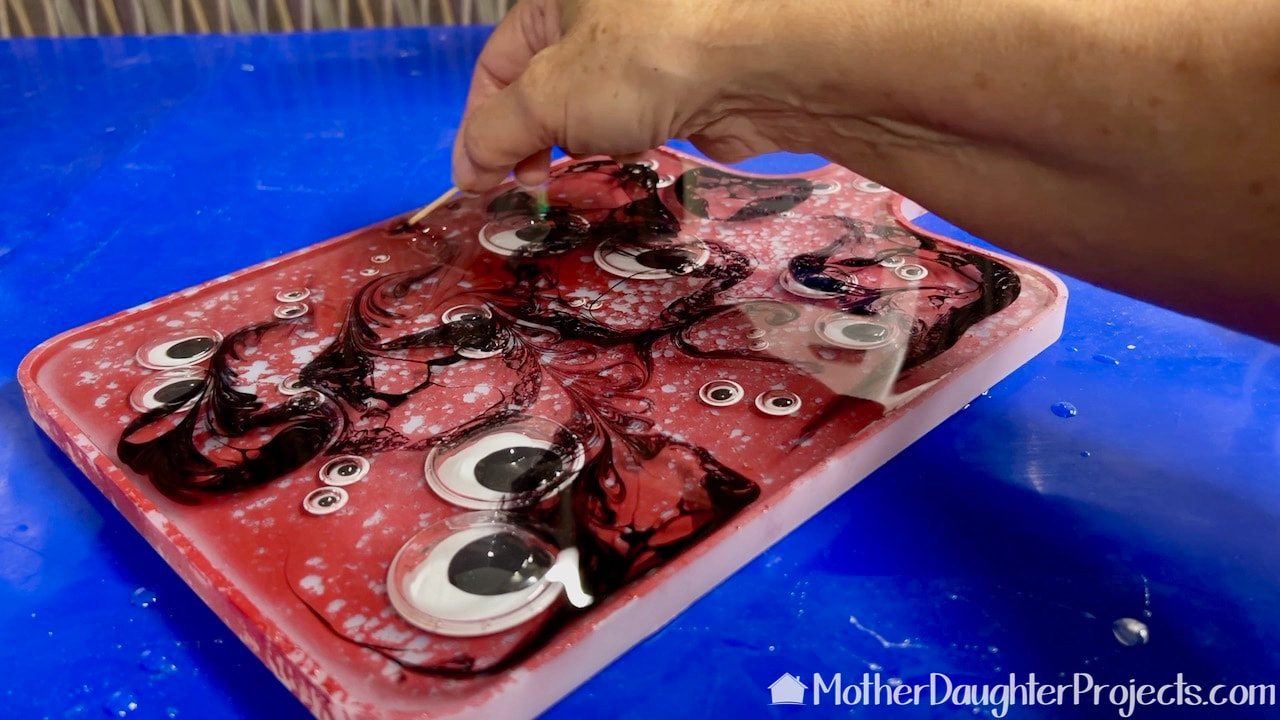
I swirled the ink with a toothpick taking care to try to keep it from covering the eyes.
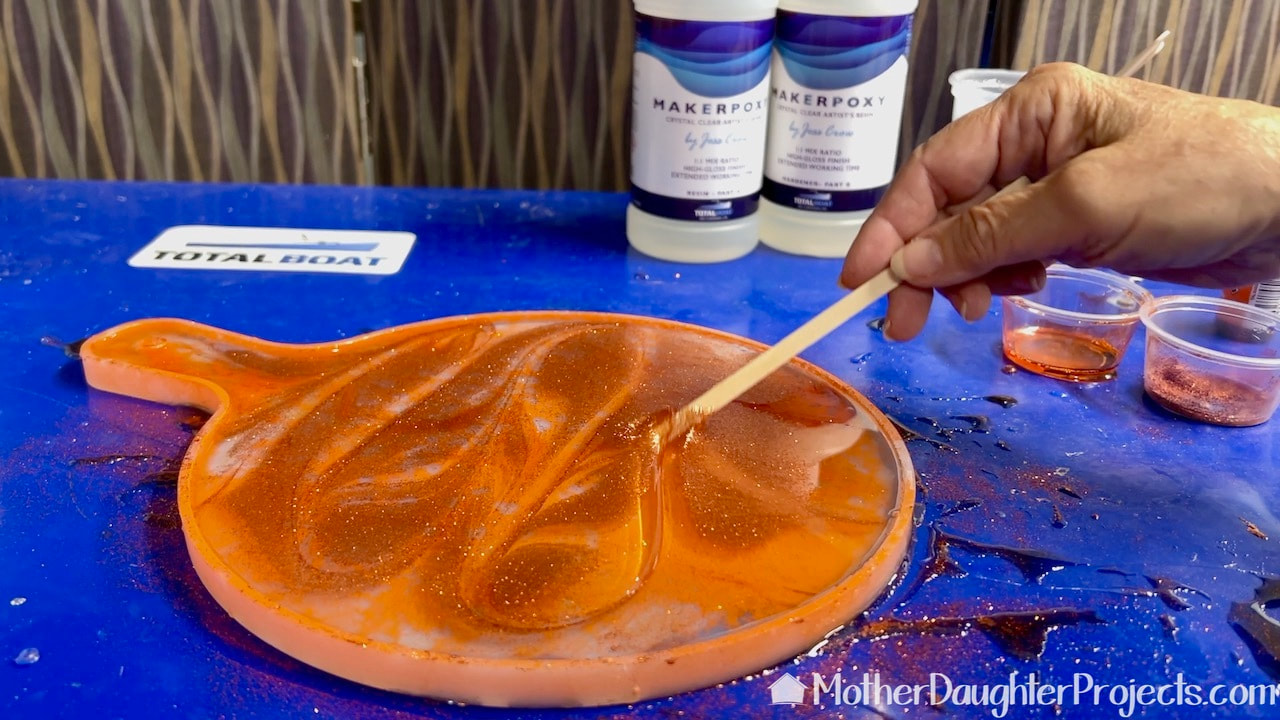
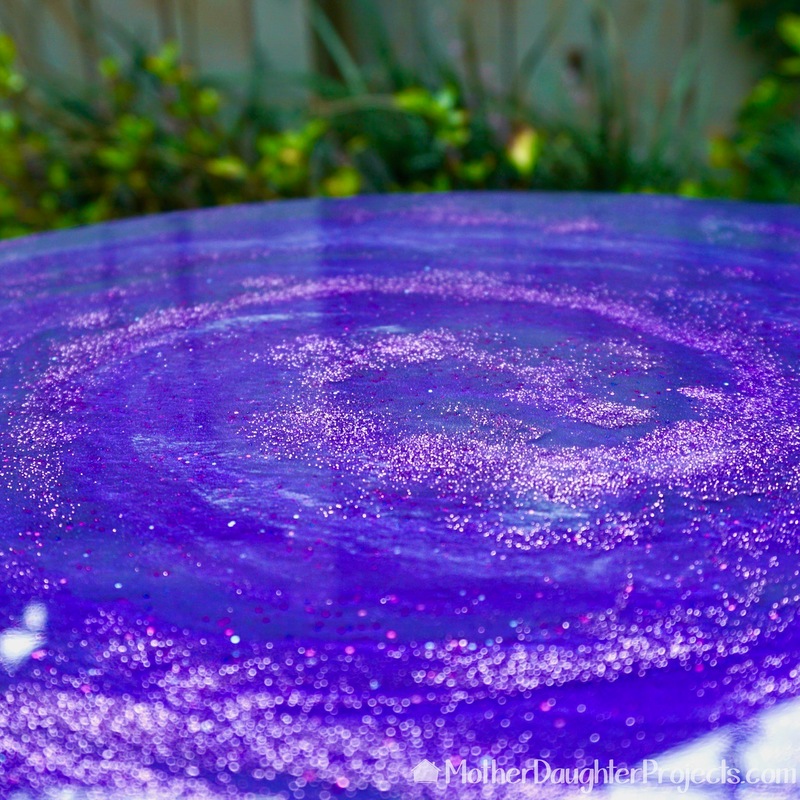
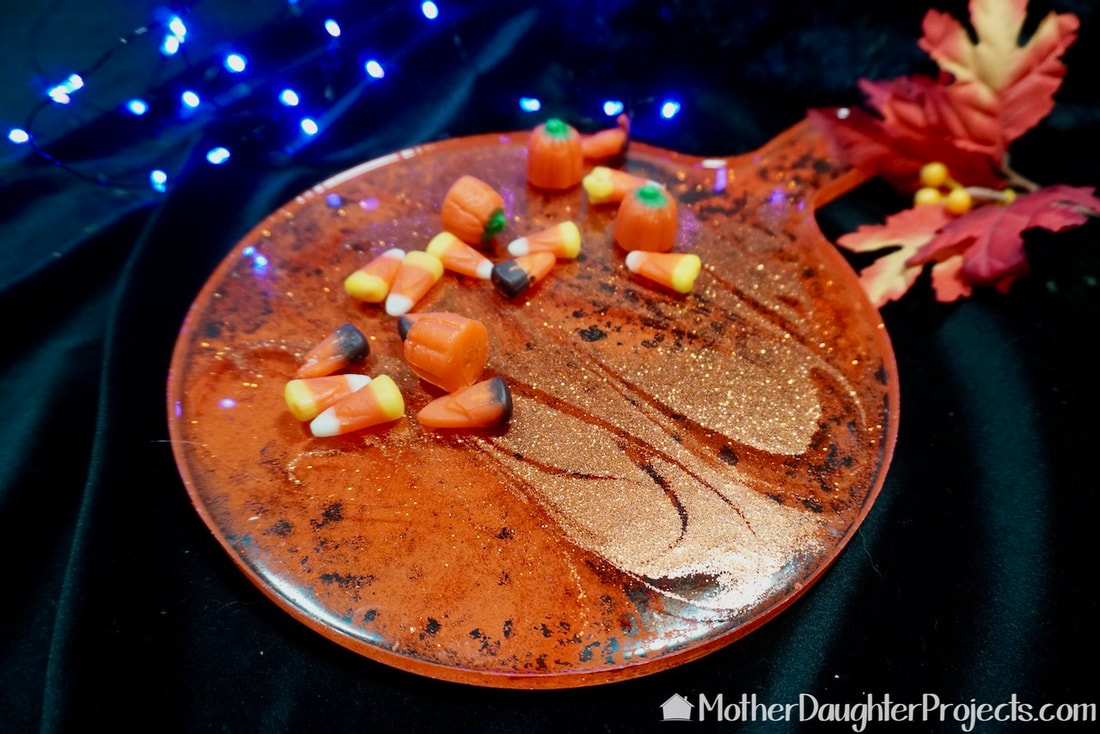
The round board also started with a spray of Dawn PowerWash and spray paint in orange. I added glitter and swirled the design as the fine glitter I used floated to the surface and drifted towards the center. Again, the design will continue to drift until the epoxy is set. I checked back at least three times to update the design.
I leave the boards to cure for 24 hours before removing the board from the mold.
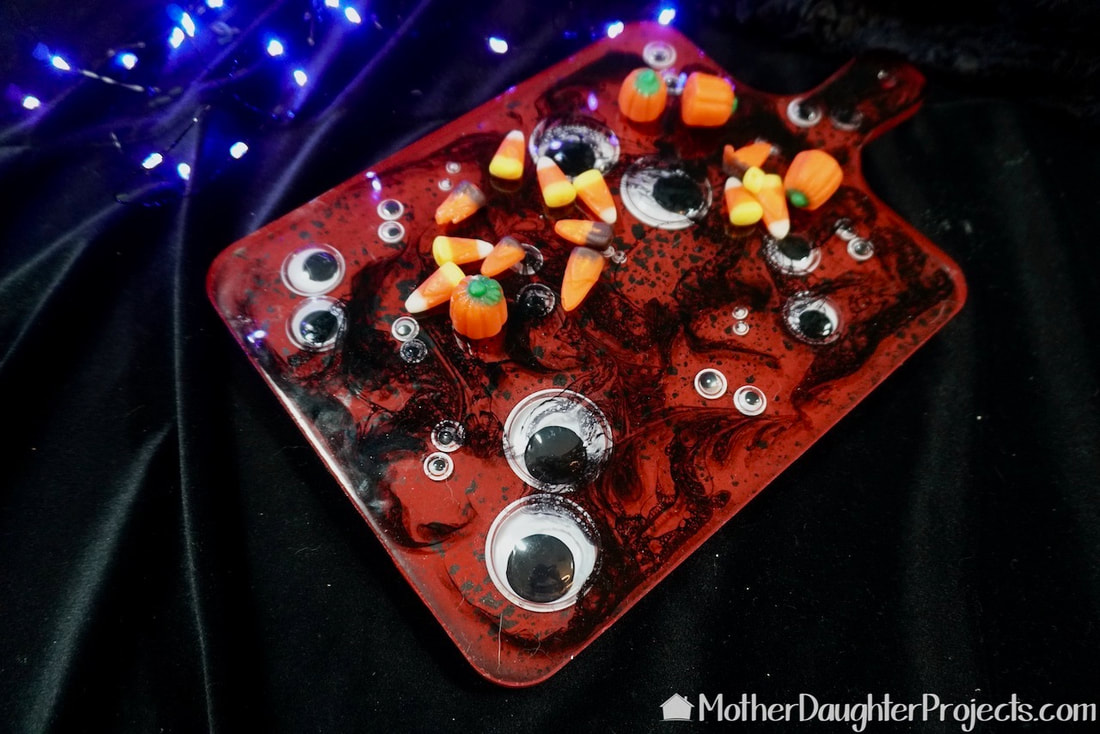
Those googly eyes will move when the board is moved. That will surprise and delight your Halloween guests.
Trick or Treat!
Be on the lookout for the instagram reel on making the orange pumpkin board.
Okay, can you tell I'm having the best time making these boards?! Because these are small, they really lend themselves to unleashing creativity. There's one more Halloween board to show which will be featured in its own reel. Actually, there's one more, but that one is not seasonal, so that board will have to wait to shine. (And it is shiny!) Please note: This is not a sponsored post. FYI: We are not professionals, and we don't claim to be. This is what we found worked for our project. Yours may need a little different approach. Safety first! FYI: Affiliate links are being used on this page. Purchasing via these links help support MDP Related Projects
0 Comments
Leave a Reply. |

Mother Daughter Projects
|