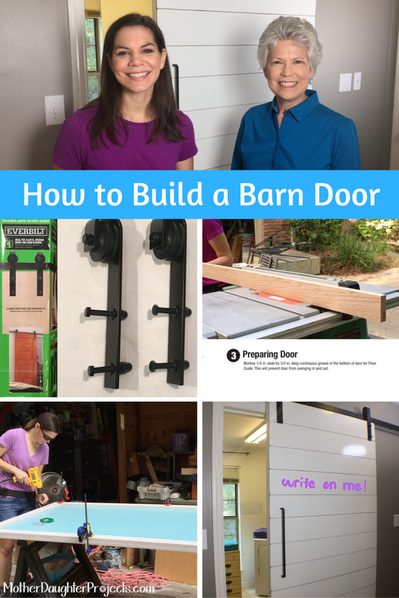
We’ve had lots of fun sharing and building our tiny barn doors over the last few months, but have really wanted to try our hand at building and installing a full-size door.
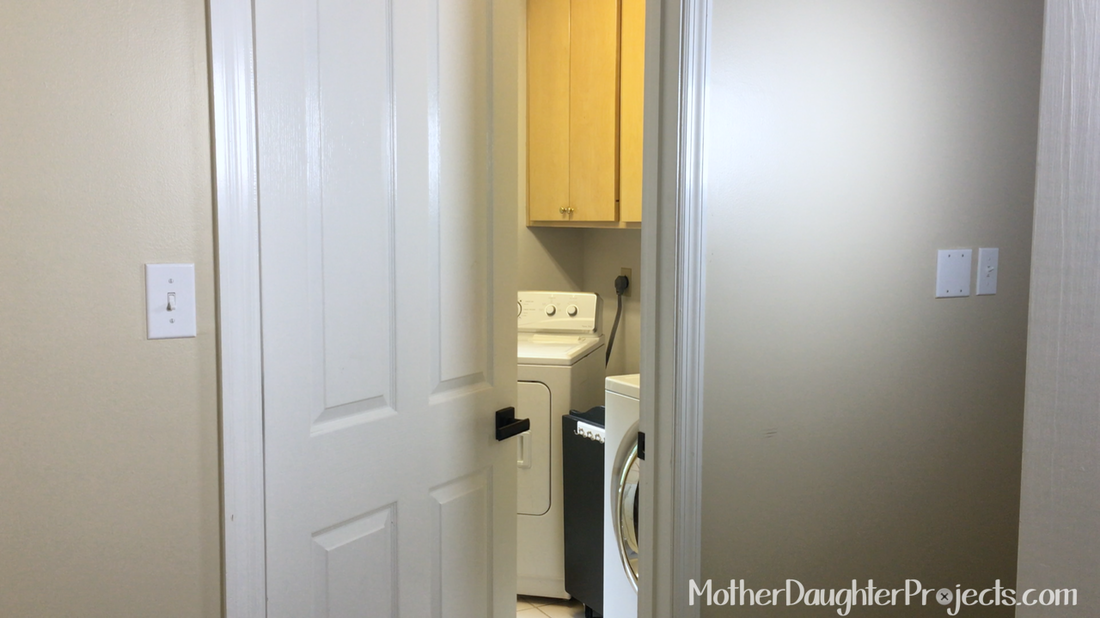
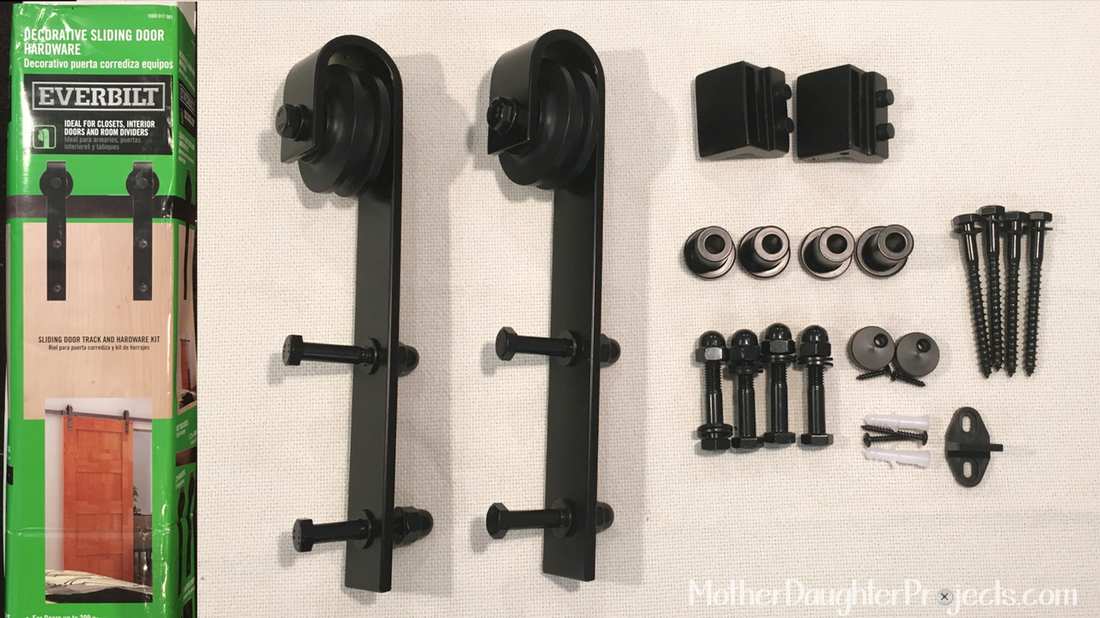
I’ve (Vicki) been wanting to replace the door to my laundry room because it opens into the room making the space feel and function smaller than it really is. I thought a sliding door would free up the space. Thanks to CrownBolt, who sells products exclusively in Home Depot under the Everbilt label, we were able to finally get this project underway.
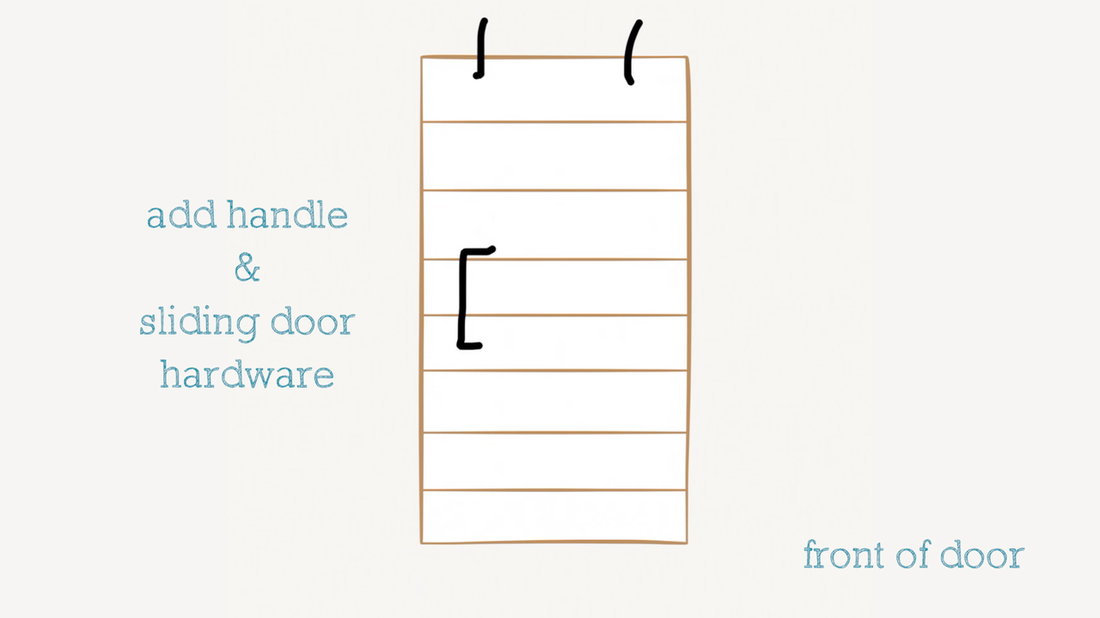
Because we did not want to remove all the existing door frame molding we had to have a door wider and taller than any available locally so we had to create one from scratch. Also, the sliding door hangers are designed to fit either a 1 3/8” or 1 3/4” thick door so it would have to be designed with those thickness in mind.
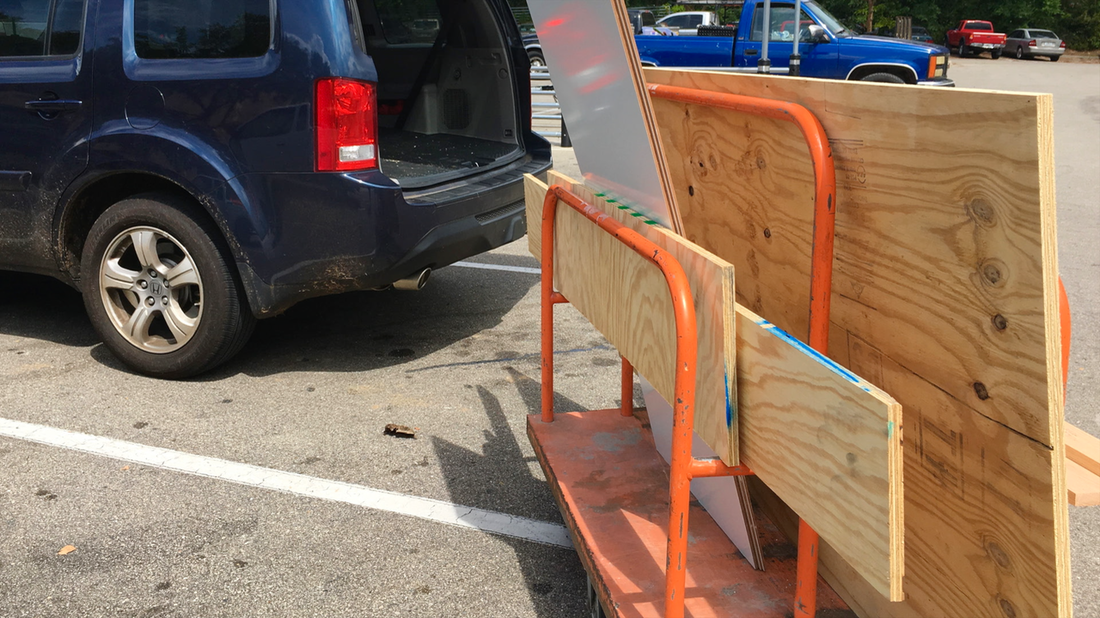
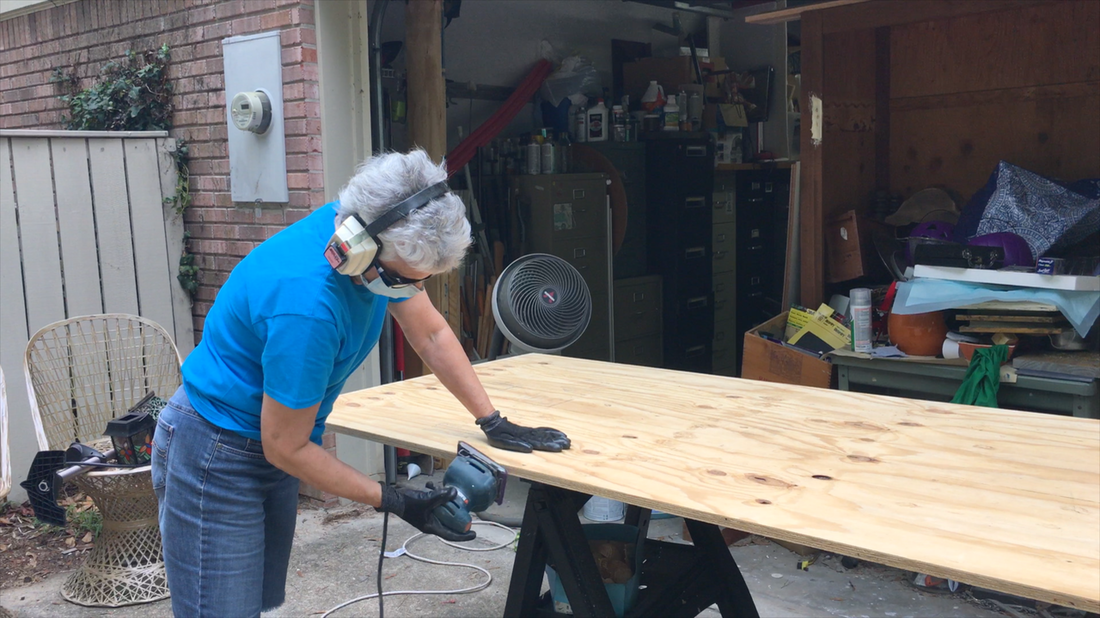
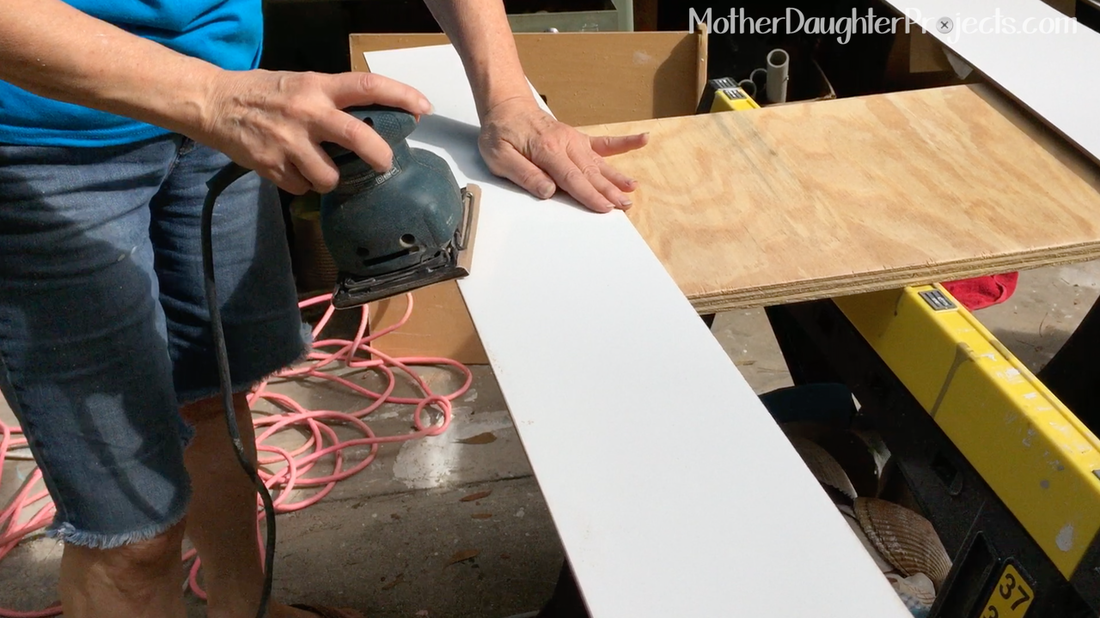
Anyone who has ever purchased lumber has found that the common names for boards like 1x2 are not actual sizes of the boards. We measured everything manually to determine we were actually creating a door with the required thickness. Our measurements were spot on so the door hangers fit perfectly!
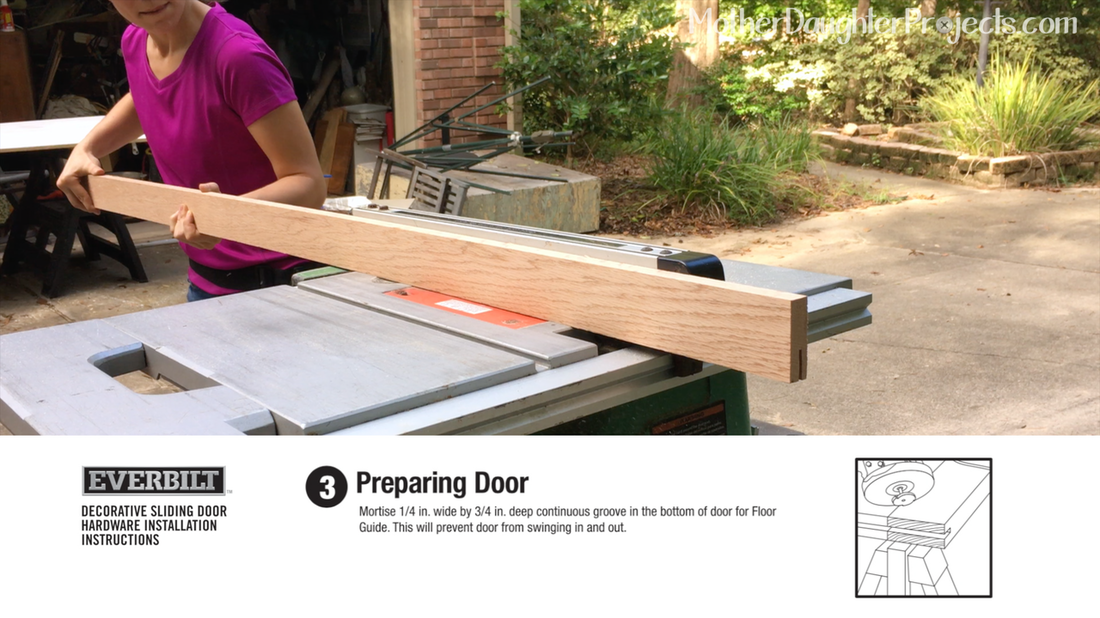
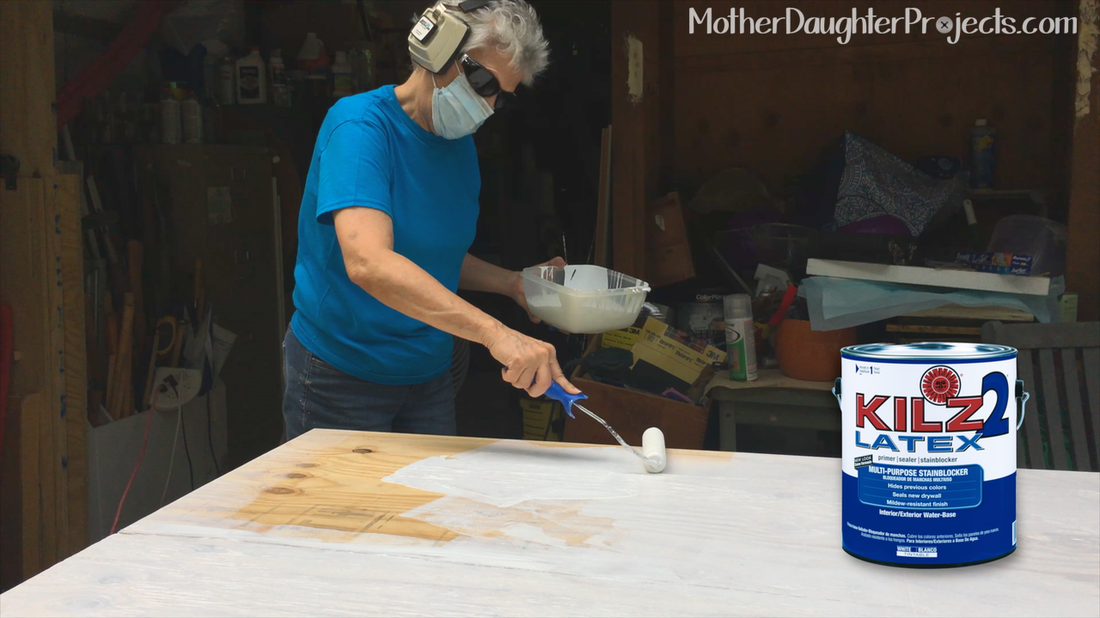
Next the instructions show that the door needs to have a groove at the bottom for the floor guide to pass through . We decided we could easily do this with a table saw. We did a couple practice tries as this was our very first time using a table saw, but it worked out great. We made one small cut then we moved the table saw guide slightly and did another pass to create the width we needed.
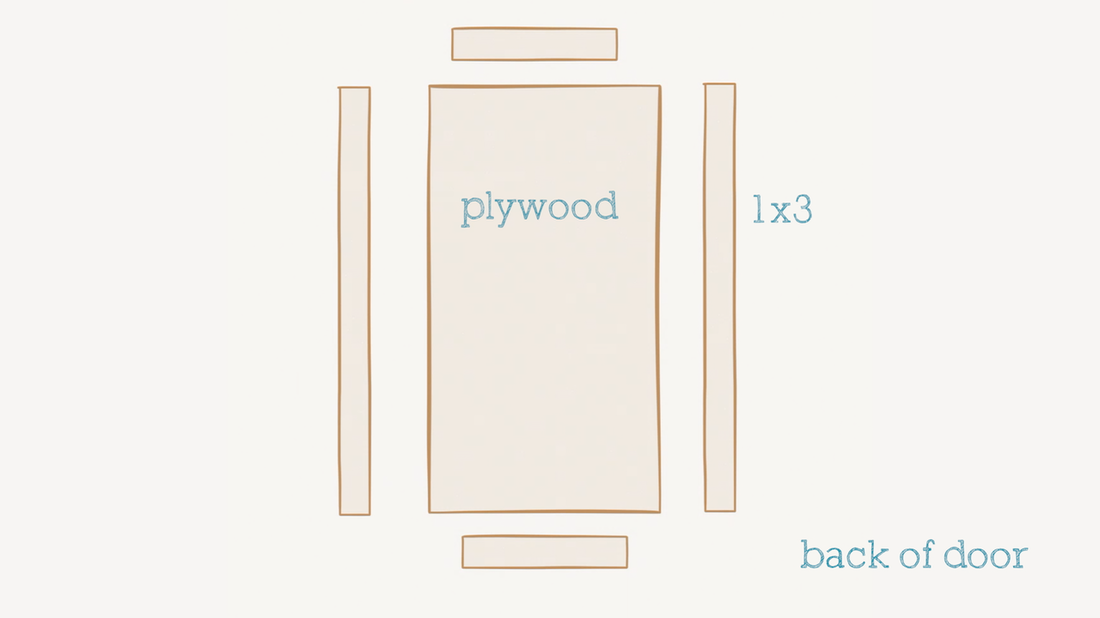
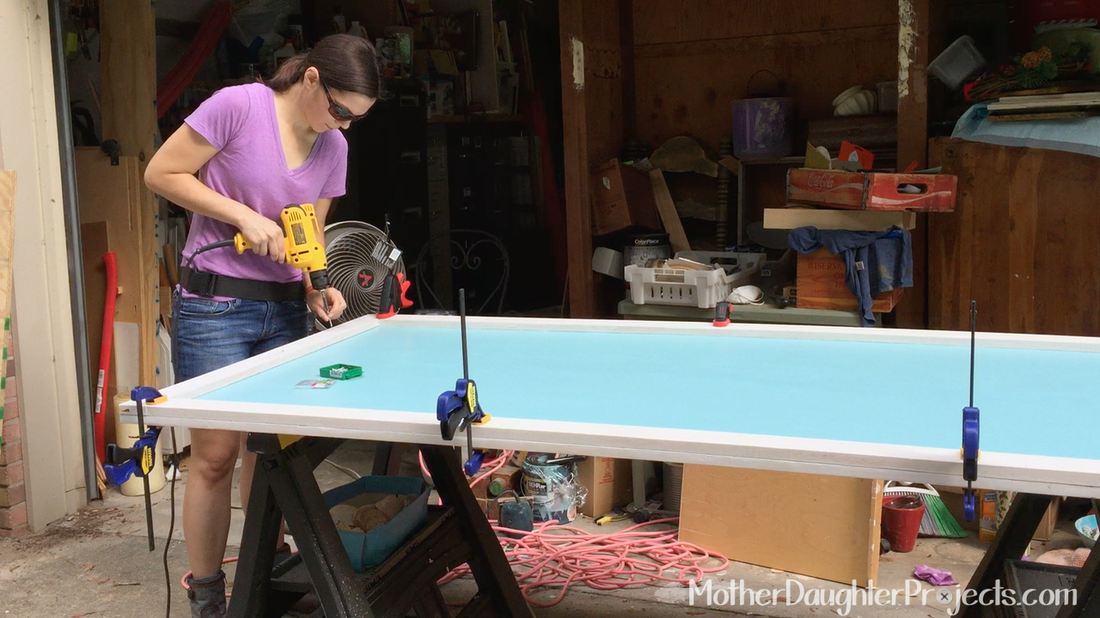
To join the boards together, we used a Kreg jig. A Kreg jig makes pocket holes which makes it easy to screw boards together. After we made all our pocket holes, we put the 1x3 boards in place and screwed them together.

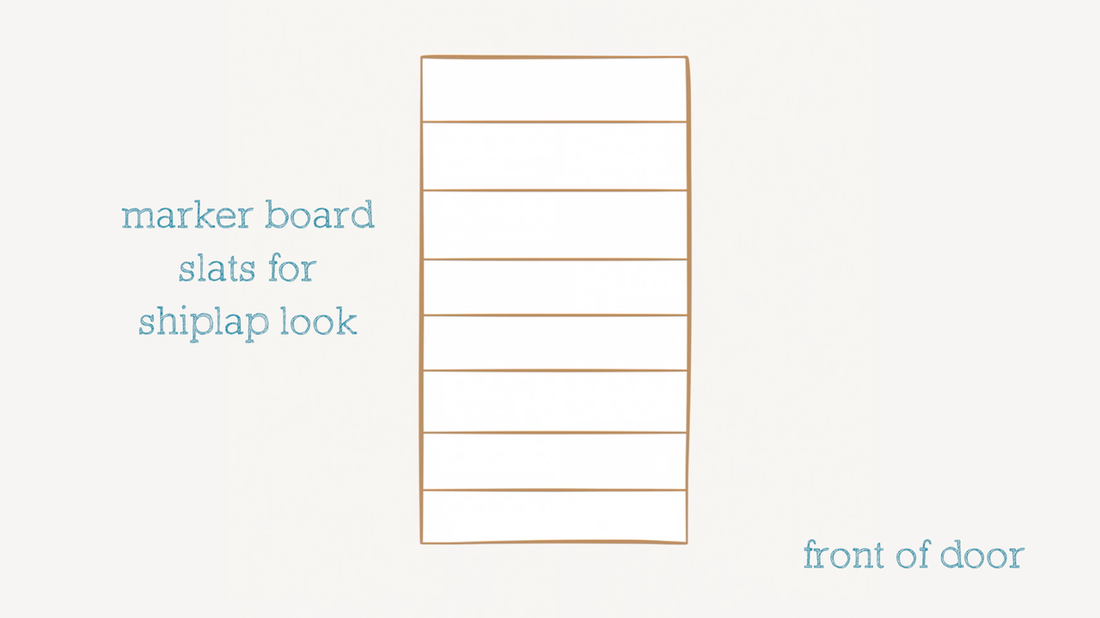
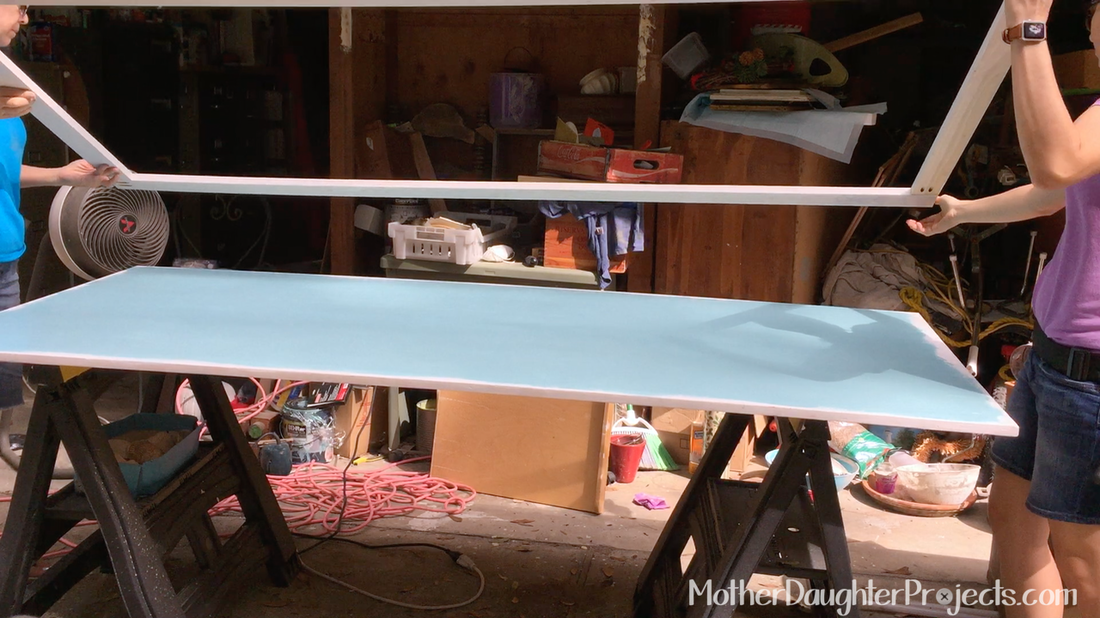
We headed back to the table saw to rip the marker board down into 6” slats. It was very helpful to do this as a team and communication and safety are key.
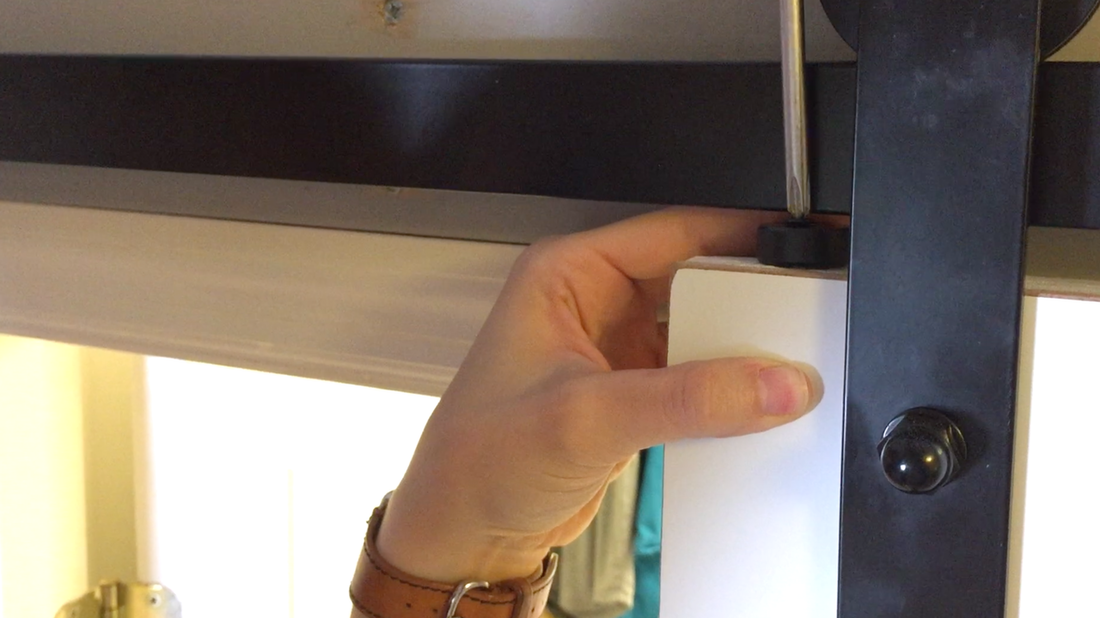
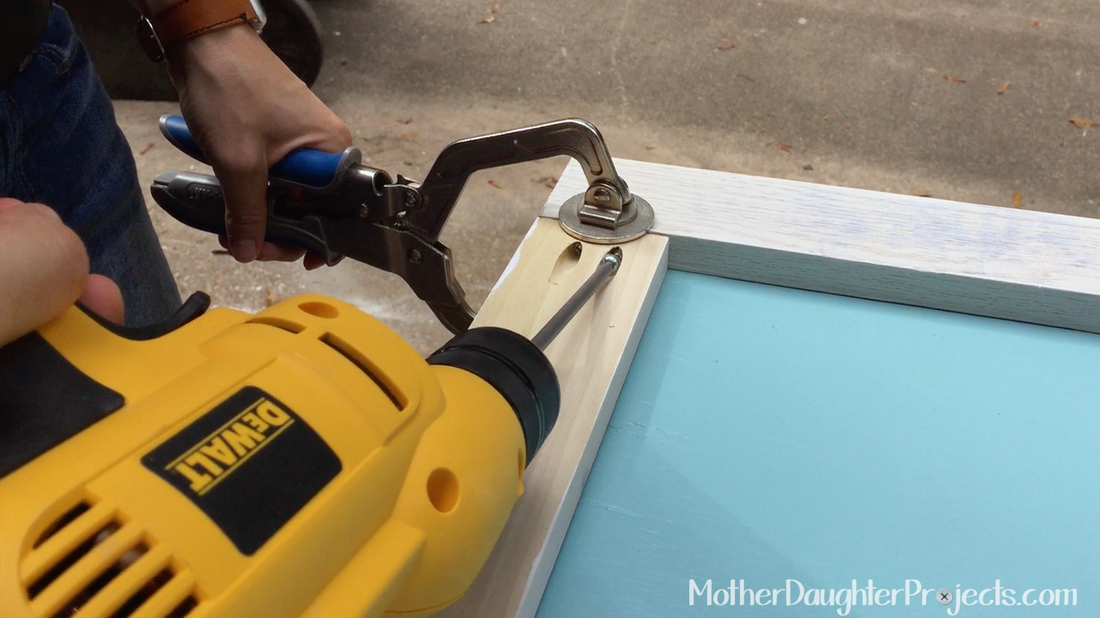
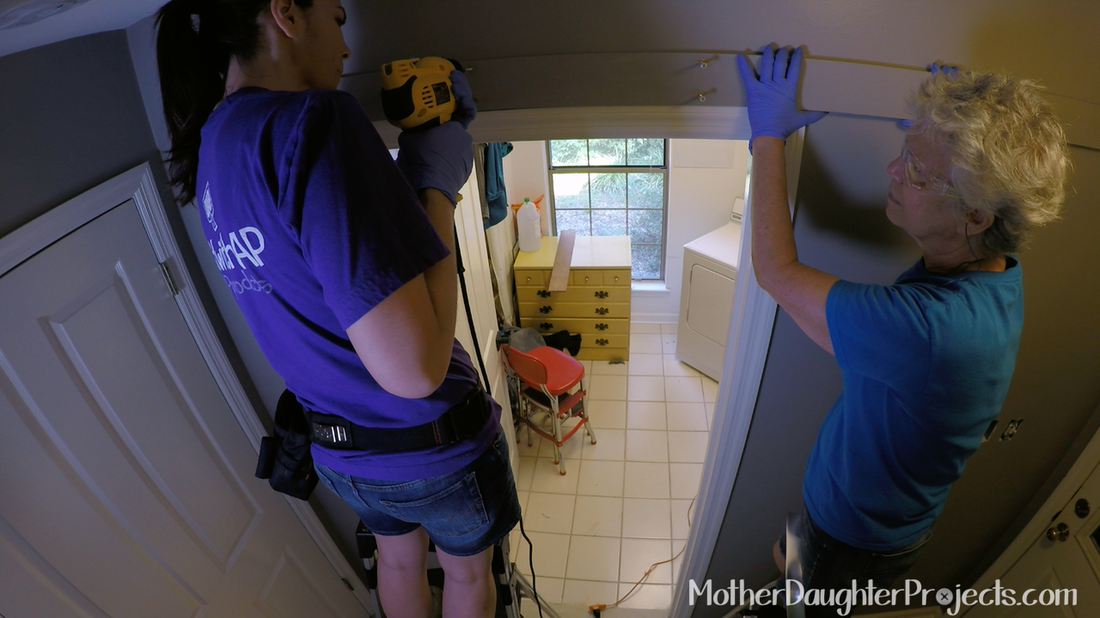
After it dried, we took the door inside and measured and marked the placement for the hanger holes. We pushed the hex bolts through the holes from the back, put the hanger in place and attached the remaining hardware.

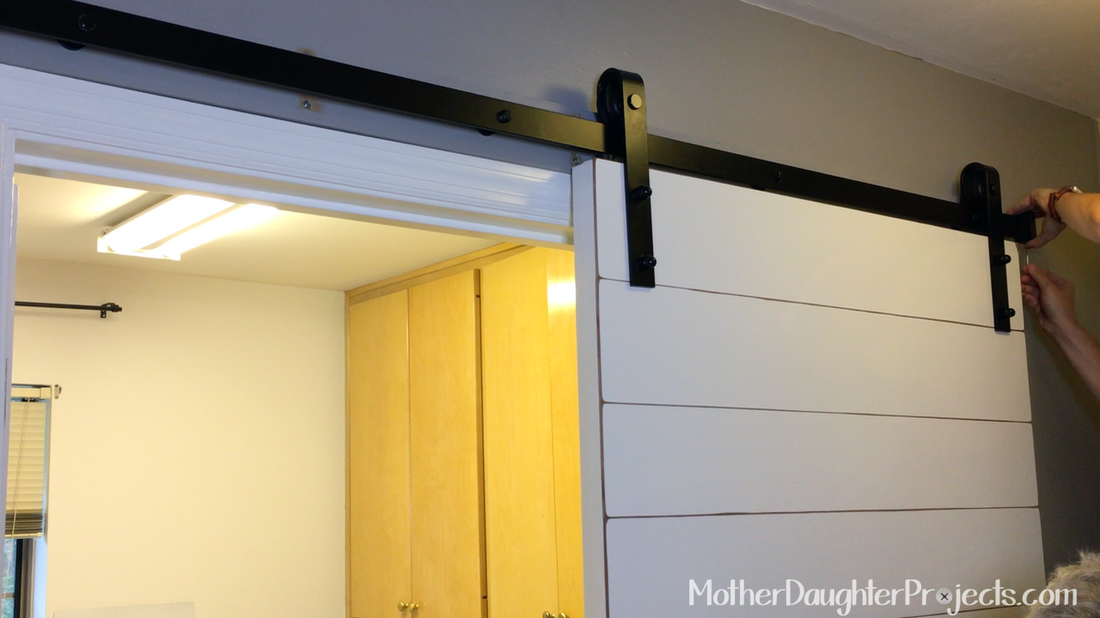
By reading the instructions, we found that if the rail did not line up to the wall studs, we needed to install a header board on which we would attach the rail.
We got the placement of the header board and marked the studs. We predrilled the screw holes into the header board.
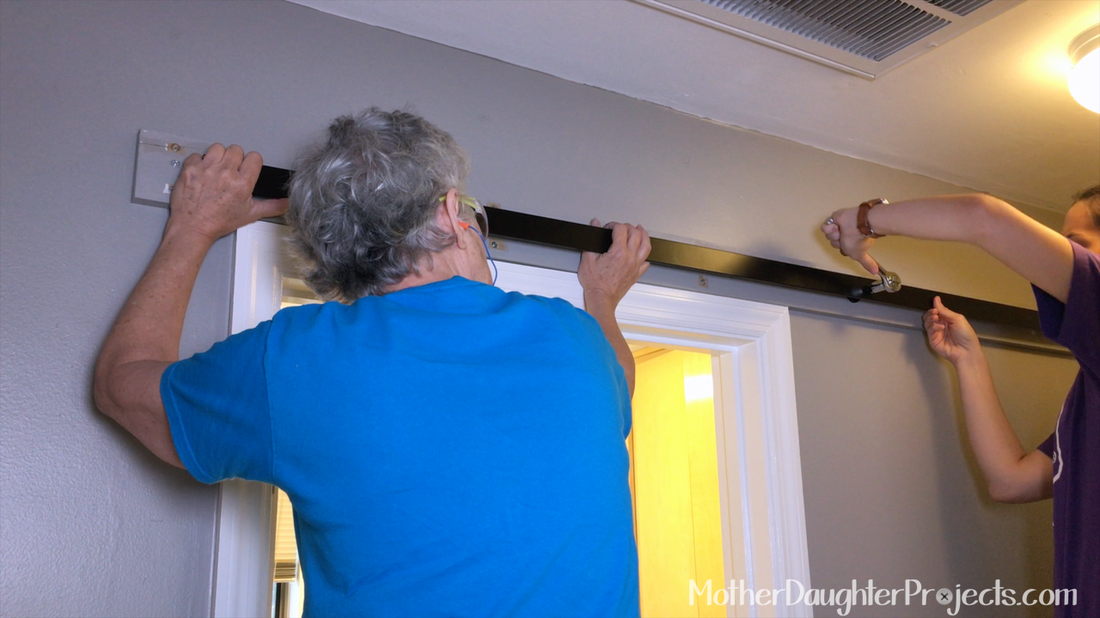
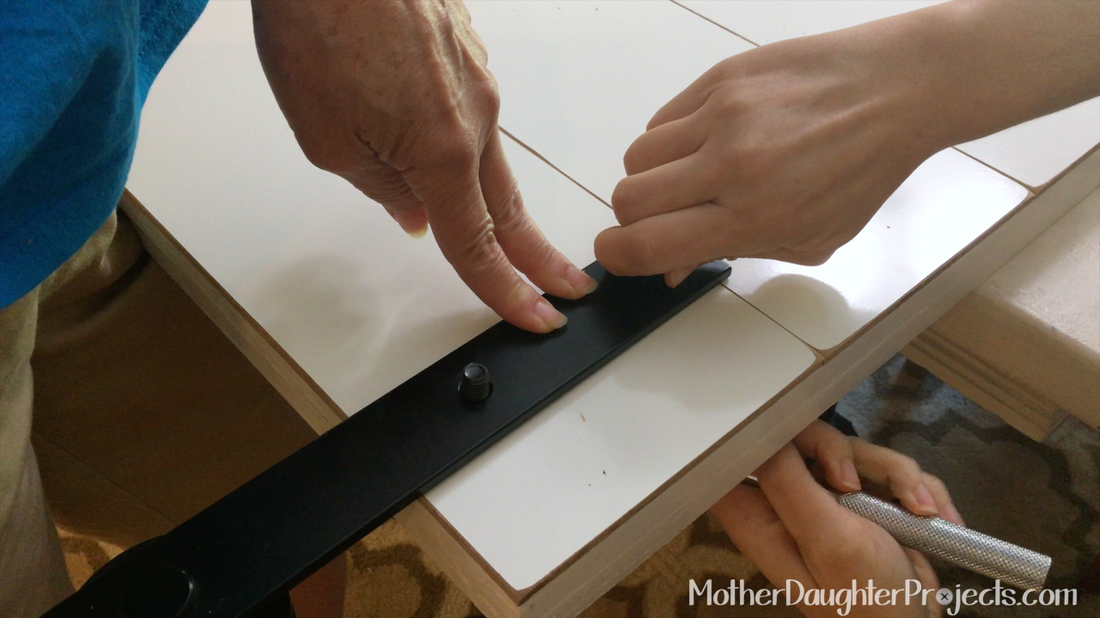
We finished attaching our header board and then marked and drilled our pilot holes for the rail. Using a ratcheting wrench we screwed the rail into place.

Now we head to the bottom of the door to install the door guide. Mom did not want to drill into her tile floor so we decided to use J-B Weld which is a quick setting epoxy that works on tile. We opened the J-B Weld, squeezed some into a container and mixed the epoxy together, we spread it on the floor guide and put it into place.
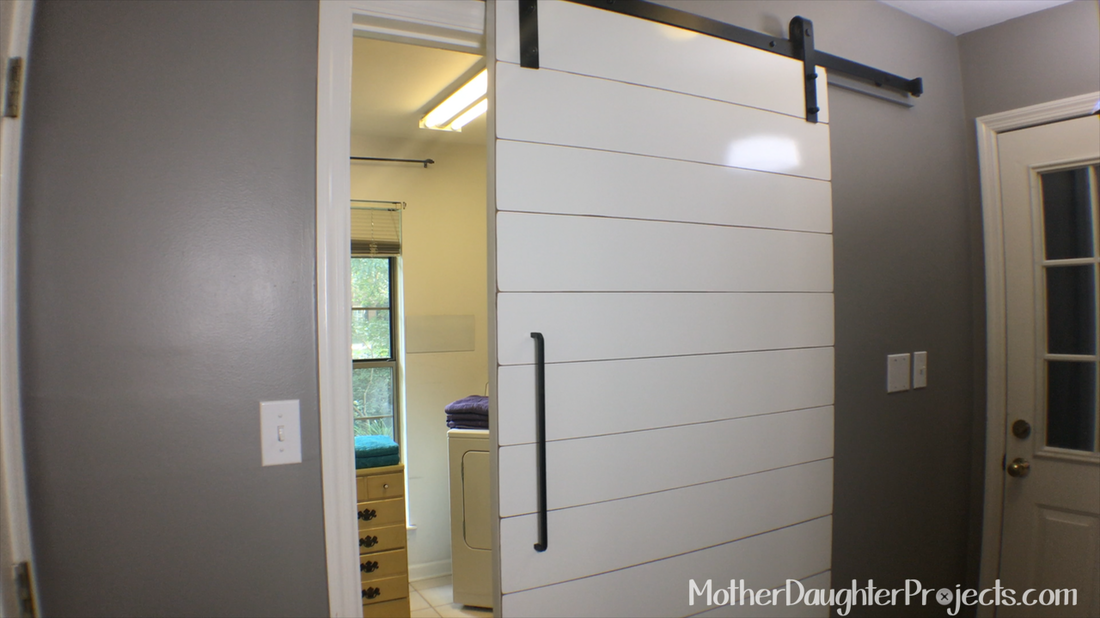
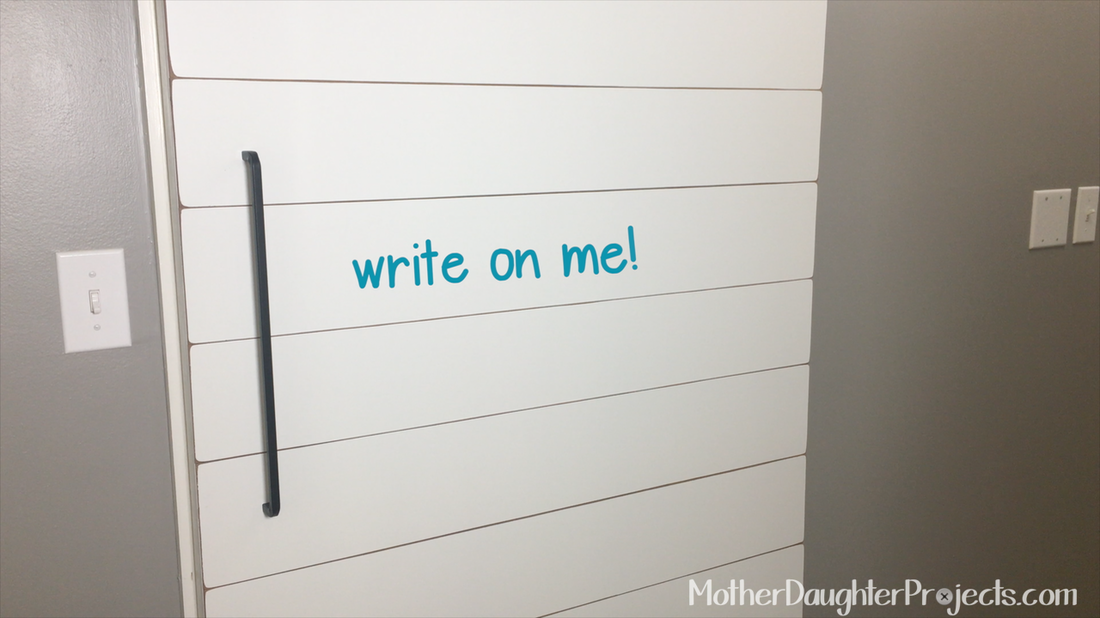
We added the handle and done!
The door has been in use for a few days now. The removal of the inward swinging door has made such a difference in the functionality of the space! There is space to move around with the bonus of letting more light into the dark hallway when the door is in the open position. It was well worth the effort and set backs to build and install this door!
Please note: We are not sponsored by any of the companies/products that we used. We were given the sliding door hardware to try out from CrownBolt. All thoughts and options are our own and based on our experience with the product. FYI: We are not professionals, and we don’t claim to be. This is what we found worked for our project. Yours may need a little different approach. Safety first! FYI: Affiliate links are being used on this page. Purchasing via these links help support MDP! Related Projects
13 Comments
Colleen
10/19/2016 12:00:14 am
How do you open the door from the laundry room side?
Steph
10/19/2016 03:14:58 pm
Hi Colleen, great question! We didn't really think about that till the end. Overall, being a laundry room most likely the door will not be closed when people are in it. Although you can slide it pretty easily by holding the frame that's on the inside of the door. If this was the door to a bedroom, bathroom, etc. we would have put a handle on both sides of the door.
Jean Eichhorn
12/23/2016 02:55:02 pm
There are inexpensive brass inserts that recess into a shallow hole. They are meant for the opening of pocket doors. It would work well for the laundry room side of this door too
Steph
12/23/2016 09:44:55 pm
Great idea!
Kai Sullivan
12/22/2016 07:07:40 am
what kind of building/home improvement skills do you or did you have before tackling this project. I feel that it is way above whatever skills I have (which is NONE).....
Steph
12/22/2016 09:41:33 am
Hi Kai! We both have learned by doing. We had no experience installing a door before this. We did a lot of research online, made a plan, then started. We ran into some obstacles along the way (which we almost always do with projects) but we figured out how to overcome them. We believe it's less important to know how to do everything going in, but more important to be willing to try taking on the project and be willing to figure it out if plan A or B doesn't work out. On top of all this, safety is key. We also make sure to follow all safety measures when taking on projects. Our goal in sharing our projects is to show anyone can do them and you don't have to be a pro. I will say this was not our first woodworking project, so for your first project I would start with something smaller :)
Carol Simen
12/22/2016 07:30:30 am
I have been wanting to do this to my powder room but I can't decide how to lock the door. Any suggestions?
Steph
12/22/2016 09:45:29 am
Hi Carol, we actually thought about that for the project but really didn't need it. We were going to look into hook and eye closers for the inside of the door. Just google that and you should find a bunch of options.
Christy Roppel
3/14/2017 05:04:02 pm
Hi! Is the bottom rail (guide) necessary? Can I use it with just the top rail? Thanks!
Steph
3/14/2017 05:12:37 pm
Hi Christy! Yes, it keeps the door in place and keeps it from swinging out and possible coming off the top track.
Danny
11/17/2018 01:16:18 pm
What type and size of wood did you use? Also, what type of screws were used in the header?
Nicole A Gillick
6/23/2019 11:01:31 am
Can you tell me where you purchased your handle?
Steph
6/23/2019 09:50:00 pm
Ikea Leave a Reply. |

Mother Daughter Projects
|