|
text by Vicki Sign up here to join our weekly email newsletter!
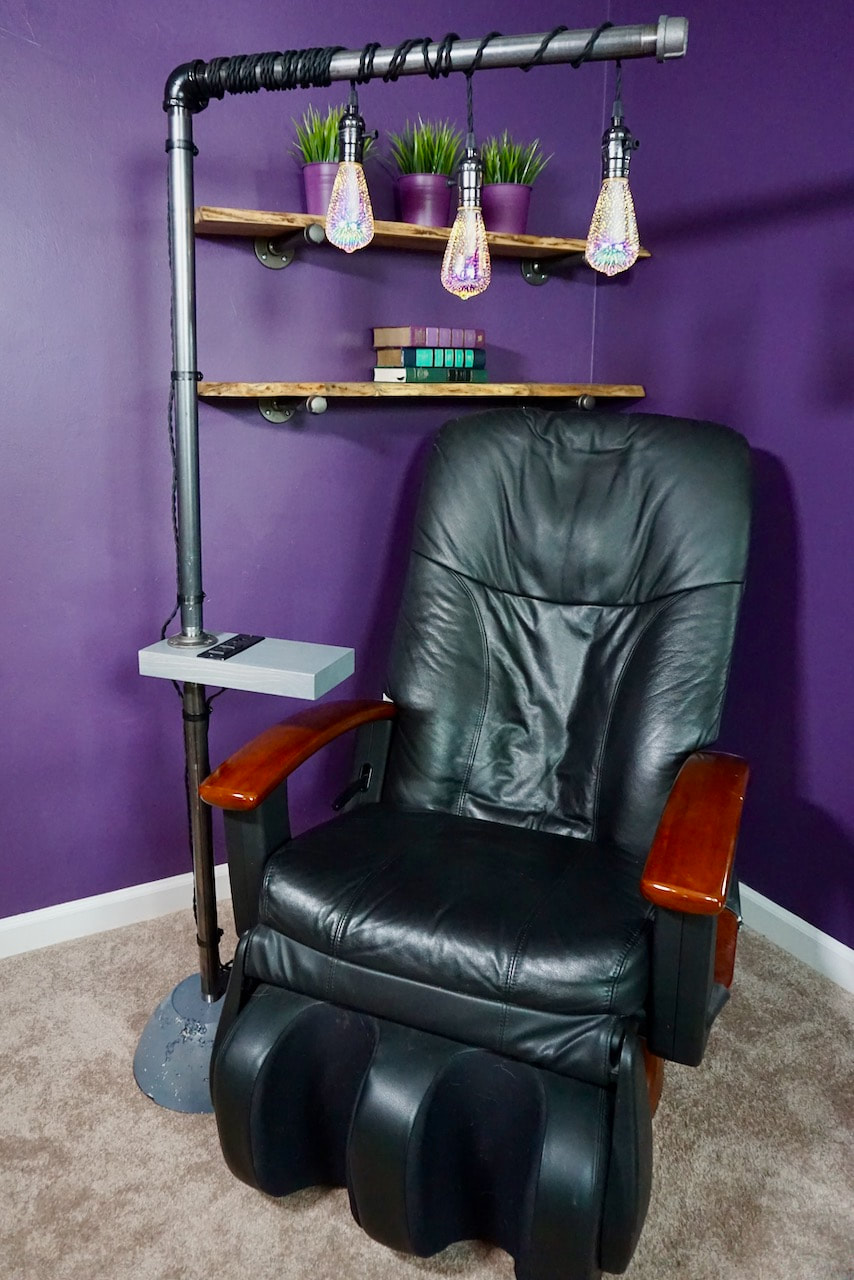
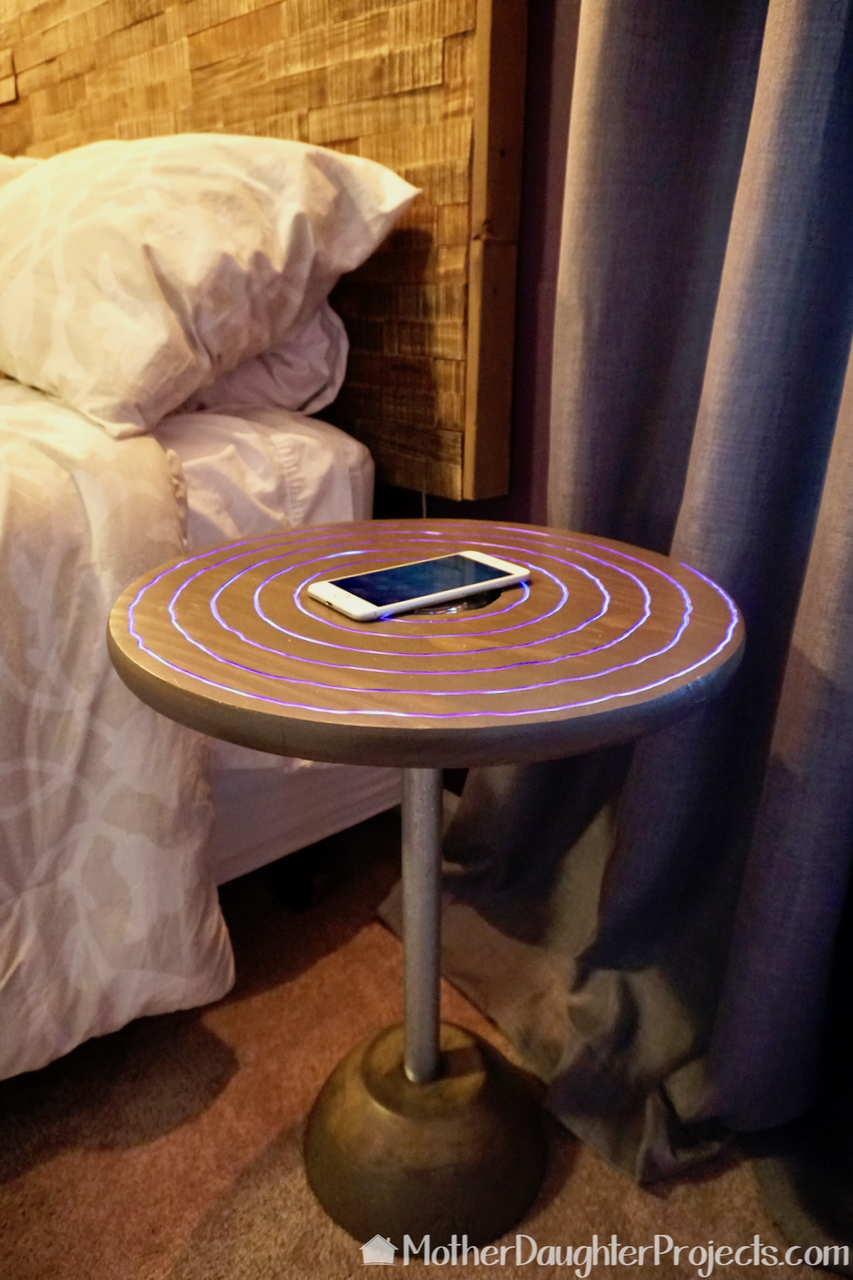
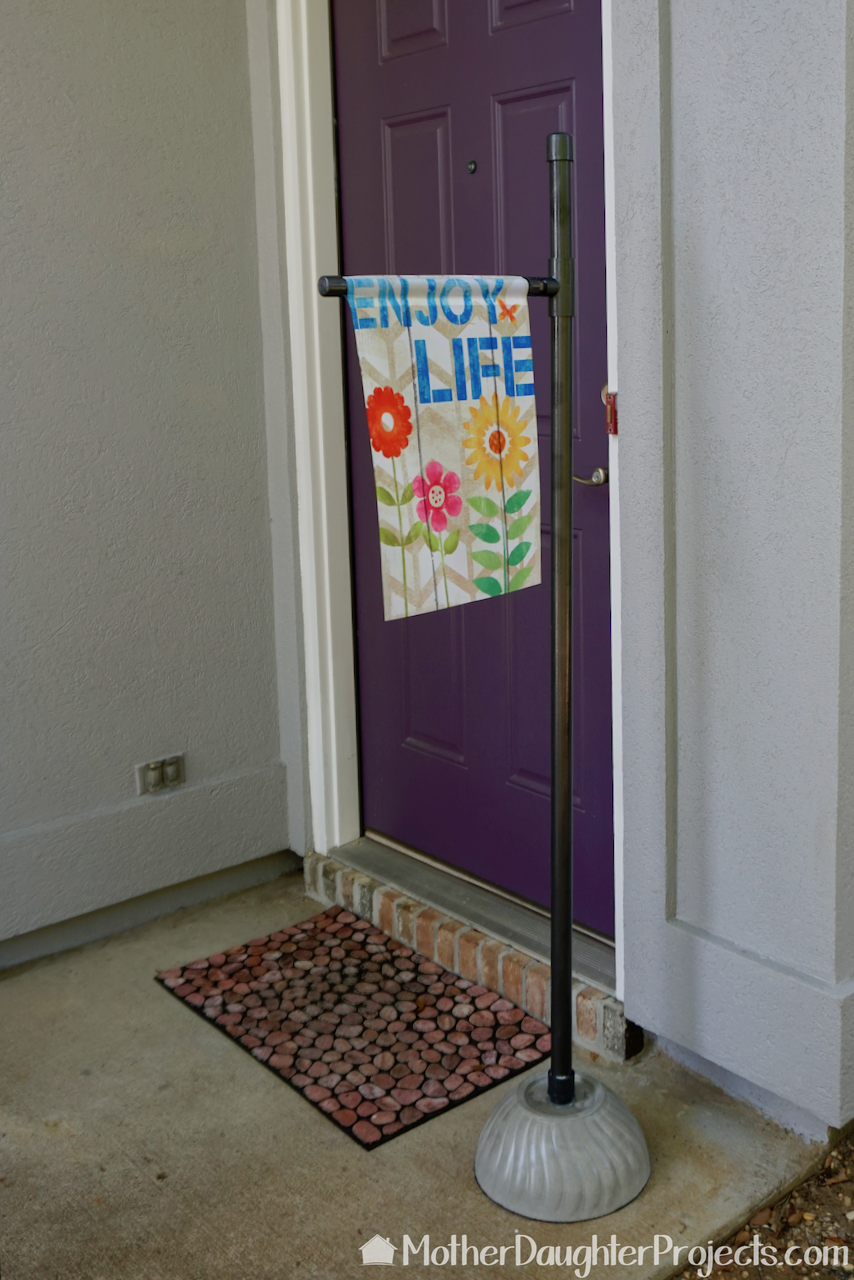
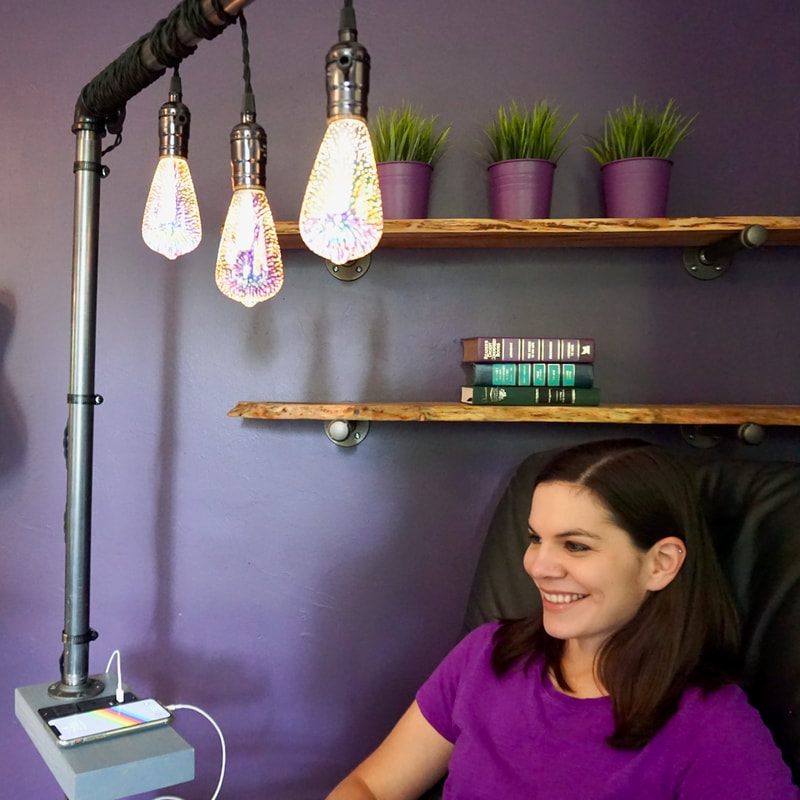
One of the most versatile concrete objects we've ever made is this base with metal pipe cap in the center. We originally used it for our A-frame Christmas tree and then we reimagined the base in use as the support for an outdoor garden flag stand. We then used it for two night stands and the metal pipe fireworks lamp and for a crate Christmas display! See? Versatile!
The base has never been the sole subject of a post, but with this post we fix that! Read on or watch the video to see how it is made! 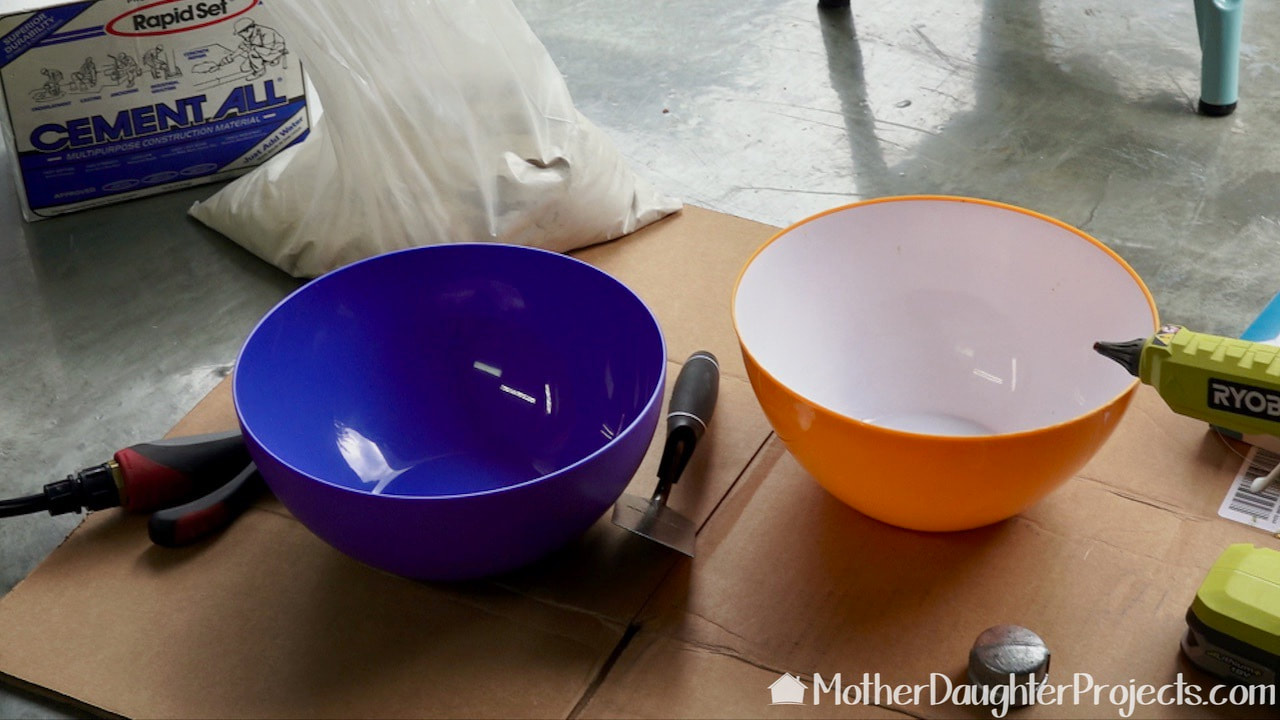
To get the look we wanted, we selected a plastic bowl that is much narrower at the bottom than at the top. We've used different ones over the years. Any plastic bowl seems to work.
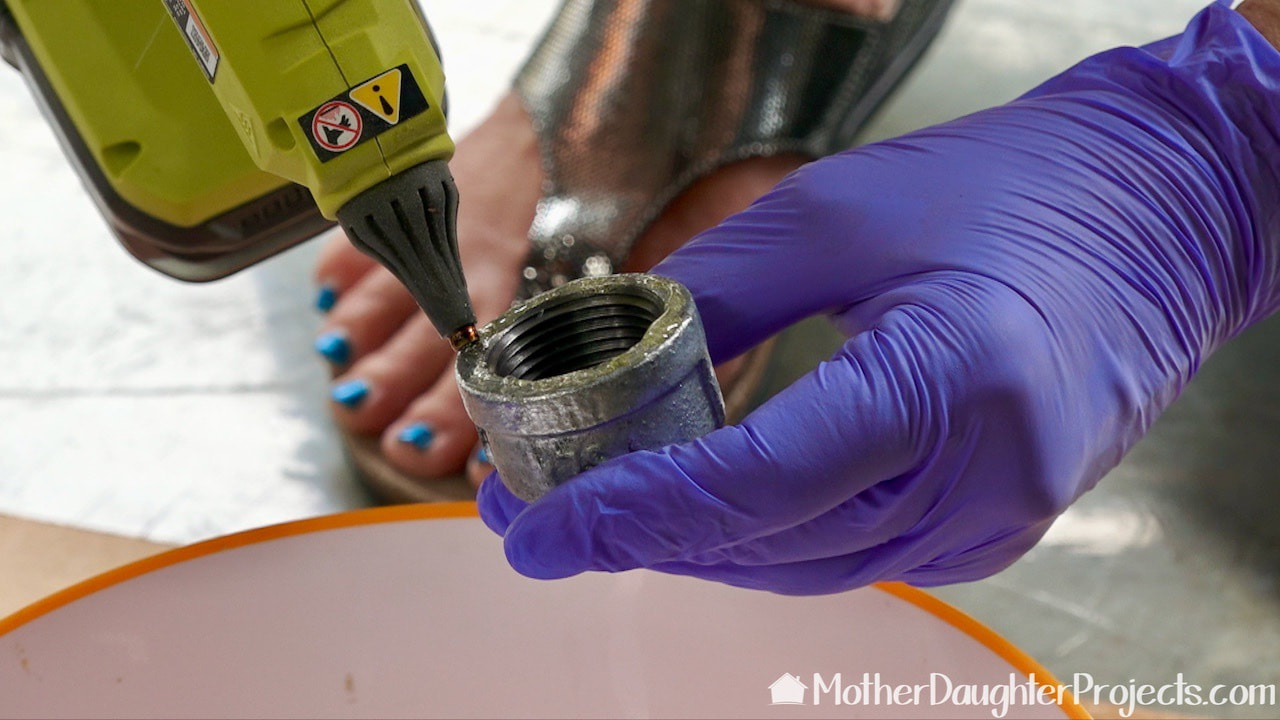
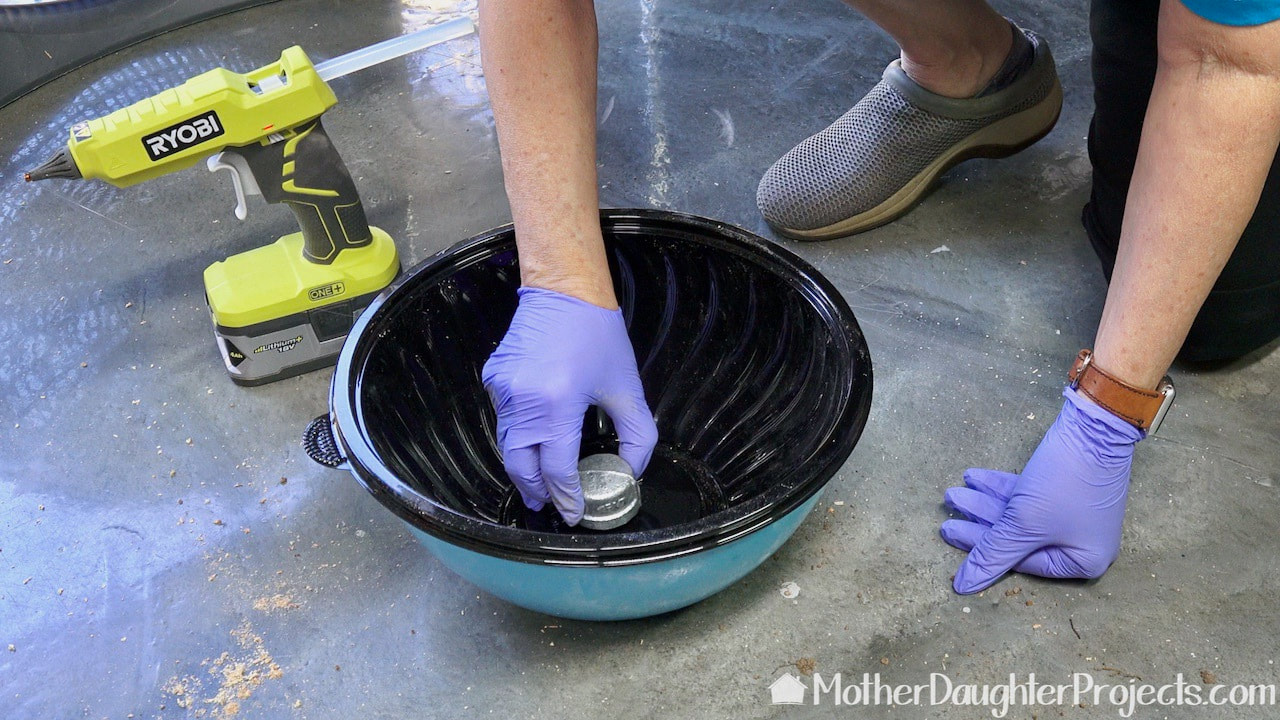
Before the next step, be sure the bowl is clean and free of grease. Hot glue the pipe cap to the center of the bottom of the bowl.
Press and hold the pipe cap in place until the hot glue dries.
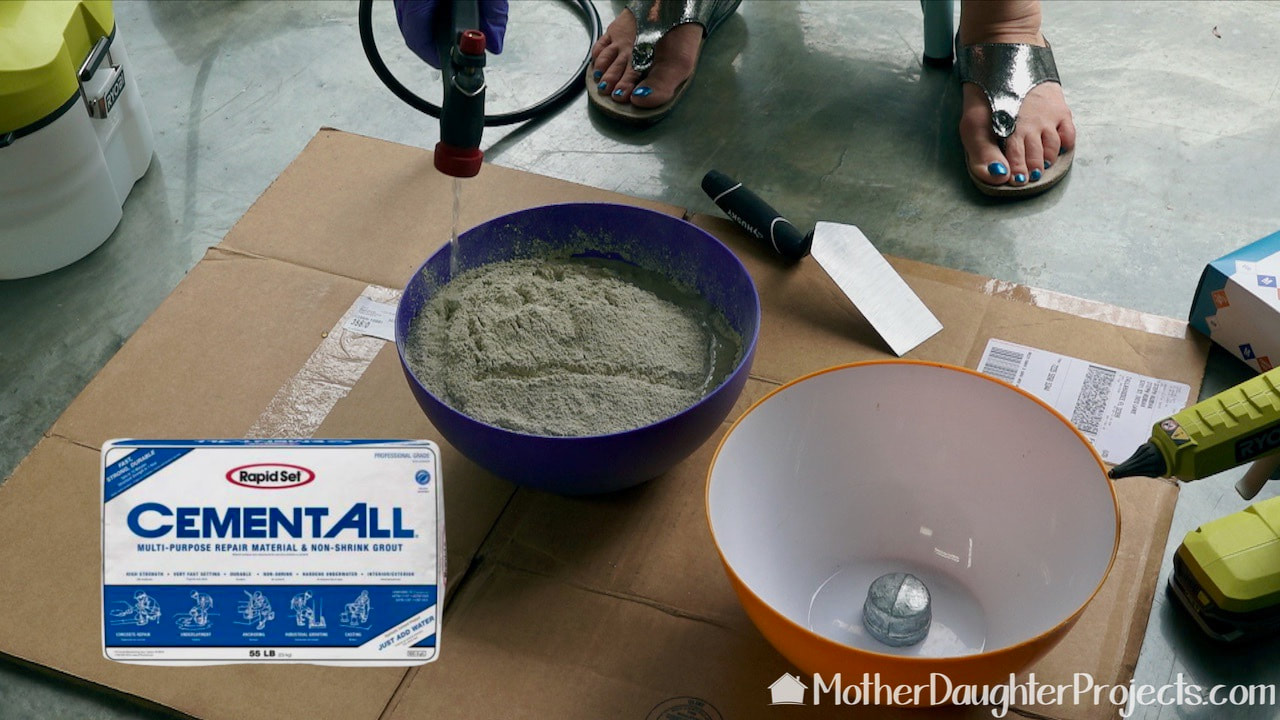
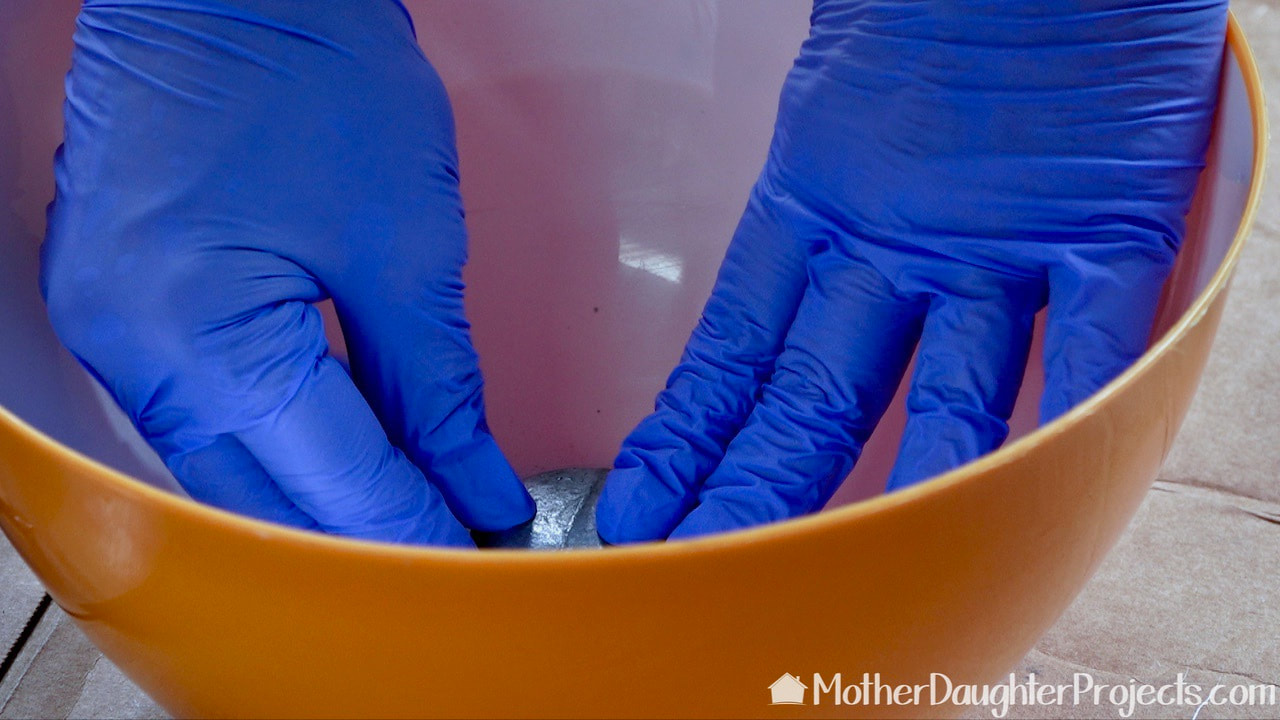
Mix up whatever concrete or cement you are using following the instructions on the packaging. Wear appropriate safety gear such as a mask, eye protection, and gloves.

Gently add the cement to the base to keep from moving the pipe cap out of place. Note: we've made five of these and never had an issue with the pipe cap moving.
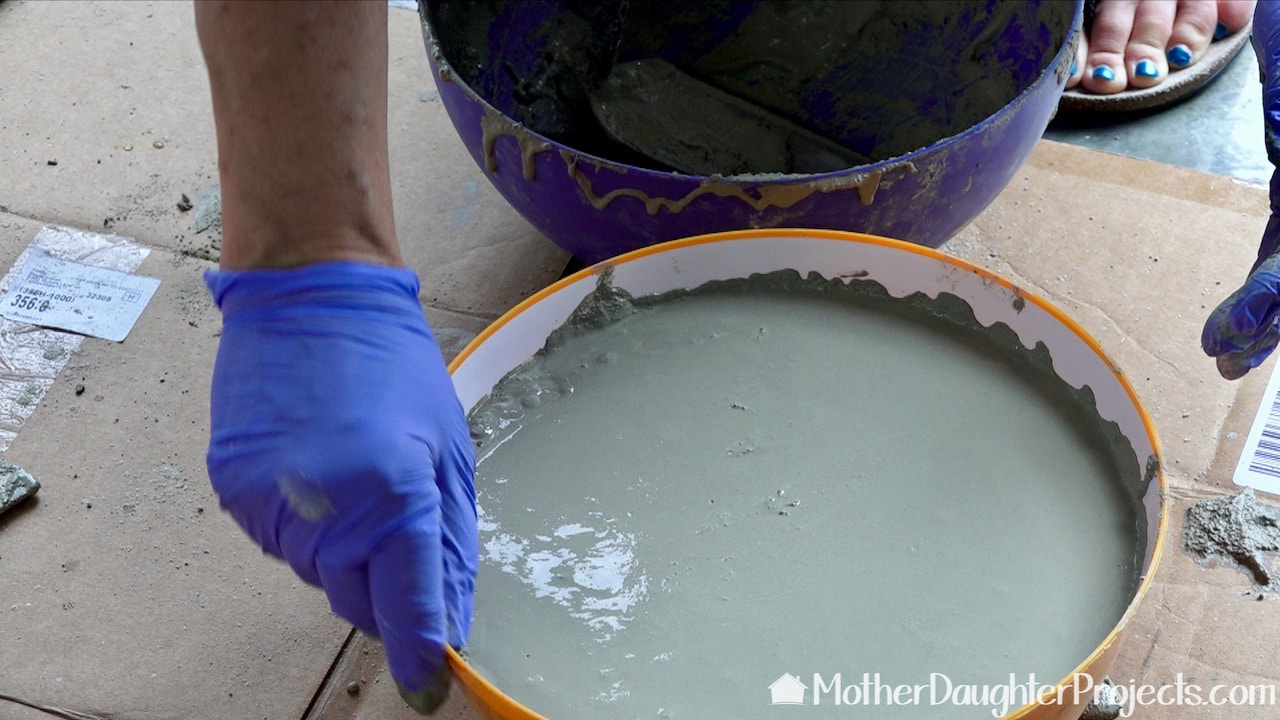
Smooth the top and bounce out any bubbles. We mixed up a bit more to fill to the top.
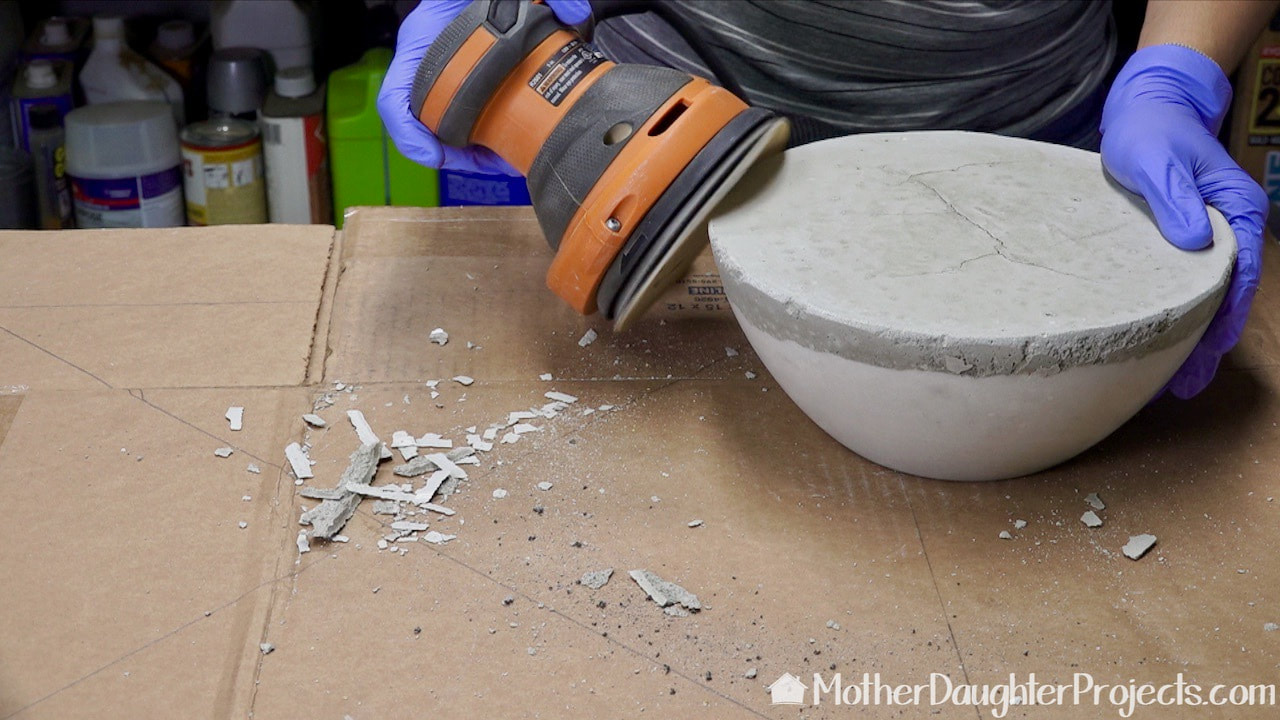
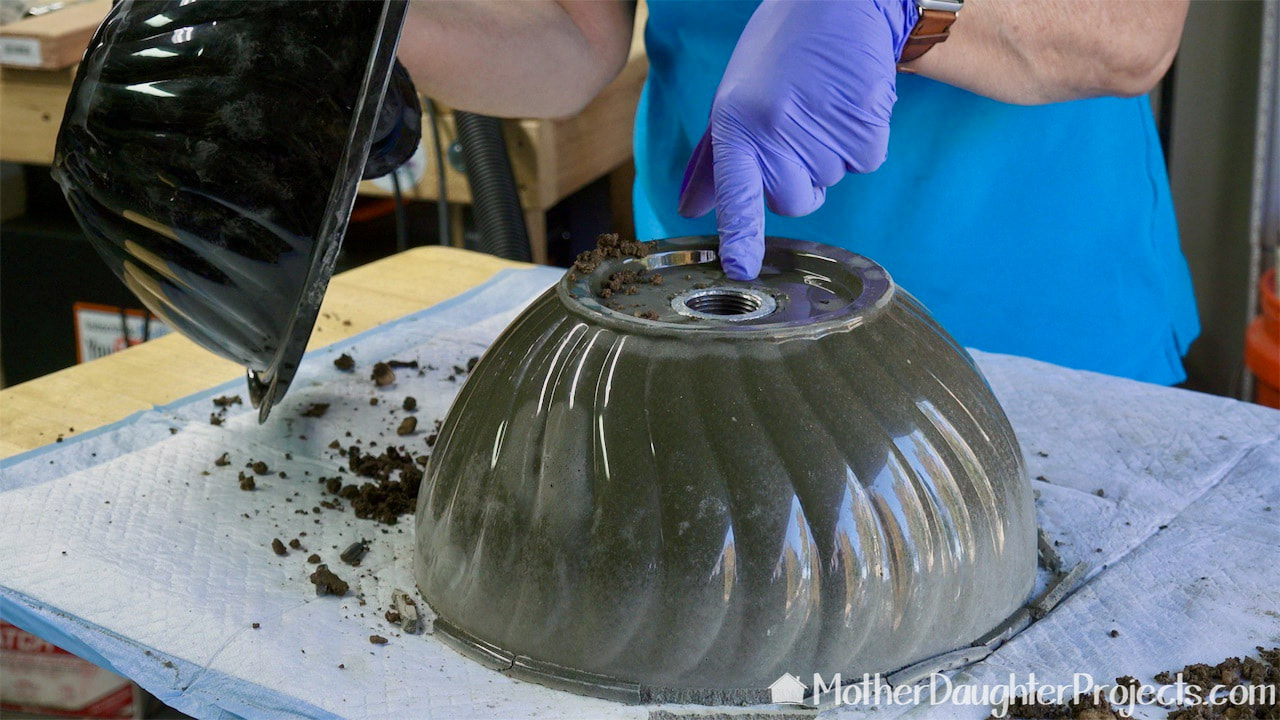
Once the cement cured, we took it out of the mold. Notice the crack in the top. This particular base has been in use many years and the crack never became an issue. Before the concrete fully cured, any rough edges were sanded.
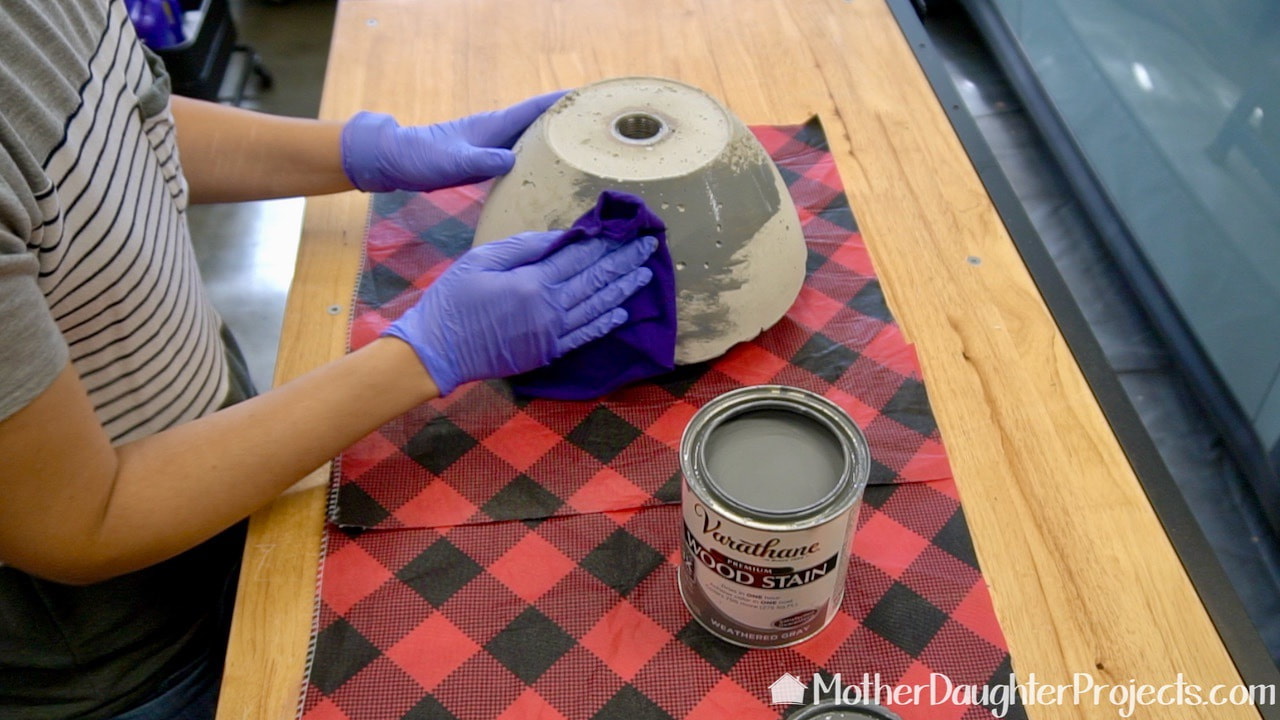
The base can be left natural and sealed or it can be stained. This one was stained with Rust-Oleum Varathane wood stain in weathered grey.
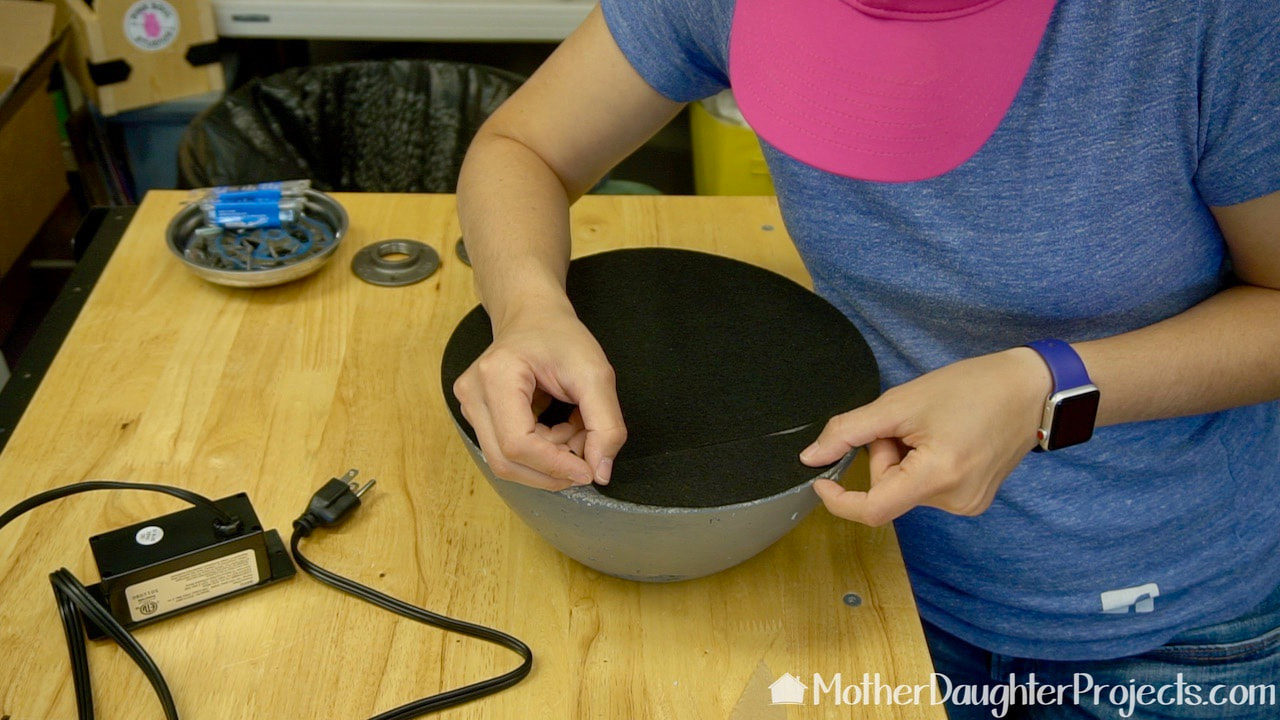
Concrete can scratch so all the bases we've ever made got a covering of sticky back felt.
This is the first base we made. We used a decorative deli bowl. This bowl was set into a more rigid bowl for stability.
This is the base right out of the mold. It's still drying but it's perfect!
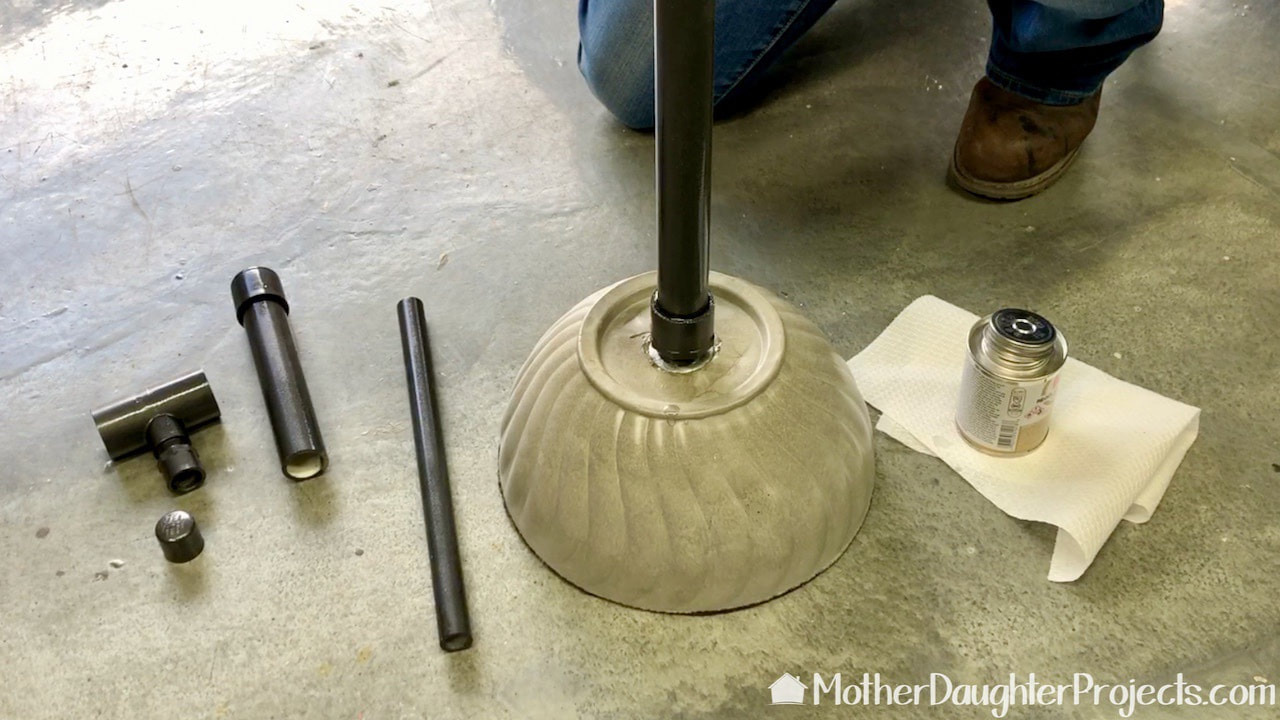
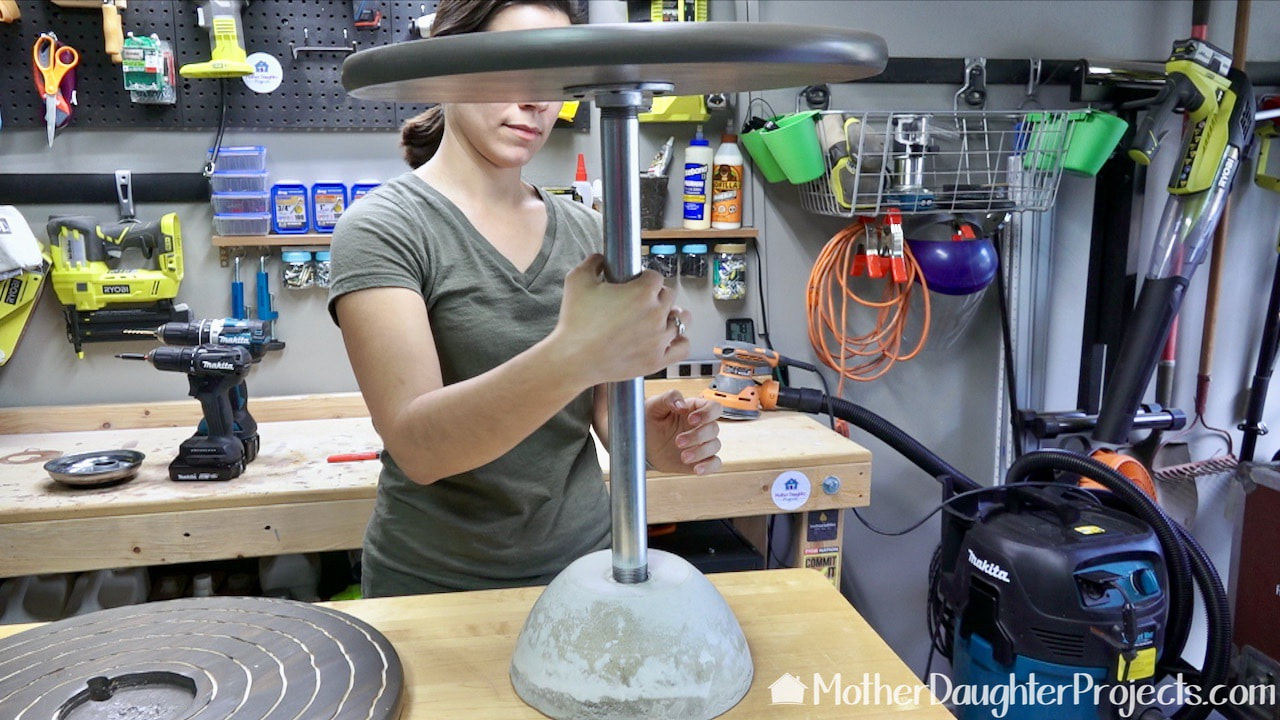
With the base dry and upright, any one inch diameter metal pipe can be screwed in. For the garden flag stand, which you see above, we used PVC fittings. Please refer to that video to see it come together.
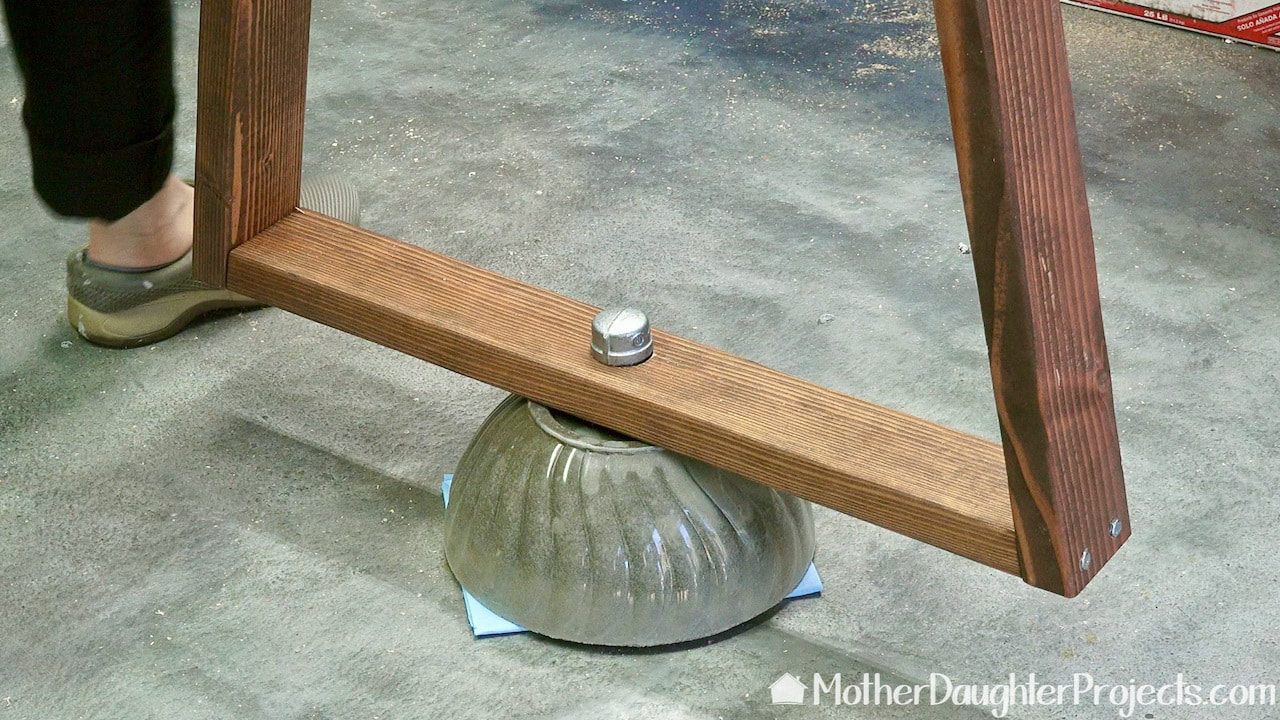
To use the base for the A-frame Christmas tree a small piece of pipe was put through a hole in the tree base and all secured with a metal pipe cap.
This is one of the end tables that use the base. This base eventually got a bit of brown stain.
What do you think? How would you use one of the bases inside or outside of your house?
Link to all projects using concrete base:
Please note: This is not a sponsored post. FYI: We are not professionals, and we don't claim to be. This is what we found worked for our project. Yours may need a little different approach. Safety first! FYI: Affiliate links are being used on this page. Purchasing via these links help support MDP! Related Projects
0 Comments
Leave a Reply. |

Mother Daughter Projects
|