Mother Daughter Projects

  • Blog
  • About
    • Contact
    • Privacy Policy
  • Tools
    • Tool Tuesday
  • Maintenance
  • Improvement
  • Decor
  • Tech
  • Blog
  • About
    • Contact
    • Privacy Policy
  • Tools
    • Tool Tuesday
  • Maintenance
  • Improvement
  • Decor
  • Tech

DIY for Homeowners

It's Always Tool Time in Our Shop!

8/17/2017

2 Comments

 
​text by Vicki     Sign up to get Mother Daughter Projects updates in your email!
Picture
It's no secret, I tend to collect and save what most people label as "junk!" It frustrates Steph but every once in a while that hoard comes in handy.

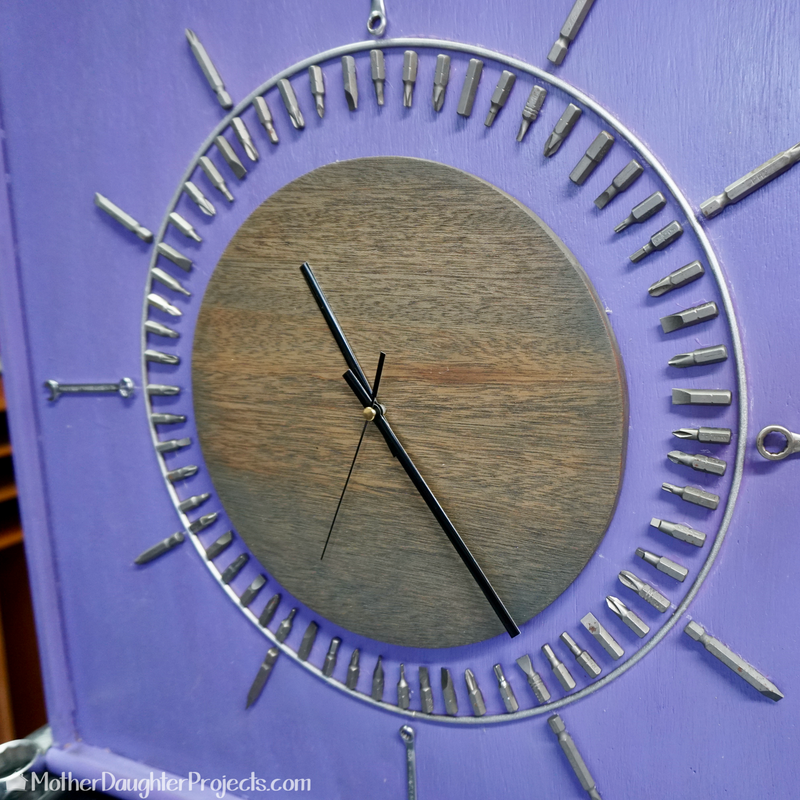
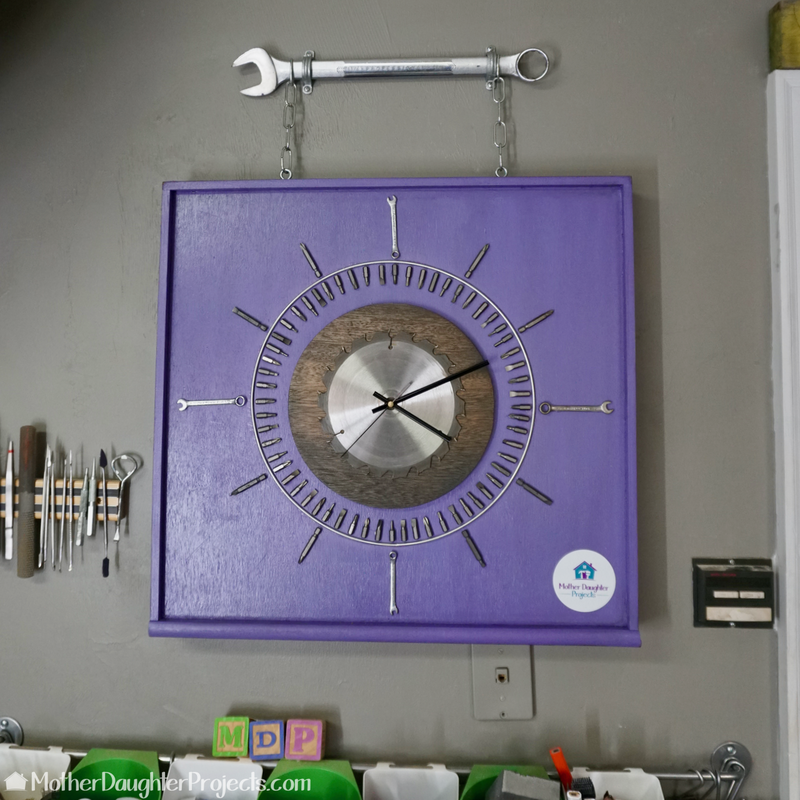
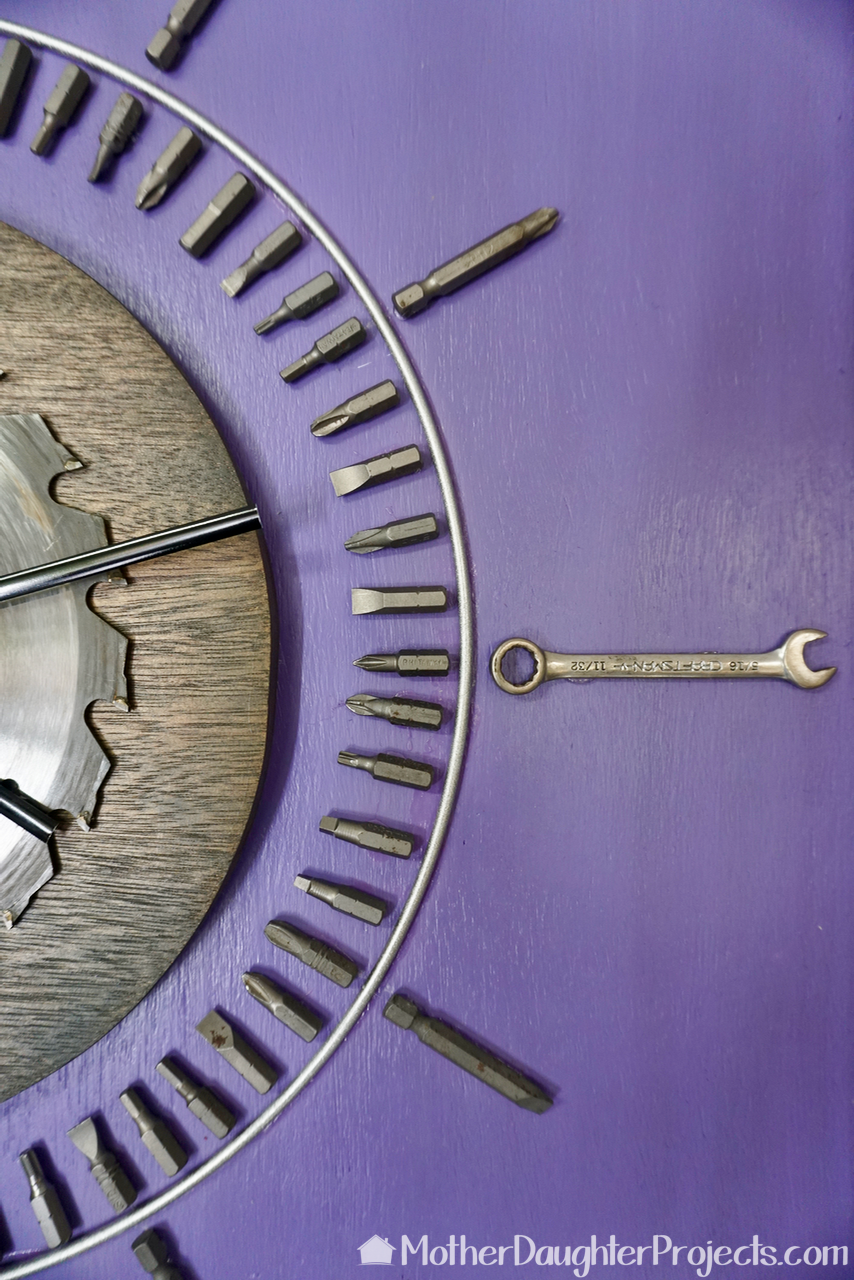
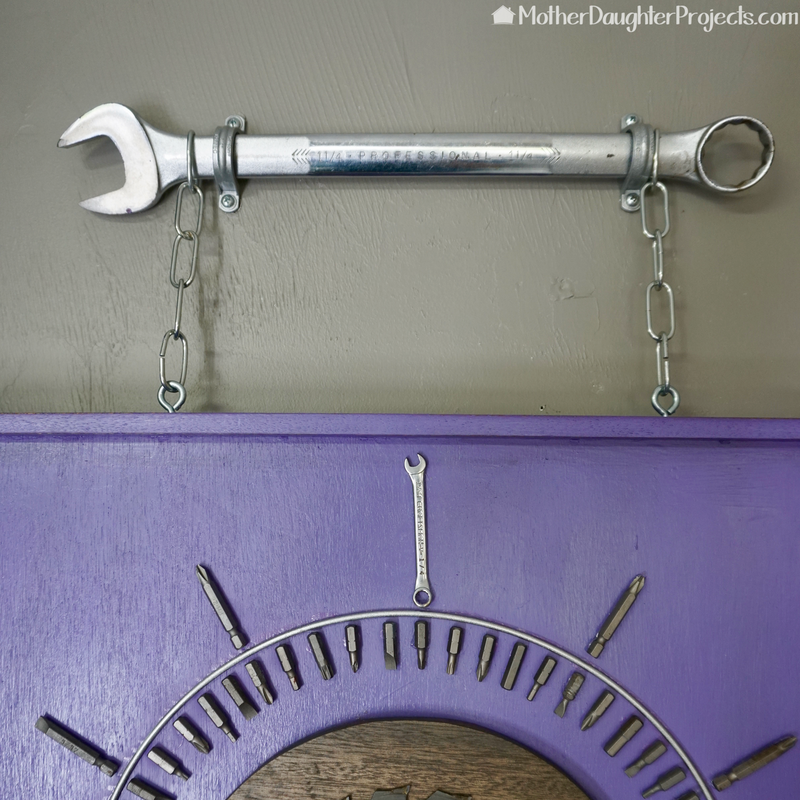
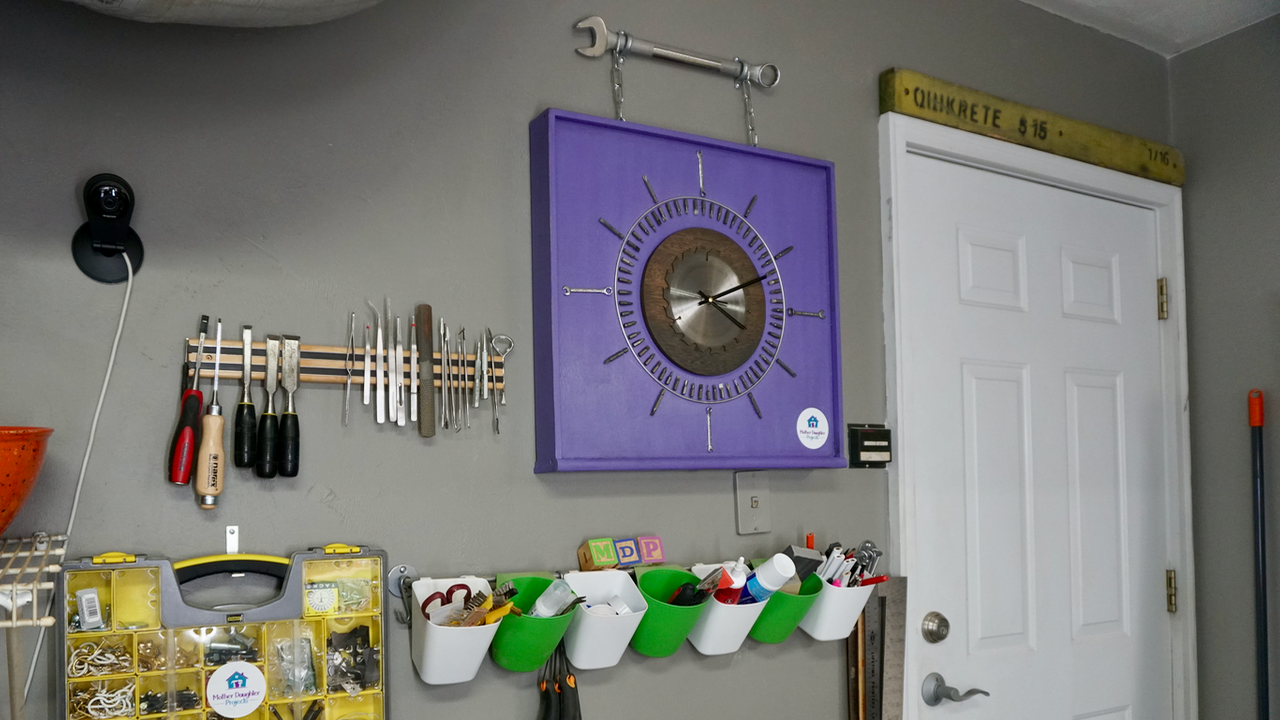
This "use what you have" clock project is an example of that. I have to tell on myself. We got a nice set of drill bits and drivers and Steph threw the old ones in the trash. I saw them and promptly fished them out, much to her dismay! She rolled her eyes and wanted to know what I was going to do with them. 

See those little bits up there in the picture, the seconds' markings on the clock? Those are the "fished out of the trash" bits! (After seeing the finished product, Steph apologized for rolling her eyes!)
Learn how to use old driver bits, wrenches, saw blades, and more to make a shop clock perfect for a garage!
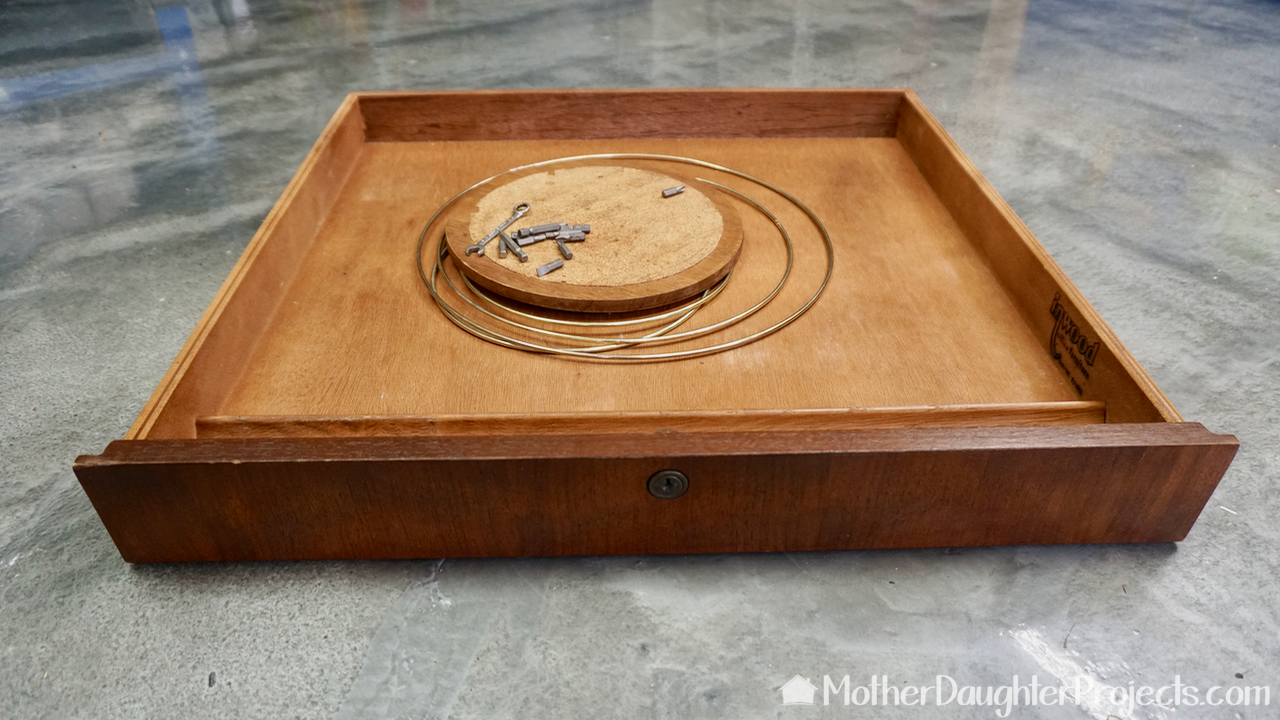
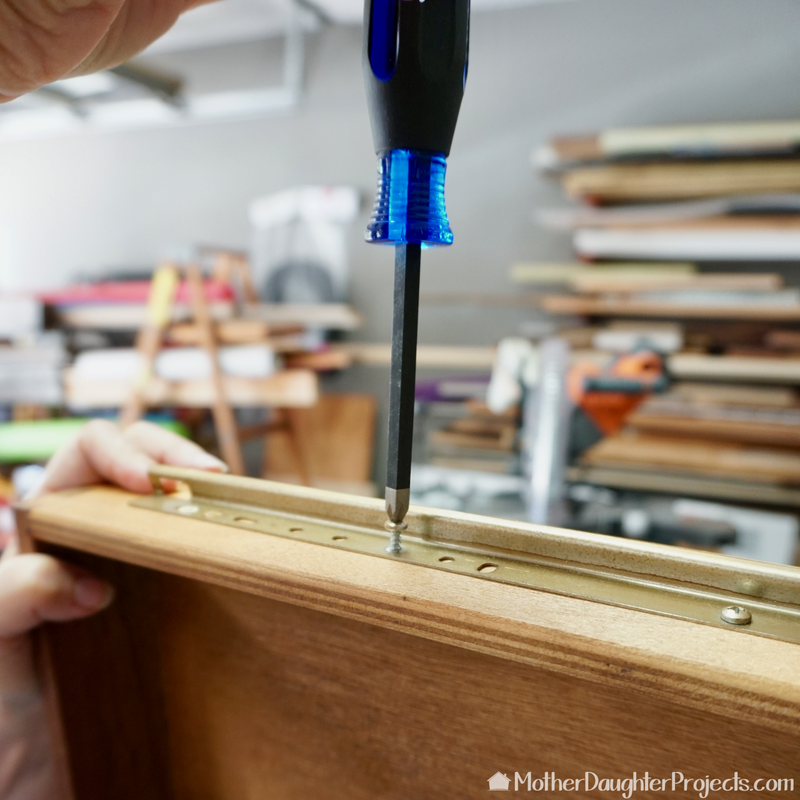
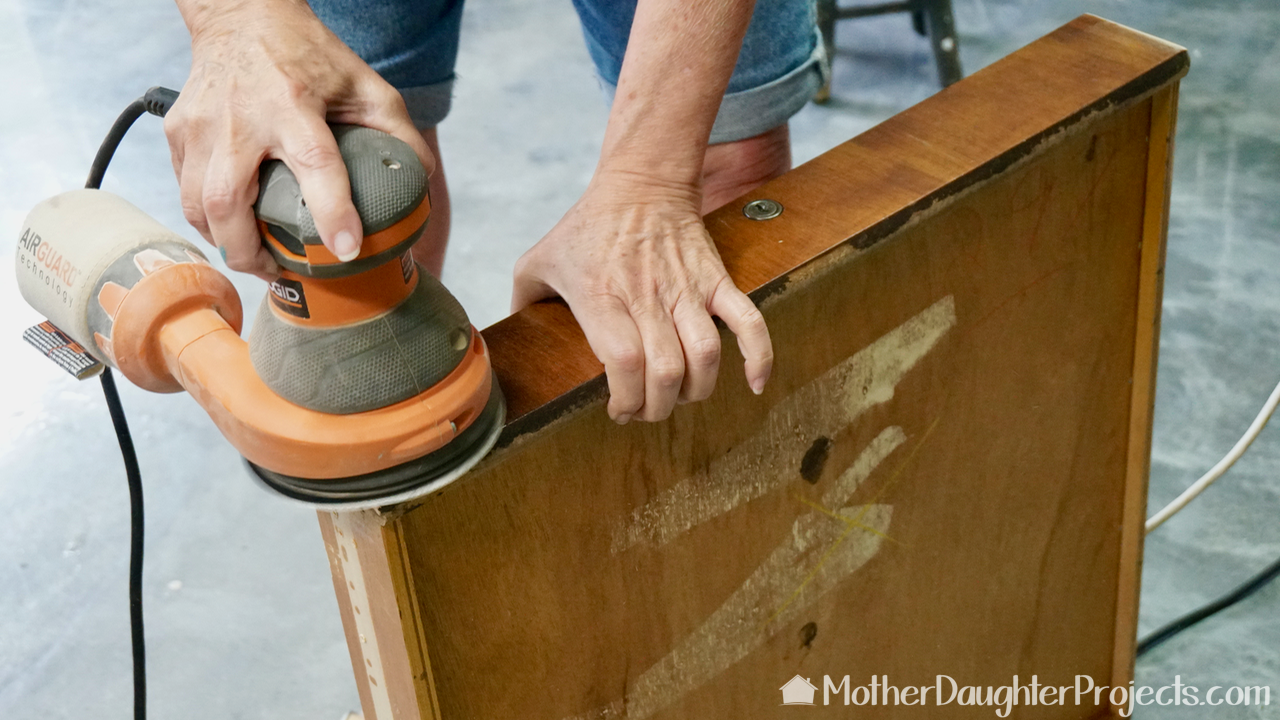
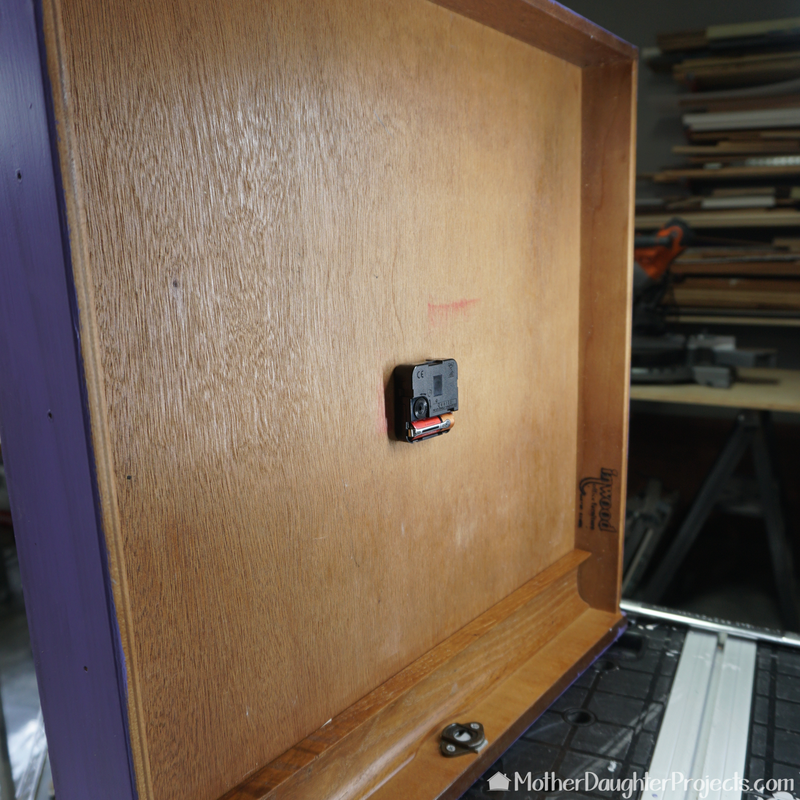
The inspiration for this clock actually started with this center drawer I found curbside. I left the desk (it was big and bulky and I couldn't put it in my car) but took all the drawers. This is the first project with the salvaged drawers. To me, the back side looked like the perfect canvas on which to build a clock.
Materials:
  • Clock mechanism (Amazon)
  • Diablo SandNet Sandpaper (Home Depot)
  • Makita Wet/Dry Vac (Home Depot)
  • Rust-Oleum Carbon Grey Stain (Amazon)
  • DAP Rapid Ruse (Amazon)
Learn how to use old driver bits, wrenches, saw blades, and more to make a shop clock perfect for a garage!
We started by removing the slide hardware from the drawer. See that screwdriver, it's so new it's not available yet at the Home Depot. Who knew a screwdriver could be improved! These Husky Dimond Tip Screwdrivers are the best!
Learn how to use old driver bits, wrenches, saw blades, and more to make a shop clock perfect for a garage!
To make it look less like a drawer, we used a jigsaw to remove the front edges so the front was now flush with the sides.
Learn how to use old driver bits, wrenches, saw blades, and more to make a shop clock perfect for a garage!
We gave the edges, front, and back a little sanding.
Learn how to use old driver bits, wrenches, saw blades, and more to make a shop clock perfect for a garage!
We found the center of the drawer and drilled a hole big enough to accommodate the clock mechanism.
Learn how to use old driver bits, wrenches, saw blades, and more to make a shop clock perfect for a garage!
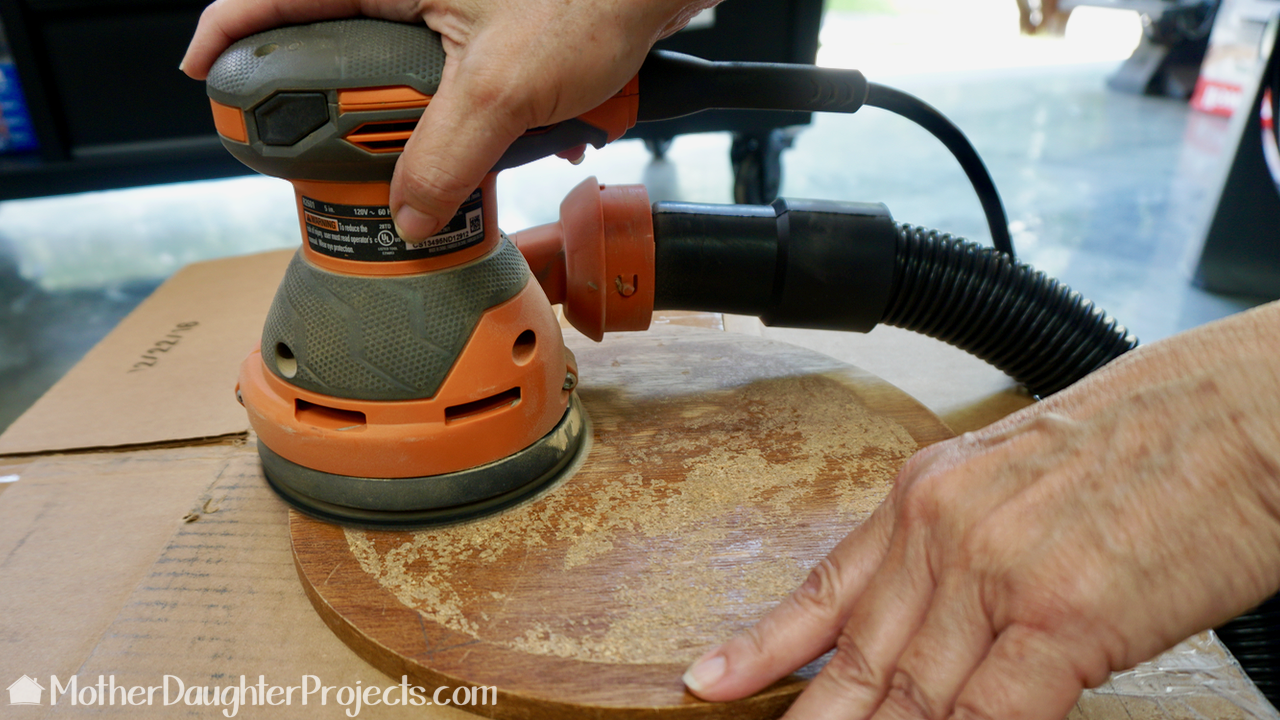
This is a wood and cork kitchen hot pad. The cork was removed with a scraper and then sanded smooth. We are using Diablo SandNet sandpaper (our new favorite). In case you're wondering, the sander is connected via that hose to a Makita shop vac. On this particular model, when the sander is plugged into the vac, and dust collection automatically turns on. It has really cut down on the amount of sanding debris that gets into the air.
Learn how to use old driver bits, wrenches, saw blades, and more to make a shop clock perfect for a garage!
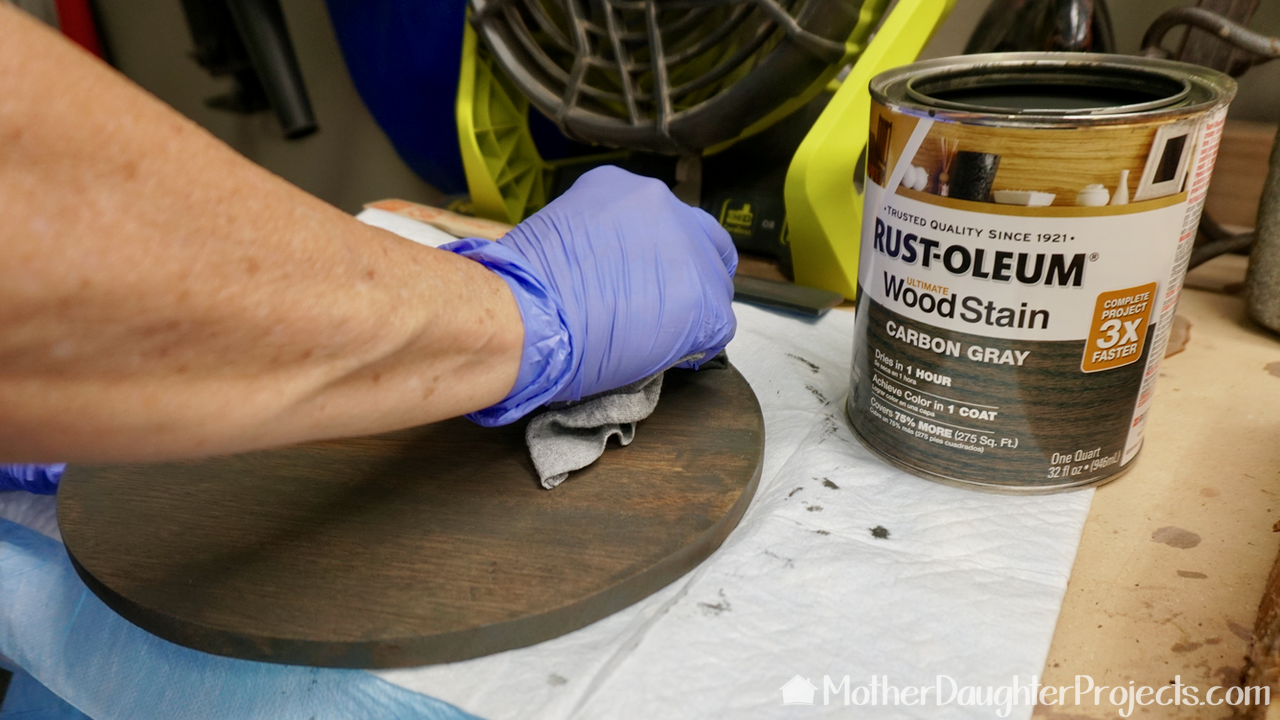
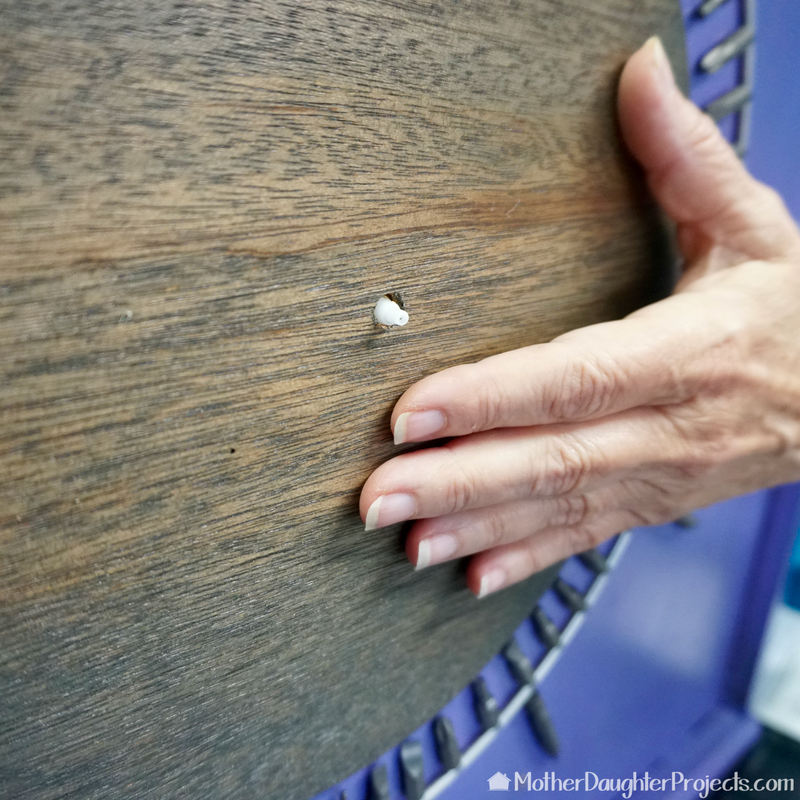
Once sanding was complete, this stain by Rust-Oleum was used. It's a new color and we really like it. A hole was cut into the center and we finished the round with a little poly.
Learn how to use old driver bits, wrenches, saw blades, and more to make a shop clock perfect for a garage!
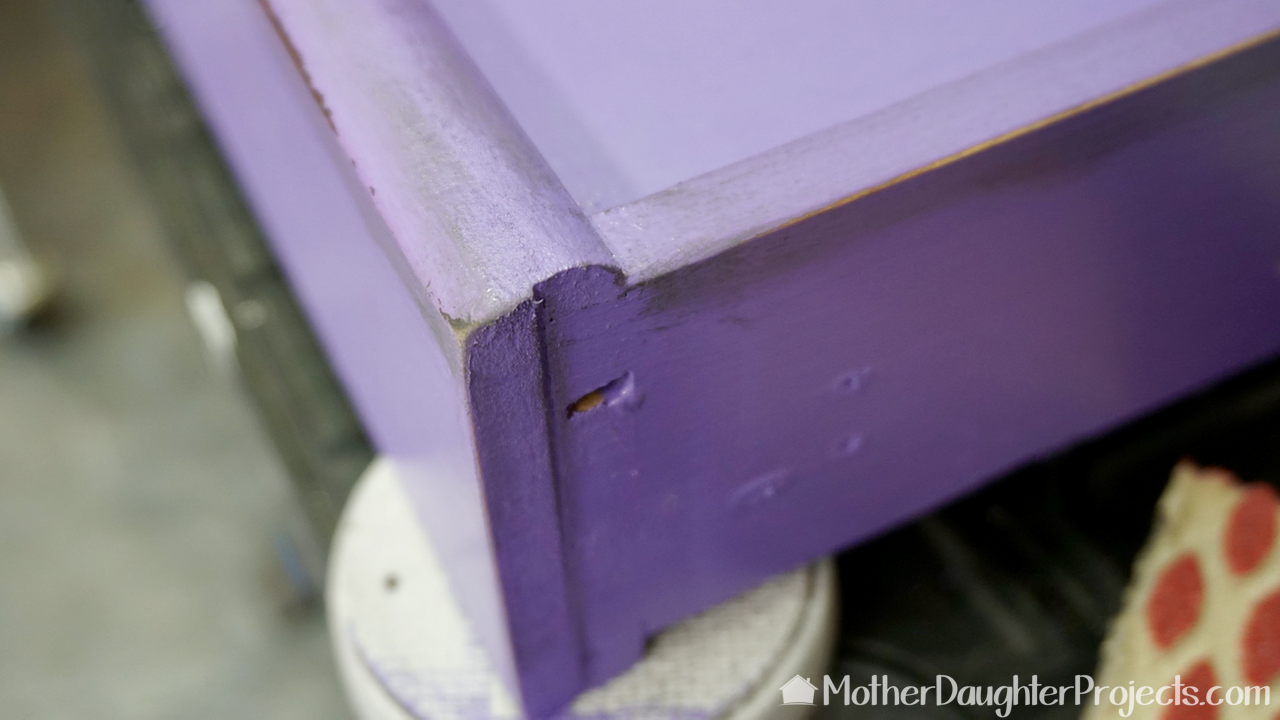
The body of the box was painted with some Behr oops paint we got at The Home Depot. This paints sells for much less. We distressed the edges and used a little of the carbon grey stain to age the piece. Wipe on, wipe off--a little stain goes a long way.
Learn how to use old driver bits, wrenches, saw blades, and more to make a shop clock perfect for a garage!
I found a simple clock face on the internet, enlarged and printed it. I used it as a guide to chalk in the major lines of the clock.
Learn how to use old driver bits, wrenches, saw blades, and more to make a shop clock perfect for a garage!
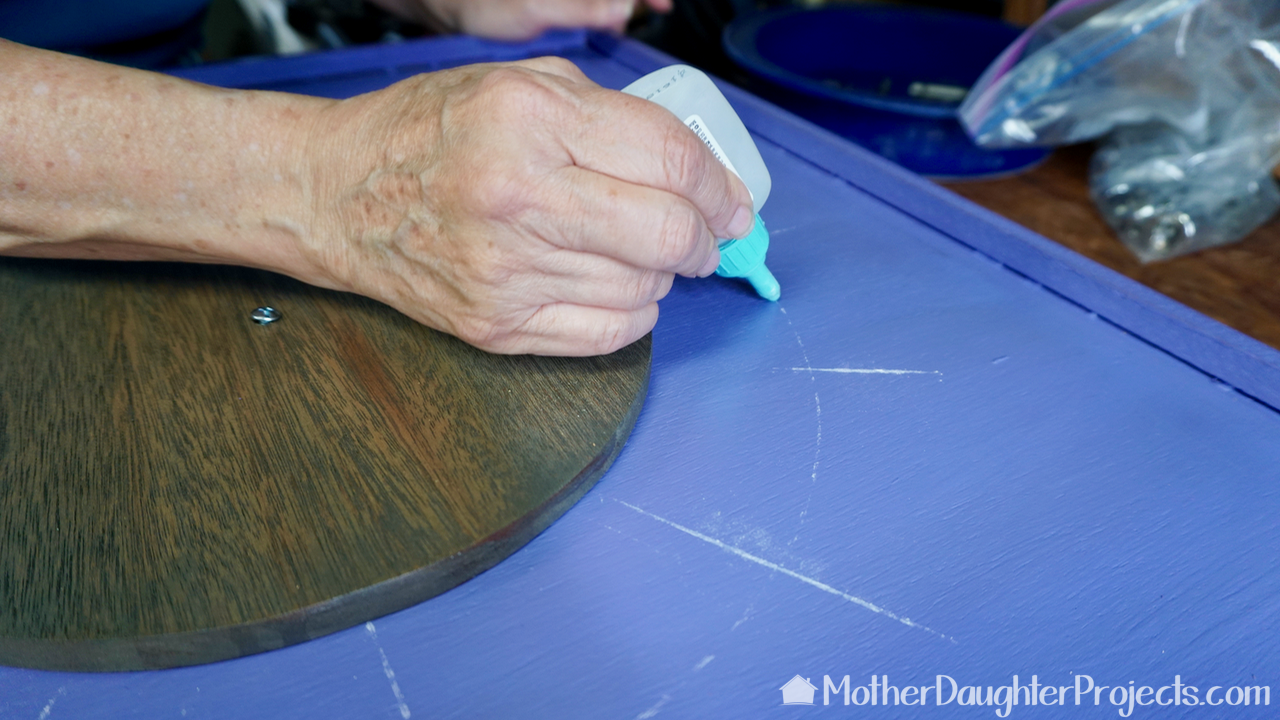
Now the fun part! Everything was glued into place. I used an old macrame ring, spray painted silver placed outside of the wood round. Before I glued it into place, I chalked the placement outline to use as a guide.
Learn how to use old driver bits, wrenches, saw blades, and more to make a shop clock perfect for a garage!
We started hot glueing into place, but that didn't seem to be holding so we used Dap Rapid Fuse. I will say it was tedious to glue all those little bits into place!
Learn how to use old driver bits, wrenches, saw blades, and more to make a shop clock perfect for a garage!
Our purchased clock mechanism came with instructions. I point this out because some do not! The shaft for our clock ended up being too short, but we hacked it and got it to work. There may be a little duct tape involved!
Learn how to use old driver bits, wrenches, saw blades, and more to make a shop clock perfect for a garage!
This is the clock mechanism peeking out. Ideally there should more of it coming through the holes.
Learn how to use old driver bits, wrenches, saw blades, and more to make a shop clock perfect for a garage!
Back side of the clock which is really the inside of the drawer.
Learn how to use old driver bits, wrenches, saw blades, and more to make a shop clock perfect for a garage!
Sooooo, we were totally finished with the clock and it was hanging on the wall when Steph said "it needs a saw blade!"
Learn how to use old driver bits, wrenches, saw blades, and more to make a shop clock perfect for a garage!
We used this giant wrench from my Dad to hang up the clock. He earned his living first as a airplane mechanic and then as a car mechanic. Thanks, Dad. I'm putting your tools to good use!
Learn how to use old driver bits, wrenches, saw blades, and more to make a shop clock perfect for a garage!
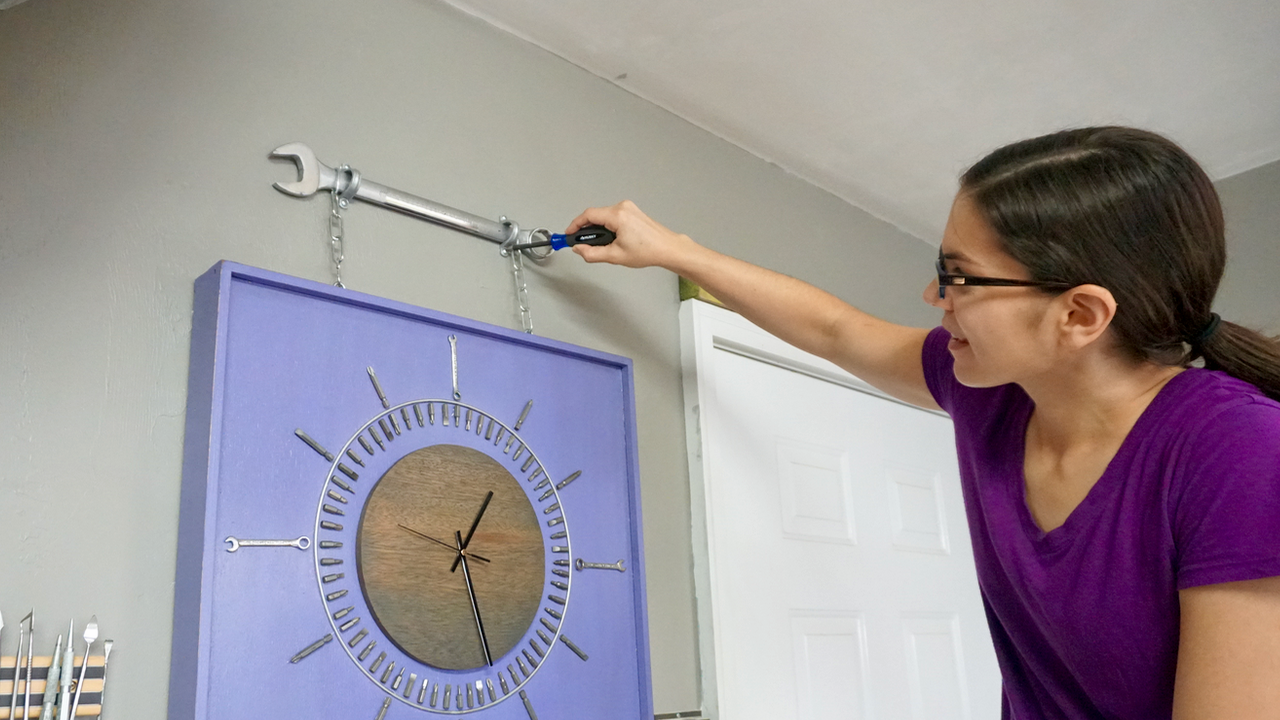
See? We had it hung on the wall, when Steph decided we needed more. We took it down, disassembled it and added the saw blade.
Learn how to use old driver bits, wrenches, saw blades, and more to make a shop clock perfect for a garage!
Wow, see what you can do when you hoard, I mean collect stuff?
Learn how to use old driver bits, wrenches, saw blades, and more to make a shop clock perfect for a garage!
I absolutely love the way this turned out. It's the perfect shop clock.
Picture
I don't often gush about projects, but I love this one! Maybe because it was my idea start to finish with the exception of that last minute saw blade addition. It's an exciting challenge to take what you have to make something functional and fun!

What are you collecting that you can make into something else? Share what you hoard, or is that just me? ~Vicki


Please note: We are not sponsored by any of the companies/products that we used. These products were picked and bought by us.

FYI: We are not professionals, and we don’t claim to be. This is what we found worked for our project. Yours may need a little different approach. Safety first!

FYI: Affiliate links are being used on this page. Purchasing via these links help support MDP!

Related Projects

Picture
Install Plastic Pegboard
Picture
Small Tool Accessory Storage
Picture
Metallic Garage Floor Coating
2 Comments
Kathy H.
6/12/2018 09:43:07 am

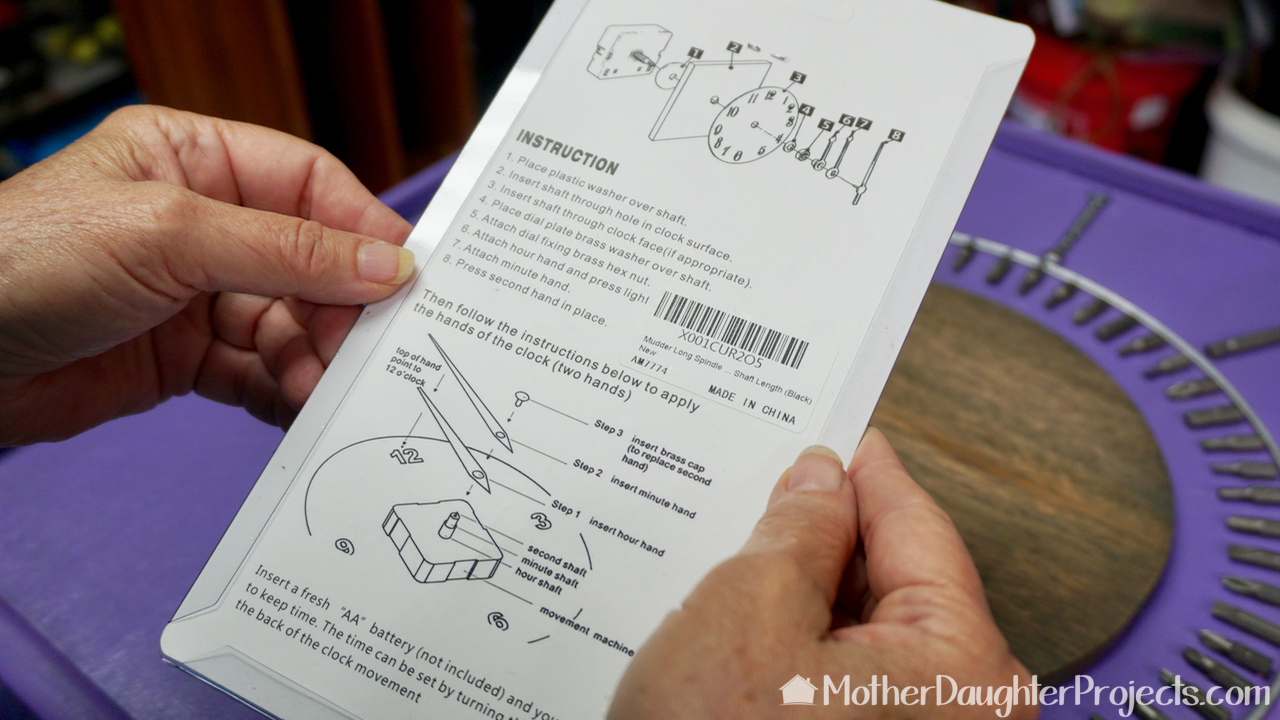
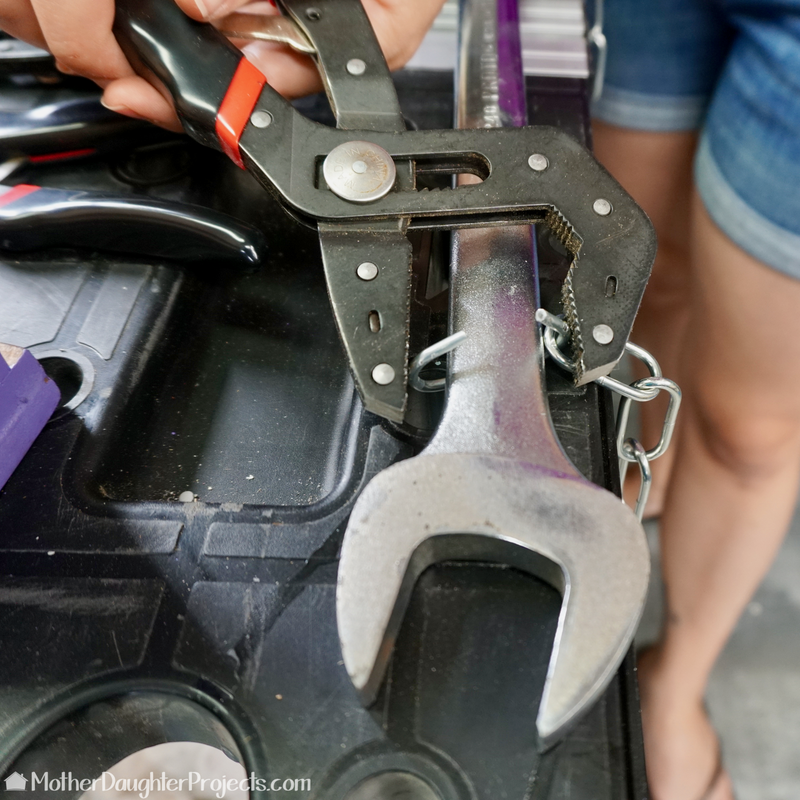
This is Awesome. I need to make a clock for our son’s garage. I’ll start collecting ASAP. He is an Auto Mechanic, I’ll use “parts” related to cars. The picture of you looking at the instructions was great. I could tell a man wasn’t making this..

Reply
Steph
6/14/2018 10:10:58 am

So happy you liked it! Good luck with the project!

Reply


Leave a Reply.

    MotherDaughterProjects.com

    Mother Daughter Projects
    ​
    Steph & Vicki

    We're homeowners sharing our DIY adventures as we learn to maintain, improve, decorate, and ​use tech in our homes.
    Share your projects with us here:  
    ​#trylearnshare
    MotherDaughterProjects.com
Mother Daughter Projects, LLC ∙ est. 2015 ∙ Tallahassee, FL by Vicki & Steph ∙ Privacy Policy