|
text by Vicki Sign up here to join our weekly email newsletter!
During the porch refresh, we decided we needed some kind of decor for the large siding clad wall. After much discussion on the pros and cons of hanging it from the vinyl siding or ceiling, we decided a free standing unit to display succulents would be best. Along the way, we ended up adding to the unit which solved a vexing, ongoing problem on the porch. Happy accident!
Materials/ Tools:
Cut list
Top
For bottom
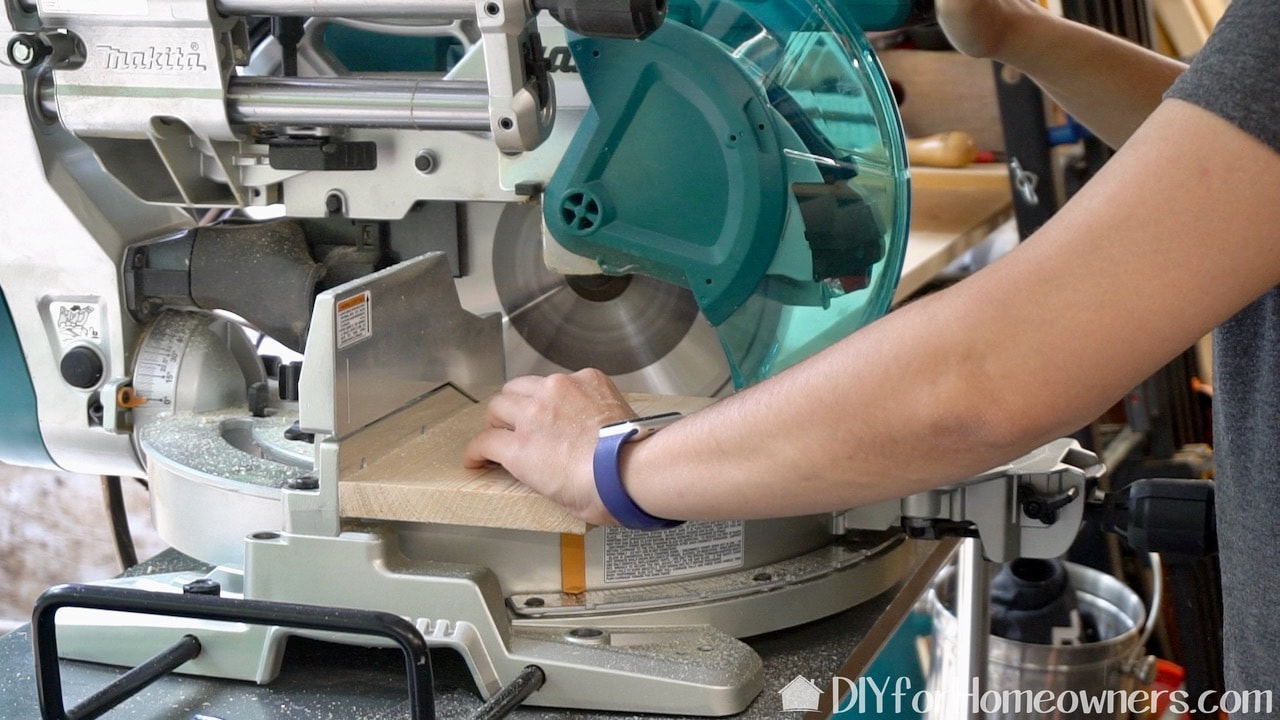
After determining the height and width we wanted for the succulent holder, we made all the cuts on the miter saw. From 1x6 boards, we cut (3) pieces 26 inches in length and (2) pieces that were 61 inches each.
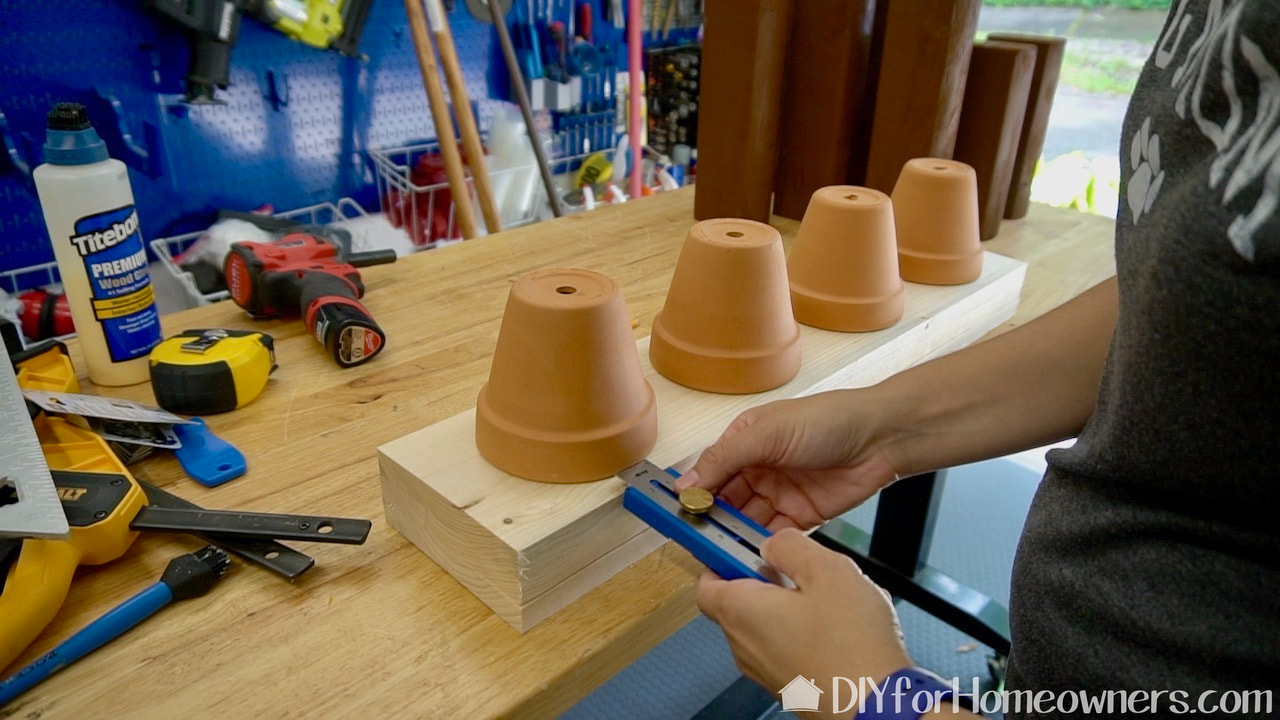
We wanted each of the three shelves to hold four potted succulents. We placed the tera cotta pots upside down on a board and determined the spacing needed between the pots. We then traced the outline of the pots onto the board.
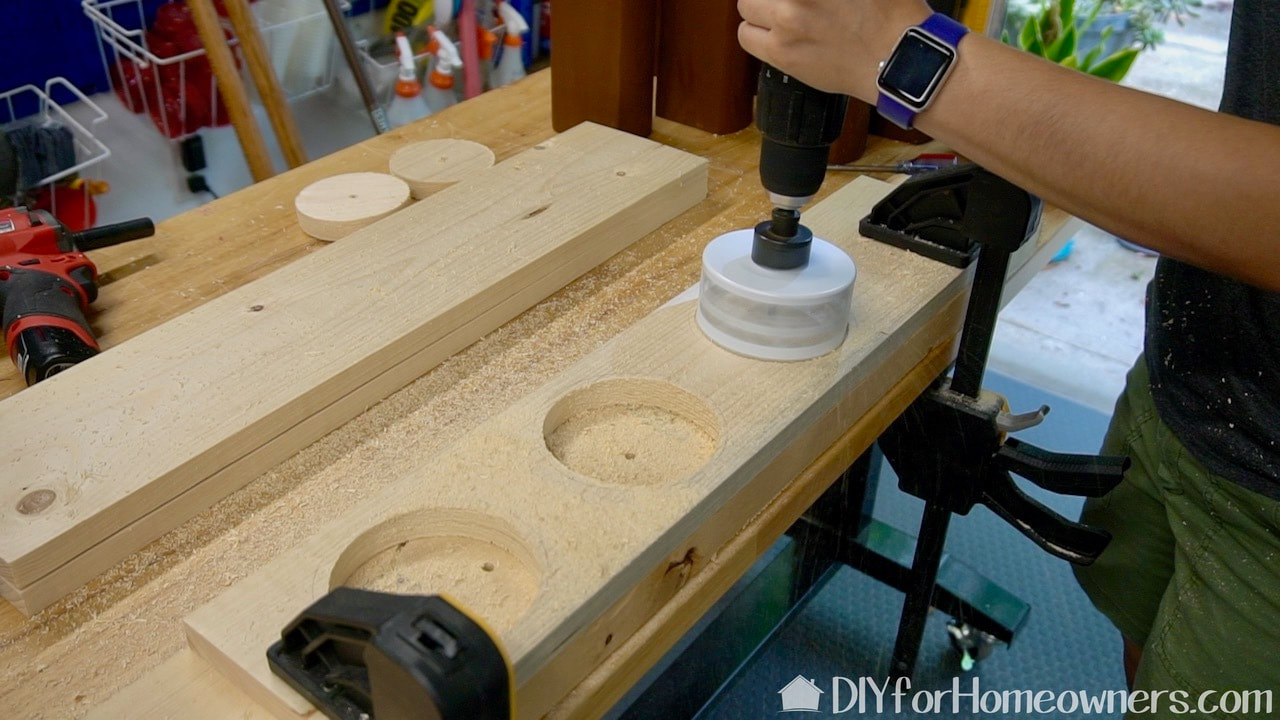
The holes for the pots could have been cut with a jig saw, but investing in a Milwaukee 4 inch hole saw made this process so easy!

The pots got painted while Steph worked on the build. I'm priming with DecoArt gesso. The final color, DecoArt Acrylic in dark turquoise, was based on the pillows we used on the porch. Be sure to paint the bottoms of the pots as they will be visible.
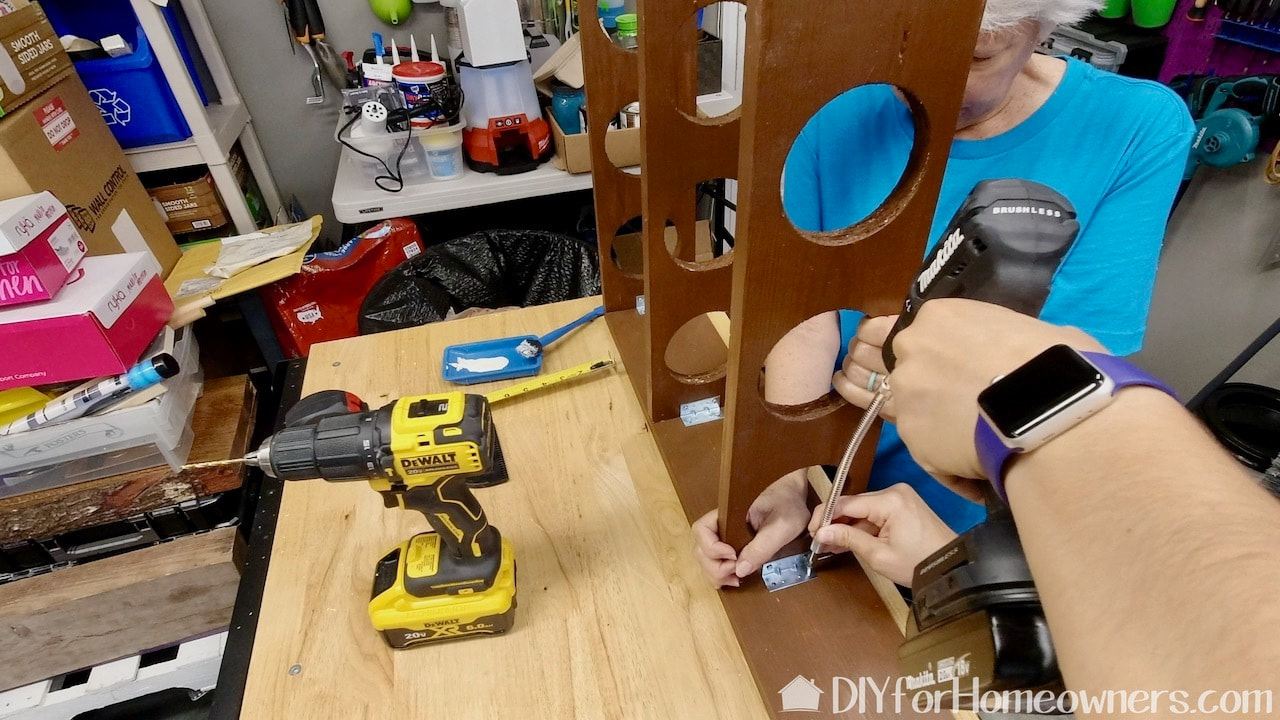
This could have been assembled using a number of types of joinery, but we are using wood glue and corner brackets to add the shelves to the sides. The unit is stained with Olympic Elite Solid Stain in Chestnut brown.
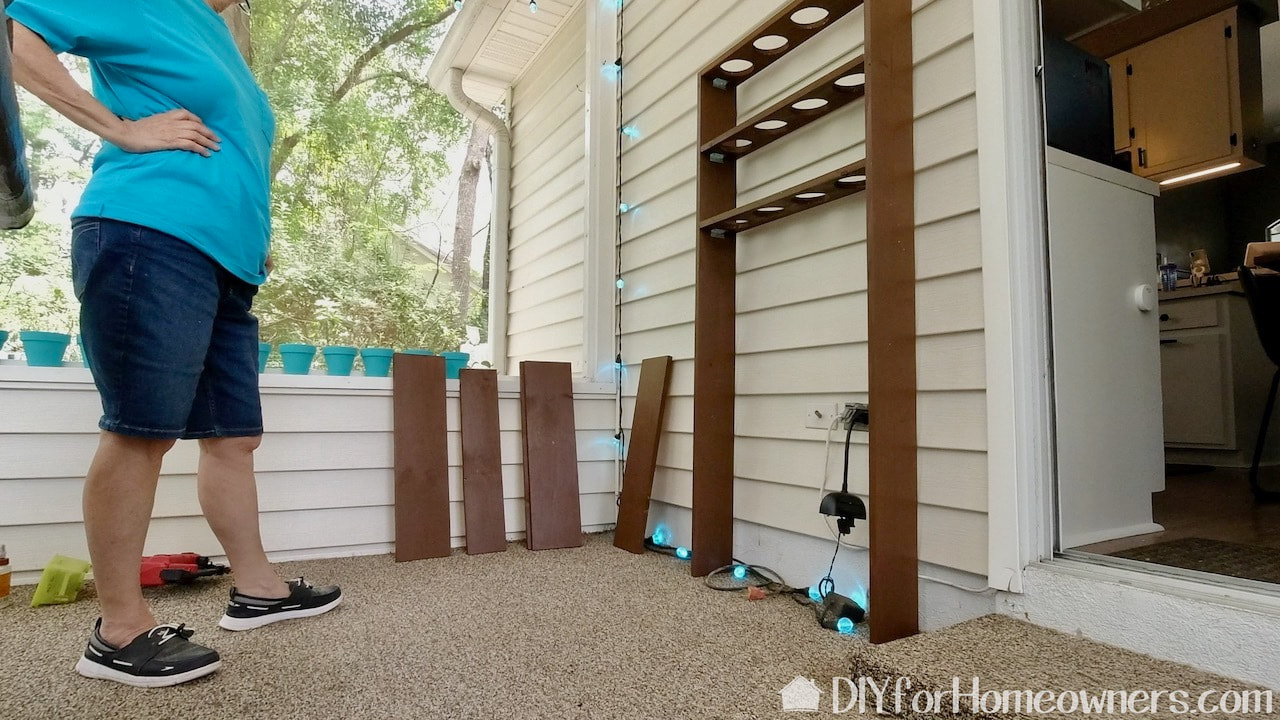
This was the moment we realized, "oh, we can add boards to the bottom and cover up all those ugly cords!" Lightbulb moment. We found some 1x8 boards in the garage, cut them to size and added them to the unit.
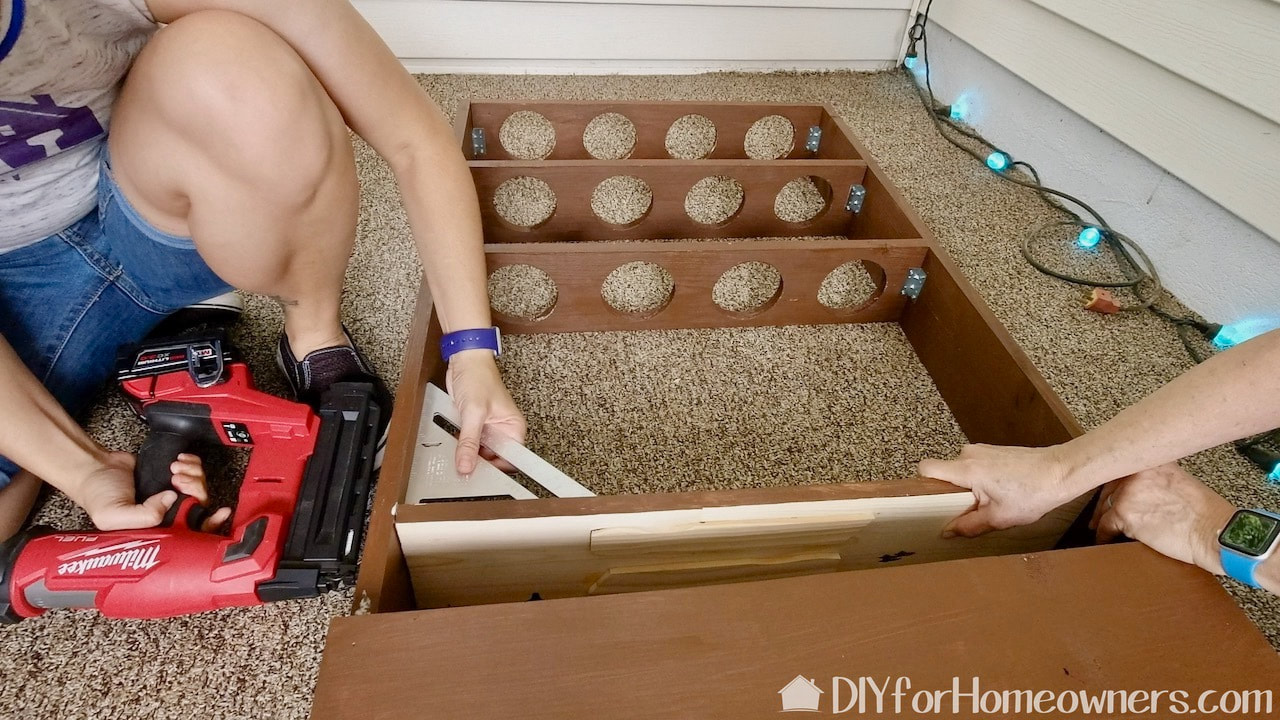
That board is weird looking because we had to piece it. It's okay because this is a hidden shelf. We're using a Milwaukee brad nailer.
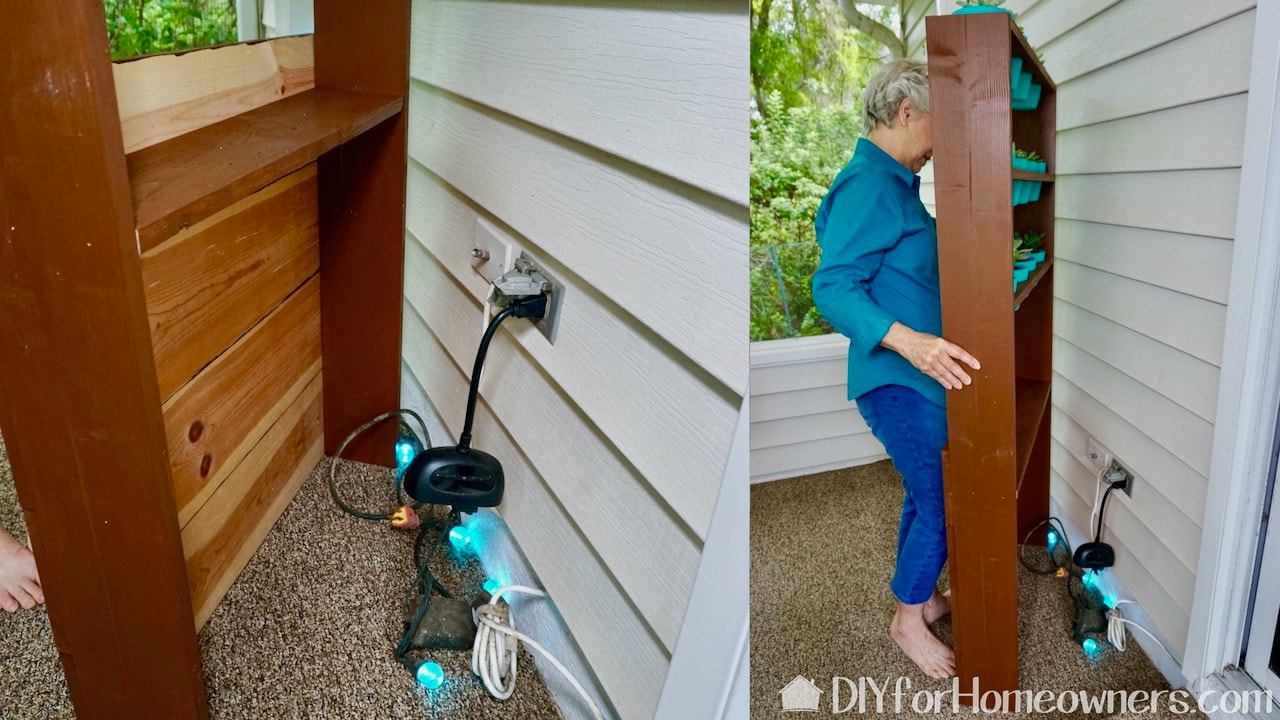
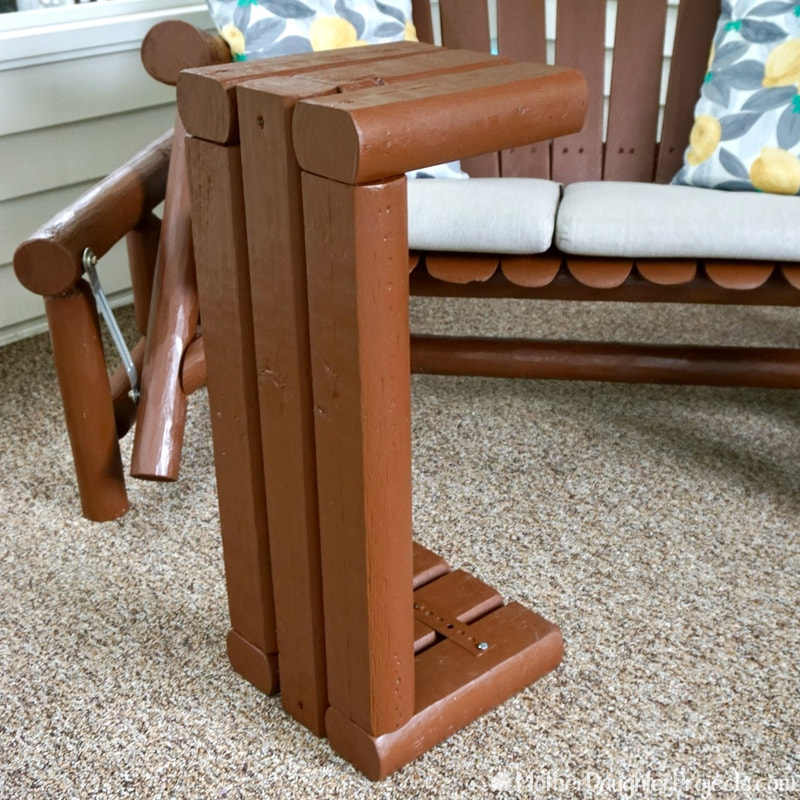
Here's the backside of the unit where you can see the hidden shelf. If we were to do this again, we would have made the shelf even lower to really hide away clutter.
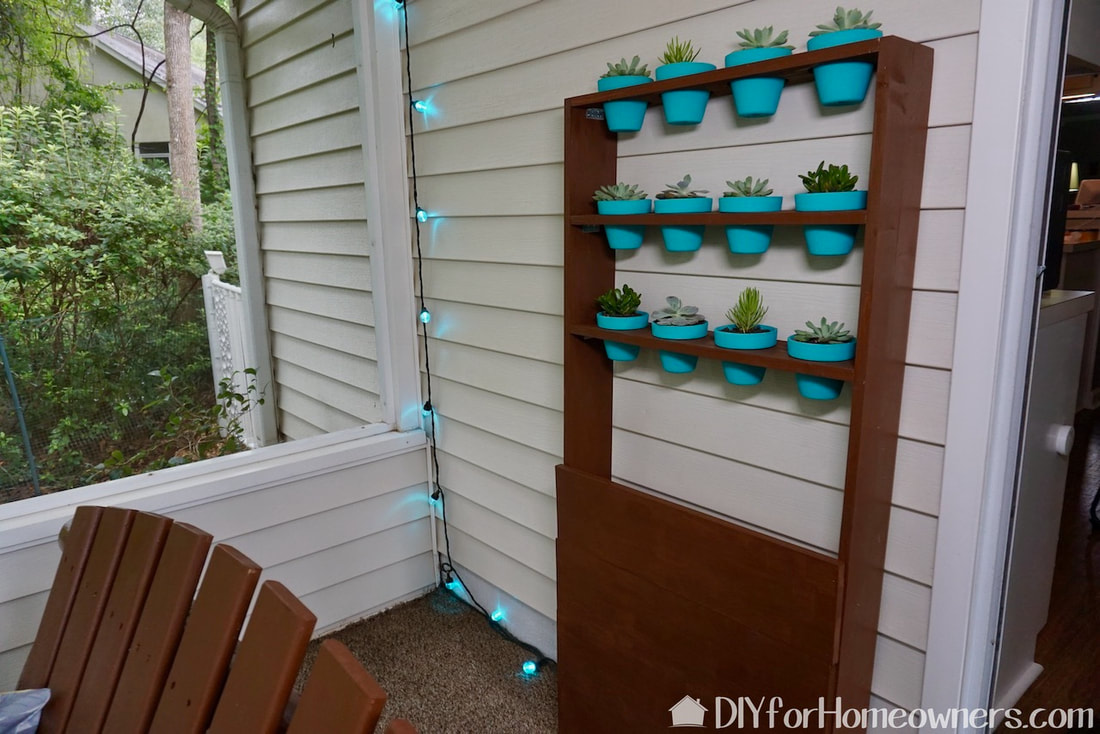
We planted the succulents and put them into place. This should be considered a tipping hazard so it should be secured to the wall if you have ANY concerns about small children or animals being able to pull it over. You can install a tipping restraint to make it safe for your space.
Check out the full reveal of the furniture makeover at the Home Depot blog! Be sure to take a look at the pillows. Would you have used a different color from the pillows on the pots? Yes, those are Christmas lights. We use them year round as the color can be changed via an app to make them appropriate for the season or decor.
Please note: This is not a sponsored post. FYI: We are not professionals, and we don't claim to be. This is what we found worked for our project. Yours may need a little different approach. Safety first! FYI: Affiliate links are being used on this page. Purchasing via these links help support MDP! Related Projects
0 Comments
Leave a Reply. |

Mother Daughter Projects
|