|
text by Vicki Sign up to get Mother Daughter Projects updates in your email!
This post is sponsored by The Home Depot as a part of The Home Depot’s ProSpective Campaign. THD provided the Makita Saw, Ridgid Sander and Husky Wrenches used in this post.
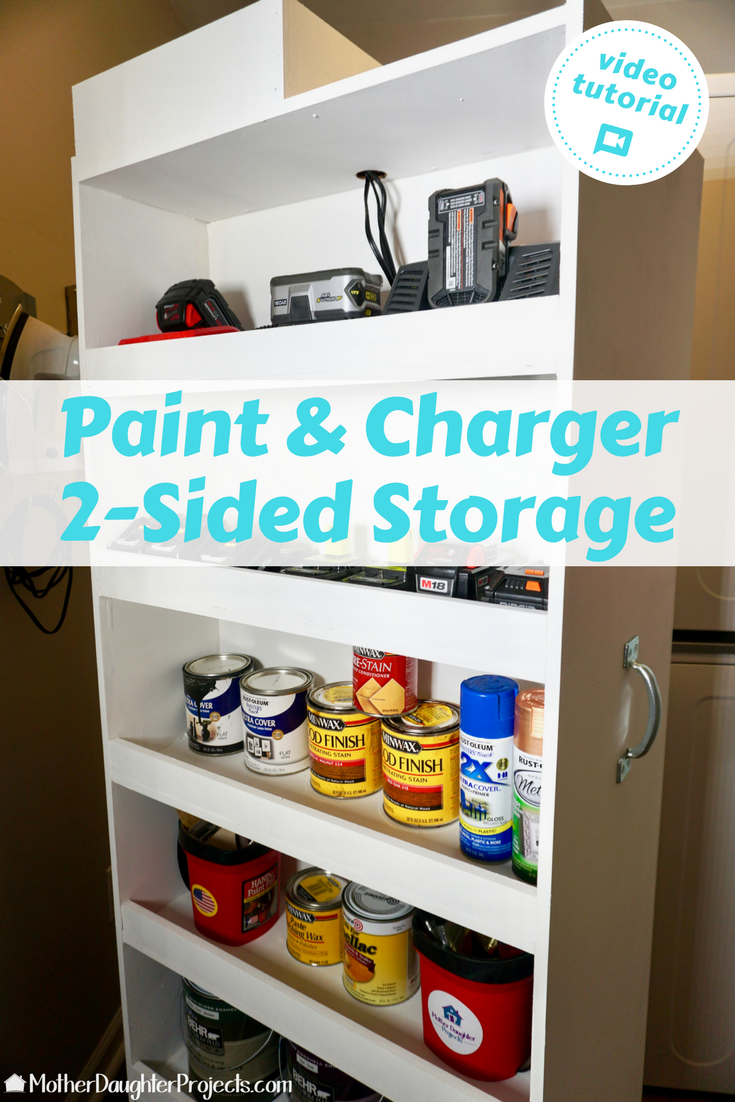
We have a growing need for paint and battery storage so we decided to build a storage unit to house them. You're probably wondering why we chose to put these two things together. Well, both paint including stains and rechargeable batteries are best stored in a controlled environment. Here in Florida, storing those thing in the garage means they are subjected to extreme changes in temperature. Neither paint or rechargeable batteries lasts as long if not stored properly.
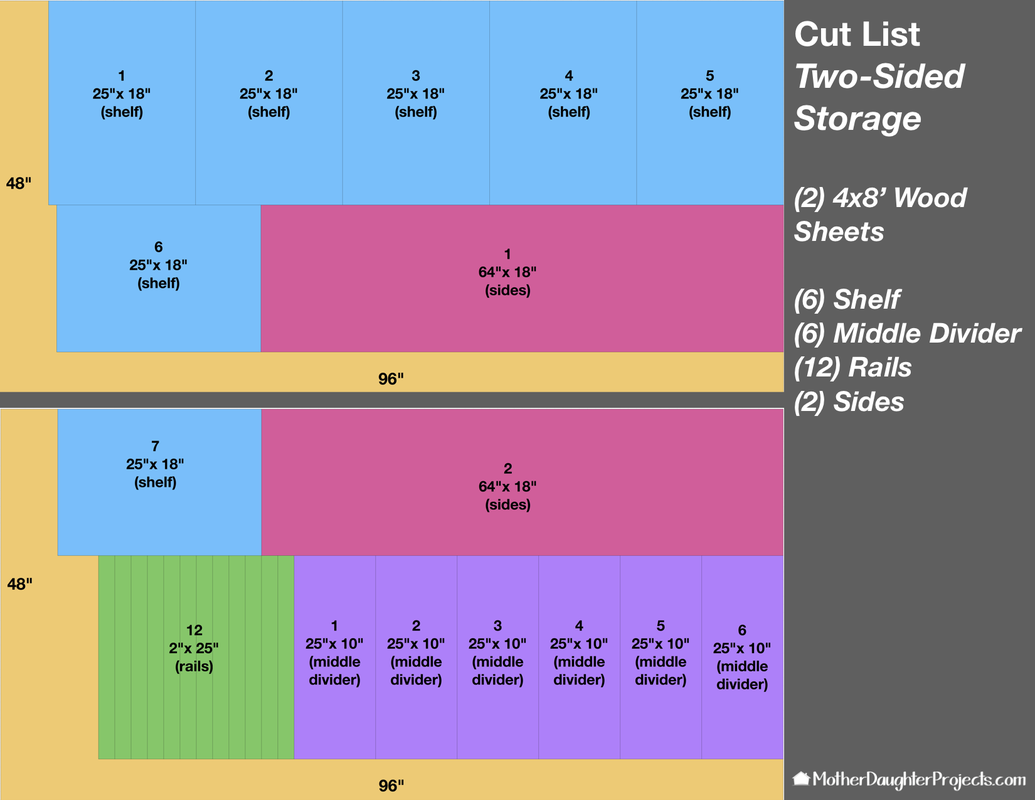
We did a little planning and created a cut list so we could best utilize our MDF.
Materials:
Tools:
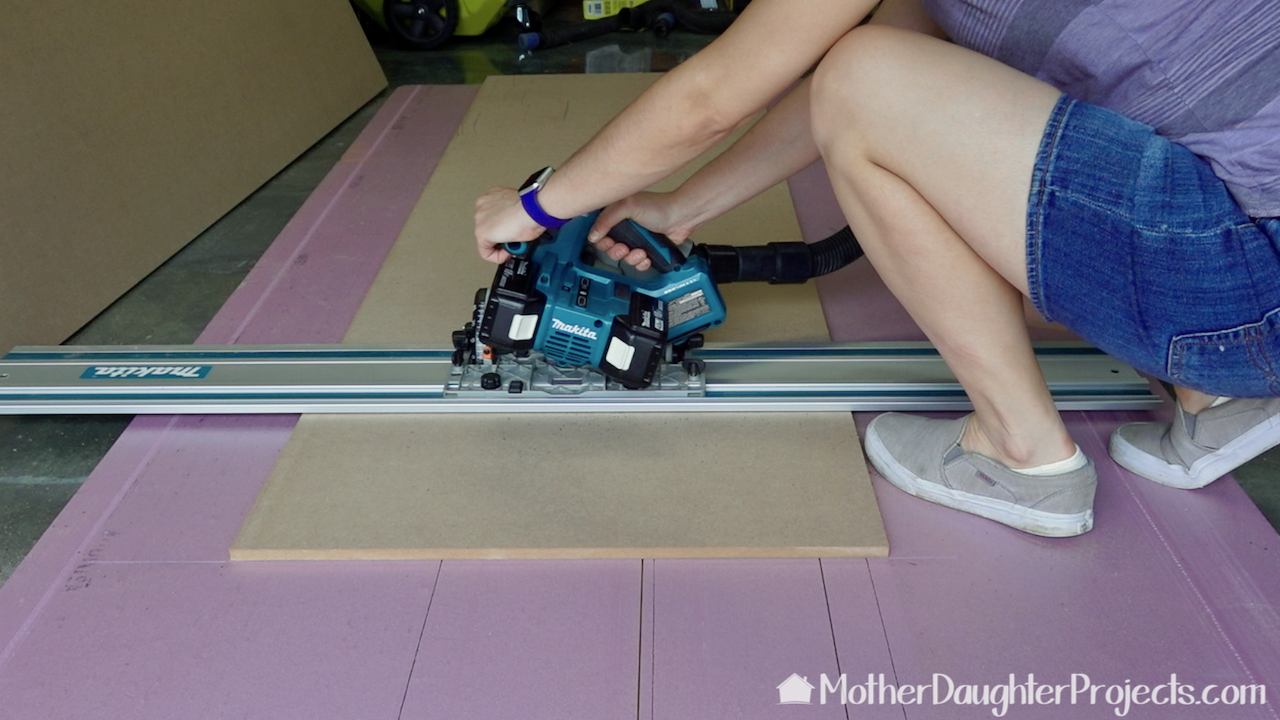
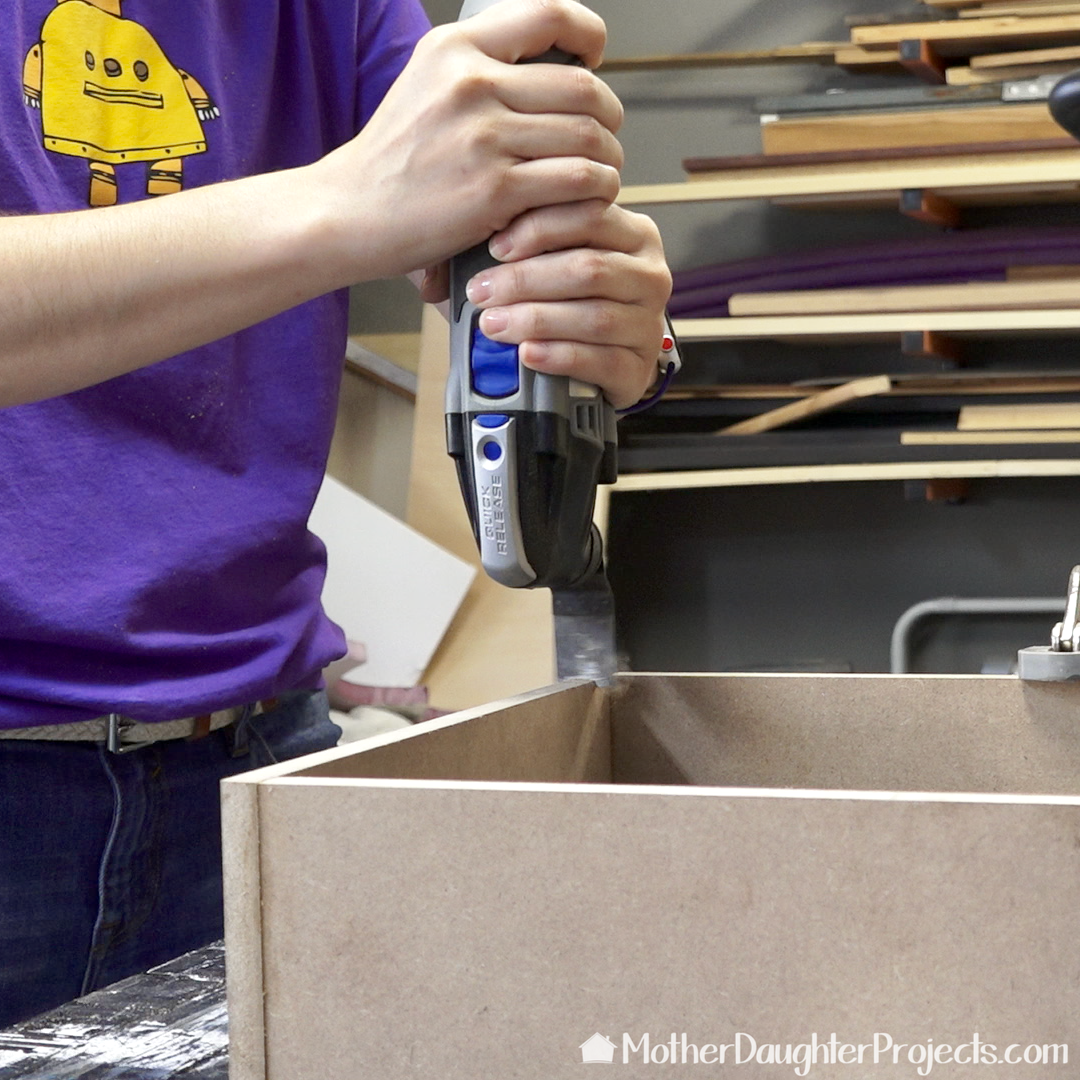
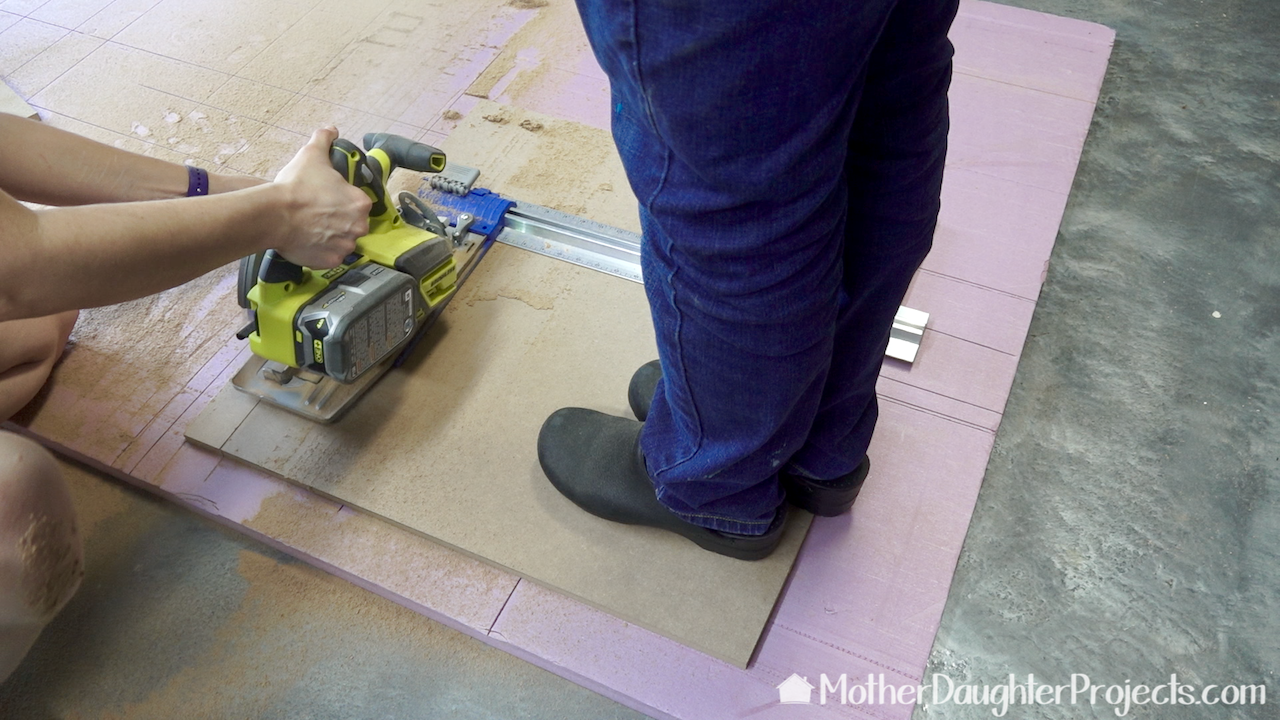
We used the Makita plunge saw with track to make many of the cuts. It is much less intimidating to use than a circular saw. The purple underneath (foam insulation) helps to protect the floor and saw blade. One day we will have a table that we can cut these larger boards with. We are ready to be off the floor!
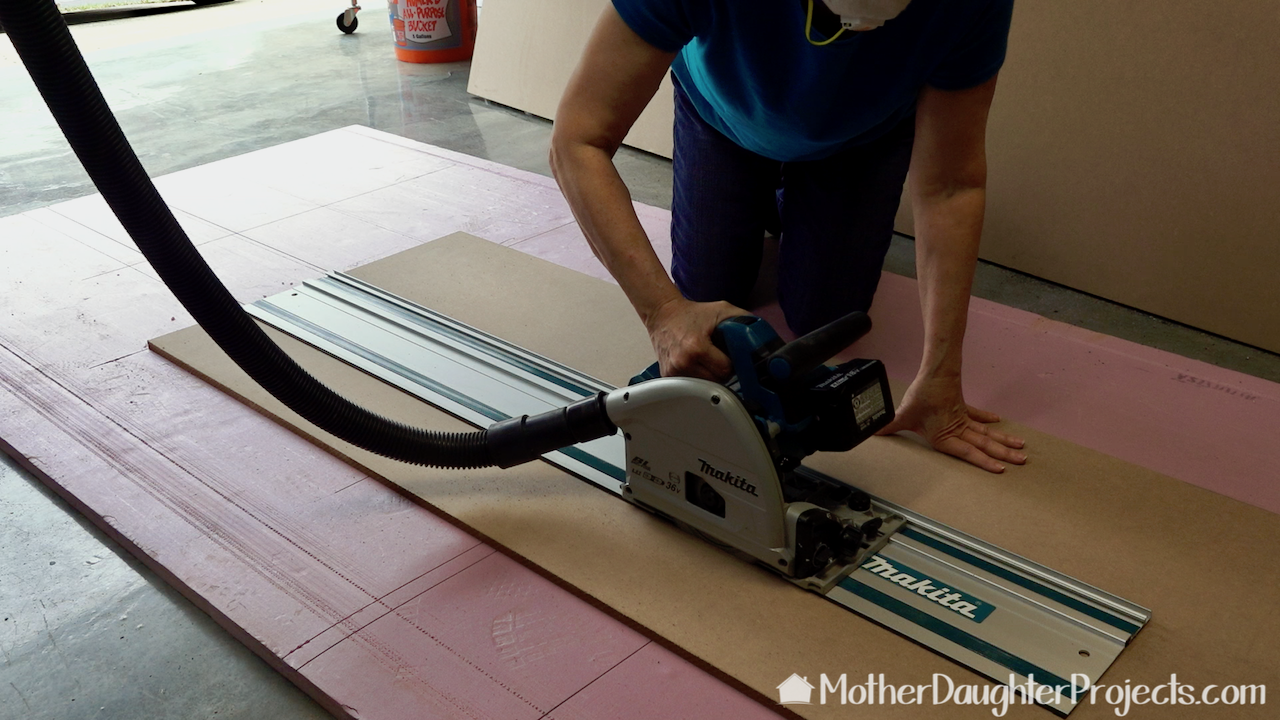
I tried out the saw and loved it! We attached it to our Makita dust vac to control sawdust. The dust control feature on this saw is a real plus!
For the repetitive cuts we used our circular saw with rip-cut attachment. But these cuts could be made with the plunge saw too. I guess one advantage to cutting on the floor is one of us can weight down whatever needs to be cut. It was like a little game of jump rope!
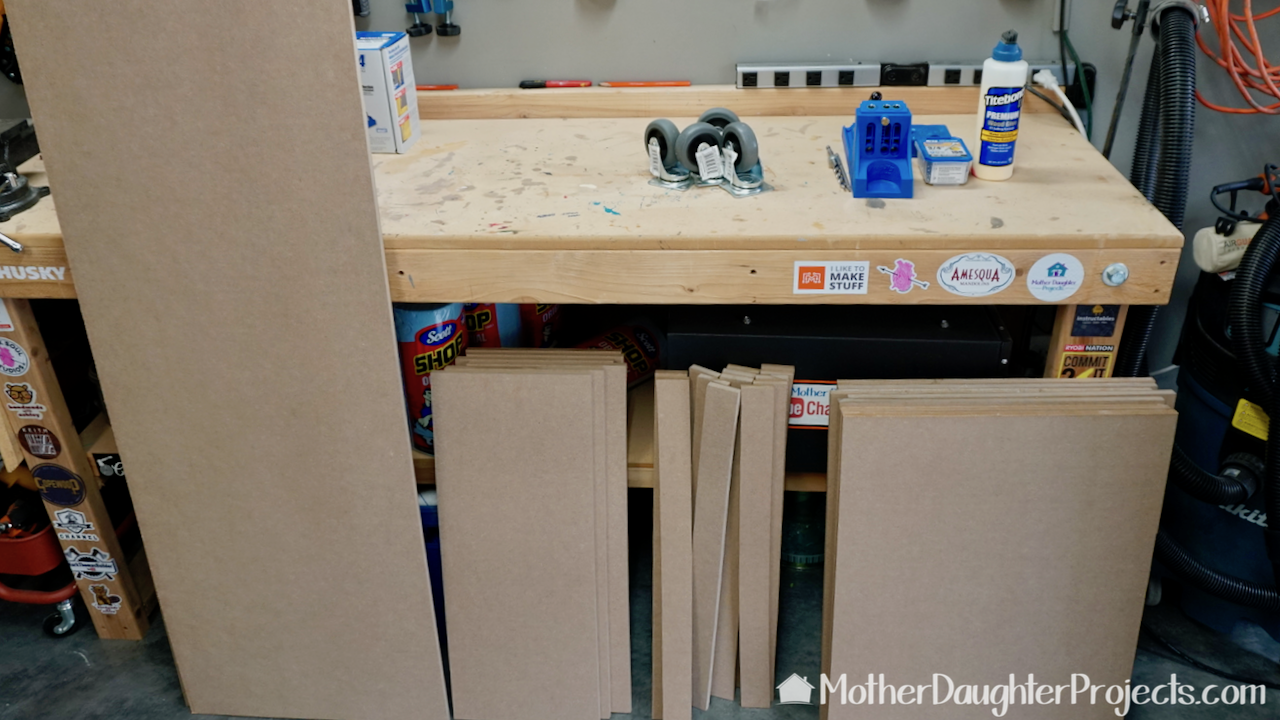
Ahhhh, everything is all cut and ready for assembly!
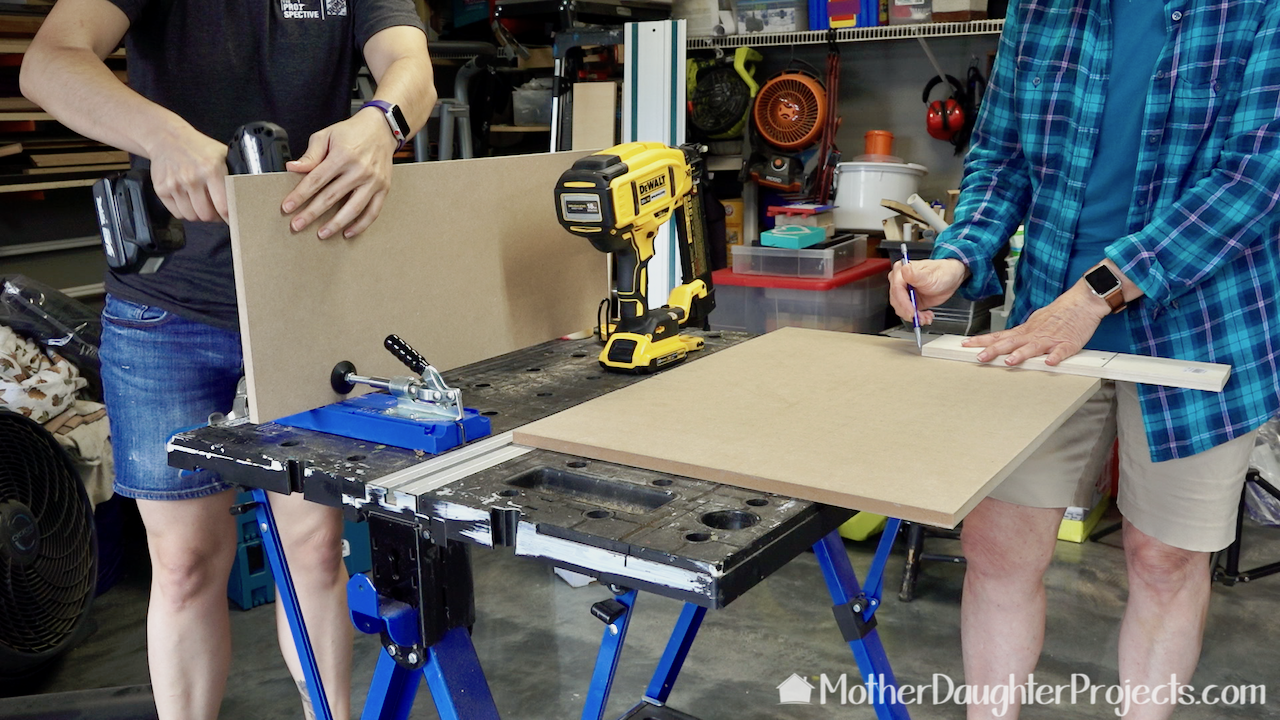
The Kreg work table provide ample space for both of us to work. Steph was making pocket holes and I was marking the center of the board.
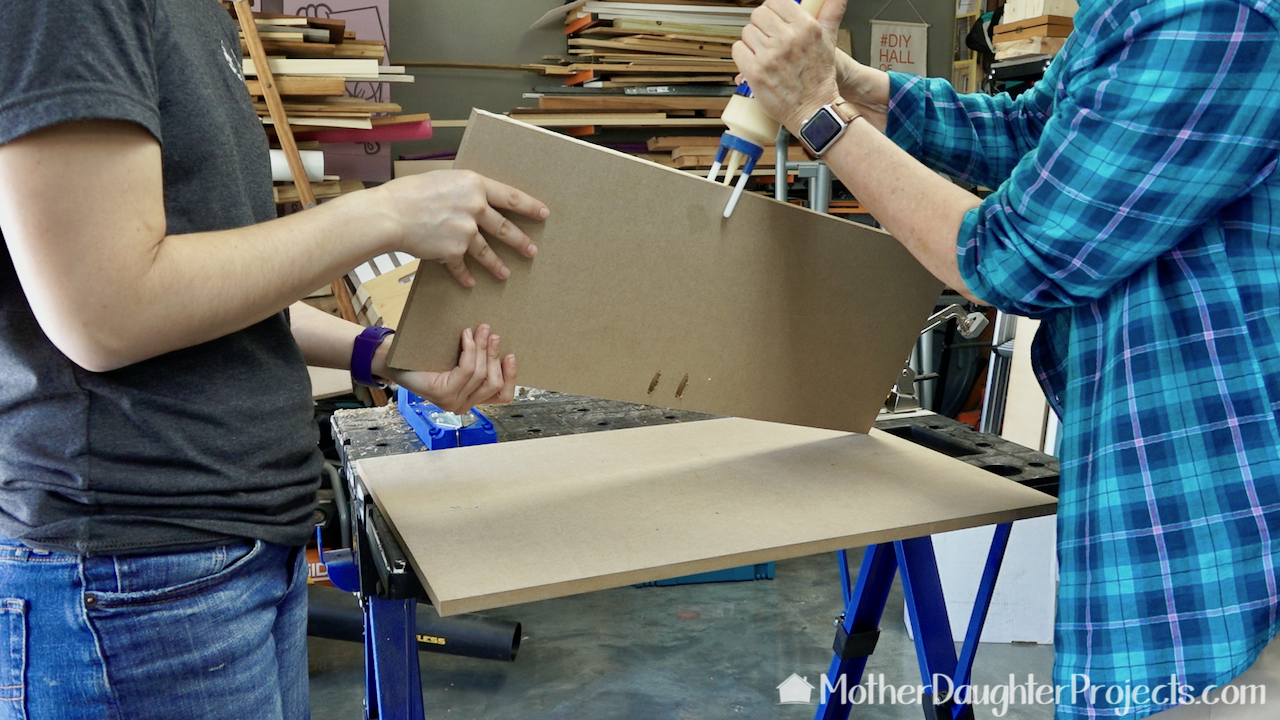
Glue was applied to the edge and clamped into place prior to brad nailing.
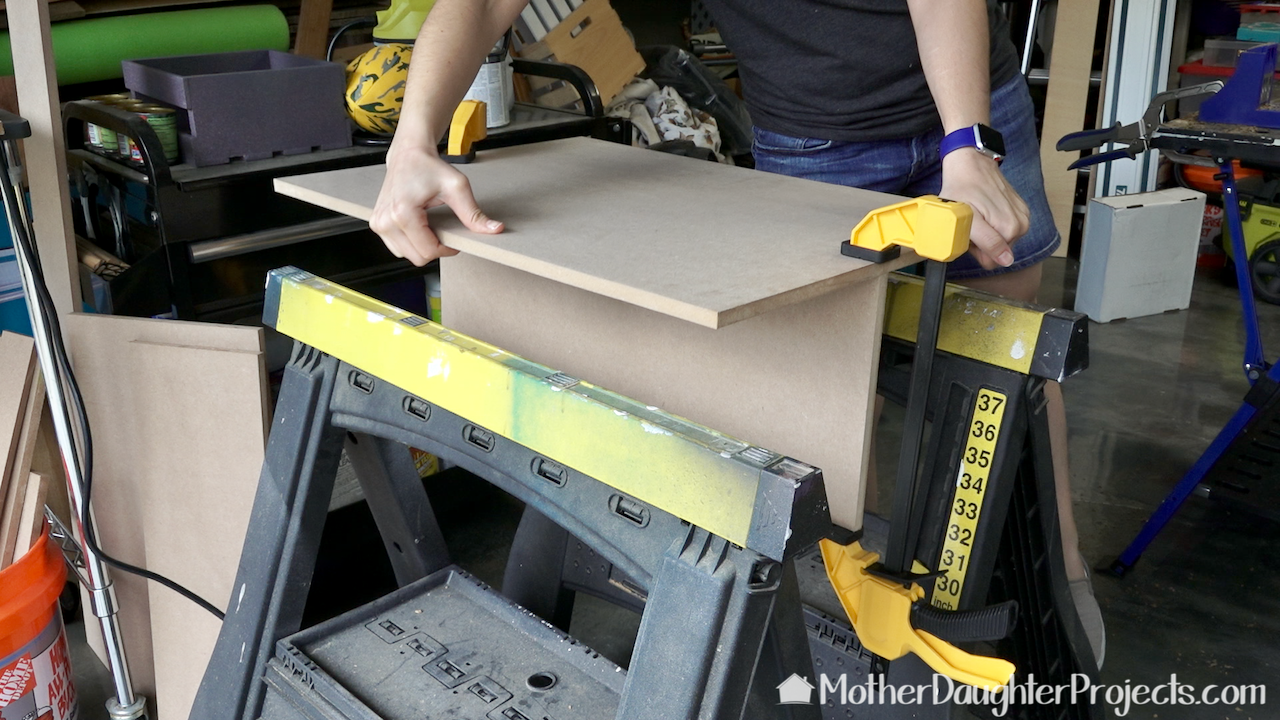
We placed the piece upside-down on two sawhorses so we could easily brad nail the boards into place.
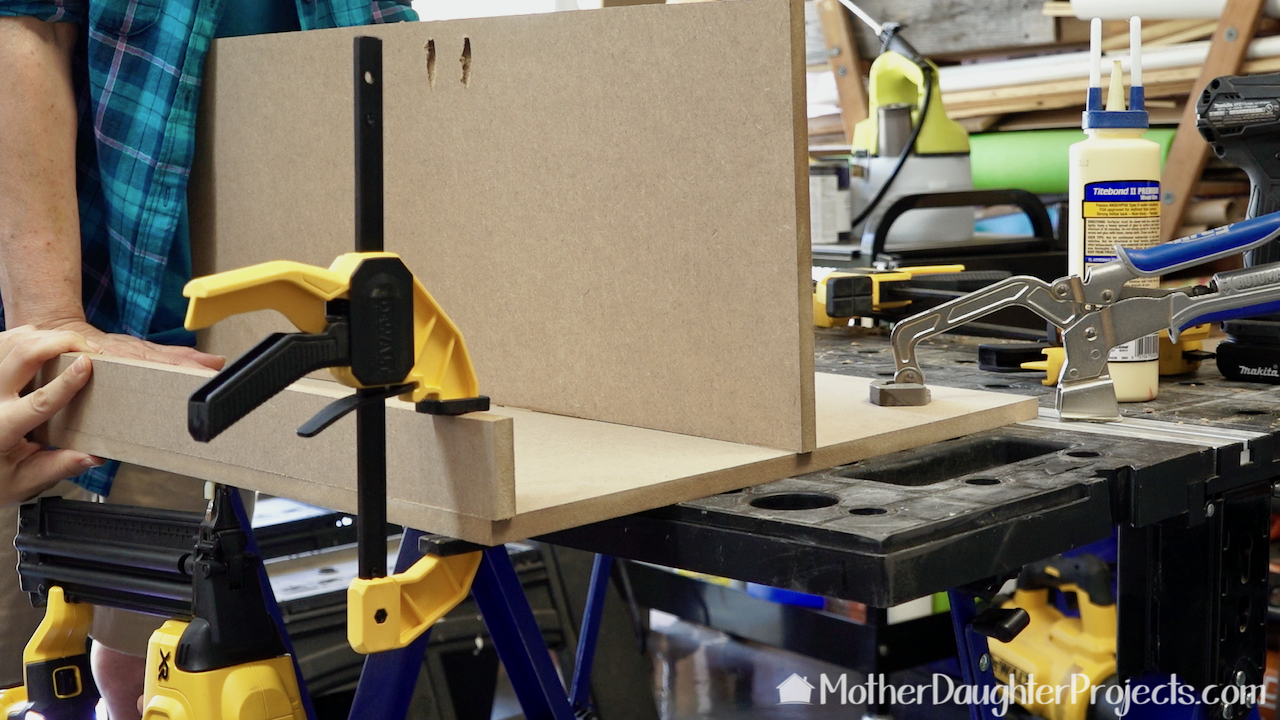
We next glued and brad nailed the shelf rails into place.

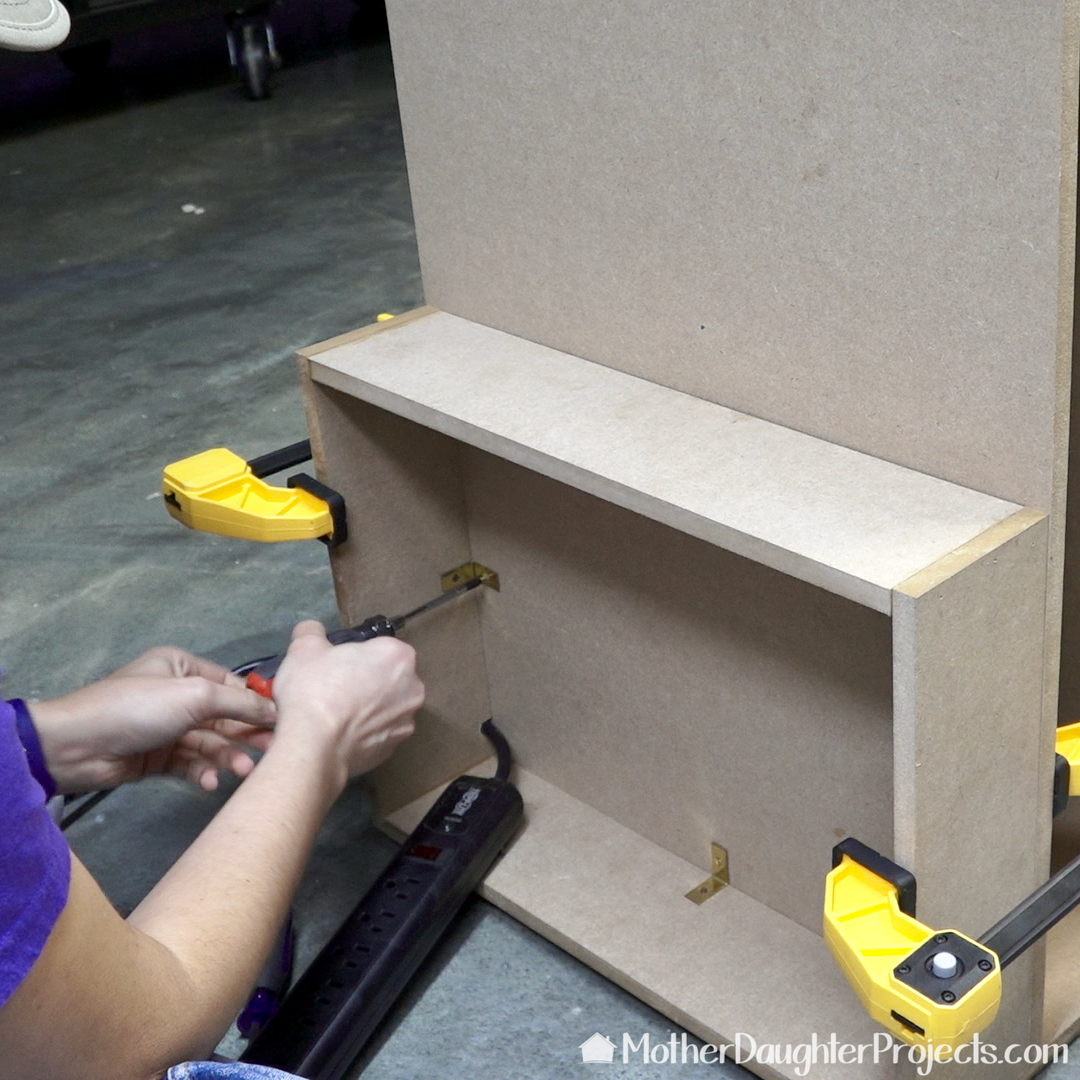
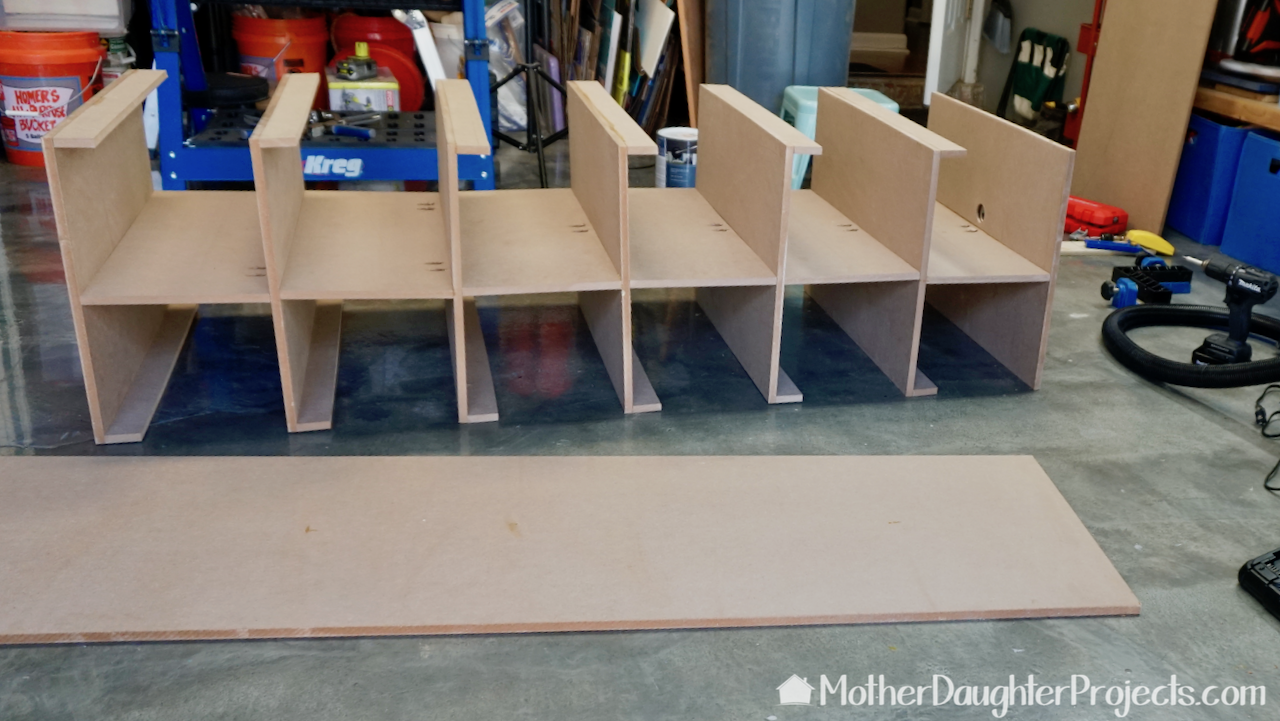
The individual sections were laid in place, glue was applied and then screwed into place using pocket hole screws.
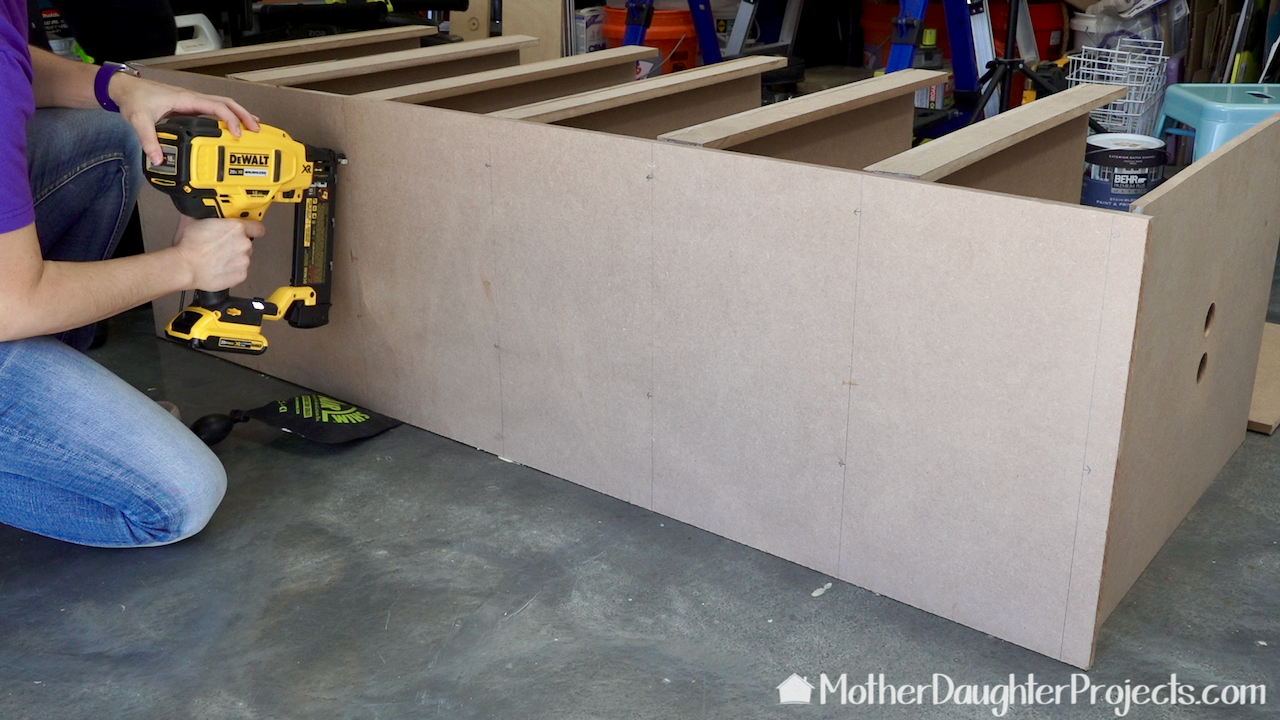
All the shelves are now attached. Now it's time to add the side panels. Again, the edges were glued, then brad nailed into place.
We marked those lines so it was easy to see where to put the brad nails.
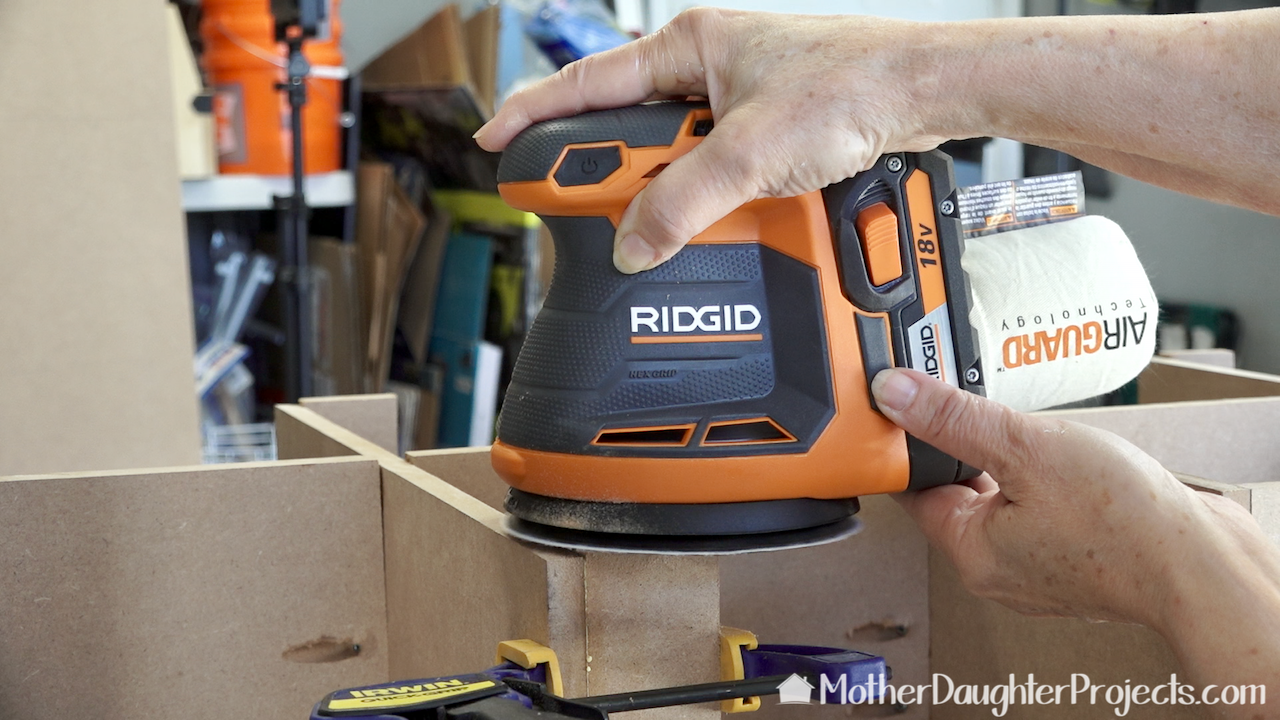
We used the Ridgid battery powered sander to fix some of our less precise cuts! It's very nice to have a cordless sander in the shop as it can be brought over to the project and not have to deal with cords!

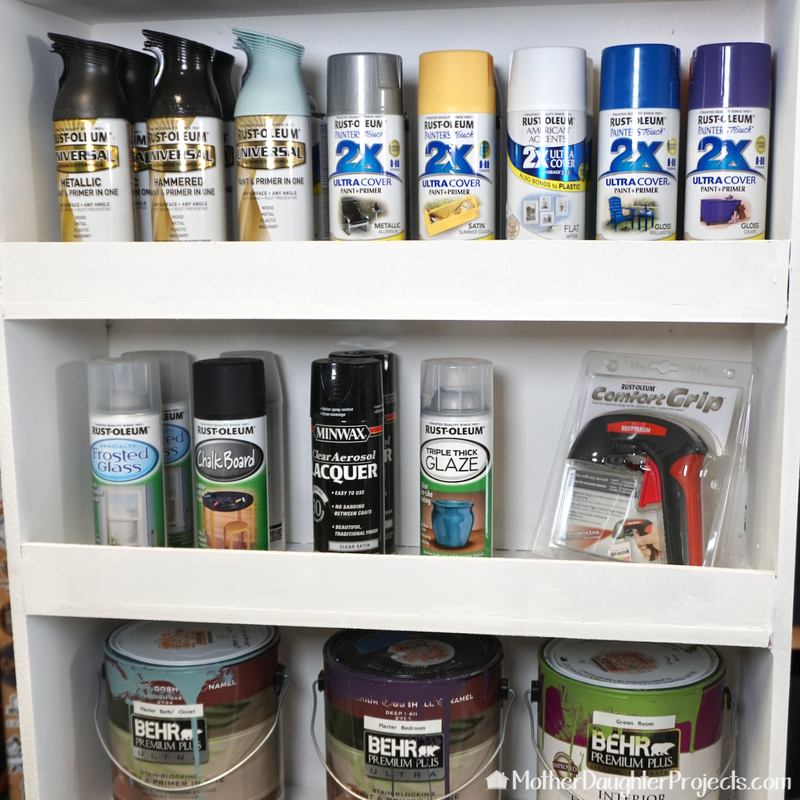
Everything is neat and tidy within the box and hidden out of sight!
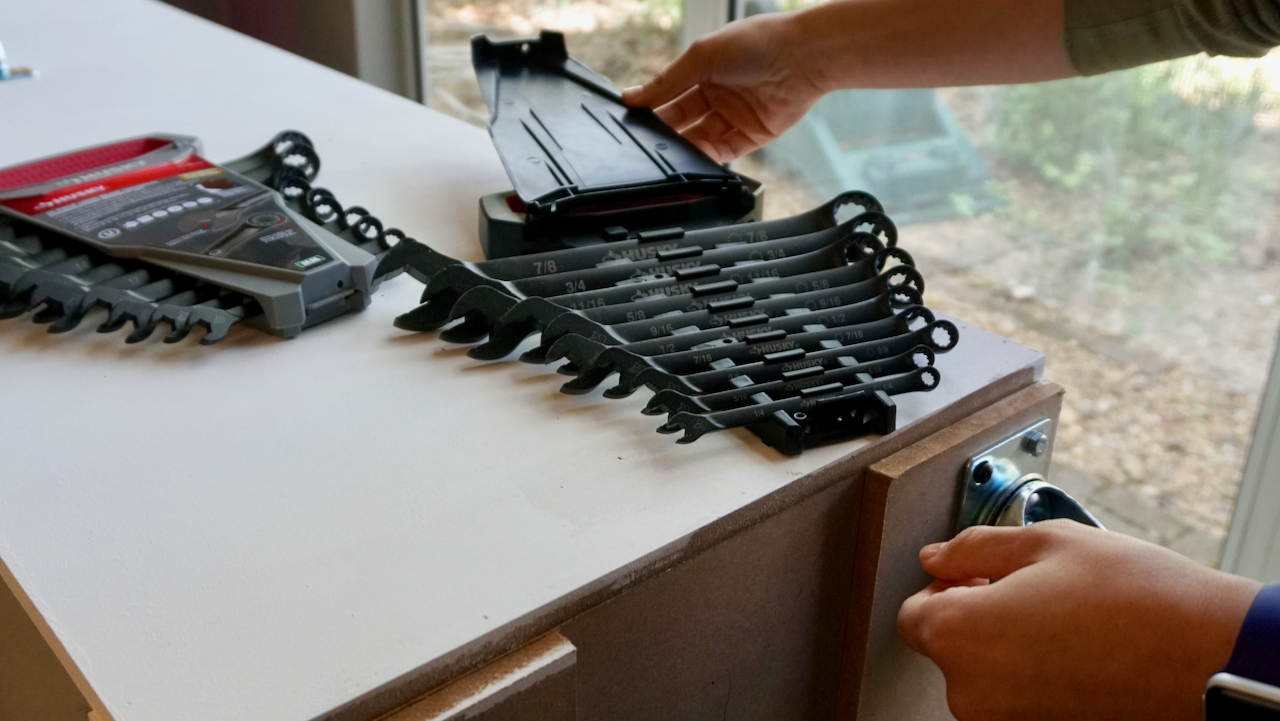
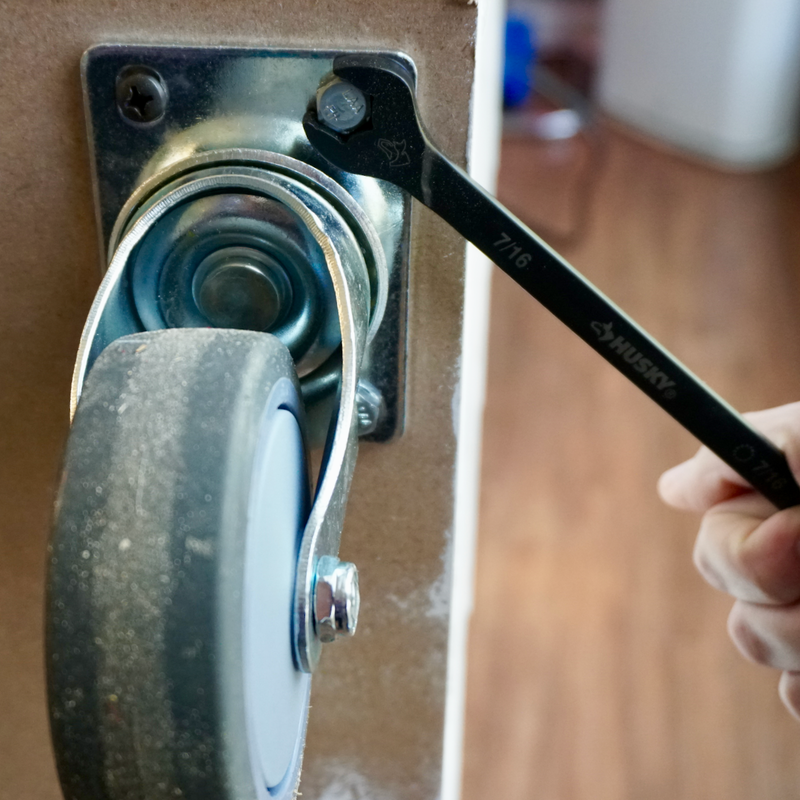
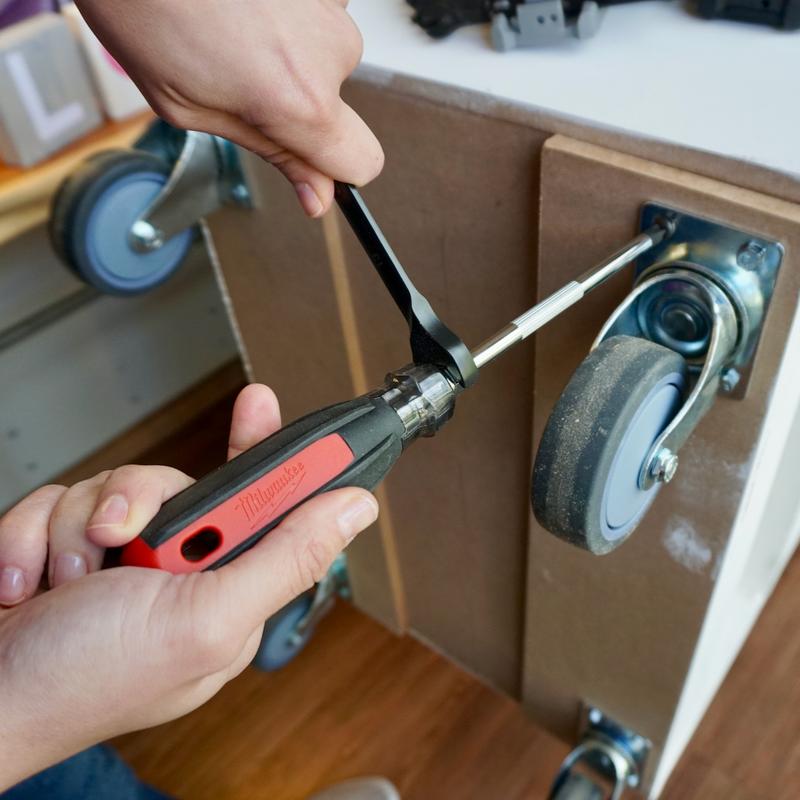
After the unit was built and stocked, we decided the wheels needed to be more heavy duty. So we swapped out the original ones for new ones. Since we used hex-head screws to attach the wheels, we used our new Husky wrenches. The wrenches come in metric and SAE version and in handy to hang and use packaging.
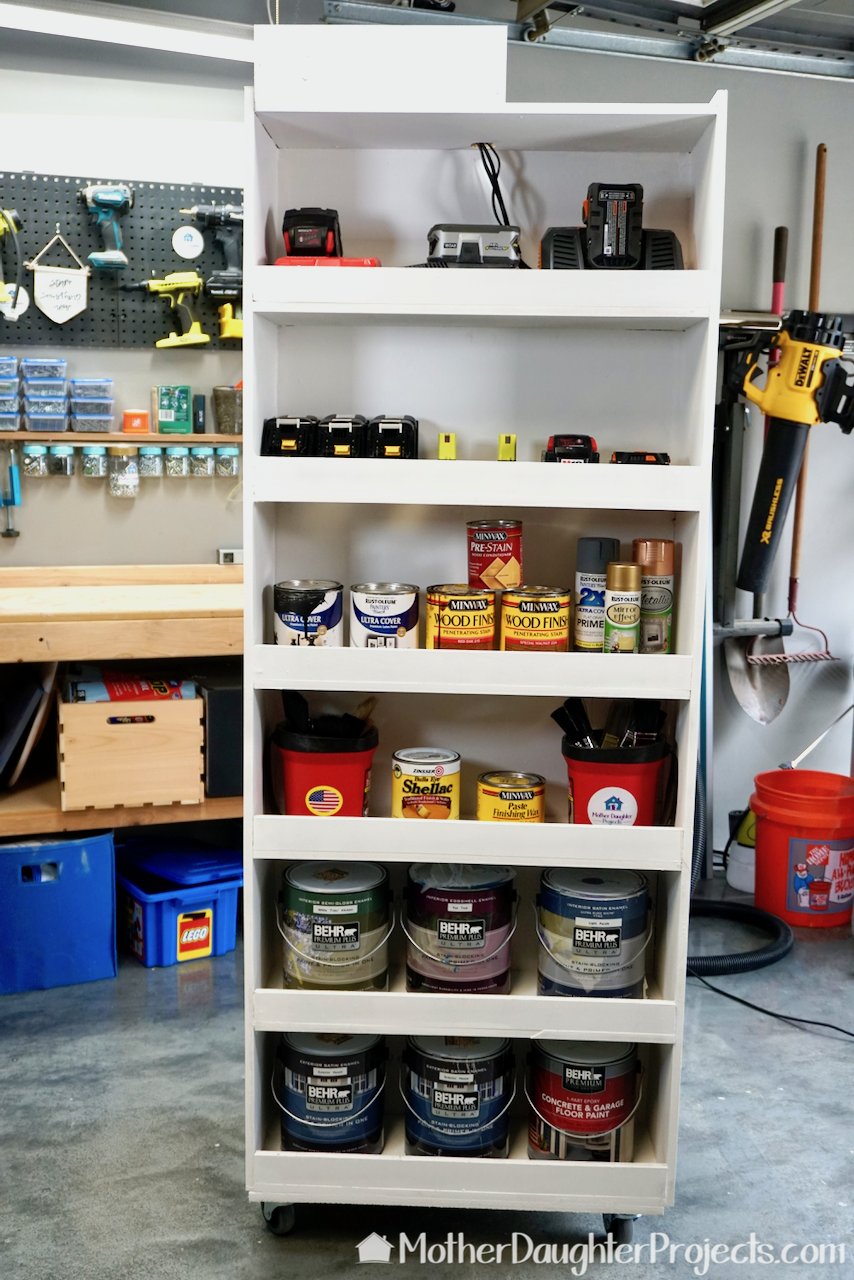
Everything fits beautifully! It's nice to have it all in one place!
We also added a handle to one side to help move it. The unit holds all our paint, batteries and charger. It's nice to have it all in one place, finally!
Although this is specific to our storage needs, this is basically a 2-sided bookcase that can be adapted to whatever you need to store. What's nice about this is one side can store stuff you don't use regularly and the other stuff you use more frequently. What would you store in a 2-sided bookcase? Where do you store your paints and batteries? We acknowledge that The Home Depot is partnering with us to participate in the The Home Depot ProSpective Campaign. As a part of the Program, we are receiving compensation in the form of products and services, for the purpose of promoting The Home Depot. All expressed opinions and experiences are our own words. Our post complies with the Word Of Mouth Marketing Association (WOMMA) Ethics Code and applicable Federal Trade Commission guidelines. FYI: We are not professionals, and we don’t claim to be. This is what we found worked for our project. Yours may need a little different approach. Safety first! FYI: Affiliate links are being used on this page. Purchasing via these links help support MDP! Related Projects
0 Comments
Leave a Reply. |

Mother Daughter Projects
|