|
text by Vicki Sign up to get Mother Daughter Projects updates in your email!
This post is sponsored by The Home Depot.
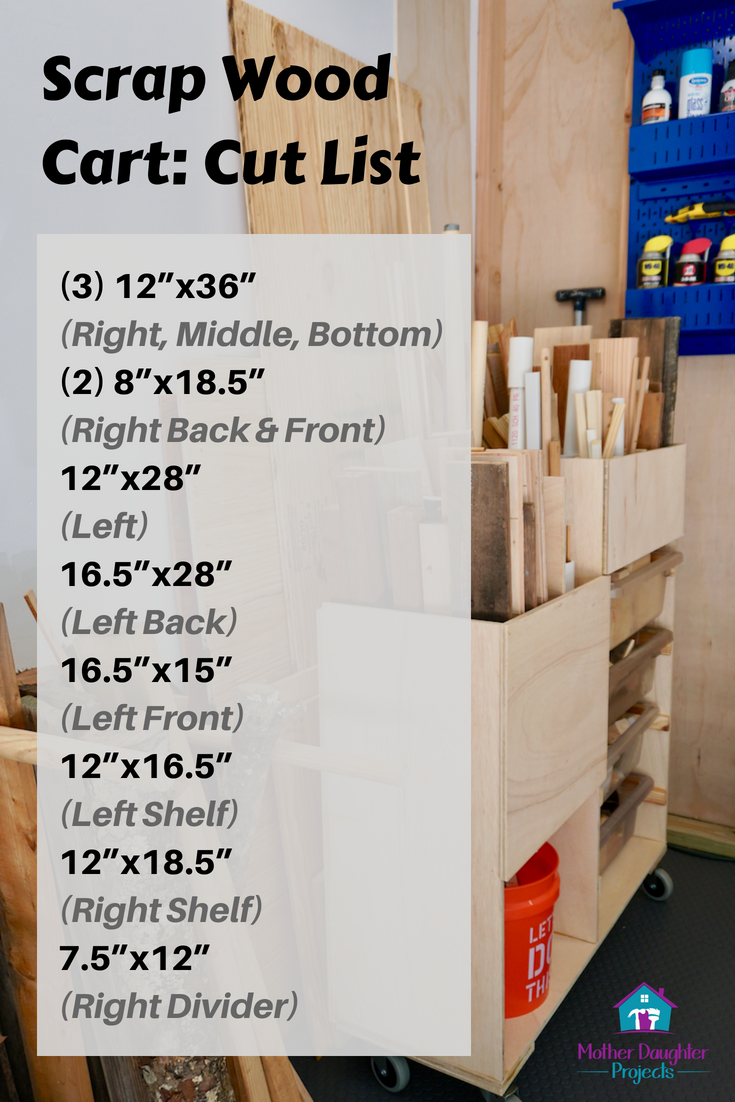
One of the last projects to be completed in the #garagemakeover was storage for scrap wood. Leftover wood is an ongoing byproduct of woodworking, and we have our fair share of scraps and offcuts. Prior to this build, we did not have an efficient way to store these wood pieces so we ended up not using them--because we didn't know what we had!
We were determined to find a way to store all the wood leftovers in the new workshop. Steph did some Pinterest research and designed a customized a storage piece that would work for us. Take a look at how it all came together. We now have a place to store large and small pieces of wood.
Tools:
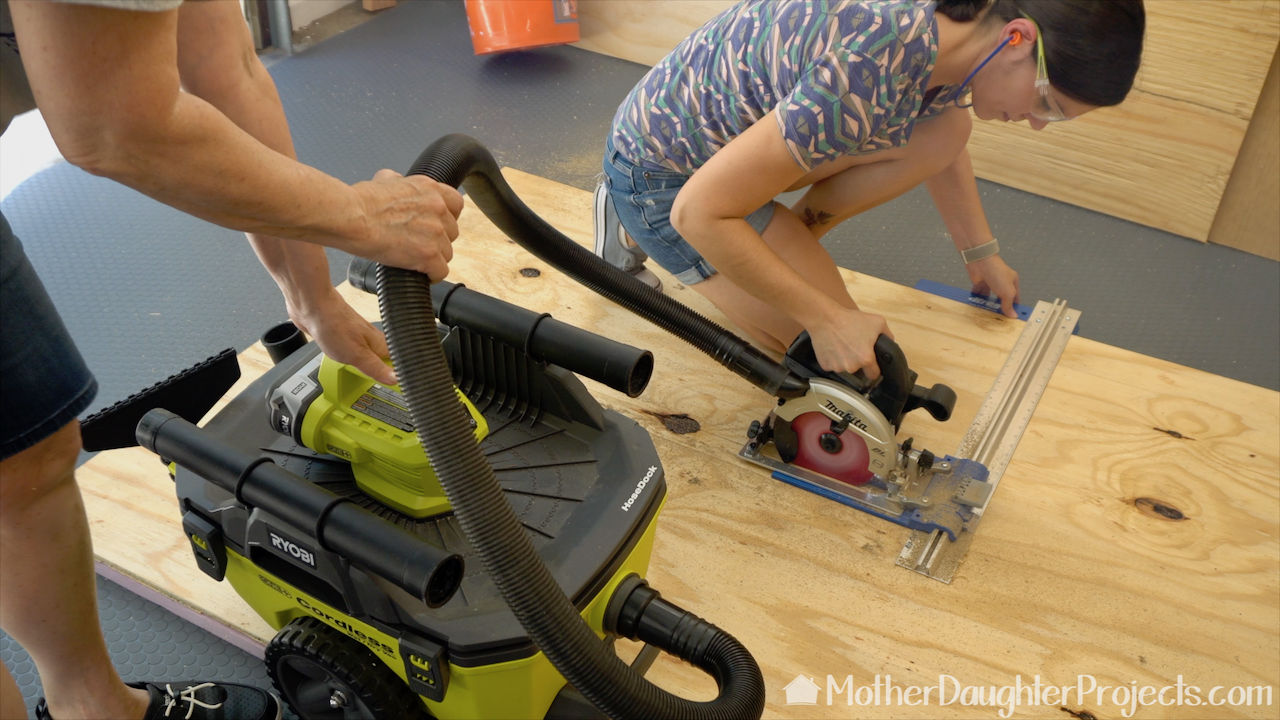
We made the vertical storage unit first. It consists of a base on risers and a divider piece that attaches to the wall. We used our new Makita Subcompact circular saw to make the cuts. Notice the port on the back of the saw. This is to collect sawdust as you cut. It's a great feature to look for if you're in the market for a circular saw.
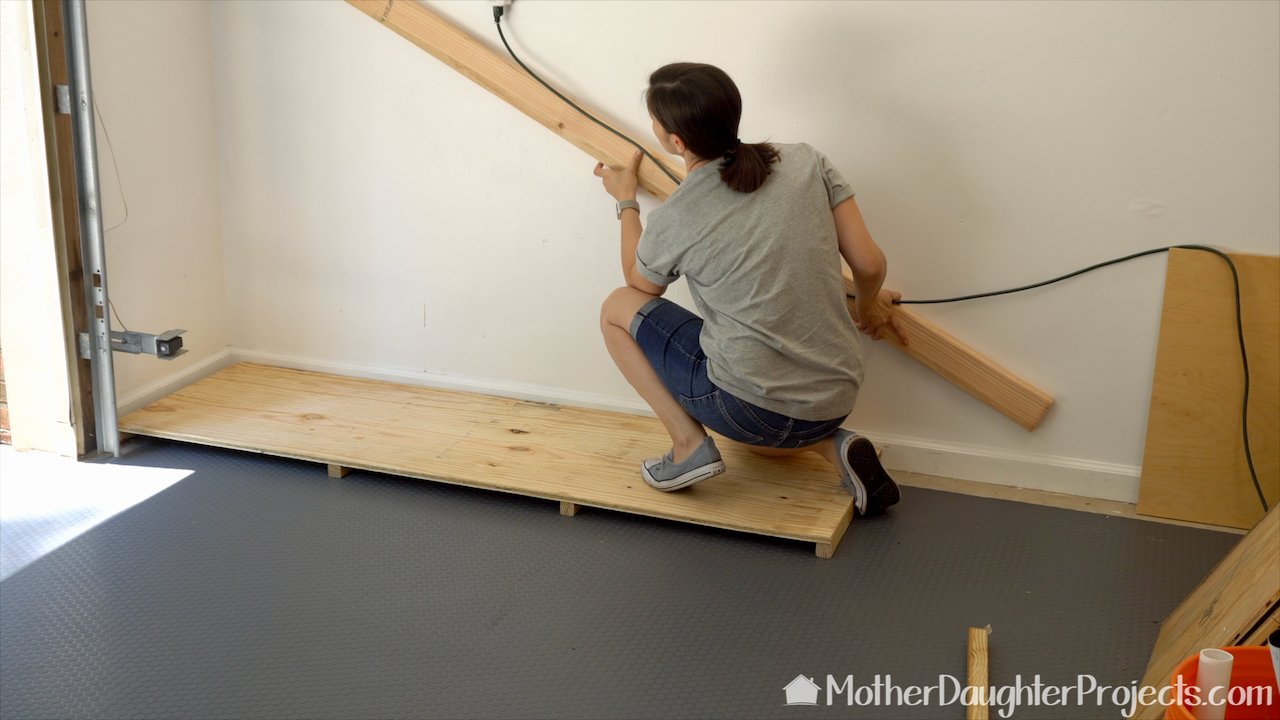
We cut 2x2 lumber down to 22" and attached it to the bottom of the plywood to keep the base up off the floor. Here Steph is working on the placement for the divider piece.
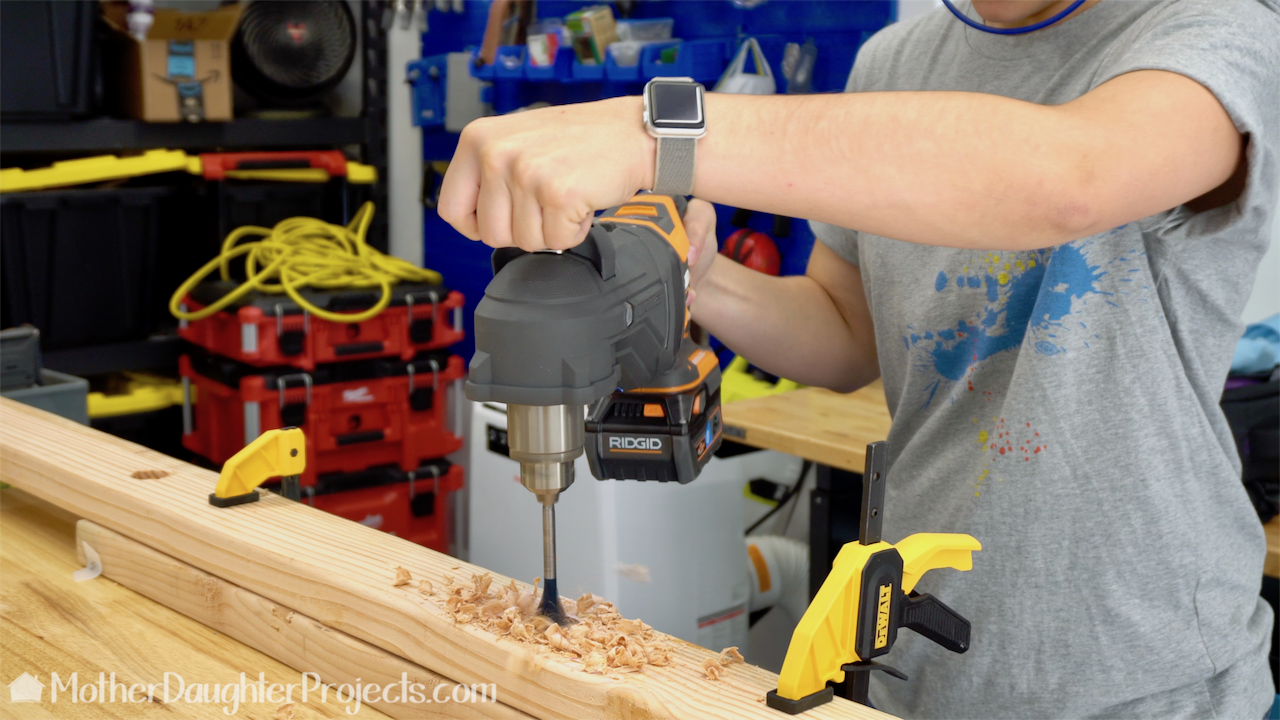
Steph cut holes for the divider dowels with the 18-Volt GEN5X Brushless MegaMax Powerbase with right angle drill. This tool has several attachments that can be used with the base.
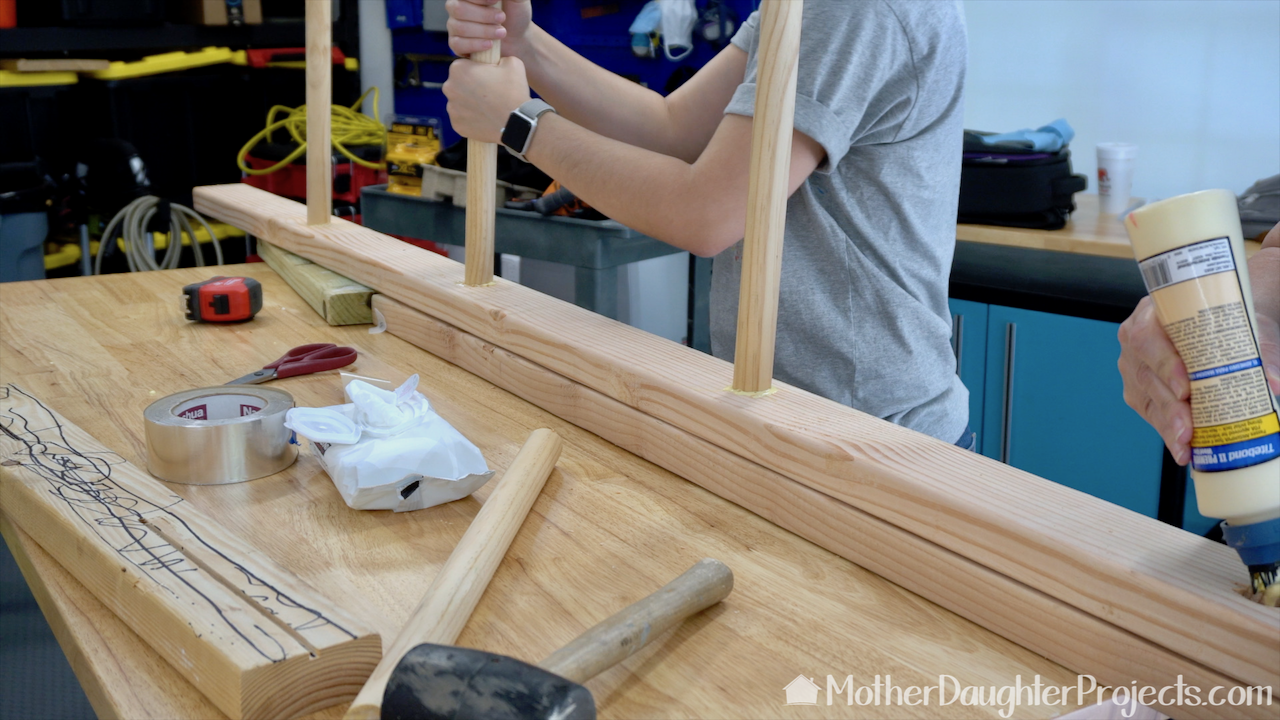
The dowels were glued into place and allowed to dry overnight.

After it was dry, we simply screwed it into the wall studs.
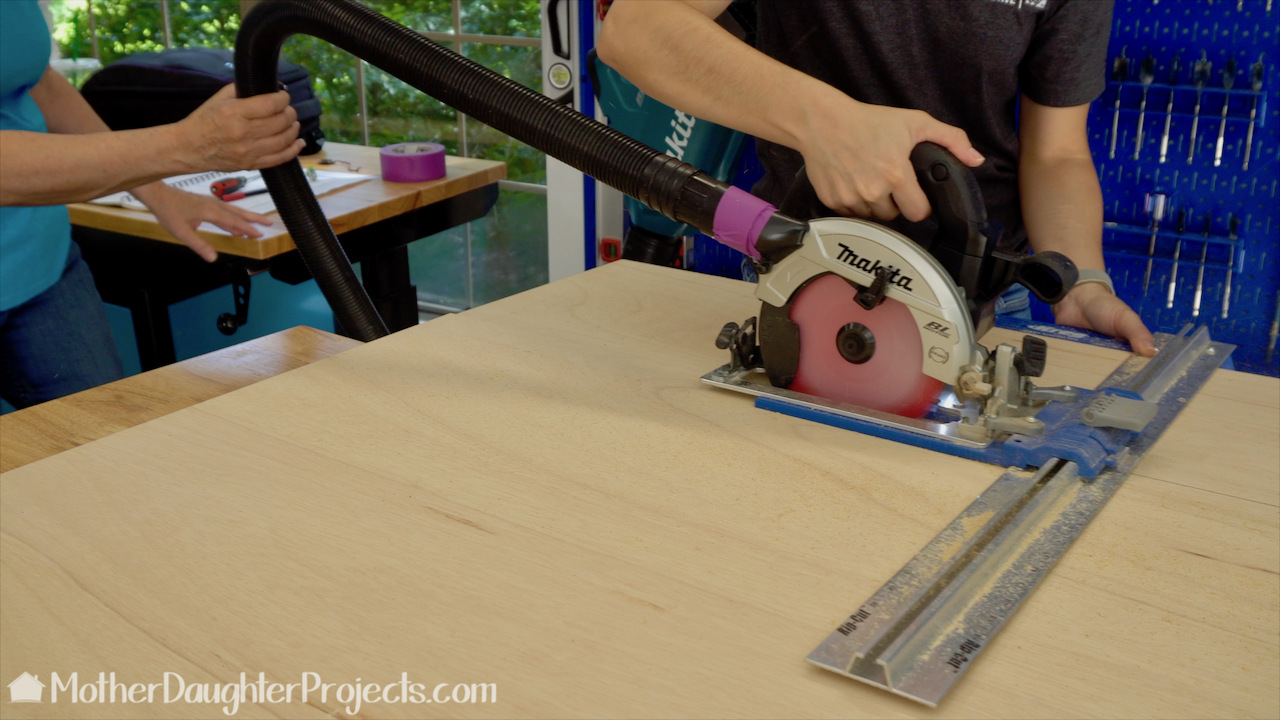
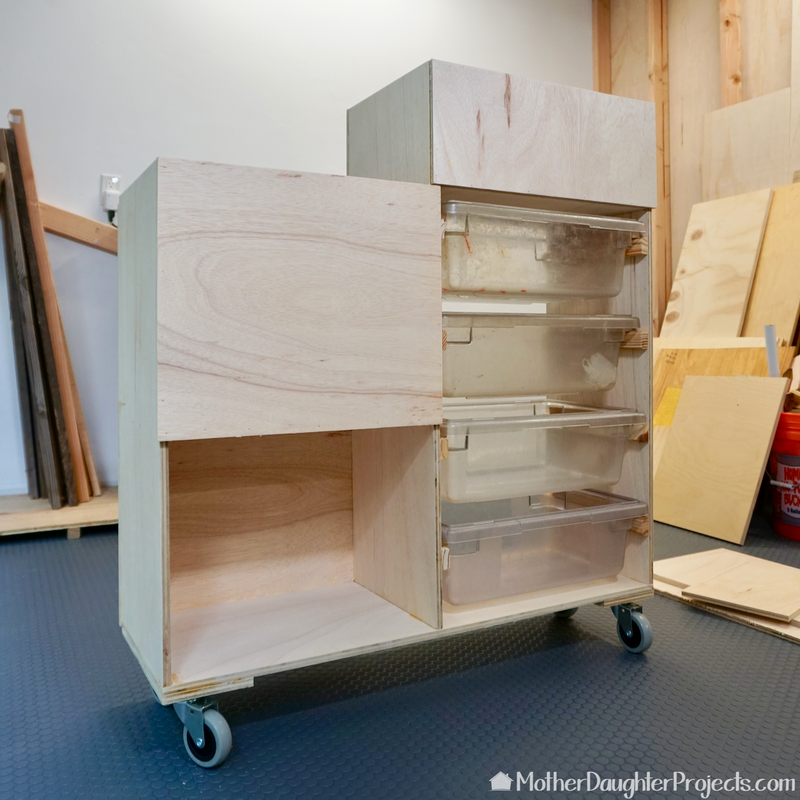
Now, it was time to move onto building the movable unit for the storage of small pieces of wood. Steph made all the cuts and I sanded everything. Using the dust collection port with the Ryobi battery powered wet/dry vac kept the sawdust very well contained.
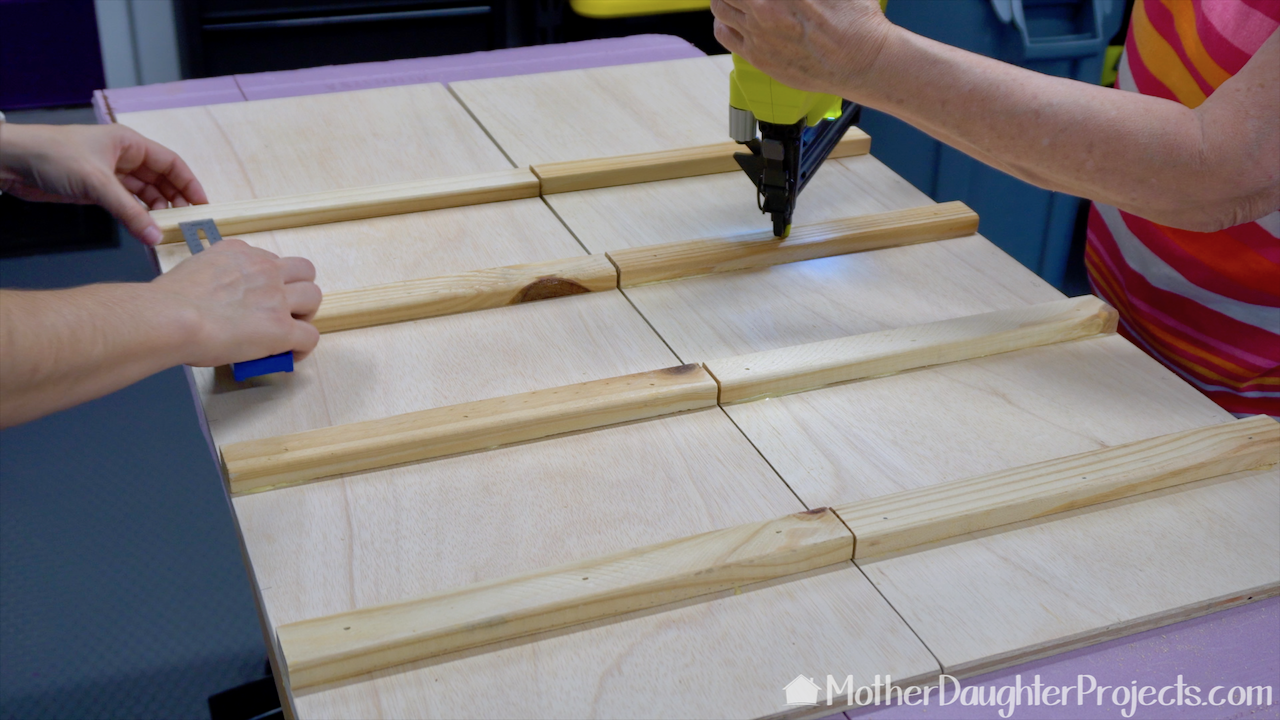
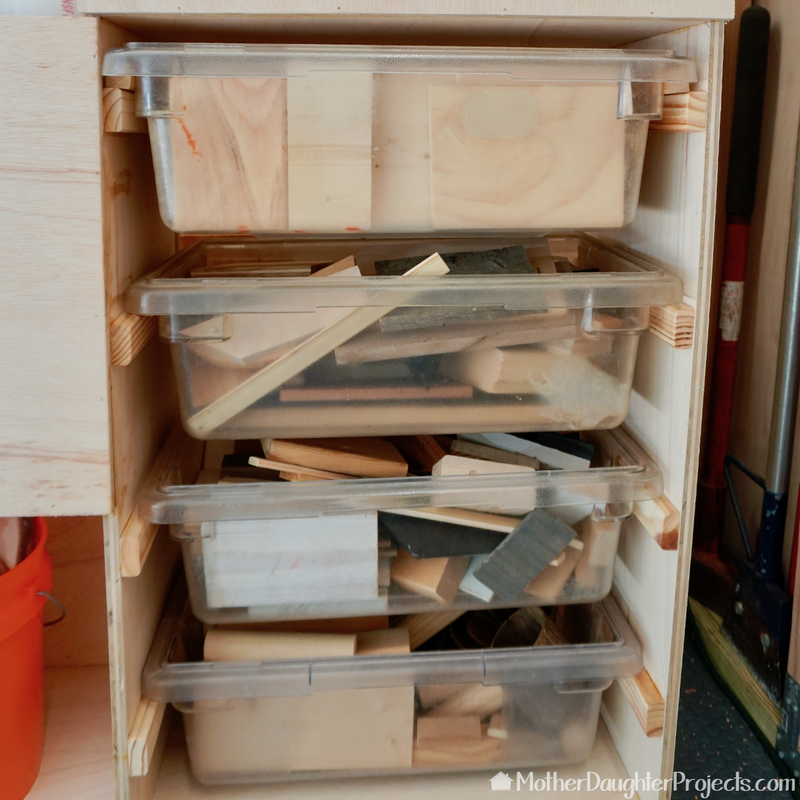
Here we are making the runners for the plastic bins to rest on. We cut the "runners" to size and then glued and brad nailed them into place.
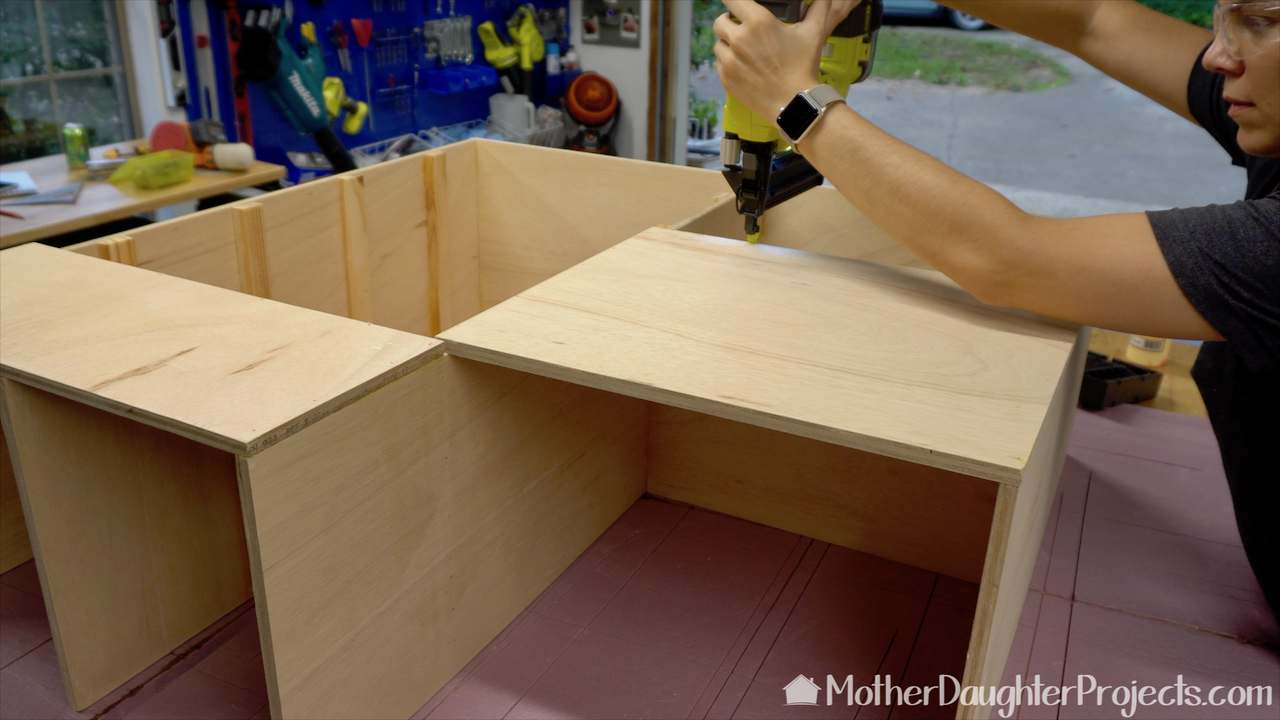
The build continued to glue and brad nail everything piece by piece. It was kind of like a puzzle. Steph designed it without my input, so it was really cool to see her vision come together. She really took into account all the different size things we needed to store.
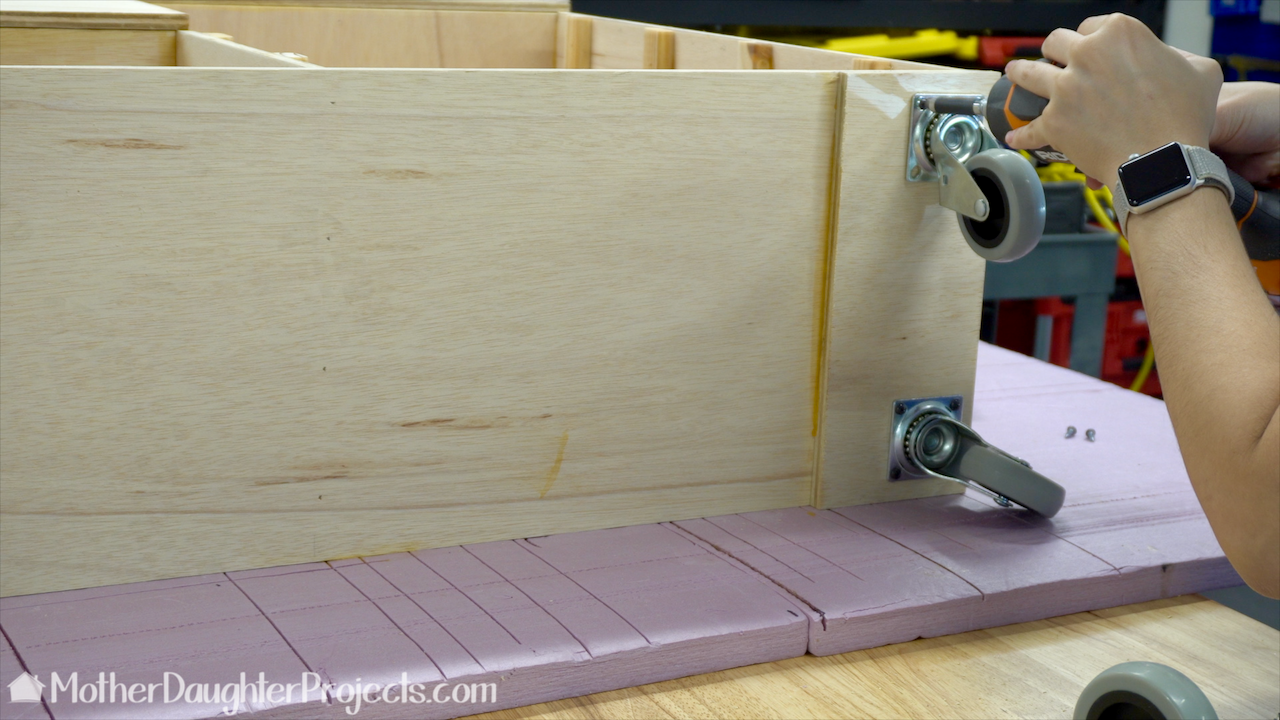
The casters were a last minute addition as we decided it should be movable. We added a little extra thickness to the bottom and added casters.
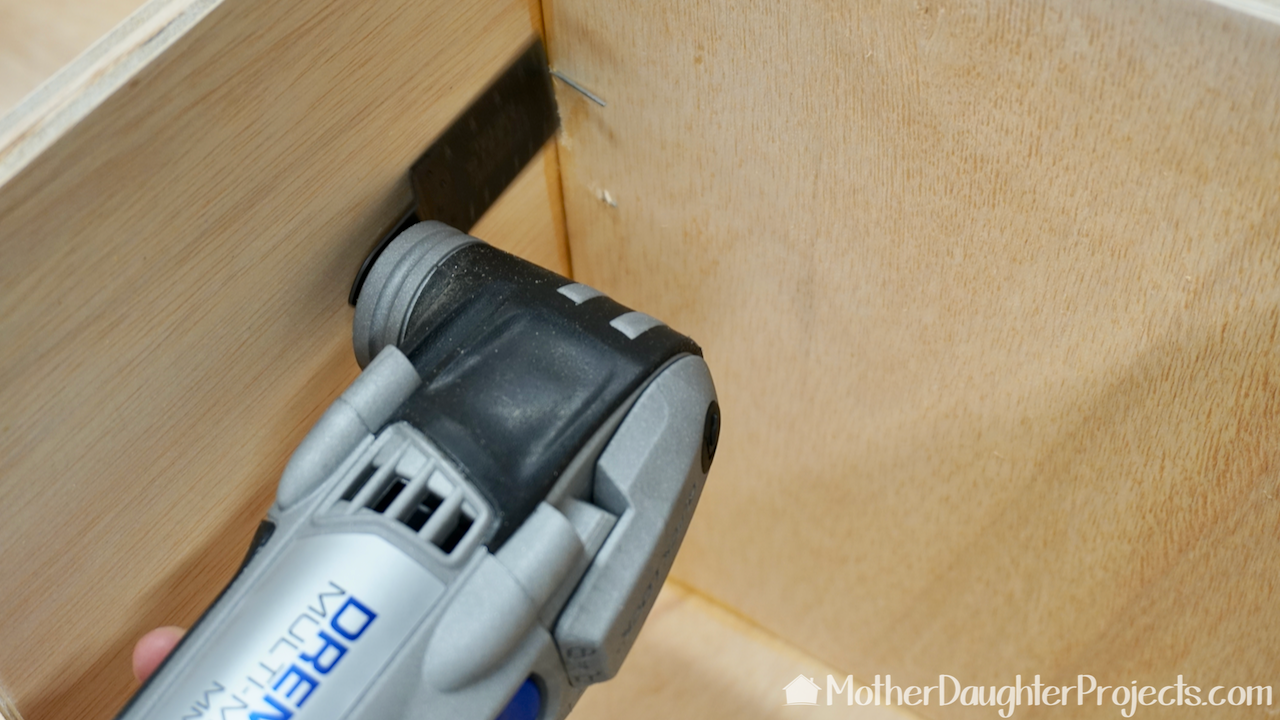
Oops! Misfires do happen! The Dremel Multi-Max easily cut off the offending brad nails!
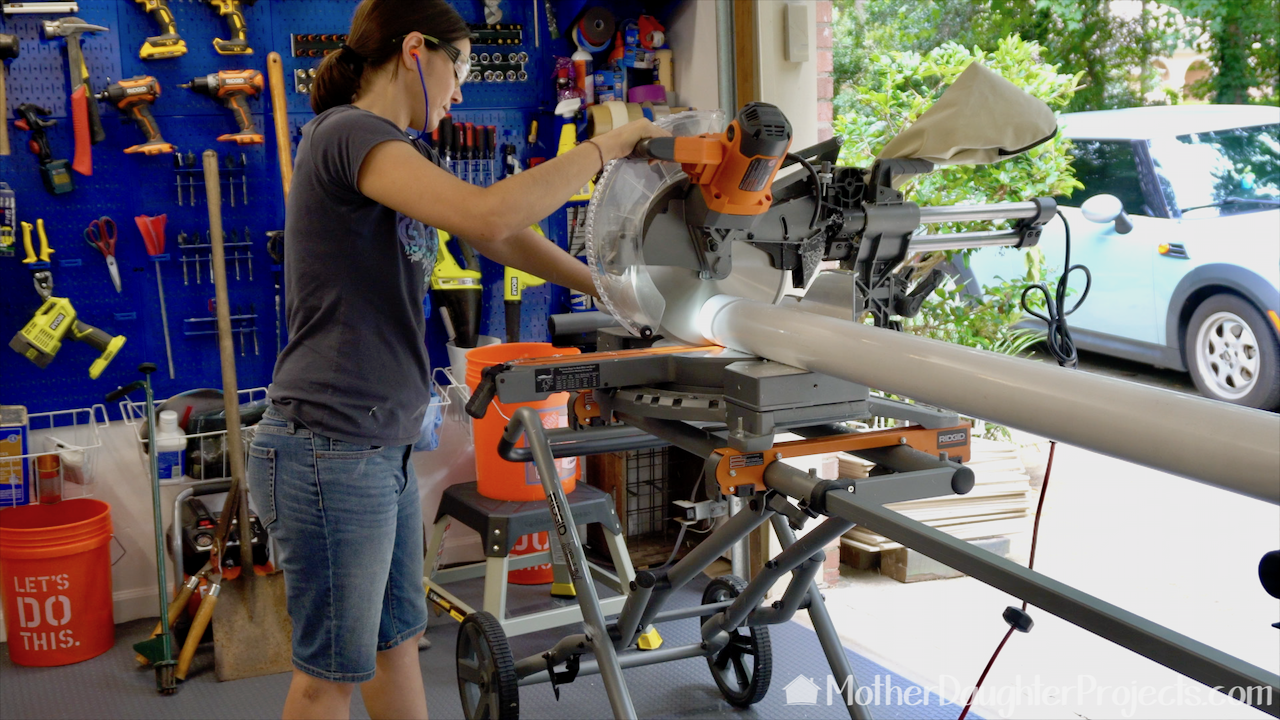
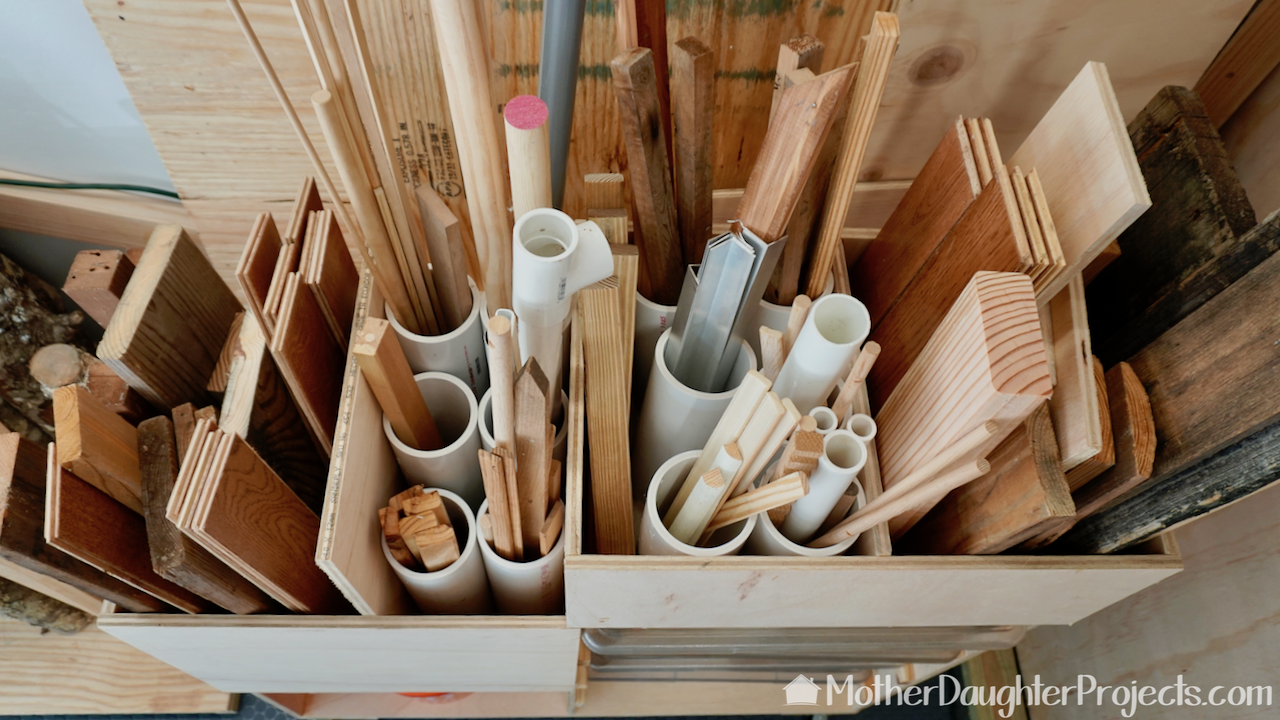
To contain all the tall, skinny scraps, Steph cut lengths of 3" PVC to fit into the top of the small scrap storage unit.
Can you find the hidden Mickey?
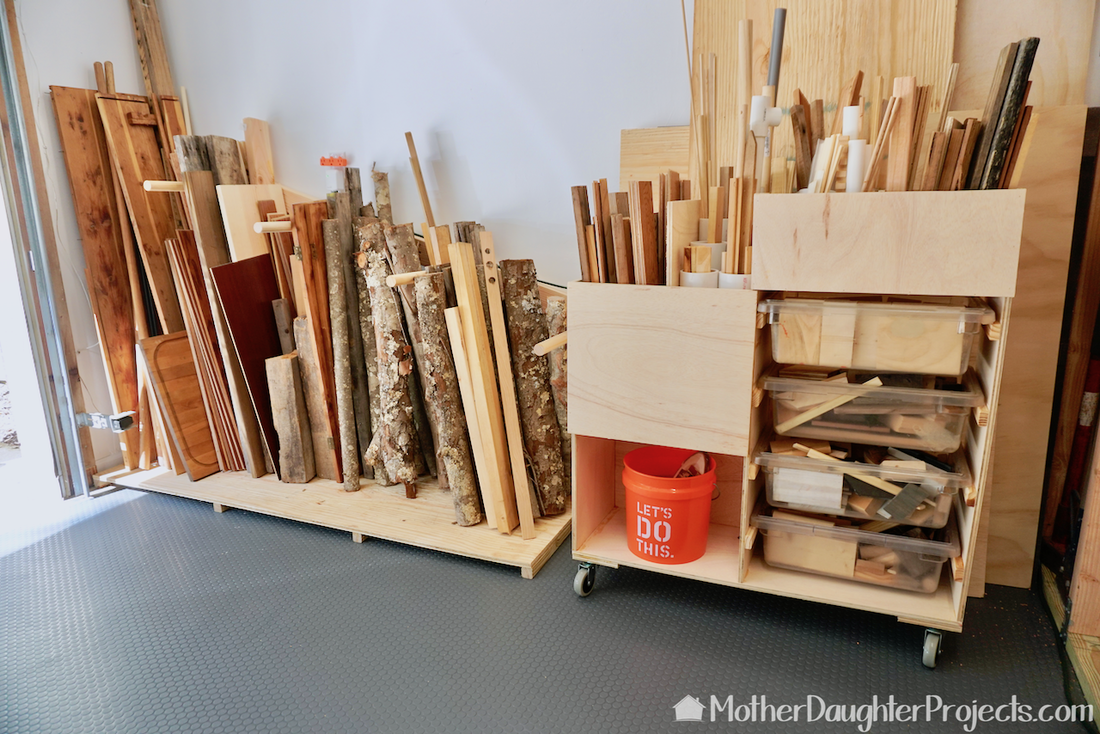
All the new wood storage fit well on the storage side of the garage. We can now see what we have and access it easily! Don't forget to watch the video for more details!
We acknowledge that The Home Depot is partnering with us to participate in the ProSpective 2018 Campaign. As a part of the Program, we are receiving compensation in the form of products and services, for the purpose of promoting The Home Depot. All expressed opinions and experiences are our own words. Our post complies with the Word Of Mouth Marketing Association (WOMMA) Ethics Code and applicable Federal Trade Commission guidelines.
FYI: We are not professionals, and we don’t claim to be. This is what we found worked for our project. Yours may need a little different approach. Safety first! FYI: Affiliate links are being used on this page. Purchasing via these links help support MDP! Related Projects
2 Comments
MsPat
9/6/2018 10:33:22 am
Like your wood working ideas...
Kat
4/4/2020 05:00:31 pm
Thanks for sharing these instructions. It looks like a cool storage piece. I just finished cutting out all the pieces and dry fit them together. I think the right front and back pieces should be 19.5” wide, not 18.5, to accommodate the board thickness. Yes? Leave a Reply. |

Mother Daughter Projects
|