Mother Daughter Projects

  • About
    • Contact
    • Privacy Policy
  • Maintenance
  • Improvement
  • Decor
  • Tech
  • Tools
  • About
    • Contact
    • Privacy Policy
  • Maintenance
  • Improvement
  • Decor
  • Tech
  • Tools

DIY for Homeowners

How to Make Faux Live Edge Floating Shelves

9/13/2023

0 Comments

 
text by Vicki     Sign up here to join our weekly email newsletter!
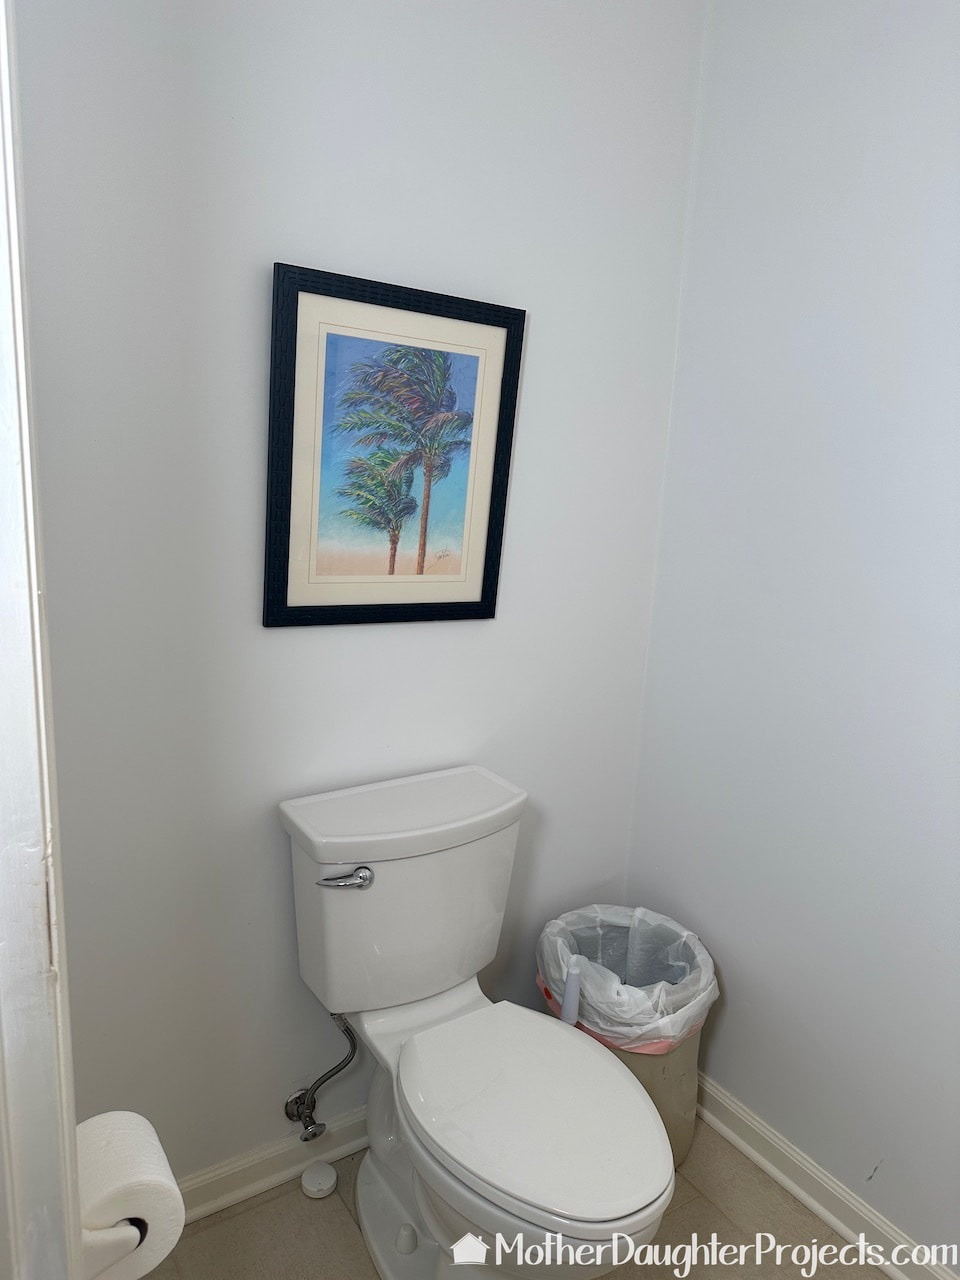
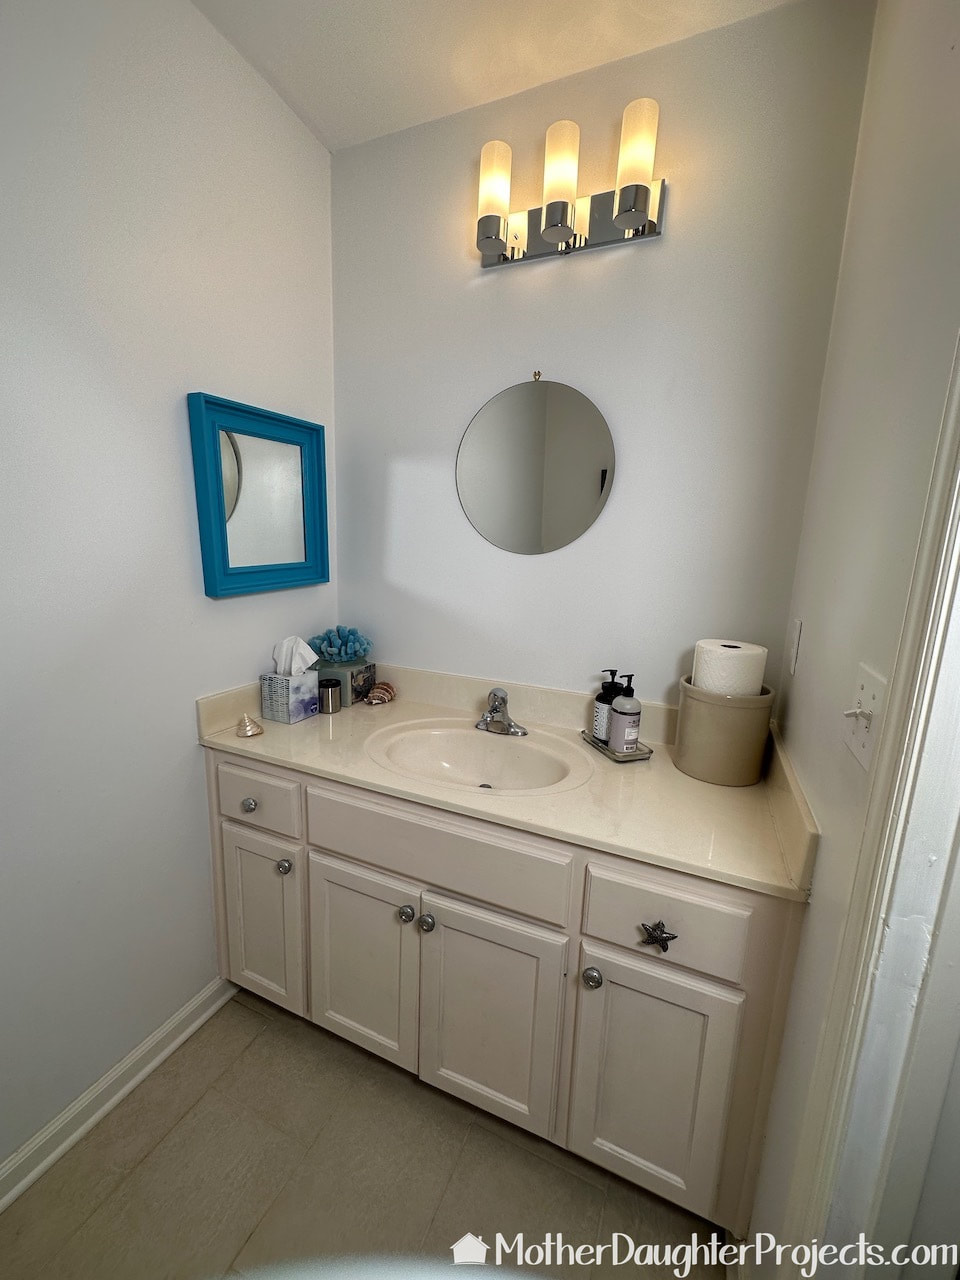
Once we learned how easy it is to fake a live edge, we were hooked. We've been looking for another project where we could use the technique and found one in this half bath makeover. 

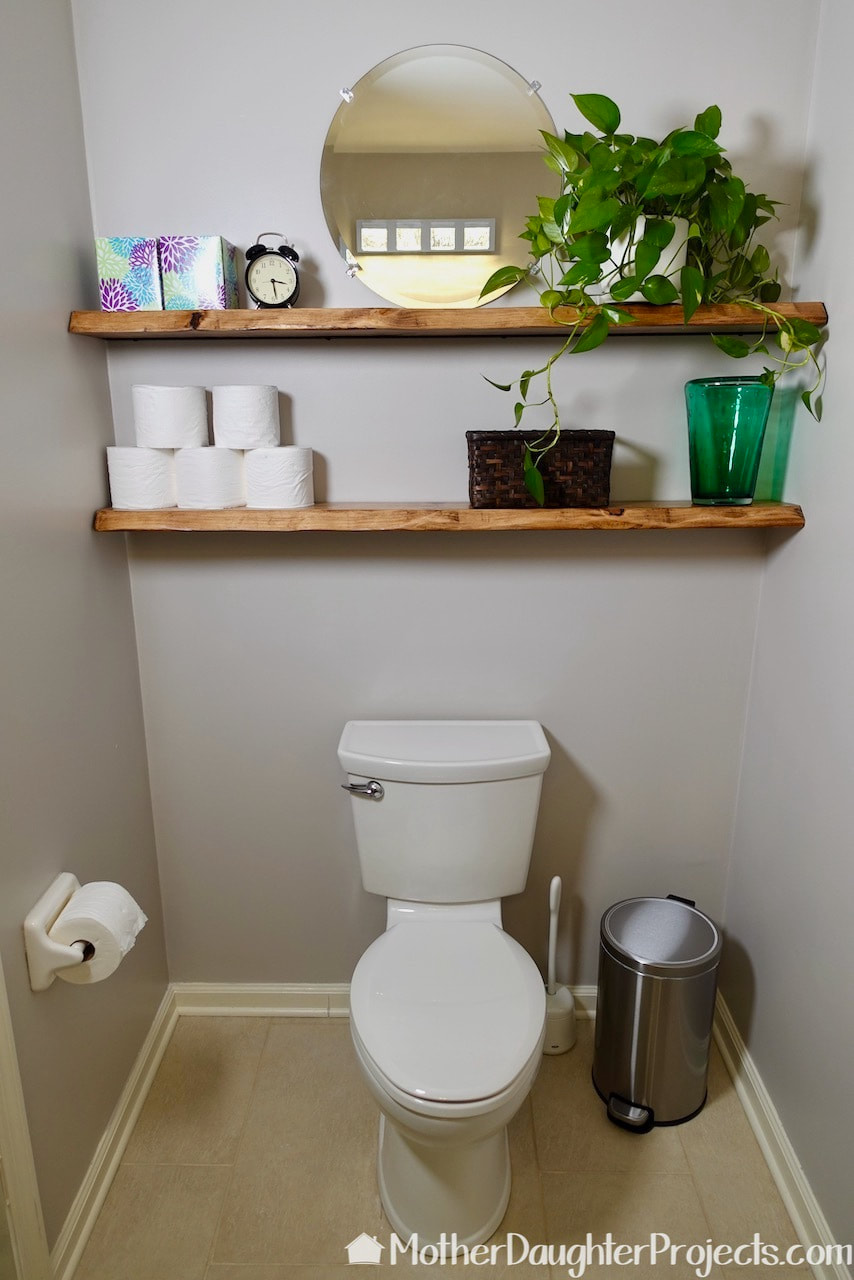
We will be adding three "live" edge shelves to this bathroom. Here's how we did it.

Materials/Tools:


  • 2x8 common board

  • 2x6 common board

  • Everbilt 1-1/2 in. x 96 in. Zinc-Plated Slotted Angle (Home Depot)

  • DEWALT 20V MAX Cordless Band Saw (Home Depot)

  • Makita 18V 5.0Ah X2 LXT Lithium-Ion (36V) Brushless Cordless 10 in. Dual-Bevel Sliding Compound Miter Saw with Laser Kit (Home Depot)

  • Makita 18V X2 LXT Lithium-Ion (36V) Brushless Cordless 6-1/2 in. Plunge Circular Saw (Home Depot)

  • DIABLO 4-1/2 in. 80-Grit Steel Demon Grinding and Polishing Flap Disc with Integrated Speed Hub (Home Depot)

  • DEWALT 20V MAX Cordless 4.5 in. - 5 in. Angle Grinder (Home Depot)

  • WEN 41 in. W x 35 in. H 600 lbs. Capacity Portable Clamping Sawhorse and Work Bench (Home Depot)

  • Kreg Track Horse (Home Depot)

  • DEWALT 20V MAX XR Cordless Brushless 3-Speed Oscillating Multi Tool (Home Depot)

  • RYOBI ONE+ HP 18V Brushless Cordless Jig Saw (Home Depot)

  • RYOBI ONE+ 18V 6 Gal. Cordless Wet/Dry Vacuum (Tool Only) with Hose, Crevice Tool, Floor Nozzle and Extension Wand (Home Depot)

  • BEHR 1 qt. Transparent Oil-Based Interior Pre-Stain Wood Conditioner (Home Depot)

  • Minwax Special Walnut 224 Stain (Amazon)

  • Glacier Bay 1/4 in. Plastic Mirror Mounting Clips (Home Depot)

  • Paper Towel Holder (Amazon)

We used common boards to make our faux live edge shelves.
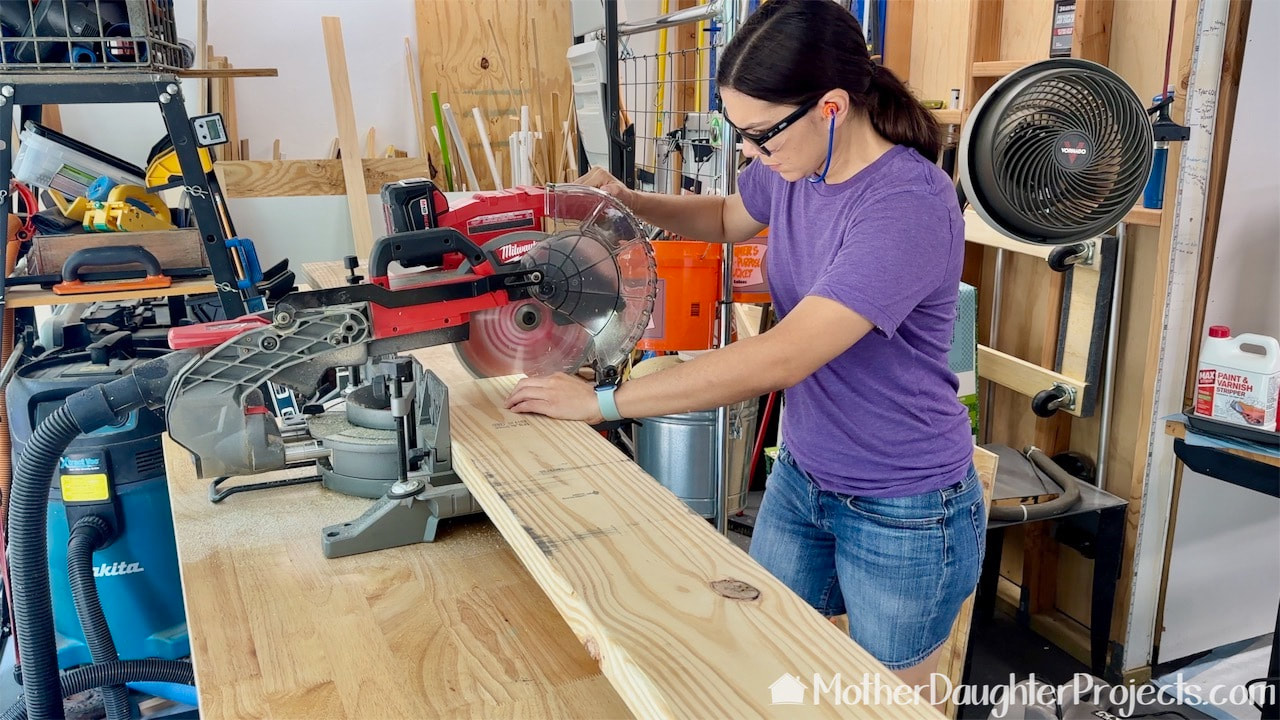
These shelves will fit into the full width of the bathroom which is 53 inches wide. The two back wall shelves are cut from 2x8 lumber and the mirror shelf is from 2x6 lumber.
Here Steph is cutting the metal to length with a DeWalt battery powered portable band saw.
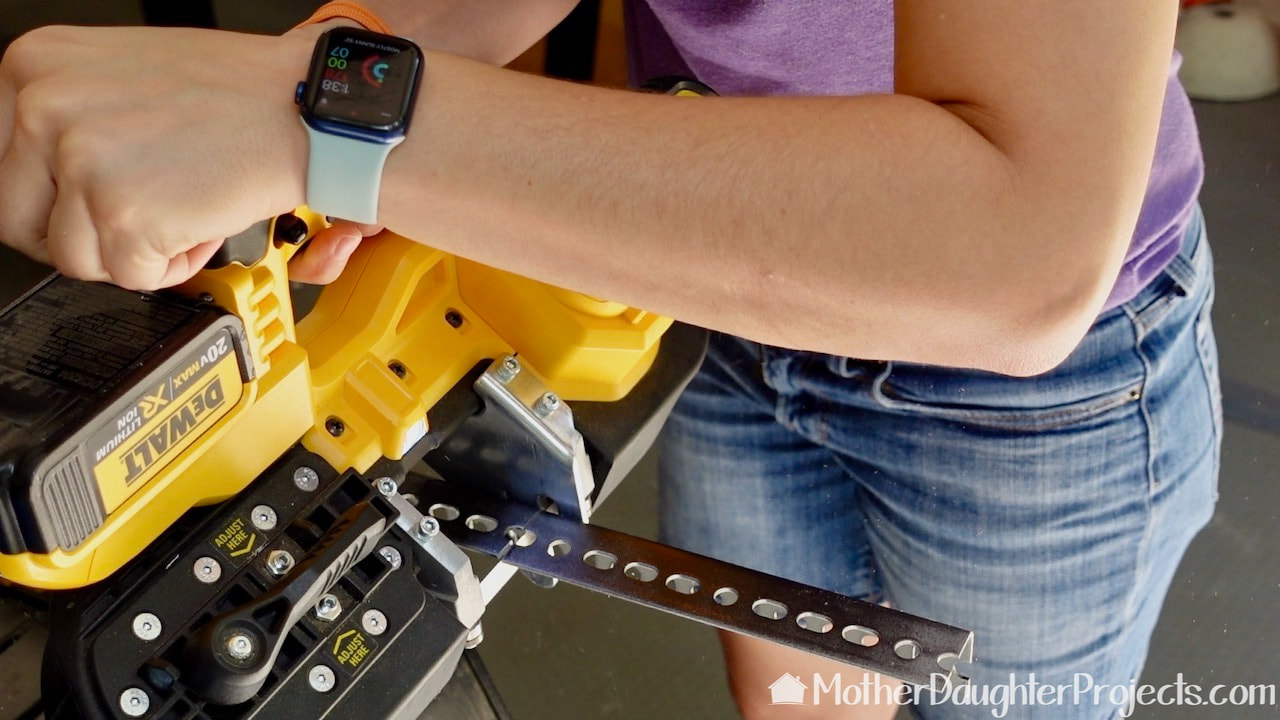
We are using angle iron to hang our floating shelves. This is actually being recycled from a project we did back in the early days of Mother Daughter Projects. Here Steph is cutting the metal to length with a DeWalt battery powered portable band saw.
We used a battery powered Ryobi jig saw to create the live edge.
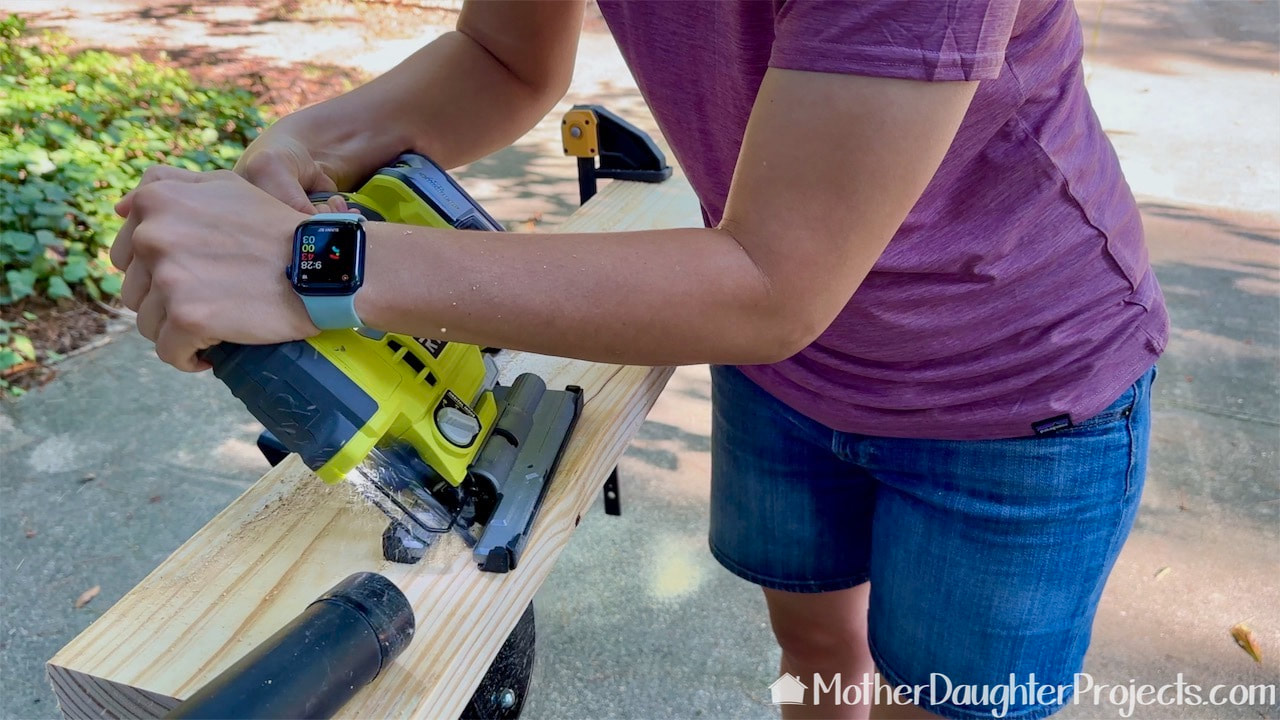
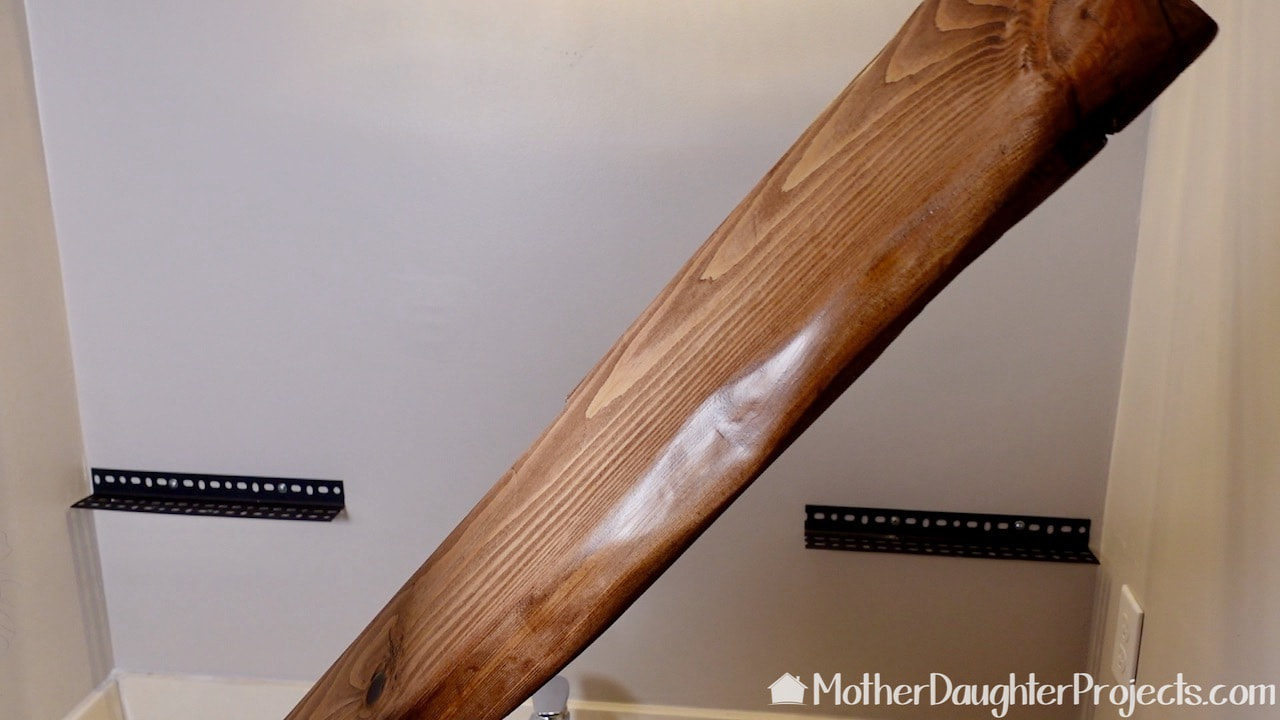
To create the "live" edge, we first used a pencil to mark one of the grain lines. We set the jig saw at a 45 degree angle and followed the pencil line.
This DeWalt angle grinder with 80 grit flap disk makes the magic and is the fun part!
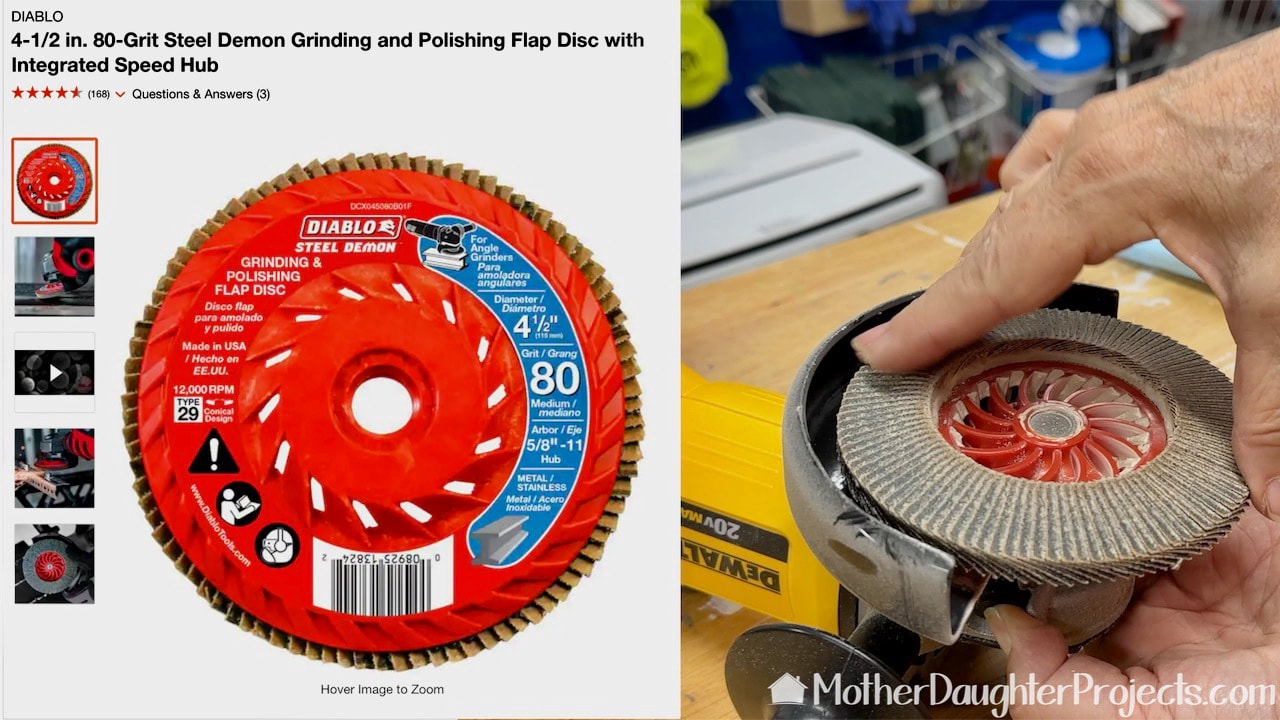
This DeWalt angle grinder with 80 grit flap disk makes the magic and is a fun part of this technique.
Using the DeWalt angle grinder to perfect the faux or fake live edge on one of the shelves.
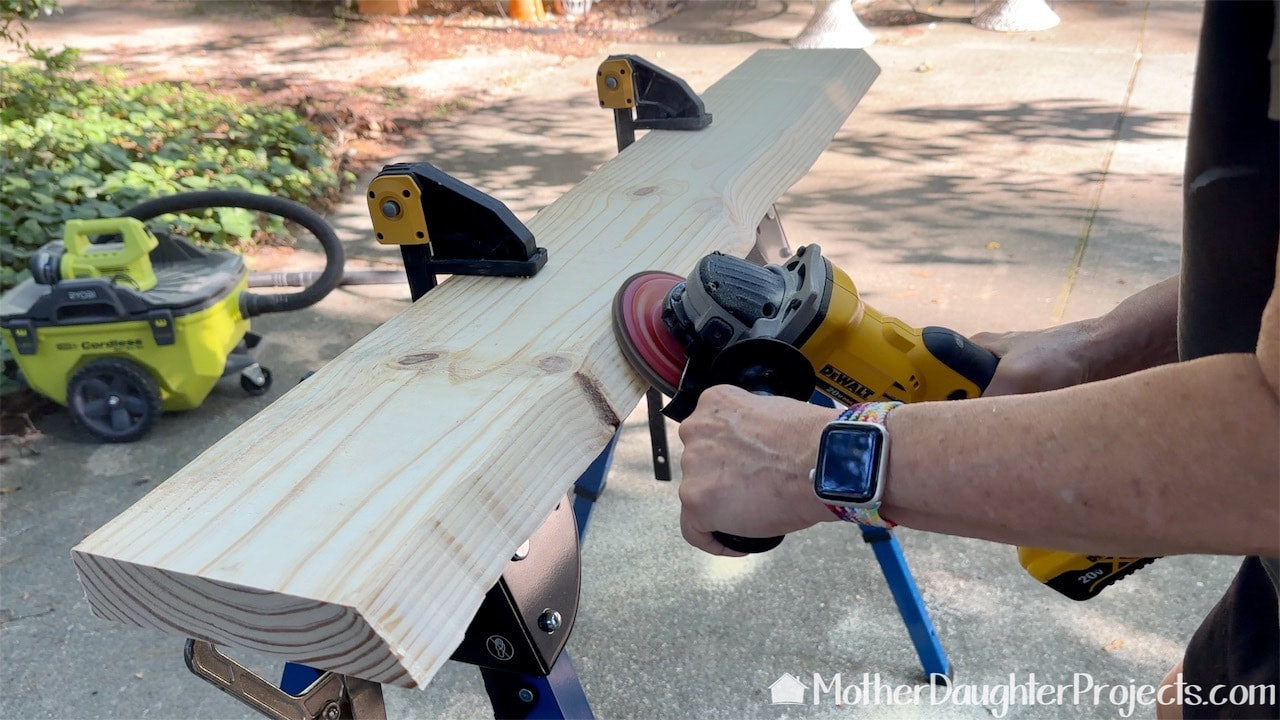
The angle grinder is used to soften edges to create a more realistic "live" edge. Just work until you are happy with the look!
Picture
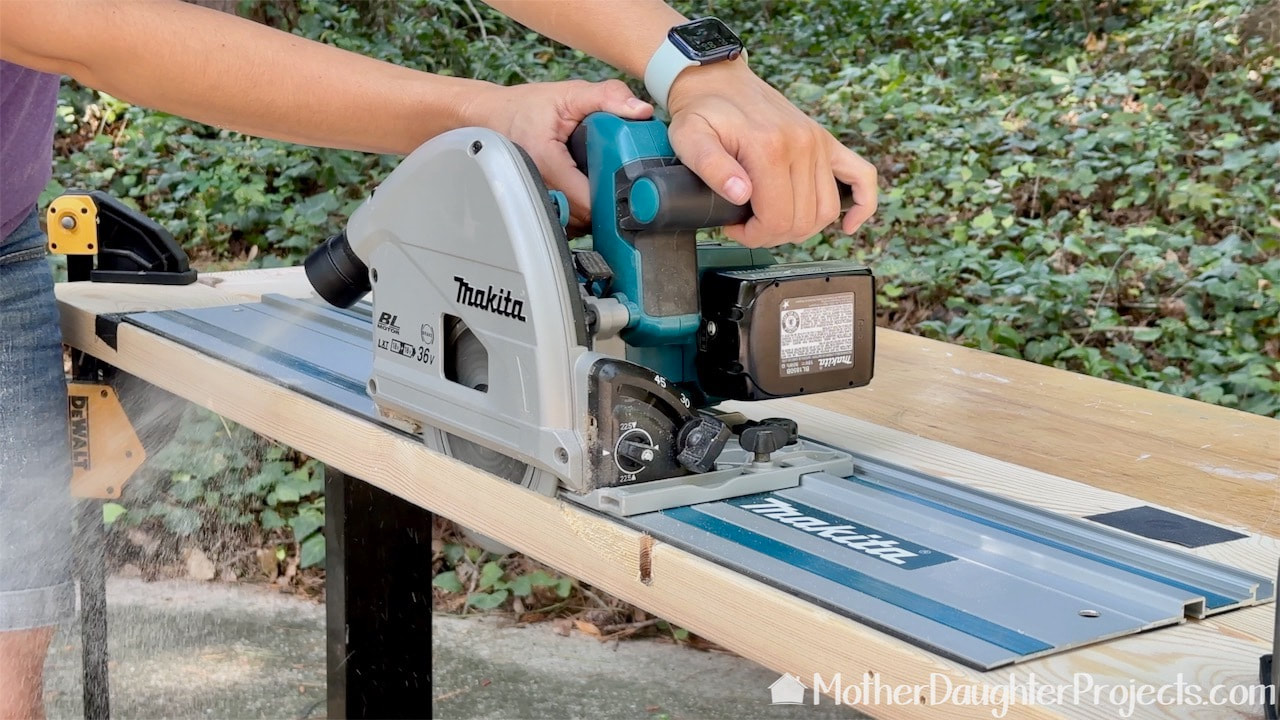
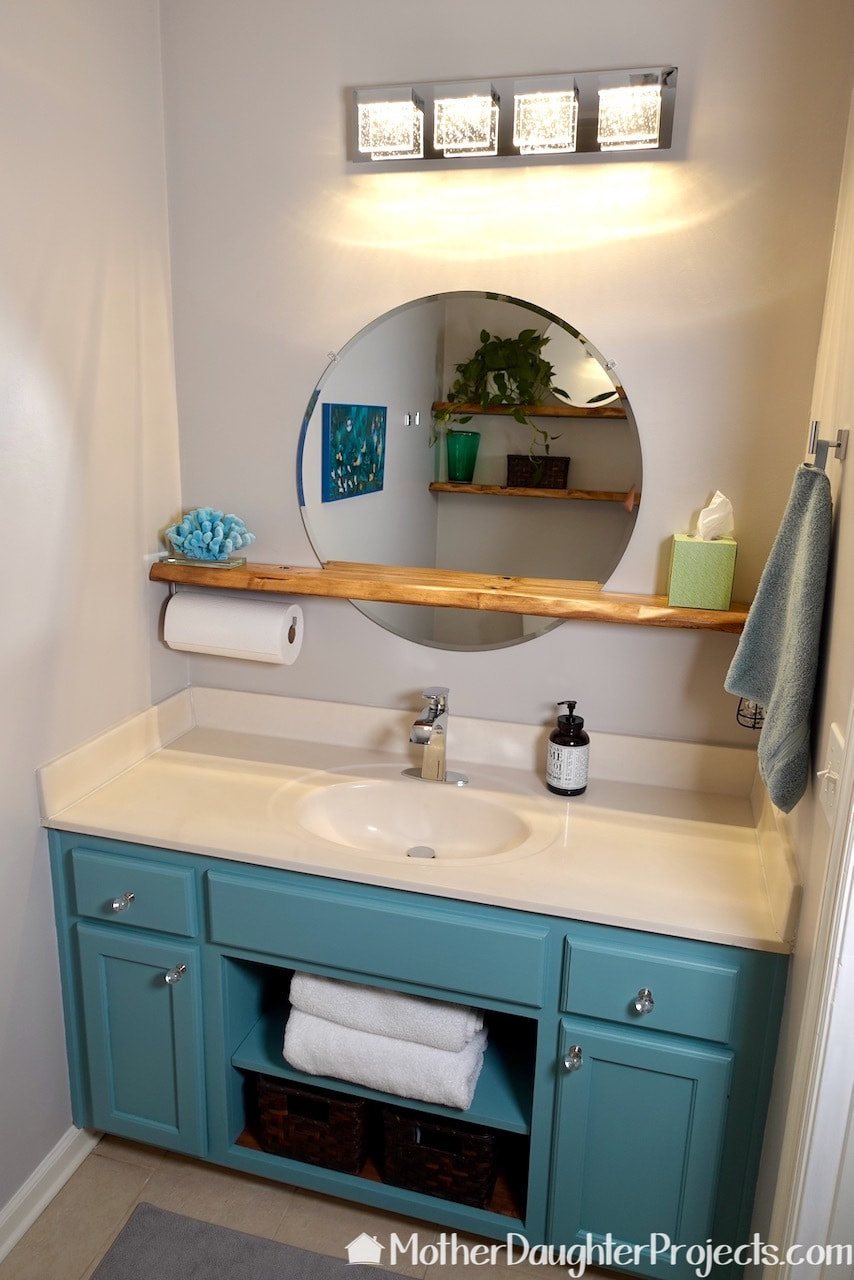
Opposite the two shelves will be a third shelf that will hold a circular mirror. They are many ways to cut the slit we needed for the back. We decided to use a combination of track saw and DeWalt multi-tool.
Behr's wood pre stain conditioner was used before the stain was applied.
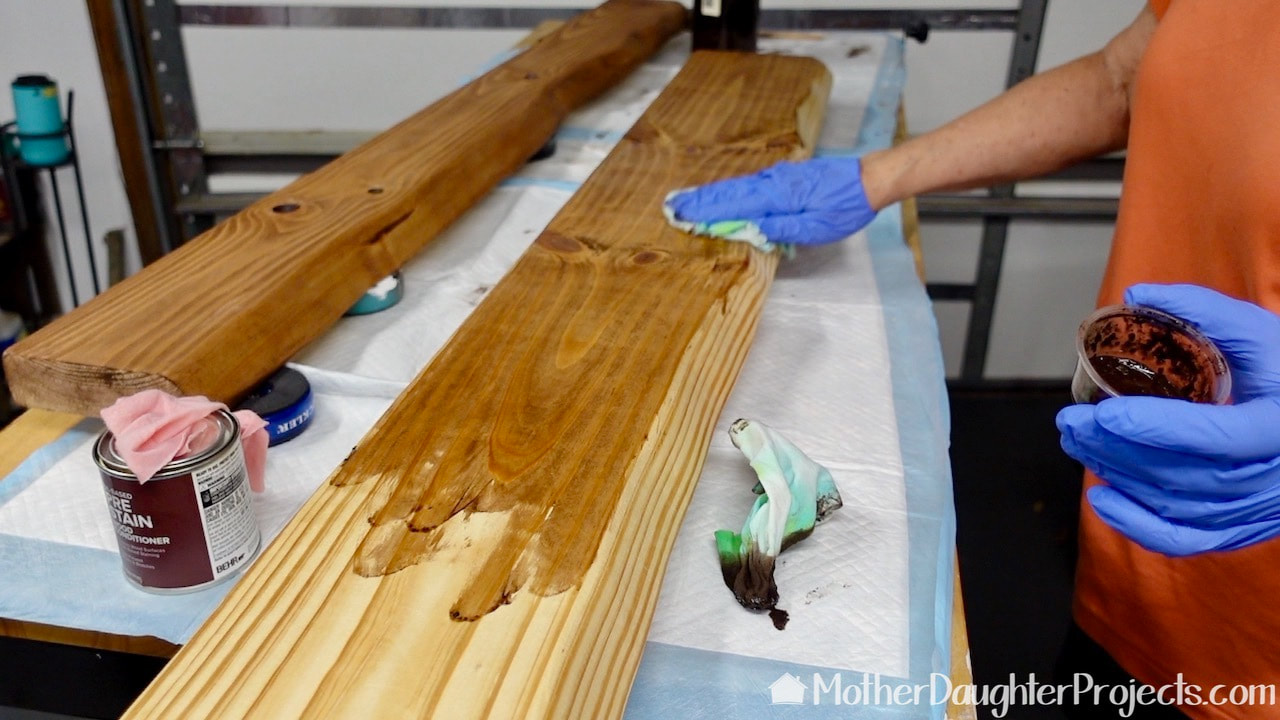
To finish the shelves, I first used Behr's wood conditioner followed by stain in "special walnut."
Hanging the floating shelves.
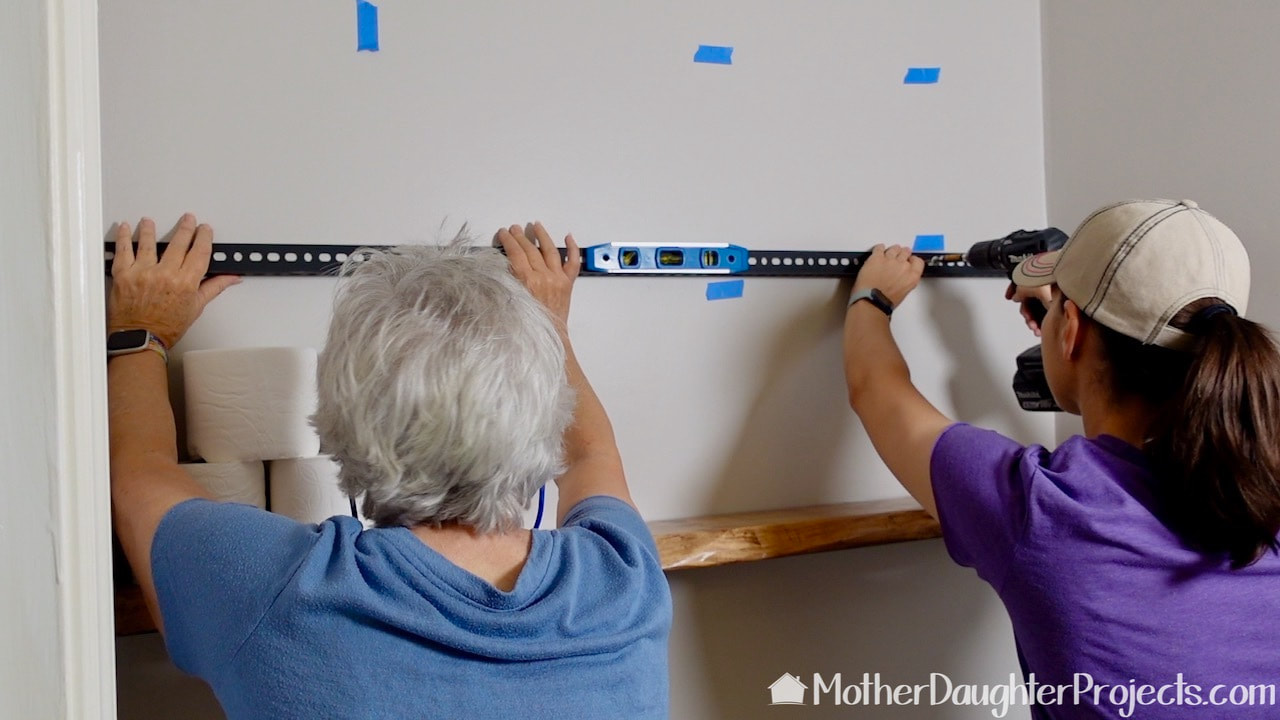
Here we are attaching the angle iron to the wall. The blue tape shows where the studs are located.
The angle iron was sprayed with Rust-Oleum flat black.
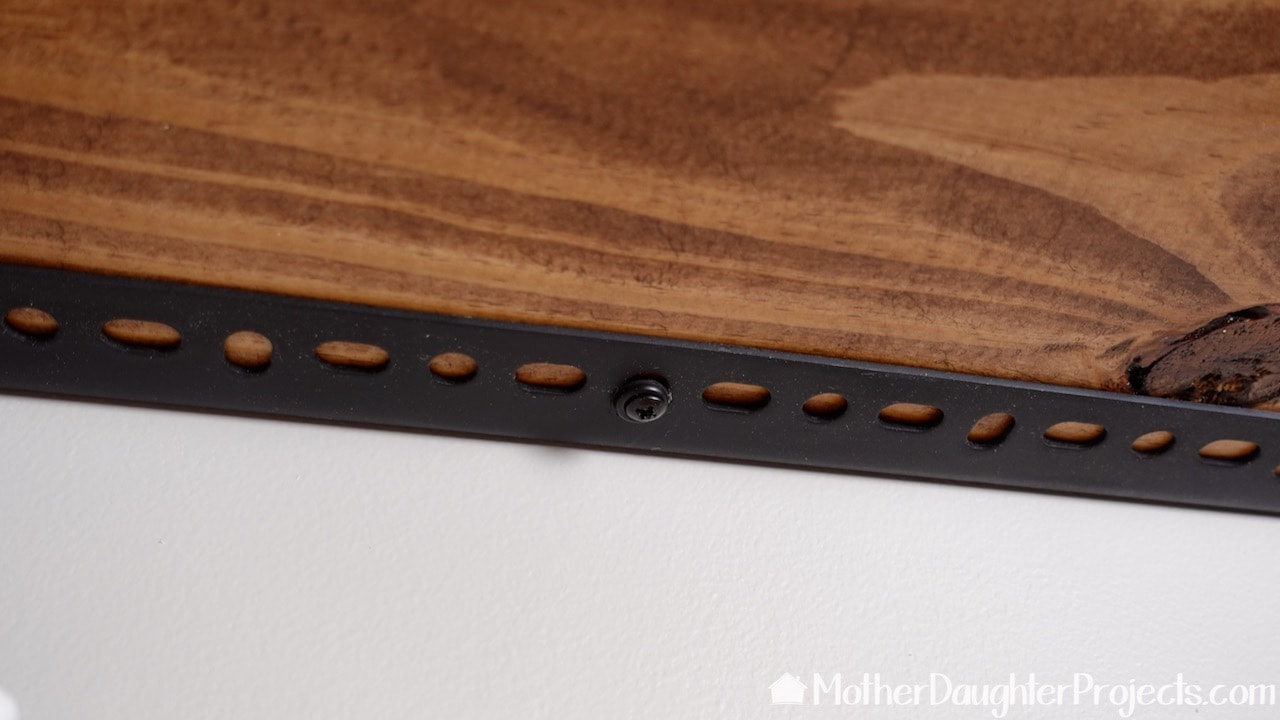
The is the underneath side of the shelf. You can see we used black washers and screws to blend in with the spray painted angle iron. The angle iron was sprayed with Rust-Oleum flat black.
Putting the fake live edge shelf into place.
Here we are getting ready to put the mirror shelf into place.
Adding the round mirror to the floating shelf.
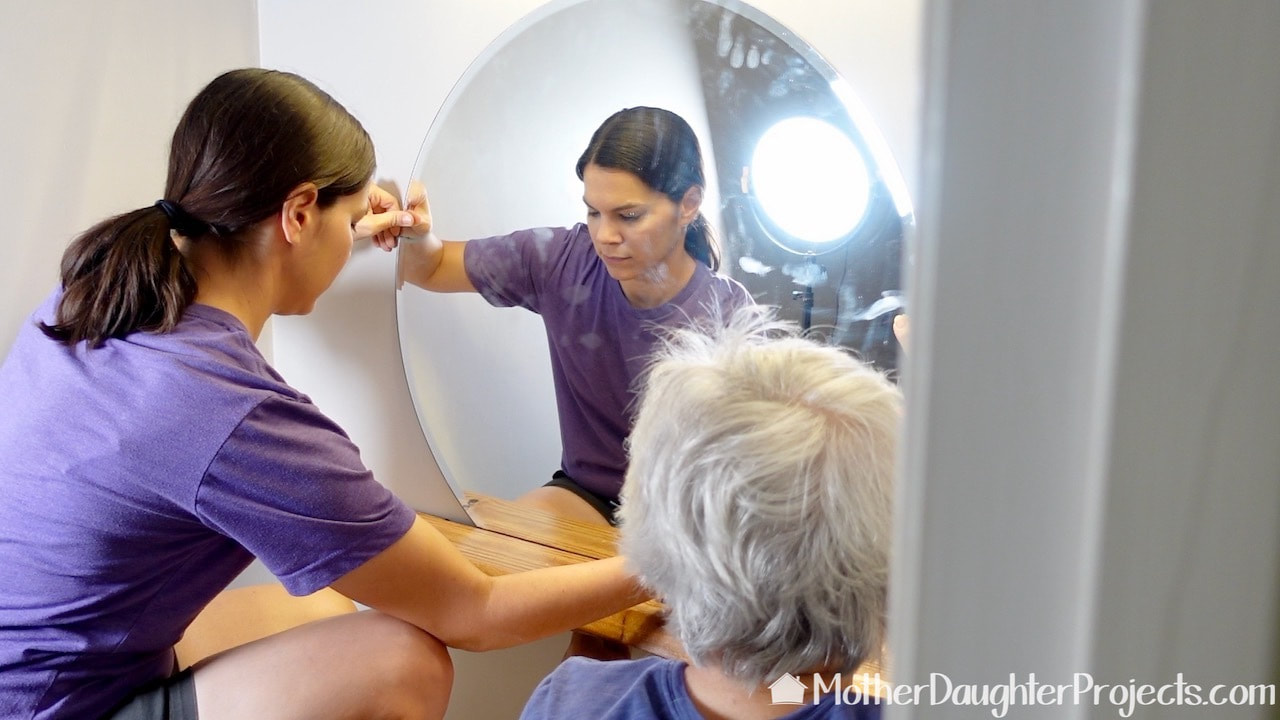
Now, will it work? The mirror fits perfectly and securely into the slit we made in the shelf!
Here is the floating mirror in place on the faux live edge shelf.
We added a couple of mirror clips to keep the mirror more securely in place. We added a simple paper towel holder under the shelf.
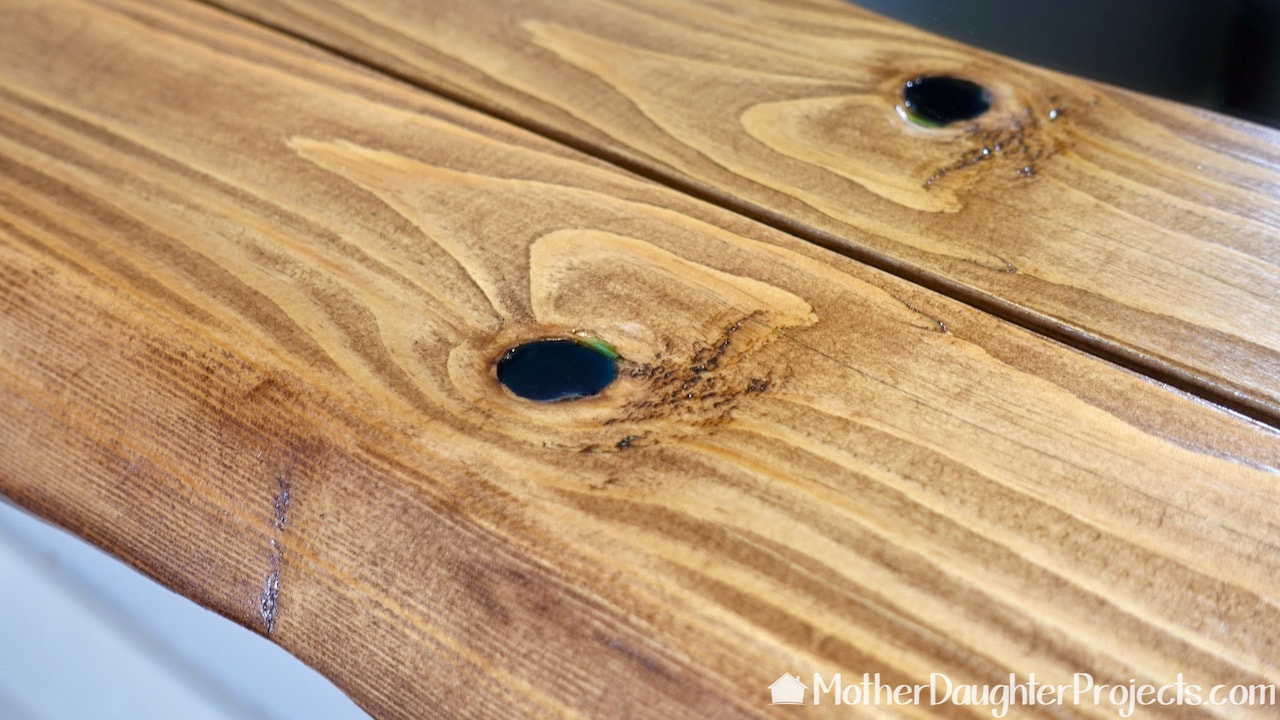
Two knot holes on the shelf went all the way through the board. Off camera we filled them with TotalBoat epoxy.
We can store lots of bathroom essentials on the open shelving.
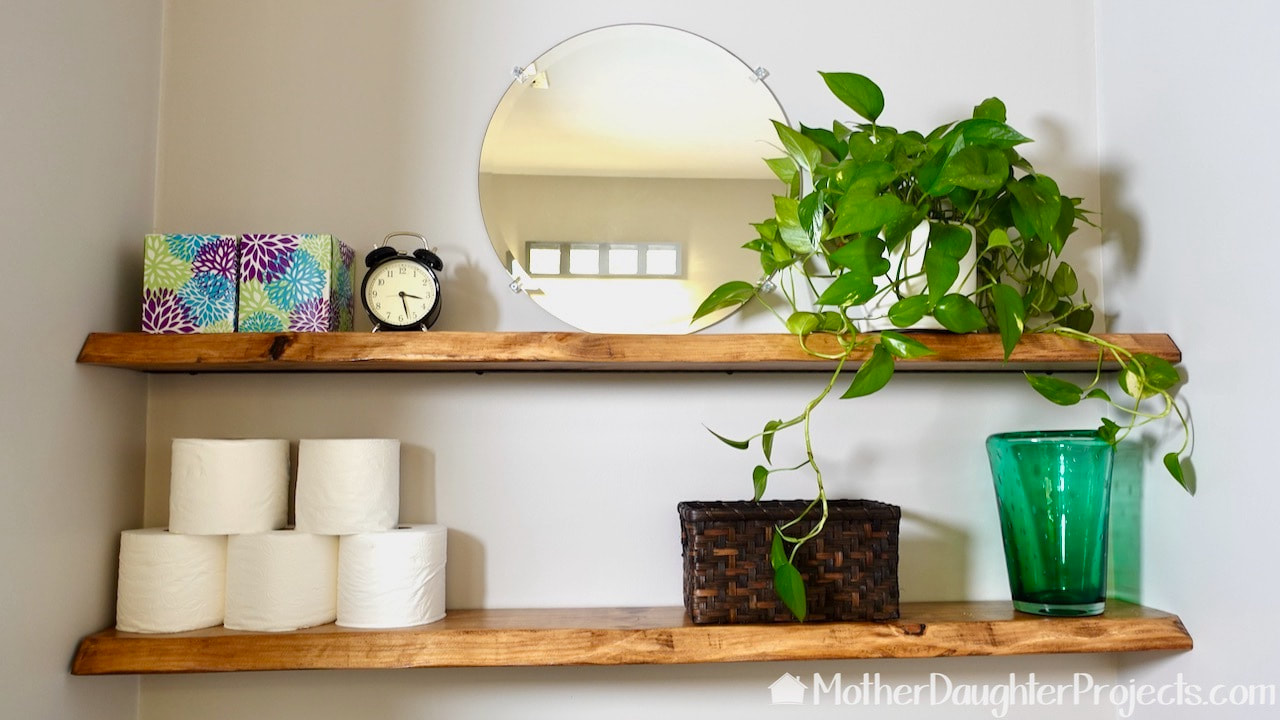
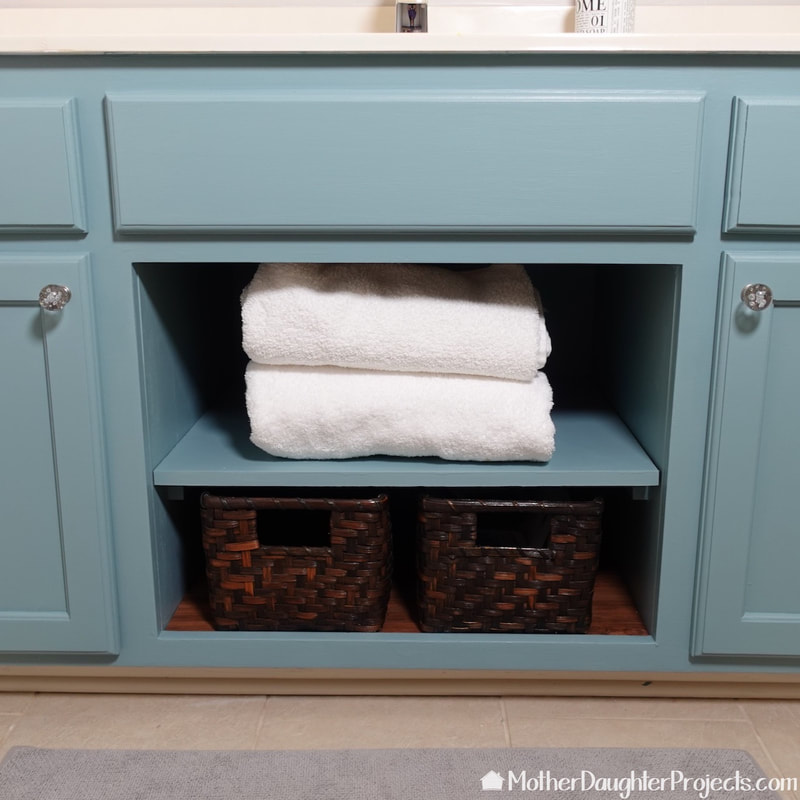
The open shelving allows guest to see and access things they might need during a visit to my home.
Picture
Before
Picture
After
Picture
Before
Picture
After
​We'll be sharing the entire bathroom remodel in a future post!

Please note: This is not a sponsored post.
​
We are not professionals, and we don't claim to be. This is what we found worked for our project. Yours may need a little different approach. Safety first!

Affiliate links are being used on this page. Purchasing via these links help support MDP.

Related Projects

Picture
Open Cabinet Bath Makeover
Picture
Floating Shelf for Small Items
Picture
Install a Barn Door
0 Comments


Leave a Reply.

    MotherDaughterProjects.com

    Mother Daughter Projects
    ​
    Steph & Vicki

    MotherDaughterProjects.com
Mother Daughter Projects, LLC ∙ est. 2015 ∙ Tallahassee, FL by Vicki & Steph ∙ Privacy Policy