Mother Daughter Projects

  • About
    • Contact
    • Privacy Policy
  • Maintenance
  • Improvement
  • Decor
  • Tech
  • Tools
  • About
    • Contact
    • Privacy Policy
  • Maintenance
  • Improvement
  • Decor
  • Tech
  • Tools

DIY for Homeowners

Get Your Garage Organized with Metal Pegboard

7/9/2018

0 Comments

 
​text by Vicki     Sign up to get Mother Daughter Projects updates in your email!
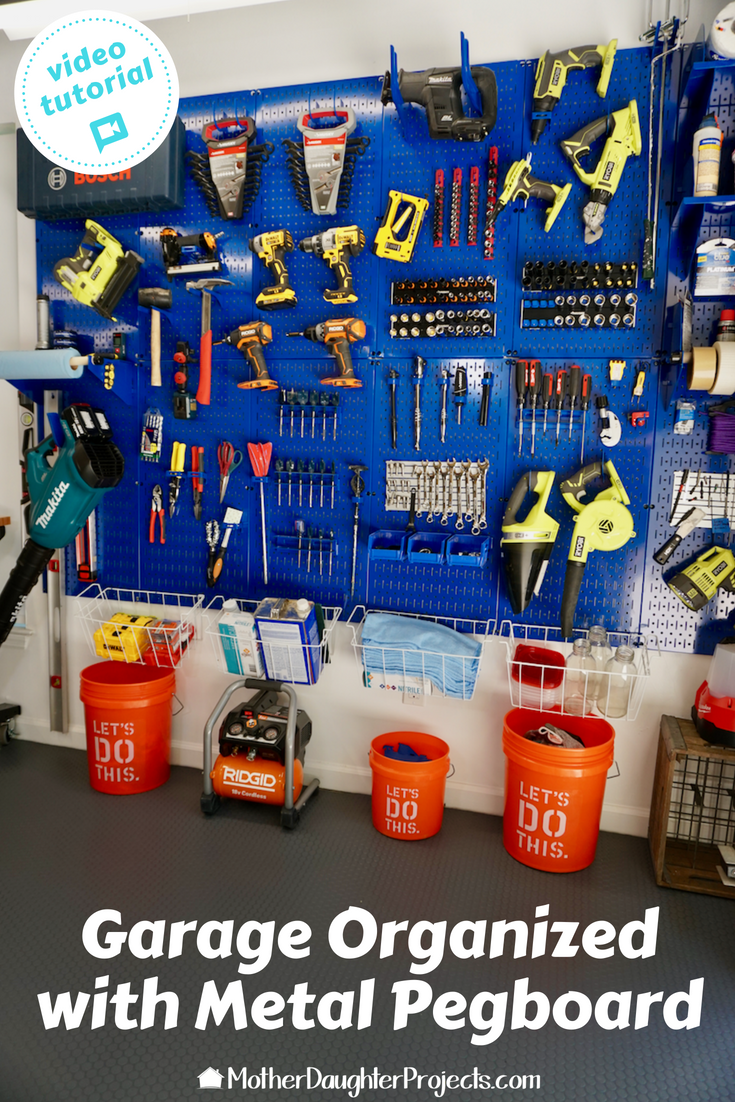
After painting, the next step in the #garagemakeover was the installation of the Wall Control Metal Pegboard wall. I have been looking forward to having this pegboard in the garage after installing and using a mini setup in my utility hallway.

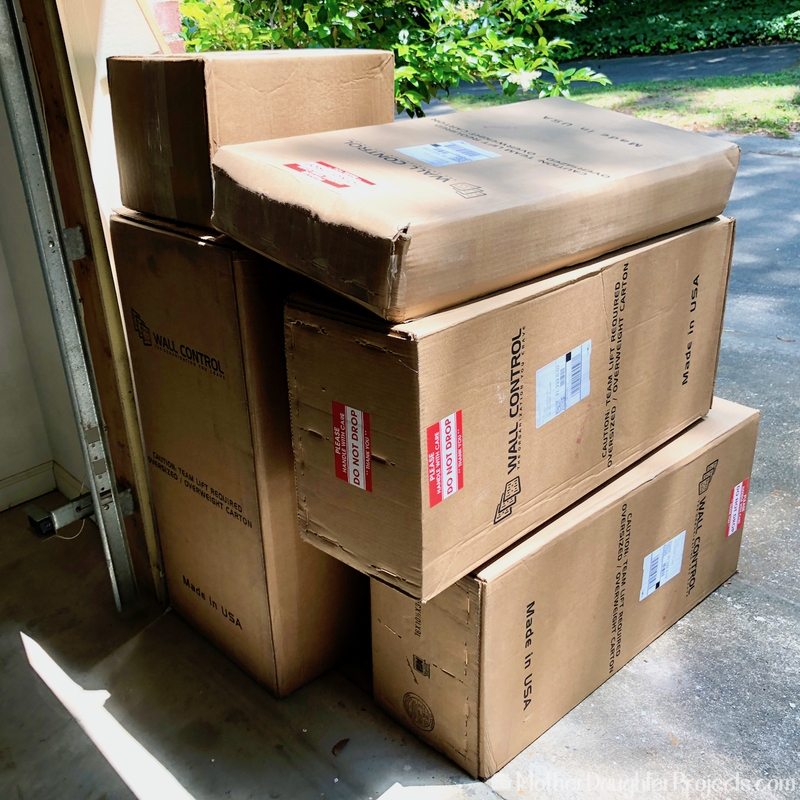
I am, by nature, highly disorganized and tend not to put things back where they belong. That results in me being frustrated by not being able to find what I need when I need it! I can't even express the joy I find in being able to find what I need on the utility wall pegboard! Bonus, now that everything has a place that I can see, I find myself consistently putting things back.

That's why I was so looking forward to seeing the pegboard go up in the garage. I was itching to get everything in place so I could start using it!

Many thanks to the family owned company, Wall Control, for providing all the pegboard panels and accessories for our project. Wall Control is made in the USA, right up the road from us in Georgia. 

Take a look at our Wall Control installation:
The Wall Control Metal Pegboard comes securely packaged to prevent damage to the products.
All the Wall Control products came securely wrapped and packaged in heavy-duty boxes. The order was complete and nothing was dented or scratched. The company obviously takes pride in not only their, product but their packaging and shipping too.
Sorting the Wall Control pegboard pegs and storage boxes.
We opened up all the packaging and sorted out all the slotted hooks, shelves, dividers, hanging bins, and other accessories. The accessories are designed to fit securely into the slots and are less likely to fall out than standard pegs.
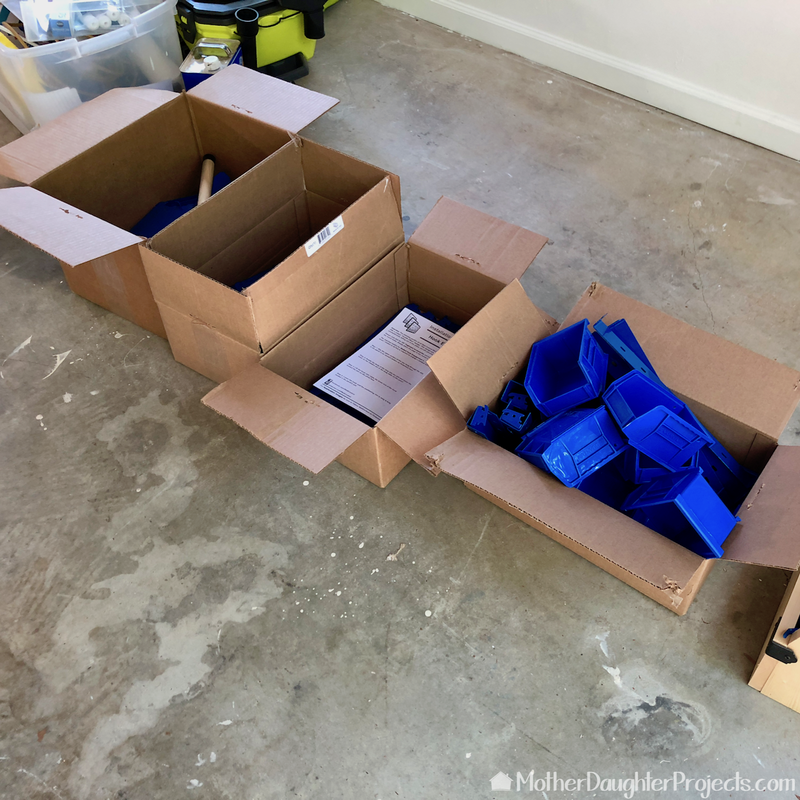
Wall Control Product:
  • (11) Blue Metal Pegboard Pack (Amazon) (Wall Control)
  • (4) Slotted Tool Board Workstation Accessory Kit, Blue (Amazon) (Wall Control)
  • (2) Slotted Storage Panel Deluxe Hook Assortment, Blue (Amazon) (Wall Control)
  • (2) Blue Pegboard Paper Towel Holder and Dowel Rod Pegboard Shelf Assembly (Amazon) (Wall Control)
  • (4) Heavy Duty Pegboard Hook Slotted Hook Pair - Blue (Amazon) (Wall Control)
  • Hanger Holder Pegboard Bracket Accessory for Wall Control Pegboard Only, 14", Blue (Amazon) (Wall Control)
  • (3) Slotted Metal Pegboard Clamp Organizer Clamp Rack Bracket Pair for Clamp Storage (Wall Control)

Other Materials:


  • Magnetic Stud Finder (Home Depot)

  • Drill/Driver (Home Depot)

  • Mallet (Home Depot)

  • Bosch 30 ft. Self Leveling Cross Line Laser Level (Home Depot)

  • Gorilla Ladders 3-Step Aluminum Step Stool Ladder (Home Depot)

  • Husky 3/8 in. Drive Magnetic Socket Rail (Home Depot)

  • Husky 1/4 in. Drive Magnetic Socket Rail (Home Depot)

  • Husky 1/4 in. Drive Socket Rail (Home Depot)

  • Husky 3/8 in. Drive Socket Rail (Home Depot)

  • Husky 12 in. 1-Compartment Magnetic Small Parts Organizer (Home Depot)

Use a magnetic stud finder to located the studs in the wall.
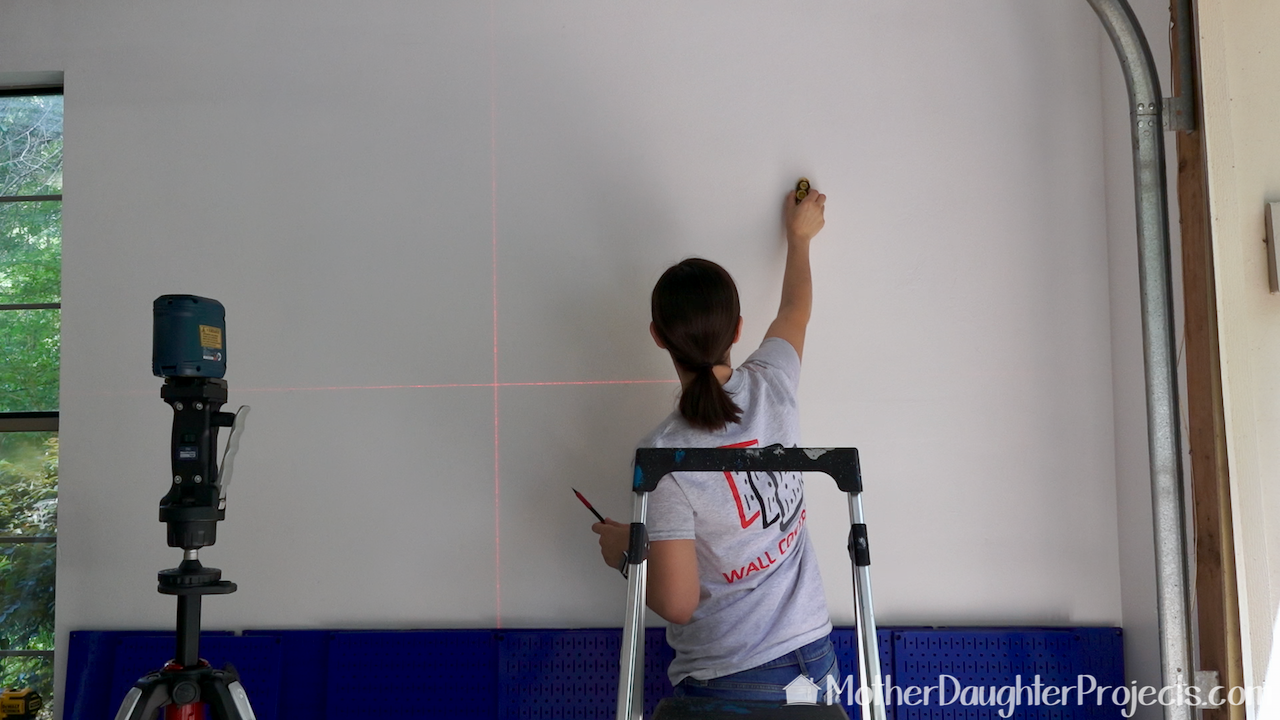
We started by determining where we wanted to place the pegboard. We had a lot of discussion about how high it should be placed and how far from the window. We used the Bosch laser level to insure level placement of the panels. Here we are looking for the studs inside the walls. Ideally, the panels should be placed on the studs, but the included wall anchors can be used if the panels don't line up with the studs. (None of our panels lined up with any of the studs!)
Wall Control Pegboard includes all the hardware needed for the installation of the wall panels.
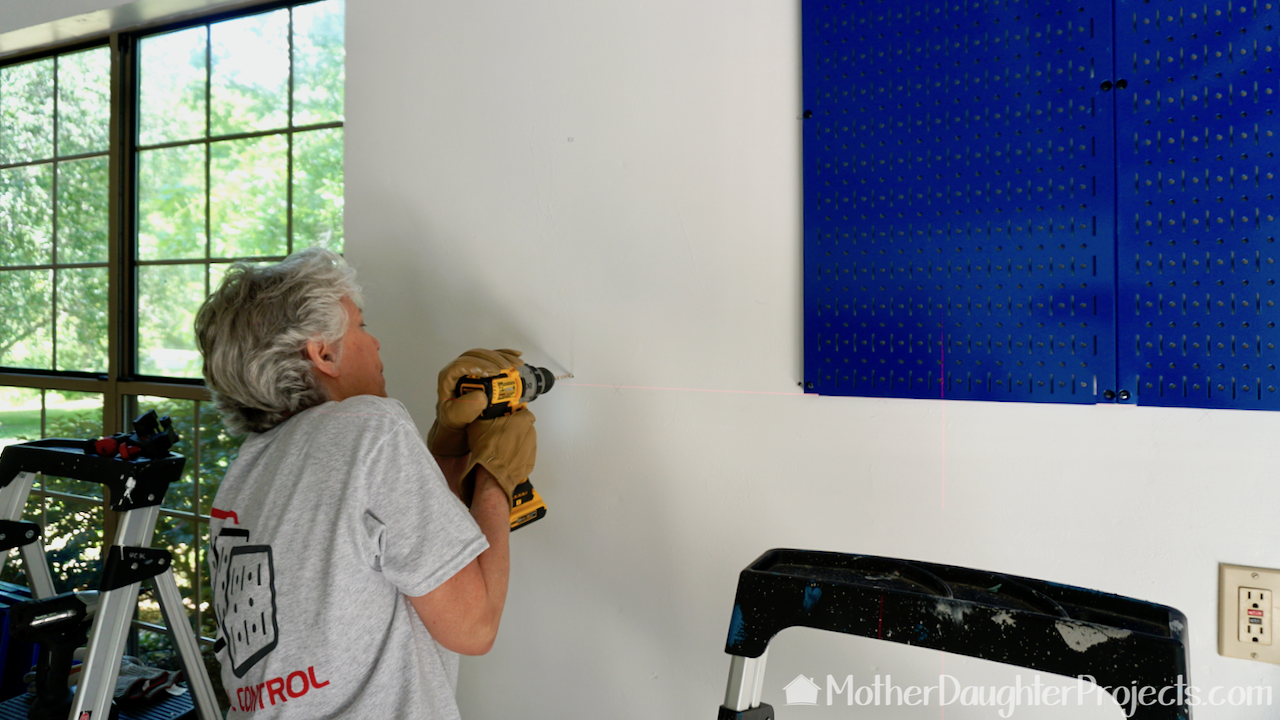
The install for the panels is as follows: hold up a panel, mark the screw hole placement, if using wall anchors, drill a hole large enough for the anchor, add the anchor, use a mallet to tap anchors into the wall, put the panel in place, and screw it to the wall. All the hardware you need for installation is included with the panels.
The first row of Wall Control panels are finished as part of the garage makeover.
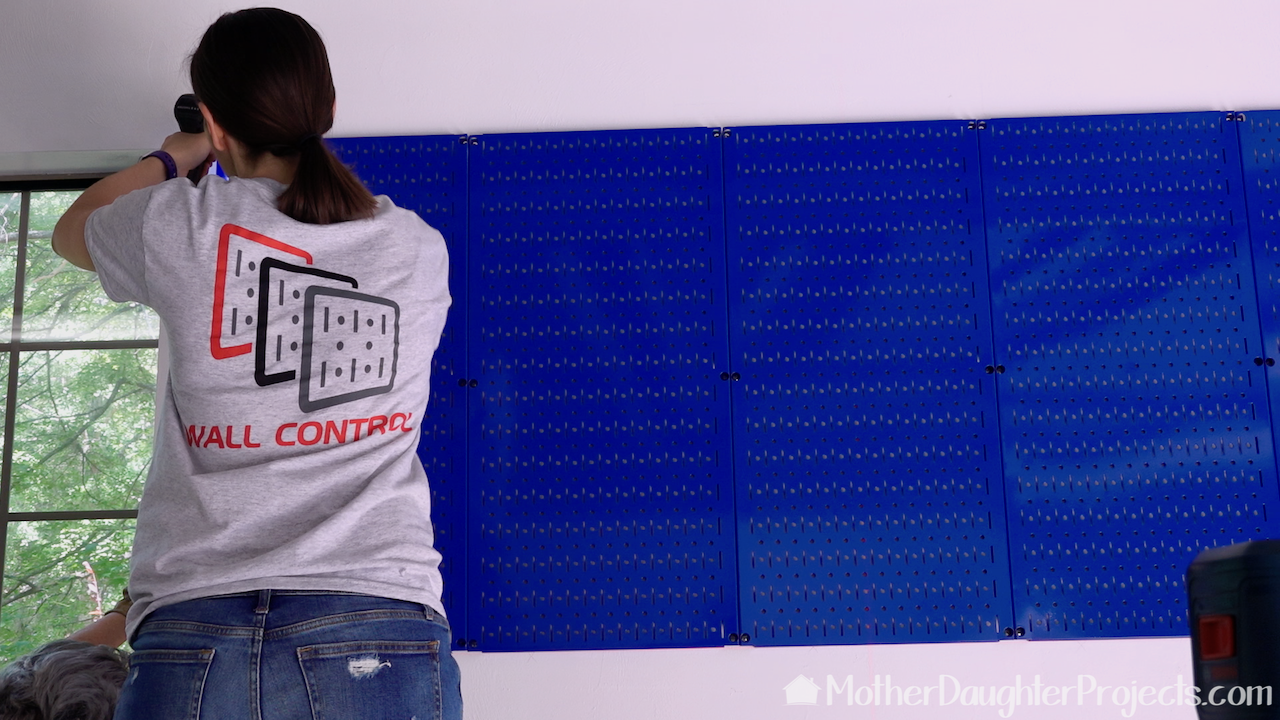
First row is finished--time to put in the second row!
The Wall Control panel installation in the garage.
We found that installing the panels it was way more efficient and accurate to install the top one then the bottom rather than do the entire top row and then the bottom.
The spade bits are stored in a Wall Control screwdriver holder.
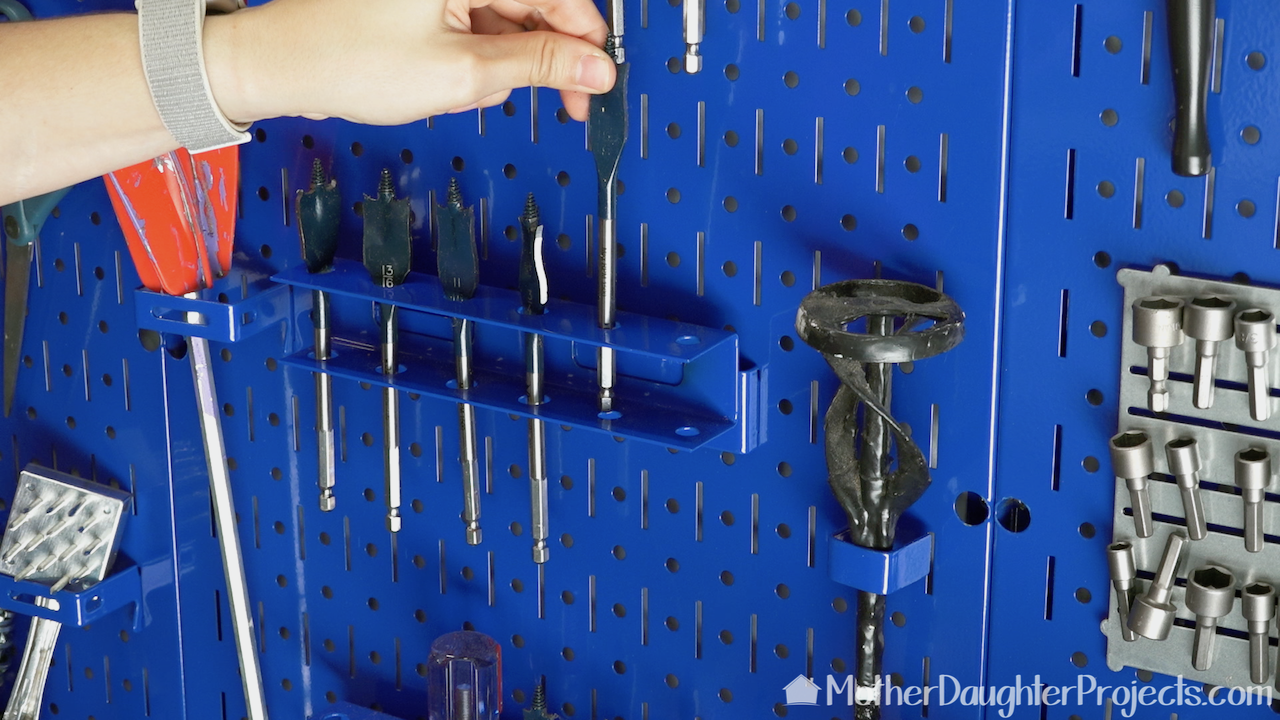
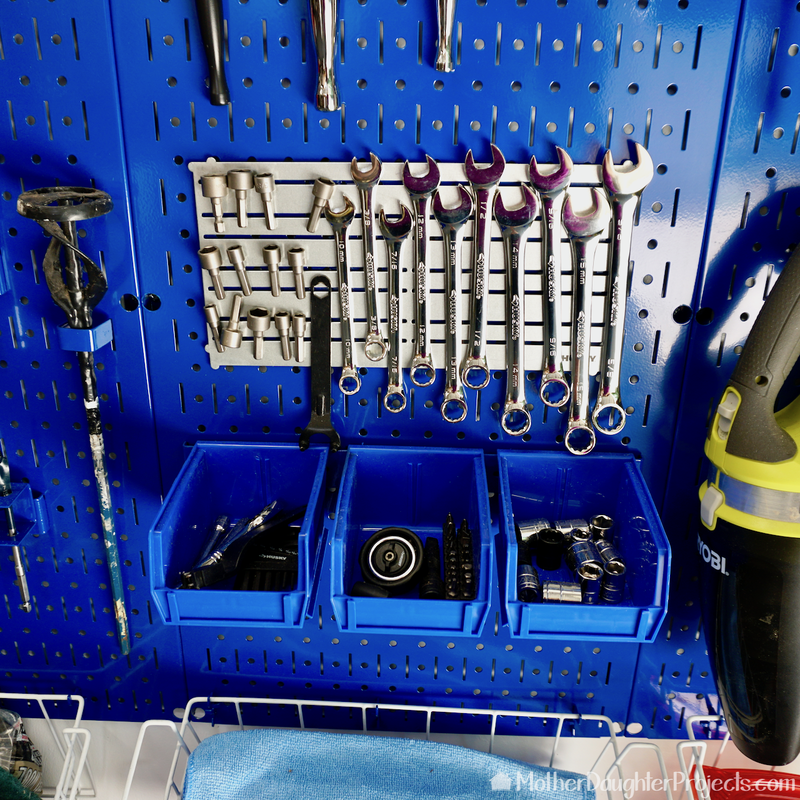
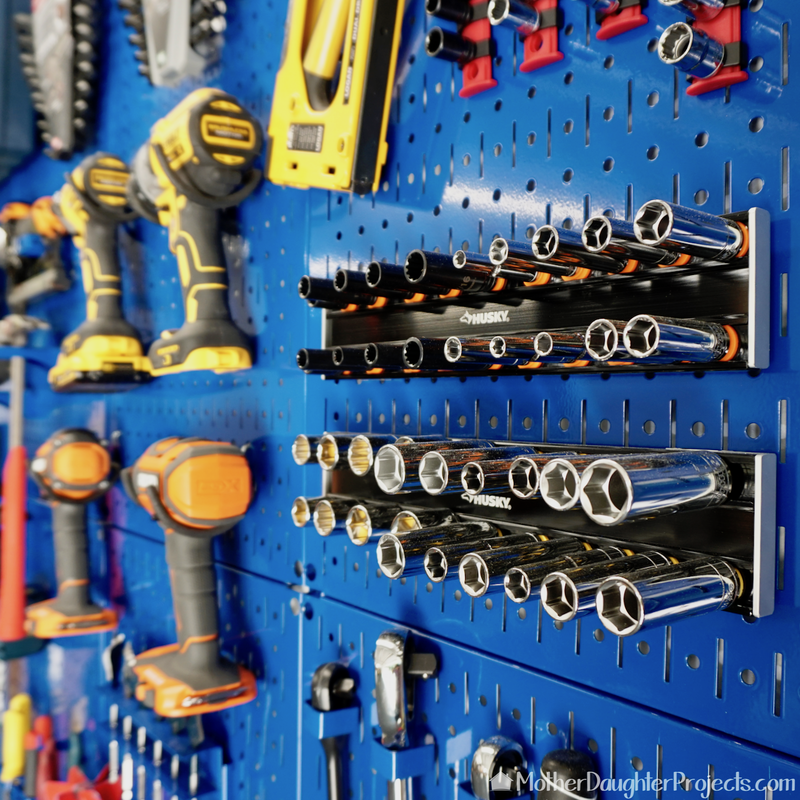
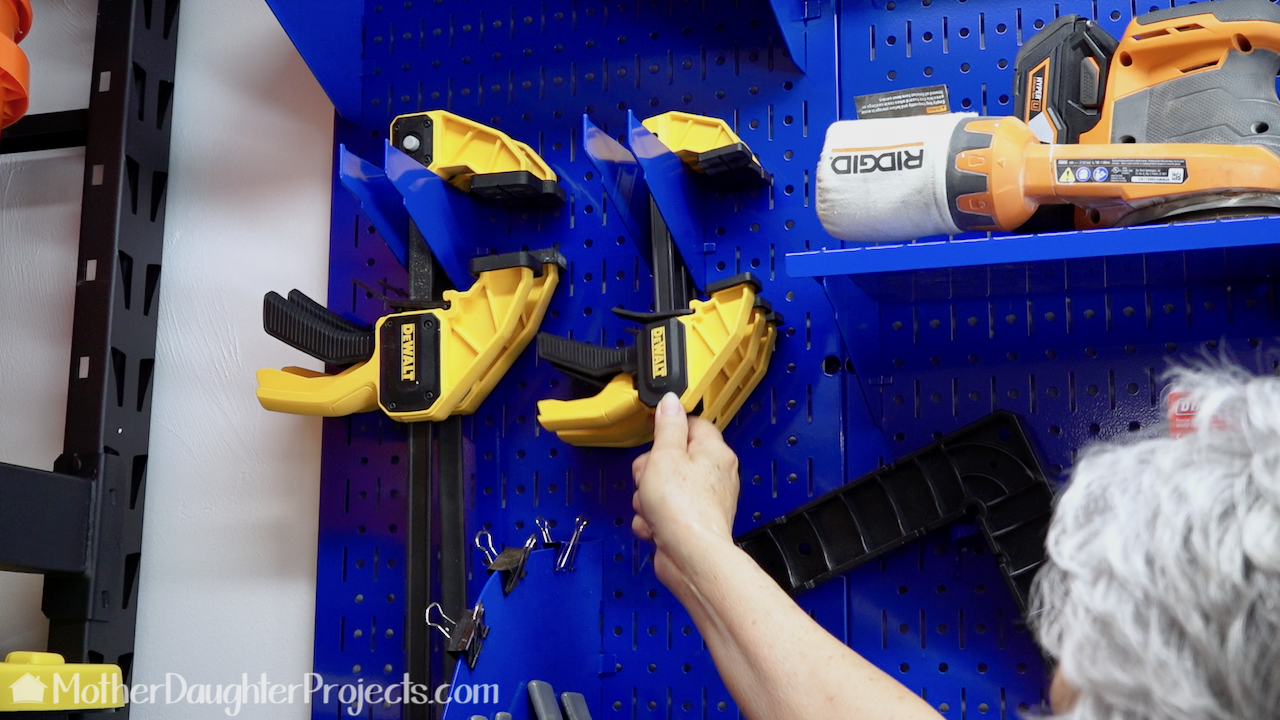
After all the panels were installed, it was time to accessorize and organize. This screwdriver holder was perfect to store these spade bits.
Picture
Wall Control paper towel holder for tape storage.
This is a paper towel holder but it's a perfect place to hold rolls of tape.
Wall Control hanging bins provide storage for small items.
This row of hanging bins hold lots of small parts. We have another set on the other wall with screws and sandpaper.
Husky Tools socket holders can be used on the Wall Control panels.
These Husky magnetic socket lets are perfect as they stick nice and secure to the panel.
The Wall Control panels all organized with power tools, safety equipment and more.
Video tutorial! Learn how to install and organize with wall control metal panels. Find out how to store clamps, bits, tools and more! #organize #garage #diy #pegboard
Picture
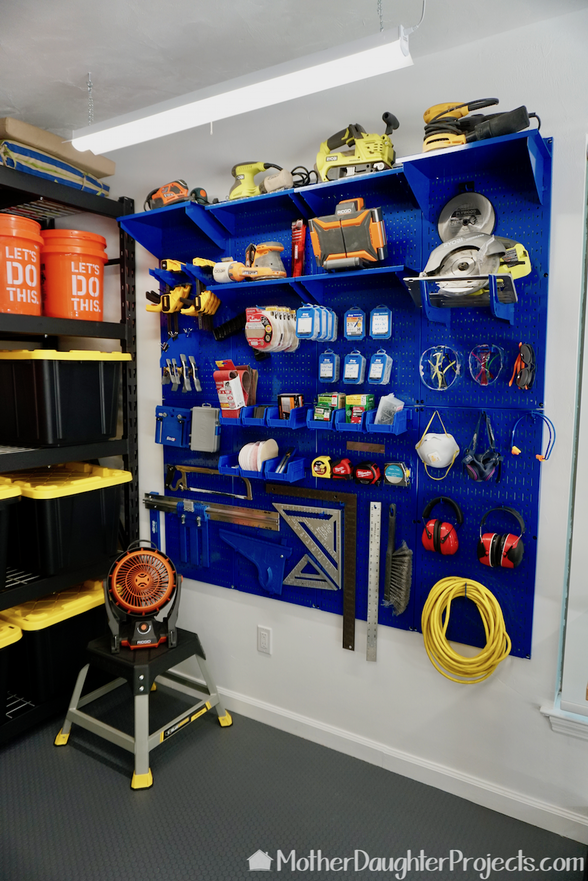
This was one of the first projects on our list when we decided to makeover my garage. After using Wall Control panels in three projects (craft closet, laundry room, utility hallway), we knew it would be perfect in the garage! We are really happy with how it looks and functions. Steph is ready to have it installed in her garage (but sadly they don't make purple panels yet)!

​A big thank you to Wall Control for providing the panels and hooks used in this project! Did you know we are brand ambassadors for Wall Control? Check it out here.

FYI: We are not professionals, and we don’t claim to be. This is what we found worked for our project. Yours may need a little different approach. Safety first!

FYI: Affiliate links are being used on this page. Purchasing via these links help support MDP!

Related Projects

Picture
DIY Vinyl Garage Flooring
Picture
How to Build a Partition Wall
Picture
DIY Garage Lighting
0 Comments


Leave a Reply.

    MotherDaughterProjects.com

    Mother Daughter Projects
    ​
    Steph & Vicki

    MotherDaughterProjects.com
Mother Daughter Projects, LLC ∙ est. 2015 ∙ Tallahassee, FL by Vicki & Steph ∙ Privacy Policy